Latest & Greatest

browse recipes

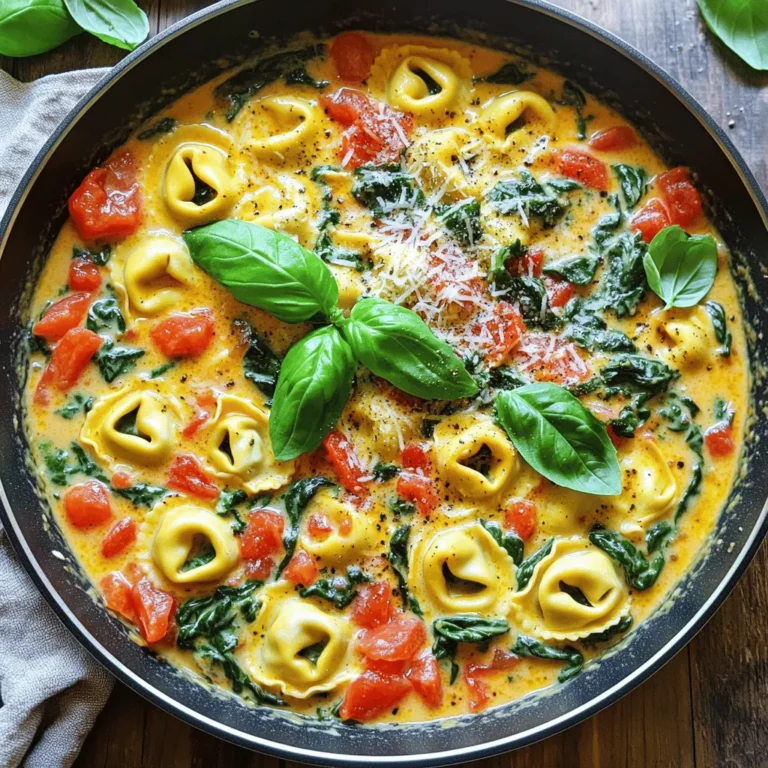
To make this vibrant salad, gather these ingredients: - 8 oz rice noodles - 1 cup shredded carrots - 1 red bell pepper, julienned - 1 cucumber, thinly sliced - 1 cup bean sprouts - 1/4 cup fresh cilantro, chopped - 1/4 cup green onions, sliced - 1/4 cup crushed peanuts (for garnish) - 1/4 cup sesame oil For the dressing, you will need: - 3 tablespoons soy sauce - 2 tablespoons lime juice - 1 tablespoon brown sugar - 1 tablespoon fish sauce (optional for added depth) - 1 teaspoon chili paste or sriracha (adjust to taste) Here’s a simple guide for portioning: - Rice noodles: 8 oz is about half a standard package. - Carrots: Use 1 cup, which is roughly 2 medium carrots. - Red bell pepper: A single pepper gives you enough for this dish. - Cucumber: One medium cucumber works well. - Bean sprouts: 1 cup is a good measure, about a handful. - Fresh cilantro and green onions: Each should be about 1/4 cup when chopped. - Crushed peanuts: Use 1/4 cup for a crunchy topping. - Sesame oil: 1/4 cup adds a nice richness to the salad. You can boost the flavor with these optional ingredients: - Add grilled chicken for protein. - Toss in some sliced radishes for a peppery kick. - Include mango for a sweet twist. - Try extra herbs like mint or basil for freshness. - Use lime zest to amplify the lime flavor. This salad is flexible. Feel free to switch things up based on what you have on hand. For the full recipe, check the [Full Recipe]. First, get a pot and fill it with water. Bring the water to a boil. Add the rice noodles to the pot. Cook them according to the package instructions, which usually takes about 4-6 minutes. You want them al dente, not too soft. Once done, drain the noodles. Rinse them with cold water to stop the cooking process. This keeps them from getting mushy. Now, let’s make the dressing. Grab a small bowl. In it, whisk together the soy sauce, lime juice, brown sugar, and fish sauce if you choose to use it. Add the chili paste or sriracha for some heat. Mix it well until the sugar is dissolved. Taste the dressing and adjust the spice level to your liking. This dressing ties all the flavors together, making the salad pop. In a large mixing bowl, combine the cooked noodles, shredded carrots, red bell pepper, cucumber, bean sprouts, cilantro, and green onions. Pour the dressing over this mixture. Toss everything gently to coat the noodles and veggies well. This step is key for even flavor distribution. Lastly, drizzle the sesame oil over the salad and toss again. Let it marinate for about 10-15 minutes. This time allows all the flavors to meld. Serve the salad chilled or at room temperature. Don't forget to top it with crushed peanuts for some extra crunch! For the full recipe, check out the earlier section. To keep your rice noodles from sticking together, rinse them after cooking. Use cold water to wash off the starch. This helps separate each noodle. You can also toss them with a little oil. A light coat of sesame oil works great here. Just make sure to use a small amount so it does not become greasy. For the best crunch, use fresh vegetables. Cut them just before you mix the salad. This keeps them crisp. Store them in ice water for a short time if you need to prep ahead. The water will help them stay fresh and crunchy. When you are ready, drain them well before adding to your salad. Spice is a key part of this salad. To adjust the heat, start with a small amount of chili paste. You can always add more later. Taste as you go to find your perfect level. If you prefer no spice, skip the chili sauce entirely. Instead, add a bit more lime juice for flavor. For the full recipe, check out the [Full Recipe]. {{image_2}} You can add protein to make your Spicy Thai Noodle Salad heartier. Chicken, tofu, or shrimp work well. For chicken, grill or sauté it in a little oil. Dice it into bite-size pieces and mix it in. For tofu, press it to remove water, then cube it. Sauté until golden or use it raw. Shrimp can be boiled or sautéed until pink. Each choice brings a unique taste and texture. Feel free to change the vegetables or herbs based on your taste. You can use bell peppers in different colors, zucchini, or snap peas. Fresh herbs like mint or basil can add a nice twist. The crunch from veggies keeps the salad fresh. Experiment to find your favorite mix! If you want a gluten-free meal, choose rice noodles or zucchini noodles. Rice noodles are easy to find and packed with flavor. Zucchini noodles, or “zoodles,” offer a low-carb option. Just spiralize the zucchini and toss it in with the salad. Both options keep the dish light and tasty. For the complete recipe, check the [Full Recipe]. To keep your Spicy Thai Noodle Salad fresh, place it in an airtight container. This helps retain flavor and texture. If you have leftovers, try to store them within two hours of making the salad. Always cool the salad to room temperature before sealing it. This way, you avoid condensation inside the container, which can make your salad soggy. You can enjoy this salad cold or at room temperature, so reheating is not usually needed. If you prefer warm noodles, gently heat them in a pan over low heat. Add a splash of water or sesame oil to help them warm evenly. Be careful not to overheat, as this can make the noodles mushy. Toss in some fresh veggies after warming for a crunchy bite. The salad lasts about 3 days in the fridge. Keep an eye on the veggies, as they can wilt quickly. If you want to freeze the salad, I recommend freezing only the noodles. The other fresh ingredients don’t freeze well. Store the noodles in a freezer-safe bag for up to a month. Thaw them in the fridge before mixing with fresh veggies and dressing again. For the full recipe, refer to the main article. Spicy Thai Noodle Salad comes from Thailand. It shows the mix of flavors in Thai cooking. This dish blends fresh veggies with rice noodles. The bold flavors come from herbs and spices. It is a popular choice for street food. Many people enjoy it for its bright taste and crunch. Yes, you can make this salad ahead of time. It tastes even better after the flavors mix. Just store it in the fridge in an airtight container. I recommend adding peanuts just before serving. This keeps them crunchy. The salad can last for about three days when stored properly. You can serve Spicy Thai Noodle Salad on its own or with other dishes. It pairs well with grilled chicken or shrimp. You can also add it to a larger meal with rice or stir-fry. For a fun twist, serve it in lettuce wraps. This keeps the meal light and fresh. Want more ideas? Check the Full Recipe for inspiration! Spicy Thai Noodle Salad is a flavorful dish that brings zest to your table. We covered key ingredients, portioning tips, and optional flavors to enhance your meal. You learned step-by-step instructions for cooking and mixing ingredients with a tasty dressing. I shared tips to keep your noodles from sticking and how to keep veggies crunchy. You can customize the dish with different proteins or veggies. Lastly, proper storage ensures freshness. Remember, this salad is easy to make and satisfying. Enjoy your culinary adventure!

Spicy Thai Noodle Salad Flavorful and Refreshing Dish

Looking for a dish that’s bursting with flavor and freshness? This Spicy Thai Noodle Salad hits the spot! Packed with vibrant ingredients, it’s a…

My Latest Desserts

My Latest Recipes

hey,

i’m !

I’m so happy you’re here!

Each recipe I share is a little piece of love from my kitchen. May they fill your heart and home with warmth. Let’s cook up something wonderful together.

Peach Upside Down Mini Cakes Delightful and Simple Treat

If you’re ready for a sweet treat that’s both delightful and simple, you’re in the right place! Peach upside down mini cakes bring the…

- Ripe peaches: Choose peaches that are firm yet slightly soft. Look for a sweet aroma. The best peaches for baking are freestone varieties, which are easy to slice. Avoid bruised or overly soft peaches. Fresh peaches make the cake taste great and add natural sweetness. - Essential baking ingredients: You need some basics. These include unsalted butter, brown sugar, and all-purpose flour. Butter adds richness, while brown sugar gives the cake a nice caramel flavor. Flour helps the cake rise and hold its shape. - Optional toppings: Whipped cream adds a creamy touch. You can also sprinkle cinnamon for extra flavor. Both serve as perfect complements to the sweet peaches. You can get creative with toppings based on your taste. For the full recipe, check out the details provided earlier. Preheat your oven to 350°F (175°C). This step is crucial for even baking. While the oven heats, get your muffin tin ready. Grease the tin with a little butter. You can also use muffin liners if you prefer. This helps the cakes come out easily after baking. In a small bowl, mix the melted butter and brown sugar. Stir until they blend well. This mixture gives the cakes a sweet, gooey base. Distribute this mixture evenly in the muffin cups. Use about a tablespoon for each cup. In a medium bowl, whisk together the dry ingredients. This includes flour, granulated sugar, baking powder, baking soda, salt, and cinnamon. In another bowl, mix the wet ingredients. Combine buttermilk, egg, and vanilla extract. Stir until well mixed. Now, pour the wet mix into the dry mix. Stir gently to combine. It’s okay if you see a few lumps; don’t overmix. Now, it's time to layer. Place 2-3 slices of peach on top of the brown sugar mixture in each muffin cup. Then spoon the cake batter over the peaches. Fill each cup about 2/3 full. Bake in your preheated oven for 18-22 minutes. Check for doneness by inserting a toothpick in the center. If it comes out clean, they are ready. Once baked, remove the mini cakes from the oven. Let them cool in the tin for about 5 minutes. To invert the cakes, place a serving platter over the muffin tin. Carefully tap the tin to release the cakes. If any peach slices stick, gently use a small knife to help them out. Serve warm, and consider topping with whipped cream for a treat. For the best flavor, use ripe, juicy peaches. Good varieties include Freestone and Clingstone. Freestone peaches come off the pit easily. Clingstone peaches cling to the pit but are very sweet. Always choose peaches that feel heavy for their size. Check for a nice, sweet smell. To slice peaches, cut them in half around the pit. Twist the two halves apart. Remove the pit with your fingers or a knife. Slice the peach halves into thin wedges. One common mistake is overmixing the batter. Mixing too much can make your cakes tough. Mix just until the dry and wet ingredients blend. It’s okay if it’s a bit lumpy. Another mistake is not greasing the muffin tin. Make sure to grease it well or use liners. This helps avoid sticking and makes cleanup easy. You can add different flavors to your mini cakes. Try using almond extract instead of vanilla for a twist. For a spiced version, add nutmeg or more cinnamon. You can also mix in chocolate chips or nuts. For serving, try placing a mint leaf on top for color. A drizzle of honey can also bring out the sweetness. Enjoy these mini cakes warm or at room temperature. They are great for gatherings and parties. For the full recipe, check out the section above. {{image_2}} You can use other seasonal fruits in these mini cakes. Try using ripe nectarines, plums, or even fresh berries. Each fruit adds a unique taste and color. For a fun twist, mix in different fruits. Pair peaches with blueberries or raspberries for a burst of flavor. This mix creates a vibrant and tasty treat. To make these mini cakes gluten-free, swap all-purpose flour for a gluten-free blend. Many blends work well, so pick one you like. For a vegan version, replace the egg with a flaxseed or chia seed mixture. Just mix one tablespoon of seeds with three tablespoons of water. Let it sit until it thickens. Maintaining texture is key. Use non-dairy milk instead of buttermilk. You can also add a tablespoon of vinegar to regular plant-based milk. This trick makes it curdle and gives a similar taste. Enjoy these variations without losing the delightful taste of the original recipe. For the full recipe, check the ingredients and steps provided. To keep your Peach Upside Down Mini Cakes fresh, follow these steps: - Allow the mini cakes to cool completely before storing. - Place them in an airtight container. This keeps moisture in. - Store in the fridge for up to 3 days for the best taste. - For longer storage, freeze the cakes. Wrap each one in plastic wrap, then place them in a freezer bag. They can last up to 3 months. When it's time to enjoy your mini cakes again, here are some tips: - To reheat, place the mini cakes in the microwave for 10-15 seconds. - For a crispier texture, use an oven. Preheat it to 350°F (175°C) and warm the cakes for about 5-7 minutes. - Serve your mini cakes warm for a cozy treat. You can also enjoy them chilled. Both options taste great! For the full recipe, check out the details above. Yes, you can use canned peaches. Just make sure to drain them well. Canned peaches may be softer than fresh ones. This will change the texture slightly but will still taste great. Cut them into similar sizes as fresh peaches for even baking. Check the mini cakes after 18 minutes. Insert a toothpick into the center. If it comes out clean, the cakes are done. If it has batter on it, bake for 2 more minutes. Watch closely to avoid overbaking, as this can dry them out. You can add spices like nutmeg or ginger for extra flavor. Try adding nuts like pecans or walnuts for crunch. Swap peaches for other fruits, like blueberries or cherries. You can also explore different toppings, like a sprinkle of powdered sugar. Yes, you can prepare the batter and store it in the fridge. Just cover it tightly. Bake the mini cakes when you are ready to enjoy them. You can also bake them ahead and store them in an airtight container for a couple of days. Absolutely! Just double all the ingredients listed. Use two muffin tins or bake in batches. Keep an eye on the baking time, as it may change slightly. Doubling will let you share these tasty treats with more friends and family. You now have a great guide for making Peach Upside Down Mini Cakes. We covered everything from picking the best peaches to avoiding baking mistakes. You also learned cool ways to mix things up with flavors and fruits. Always remember to store leftovers properly and reheat for the best taste. Enjoy making these cakes for yourself and others. They’re sure to impress! Happy baking!