
Shrimp Scampi Linguine Flavorful and Simple Recipe
If you crave a dish that bursts with flavor and is simple to make, you’re in the right place! This
If you crave a dish that bursts with flavor and is simple to make, you’re in the right place! This
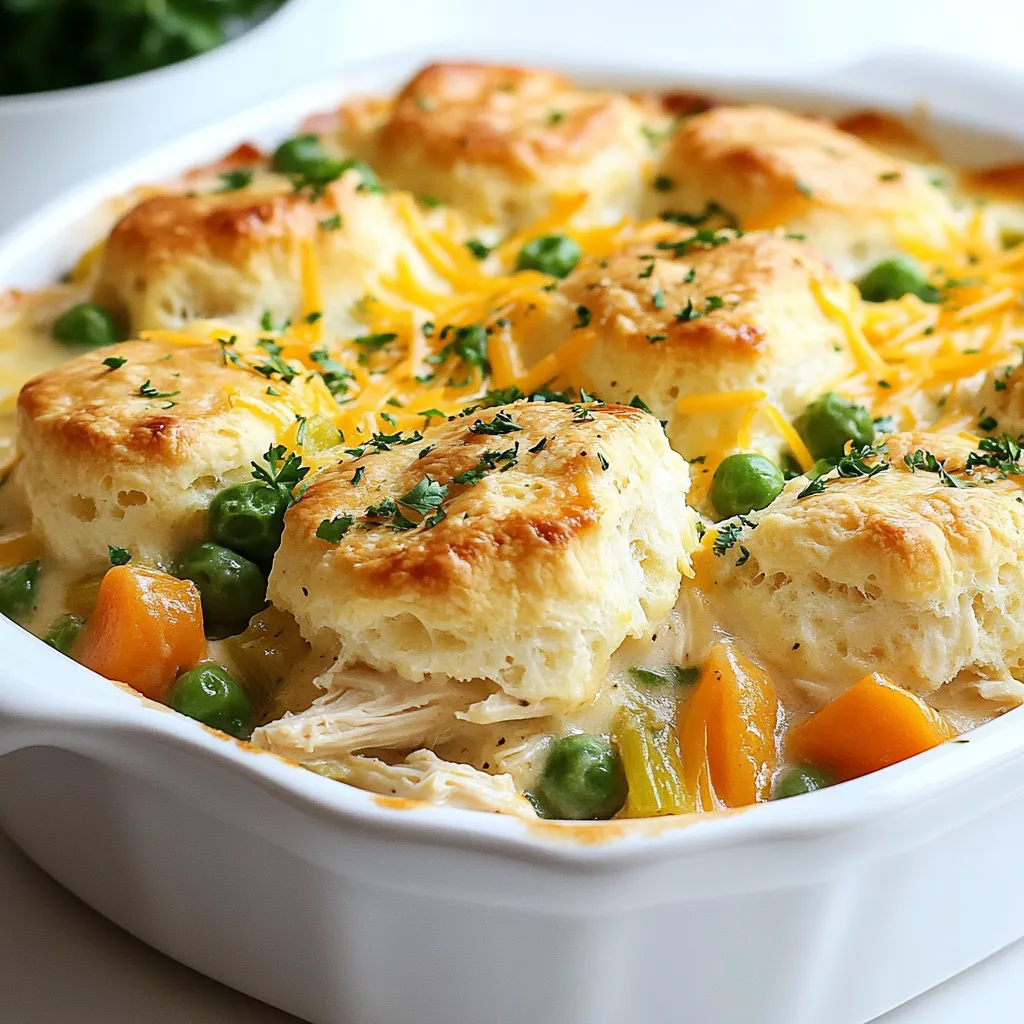
Are you ready to whip up a comfy, home-cooked meal that satisfies everyone at the table? In this guide to

Crack Chicken Casserole is the perfect comfort food for busy nights. With its creamy base and cheesy goodness, it’s a
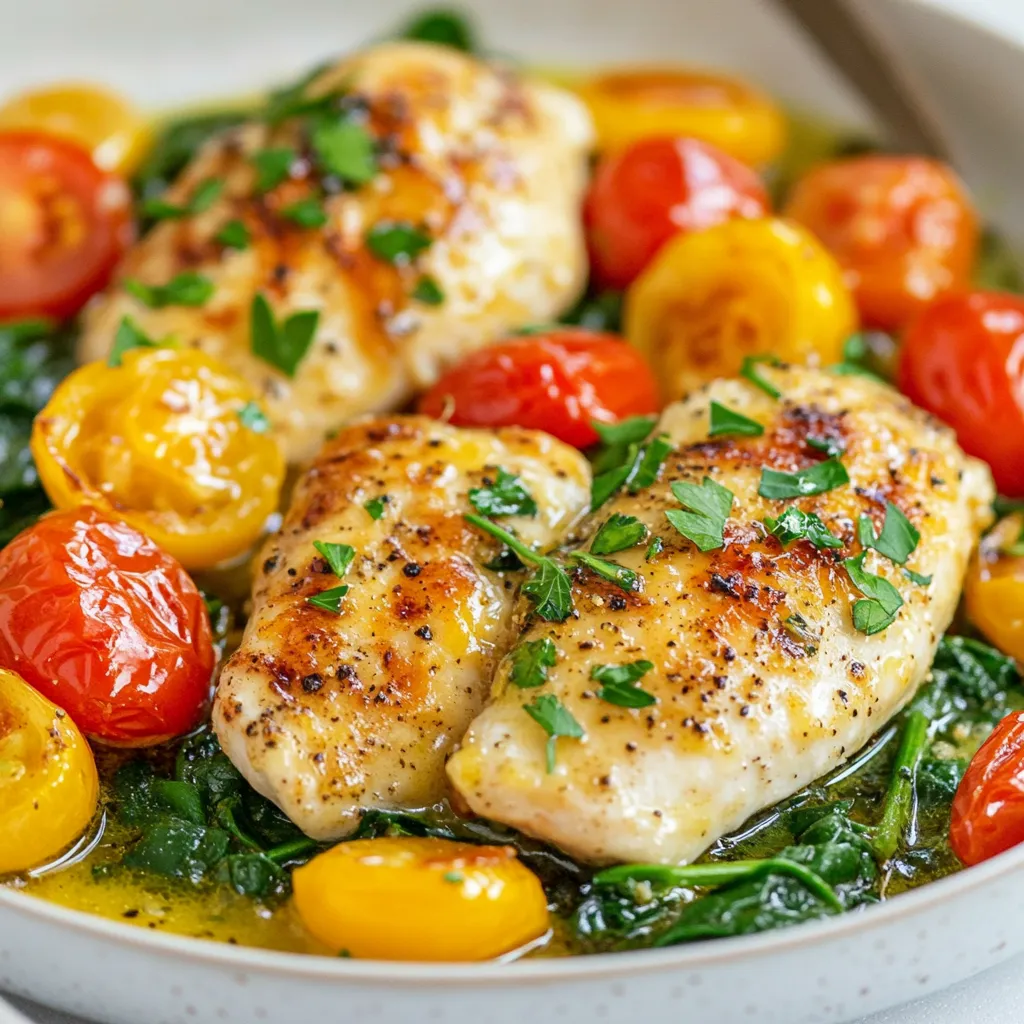
Looking for a quick and tasty dinner? This Lemon Garlic Chicken Skillet is your answer! With just a few simple

If you’re searching for a fun and tasty meal, look no further! My Cheesy Taco Stuffed Zucchini Boats are not

Welcome to your new favorite comfort dish: Curry Dumpling Soup! This tasty soup warms you up with soothing flavors and

If you crave a warm bowl of comfort, look no further than this creamy baked potato soup! It’s thick, rich,
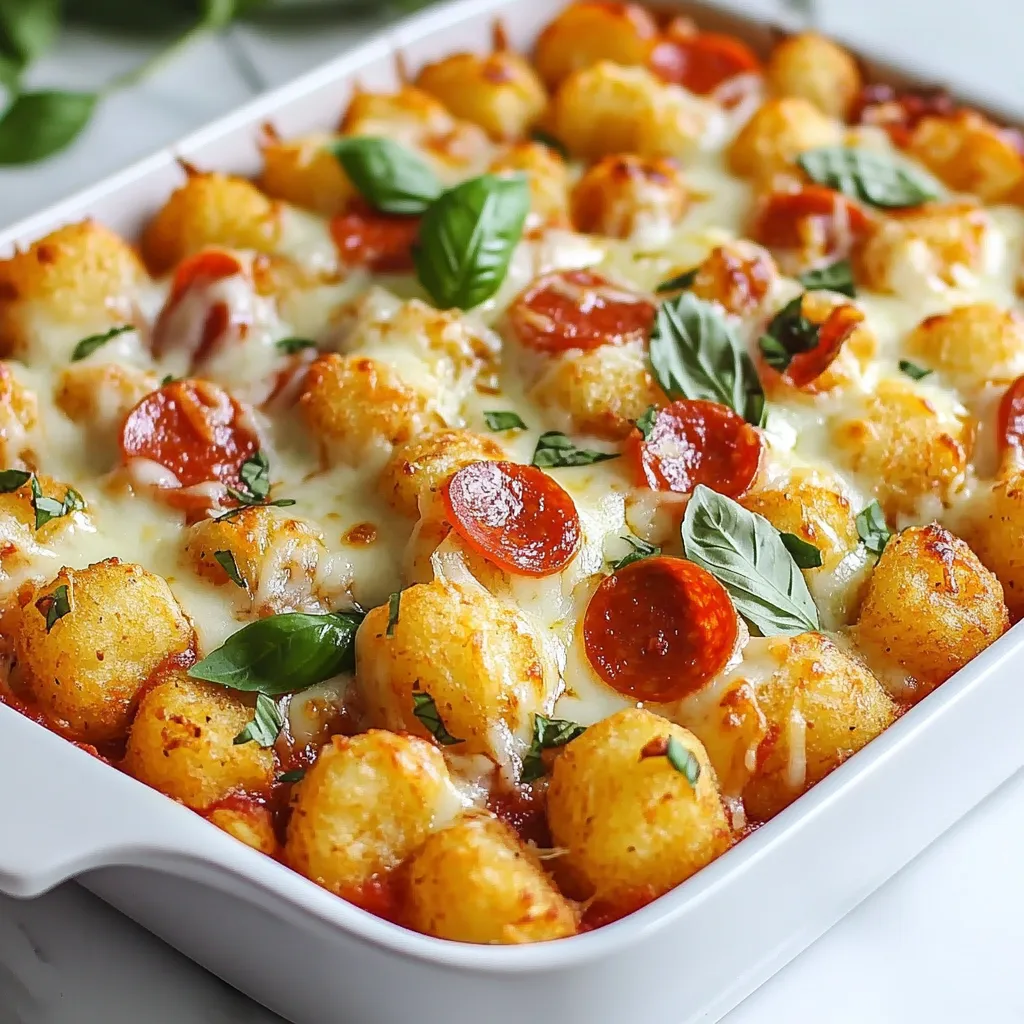
Looking for a fun family meal that brings everyone together? Try my Pizza Tot Casserole! It’s easy to make and
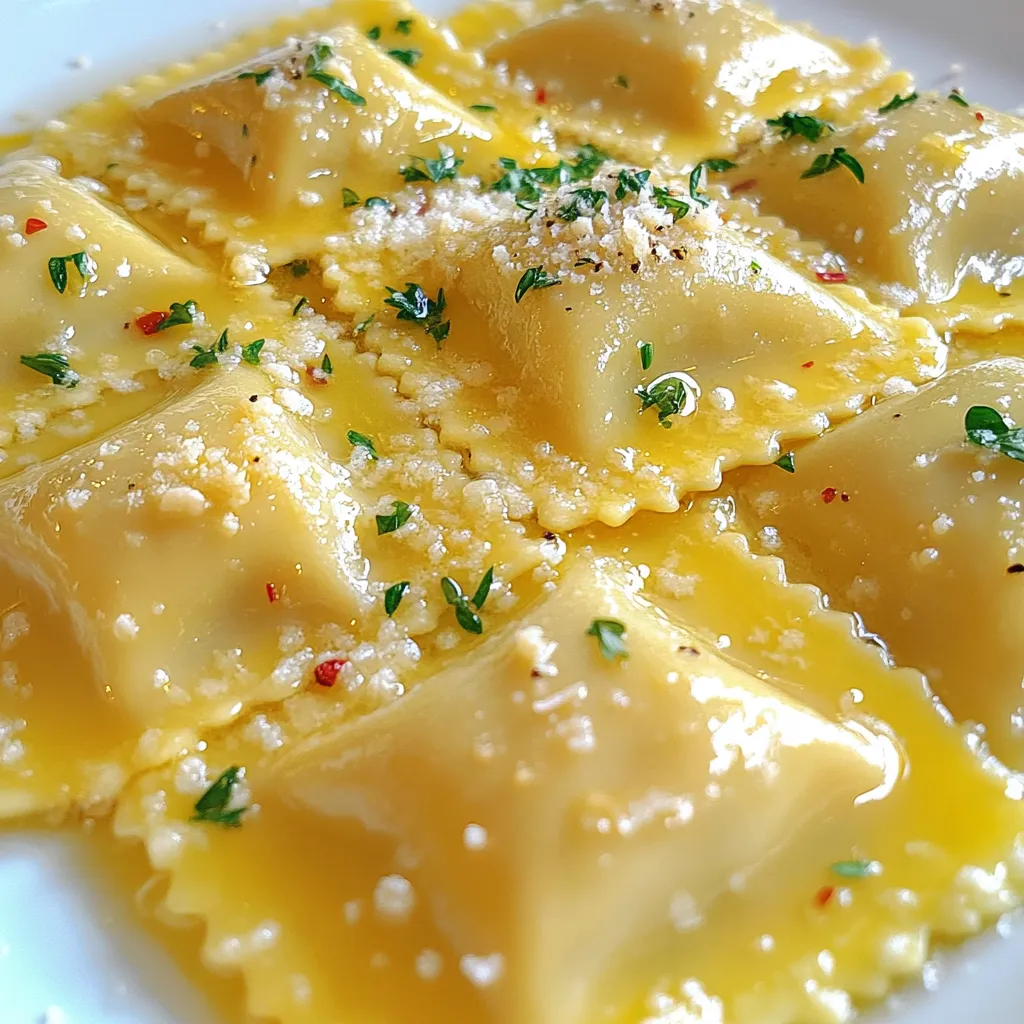
Are you craving a quick, tasty meal that impresses? Look no further than Minute Garlic Butter Ravioli! This simple and
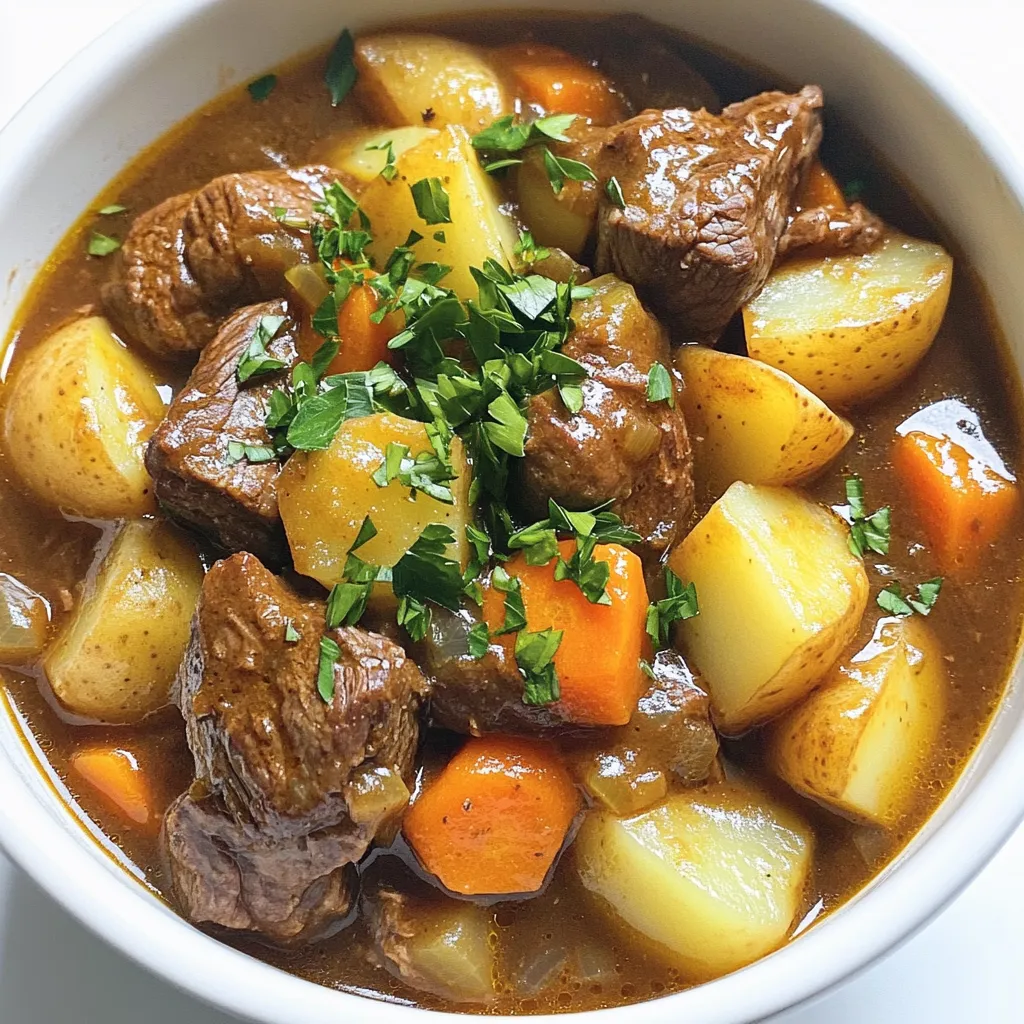
Looking for a warm, cozy meal that feels like a hug in a bowl? My Slow Cooker Rustic Beef Stew
