Skip to content
DisclaimerTerms Of UseGDPR PolicyCookie Policy

Lisa Dishes

  • Home
  • Drinks
  • Appetizers
  • Dinner
  • Dessert
  • About
  • Contact
  • Privacy Policy
DisclaimerTerms Of UseGDPR PolicyCookie Policy

NO-ING-IMG

- 2 large sweet potatoes - 2 tablespoons olive oil - 1 teaspoon paprika - 1 teaspoon garlic powder - 1/2 teaspoon cumin - Salt and pepper, to taste - 1/2 cup Greek yogurt or sour cream - 1 tablespoon chipotle in adobo sauce, minced - 1 teaspoon lime juice - 1/2 teaspoon garlic powder - Salt, to taste Sweet potatoes are my favorite. They are sweet, bright, and full of nutrients. For this dish, I use two large sweet potatoes. The olive oil gives the wedges crispiness. I add two tablespoons, which brings a lovely flavor too. I use spices to add depth. Paprika and garlic powder are my go-to choices. They create warmth and enhance the taste. Cumin adds a hint of earthiness, balancing the sweet. I also add salt and pepper to boost the flavors. For the dip, I choose Greek yogurt for creaminess. You can also use sour cream if you prefer. I mix in one tablespoon of minced chipotle for heat. Lime juice brightens the dip. Garlic powder gives it a nice kick, while a pinch of salt rounds it off. These ingredients come together for a tasty treat. You get crispy sweet potato wedges paired with a zesty dip. Perfect for snacking or serving at gatherings! - Wash and peel the sweet potatoes. - Cut them into wedges, about 1/2 inch thick. To start, I always wash the sweet potatoes under cool water. This step removes dirt and any residue. Next, peel off the skin with a vegetable peeler. The skin is tasty, but it can be tough for some. After peeling, I cut the sweet potatoes into wedges. A 1/2 inch thickness is perfect. This size helps them cook evenly and gives a nice texture. - Toss with olive oil and spices. In a large bowl, I toss the sweet potato wedges with olive oil. I use two tablespoons for a good coat. Adding spices is key here. I sprinkle in paprika, garlic powder, cumin, salt, and pepper. I mix everything well so each wedge is covered. This blend brings out the sweet potato's natural flavor and adds a nice kick. - Preheat air fryer to 400°F (200°C). - Cook for 15-20 minutes, shaking halfway. Next, I preheat my air fryer to 400°F (200°C). This step takes just a few minutes. Once preheated, I place the wedges in a single layer in the basket. I set the timer for 15-20 minutes. Halfway through, I give the basket a shake. This helps all sides cook evenly and become crispy. You want them golden brown and slightly crunchy. - Mix yogurt or sour cream with chipotle and seasonings. While the sweet potatoes cook, I make the chipotle dip. In a small bowl, I combine Greek yogurt or sour cream. I like to use half a cup for a creamy base. Then, I add minced chipotle from adobo sauce. One tablespoon is enough for a smoky flavor. I also squeeze in a teaspoon of lime juice. Finally, I add garlic powder and a pinch of salt. I stir it all until it’s smooth. - Serve hot with the dip. Once the sweet potato wedges are done, I serve them hot. I like to arrange them nicely on a plate. The chipotle dip goes in a small bowl in the center. This setup looks great and invites everyone to dig in. Enjoy the crunch of the wedges with the creamy dip. It’s a perfect snack or side! To get crispy sweet potato wedges, set your air fryer to 400°F (200°C). Cook them for 15-20 minutes. Shake the basket halfway through. This helps them cook evenly. Avoid overcrowding the air fryer. When you crowd the basket, the hot air cannot circulate well. This leads to soggy wedges. Add more flavor to your wedges by mixing in spices. Try using cayenne pepper for heat. You can also add rosemary or thyme for a fresh taste. For a spicier dip, increase the chipotle in adobo sauce. You can blend in more lime juice to balance the heat. Make your dish look great! Arrange the wedges in a spiral on a large platter. Place the chipotle dip in a small bowl at the center. Add fresh cilantro leaves on top for color. This makes your dish pop and look appetizing. {{image_2}} You can make sweet potato wedges even more fun. Try adding cinnamon and maple for a sweet twist. This combo gives a warm, cozy taste. Another idea is to sprinkle Parmesan cheese on top after cooking. It melts nicely and adds a savory touch. Dips can change the whole meal. Try a creamy avocado dip for a fresh taste. Just mash ripe avocados and add salt and lime juice. For something spicier, use a ranch dip with hot sauce. Both options pair well with sweet potato wedges. If you don’t have an air fryer, you can bake the wedges in the oven. Spread them on a baking sheet and set the oven to 425°F (220°C). Bake for about 25-30 minutes, flipping halfway. Remember to check for a golden color. Adjust cooking times based on your oven, as they can vary. To keep your sweet potato wedges fresh, place them in an airtight container. Store them in the fridge for up to three days. Avoid letting them sit out to maintain their texture. When you're ready to eat them again, you have a few good options for reheating. You can pop them back in the air fryer for about 5-7 minutes at 350°F. This brings back their crispiness. Alternatively, you can use the oven. Set it to 400°F and bake for 10-15 minutes. The chipotle dip can last in the fridge for about a week. Store it in a sealed container to keep it fresh. If you want to keep it longer, consider freezing it. To freeze the dip, put it in a freezer-safe container. Leave some space at the top for expansion. Thaw it overnight in the fridge before using. Give it a good stir after thawing. You can make sweet potato wedges ahead of time. Simply cut and season them, then store them in the fridge. They will stay fresh for up to two days. When ready to cook, just air fry them straight from the fridge. Prepping the dip in advance is also easy. Mix the ingredients and store them in the fridge. This way, you can enjoy a quick snack or side dish anytime! To make your sweet potato wedges crispy, follow these tips: - Cut the sweet potatoes into even wedges, about 1/2 inch thick. - Toss them in olive oil and spices to coat well. - Preheat the air fryer for 3-5 minutes at 400°F (200°C). - Cook in a single layer, shaking the basket halfway through. - Avoid overcrowding the basket; this helps air circulate. These steps help give you that perfect, crunchy texture. Yes, you can use other potatoes! Consider these options: - Regular russet potatoes for a classic taste. - Yukon gold potatoes for a creamier texture. - Red potatoes for a slightly sweet flavor. Each type of potato will give a unique taste and texture. The chipotle dip can be spicy, but you can adjust the heat. - Use less chipotle in adobo sauce for a milder flavor. - You can also add more yogurt or sour cream to cool it down. - If you love spice, add extra minced chipotle for more kick. Tailor the heat to suit your taste buds! Sweet potato wedges are great as snacks or side dishes. Here are some ideas: - Serve them as a tasty appetizer at parties. - Pair them with grilled meat for a hearty meal. - Add them to salads for extra flavor and crunch. These wedges fit well into many meal plans! Yes, you can make this recipe vegan! Here are some substitutes: - Replace Greek yogurt with a non-dairy yogurt. - Use a nut-based sour cream for the dip. - Ensure all spices are free from animal products. These swaps keep the dish delicious and plant-based! You can make delicious sweet potato wedges and a tasty dip. Start with simple ingredients. Follow the steps to prepare, season, and cook the wedges. Enjoy them hot with your flavorful chipotle dip. Consider trying different spices or dips to mix things up. Store leftovers wisely, so nothing goes to waste. Experiment and find your perfect version. Enjoy your cooking and snacking!

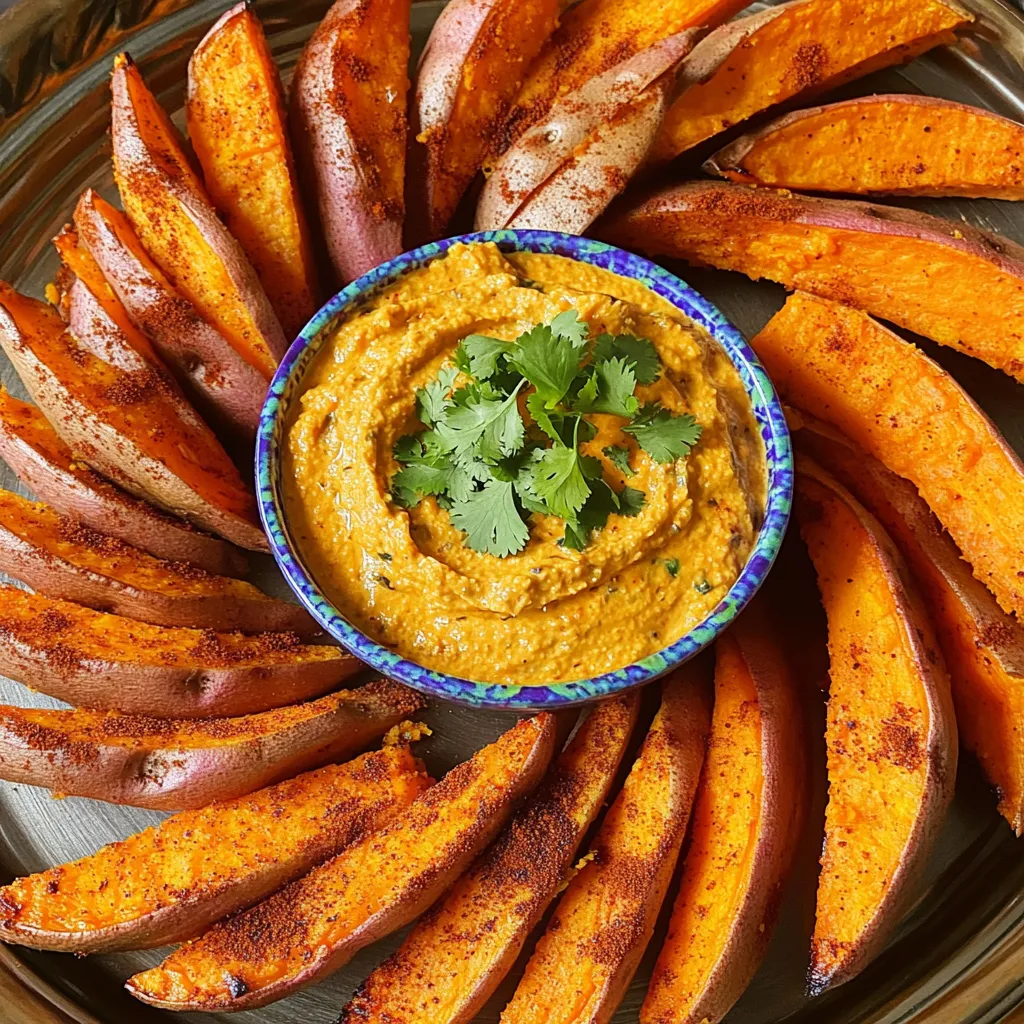
Air Fryer Sweet Potato Wedges with Chipotle Dip Delight

Looking for a tasty treat that’s quick and healthy? You’re in the right place! These Air Fryer Sweet Potato Wedges

- 1 cup all-purpose flour - 1/2 cup pumpkin puree (not pumpkin pie filling) - 1/4 cup granulated sugar - 1/4 cup brown sugar, packed - 1 teaspoon baking powder - 1/2 teaspoon baking soda - 1 teaspoon pumpkin spice - 1/2 teaspoon salt - 1/4 cup milk - 1 large egg - 2 tablespoons melted butter - 1 teaspoon vanilla extract - 1/4 cup granulated sugar (for rolling) - 1 teaspoon pumpkin spice (for rolling) For sweeteners, you can use alternatives like honey or maple syrup. Just adjust the amount to taste. If you need gluten-free options, try almond or coconut flour. For dairy-free milk, almond or oat milk works well. Replace the egg with a flaxseed egg for a vegan option. Using these tips can help you adapt the recipe to fit your needs. Enjoy the process of making these donut holes. The flavors will shine through with each tasty bite! 1. Combine dry ingredients: In a large bowl, add 1 cup of flour, 1/4 cup of granulated sugar, and 1/4 cup of brown sugar. Next, add 1 teaspoon of baking powder, 1/2 teaspoon of baking soda, 1 teaspoon of pumpkin spice, and 1/2 teaspoon of salt. Whisk everything together until mixed well. This mix gives your donut holes a great flavor. 2. Mix wet ingredients: Take another bowl and add 1/2 cup of pumpkin puree, 1/4 cup of milk, 1 large egg, 2 tablespoons of melted butter, and 1 teaspoon of vanilla extract. Stir until you see a smooth mix. Adding pumpkin puree makes these donut holes moist and tasty. 1. Preheating the air fryer: Set your air fryer to 350°F (175°C) to preheat. This step is vital for even cooking. 2. Rolling and arranging donut holes: Lightly grease your hands. Scoop out about 1 tablespoon of the dough and roll it into a ball. Place these balls on a parchment-lined plate. This helps keep them from sticking. 3. Cooking time and tips for even cooking: Once preheated, put the donut holes in the air fryer basket in a single layer. Cook for about 8-10 minutes. Halfway through, shake the basket gently to help them cook evenly. They should be golden brown when done. 1. Rolling in sugar mixture: While the donut holes cook, mix 1/4 cup of granulated sugar with 1 teaspoon of pumpkin spice in a small bowl. This mix will give the donut holes a sweet and spicy coat. 2. Ideal serving suggestions: As soon as you take the donut holes out of the air fryer, roll them in the sugar mixture. Serve these warm for the best taste. Enjoy them with a cup of coffee or tea for a cozy treat. To get the best texture for your donut holes, start by mixing carefully. If you overmix, the donut holes may turn out tough. You want your batter to be slightly lumpy. This helps keep them soft. Next, cooking temperature matters. Preheat your air fryer to 350°F (175°C). This heat cooks the donut holes evenly and gives them a nice golden color. Cook them for about 8-10 minutes. Don’t forget to shake the basket halfway through to help even cooking. Using an air fryer to make these donut holes has great perks. First, it is a healthier cooking method. You use less oil than frying, which keeps the calories lower. Second, air fryers save time. You can whip up these tasty treats in just 25 minutes. That includes prep and cooking time! Plus, air fryers heat up quickly. You will spend less time waiting. Sometimes, you may face issues with your donut holes. If they do not rise, check your baking powder and baking soda. Make sure they are fresh. If they are old, your donut holes may not puff up as expected. If your donut holes stick to the basket, use cooking spray or oil. Lightly grease the basket before adding the donut holes. This will help them release easily after cooking. {{image_2}} You can make these donut holes even more fun. Adding chocolate chips is an easy way to do it. Just fold in about half a cup of mini chocolate chips into the batter. They melt and create a delightful surprise in each bite. You can also switch up the spices. Instead of just pumpkin spice, try using cinnamon, nutmeg, or ginger. Each spice adds a new twist to the flavor. You can choose to glaze your donut holes or roll them in sugar. To create a simple glaze, mix powdered sugar with milk until smooth. Add a splash of vanilla for extra flavor. You can even tint the glaze with food coloring for fun! For flavor options, try adding maple syrup or a dash of orange zest to your glaze. This gives a unique touch to your donut holes. Fall brings the perfect chance for seasonal flavors. Try adding chopped pecans or walnuts to your batter. These nuts add crunch and warmth. You can also use festive toppings like sprinkles or crushed candy corn. These toppings make your donut holes look extra special. Another idea is to drizzle caramel sauce over them. This gives a sweet finish and enhances the pumpkin flavor. Enjoy experimenting with these fun variations! To keep your donut holes fresh, store them in an airtight container. A glass or plastic container works well. Place parchment paper between layers to avoid sticking. They stay good for up to three days at room temperature. When you're ready to enjoy leftovers, reheat them in your air fryer. Set it to 350°F (175°C) and heat for about 3-4 minutes. This keeps them crispy and warm. You can also use a microwave, but they may lose their crunch. If you want to save some for later, freezing is a great option. Place the donut holes in a single layer on a baking sheet. Freeze them for about an hour. Once frozen, transfer them to a freezer-safe bag or container. They can last for up to two months in the freezer. To eat, simply thaw overnight in the fridge or heat directly from frozen in the air fryer for 5-7 minutes. Air Fryer Pumpkin Spice Donut Holes are best fresh. They last about 2 days at room temperature. Store them in an airtight container to keep them soft. If you want them to last longer, you can freeze them. Just make sure they cool down completely before freezing. When ready to eat, heat them in the air fryer for a few minutes for extra warmth. Yes, you can bake these donut holes! Preheat your oven to 350°F (175°C). Grease a mini muffin tin or line it with paper liners. Fill each cup about halfway with the batter. Bake for 10-12 minutes. Check with a toothpick; it should come out clean. Baking gives a different texture, but they will still taste great! You can serve these donut holes with many things! A warm cup of coffee or tea pairs well. You can also try them with a scoop of vanilla ice cream. For a festive touch, drizzle some caramel sauce over them. Enjoying them with friends and family makes these treats even better! Making Air Fryer Pumpkin Spice Donut Holes is fun and simple. We covered the ingredients, substitutions, and step-by-step cooking instructions. Tips for perfect texture and troubleshooting common issues help you succeed. You can explore variations like chocolate chips or seasonal flavors to keep things exciting. Finally, storage and reheating tips ensure your leftovers stay fresh. These treats are easy to make, delicious, and perfect for any occasion. Enjoy making and sharing them with friends and family!

Air Fryer Pumpkin Spice Donut Holes Simple Delight

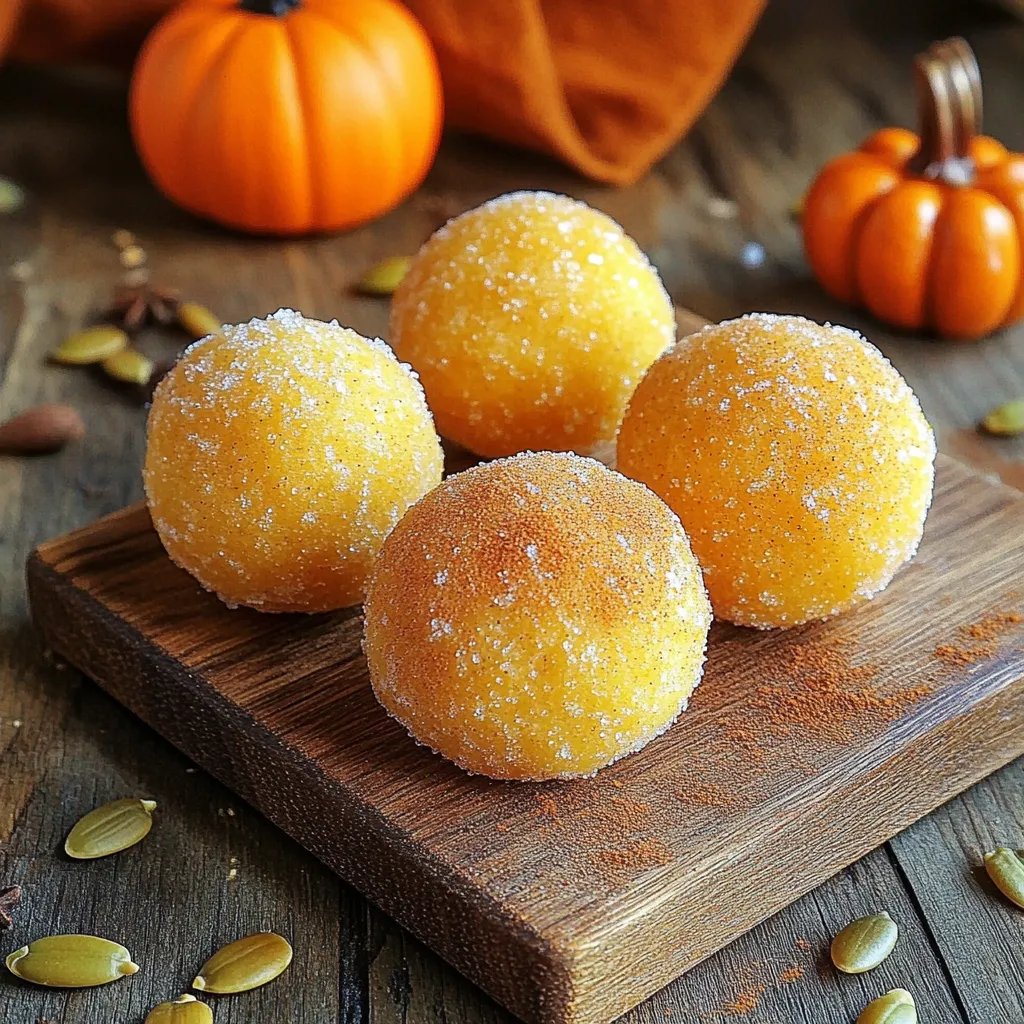
Are you ready to enjoy a sweet, seasonal treat? These Air Fryer Pumpkin Spice Donut Holes are a simple delight

To make Minute Spicy Garlic Noodles, you will need: - 8 oz. egg noodles or any noodles of choice - 4 tablespoons soy sauce - 2 tablespoons sesame oil - 6 cloves garlic, minced - 1 red chili pepper, finely sliced (adjust to heat preference) - 1 tablespoon fresh ginger, grated - 2 green onions, chopped - 1 tablespoon chili paste (sriracha or gochujang for extra kick) - 1 tablespoon lime juice - Salt and pepper to taste - Sesame seeds for garnish You can swap some ingredients to fit your taste. For the noodles, use rice noodles or whole wheat noodles. Instead of soy sauce, try tamari for a gluten-free option. You can also replace sesame oil with olive oil if needed. If you don’t have a red chili pepper, use red pepper flakes or hot sauce for heat. For lime juice, lemon juice works well too. Choosing the right noodles is key. Look for noodles that cook quickly, like egg noodles or rice noodles. Check the package for cooking times. Fresh noodles often taste better than dried ones. If you like a chewy texture, go for thicker noodles. Always read the ingredients to avoid added preservatives. This dish is quick and packed with flavor. Start by gathering all your ingredients. You will need egg noodles, soy sauce, sesame oil, garlic, chili pepper, ginger, green onions, chili paste, lime juice, and sesame seeds. Make sure to have everything ready before you start cooking. This will help the process go smoothly. 1. Boil a large pot of salted water. Cook your noodles according to the package instructions. This usually takes about 8-10 minutes. 2. Drain the noodles and set them aside. Don’t forget to save a cup of noodle water. This water will help create your sauce. 3. Heat sesame oil in a large skillet or wok over medium heat. 4. Add minced garlic, grated ginger, and sliced chili pepper. Sauté for 1-2 minutes. Make sure the garlic doesn’t burn, or it will taste bitter. 5. Pour in the soy sauce and chili paste. Mix everything well. Adjust the spice by adding more chili paste if you want it hotter. 6. Toss the drained noodles into the skillet. Mix well, adding reserved noodle water a little at a time. This gives you a silky sauce that coats the noodles nicely. 7. Squeeze lime juice over the noodles. Season with salt and pepper to taste. Add chopped green onions and toss for another minute. 8. Remove from heat and serve right away. Garnish with sesame seeds and extra green onions if you like. To make a great sauce, balance the flavors. Start with the soy sauce and chili paste. Add the reserved noodle water slowly to control the thickness. If you want more heat, add a bit more chili paste. For a touch of brightness, the lime juice is key. It adds a fresh taste that cuts through the richness of the sauce. Always taste as you go to get the flavors just right. To make your Minute Spicy Garlic Noodles sing, focus on the balance of flavors. Start with fresh garlic and ginger. Their bright notes boost the dish. Red chili peppers add heat, so choose your amount wisely. If you want more spice, add extra chili paste. Lime juice gives a nice tang that brightens the flavors. Always taste as you go. This helps you find the perfect mix. The key to great noodles is timing. Boil your noodles until they’re just tender. Follow the package instructions closely. Drain them, but save some noodle water. This water is gold! It helps create a silky sauce when you mix it back in. When adding the noodles to the skillet, toss them gently. This ensures each noodle gets coated in the sauce. A large pot for boiling noodles is a must. Use a colander to drain them easily. For cooking, a skillet or wok works best. These tools let the garlic and ginger sauté well. A good spatula helps you toss everything without breaking the noodles. Finally, have measuring spoons for accuracy. This ensures you get just the right amount of soy sauce and sesame oil. {{image_2}} You can easily make these noodles vegetarian or vegan. Swap the egg noodles for rice noodles or whole grain options. Use soy sauce and sesame oil, which are plant-based. For a boost of flavor, add tofu or tempeh. Both provide protein and soak up the tasty sauce well. The heat level is up to you! If you love spice, add more chili paste. You can also use two red chili peppers for a fiery kick. If you prefer mild flavors, skip the chili paste. You can still enjoy the garlic and ginger taste without the heat. Feel free to customize your noodles by adding protein or veggies. Chicken, shrimp, or beef will enhance the dish. Cut them into small pieces for quick cooking. You can also mix in colorful vegetables like bell peppers, broccoli, or carrots. This adds crunch and nutrients to your meal while keeping it delicious. After you enjoy your Minute Spicy Garlic Noodles, let them cool down. Place the noodles in an airtight container. They stay fresh in the fridge for about 3 to 4 days. If you want to keep them longer, consider freezing. To reheat your noodles, use a skillet or microwave. If using a skillet, add a splash of water or broth. Heat on low until warm. If using a microwave, cover the bowl with a damp paper towel. Heat in short bursts, stirring in between. For freezing, store the noodles in a freezer-safe container. Add a bit of oil to prevent sticking. They can last for up to 2 months in the freezer. When ready to eat, thaw them in the fridge overnight and reheat as mentioned above. Minute Spicy Garlic Noodles last about 3 to 4 days in the fridge. Store them in an airtight container. This keeps them fresh and tasty. Always check for any signs of spoilage before eating. Yes, you can make these noodles in advance. Cook the noodles and sauce separately. Combine them right before serving. This way, the noodles stay firm and do not get soggy. You can serve these noodles with many dishes. Try a simple salad or steamed veggies. Grilled chicken or shrimp also pairs well. For a light meal, enjoy them with some fresh fruit. Yes, you can use gluten-free noodles. Look for rice noodles or gluten-free pasta. Ensure all sauces are gluten-free too. This way, everyone can enjoy this tasty dish. In this blog post, we detailed the key ingredients for Minute Spicy Garlic Noodles, shared cooking steps, and provided tips for enhancing flavor. I discussed variations for every taste and how to store your delicious creations. Remember, the right ingredients and careful cooking make all the difference. Take your time, enjoy the process, and don’t hesitate to get creative! With these tips and tricks, you can impress anyone with your noodle skills. Happy cooking!

Minute Spicy Garlic Noodles Flavorful and Quick Dish

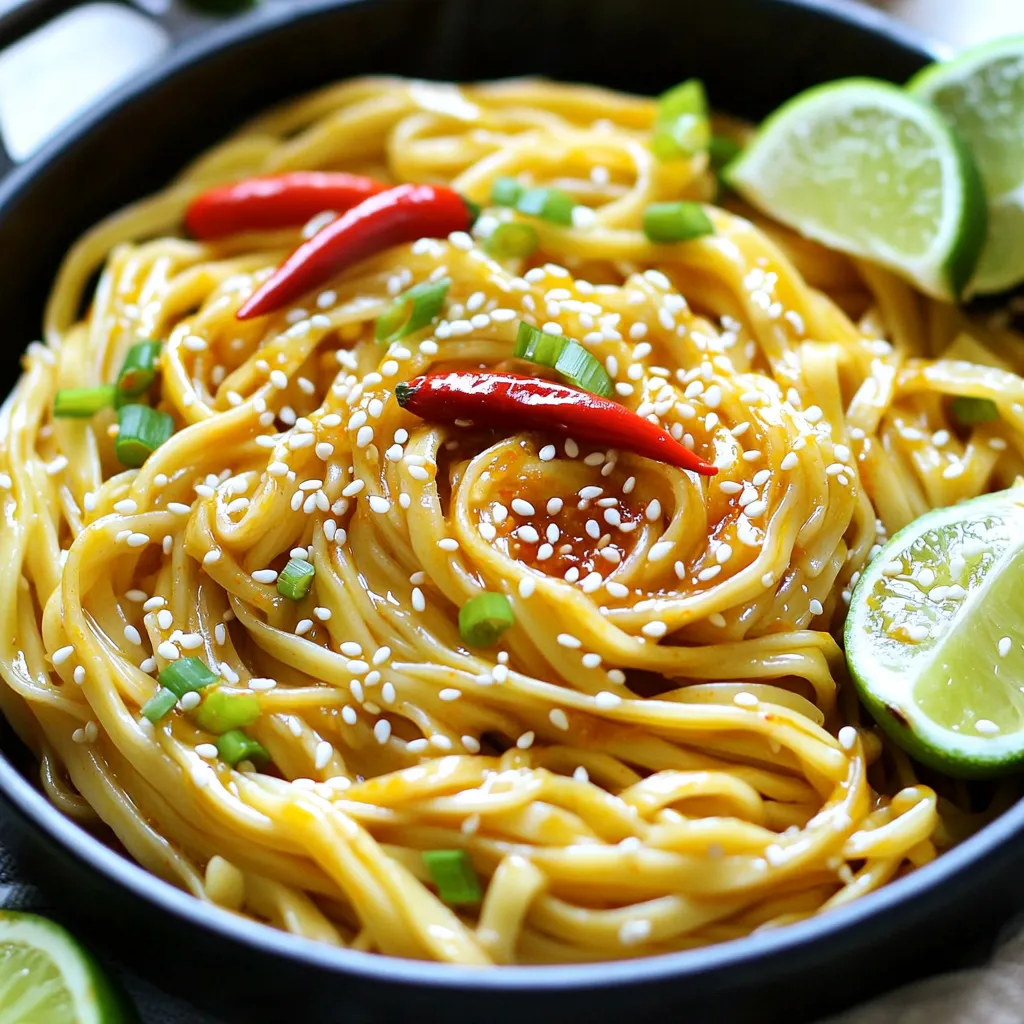
Are you ready for a quick and flavorful dish? Minute Spicy Garlic Noodles are your answer! In just a few

To make Garlic Herb Butter Roasted Chicken Thighs, you need a few key items. Each ingredient plays a role in creating rich flavors and a crispy texture. Here’s what you will need: - 4 bone-in, skin-on chicken thighs - 4 tablespoons unsalted butter, softened - 1 tablespoon fresh rosemary, chopped - 1 tablespoon fresh thyme, chopped - 5 cloves garlic, minced - 1 lemon, zested and juiced - Salt and black pepper to taste - 1 teaspoon paprika - Fresh parsley, chopped, for garnish These ingredients balance well together. The chicken thighs give a juicy base. The garlic herb butter adds depth and flavor. Fresh herbs like rosemary and thyme brighten the dish. This mix makes every bite delightful. Don't skip the lemon; it adds a fresh zing. When you gather your ingredients, ensure they are fresh. Fresh herbs and garlic make a big difference. Quality chicken thighs will give you the best results. Now you’re ready to dive into the cooking process! Start by preheating your oven to 425°F (220°C). This high heat will help the chicken skin get nice and crispy. In a mixing bowl, combine the softened butter, chopped rosemary, thyme, minced garlic, lemon zest, and lemon juice. Mix well until all ingredients blend together smoothly. This herb butter will add great flavor to the chicken. Pat the chicken thighs dry with a paper towel. This step is key for crispy skin. Next, season both sides with salt, black pepper, and paprika. Then, loosen the skin of each thigh gently. Spoon about half of the herb butter mixture underneath the skin. Rub the rest of the butter on the outside of the chicken. Place the chicken thighs in a baking dish, skin side up. Roast in the preheated oven for 35 to 40 minutes. Check that the internal temperature reaches 165°F (74°C) and the skin is golden and crispy. After roasting, remove the chicken from the oven. Let it rest for 5 minutes before serving. This resting step keeps the chicken juicy. Garnish with freshly chopped parsley for a lovely finish. To get that perfect crispy skin, start by drying the chicken thighs. Use a paper towel to pat them dry. This helps the skin crisp up nicely while cooking. Next, season both sides with salt, black pepper, and paprika. This adds flavor and aids in getting a crunchy texture. Want to boost the flavor? Consider adding more herbs. Fresh basil or oregano adds a nice twist. You can also try a pinch of cayenne for some heat. Mix these into your garlic herb butter for an extra kick. Adjust the herbs based on what you like. Letting the chicken rest is key for juicy meat. After roasting, remove it from the oven and let it sit for five minutes. This helps the juices redistribute, making every bite tender and moist. Don't skip this step; it makes a big difference! {{image_2}} You can switch out rosemary and thyme for other herbs. Try using sage for a warm flavor. Oregano brings a nice Mediterranean touch. If you love a bit of heat, add fresh basil. Each herb gives a unique taste. Experiment until you find your favorite mix! You can make these chicken thighs in different ways. An air fryer cooks them quickly and makes the skin crispy. Set it to 400°F (200°C) and cook for 25-30 minutes. You can also grill the thighs. Just preheat the grill to medium heat. Grill each side for about 6-8 minutes. Check that the inside reaches 165°F (74°C). Pair your garlic herb butter chicken with tasty sides. Roasted veggies like carrots and broccoli are great choices. You can also serve it with creamy mashed potatoes. A fresh salad with lemon vinaigrette adds a nice crunch. Rice pilaf complements the chicken perfectly. Try different sides to find what you love best! To keep your chicken thighs fresh, place them in an airtight container. You can store them in the fridge for up to three days. Always let them cool down to room temperature before sealing. This helps prevent moisture buildup and keeps the chicken tasty. When you're ready to enjoy leftovers, reheat them gently. The best way is to use an oven. Preheat your oven to 350°F (175°C). Place the chicken on a baking sheet. Cover it with foil to keep it moist. Heat for about 20 minutes or until warm. You can also use a microwave, but the oven gives better results. If you want to store chicken thighs for longer, freezing is a great option. Wrap each thigh in plastic wrap or foil. Then, place wrapped thighs in a freezer bag. They can last up to three months in the freezer. To thaw, move them to the fridge overnight. This keeps the meat juicy and safe to eat. Yes, you can use boneless chicken thighs. They will cook faster than bone-in thighs. You may need to check the cooking time. Boneless thighs will take about 25 to 30 minutes to reach 165°F (74°C). This option is great for a quick meal. You can check if the chicken is done by using a meat thermometer. Insert it into the thickest part of the thigh. The chicken should reach 165°F (74°C) for safe eating. The skin should be golden brown and crispy. If you don't have a thermometer, cut into the meat. It should be clear, not pink. If you want to avoid butter, you can use olive oil or ghee. Both options add nice flavor. You can also try plant-based butter for a vegan choice. Keep in mind that each substitute may change the taste a bit. To make this recipe healthier, use less butter or a butter substitute. You can also remove the skin from the chicken thighs. This lowers the fat content. Adding more herbs and spices boosts flavor without extra calories. Serve with a side of veggies for a balanced meal. Yes, you can make the garlic herb butter ahead of time. Mix it up and store it in the fridge for up to 3 days. You can also freeze it for later use. This makes meal prep easier and faster. Just let it thaw before using. This post covered making delicious roasted chicken thighs. We talked about the important ingredients, like chicken, garlic herb butter, and seasonings. You learned how to prepare and roast the chicken for crispy skin. Tips for flavor and juiciness help you get the best meal. Explore variations, including cooking methods and sides, to suit your taste. Remember to store leftovers properly and reheating tips to enjoy later. With the right steps, you can make this dish a favorite in your home. Enjoy your cooking journey!

Garlic Herb Butter Roasted Chicken Thighs Delight

Are you ready to impress your family with a simple yet mouth-watering dish? In this blog post, I’ll guide you

- 6 cups apple cider - 1 cup caramel sauce (plus extra for drizzling) - 1 cup orange juice For this punch, apple cider is your base. It gives that sweet and tangy flavor we love in fall. Caramel sauce adds richness and sweetness. You can use store-bought or homemade for this drink. Orange juice brightens up the punch and adds citrus notes. - 1 teaspoon ground cinnamon - 1/2 teaspoon ground nutmeg - 1/4 teaspoon ground ginger - 4 whole cloves - 1 star anise (optional) Spices are key to this recipe. Ground cinnamon gives warmth. Nutmeg adds depth and a soft spice. Ginger brings a hint of heat, while whole cloves offer a bold aroma. If you want a little more flavor, toss in a star anise. It has a sweet, licorice-like taste. - Cinnamon sticks - Sliced apples and oranges Garnishes make a drink look great! Use cinnamon sticks for stirring and a pretty touch. Sliced apples and oranges not only look nice but also add extra flavor. They make your drink even more festive. Start by taking a large pot. Add 6 cups of apple cider, 1 cup of caramel sauce, and 1 cup of orange juice. Mix these liquids well using a wooden spoon. Stir until the caramel blends smoothly into the cider. Next, we bring in the spices. Add 1 teaspoon of ground cinnamon, 1/2 teaspoon of ground nutmeg, and 1/4 teaspoon of ground ginger. Don’t forget the 4 whole cloves. If you like, toss in 1 star anise for extra flavor. Stir the pot again to mix all the spices evenly into the liquid. Now, place the pot over medium heat. Watch for it to simmer. This should take a few minutes. Once it simmers, lower the heat and let it cook for about 15 minutes. This time helps the flavors blend well. After 15 minutes, take a taste. If you want it sweeter, add more caramel sauce. To keep it smooth, strain the punch through a fine mesh sieve. This will remove the whole spices. Serve the warm punch in heat-proof mugs or glasses. Drizzle a little extra caramel sauce on top if you like. For garnish, add a cinnamon stick and a few slices of fresh apples and oranges. This makes your drink look festive and inviting! To make your drink just right, you can adjust the sweetness. If you want it sweeter, add more caramel sauce. Start with a small amount and taste as you go. You can also add flavors like vanilla or even a splash of rum for a twist. Try using different spices, too! Cardamom or allspice can add a special touch. When serving warm drinks, choose heat-proof mugs or glasses. They keep the drink hot and look nice. You can get creative with garnishes. Add a cinnamon stick for stirring or a slice of apple on the rim. A sprinkle of nutmeg can also make it more festive. To prevent burning while simmering, keep the heat low and stir often. This helps all the flavors blend without sticking. For a smooth drink, strain it through a fine mesh sieve. This removes whole spices and keeps your punch silky. Avoid adding too many spices, as they can make the drink gritty. {{image_2}} You can make this punch even more fun by adding spirits. Rum or bourbon pairs well with the sweet apple cider. Start with one to two ounces per serving. This amount will enhance the flavor without making it too strong. If you want a spiced kick, try spiced rum. It adds warmth and depth to each sip. For a kid-friendly twist, skip the alcohol. This punch is tasty without it! Add more apple cider or juice. You can also mix in some sparkling water for fizz. This makes it lighter and refreshing. Serve it in fun cups to make it special for the kids. Want to try something new? Swap out the orange juice. Use cranberry or pear juice instead. These fruits give a unique twist to the punch. You can even add slices of fresh pears or cranberries for extra flair. Each season offers its own fun flavors to explore! To keep your warm caramel apple cider punch fresh, store it in a clean jar. Use a container with a tight lid to avoid spills. Let the punch cool down before sealing it. Place it in the fridge within two hours of making. This helps keep the flavors bright and tasty. When it’s time to enjoy leftovers, reheating is key. Use a pot on low heat for best results. Stir gently to mix the flavors. Avoid boiling the punch, as this can ruin the taste. Heat it just until warm. You can also use a microwave. Heat in short bursts to prevent overheating. You can store the punch in the fridge for up to four days. After that, the flavor may fade. Always check for any signs of spoilage before consuming. If it smells off or looks unusual, don’t drink it. Fresh is always best! Yes, you can use store-bought caramel sauce. For the best flavor, I recommend brands like Ghirardelli or Smucker's. They both offer thick, rich caramel that blends well with the cider. Look for sauces that have a short ingredient list. This ensures you get a more natural taste. If you need a substitute for apple cider, try using apple juice or pear juice. Both offer a fruity taste similar to cider. You can also mix in some cranberry juice for a tart twist. Just remember to adjust the sweetness, as these juices can be sweeter than cider. To make this punch vegan, use a plant-based caramel sauce. Many brands offer vegan options made from coconut or almond milk. Also, ensure your apple cider and orange juice are free from animal products. This way, you can enjoy a warm, cozy drink without any animal ingredients. This blog post shared a tasty recipe for Warm Caramel Apple Cider Punch. We covered the main ingredients, flavors to enhance the taste, and tips for serving. You can even adjust it for different diets. Remember, the right spices make a big difference. With these ideas, you can impress family and friends during gatherings. So, gather your ingredients and start mixing. Your warm punch will be a hit!

Warm Caramel Apple Cider Punch Flavorful Fall Drink

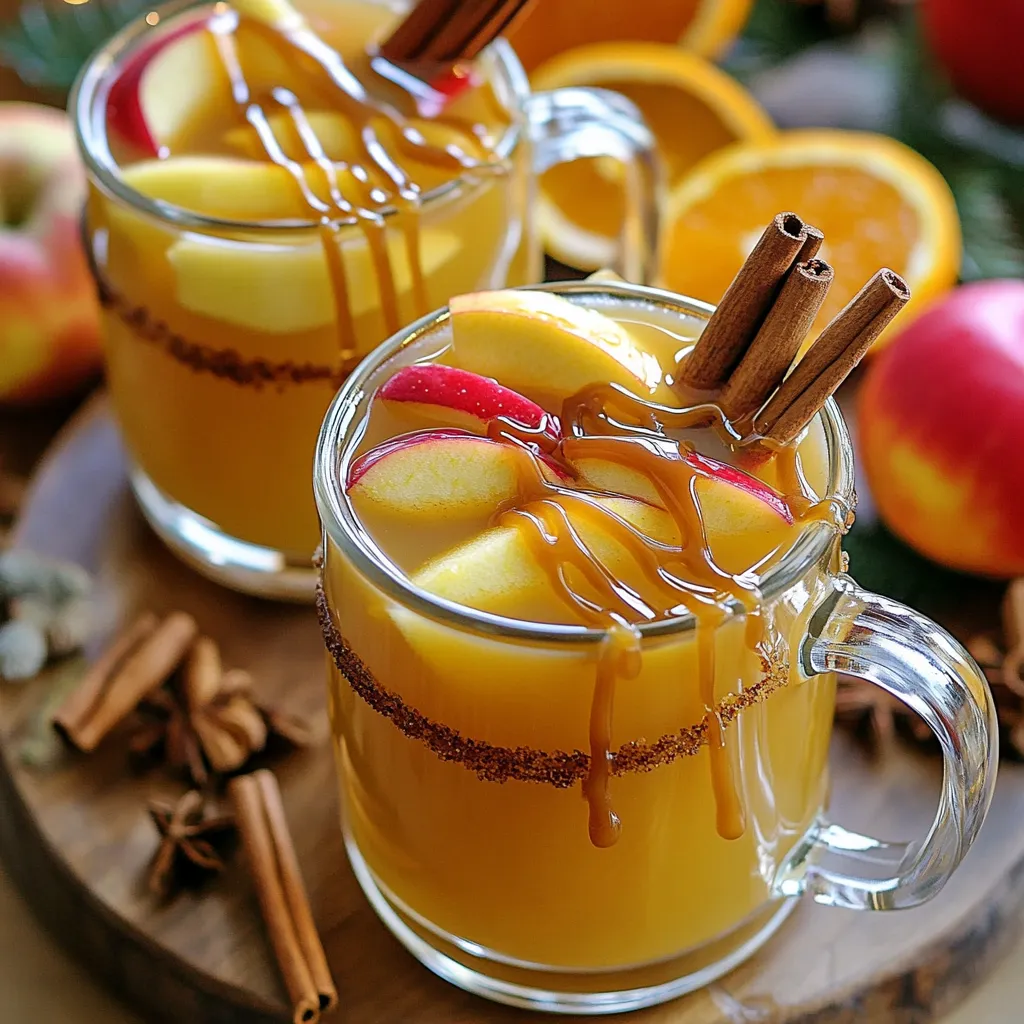
Fall is here, and that means it’s time for cozy drinks! The Warm Caramel Apple Cider Punch is the perfect

- 1 pre-made graham cracker or shortcrust pastry shell - 1 cup cream cheese, softened - 1 cup pumpkin puree (canned or freshly made) - 1/2 cup granulated sugar - 1/4 cup brown sugar - 2 large eggs - 1 teaspoon vanilla extract - 1 tablespoon pumpkin pie spice - 1/2 teaspoon salt - 1/2 cup all-purpose flour - 1/4 cup oats - 1/4 cup brown sugar - 1/4 cup unsalted butter, melted - 1/2 teaspoon cinnamon - Whipped cream - Pumpkin pie spice for sprinkling Gathering the right ingredients is key to making this pumpkin cream cheese tart shine. You start with a pre-made pastry shell. This saves time and keeps things simple. Next, the cream cheese needs to be softened. Soft cream cheese blends easily with other ingredients. Pumpkin puree adds that rich flavor. You can use canned puree or make your own. After that, you will mix in granulated and brown sugar. The sugars sweeten the tart and add depth. Two large eggs act as a binder. They help hold the filling together. Vanilla extract adds warmth, while pumpkin pie spice brings that classic fall flavor. Finally, a pinch of salt balances the sweetness and enhances taste. For the streusel topping, you’ll need flour, oats, brown sugar, melted butter, and cinnamon. This mixture creates a crunchy topping that contrasts nicely with the creamy filling. Optional garnishes like whipped cream and a sprinkle of pumpkin pie spice make the tart look beautiful and festive. These simple touches elevate each slice into a treat. With these ingredients, you are ready to create a delicious pumpkin cream cheese tart that everyone will love. - Preheat the oven to 350°F (175°C). This helps the tart bake evenly. - Prepare the pastry shell by placing it in a tart pan. This makes it easy to fill. - Beat the softened cream cheese until smooth. This creates a nice base for your filling. - Incorporate pumpkin puree and sugars. Mix well to combine all the flavors. - Pour the pumpkin cream cheese mixture into the pastry shell. Spread it evenly for a nice look. - Prepare and sprinkle the streusel topping over the filling. This adds a crunchy layer. - Bake for 45-50 minutes until set. The filling should be firm and the top golden. - Allow the tart to cool for at least 30 minutes before slicing. This helps the filling set up better. For best results, refrigerate for about an hour before serving. To get the best texture, start with softened cream cheese. Cold cream cheese makes it hard to mix. Let it sit out for about 30 minutes before you use it. This way, it blends well with the other ingredients. Use an electric mixer to beat the cream cheese until it's smooth and creamy. Mix slowly at first to avoid splatter, then speed up as it combines. Adding spices can take your tart to the next level. Pumpkin pie spice is a great start, but don’t stop there. You can add a pinch of nutmeg or ginger for a warm kick. Check the sweetness, too. Taste the mixture before pouring it into the crust. If it needs more sweetness, add a bit more granulated sugar or brown sugar. Presentation makes your tart look fancy. Serve each slice with a dollop of whipped cream on top. A sprinkle of pumpkin pie spice adds a nice touch. For drinks, pair it with a warm spiced cider or a cup of coffee. The flavors complement each other well. Enjoy your delicious creation! {{image_2}} If you want a gluten-free crust, use almond flour or gluten-free biscuits. Many stores sell gluten-free options that taste great. You can also make your own with ground nuts and butter. For a dairy-free version, swap the cream cheese with a plant-based cream cheese. Look for brands that use cashews or coconut. These options work well and keep the tart creamy. Want to switch it up? Try flavored tarts like chocolate or caramel. Adding cocoa powder to the cream cheese mix gives a rich twist. You can also fold in toasted nuts, like pecans or walnuts, for a crunchy texture. Consider adding a hint of citrus. A little orange or lemon zest brightens the flavor. Just a teaspoon can change the whole taste of the tart. Spices can change with the seasons. Add nutmeg or ginger for a warm winter feel. For spring, try a fresh herb like mint for a cool taste. Deciding between fresh or canned pumpkin? Fresh pumpkin gives a pure flavor. Canned pumpkin is easy and still tasty. Both work well, so use what you have. To store the pumpkin cream cheese tart in the fridge, cover it tightly with plastic wrap or aluminum foil. This keeps it fresh and prevents it from absorbing other smells. You should store it in the fridge for up to five days. If you want to save some tart for later, freezing is a great option. First, let the tart cool completely. Then, wrap it well in plastic wrap and aluminum foil to stop freezer burn. You can freeze the tart for up to three months. When you're ready to enjoy it, thaw it in the fridge overnight. To check if your tart is still good, look for any off smells, mold, or a change in texture. If it smells sour or has a watery layer, it's best to toss it. To keep the flavor and texture nice, slice and store pieces separately. This way, you can enjoy it fresh each time! Yes, you can make this tart ahead of time. It stays fresh for days. I recommend baking it a day before you serve it. After baking, let it cool completely. Then, cover it with plastic wrap and place it in the fridge. This will help the flavors blend well. Just remember to let it sit at room temperature for a bit before slicing. If you need a substitute for cream cheese, there are a few options. You can use mascarpone cheese for a similar taste. Greek yogurt is another great option. It will make the tart a bit tangy but still creamy. Silken tofu can work too if you want a dairy-free choice. Just blend it until smooth. The tart can last about 4 to 5 days in the fridge. Make sure to store it in an airtight container. This keeps it fresh and safe to eat. If you notice any strange smells or changes in texture, it’s best to throw it away. Always trust your senses when it comes to food safety. Absolutely! A homemade pastry shell can be even better. It lets you control the flavor and texture. You can use a basic pie crust recipe or a graham cracker crust. Just make sure it is baked and cooled before adding the filling. This step will ensure the tart holds its shape and tastes fresh. This pumpkin cream cheese tart brings together rich flavors and a perfect texture. You learned how to prepare it step-by-step, from mixing the filling to creating a crunchy streusel topping. I shared tips on enhancing flavors, dietary tweaks, and storage methods to keep it fresh. In the end, this tart is a versatile treat for any occasion. Whether you stick to the classic recipe or try a twist, you can't go wrong. Enjoy the process and the delicious result!

Pumpkin Cream Cheese Tart with Streusel Delight

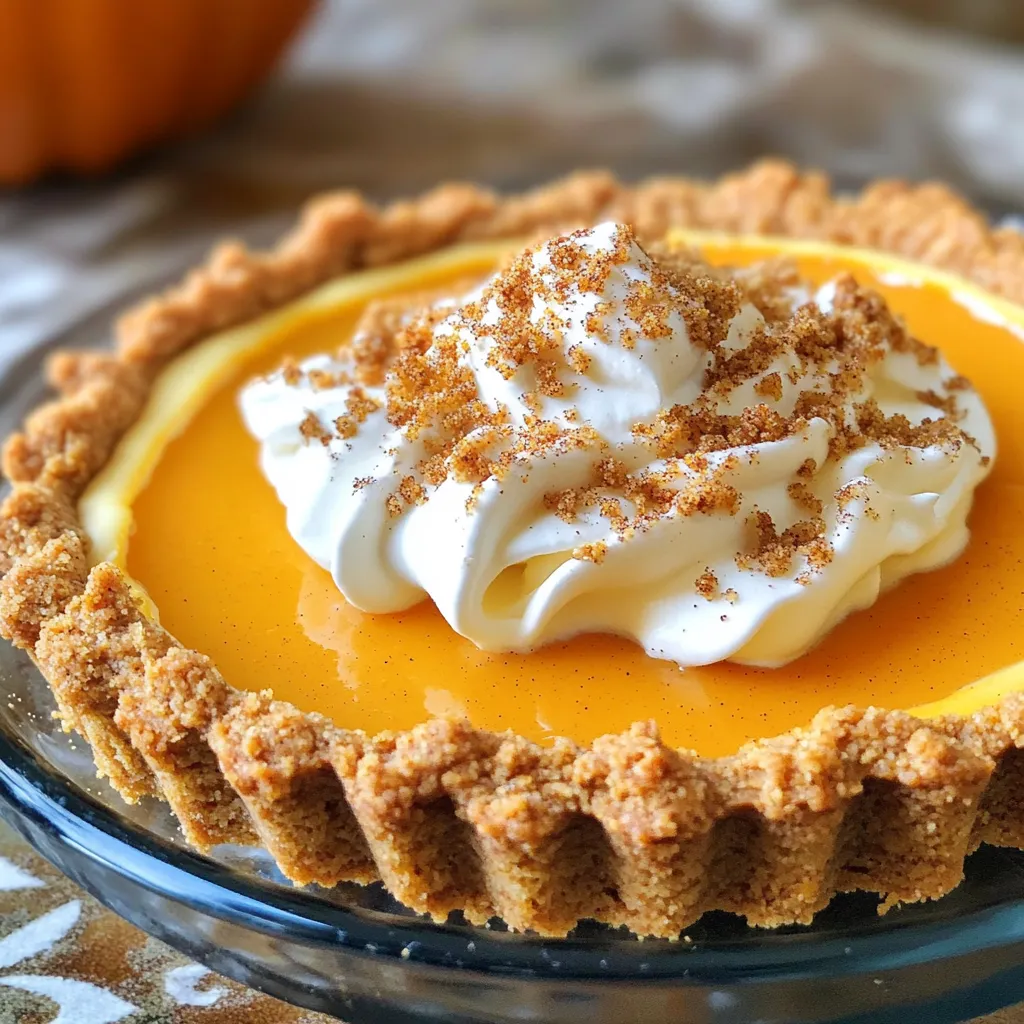
Get ready to impress your friends and family with a dessert that’s a true showstopper: the Pumpkin Cream Cheese Tart

Here’s what you need to make bakery-style apple cinnamon muffins. Each ingredient plays a big part in flavor and texture. - Dry ingredients: - 2 cups all-purpose flour - 1 cup granulated sugar - 2 teaspoons baking powder - 1 teaspoon baking soda - 1 teaspoon ground cinnamon - ½ teaspoon salt - Wet ingredients: - 1 large egg - 1 cup unsweetened applesauce - ½ cup vegetable oil - ½ cup milk - 1 teaspoon vanilla extract - Additional ingredients: - 2 medium apples, peeled, cored, and diced (I prefer Granny Smith) - ½ cup chopped walnuts (optional) - 1 tablespoon brown sugar (for topping) Each of these ingredients brings a unique taste. The apples add sweetness and moisture. The walnuts add crunch if you choose to use them. The brown sugar topping gives a nice caramelized finish. When you gather these items, you set the stage for a delicious baking experience. Enjoy the process! - Preheat the oven and prepare muffin tin: Start by setting your oven to 375°F (190°C). This step is key for even baking. Line a 12-cup muffin tin with paper liners or grease it well. This will help prevent sticking. - Combine and mix dry ingredients: In a large bowl, mix 2 cups of all-purpose flour, 1 cup of sugar, 2 teaspoons of baking powder, 1 teaspoon of baking soda, 1 teaspoon of ground cinnamon, and ½ teaspoon of salt. Whisk these dry ingredients well to ensure they blend perfectly. - Whisk together wet ingredients: In another bowl, crack 1 large egg. Then, add 1 cup of unsweetened applesauce, ½ cup of vegetable oil, ½ cup of milk, and 1 teaspoon of vanilla extract. Whisk until the mixture is smooth and well combined. - Combine wet and dry mixtures: Pour the wet mixture into the dry ingredients. Stir gently until just combined. It’s okay if the batter has a few lumps; avoid overmixing to keep the muffins light. - Incorporate apples and walnuts into the batter: Fold in 2 medium apples, peeled, cored, and diced. If you like, add ½ cup of chopped walnuts too. This adds texture and flavor throughout the muffins. - Fill muffin cups and prepare topping: Spoon the batter into the muffin cups, filling each about ¾ full. Then, mix 1 tablespoon of brown sugar with a pinch of cinnamon. Sprinkle this mixture on top of the muffins for a sweet crust. - Bake muffins and check for doneness: Place the muffin tin in the oven and bake for 18-20 minutes. To check for doneness, insert a toothpick into the center of a muffin. If it comes out clean, they are ready! - Cooling and serving suggestions: Let the muffins cool in the tin for about 5 minutes. Then, transfer them to a wire rack to cool completely. Serve warm, and if you want, add a dusting of powdered sugar or a pat of butter for extra flavor. Avoiding overmixing the batter Mix the wet and dry ingredients gently. Overmixing can lead to tough muffins. You want to stir until just combined. Lumps are okay! They help keep your muffins light and fluffy. Substitutions for ingredients If you lack applesauce, use mashed bananas or yogurt. Both give moisture and flavor. Need a nut-free version? Skip the walnuts or swap them for seeds. You can use almond milk instead of regular milk for a dairy-free option. Achieving the perfect rise Use fresh baking powder and baking soda. This makes your muffins rise high and fluffy. Fill your muffin cups about ¾ full. This allows room for growth without spilling over. How to create a crispy muffin top Sprinkle a mix of brown sugar and cinnamon on top before baking. This adds a sweet crunch and a beautiful finish. Bake at the right temperature for the right time. Keep an eye on them during the last few minutes to avoid burning. {{image_2}} You can change the fruit in these muffins. Instead of apples, try pears or berries. They bring different flavors and textures. For a fun twist, use seasonal fruits. In fall, add pumpkin for a cozy taste. In winter, cranberries give a tart kick. Each fruit adds a unique spin to your muffins. If you need gluten-free muffins, swap the all-purpose flour. Use a gluten-free blend instead. It works well and keeps the muffins tasty. For vegan options, replace the egg with a flax egg. Mix one tablespoon of flaxseed meal with three tablespoons of water and let it sit. You can use almond milk instead of regular milk. These swaps keep the muffins fluffy and delicious. To keep your bakery-style apple cinnamon muffins fresh, follow these tips: - Room Temperature Storage: Store the muffins in an airtight container. This keeps them soft and moist. Place them at room temperature for up to three days. If you add a paper towel inside, it helps soak up extra moisture. This prevents sogginess. - Freezing Muffins for Longer Shelf Life: For longer storage, freeze the muffins. Wrap each muffin in plastic wrap. Then, place them in a freezer bag. This way, they stay fresh for up to three months. When you're ready to eat one, just take it out and let it thaw at room temperature. To enjoy your muffins warm and fresh, here’s how to reheat them: - How to Reheat for Optimal Freshness: If you want to reheat, use the oven for best results. Preheat the oven to 350°F (175°C). Place the muffins on a baking sheet and heat for about 5-10 minutes. This keeps the outside crispy and the inside soft. - Using the Microwave vs. Oven: You can also use the microwave. Heat the muffins for about 15-20 seconds. This method is quick, but it might make them a bit soft. If you prefer a crispier muffin, the oven is your best bet. Can I make these muffins ahead of time? Yes, you can make these muffins ahead of time. Bake them and let them cool completely. Store them in an airtight container. They will stay fresh for about three days at room temperature. You can also freeze them for up to three months. Just thaw at room temperature when you're ready to enjoy. How long do baked muffins last? Baked muffins last about three days at room temperature. To keep them fresh, store them in a sealed container. If you want them to last longer, freezing is a great option. Just wrap each muffin in plastic wrap and place them in a freezer bag. Why are my muffins too dense? Dense muffins can happen if you overmix the batter. When mixing, do it gently. Also, using too much flour can make them heavy. To avoid this, spoon flour into the measuring cup and level it off with a knife. What can I do if my muffins are too dry? If your muffins turn out dry, you might have baked them too long. Always check them a couple of minutes early. Adding more applesauce or using oil instead of butter can also help add moisture. Next time, try to mix the wet and dry ingredients just until combined. You learned how to make delicious muffins with simple ingredients. We went through each step, from mixing to baking, ensuring your muffins rise perfectly. I shared tips to avoid common mistakes and even offered tasty variations. Remember, you can try different fruits, use gluten-free options, or store muffins for later enjoyment. Baking is fun and rewarding. Keep experimenting to find your perfect muffin recipe. Enjoy the process and share your tasty treats with friends and family. Happy baking!

Bakery-Style Apple Cinnamon Muffins Tasty and Easy Recipe

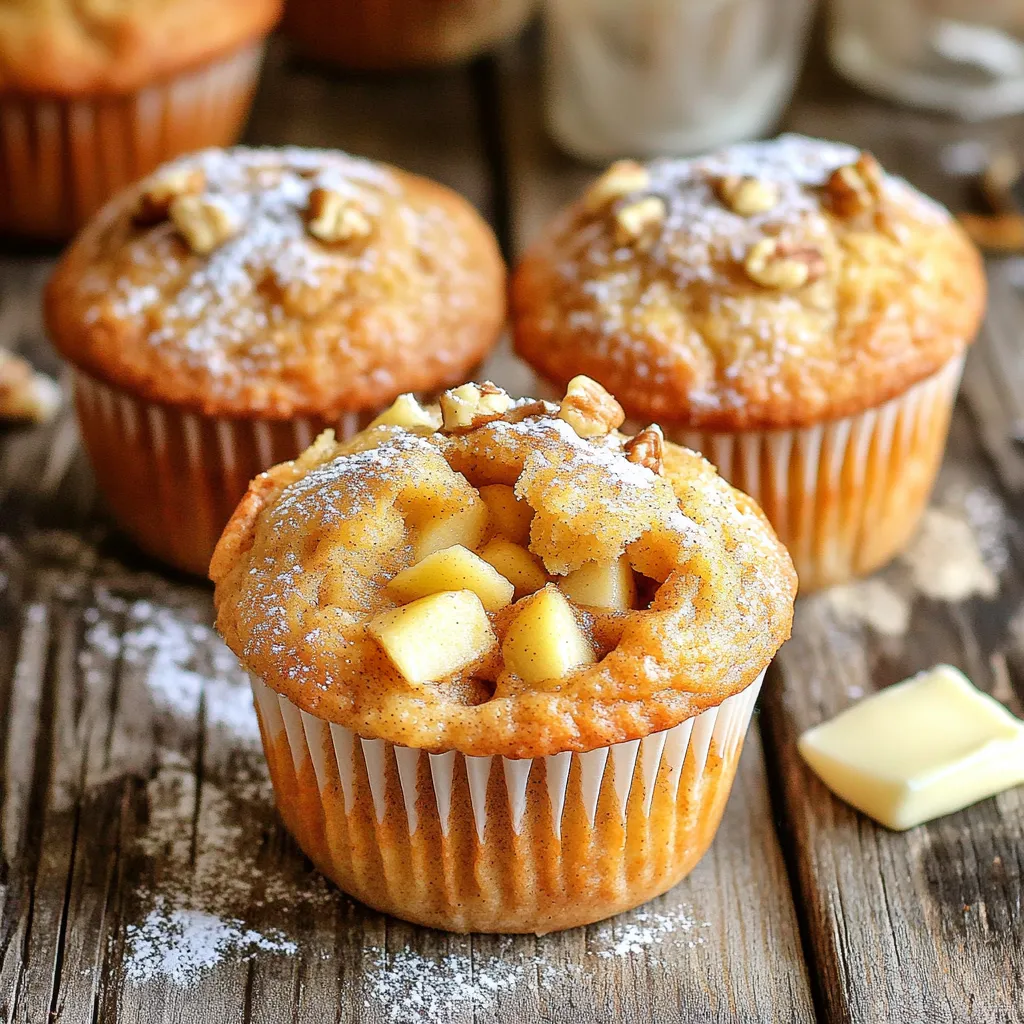
Are you craving a warm, sweet treat that’s super easy to make? Look no further! This Bakery-Style Apple Cinnamon Muffins

- 4 salmon fillets (6 oz each) Salmon fillets are the star of this dish. They cook quickly and absorb flavors well. Choose fresh, bright fillets for the best taste. If you can, get wild-caught salmon. It’s healthier and tastier than farmed fish. - 2 medium zucchinis, cut into half-moons Zucchini adds a lovely crunch and color. It cooks fast and pairs well with salmon. Try to cut the zucchini into even pieces. This way, they cook at the same rate. - 1 tablespoon olive oil - 2 tablespoons lemon juice (freshly squeezed) - 1 tablespoon lemon zest - 2 teaspoons black pepper - 1 teaspoon garlic powder - 1 teaspoon sea salt - 1 teaspoon dried thyme - Fresh parsley for garnish This seasoning blend enhances the dish's bright flavor. Use fresh lemon juice and zest for the best taste. The black pepper adds a nice kick. Garlic powder deepens the flavor without being too strong. Sea salt and thyme complete the mix. Lastly, parsley gives a pop of color and freshness when you serve it. First, gather all your ingredients. You will need: - 4 salmon fillets (6 oz each) - 2 medium zucchinis, cut into half-moons - 1 tablespoon olive oil - 2 tablespoons lemon juice (freshly squeezed) - 1 tablespoon lemon zest - 2 teaspoons black pepper - 1 teaspoon garlic powder - 1 teaspoon sea salt - 1 teaspoon dried thyme - Fresh parsley for garnish Next, preheat your oven to 400°F (200°C). This heat works well for cooking salmon and zucchini. Line a large sheet pan with parchment paper. It makes cleanup easier. Now, take a small bowl. In it, whisk together olive oil, lemon juice, lemon zest, black pepper, garlic powder, sea salt, and dried thyme. Mix until smooth. Set this aside; we will use it soon. Now, place the salmon fillets in the center of your sheet pan. Make sure they have space around them. Next, arrange the zucchini half-moons around the salmon. They should fit nicely on the pan. Take your lemon pepper mixture and drizzle it over the salmon and zucchini. Make sure every piece gets a good coat. This will add great flavor and help the dish shine. Place the sheet pan in your preheated oven. Bake for 15-20 minutes. The salmon should flake easily with a fork when it's done. The zucchini should be tender but still bright. Once cooked, carefully take the sheet pan out of the oven. Let it rest for a few minutes. This helps the flavors settle. To finish, garnish the dish with chopped fresh parsley. It adds color and freshness. Enjoy your meal! When picking salmon, look for bright color. The flesh should be firm, not mushy. Smell the fish; it should smell like the ocean, not fishy. Check for moisture; fresh salmon should be moist. Ask your fishmonger for the freshest catch. They can guide you to the best options available. Zucchini cooks quickly, so cut it into even pieces. I like half-moons for a nice look. Always wash zucchini well before slicing. Cook it until tender, but don’t overdo it. You want it soft but still bright green. A quick toss in olive oil and seasoning makes it shine. Feel free to adjust seasonings to your taste. If you love spice, add cayenne pepper. For a milder dish, cut back on black pepper. Fresh herbs like dill or basil can add a twist. Experiment with flavors to find what works best for you. Always taste as you go! {{image_2}} You can swap zucchini for many other veggies. Bell peppers add color and crunch. Broccoli florets bring nutrition and taste. Asparagus pairs well with salmon too. Carrots offer a sweet touch. You can even mix in cherry tomatoes for a burst of flavor. Just cut the vegetables to a similar size for even cooking. While lemon pepper is a favorite, try other flavors. A soy sauce mix gives a savory taste. Honey mustard adds a sweet kick. You can use a spicy blend with chili flakes for heat. Try a herb mix with dill or rosemary. Each marinade changes the whole dish. This salmon dish goes well with rice or quinoa for a filling meal. A fresh salad brightens the plate and adds crunch. Serve with crusty bread to soak up the juices. You can also pair it with a light white wine for a fancy touch. Don’t forget to sprinkle extra herbs on top for a pop of color! You can store leftover salmon and zucchini in the fridge. Place them in an airtight container. Keep them for up to three days. The salmon may lose some texture, but it will still taste good. When ready to eat, check for any off smells before using. If you want to save the leftovers longer, freezing works well. Wrap the salmon and zucchini tightly in plastic wrap. Then, place them in a freezer bag. This keeps air out and helps prevent freezer burn. You can freeze them for up to three months. When you are ready to eat, thaw them overnight in the fridge. To reheat, use the oven for the best taste. Preheat your oven to 350°F (175°C). Place the salmon and zucchini on a baking sheet. Cover with foil to keep moisture in. Heat for about 10-15 minutes or until warm. You can also use a microwave, but this may make the fish a bit less tasty. If using a microwave, heat in short bursts to avoid overcooking. Enjoy your meal! Yes, you can use frozen salmon. Just remember to thaw it first. Place the salmon in the fridge overnight. If you are in a hurry, run it under cold water for about an hour. After thawing, pat it dry with paper towels. This helps the seasoning stick better. The cooking time may need slight adjustments. Check for doneness as you bake. Lemon pepper salmon pairs well with many sides. Here are some ideas: - Rice or quinoa for a hearty base - A fresh green salad for crunch - Roasted potatoes for a filling option - Steamed broccoli or green beans for added veggies These sides balance the meal and add more flavors. Salmon is done when it flakes easily with a fork. Insert a fork into the thickest part of the fish. If it breaks apart easily, it’s ready. The color should be opaque and light pink. You can also use a food thermometer. The thickest part should reach 145°F (63°C). This ensures it is safe to eat. This blog post covers making a great dish with salmon and zucchini. We looked at the key ingredients, including salmon fillets and a tasty seasoning blend. I shared step-by-step instructions for prepping and baking. I also gave tips for choosing fresh salmon and cooking zucchini. You can even explore different veggies and marinades for a twist. Lastly, we discussed how to store and reheat your meal. Cooking can be fun and easy, so get started with this recipe!

Sheet-Pan Lemon Pepper Salmon with Zucchini Delight

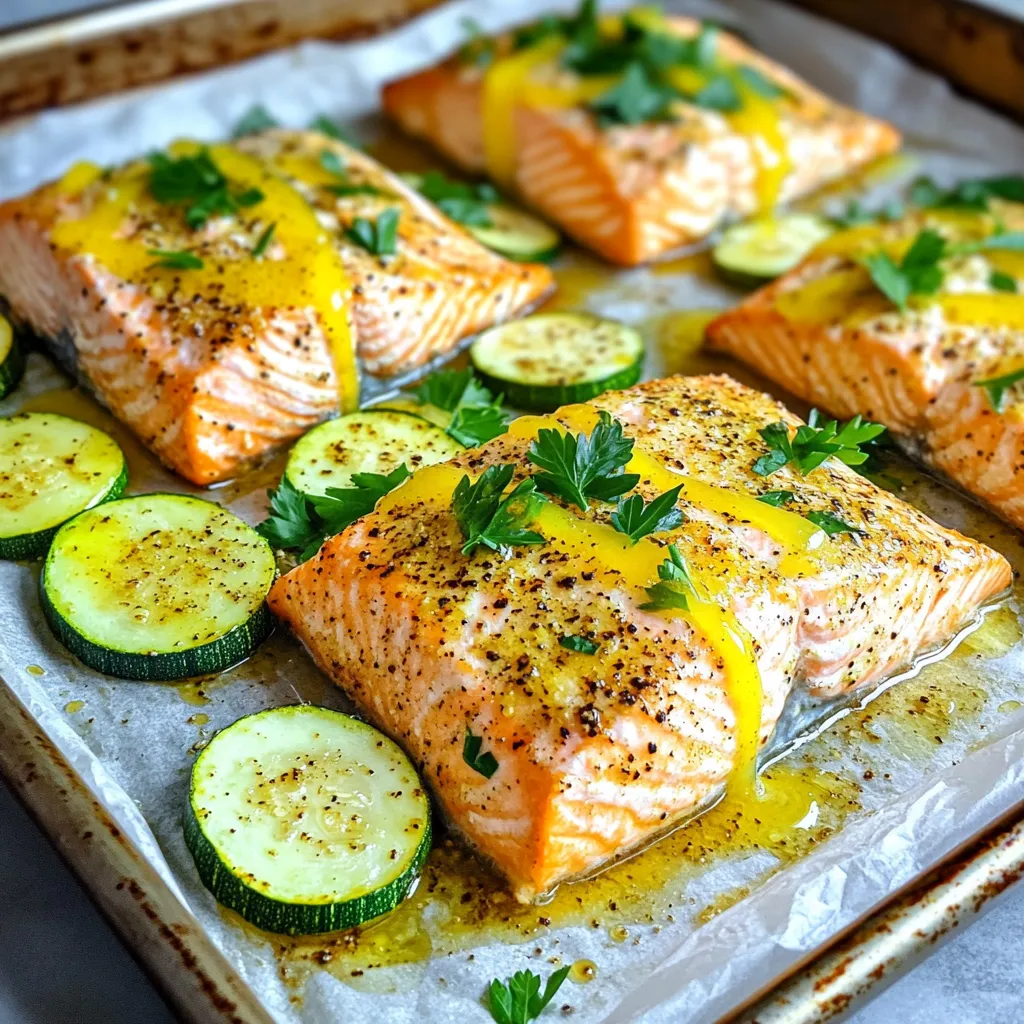
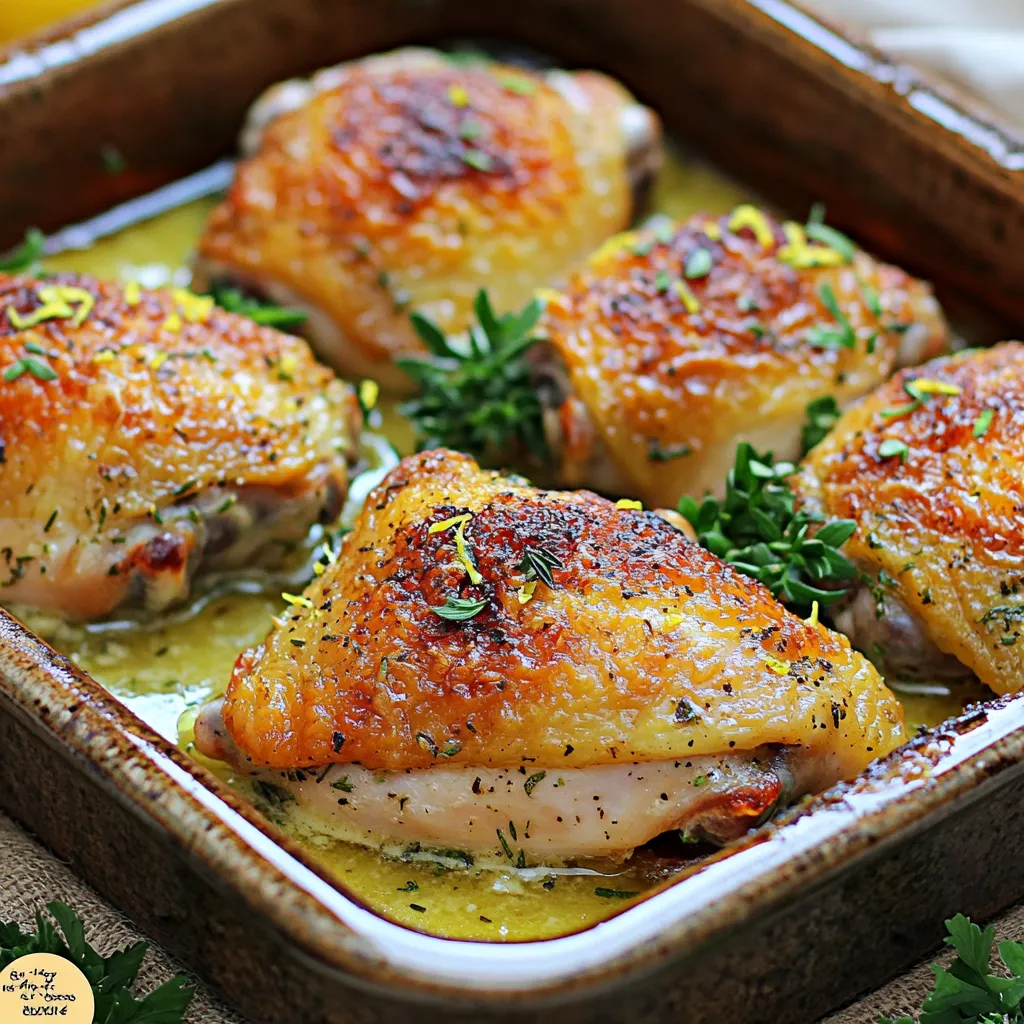
Are you ready to taste the joy of a quick and healthy meal? My Sheet-Pan Lemon Pepper Salmon with Zucchini

- 1 lb beef stew meat - 4 ears of fresh sweet corn (or 2 cups frozen) - 2 medium potatoes - 1 large onion - 2 cloves garlic - 4 cups beef broth - 1 cup milk or plant-based alternative - 1 cup heavy cream - Seasonings: dried thyme, smoked paprika, salt, pepper - 2 tablespoons olive oil - Fresh parsley for garnish Gathering the right ingredients is key to making this chowder shine. Start with the beef stew meat, which brings rich flavor and texture. You can use fresh sweet corn for a burst of sweetness or frozen corn if fresh is not available. Don't forget the potatoes; they add heartiness to the dish. A large onion and two cloves of garlic will give it depth. Use beef broth as your base. This will enhance the beef and corn flavors. For a creamy finish, you’ll want milk and heavy cream. Season with dried thyme and smoked paprika for warmth. Salt and pepper will enhance all the flavors. Lastly, olive oil helps with browning the beef and gives a nice richness. Chop fresh parsley for garnish. It adds color and a fresh taste. These ingredients come together to create a delightful meal that warms the soul. Enjoy the process of preparing them! First, you need to brown the beef stew meat. Heat 2 tablespoons of olive oil in a skillet over medium-high heat. Once hot, add the 1 lb of beef stew meat. Cook it for about 5-7 minutes. You want it nicely browned on all sides. This step adds flavor to your chowder. After browning, transfer the beef to your slow cooker. Now it's time to add some tasty vegetables. In the same skillet, toss in 1 large chopped onion and 2 minced garlic cloves. Sauté them for about 3 minutes until they turn translucent. This step makes your chowder smell amazing! Next, add 2 diced medium potatoes and the kernels from 4 ears of sweet corn (or 2 cups of frozen corn) into the slow cooker. Pour in 4 cups of beef broth to the slow cooker. Then add 1 teaspoon of dried thyme, 1 teaspoon of smoked paprika, and salt and pepper to taste. Mix all the ingredients together thoroughly. This ensures that every bite of chowder is full of flavor. You can choose to cook on low or high heat. For a rich taste, set the slow cooker on low for 6-8 hours. If you’re short on time, high heat for 3-4 hours works, too. The chowder is ready when the beef is tender and the potatoes are cooked through. You can check by poking a potato with a fork. About 30 minutes before serving, stir in 1 cup of milk and 1 cup of heavy cream. This step makes your chowder creamy and smooth. Stir occasionally and warm it through. Before serving, taste the chowder and adjust the seasoning if needed. Enjoy your hearty meal! - Achieving the best flavor: Start by browning the beef stew meat in olive oil. This step adds a rich taste. Don't rush it; let it brown well for about 5-7 minutes. Once browned, transfer it to the slow cooker. The browned bits left in the pan add extra flavor when you sauté the onion and garlic. - Ensuring the beef is tender: The key to tender beef is low and slow cooking. Cook on low for 6-8 hours. If you're short on time, the high setting works too, but aim for 3-4 hours. Check the beef near the end of cooking. It should shred easily with a fork when done. - Presentation tips for serving: Use nice bowls to ladle the chowder. Sprinkle chopped fresh parsley on top for a pop of color. This simple touch makes it look gourmet. - Pairing recommendations: Crusty bread is perfect with this chowder. It soaks up the rich flavors. You can also serve a simple green salad for a fresh contrast. - Flavor boost ideas: For a little more zing, add fresh herbs like thyme or rosemary. A pinch of cayenne pepper can bring some warmth. You can even swap smoked paprika for regular paprika for a different flavor profile. - Adding other vegetables: Feel free to mix in other veggies. Carrots or bell peppers add a nice crunch. You can also use frozen peas or diced celery for added texture. Just remember to chop them small so they cook evenly. {{image_2}} You can switch the beef for other meats. Chicken or turkey works well in chowder. Just cut them into bite-sized pieces. If you want a lighter option, go for turkey. For a dairy-free version, use plant-based milk. Almond or oat milk are great choices. You can also skip the heavy cream entirely. Different regions have unique flavors. In the Southwest, add cumin and chili powder for a kick. In the Midwest, consider adding herbs like dill. Some people even toss in jalapeños for heat. Pair your chowder with cornbread or a fresh salad. These sides bring more flavor and texture to your meal. You can also make this chowder on the stovetop. Just brown the beef in a pot, then add your veggies and broth. Simmer for about an hour until everything is tender. If you have an Instant Pot, use it! Cook on high pressure for 30 minutes. Add the milk and cream at the end, just like in the slow cooker. To keep your chowder fresh, use airtight containers. Glass or plastic containers work well. Let the chowder cool before sealing. Store it in the fridge. It can last for up to three days. Make sure the fridge stays below 40°F (4°C) to keep food safe. When it's time to enjoy the leftovers, use a pot on the stove. Heat over medium-low heat. Stir often to avoid burning. You can also use the microwave. Place chowder in a microwave-safe bowl. Heat in short bursts, stirring in between. This keeps the texture and flavor intact. To save some chowder for later, freezing is a great option. First, let it cool completely. Then, pour it into freezer-safe containers. Leave some space at the top for expansion. It can last for up to three months in the freezer. When you’re ready to eat, move it to the fridge to thaw overnight. Reheat it on the stove or microwave as mentioned above. Enjoy your delicious chowder any time! You can store this chowder in the fridge for up to three days. Make sure to use an airtight container. For longer storage, freeze the chowder for up to three months. Thaw it in the fridge overnight when ready to eat. Yes, making this chowder ahead is easy and smart. Cook it fully and let it cool before storing. Keep it in the fridge and heat it before serving. This helps the flavors blend nicely. You can make this chowder vegetarian by swapping the beef for plant-based meat. Use vegetable broth instead of beef broth. For creaminess, substitute heavy cream with coconut milk or cashew cream. Add extra veggies like bell peppers or zucchini for more flavor. This chowder pairs well with crusty bread for dipping. You can also serve it with a fresh garden salad or cornbread. These options add a nice crunch and freshness. To thicken the chowder, mash some of the potatoes after cooking. You can also mix cornstarch with water and add it to the pot. Let it cook for a few minutes until it thickens. This way, you keep the flavor rich and tasty. This blog post covered making a hearty slow cooker beef and sweet corn chowder. We explored the key ingredients, step-by-step instructions, and tips for great flavor. You learned about variations and the best ways to store leftovers. In essence, this chowder is versatile and easy. Whether you stick to the recipe or experiment, it will satisfy your cravings. Enjoy making this comforting dish for yourself and others!

Slow Cooker Beef and Sweet Corn Chowder Delight

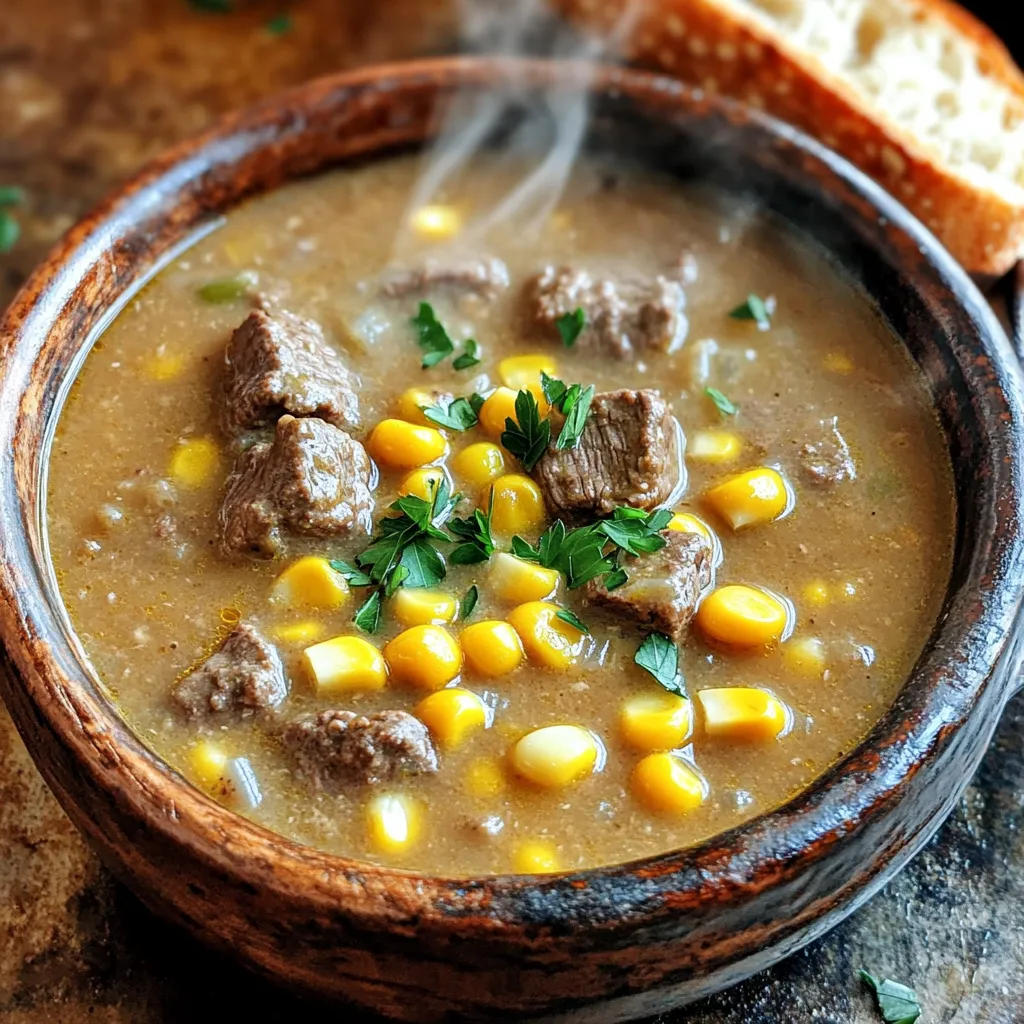
Are you ready for a warm and hearty dish that comforts the soul? My Slow Cooker Beef and Sweet Corn

For this recipe, you need just a few key items. Gather these: - 2 lbs chicken wings These wings will be the star of your dish. Fresh wings work best. To make your wings tasty, you need some simple seasonings. Here’s what to use: - 1 tablespoon baking powder - 1 teaspoon salt - 1 teaspoon black pepper - 1 teaspoon garlic powder - 1 teaspoon onion powder - 1 teaspoon smoked paprika These seasonings add flavor and help with crispiness. The baking powder is key to that crunch! Choosing the right BBQ sauce can change the whole dish. You can use: - Your favorite store-bought BBQ sauce - Homemade BBQ sauce if you prefer to make it yourself - Specialty sauces like honey BBQ or spicy variations Feel free to experiment! Each sauce brings its own twist to the wings. Start by rinsing the chicken wings under cold water. This step helps remove any residue from the wings. After rinsing, pat them dry with paper towels. Dry wings are key to crispy results. If you skip this, your wings might not be as crunchy. In a large bowl, combine the following ingredients: - 1 tablespoon baking powder - 1 teaspoon salt - 1 teaspoon black pepper - 1 teaspoon garlic powder - 1 teaspoon onion powder - 1 teaspoon smoked paprika Mix these well. Each spice adds a layer of flavor. The baking powder helps the wings crisp up nicely. Next, preheat your air fryer to 400°F (about 200°C). This takes about 5 minutes. While it preheats, add the dried chicken wings into the bowl with the seasoning mix. Toss the wings until they are evenly coated. Place the wings in a single layer in the air fryer basket. Do not overcrowd them; this ensures they crisp up. Cook for 25 to 30 minutes. Remember to shake the basket halfway through. This helps cook them evenly. Once the wings are golden brown and crispy, transfer them to a large bowl. Pour your favorite BBQ sauce over the wings. Toss them gently until all wings are well-coated. To finish, return the coated wings to the air fryer. Cook them for an extra 5 to 7 minutes at 400°F. This caramelizes the sauce and gives it a great finish. Enjoy your crispy BBQ chicken wings! To get your wings extra crispy, follow these steps. First, always dry your wings well. Moisture is the enemy of crispiness. After rinsing, use paper towels to pat them dry. Next, mix baking powder with the spices. The baking powder helps create that perfect crunch. Make sure to coat each wing thoroughly. When cooking, space the wings apart in the air fryer. This allows air to circulate, leading to even crispiness. Choosing the right BBQ sauce can make your wings shine. Here are a few tasty options: - Classic BBQ Sauce: This is a go-to favorite for many. It has a sweet and smoky flavor. - Spicy BBQ Sauce: If you like heat, try adding hot sauce to your BBQ. It adds a nice kick. - Honey BBQ Sauce: Mixing honey with BBQ sauce gives a sweet glaze. It’s great for a sticky finish. - Garlic BBQ Sauce: Add minced garlic to your sauce for a bold flavor. It pairs well with the spices in the wings. When making crispy BBQ chicken wings, a few mistakes can ruin your dish. Avoid overcrowding the air fryer. If wings are too close, they won’t cook evenly. Also, don’t skip the preheat step. Preheating helps seal in moisture and get that crispy skin. Lastly, don’t rush the cooking time. Let the wings cook fully for the best flavor and texture. {{image_2}} To make spicy BBQ wings, add some heat! Mix in 1-2 teaspoons of cayenne pepper or chili powder. You can also use a spicy BBQ sauce. This will give your wings a fiery kick. Serve with a side of cooling ranch or blue cheese dressing. This combo makes every bite exciting! For a sweet twist, try honey garlic wings. Combine 1/4 cup of honey with your BBQ sauce. Add 2-3 minced garlic cloves to the mix. Toss the wings in this blend after air frying. The sweet and savory notes will impress your family and friends. They won’t be able to resist! For a fresh flavor, use herbs. Chop fresh herbs like rosemary, thyme, or cilantro. Mix them with your seasoning blend before coating the wings. This adds a lovely aroma and taste. You can also sprinkle herbs on top after cooking. This gives your wings a fancy touch! To keep your crispy BBQ chicken wings fresh, store them in an airtight container. Let the wings cool down first. They can stay in the fridge for up to four days. If you want to keep them longer, freezing is your best option. You can freeze the wings for later use. Place the cooled wings in a freezer-safe bag or container. Squeeze out as much air as possible. They can last in the freezer for up to three months. When you are ready to eat, thaw them in the fridge overnight. To reheat your wings, the air fryer works best. Preheat it to 375°F. Place the wings in a single layer and heat for about 10 minutes. This will help them regain their crispiness. You can also use the oven. Heat the oven to 375°F and bake for 15-20 minutes. Enjoy your tasty wings again! Cook chicken wings in an air fryer for 25 to 30 minutes. Set the temperature at 400°F. Shake the basket halfway through to ensure even cooking. This method gives you crispy wings every time. Yes, you can use frozen chicken wings. Just cook them for a longer time. Add around 10 to 15 minutes to the cooking time. Make sure they reach an internal temperature of 165°F. Thawing them first helps with crispiness. The best BBQ sauce depends on your taste. Some like sweet sauces, while others prefer tangy or spicy. A classic choice is a honey BBQ sauce. You can also try spicy chipotle or a tangy vinegar-based sauce for a kick. The key is to pick a sauce you enjoy. In this post, we covered how to make tasty chicken wings using an air fryer. We looked at essential ingredients, seasoning, and sauce choices. I shared step-by-step instructions to help you cook them perfectly. You learned tips for crispy wings and easy variations. Remember to store any leftovers properly! With practice, you'll make wings that impress everyone. Enjoy your cooking and have fun trying different flavors.

Air Fryer Crispy BBQ Chicken Wings Easy and Tasty Recipe

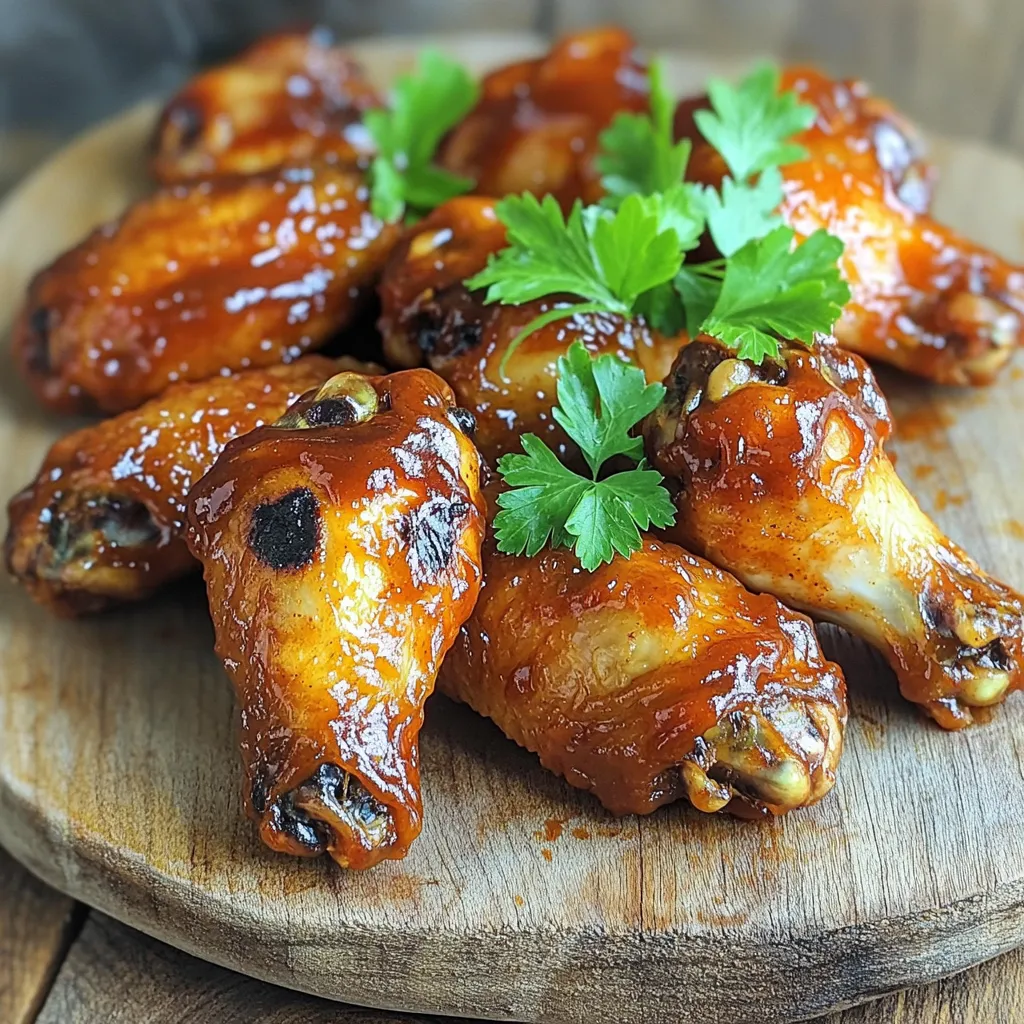
Are you ready to take your chicken wing game to the next level? This easy and tasty recipe for Air

Older posts
Newer posts
← Previous Page1 … Page15 Page16 Page17 … Page84 Next →

dsad

© 2026 Lisa Dishes • Built with GeneratePress

Our Policies

  • Copyright Policy
  • Cookie Policy
  • GDPR Policy
  • Privacy Policy
  • Disclaimer
  • Terms Of Use

More Information

  • Home
  • About
  • Contact
  • Appetizers
  • Dessert
  • Dinner
  • Drinks
©2026, Lisa Dishes About Back To Top