


Latest & Greatest

Black Pepper Chicken Flavorful Meal You’ll Love
If you’re craving a meal that bursts with flavor, look no further than Black Pepper Chicken! This dish combines juicy
Read more…
Sausage Breakfast Casserole Flavorful Morning Bake
Start your day right with a Sausage Breakfast Casserole that’ll impress everyone. This flavorful morning bake is easy to prepare
Read more…
Easy Hummus Recipe Simple and Flavorful Delight
If you’re looking for a quick and tasty snack, this easy hummus recipe is perfect for you! I’ll show you
Read more…
Peruvian Chicken with Green Sauce Flavorful Delight
Are you ready to spice up your dinner routine? Peruvian Chicken with Green Sauce is bursting with flavor and sure
Read more…
Baked Crunchy Hot Honey Chicken Delight Recipe
Get ready to spice up your dinner nights with my Baked Crunchy Hot Honey Chicken Delight! This easy recipe combines
Read more…
Savory Chicken Noodle Casserole Easy Family Meal
Looking for an easy, delicious dinner that your whole family will love? You’ve found it! This Savory Chicken Noodle Casserole
Read more…
Spring Berry Parfait Delightful and Easy Recipe
Spring is here, and it’s the perfect time to enjoy fresh fruits! One of my favorite treats is a Spring
Read more…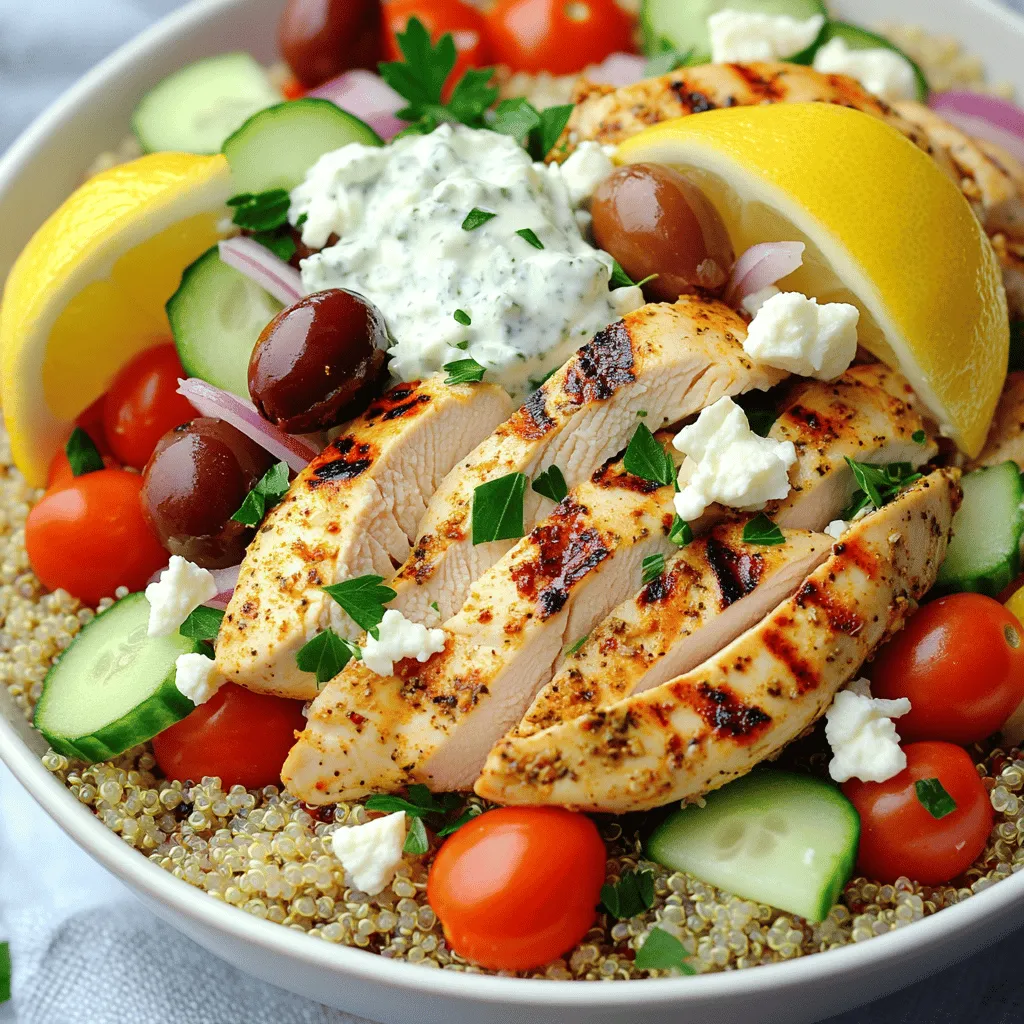
Greek Chicken Bowls Tasty and Balanced Meal Option
Looking for a tasty and balanced meal? Greek Chicken Bowls are your answer! This dish combines tender marinated chicken with
Read more…browse recipes


![- 1 cup Arborio rice - 4 cups vegetable broth (low sodium) - 1 cup of mushrooms (cremini or shiitake), sliced - 1 medium onion, finely chopped - 2 cloves of garlic, minced - ½ cup heavy cream - ½ cup grated Parmesan cheese - 2 tablespoons olive oil - 2 tablespoons unsalted butter - Salt and pepper to taste - Fresh parsley, chopped (for garnish) The ingredients in creamy mushroom risotto are simple yet full of flavor. I love using Arborio rice. It gives that creamy texture we all crave. The vegetable broth adds depth and warmth. You can choose cremini or shiitake mushrooms, as both bring unique flavors. Onions and garlic build a strong base. The heavy cream and Parmesan cheese add richness. Olive oil and butter make every bite smooth and tasty. Don't forget salt and pepper for seasoning. Fresh parsley brings a pop of color and freshness at the end. - For rice, you can try Carnaroli. It’s another great option. - Button mushrooms are a good choice if you want a milder taste. - Use coconut cream or cashew cream for dairy-free options. Substituting ingredients can still give you a great risotto. If you can’t find Arborio rice, Carnaroli works well too. Button mushrooms can be lighter but still delicious. And if you prefer dairy-free, the alternatives are creamy and satisfying. - When choosing mushrooms, look for firm ones. They should be dry and free of spots. - High-quality Parmesan cheese can make a big difference. It should be aged and flavorful. Always pick the best ingredients for your risotto. Fresh mushrooms have more flavor and a better texture. Good Parmesan cheese enhances the dish. It adds richness and depth that brings everything together. For the full recipe, check the section above! 1. Start by heating the vegetable broth in a medium saucepan over low heat. This keeps it warm, ready for your risotto. 2. In a large skillet, heat the olive oil and one tablespoon of butter over medium heat. 3. Add the finely chopped onion and sauté for about three to four minutes. You want it to become translucent. 4. Next, stir in the minced garlic and sliced mushrooms. Cook these for five to six minutes until the mushrooms are soft. They will release their moisture, adding flavor to your dish. 1. Now, add one cup of Arborio rice to the skillet. Stir it well to coat the grains with the tasty mixture. Let it cook for one to two minutes. This toasts the rice, giving it a nice flavor. 2. Gradually ladle in the warm vegetable broth, one cup at a time. Stir frequently as you do this. Wait until each cup is absorbed before adding the next. This process will take about 20 to 25 minutes. Make sure the rice stays creamy and slightly firm. 1. When the rice is creamy and al dente, remove the skillet from heat. Stir in the half cup of heavy cream and the last tablespoon of butter. This will make the risotto rich and velvety. 2. Add the grated Parmesan cheese next. Mix it in well, and season with salt and pepper to taste. 3. Let the risotto sit for a couple of minutes before serving. This allows it to thicken slightly and enhances the flavors. For a full recipe, check [Full Recipe]. Enjoy your cooking! To get that creamy risotto, constant stirring is key. As you stir, the starch from the Arborio rice releases. This makes the dish rich and velvety. If you stop stirring, the rice will not cook evenly. Also, keep your broth at a warm temperature. Adding cold broth can shock the rice. It slows down cooking and can lead to uneven texture. Warm broth works wonders for a creamy result. You should monitor the rice closely. Risotto takes about 20-25 minutes to cook. You want the rice to be al dente, meaning it should still have a slight bite. If it is too hard, give it more time. If it becomes too soft, you may have overcooked it. Best practice? Taste the rice before it finishes cooking. This helps you know when it is just right for you. Herbs can take your risotto to the next level. I love adding thyme or basil for a fresh taste. You can also experiment with different spices. A pinch of nutmeg or black pepper adds a nice kick. Feel free to mix and match. Each addition can give your creamy mushroom risotto a unique flair. Enjoy the process of discovery! For the full recipe, check out the above section. {{image_2}} You can add tasty proteins to your creamy mushroom risotto. Chicken or shrimp work great. Simply cook them separately and mix them in at the end. If you want a vegetarian option, consider using tofu. Tofu soaks up flavors well. Cut it into cubes and sauté until golden. This adds a nice texture to your dish. Adding vegetables can brighten your risotto. Try incorporating peas, spinach, or asparagus. These add color and nutrients. Seasonal veggies also make a fun twist. For spring, add fresh peas or asparagus. In fall, consider mushrooms or butternut squash. Each vegetable brings its own flavor, enhancing the overall dish. Want to make your risotto extra special? Try a truffle mushroom risotto. Use truffle oil to add a rich, earthy taste. Just a little goes a long way! You can also experiment with different cheeses. While Parmesan is classic, try using goat cheese or Gruyère for a unique twist. Each cheese adds its own flavor, making your risotto truly stand out. For the Full Recipe, check back to see how these variations fit in! To store leftover risotto, let it cool first. Place it in an airtight container. This keeps it fresh for up to three days in the fridge. For reheating, add a splash of broth or water. Heat it gently on the stove or microwave. Stir often to keep it creamy. Yes, you can freeze risotto! It works well for up to two months. To freeze, use a freezer-safe container. Make sure to leave some space for expansion. For defrosting, move it to the fridge overnight. Reheat it slowly, adding a little broth or water as needed. Leftover risotto can be a star in new dishes. You can shape it into patties and pan-fry them. This makes a tasty risotto cake! Another idea is to use it in stuffed peppers. For parties, serve it in small cups as a bite-sized treat. Everyone loves a creative twist! For the full recipe, check the details above. Arborio rice is the best choice for risotto. It has a high starch content. This gives risotto its creamy texture. Other rice types can work, but results vary. Carnaroli rice is a great alternative. It has a firmer texture and absorbs flavors well. You can also use Vialone Nano rice. It cooks faster but still offers a nice creaminess. If your risotto is overcooked, don’t panic! You can save it with a few tricks. First, add a splash of warm broth. This can help loosen the rice. Next, stir in a bit of heavy cream. This adds moisture and richness back in. If it’s too mushy, try adding cooked veggies or proteins. They can help balance the texture. Yes, you can make risotto ahead of time! Cook it until it's just al dente. This means it has a little bite. Let it cool down quickly. Store it in a sealed container in the fridge. When you reheat, add a bit of broth. This keeps it creamy. Stir it often to avoid clumps. For a detailed step-by-step guide, check out the [Full Recipe](#) for creamy mushroom risotto. It includes all the ingredients and steps you'll need. In this blog post, we explored how to make a delicious risotto step by step. We discussed essential ingredients, tips for creamy texture, and flavor variations. You can customize your risotto with different proteins and vegetables or enhance flavors with herbs. Remember to use quality ingredients for the best result. Enjoy this comforting dish, whether it’s for a special occasion or a cozy dinner at home. With practice, you'll master this tasty classic in no time!](https://lisadishes.com/wp-content/uploads/2025/06/2abffac3-2ab2-489c-a05e-b5417d21220a.webp)
Creamy Mushroom Risotto Rich and Flavorful Delight
Are you ready to whip up a creamy mushroom risotto that bursts with flavor? This dish is a delightful blend of rich mushrooms, smooth…
My Latest Desserts

Pumpkin Spice Energy Bites Tasty and Healthy Snack
Looking for a tasty and healthy snack to fuel your day? This Pumpkin Spice Energy Bites recipe is your answer! Read Full Recipe-
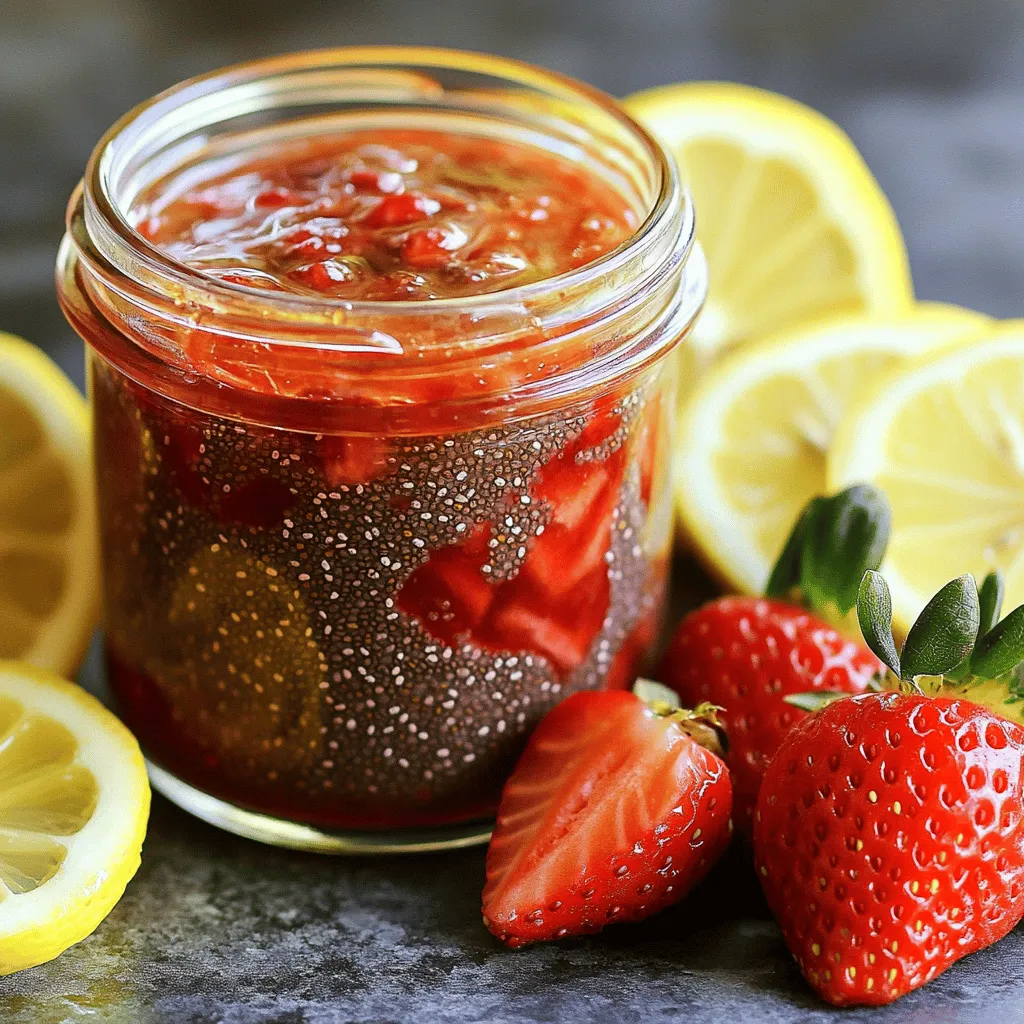
Strawberry Chia Seed Jam Tasty and Healthy Treat
If you’re craving a sweet treat that’s also good for you, I’ve got just the thing: Strawberry Chia Seed Jam! Read Full Recipe -
Mango Coconut Chia Pudding Healthy and Easy Recipe
Are you ready to indulge in a delicious, healthy treat? Mango Coconut Chia Pudding is simple to make and packed Read Full Recipe -
Pumpkin Spice Muffins Warm and Cozy Fall Treat
Fall is the perfect time for warm and cozy treats, and nothing says autumn like pumpkin spice muffins. These fluffy Read Full Recipe -
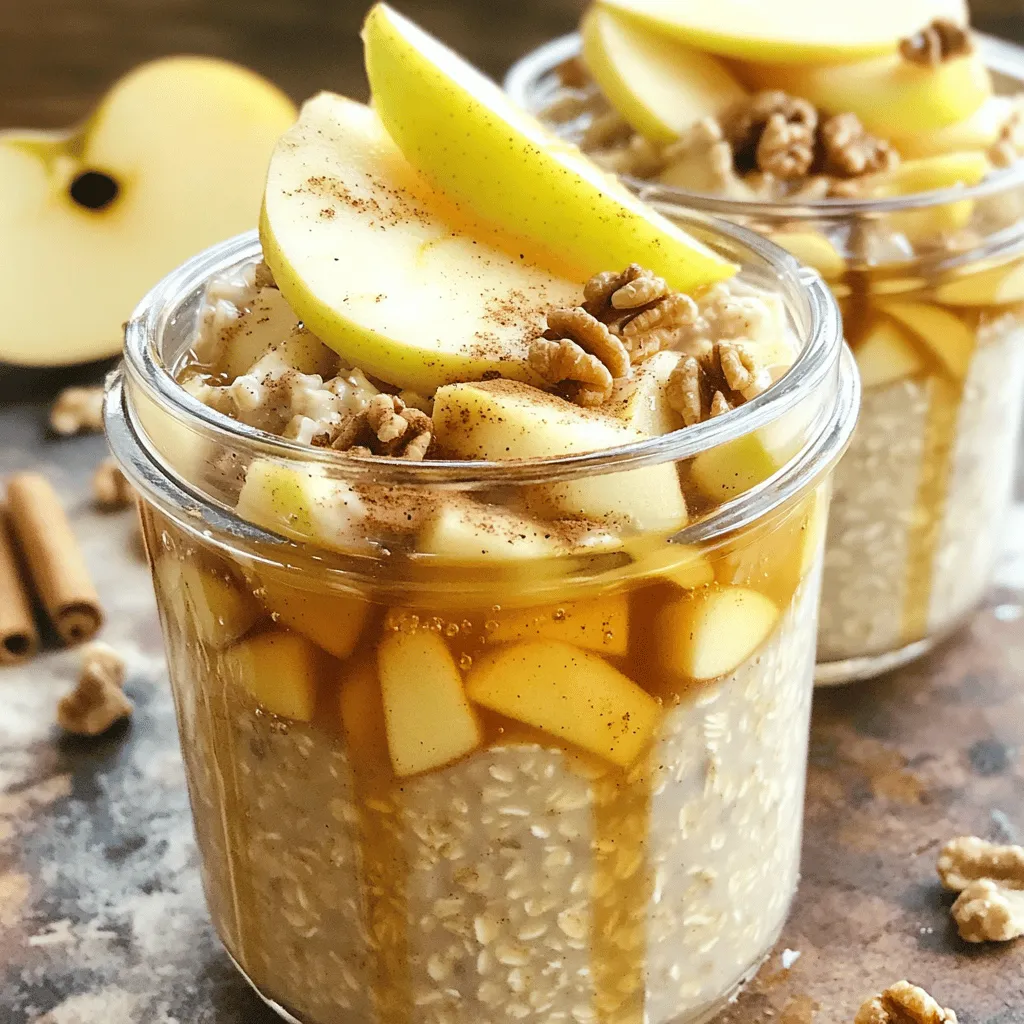
Apple Cinnamon Overnight Oats Healthy Breakfast Option
Looking for a quick and healthy breakfast? You’ve found it! Apple Cinnamon Overnight Oats are the perfect choice for busy Read Full Recipe -
Raspberry Almond Shortbread Bars Simple and Tasty Treat
Looking for a sweet treat that’s easy to make and perfect for any occasion? Raspberry Almond Shortbread Bars are your Read Full Recipe -
Chocolate Covered Strawberry Pops Delightful Treats
Are you ready for a sweet treat? Chocolate Covered Strawberry Pops are delicious and fun to make. I’ll guide you Read Full Recipe -
Fresh Strawberry Yogurt Bark Delicious and Easy Treat
Looking for a quick and tasty treat? Fresh Strawberry Yogurt Bark is your answer! This easy recipe combines creamy Greek Read Full Recipe -
No-Bake Snickers Bars Simple and Decadent Treat
Indulge in a simple and delicious treat with my No-Bake Snickers Bars recipe! These bars come together fast and need Read Full Recipe -
Lemon Blueberry Energy Bites Nourishing Snack Idea
Looking for a tasty, energy-packed snack? Try my Lemon Blueberry Energy Bites! These little balls are the perfect blend of Read Full Recipe


My Latest Recipes

hey,
i’m !
I’m so happy you’re here!
Each recipe I share is a little piece of love from my kitchen. May they fill your heart and home with warmth. Let’s cook up something wonderful together.


![To make a truly delightful veggie pizza, here are the key ingredients you need: - 1 ½ cups all-purpose flour - 1 teaspoon instant yeast - ½ teaspoon salt - ½ teaspoon sugar - ½ cup warm water (110°F/43°C) - 1 tablespoon olive oil - ½ cup pizza sauce - 1 cup shredded mozzarella cheese - ½ cup bell peppers (red, yellow, green), diced - ½ cup cherry tomatoes, halved - ¼ cup red onion, thinly sliced - 1 cup spinach leaves - 1 teaspoon dried oregano - 1 teaspoon garlic powder - Salt and pepper to taste These ingredients work together to create a perfect base, rich flavors, and fresh veggies. You can make your pizza unique by adding these optional ingredients: - Mushrooms, sliced - Zucchini, thinly sliced - Olives, sliced - Artichoke hearts, quartered - Fresh basil or arugula for garnish These extras allow you to play with flavors and textures. Feel free to mix and match based on your taste. When making a veggie pizza, it is good to know its nutritional value: - Calories per serving: Approximately 220 - Protein: 10 grams - Carbohydrates: 30 grams - Fat: 8 grams - Fiber: 3 grams This pizza can be a healthy choice, especially when you load it with fresh veggies. You can enjoy a delicious meal without guilt. For the full recipe, check the details above. To make your dough, gather these ingredients: - 1 ½ cups all-purpose flour - 1 teaspoon instant yeast - ½ teaspoon salt - ½ teaspoon sugar - ½ cup warm water (110°F/43°C) - 1 tablespoon olive oil In a mixing bowl, mix the flour, yeast, salt, and sugar. Slowly add the warm water and olive oil. Stir until a dough forms. Then, knead the dough on a floured surface for 5 to 7 minutes. The dough should feel smooth and elastic. After kneading, place the dough in a lightly oiled bowl. Cover it with a kitchen towel. Let it rise in a warm spot for about 1 hour. The dough should double in size. This step is key for a fluffy crust. Once the dough has risen, preheat your oven to 475°F (245°C). If you have a pizza stone, place it in the oven while it heats. Punch down the dough to remove air bubbles. Roll it out on a floured surface into a 12-inch circle. You can also shape it on a parchment-lined baking sheet. Next, spread the pizza sauce evenly over the dough. Leave a small border at the edges. Then, sprinkle shredded mozzarella cheese on top. Now it's time to add the veggies: - ½ cup bell peppers, diced - ½ cup cherry tomatoes, halved - ¼ cup red onion, thinly sliced - 1 cup spinach leaves Top it all with dried oregano, garlic powder, salt, and pepper for flavor. Transfer the pizza to the preheated oven or onto the hot pizza stone. Bake for 12 to 15 minutes. The crust should turn golden and the cheese bubbly. Let the pizza cool for a few minutes before slicing. Enjoy your tasty veggie pizza! For a full recipe, check here: [Full Recipe]. To make great dough, start with fresh ingredients. Use warm water, about 110°F, to help the yeast grow. Mix the flour, yeast, salt, and sugar in a bowl. Gradually add the warm water and olive oil. Knead the dough for 5-7 minutes on a floured surface. This step makes the dough smooth and elastic. After kneading, let it rise in a warm spot for one hour. This helps the dough double in size. A crispy crust brings joy to every bite. Preheat your oven to 475°F. If you have a pizza stone, place it in the oven while it heats. Rolling the dough thin also helps; aim for about ¼ inch thick. Use parchment paper for easy transfer if you don’t have a pizza stone. Bake the pizza for 12-15 minutes, until the crust is golden. This high heat creates a nice crunch. To make your pizza extra tasty, use quality ingredients. Start with a flavorful pizza sauce. You can add herbs like oregano or basil for a fresh taste. Garlic powder gives a nice kick. Don’t be shy with cheese; more cheese means more flavor! Layer your veggies evenly to ensure each slice has a variety of tastes. Sprinkle a bit of salt and pepper before baking to enhance all the flavors. For more tips and the full recipe, check the earlier sections. {{image_2}} You can mix and match veggies for your pizza. Some great options include: - Mushrooms - Zucchini - Artichokes - Olives - Broccoli Feel free to experiment! Each veggie adds its own flavor and texture. For a spicy kick, try jalapeños or banana peppers. If you want a sweeter taste, add roasted red peppers. The key is to balance flavors and colors. While pizza sauce is classic, you can use other sauces too. Here are some tasty options: - Pesto - Alfredo - BBQ sauce - Olive oil and garlic Each sauce brings a new twist. Pesto adds a fresh taste, while BBQ sauce gives a smoky flavor. Try different sauces to find your favorite. You can make your veggie pizza lighter without losing flavor. Here are some tips: - Use less cheese or a lower-fat option. - Add more veggies to replace cheese. - Use a cauliflower crust instead of traditional dough. - Skip heavy sauces and stick to tomato or olive oil. These changes can help you enjoy pizza while keeping it healthy. You get all the flavor without the extra calories. When you want to enjoy veggie pizza but don’t feel like cooking, try these top places. They offer some of the best veggie pizzas around. 1. The Green Slice They serve a fresh and colorful veggie pizza. The crust is thin and crispy. You’ll enjoy their homemade sauce and fresh toppings. 2. Veggie Haven This spot focuses on healthy options. Their veggie pizza is packed with seasonal vegetables. It’s a great choice for health-conscious eaters. 3. Pizza Garden Known for their garden-fresh toppings, they have many veggie options. You can customize your pizza with your favorite veggies. The atmosphere is fun and family-friendly. 1. Domino's They have a robust veggie pizza menu. You can choose multiple toppings, like mushrooms and green peppers. Their online ordering makes it easy. 2. Papa John's Their veggie pizza is loaded with fresh ingredients. You can add extra cheese or keep it light. The garlic sauce is a must-try for dipping. 3. Pizza Hut They offer a variety of veggie pizzas. The stuffed crust option is popular. It’s a treat if you want something cheesy and filling. - The Green Slice has a 4.8/5 rating. Customers love the fresh taste and friendly staff. - Veggie Haven scores a 4.5/5. People rave about the variety of toppings and healthy choices. - Pizza Garden holds a 4.7/5 rating. Diners appreciate the unique flavors and cozy vibe. These restaurants make great veggie pizzas. You can find something for every taste. If you're curious about making your own, check out the Full Recipe to get started! To store leftover veggie pizza, wrap it well in plastic wrap or foil. You can also place it in an airtight container. This keeps the pizza fresh for about 3-4 days in the fridge. If you want to keep it longer, freeze the slices. Just remember to separate them with parchment paper. This prevents them from sticking together. When ready to eat, reheat in the oven for the best taste and texture. Yes, you can make the dough ahead of time. After kneading, let it rise for about an hour. Then, punch it down and wrap it tightly in plastic. Store it in the fridge for up to 24 hours. If you want to save it longer, freeze the dough instead. Just thaw it overnight in the fridge before using. This gives you fresh dough without the last-minute rush. To make a gluten-free version, use gluten-free flour instead of all-purpose flour. Look for a blend designed for pizza dough. You also need to adjust the liquid, as gluten-free flours absorb moisture differently. Add a little more warm water if needed. Follow the same steps for the dough and toppings. You’ll enjoy a tasty pizza that everyone can eat! Check out the Full Recipe for all the details. We covered the key parts of making a great veggie pizza. First, we found essential and optional ingredients to create your perfect pie. Next, we walked through easy steps to prepare the dough, let it rise, and bake it to golden perfection. Then, we shared tips to get the ideal crust and flavor. Finally, we explored different toppings, sauces, and even where to grab a slice nearby. Making veggie pizza at home is fun and tasty. Now, it's your turn to try these recipes and make each meal special.](https://lisadishes.com/wp-content/uploads/2025/05/e647fc9b-6adf-4f34-be83-12ae064584f8-300x300.webp)
Crispy Garlic Chicken Wings Easy and Flavorful Recipe
Get ready to elevate your wing game with crispy garlic chicken wings! In this easy, flavorful recipe, you’ll learn how to create perfectly crispy…