Skip to content
DisclaimerTerms Of UseGDPR PolicyCookie Policy

Lisa Dishes

  • Home
  • Drinks
  • Appetizers
  • Dinner
  • Dessert
  • About
  • Contact
  • Privacy Policy
DisclaimerTerms Of UseGDPR PolicyCookie Policy

lisa

To make Peanut Butter Energy Balls, you need: - 1 cup rolled oats - 1/2 cup creamy peanut butter - 1/4 cup honey or maple syrup - 1/4 cup ground flaxseed - 1/4 cup chocolate chips (dark or milk) - 1/4 cup shredded coconut (unsweetened) - 1/2 teaspoon vanilla extract - A pinch of sea salt These ingredients work together to create a tasty and filling snack. The rolled oats give you fiber, while the peanut butter adds protein and healthy fats. You can mix in different flavors by adding these optional ingredients: - Chopped nuts (like almonds or walnuts) - Dried fruits (like cranberries or raisins) - Seeds (like chia or pumpkin seeds) - Spices (like cinnamon or nutmeg) These options let you make the energy balls your own. You can switch things up based on your taste or what you have at home. Let’s look at what each ingredient brings to the table: - Rolled oats: They provide fiber, which helps digestion and keeps you full. - Creamy peanut butter: This ingredient is rich in protein and healthy fats, giving you energy. - Honey or maple syrup: These natural sweeteners offer a quick energy boost. - Ground flaxseed: This adds omega-3 fatty acids and fiber, which are great for heart health. - Chocolate chips: They sweeten the balls and add some antioxidants. - Shredded coconut: This ingredient gives healthy fats and fiber, plus a fun texture. - Vanilla extract: It adds flavor without calories. - Sea salt: A pinch enhances the taste of all the ingredients. Each of these ingredients plays a role in making these energy balls not just tasty, but also good for you. They provide a mix of carbs, protein, and healthy fats, making them a great snack for any time of the day. For the full recipe, check the link above. To make these Peanut Butter Energy Balls, start by gathering your ingredients. You will need rolled oats, creamy peanut butter, honey or maple syrup, ground flaxseed, chocolate chips, shredded coconut, vanilla extract, and a pinch of sea salt. 1. Mix dry ingredients: In a large mixing bowl, combine 1 cup of rolled oats, 1/4 cup of ground flaxseed, and a pinch of sea salt. Stir these until they are evenly mixed. 2. Add wet ingredients: Pour in 1/2 cup of creamy peanut butter, 1/4 cup of honey or maple syrup, and 1/2 teaspoon of vanilla extract. 3. Combine well: Use a spatula or your hands to mix everything together. The mixture should feel sticky. If it’s too crumbly, add a bit more peanut butter. 4. Incorporate extras: Fold in 1/4 cup of chocolate chips and 1/4 cup of shredded coconut until they are mixed in evenly. 5. Form balls: Take small amounts of the mixture and roll them into balls. Aim for about 1 inch in diameter. 6. Place on baking sheet: Line a baking sheet with parchment paper and set the energy balls on it. 7. Chill: Refrigerate for at least 30 minutes to help them firm up. When mixing, don’t be afraid to use your hands! It helps you feel the texture. If the mix feels too dry, add a touch more peanut butter. When rolling the balls, make them uniform in size. This way, they will all chill evenly. If they stick to your hands, dampen them with a little water. After chilling, these energy balls are ready to eat! They stay fresh in an airtight container in the fridge for up to one week. Serve them as a snack or a quick breakfast. You can also pack them in lunchboxes for a healthy treat. Want to try these out? Check out the Full Recipe for Nutty Delight Peanut Butter Energy Balls. One big mistake is not measuring ingredients correctly. Use a measuring cup for accuracy. If you add too much peanut butter, your balls can be too sticky. If you add too little, they may fall apart. Another mistake is skipping the fridge time. Refrigerating helps them firm up. If you skip this step, your energy balls will be too soft. To get the best texture, mix the ingredients until sticky but not too wet. If the mix feels dry, add a little more peanut butter. You want a balance. A hint of sea salt enhances the flavor. Use quality peanut butter for a richer taste. The right amount of honey or maple syrup adds sweetness without being overpowering. You need a large mixing bowl and a spatula for mixing. A baking sheet lined with parchment paper makes cleanup easy. Use a small cookie scoop for even-sized balls. This keeps them consistent in size. A refrigerator is essential for firming them up. If you have a food processor, it can save time when mixing. For the full recipe, check out Nutty Delight Peanut Butter Energy Balls 🥜 to create this tasty snack! {{image_2}} You can change the taste of your energy balls by using different nut butters. Try almond, cashew, or sunflower butter. Each nut butter brings its own flavor and texture. You can also switch sweeteners. Use agave syrup or coconut nectar instead of honey. These small changes can make your snack feel new. Boost the nutrition in your energy balls by adding protein or superfoods. You can stir in protein powder, chia seeds, or hemp seeds. These add protein and healthy fats. You can also use ingredients like spirulina or matcha powder for an extra health kick. Just a little goes a long way! Make your energy balls fun for any season or holiday. In fall, add pumpkin puree and spices like cinnamon. For summer, mix in fresh berries or a hint of lime. Around holidays, try festive flavors like peppermint or gingerbread. These ideas keep your snacks exciting and fresh throughout the year. To keep your Peanut Butter Energy Balls fresh, store them in an airtight container. Place them in the fridge for the best taste and texture. If you want to keep them longer, consider freezing them. Always separate layers with parchment paper to avoid sticking. These energy balls last up to a week in the fridge. They can stay fresh for about three months in the freezer. When ready to eat, just take them out and let them thaw for a few minutes. Check your energy balls for changes in smell or texture. If they smell off or feel too dry or hard, it’s best to throw them away. When in doubt, trust your senses. Always prioritize your health and safety! You can use maple syrup or agave nectar instead of honey. Both work well. They add sweetness and stickiness. You can also try mashed bananas for a different flavor. Just remember, the texture may change slightly. Yes, you can use quick oats or ground oats. You may also try puffed rice or quinoa flakes. These alternatives will change the texture, but they will still taste great. Just ensure they are finely ground for easy mixing. For a healthier option, use dark chocolate chips or cacao nibs. You can also try dried fruits like raisins or cranberries. Nuts or seeds are great too! They add crunch and flavor without the added sugar. Add protein powder to your mixture. You can use whey, pea, or soy protein. Greek yogurt is another option. It adds creaminess and boosts protein. Just adjust the other wet ingredients to keep the right texture. These energy balls can last up to one week in the fridge. Store them in an airtight container. For longer storage, you can freeze them. They will last for up to three months in the freezer. You can find the full recipe [here](#). The recipe includes all the ingredients and steps to make these tasty snacks. Enjoy making them! Peanut Butter Energy Balls are easy to make and fun to customize. You learned about key ingredients and their benefits. The step-by-step guide helps you mix and form perfect energy balls. I shared tips to avoid common mistakes and achieve the best texture. You can explore different flavors and seasonal ideas too. With the right storage, your energy balls can last longer. Enjoy crafting these tasty snacks for energy boosts! Stick to the recipe and have fun!

Peanut Butter Energy Balls Simple and Nutritious Snack

Looking for a quick and healthy snack? Peanut butter energy balls are the answer! Packed with protein and healthy fats,

For my Healthy Oatmeal Breakfast Cookies, you will need: - 1 ½ cups rolled oats - 1 ripe banana, mashed - ½ cup almond butter (or peanut butter) - ¼ cup honey or maple syrup - ½ cup unsweetened applesauce - 1 teaspoon vanilla extract - 1 teaspoon baking powder - ½ teaspoon cinnamon - ½ cup mix-ins (chocolate chips, nuts, dried fruit, or seeds) - Pinch of salt Each ingredient in these cookies provides unique health benefits: - Rolled oats are rich in fiber. They help keep you full longer. - Bananas provide potassium. They add natural sweetness and moisture. - Almond butter offers healthy fats. It supports heart health and keeps energy steady. - Honey or maple syrup sweetens naturally. They add antioxidants and minerals. - Unsweetened applesauce gives moisture. It replaces oil and sugar well. - Vanilla extract enhances flavor. It can boost your mood too. - Baking powder helps cookies rise. It ensures a light texture. - Cinnamon adds flavor and may lower blood sugar levels. - Mix-ins like chocolate or nuts boost nutrition. They add variety and fun. You can easily adjust the recipe for dietary needs: - Nut-free: Use sunflower seed butter instead of almond butter. - Vegan: Replace honey with maple syrup and use a flax egg. - Gluten-free: Ensure you use certified gluten-free oats. - Lower sugar: Cut back on honey or maple syrup by half. - Fruit-based: Swap the banana for another fruit puree like pumpkin or sweet potato. These options make the cookies fit for many diets while still tasting great. For the full recipe, check the beginning of the article! First, gather all your ingredients. You need rolled oats, banana, almond butter, honey or maple syrup, applesauce, vanilla extract, baking powder, cinnamon, and a pinch of salt. Choose your mix-ins, like chocolate chips or nuts. Make sure your banana is ripe; it needs to be soft and sweet. This banana will add flavor and moisture to your cookies. Start by preheating your oven to 350°F (175°C). Line a baking sheet with parchment paper. In a large bowl, mix the mashed banana, almond butter, honey or syrup, applesauce, and vanilla extract. Stir until it’s smooth. In another bowl, combine the rolled oats, baking powder, cinnamon, and a pinch of salt. Gradually add the dry mix to the wet mix and stir well. Finally, fold in your chosen mix-ins. Using a tablespoon, drop dollops of the cookie mix onto the baking sheet. Shape each dollop into a round cookie. Bake for about 12-15 minutes. Watch for the edges turning golden. Once baked, let the cookies cool on the sheet for 5 minutes. Then, move them to a wire rack to cool completely. When shaping cookies, wet your hands slightly. This helps prevent the mix from sticking to your fingers. Make sure the cookies are spaced well on the sheet; they will spread a bit while baking. For a fun touch, sprinkle a little cinnamon on top before baking. This adds flavor and looks nice. Enjoy your Healthy Oatmeal Breakfast Cookies warm or let them cool and store them for later. Follow the Full Recipe for all the details! To get the best texture, use ripe bananas. They add natural sweetness and moisture. If your bananas are not ripe enough, the cookies may turn out dry. Also, don’t skip the baking powder. It helps the cookies rise and stay soft. Mix the oats well with the wet ingredients. This helps each bite feel great. If you like a chewier cookie, let the dough rest for a few minutes before baking. After your cookies cool, store them in an airtight container. They stay fresh for about a week. For longer storage, place them in the fridge. You can also freeze them for up to three months. When you want to eat one, just take it out and let it sit for a few minutes. Warm it in the microwave for about 10-15 seconds. This brings back that fresh-baked taste. One common mistake is overmixing the dough. This can make the cookies tough. Just mix until everything is combined. Another mistake is not measuring your ingredients. Too much or too little can change the cookies. Always use measuring cups. Finally, don’t skip the mix-ins. They add flavor and fun to each bite. Use your favorite ingredients, like chocolate chips or nuts, for a tasty twist. For more details, check the Full Recipe. {{image_2}} You can change the flavor of your healthy oatmeal breakfast cookies easily. Consider adding various mix-ins to create fun twists. Here are some ideas: - Cocoa powder: Mix in 1-2 tablespoons for a chocolatey taste. - Peanut butter: Swap almond butter for creamy or crunchy peanut butter. - Coconut flakes: Add unsweetened coconut for a tropical flavor. - Spices: Try nutmeg or ginger for a warm, cozy touch. It’s important to cater to different dietary needs. Here are some allergy-friendly swaps: - Nut butter: Use sunflower seed butter for nut-free options. - Sweeteners: Substitute honey with agave syrup for a vegan option. - Gluten-free oats: Make sure to choose certified gluten-free oats for those with celiac disease. - Applesauce: If allergic to apples, use pureed pears instead. Using seasonal ingredients can make your cookies even tastier. Here are some ideas: - Pumpkin puree: Add this in the fall for a rich flavor. - Zucchini: Grate and mix in summer squash for moisture and nutrients. - Fresh berries: Use blueberries or raspberries in spring for freshness. - Cranberries: Dried cranberries make a great addition in winter. These variations help keep your healthy oatmeal breakfast cookies exciting and adaptable to your preferences. For the full recipe, check out the details above! To keep your healthy oatmeal breakfast cookies fresh, store them in an airtight container. This method prevents air and moisture from getting in. You can keep them at room temperature for up to three days. If you want to enjoy them longer, consider refrigerating them. The cool air helps maintain their taste and texture. Freezing is a great way to extend the life of your cookies. First, let them cool completely after baking. Then, place the cookies in a single layer on a baking sheet. Freeze them for about an hour. Once they are firm, transfer the cookies to a freezer-safe bag. Be sure to label the bag with the date. You can freeze them for up to three months. These cookies last well, especially when stored properly. At room temperature, expect them to stay fresh for about three days. In the fridge, they can last up to a week. If you freeze them, they last for about three months. Just remember to thaw them in the fridge or at room temperature before enjoying. Yes, you can make these cookies vegan! Just replace the honey with maple syrup. You can also use a plant-based yogurt instead of applesauce if you want a creamier texture. Almond butter and peanut butter are already vegan-friendly. Using a ripe banana keeps the cookies moist and sweet. To mash bananas, I use a fork. Start by peeling the banana and placing it in a bowl. Press down with the fork and mash until it’s smooth. If you like some chunks, leave a few small pieces. This gives the cookies a nice texture and adds sweetness. To make these cookies gluten-free, simply swap the rolled oats for certified gluten-free oats. Most oats can be cross-contaminated with gluten during processing. Using gluten-free oats ensures the cookies stay safe for gluten-sensitive eaters. You can also check the baking powder to confirm it’s gluten-free. This article covered everything you need to know about baking delicious cookies. We explored the key ingredients, their health benefits, and how to substitute for special diets. You learned step-by-step instructions, tips for perfect textures, and how to avoid common mistakes. We also discussed flavor variations and best storage practices. In short, baking cookies can be fun and easy. With these tips, you can create treats that anyone will love. Happy baking!

Healthy Oatmeal Breakfast Cookies Simple and Tasty Recipe

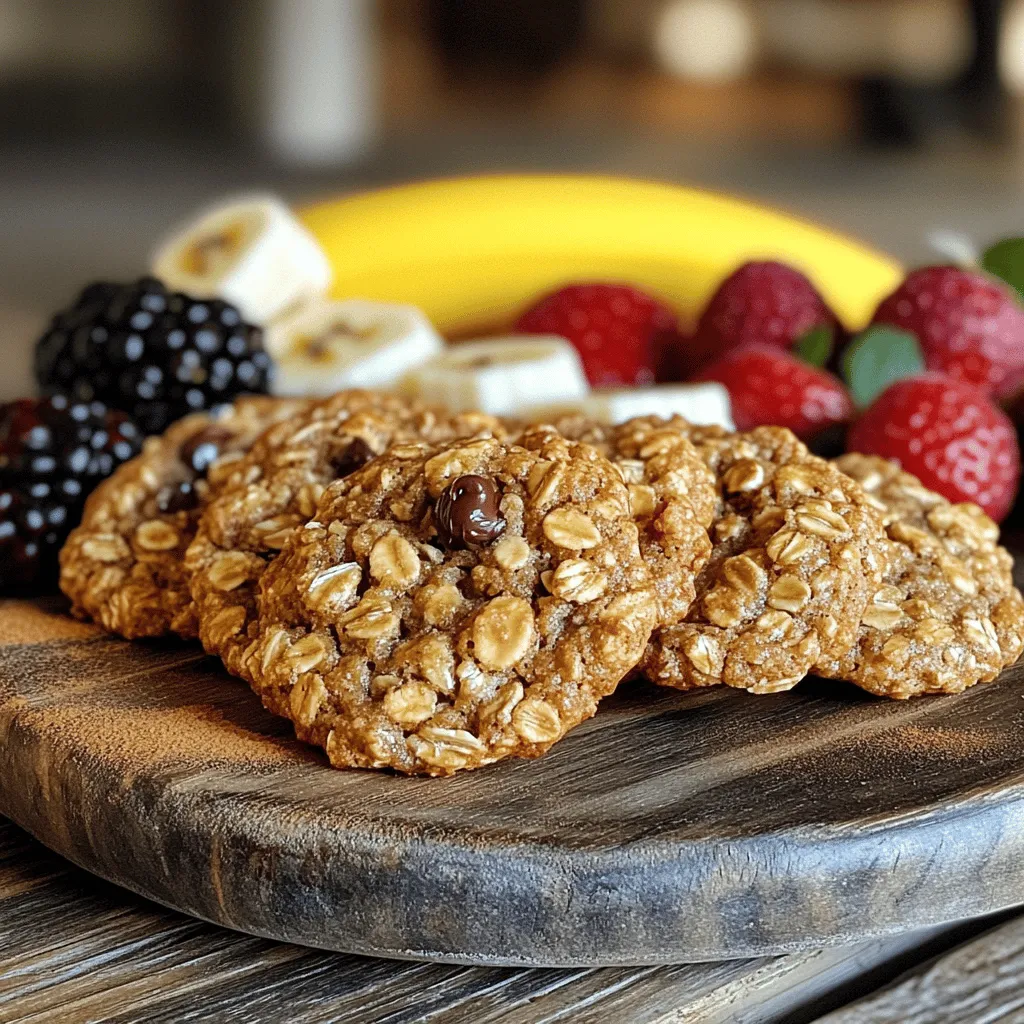
Looking for a tasty way to kick-start your day? You’re in the right place! These Healthy Oatmeal Breakfast Cookies are

- 1 cup unsalted butter (2 sticks) - 2 cups granulated sugar - 4 large eggs - 1 teaspoon vanilla extract - 1 cup all-purpose flour - 2/3 cup unsweetened cocoa powder - 1/2 teaspoon salt - 1/2 teaspoon baking powder - 1 cup semi-sweet chocolate chips - 1/2 cup caramels (unwrapped) - 1/4 cup heavy cream - Sea salt for sprinkling To create salted caramel brownies, you need quality ingredients. The butter, sugar, eggs, and vanilla provide a rich base. These ingredients create a soft and moist brownie. The dry ingredients include flour, cocoa powder, salt, and baking powder. This mixture adds texture and flavor to the brownies. The caramel and chocolate elements make your brownies special. Semi-sweet chocolate chips add a gooey, chocolatey taste. Caramels mixed with heavy cream create that sweet, sticky layer. This combination of flavors makes every bite a delight. You can find the full recipe above, which details every step to make these brownies. Happy baking! 1. Preheating the oven: Start by preheating your oven to 350°F (175°C). This ensures even baking. 2. Greasing and lining the pan: Take a 9x13 inch baking pan. Grease it lightly with butter. Then, line it with parchment paper. Leave some paper hanging over the sides. This helps you lift the brownies out later. 1. Melting butter and sugar: In a large saucepan, melt 1 cup of unsalted butter over medium heat. Once melted, add 2 cups of granulated sugar. Stir it until smooth and then remove from heat. 2. Mixing in eggs and vanilla: Let the butter and sugar cool a bit. Add in 4 large eggs, one at a time. Mix after each egg. Stir in 1 teaspoon of vanilla extract until combined. 3. Combining dry ingredients: In a separate bowl, whisk together 1 cup of all-purpose flour, 2/3 cup of unsweetened cocoa powder, 1/2 teaspoon of salt, and 1/2 teaspoon of baking powder. Gradually add this mix to the wet ingredients. Stir just until combined. Finally, fold in 1 cup of semi-sweet chocolate chips. 1. Melting caramels with heavy cream: In a microwave-safe bowl, place 1/2 cup of unwrapped caramels and 1/4 cup of heavy cream. Microwave in 30-second bursts, stirring each time, until smooth. 2. Tips for achieving smooth caramel: Make sure to stir well after each interval. If it's too thick, add a bit more cream. This will help make it silky. 1. Pouring brownie batter and creating layers: Pour half of the brownie batter into the prepared pan. Spread it evenly. Drizzle half of the salted caramel over this layer. Use a knife to swirl it gently. 2. Baking time and checking doneness: Pour the rest of the brownie batter over the caramel. Then, add the remaining caramel on top. Swirl lightly with the knife again. Bake for 25-30 minutes. Check doneness by inserting a toothpick. It should come out with a few moist crumbs, not wet batter. Choosing the right caramel is key. I love using soft caramels. They melt nicely and blend well. You can find them in most stores. If you want to make it from scratch, go for a simple recipe. Just cook sugar, butter, and cream together until smooth. The importance of sea salt cannot be stressed enough. A sprinkle of sea salt on top contrasts with the sweetness. It enhances the flavor and makes each bite pop. Use flaky sea salt for the best results. This small step adds a gourmet touch. Overmixing the batter can ruin your brownies. Mix just until the dry ingredients blend in. If you mix too much, your brownies may end up tough. Baking too long is another common mistake. Keep an eye on the time. I bake these brownies for 25 to 30 minutes. A toothpick should have a few moist crumbs. If it comes out clean, they are likely overbaked. Essential baking tools can make a big difference. You need a good mixing bowl and a whisk. A spatula helps to fold in the chocolate chips. A microwave-safe bowl is perfect for melting caramels. Use a 9x13 inch baking pan for the best results. Don’t forget parchment paper! It makes removing the brownies easy. {{image_2}} You can easily change your salted caramel brownies by adding different ingredients. Nuts, like walnuts or pecans, add crunch. They pair well with the soft brownies. You can also use different chocolate types. Try dark chocolate or white chocolate chips for a new taste. Another fun twist is using flavored extracts. Instead of vanilla, you can add almond or hazelnut extract. These flavors will make your brownies unique and delicious. If you need gluten-free brownies, swap out regular flour for a gluten-free blend. Make sure to check the package for the right amount to use. This keeps the texture close to traditional brownies. For a vegan option, replace butter with coconut oil or a vegan butter substitute. Use flax eggs or applesauce instead of regular eggs. This way, you can enjoy decadent brownies without animal products. How you serve your brownies can make them even more appealing. A simple garnish of sea salt on top adds flair and flavor. You can also drizzle extra caramel sauce over the brownies for a stunning look. Consider serving them with a scoop of ice cream. A scoop of vanilla or salted caramel ice cream complements the brownies well. You can also place fresh fruit, like raspberries or strawberries, on the side. This adds color and freshness to your plate. For full details on making these brownies, check the Full Recipe. To keep your salted caramel brownies fresh, store them in an airtight container. This helps prevent them from drying out. If you plan to eat them within a few days, just keep them at room temperature. However, if you want to keep them longer, refrigeration can work well. - Best practices for refrigeration: Place the brownies in a container and cover them with plastic wrap. This keeps moisture in and keeps the brownies soft. They can last up to a week in the fridge without losing their taste. - Freezing brownies for later use: You can freeze brownies for up to three months. Wrap them tightly in plastic wrap and then place them in a freezer bag. When you’re ready to eat, simply thaw them in the fridge overnight. They’ll taste just as good as fresh! The typical duration for freshness depends on how you store them. At room temperature, your brownies can stay fresh for about 3 to 4 days. In the fridge, they can last up to a week. If you freeze them, they can stay fresh for about three months. Just be sure to check for any unwanted smells or changes in texture before eating. For the best salted caramel brownies, I recommend using homemade caramel. It tastes richer and fresher. You can use store-bought caramel if you’re short on time. Look for a thick, creamy option. This will help create that gooey texture you want in your brownies. Yes, you can make these brownies without eggs. Try using one of these substitutes: - 1/4 cup unsweetened applesauce per egg - 1/4 cup mashed banana per egg - 1 tablespoon ground flaxseed mixed with 2.5 tablespoons water per egg Each option adds moisture and binds the ingredients well. To check if your brownies are done, use the toothpick test. Insert a toothpick in the center. If it comes out with a few moist crumbs, your brownies are ready. If it comes out clean, they may be overbaked. Brownies should be soft and slightly underbaked in the middle for the best texture. In this blog post, I covered how to make delicious brownies with salted caramel. We talked about the key ingredients, from butter to chocolate chips, and shared easy steps for mixing and baking. I included tips to avoid common mistakes and ways to customize your brownies. Remember to store them properly to keep them fresh. Enjoy experimenting with different flavors and make your brownies stand out! With practice, you’ll create treats that everyone will love. Happy baking!

Salted Caramel Brownies Decadent and Irresistible Treat

Are you ready for a sweet treat that nails the perfect balance of salty and sweet? My Salted Caramel Brownies

- 1 can (15 oz) chickpeas, drained and rinsed - 2 tablespoons olive oil - 4 cloves garlic, minced - 1 teaspoon smoked paprika - 1 teaspoon cumin - 1/2 teaspoon cayenne pepper (adjust to taste) - Salt and pepper to taste - Fresh parsley, chopped (for garnish) The main ingredients for crispy garlic roasted chickpeas are simple yet powerful. First, chickpeas form the base of this dish. They are packed with protein and fiber, making them a healthy choice. Using canned chickpeas saves time, but you can use dried ones if you prefer. Just make sure to soak and cook them first. Next, we have olive oil. It helps the chickpeas crisp up nicely. You can swap it with other oils, but olive oil adds a lovely flavor. The minced garlic brings a punch of taste. Fresh garlic is best for that robust flavor. When it comes to seasoning, you can get creative. Smoked paprika adds a warm, smoky taste. Cumin gives a bit of earthiness. If you like heat, cayenne pepper is your friend. Adjust it to your spice level. Don't forget salt and pepper to enhance all the flavors. Lastly, fresh parsley adds a pop of color and freshness. It makes the dish look nice and bright. You can find the full recipe for crispy garlic roasted chickpeas to make this delightful snack at home. - Preheat your oven to 400°F (200°C). - Line a baking sheet with parchment paper. - Rinse and pat dry the chickpeas. - Combine chickpeas with olive oil and seasonings. To start, you need to rinse the chickpeas well. This removes extra salt and helps with flavor. Use a clean kitchen towel to pat them dry. This step is key for getting them crispy. In a mixing bowl, add the dried chickpeas. Pour in two tablespoons of olive oil. Next, add four cloves of minced garlic. For spice, include one teaspoon of smoked paprika, one teaspoon of cumin, and half a teaspoon of cayenne pepper. Season with salt and pepper to taste. Toss everything together until the chickpeas are well-coated. - Spread chickpeas on the baking sheet. - Roast for 20-25 minutes, stirring halfway through. Now, spread the chickpeas out on the prepared baking sheet. Make sure they are in a single layer. This helps them cook evenly. Roast the chickpeas in the preheated oven for about 20 to 25 minutes. Stir them halfway through. This ensures they crisp up nicely. Keep an eye on them to prevent burning. Once they turn golden brown and crispy, take them out. Let them cool for a few minutes. They will continue to crisp as they cool. Enjoy your Crispy Garlic Roasted Chickpeas! For the full recipe, check the earlier section. To get that perfect crunch, drying the chickpeas is key. After rinsing, use a kitchen towel to pat them dry. This removes moisture, which can make them soggy. Spread the chickpeas on a towel in a single layer for best results. Avoid overcrowding your baking sheet. If you pile the chickpeas on top of each other, they will steam instead of roast. Keep them in a single layer for even cooking. This helps them turn golden brown all over. You can adjust the seasoning levels to match your taste. If you love garlic, add more minced garlic. For a smoky flavor, increase the smoked paprika. Feel free to experiment with different spices, like chili powder or curry powder. Each choice adds a unique touch to your chickpeas. For the best flavor, serve your crispy chickpeas right after baking. Let them cool for a few minutes before serving. This cooling time allows them to crisp up even more. Enjoy them as a tasty snack or add them to salads for extra crunch. For the complete guide, check out the Full Recipe. {{image_2}} You can easily change the taste of crispy garlic roasted chickpeas. For a spicy kick, add more cayenne or chili powder. This will give the chickpeas a nice heat that many love. If you prefer herbs, try mixing in rosemary or thyme. These herbs add a fresh and vibrant flavor. Both options will keep your snack exciting and new. To make your chickpeas even more special, consider adding nutritional yeast. This gives them a cheesy flavor that is delightful. You can also mix in seeds like pumpkin or sunflower. Nuts such as almonds or cashews add a crunchy texture. These ingredients will make your crispy chickpeas stand out even more. Crispy garlic roasted chickpeas are already gluten-free. This makes them a great choice for many diets. If you follow a vegan diet, rest easy. The recipe is vegan-friendly, too. You can enjoy these snacks without worry. They fit into many meal plans while being tasty and healthy. For the Full Recipe, you can refer to the main recipe section above. To keep your crispy garlic roasted chickpeas fresh, use an airtight container. Glass jars or plastic containers work well. This helps prevent air from making them soggy. You want to keep that crunch! Always store them at room temperature. Avoid using paper bags, as they let in moisture. These chickpeas do best at room temperature. They can last about 5 days in a cool, dry pantry. If you put them in the fridge, they might lose their crunch faster. So, it’s best to avoid refrigeration unless you need to keep them longer. If your chickpeas lose their crunch, don’t worry! Preheat your oven to 400°F (200°C). Spread them out on a baking sheet. Bake for about 5 to 10 minutes until they are crispy again. Keep an eye on them to avoid burning. If you notice any chickpeas that taste stale or soft, it’s best to toss them out. Enjoy your crispy garlic roasted chickpeas fresh for the best flavor and texture! You can find the full recipe above. To make crispy garlic roasted chickpeas, follow these steps: 1. Preheat your oven to 400°F (200°C). Line a baking sheet with parchment paper. 2. Drain and rinse one can of chickpeas. Pat them dry with a towel. 3. In a mixing bowl, combine the chickpeas with 2 tablespoons of olive oil, 4 minced garlic cloves, 1 teaspoon smoked paprika, 1 teaspoon cumin, and 1/2 teaspoon cayenne pepper. Add salt and pepper to taste. 4. Toss the mixture until all chickpeas are coated. 5. Spread the chickpeas on the baking sheet in a single layer. 6. Roast for 20-25 minutes, stirring halfway through until golden brown and crispy. 7. Let them cool for a few minutes. Garnish with chopped parsley before serving. This method ensures a tasty snack that you can enjoy anytime. For the complete recipe, refer to the Full Recipe section. Yes, you can use dried chickpeas, but there are pros and cons to each option. Dried Chickpeas: - Pros: They are often cheaper, have no added sodium, and offer a fresher taste. - Cons: They require soaking overnight and longer cooking times. You need to plan ahead. Canned Chickpeas: - Pros: They are quick and easy to use, with no prep time. They save you time. - Cons: They can contain added sodium, which may not be ideal for some diets. Using either option will yield delicious results, but canned chickpeas are more convenient. You can enjoy crispy garlic roasted chickpeas in many ways: - As a healthy snack on their own. - Tossed over salads for added crunch. - Used as a topping for soups to enhance flavor. - Paired with dips like hummus or tzatziki for extra taste. These chickpeas fit well with various meals and snacks, making them a versatile addition to your kitchen. Crispy Garlic Roasted Chickpeas are tasty and easy to make. We covered key ingredients, like chickpeas and seasonings, along with simple steps for roasting. I shared tips for achieving that perfect crunch and various flavor tweaks. Store these snacks wisely to keep them fresh and crispy. Experiment with flavors and enjoy the countless ways to serve them. You'll love how nutritious and fun they are!

Crispy Garlic Roasted Chickpeas Flavorful Snack Idea

Looking for a tasty and healthy snack? Crispy Garlic Roasted Chickpeas are your answer! Packed with flavor, they’re easy to

To make easy chicken tortilla soup, you need the following ingredients: - 2 tablespoons olive oil - 1 medium onion, diced - 2 cloves garlic, minced - 1 red bell pepper, diced - 1 jalapeño, minced - 1 teaspoon ground cumin - 1 teaspoon smoked paprika - 4 cups chicken broth - 1 (15 oz) can diced tomatoes (with juices) - 1 (15 oz) can black beans, rinsed and drained - 2 cups cooked chicken, shredded - 1 cup corn (frozen or fresh) - Salt and pepper to taste - 1 lime, juiced - Fresh cilantro, chopped (for garnish) - Tortilla strips (for serving) - Avocado slices (optional, for garnish) Each ingredient adds its own flavor and texture. The olive oil gives richness. The onion and garlic add sweetness. Red bell pepper and jalapeño bring color and spice. Ground cumin and smoked paprika deepen the taste. Chicken broth is the base. Diced tomatoes, black beans, and corn add heartiness. Finally, lime juice brightens the soup. This recipe is smart and quick. It takes about 30 minutes to make. You can find the full recipe linked above. Enjoy cooking! 1. Heat olive oil and sauté onion. Start by warming the olive oil in a large pot over medium heat. Add the diced onion and let it sauté until it's soft and clear. This should take about 3 to 4 minutes. 2. Add garlic and other vegetables. Next, stir in your minced garlic, diced red bell pepper, and minced jalapeño. Cook these for another 2 to 3 minutes. You want them to soften but not lose their bright colors. 3. Stir in spices and cook until fragrant. Now, sprinkle in the ground cumin and smoked paprika. Stir everything together for about a minute. The spices will start to smell really good. This step adds depth to your soup. 1. Incorporate chicken broth and canned ingredients. Pour in the chicken broth, along with the canned diced tomatoes and black beans. Then add your shredded chicken and corn. Give everything a good stir to combine. 2. Bring to a boil and then simmer. Turn up the heat and bring the mixture to a boil. Once it bubbles, lower the heat and let it simmer for about 15 to 20 minutes. This allows all the flavors to mix well. 3. Add lime juice and adjust seasoning. Once the soup is done, season it with salt and pepper. Then add the fresh lime juice. This will brighten up the flavors. Now, you’re ready to serve your Easy Chicken Tortilla Soup. For full details on the ingredients and other tips, check the Full Recipe. Enjoy your cooking! - Adjusting spices for heat levels: If you like spice, add more jalapeño. For less heat, use less or remove seeds. You can also try a dash of cayenne for extra kick! - Fresh herbs for added freshness: Adding fresh cilantro at the end brightens the soup. You can also use fresh parsley if cilantro isn’t your favorite. - Recommended cooking times for optimal flavor: Letting the soup simmer for 15-20 minutes helps all the flavors blend. The longer it simmers, the deeper the taste. - Best garnishes to complement the soup: Top your soup with crispy tortilla strips for crunch. Avocado slices or a dollop of sour cream also add creaminess. - Pairing ideas with sides or drinks: Serve with warm corn tortillas or a fresh salad. A light beer or a zesty limeade pairs well too. For the complete recipe of Easy Chicken Tortilla Soup, check out the Full Recipe section! {{image_2}} You can easily change the protein in this soup. Try using beef or turkey instead of chicken. For a plant-based option, tofu or tempeh works great. Each protein gives the soup a unique taste. Adding more veggies can make the soup even better. Try adding spinach for greens or carrots for sweetness. You could also use zucchini or bell peppers to boost the flavor and nutrition. Make your soup your own! If you need a gluten-free version, use corn tortillas instead of regular ones. Most canned ingredients are gluten-free too, so check the labels. For vegetarian or vegan versions, skip the chicken and use vegetable broth. You can add more beans or lentils for protein. This way, everyone can enjoy a delicious bowl of soup! To store leftovers of your easy chicken tortilla soup, let it cool first. Once cool, pour it into an airtight container. Make sure to seal it tightly. This will help keep the soup fresh. In the refrigerator, your soup will last about 3 to 4 days. If you notice any off smells or changes in color, it's best to discard it. Always trust your senses. If you want to keep the soup longer, freezing is a great option. First, let the soup cool completely. Then, pour it into freezer-safe containers. Leave some space at the top, as the soup will expand when frozen. For best taste, use the frozen soup within 3 months. When you're ready to eat it, thaw it overnight in the fridge. You can also use cold water for quicker thawing. To reheat, pour the soup into a pot and heat it over medium heat. Stir it well until it’s hot. For a quick option, use the microwave. Just make sure to stir halfway for even heating. For the full recipe, check the details above. Enjoy your delicious meal anytime! Easy Chicken Tortilla Soup stays fresh for about 3 to 4 days in the fridge. Store it in an airtight container. This keeps the flavors strong and the soup safe to eat. If you see any signs of spoilage, like off smells or mold, it’s best to toss it. To enjoy your soup longer, you can freeze it. Yes, you can make Easy Chicken Tortilla Soup in advance. This soup tastes even better the next day as the flavors blend. I recommend making it on the weekend and enjoying it for a quick weeknight meal. Just reheat it on the stove or in the microwave. This makes meal prepping simple and tasty! You can use vegetable broth or water if you want a different flavor. Both options work well. If you are avoiding broth, try using stock or even a can of diced tomatoes with added water. These swaps can still give your soup a great taste. Choose what fits your diet best! This blog post covered all you need to know about Easy Chicken Tortilla Soup. We looked at ingredients, preparation, cooking steps, and ways to enhance the flavor. I also shared tips for storage and options for dietary needs. In summary, this soup is simple to make and versatile. You can adjust it to fit your taste. Now you have the tools to enjoy a delicious meal anytime. Happy cooking!

Easy Chicken Tortilla Soup Flavorful and Quick Recipe

Looking for a quick, tasty meal? This Easy Chicken Tortilla Soup is perfect for any day. With fresh veggies, spices,

- Ripe mangoes - Red onion - Jalapeño peppers - Fresh cilantro - Limes - Avocado (optional) To make the best quick mango salsa, you need ripe mangoes. Look for yellow and slightly soft ones. Red onion gives a nice crunch and bite. Jalapeño peppers add heat, but you can adjust how much you use. Fresh cilantro brightens the flavor. Limes bring a zesty kick to the salsa. You can add diced avocado for creaminess, but it’s optional. - Salt - Pepper Salt and pepper are key in this recipe. They enhance the natural flavors of the fresh ingredients. Start with a pinch, then taste and adjust as needed. - Tortilla chips - Grilled chicken - Fish You can serve this salsa with tortilla chips for a fun snack. It also pairs well with grilled chicken, adding a fresh touch. If you love seafood, try it on fish. This salsa is versatile and elevates any dish! For the full recipe, check the section above. Enjoy making your quick mango salsa! 1. Start by dicing the ripe mangoes. Cut them into small cubes. This adds sweetness and texture. 2. Next, chop the red onion finely. You want small pieces to blend well. The onion adds crunch and flavor. 3. Now, mince the jalapeño. Remove the seeds for less heat. This step keeps your salsa mild. 4. Finally, chop the fresh cilantro. This herb brings brightness to the dish. 1. In a large mixing bowl, combine the diced mangoes, chopped red onion, and minced jalapeño. 2. Add the freshly chopped cilantro and the diced avocado if you want extra creaminess. 3. Squeeze the juice of two limes over the mixture. This adds zing and keeps the salsa fresh. 4. Gently toss all the ingredients together. Be careful not to mush the mango or avocado. 1. Now, season with salt and pepper to taste. Adjust these as you like. 2. Let the salsa sit for about ten minutes. This allows the flavors to meld and develop. 3. Serve this quick mango salsa with tortilla chips or use it on grilled chicken or fish. 4. For the full recipe, check the details above! To make great salsa, pick ripe mangoes. Look for mangoes that are slightly soft when you press them. They should have a sweet smell at the stem. The best mango types for salsa are Tommy Atkins and Haden. They add flavor and sweetness. You can make your salsa even tastier! Try adding minced garlic or a pinch of cumin. These give a nice depth to the dish. If you want a bit of sweetness, drizzle in some honey. It balances the spice from the jalapeño. Serve your mango salsa cold for the best taste. Allow it to sit for about 10 minutes after mixing. This helps the flavors blend and become more vibrant. Enjoy it fresh with tortilla chips or on top of grilled chicken or fish. {{image_2}} You can change the flavor by adding pineapple or papaya. Both fruits pair well with mango. They add sweetness and a fresh taste. Diced pineapple gives a nice crunch. Papaya brings a softer texture and unique flavor. Try mixing these fruits in equal parts with mango for a fun twist. If you like heat, increase the jalapeño amount. Use two jalapeños for extra spice. You can also add hot sauce for more kick. Just a few drops can make a big difference. Start small and taste as you go. You can always add more! You can incorporate black beans or corn into your salsa. They add protein and texture. Black beans make the dish heartier. Corn gives a sweet crunch. For a fruity mix, try adding diced strawberries or kiwi. Each fruit adds a new layer of flavor. Experiment to find your favorite mix! This recipe is simple, but these variations keep it exciting. Check the Full Recipe to get started! To store leftover mango salsa, place it in an airtight container. Glass or plastic containers work well. Make sure to seal it tightly to keep out air. This helps keep the salsa fresh. Can you freeze mango salsa? Yes, you can freeze it, but it may change texture. Use a freezer-safe container or a heavy-duty freezer bag. Remove as much air as possible before sealing. This prevents freezer burn. In the fridge, mango salsa lasts about 3 to 5 days. Check for signs of spoilage. If it smells sour or looks watery, it's time to toss it. Always trust your senses when it comes to food safety. To pick ripe mangoes, look for these signs: - Color: Ripe mangoes should have a vibrant hue. - Feel: Gently squeeze the fruit. It should feel slightly soft. - Aroma: Smell near the stem. A sweet scent means ripeness. - Skin: Look for small blemishes, as they often indicate flavor. Choose mangoes that feel smooth and firm but yield a bit when pressed. Avoid hard mangoes; they won’t be sweet. Mango salsa pairs well with more than just chips. Here are some fun ideas: - Grilled chicken: Use it as a fresh topping. - Fish tacos: Add to your taco for a sweet touch. - Salads: Mix it into a green salad for a fruity kick. - Quesadillas: Spread it inside for added flavor. You can experiment with different dishes to make them pop with flavor. Yes, you can prepare mango salsa in advance. Here are some best practices: - Store in the fridge: Keep it in an airtight container. - Add lime juice: This helps preserve the color and flavor. - Mix just before serving: For the best taste, combine ingredients right before you eat. If it sits too long, the mango might get mushy. Enjoy it fresh for the best experience. For the complete recipe, check the Full Recipe section. In this blog post, we explored how to make delicious mango salsa. You learned about the fresh ingredients needed, like ripe mangoes and jalapeño peppers. We covered easy steps to prepare and mix the salsa, plus tips on flavor and storage. Mango salsa is not just tasty; it can enhance many dishes. You can customize it with variations to suit your taste. Enjoy this vibrant salsa, knowing it’s simple to make and great for sharing.

Quick Mango Salsa Flavorful and Simple Recipe

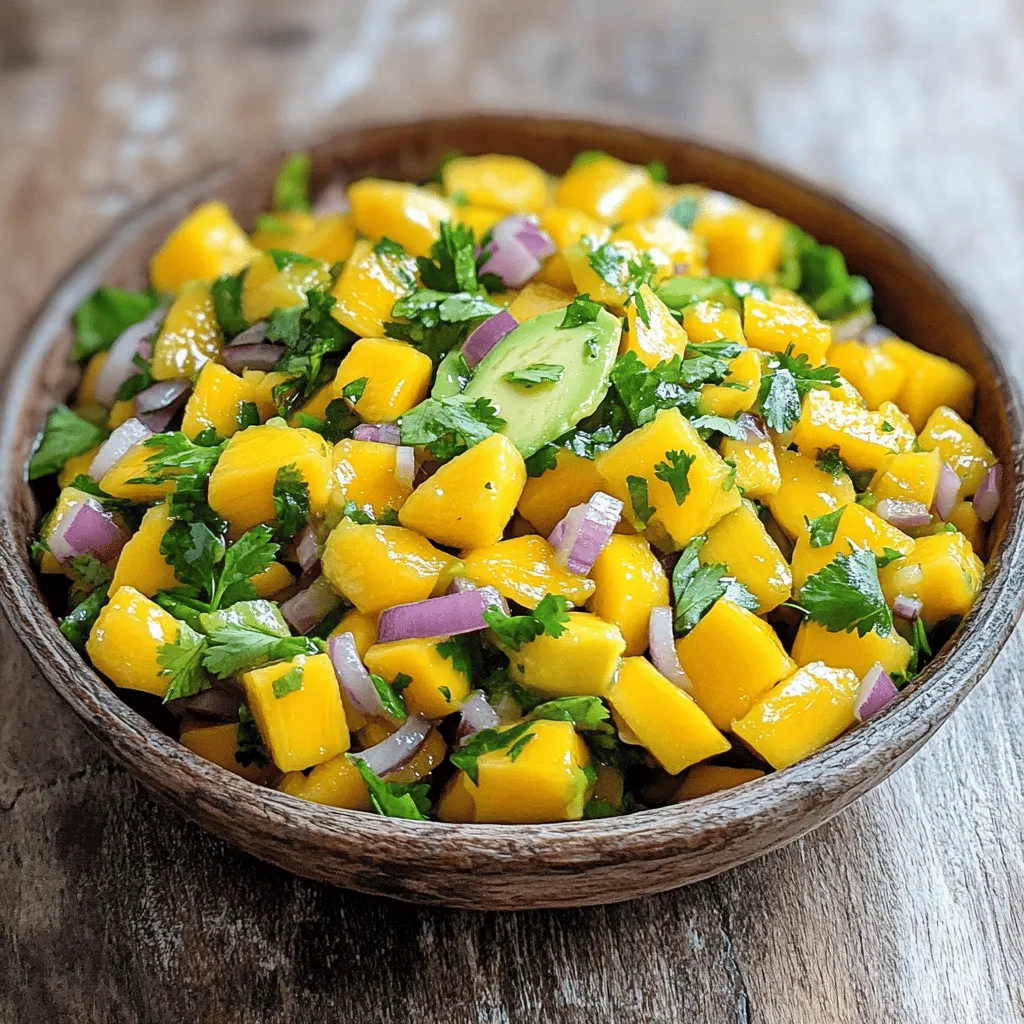
Are you ready to spice up your meals? This Quick Mango Salsa is bright, fresh, and oh-so-simple to make. With

For lemon poppy seed muffins, gather these key ingredients: - 1 ½ cups all-purpose flour - ½ cup granulated sugar - 2 teaspoons poppy seeds - 1 tablespoon baking powder - ½ teaspoon baking soda - ¼ teaspoon salt - 1 large egg - ½ cup buttermilk (or milk with a splash of lemon juice) - ¼ cup vegetable oil - Zest of 1 large lemon - 2 tablespoons fresh lemon juice - Optional: ¼ cup powdered sugar for glaze (mixed with a splash of lemon juice) Measuring ingredients accurately matters for baking. Use dry measuring cups for flour and sugar. Spoon the flour into the cup and level it with a knife. Avoid packing the flour down. For liquid ingredients, use a liquid measuring cup. Check the measurement at eye level to ensure accuracy. If you want a sweet glaze, measure the powdered sugar carefully to avoid a too-sweet finish. You can swap some ingredients if needed. Use whole wheat flour for a healthier option. If you don’t have buttermilk, mix regular milk with a splash of lemon juice. This creates a similar tangy flavor. For a dairy-free version, try almond milk or oat milk. You can also skip the egg by using a flaxseed meal or applesauce. These swaps keep the muffins moist and tasty. Start by preheating your oven to 375°F (190°C). This ensures even baking. Line a muffin tin with paper liners or grease it with cooking spray. This step helps the muffins release easily. In a large mixing bowl, gather your dry ingredients. You need 1 ½ cups of all-purpose flour, ½ cup of granulated sugar, 2 teaspoons of poppy seeds, 1 tablespoon of baking powder, ½ teaspoon of baking soda, and ¼ teaspoon of salt. Whisk these ingredients well together. This mix adds flavor and structure to the muffins. Now, take another bowl for the wet ingredients. Whisk together 1 large egg, ½ cup of buttermilk (or milk with a splash of lemon juice), ¼ cup of vegetable oil, the zest of 1 lemon, and 2 tablespoons of fresh lemon juice. Mix until everything is smooth. This blend brings moisture and tang. Pour the wet mixture into the dry mix. Use a spatula to gently fold everything together. You want to mix until just combined. A few lumps are okay; don't overmix. This keeps the muffins light and fluffy. Divide the batter evenly in the muffin tin, filling each cup about 2/3 full. Bake in your preheated oven for 18-20 minutes. Check doneness by inserting a toothpick into the center of a muffin. It should come out clean. Once baked, let them cool in the tin for 5 minutes, then transfer to a wire rack. Enjoy your delicious Lemon Poppy Seed Muffins! For the full recipe, check the details provided earlier. To keep your muffins moist, use buttermilk. This adds richness and flavor. Also, do not overmix the batter. Mix just until the dry and wet ingredients come together. Overmixing creates tough muffins. One common mistake is filling the muffin cups too full. Fill them about two-thirds full for the best rise. Another mistake is not preheating the oven. Always preheat to get the perfect crust. Lastly, check for doneness with a toothpick. If it comes out clean, the muffins are ready. You can add extras to boost flavor. Blueberries or lemon zest enhances the lemon flavor. A glaze made from powdered sugar and lemon juice adds sweetness. Try adding nuts for a crunchy texture. These little touches make each muffin special. For the full recipe, check out the steps above to create your own batch of these delightful muffins. {{image_2}} You can easily add blueberries to your lemon poppy seed muffins. Blueberries bring a burst of sweetness. They also add a nice contrast to the lemon flavor. Just fold in about one cup of fresh or frozen blueberries. You can also try raspberries or diced strawberries. These fruits add color and taste, making your muffins even more delicious. If you want gluten-free muffins, you can make simple swaps. Use a gluten-free flour blend instead of all-purpose flour. Look for blends that work well in baking. Add a little xanthan gum if your blend does not include it. This helps provide structure to your muffins. The taste will still be bright and yummy! Feel free to get creative with flavors! You can add a teaspoon of vanilla extract for warmth. Or, try mixing in some chopped nuts for crunch. Almonds or walnuts work great. For a tropical twist, add shredded coconut. The options are endless! Experimenting makes baking fun and personal. Enjoy trying out new flavors in your lemon poppy seed muffins! To keep your lemon poppy seed muffins fresh, store them in an airtight container. This will help keep them moist and flavorful. Place them at room temperature if you plan to eat them within a couple of days. For longer storage, the fridge is a good option. Just remember to let them cool completely before sealing them up. Freezing is a great way to enjoy these muffins later. After they cool, wrap each muffin tightly in plastic wrap. Place them in a freezer bag or container. Label it with the date. They can stay fresh for up to three months in the freezer. When you’re ready to eat, just take one out and thaw it at room temperature. To enjoy these muffins warm, you can reheat them easily. For best results, use the oven. Preheat it to 350°F (175°C). Place the muffins on a baking sheet and heat for about 5-10 minutes. If you’re in a hurry, you can use the microwave. Heat each muffin for 15-20 seconds. They will taste just as good as fresh! Lemon poppy seed muffins stand out due to their bright flavor. The lemon zest brings a refreshing taste. The poppy seeds add a delightful crunch and a unique look. Together, they create a lovely balance of sweet and tart. This combination makes them perfect for breakfast or a snack. Yes, you can use whole wheat flour. It adds more fiber and a nutty taste. Start by replacing half the all-purpose flour with whole wheat flour. This helps keep the muffins light and fluffy. If you use all whole wheat flour, the muffins may be denser. To keep your muffins fresh, store them at room temperature in an airtight container. This keeps them soft for a few days. If you want to keep them longer, freeze them. Wrap each muffin in plastic wrap, then place them in a freezer bag. They can last up to three months. These muffins pair well with various drinks. Try serving them with tea or coffee for a cozy treat. You can also enjoy them with a dollop of yogurt or some fresh fruit. A light drizzle of honey or a sprinkle of powdered sugar adds a sweet touch. For the full recipe, including all the steps and tips, check the Full Recipe section. You will find everything you need to make these delightful muffins! In this post, I covered the key ingredients and instructions for baking muffins. You learned measurement tips, ingredient substitutions, and how to prep your oven. I shared tricks for moist muffins and how to avoid errors. Plus, we looked at fun variations like gluten-free options and creative flavors. Proper storage and reheating tips help keep your muffins fresh. Remember, baking is about experimenting and having fun, so try new ingredients and flavors. Enjoy your baking journey!

Lemon Poppy Seed Muffins Delightfully Sweet Treat

Indulge in the delightful taste of Lemon Poppy Seed Muffins! These sweet treats burst with fresh lemon flavor and a

To make grilled vegetable skewers, you need a few key items. Here’s what you'll need: - 1 zucchini, sliced into thick rounds - 1 red bell pepper, cut into large chunks - 1 yellow bell pepper, cut into large chunks - 1 red onion, cut into wedges - 1 cup cherry tomatoes - 1 cup mushrooms, halved - 2 tablespoons olive oil - 2 teaspoons garlic powder - 1 teaspoon smoked paprika - Salt and pepper to taste - Fresh basil leaves for garnish - Wooden or metal skewers Substitutions for Common Allergens or Preferences: - If you are allergic to certain vegetables, feel free to swap them out. You can use eggplant or asparagus instead. - For a vegan option, skip the cheese and stick to the vegetables. - If you need a gluten-free dish, the ingredients listed are already gluten-free. Tips for Selecting the Freshest Vegetables: - Look for vegetables that are firm and bright. This shows they are fresh. - Pick bell peppers that have smooth skin and are heavy for their size. - Choose zucchini that are small to medium-sized for the best flavor. - Check mushrooms for dryness; they should not be slimy or wet. Using fresh, quality ingredients makes a big difference in flavor. For a full recipe that guides you through the cooking process, refer to the [Full Recipe]. First, prepare your vegetables. I recommend using fresh, seasonal veggies for the best taste. Start by washing all your veggies well. Then, slice the zucchini into thick rounds and cut the bell peppers into large chunks. Cut the red onion into wedges, and halve the mushrooms. Cherry tomatoes can stay whole. Next, marinate the vegetables. Marinating helps enhance the flavor and makes them juicy. In a large bowl, combine the sliced vegetables. Drizzle with olive oil, then add garlic powder, smoked paprika, salt, and pepper. Toss everything until the veggies are well coated. Now, let's get skewering! If you use wooden skewers, soak them in water for at least 30 minutes. This helps prevent burning on the grill. When you're ready, thread the marinated vegetables onto the skewers. Alternate between different types for a colorful look. For grilling, preheat your grill to medium-high heat. This is about 375°F to 450°F. Place the skewers on the grill and cook for about 10-12 minutes. Turn them occasionally to get that perfect char. Look for tender veggies with slight charring on the edges. Be careful when handling the skewers. They can get hot! Use tongs or a grill glove to protect your hands. After grilling, let the skewers cool for a minute. You can serve them as is, or with dips and sauces. A tasty option is hummus or tzatziki. Pair your skewers with sides like rice or a fresh salad. These dishes complement the smoky flavors well. For a full recipe, check out the details above. Enjoy your delicious grilled vegetable skewers! To avoid common grilling mistakes, keep these points in mind: - Preheat your grill. A hot grill helps to sear the veggies quickly. - Use a mix of vegetables for color and taste. This makes your skewers fun and tasty. - Cut vegetables evenly. This helps them cook at the same rate. - Don’t overcrowd the skewers. Leave space for heat to circulate. For even cooking of vegetables, try these best practices: - Soak wooden skewers in water for 30 minutes. This prevents burning. - Turn the skewers often. This creates a nice char on all sides. - Grill on medium-high heat for about 10-12 minutes. Check for tenderness. To make your grilled vegetable skewers even tastier, consider these marinades and seasonings: - Olive oil is great for moisture. It adds a rich flavor. - Try garlic powder and smoked paprika. These spices give a nice kick. - Lemon juice can brighten the flavors. It adds a fresh touch. If you want a smoky flavor without smoke, use these ideas: - Add a dash of liquid smoke to your marinade. This gives a deep taste. - Use smoked paprika. It adds a nice smoky flavor without extra steps. To serve and present grilled vegetable skewers creatively, think about these ideas: - Arrange the skewers on a colorful platter. This makes them eye-catching. - Serve with dips like tzatziki or hummus. This adds more flavor and fun. - Stack skewers upright in a glass. It creates a stunning display. For garnishing and plating to enhance visual appeal, try: - Sprinkle fresh herbs like basil or parsley. This adds color and aroma. - Use lemon wedges on the side. They make the dish pop and add zest. For the Full Recipe, check the detailed instructions above. {{image_2}} You can mix and match many vegetables for your skewers. Try these options: - Eggplant, cut into cubes - Asparagus, trimmed - Cherry peppers, whole - Carrots, sliced into sticks Seasonal veggies are great too! In summer, use fresh corn. In fall, think about adding sweet potatoes. Always choose what looks best at the store or market. Making your skewers vegan or gluten-free is easy. Here are some ideas: - Swap olive oil with avocado oil for a different flavor. - Use gluten-free soy sauce in place of regular soy sauce. - To add protein, try marinated tofu or halloumi cheese. Both tofu and halloumi grill well. Just cut them into cubes and thread them onto the skewers. You can bring global flavors to your skewers with spices and marinades. Here are some ideas: - For a Mediterranean twist, use oregano and lemon juice. - For an Asian flair, try teriyaki sauce and sesame seeds. - For a Mexican spin, add chili powder and lime juice. These flavors will make your skewers exciting and unique. Customize them as you like! For the full recipe, check out the link provided. To keep your grilled vegetable skewers fresh, put them in an airtight container. This keeps moisture in and air out. Place the container in the fridge right after they cool down. You want to eat them within three days for the best taste. When reheating, use a skillet on low heat. This method helps retain texture. You can add a splash of water to keep them moist. Avoid using the microwave, as it can make them soggy. If you want to store grilled vegetables for longer, try freezing them. First, let the skewers cool completely. Then, remove the veggies from the skewers. Spread them out on a baking sheet to freeze them individually. Once frozen, you can store them in a freezer bag. To thaw, place the vegetables in the fridge overnight. You can reheat them in a skillet or oven. Just remember to heat them slowly so they don’t lose their flavor and texture. Grilled vegetable skewers last about three to five days in the fridge. Always check for signs of spoilage. Look for changes in color or smell. If they smell off or look slimy, it’s best to toss them out. Eating fresh is always the goal for great taste. What vegetables work best for skewers? I find that colorful veggies like zucchini, bell peppers, onions, and cherry tomatoes shine. Mushrooms also add great flavor. You can mix these with any favorite vegetables. How long should skewers marinate for optimal flavor? Marinating for at least 30 minutes works well. You can go longer if you want more depth. Just make sure to keep the skewers in the fridge. Can I make grilled vegetable skewers in the oven or broiler? Yes! You can use an oven or broiler. Just set the temperature to high, and cook for about 10-15 minutes, turning halfway. It’s a great option if you can’t grill outside. Are wooden skewers better than metal skewers? Both have pros and cons. Wooden skewers are cheaper and can be tossed after use. But metal skewers are reusable and don’t burn. Choose what works best for you. How can I tell when the vegetables are fully cooked? Look for a nice char and soft texture. The veggies should be tender but not mushy. A fork should easily pierce them. A serving of grilled vegetable skewers has about 150 calories. This includes vitamins from veggies, healthy fats from olive oil, and fiber. To make them healthier, use less oil or add more veggies. To change the recipe size, just multiply or divide the ingredients. For example, if you want to serve eight, double everything. For fewer servings, cut the numbers in half. Keep the cooking time the same for even grilling. Grilled vegetable skewers are easy and fun to make. We covered the best ingredients, preparation steps, and grilling tips. You learned how to select fresh veggies and marinate them for flavor. We also explored serving ideas and dietary options. Don’t forget about storage! Use these tips to enjoy your skewers longer. With a few simple tricks, you can create delicious, colorful meals. Now, get grilling and enjoy your tasty creations!

Grilled Vegetable Skewers Flavorful and Simple Recipe

Looking for a tasty way to enjoy fresh veggies? Try making Grilled Vegetable Skewers! This simple recipe packs bold flavors

To make a classic peach pie, gather these simple ingredients: - 6-8 ripe peaches, peeled and sliced - 1 cup granulated sugar - 1/4 cup all-purpose flour - 1/4 teaspoon salt - 1 teaspoon ground cinnamon - 1 tablespoon lemon juice - 1 tablespoon butter, diced - 1 package refrigerated pie crusts (2 crusts) - 1 egg, beaten (for egg wash) These items create a sweet and warm pie that celebrates the peach's natural flavor. You can swap some ingredients if needed. Try these ideas: - Brown sugar can replace granulated sugar for a richer taste. - Cornstarch works well in place of flour to thicken the filling. - If you're out of lemon juice, use vinegar or orange juice. - For a dairy-free option, leave out the butter or use coconut oil. - Any pie crust recipe will work if you want to make your crust from scratch. Choosing the right peaches is key for a great pie. Look for these signs: - Pick peaches that are firm but yield slightly to pressure. - The color should be vibrant, with a golden hue. - Avoid bruises, soft spots, or wrinkled skin. - Smell the peach; it should have a sweet, fragrant scent. - If peaches are hard, let them ripen at room temperature for a few days. With these tips, you can find the best peaches for your classic peach pie. For the full recipe, check out the details above. Start by peeling and slicing 6 to 8 ripe peaches. Use fresh peaches for the best taste. In a large bowl, mix the sliced peaches with 1 cup of granulated sugar, 1/4 cup of all-purpose flour, 1/4 teaspoon of salt, and 1 teaspoon of ground cinnamon. Add 1 tablespoon of lemon juice to brighten the flavors. Toss gently to coat the peaches. Let this mixture sit for about 15 minutes. This allows the juices to mix and makes the filling sweeter. Roll out one of the refrigerated pie crusts. Fit it into a 9-inch pie pan. Press it down into the corners and leave some overhang. Pour the peach filling into the crust. Spread it out evenly. Dot the filling with small pieces of diced butter for richness. Roll out the second pie crust and place it over the filling. Trim any excess crust. Press the two crusts together and crimp the edges to seal. Cut small slits in the top crust for steam to escape. Preheat your oven to 425°F (220°C). Brush the top crust with a beaten egg for a golden finish. Bake the pie for 15 minutes. Then, reduce the temperature to 350°F (175°C) and bake for another 30 to 35 minutes. Look for a golden crust and bubbling filling. Once done, remove the pie from the oven. Let it cool on a wire rack for at least 2 hours before slicing. Enjoy this peachy dream pie, a perfect treat for any occasion! For the full recipe, refer to the earlier section. To create a pie crust that shines, use cold butter. Cold butter helps the crust stay flaky. You can also chill your mixing bowl and utensils. This keeps everything cool and makes mixing easy. Roll your dough on a lightly floured surface. This prevents sticking and allows for even thickness. For a crispier crust, pre-bake it for a few minutes. This trick helps the bottom stay firm. Fresh peaches are key to a great pie. Look for ripe, juicy peaches that smell sweet. You can add a splash of vanilla extract for depth. A pinch of nutmeg can also boost the flavor. Lemon juice brightens the taste and balances sweetness. Let your peach filling sit for 15 minutes. This allows the flavors to blend and juices to form. One common mistake is overfilling the pie. Leave some space for the juices to bubble. Another issue is not sealing the crust well. If it opens while baking, juices will spill out. Always cut slits in the top crust. This lets steam escape and prevents sogginess. Lastly, don’t skip cooling the pie. Cooling helps it set up, making slicing easier. Follow these tips for a delicious homemade delight. For the full recipe, check the details above. {{image_2}} You can mix things up with your peach pie. Try adding fresh blueberries for a sweet twist. Raspberries also work well, giving a tart balance. If you like spices, consider adding nutmeg or ginger to the filling. For a nutty taste, include chopped pecans or almonds. These flavors create a pie that surprises and delights your taste buds. If you need a gluten-free option, you can change the crust. Look for gluten-free pie crusts at the store. You can also make your own with almond flour or coconut flour. Use a mix of these flours with a bit of cold butter and ice water. This will create a good texture for your pie. The filling stays the same, so your peach flavor shines through. Peach pie is great, but you can use other fruits too. In summer, try nectarines or plums for a similar taste. Apples work well in the fall, adding a crisp bite. In winter, use frozen fruit when fresh is not available. Just remember to adjust the sugar based on the fruit's sweetness. Each fruit will give your pie a new and tasty spin. For the full recipe, check out the Peachy Dream Pie above. To keep your peach pie fresh, cover it tightly with plastic wrap or foil. This keeps the air out and prevents the crust from getting soggy. Store it at room temperature for up to two days. If you want to save it longer, move it to the fridge. It will stay good for about a week in there. You can freeze peach pie for later use. First, let it cool completely to avoid ice crystals. Wrap it tightly in plastic wrap and then foil. This double layer helps keep out air and moisture. You can freeze it for up to three months. When ready to eat, thaw it in the fridge overnight before reheating. To reheat your pie, preheat your oven to 350°F (175°C). Place the pie on a baking sheet. Heat it for about 20-25 minutes. This warms the filling and makes the crust crispy again. Avoid the microwave, as it can make the crust soft and chewy. Enjoy your classic peach pie warm for the best taste! You can tell the pie is done by looking at the crust. It should be golden brown. The peach filling will bubble up through the slits on top. Once you see these signs, it’s time to take it out. Let it cool for two hours. This helps the filling set. Yes, you can use canned peaches. They are a good option when fresh peaches are not in season. Drain them well and reduce the sugar in the recipe. Canned peaches are softer, so your pie may be less firm. Just be sure to adjust the cooking time. Classic peach pie pairs well with many things. Ice cream is a favorite choice. Whipped cream also adds a nice touch. For a twist, serve it with a scoop of yogurt. You can enjoy it warm or chilled, depending on your taste. We covered key ingredients and their swaps, plus tips for picking the best peaches. You learned how to make the filling, assemble the pie, and bake it right. I shared tricks for a perfect crust and boosted peach flavor as well. Don’t forget, seasonal fruits add a fun twist! Store leftovers well, freeze if needed, and reheat for a tasty treat. Now you’re ready to bake a delicious peach pie that impresses everyone. Enjoy every slice!

Classic Peach Pie Irresistible Homemade Delight

Are you ready to bake the perfect classic peach pie? This homemade delight will take you straight to summer with

To make Garlic Parmesan Roasted Potatoes, you need simple, fresh ingredients. Here’s what you will need: - 2 lbs baby potatoes, halved - 4 tablespoons olive oil - 4 cloves garlic, minced - 1 cup grated Parmesan cheese - 1 teaspoon dried oregano - 1 teaspoon dried thyme - Salt and black pepper to taste - Fresh parsley, chopped (for garnish) These ingredients come together to create a flavorful dish. The baby potatoes are bite-sized and cook well. Olive oil helps the potatoes brown nicely. Garlic adds a strong, lovely flavor. Parmesan cheese gives a rich, cheesy taste. Oregano and thyme add depth and earthiness. Salt and pepper balance the flavors. Finally, fresh parsley brightens the dish. Using fresh ingredients makes a big difference. You can find these items at any grocery store. For the best taste, use high-quality olive oil and cheese. This dish is perfect for family dinners or gatherings. It pairs well with many main dishes. You can find the full recipe at the link provided. First, you need to preheat your oven to 425°F (220°C). This step is key. A hot oven ensures your potatoes get crispy and golden. Next, grab a large mixing bowl. In it, combine 2 lbs of halved baby potatoes with 4 tablespoons of olive oil. Add 4 cloves of minced garlic, 1 teaspoon of dried oregano, 1 teaspoon of dried thyme, salt, and black pepper. Toss everything well. Make sure each potato is coated with the oil and spices. Now, spread the potato mix in a single layer on a baking sheet lined with parchment paper. This lining helps with easy cleanup. Place the baking sheet in your preheated oven. Roast for about 25-30 minutes. Halfway through, toss the potatoes. This helps them cook evenly. Look for a golden brown color and crispy edges. Once the potatoes are roasted, take them out of the oven. Sprinkle 1 cup of grated Parmesan cheese over the hot potatoes. Return them to the oven for another 5 minutes. This step melts the cheese and gives it a nice crust. Finally, remove from the oven and garnish with fresh parsley. Your Garlic Parmesan Roasted Potatoes are ready to enjoy! For the full recipe, check the section above. To get crispy potatoes, start by using baby potatoes. They roast well and cook evenly. Halve them to ensure they get that nice, golden finish. Coat them well with olive oil, garlic, and seasonings. This helps them crisp up nicely. Make sure to spread them out on the baking sheet. If they are too close, they will steam instead of roast. Toss them halfway through cooking for even crispiness. Garlic Parmesan Roasted Potatoes taste great on their own. But, you can add more flavor easily. Try adding smoked paprika for a hint of smokiness. You can also mix in some crushed red pepper for a kick. Fresh herbs like rosemary or sage add a nice touch. You could even swap the Parmesan for another cheese. Cheddar or feta can give a new twist to the dish. These potatoes pair well with many meals. Serve them alongside grilled chicken or steak for a hearty dinner. They also make a great side for a fresh salad. For a fun twist, top them with sour cream or yogurt. You can even mix in some sautéed veggies for a colorful plate. Enjoy them hot, right out of the oven, for the best flavor. Check the Full Recipe for more details! {{image_2}} To add heat, toss in some red pepper flakes. Start with one teaspoon and adjust to your taste. This spice will give your potatoes a nice kick. You can mix it in when you add the garlic. The heat pairs well with the creamy Parmesan. It makes the dish more exciting and fun. For a fresh twist, try adding different herbs. You can use fresh rosemary or basil. Just chop them finely and mix them in with the other ingredients. This will give your potatoes a fragrant aroma. You can also try a mix of herbs for a layered flavor. Each herb adds its own unique taste. If you want to switch up the cheese, try using cheddar or gouda. They melt nicely and add a rich flavor. You can also try nutritional yeast for a dairy-free option. It gives a cheesy flavor without the dairy. Experiment with different cheeses to find your favorite mix. For the full recipe, check out the [Full Recipe]. After cooking your Garlic Parmesan Roasted Potatoes, let them cool. Place leftovers in an airtight container. They can stay fresh in the fridge for up to three days. Make sure to keep them sealed to avoid drying out. To reheat, set your oven to 350°F (175°C). Spread the potatoes on a baking sheet. Heat for about 10-15 minutes until warm. This will help keep them crispy. You can also use a microwave, but they may lose some crunch. If you want to freeze the potatoes, cool them completely first. Place them in a freezer bag, removing as much air as possible. They can last up to two months in the freezer. When you are ready to eat them, let them thaw overnight in the fridge before reheating. For best texture, reheat in the oven. Check out the Full Recipe for more details on preparation! You should cook Garlic Parmesan Roasted Potatoes for about 25-30 minutes. This timing works well for baby potatoes. They become golden and crispy when roasted at 425°F (220°C). Halfway through cooking, toss the potatoes for even browning. Yes, you can use other potatoes. Russet or Yukon Gold potatoes are great options. Just cut them into even pieces for proper cooking. Keep in mind that cooking times may vary slightly based on the potato type and size. Garlic Parmesan Roasted Potatoes pair well with many dishes. They are great with grilled chicken or steak. You can also serve them with roasted vegetables or a fresh salad. This dish adds flavor and crunch to any meal. For the full recipe, check out the [Full Recipe]. You learned how to make tasty garlic Parmesan roasted potatoes. We covered the key ingredients and easy steps to cook them. I shared tips for crispy texture and flavor boosts, plus fun variations. You can store leftovers easily and even freeze them. These roasted potatoes are sure to please. Try them with your favorite dish or as a snack. Happy cooking!

Garlic Parmesan Roasted Potatoes Simple and Tasty Dish

If you crave a side dish that’s both simple and delicious, you’ve found it! Garlic Parmesan Roasted Potatoes are easy

Older posts
Newer posts
← Previous Page1 … Page14 Page15 Page16 … Page55 Next →

dsad

© 2025 Lisa Dishes • Built with GeneratePress

Our Policies

  • Copyright Policy
  • Cookie Policy
  • GDPR Policy
  • Privacy Policy
  • Disclaimer
  • Terms Of Use

More Information

  • Home
  • About
  • Contact
  • Appetizers
  • Dessert
  • Dinner
  • Drinks
©2025, Lisa Dishes About Back To Top