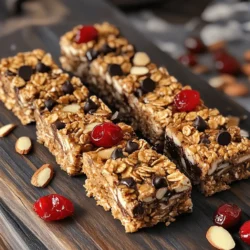
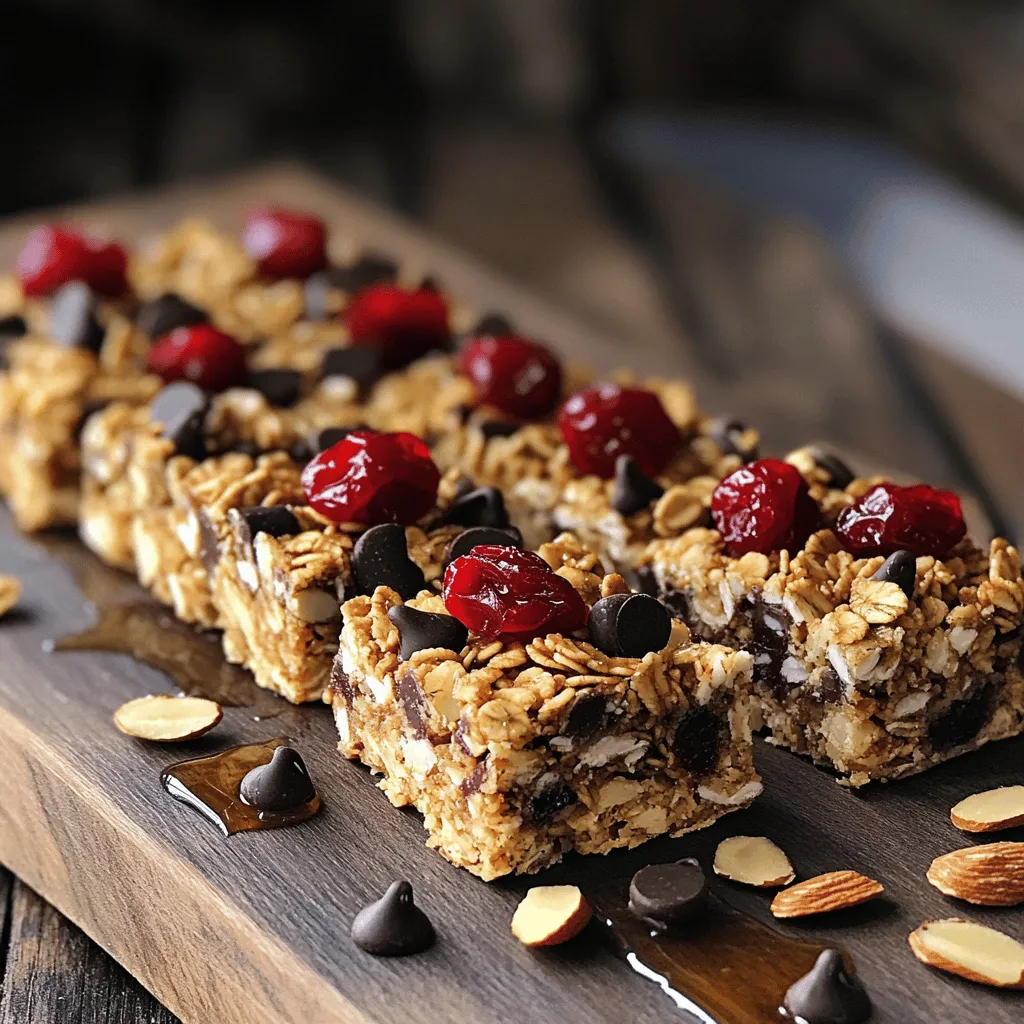
If you’re looking for a snack that’s both tasty and healthy, you’ll love these Cherry Chocolate Granola Bars! Packed with sweet cherries, rich chocolate, and wholesome ingredients, they make the perfect treat for any time of day. Plus, I’ll share easy tips for perfecting the texture and fun flavor variations. Let’s dive into the world of delicious granola bars that not only satisfy your cravings but also boost your nutrition!
Ingredients
Complete List of Ingredients
To make Cherry Chocolate Granola Bars, you need these tasty ingredients:
– 2 cups rolled oats
– ½ cup almond butter (or any nut/seed butter of choice)
– ¼ cup honey or maple syrup
– ½ cup dark chocolate chips
– ½ cup dried cherries, chopped
– ¼ cup sunflower seeds
– ¼ cup sliced almonds
– 1 teaspoon vanilla extract
– ½ teaspoon cinnamon
– Pinch of salt
Ingredient Substitutions
You can swap some ingredients if needed. Here are a few ideas:
– If you don’t have almond butter, peanut butter works too.
– Maple syrup can replace honey for a vegan option.
– You can use any dried fruit instead of cherries, like cranberries or raisins.
– For a nut-free version, skip the nuts and use pumpkin seeds.
Tips for Selecting High-Quality Ingredients
Choosing the best ingredients helps make better bars. Here are my tips:
– Buy organic oats to avoid pesticides and chemicals.
– Look for nut butters with no added sugars or oils.
– Choose dark chocolate chips with at least 70% cocoa for a rich taste.
– Select plump, moist dried cherries for a juicy bite.
– Always check the expiration dates on all products.
These tips help you create delicious Cherry Chocolate Granola Bars.
Step-by-Step Instructions
Prepping Your Baking Dish
Start by preheating your oven to 350°F (175°C). Next, grab an 8×8 inch baking dish. Line it with parchment paper, leaving some paper hanging over the edges. This step makes it easy to lift out the granola bars later.
Mixing Dry Ingredients
In a large bowl, mix 2 cups of rolled oats, ¼ cup of sunflower seeds, and ¼ cup of sliced almonds. Add ½ cup of chopped dried cherries, ½ teaspoon of cinnamon, and a pinch of salt. Stir these dry ingredients until they are well combined. This mixture forms the base of your granola bars and gives them texture.
Combining Wet Ingredients
For the wet mix, take a microwave-safe bowl. Add ½ cup of almond butter and ¼ cup of honey or maple syrup. Microwave this mix in 20-second intervals. Stir after each interval until it becomes smooth and melted. Once ready, stir in 1 teaspoon of vanilla extract. Pour this warm mixture over the dry ingredients and mix well. This helps to coat all the oats and nuts evenly.
Baking and Cooling Instructions
Transfer the mixture into your prepared baking dish. Press it firmly with a spatula or your hands. This step ensures the bars hold together when baked. Bake for 20-25 minutes, until the edges turn golden brown. Once baked, let it cool in the dish for about 10 minutes. Use the parchment paper to lift the granola out and place it on a wire rack. Allow it to cool completely before cutting into bars. Store your delicious bars in an airtight container. Enjoy this tasty snack!
Tips & Tricks
How to Achieve the Perfect Texture
To get the best texture in your Cherry Chocolate Granola Bars, focus on the oats. Use rolled oats for the right chewiness. Press the mixture firmly into the baking dish. This step helps the bars hold together well. Bake until the edges are golden brown, but not too dark. A bit of crunch is good, but you want a soft center too.
Common Mistakes to Avoid
One common mistake is not measuring ingredients accurately. Use a scale for the best results. Overmixing can also ruin the bars. Gently fold in the chocolate chips to keep them whole. Lastly, don’t skip cooling the bars before cutting. This makes them easier to slice and keeps them from falling apart.
Use of Additional Flavorings and Add-ins
You can customize your bars by adding other flavors. Try adding a sprinkle of sea salt on top for contrast. Nuts like walnuts or pecans add a nice crunch. You could also toss in some coconut flakes for extra flavor. If you love spices, a dash of nutmeg can make a big difference. Each of these adds a unique twist to the classic Cherry Chocolate Granola Bars recipe.
Variations
Chocolate Cherry Nut Granola Bars
You can add a nutty twist to your Cherry Chocolate Granola Bars. By mixing in chopped nuts, you heighten the texture and flavor. Use walnuts, pecans, or hazelnuts to enhance the crunch. Simply add about ½ cup of your chosen nuts to the dry mix. This change makes the bars more filling and adds healthy fats.
Vegan and Gluten-Free Options
Want to make your bars vegan? Swap honey for maple syrup. Both sweeteners work well, but maple syrup keeps it plant-based. For a gluten-free option, ensure your oats are certified gluten-free. This small change allows everyone to enjoy your tasty snack without worry. With these swaps, your Cherry Chocolate Granola Bars will be a hit with all!
Flavor Additions: Coconut, Almonds, and More
You can easily customize flavors in your granola bars. For a tropical twist, add shredded coconut. About ½ cup will do the trick! You can also spice it up with 1 teaspoon of almond extract instead of vanilla. This gives your bars a unique flavor and aroma. Try adding spices like nutmeg or ginger for a warm touch. Each variation adds a new layer of taste, making your snacks even more exciting.
Storage Info
Best Practices for Storing Granola Bars
To keep your Cherry Chocolate Granola Bars fresh, store them in an airtight container. This protects them from air and moisture. You can place them in the pantry or the fridge. If you use the fridge, they stay fresh longer. Make sure to separate layers with parchment paper. This way, they won’t stick together.
How Long They Last
When stored correctly, these granola bars last for up to two weeks. If you keep them in the fridge, they may stay fresh for a bit longer. Check for any signs of spoilage. If they smell off or have changed color, toss them out. Always trust your senses.
Freezing Instructions for Long-Term Storage
Freezing is a great option if you want to keep your bars for longer. To freeze, wrap each bar in plastic wrap. Then, place them in a freezer-safe bag or container. They can last for up to three months in the freezer. When you want to eat them, simply thaw them in the fridge overnight. This keeps them tasty and ready to enjoy!
FAQs
Can I use different types of nuts or seeds?
Yes, you can use other nuts or seeds. Try walnuts, pecans, or pumpkin seeds. Each adds a unique flavor and texture. Just keep the total amount the same. You can mix and match to find your favorite combo.
Are Cherry Chocolate Granola Bars healthy?
Definitely, these bars are a healthy snack option. They contain oats, nuts, and dried fruits. These ingredients provide fiber, protein, and essential nutrients. Using dark chocolate adds antioxidants while keeping sugar low. They are great for energy, perfect for a quick snack.
Where can I buy pre-made Cherry Chocolate Granola Bars?
You can find pre-made bars in most grocery stores. Check the health food aisle or snack section. Brands like Nature Valley or RXBAR often have similar flavors. Always read the label to ensure quality ingredients.
How to make these bars gluten-free?
To make gluten-free Cherry Chocolate Granola Bars, use gluten-free oats. Many brands offer certified gluten-free oats now. This simple swap ensures your bars are safe for those with gluten allergies or sensitivities.
This guide walked you through making delicious Cherry Chocolate Granola Bars. We covered the key ingredients, including tips on choosing the best ones. You learned step-by-step instructions for mixing and baking. Plus, we shared useful tips to avoid common mistakes. You explored fun variations and storage methods to keep your bars fresh.
Remember, baking is all about experimenting and enjoying the process. Try different flavors and ingredients to make this recipe your own. Happy baking!