
Brighten your day with zesty no-bake lemon curd tarts! This easy and refreshing treat brings together tangy lemon and a crisp graham cracker crust. Whether it's for a sunny afternoon snack or a special occasion, these tarts are sure to impress. In this guide, I’ll show you how to whip up these delightful tartlets without turning on your oven. Let’s dive in and create something delicious together!
Why I Love This Recipe
- Bright and Refreshing: The zesty lemon flavor is a perfect balance of tartness and sweetness, making these tarts incredibly refreshing.
- No Baking Required: This recipe simplifies dessert preparation, allowing you to create something delicious without turning on the oven.
- Easy to Customize: You can easily adapt the recipe with different fruit curds or toppings, making it versatile for any occasion.
- Elegant Presentation: These tarts are not only tasty but also visually stunning, perfect for impressing guests at dinner parties.
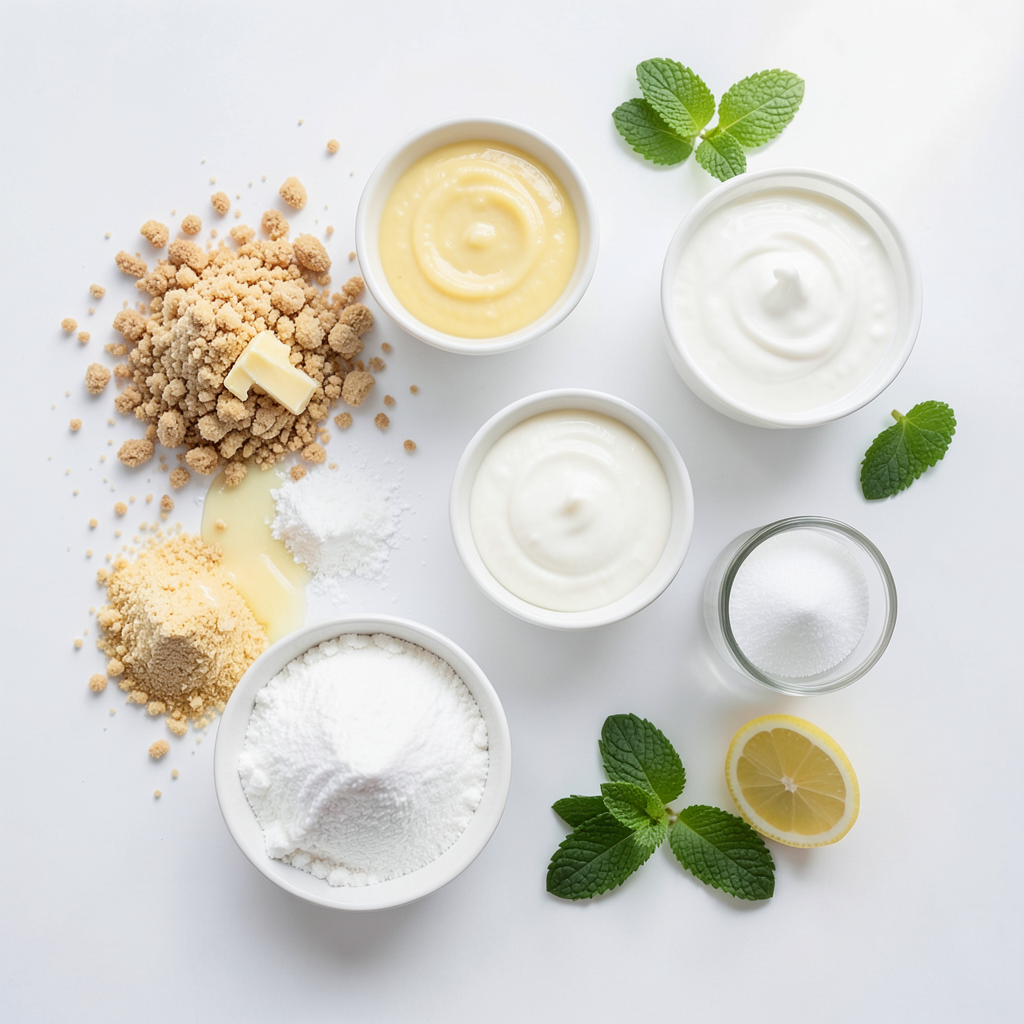
Ingredients
Main components
For the graham cracker crust, you will need:
- 1 cup graham cracker crumbs
- 1/2 cup unsalted butter, melted
- 1/4 cup powdered sugar
For the lemon curd filling, gather these items:
- 2 cups fresh lemon curd (store-bought or homemade)
- 1 cup heavy whipping cream
- 2 tablespoons granulated sugar
- Zest of 1 lemon
You can add these optional garnishes:
- Fresh mint leaves for garnish
Step-by-Step Instructions
Preparing the crust
1. In a mixing bowl, combine the graham cracker crumbs, melted butter, and powdered sugar. Mix it well until the mixture is like wet sand.
2. Take the mixture and press it firmly into the bottoms and sides of tartlet pans or muffin tins. This forms the crust.
3. Once pressed, chill the crust in the refrigerator while you prepare the lemon curd filling.
Making the lemon curd filling
1. In another bowl, whip the heavy cream until soft peaks form. This means it should look fluffy.
2. Gradually add in granulated sugar and lemon zest. Keep whipping until stiff peaks form. This makes the cream thick and rich.
3. Now, gently fold the whipped cream into the lemon curd. Make sure to be careful so you don’t deflate the mixture.
Assembling the tarts
1. Remove the chilled crusts from the refrigerator. Fill each tart shell with the lemon curd mixture.
2. Use a spatula to smooth the top of each tart. This gives a nice finish.
3. After filling, return the tarts to the refrigerator. Chill for at least 2 hours so the filling can set.
This process gives you a zesty treat that’s both easy and refreshing. Enjoy each layer of flavor when you take a bite!
Tips & Tricks
Achieving the perfect crust
To make a great crust, press the graham cracker mix firmly. Use your fingers or a flat object to pack it down. This helps the crust hold together. Make sure you press it against the sides too.
Chill the crust for at least 30 minutes. This cool time makes it firm. A well-chilled crust stays intact when you fill it.
Whipping cream tips
For the best whipped cream, start with cold tools. Chill your bowl and beaters before you begin. This keeps the cream cold and helps it whip faster.
Whip the cream until you see soft peaks first. Then add sugar and lemon zest. Continue whipping until you see stiff peaks. Be gentle when folding the whipped cream into the lemon curd. This keeps it light and airy.
Serving suggestions
For a fun presentation, arrange the tarts on a bright platter. Sprinkle extra lemon zest on top for color. Add a dollop of whipped cream on the side for a treat.
You can also pair these tarts with fresh berries. Strawberries or blueberries work well. Their sweetness complements the tart lemon flavor nicely.
Pro Tips
- Use Fresh Lemons: For the best flavor, always use fresh lemons to make your lemon curd. The zest and juice from fresh lemons provide a vibrant taste that enhances the tarts.
- Chill the Crust: Be sure to chill the graham cracker crust before adding the filling. This helps the crust hold its shape and prevents it from becoming soggy.
- Whip Cream to Stiff Peaks: When whipping the cream, ensure you reach stiff peaks. This will give your filling a light and airy texture, making the tarts even more delightful.
- Garnish for Presentation: Don’t skip the garnish! Fresh mint leaves and a sprinkle of lemon zest not only enhance the visual appeal but add a refreshing touch to each bite.
Variations
Flavor customizations
You can add fun twists to your lemon curd tarts. One great idea is to mix in fruit purees. Fruits like strawberries or raspberries pair well with lemon. Just fold the puree into the lemon curd for a burst of flavor.
Another option is to use flavored whipped cream. You can try vanilla or almond extract to change the taste. Just add a few drops when whipping the cream. This adds a unique twist to your tarts.
Dietary alternatives
If you need gluten-free options, use almond flour instead of graham cracker crumbs. Mix it with melted butter and powdered sugar for a tasty crust. It’s simple and just as delicious.
For a vegan version, substitute the heavy cream with coconut cream. You can also use a plant-based lemon curd. This way, everyone can enjoy these zesty tarts.
Serving style variations
You can make your tarts in different sizes. Mini tarts are perfect for parties. They’re cute and easy to grab. Large tarts work great for sharing at family gatherings.
Using different molds can also change how your tarts look. Try heart-shaped or star-shaped molds for a fun touch. It makes your dessert more exciting and special for any occasion.
Storage Info
Best storage practices
To keep your zesty no-bake lemon curd tarts fresh, store them in the refrigerator. Place the tarts in an airtight container. This will help keep them from drying out. Make sure to eat them within three days for the best taste.
You can also freeze these tarts if you want to save them for later. Wrap each tart tightly in plastic wrap, then place them in a freezer-safe bag. They can last up to two months in the freezer. When you're ready to eat them, thaw them in the refrigerator overnight.
Shelf life
These delightful tarts stay fresh for about 3 days in the fridge. After that, the flavor and texture may change. Watch for signs of spoilage, such as a change in color or a sour smell. If you see any mold, it's best to throw them away. Enjoy your zesty no-bake lemon curd tarts while they are still at their best!
FAQs
Can I use store-bought lemon curd?
Yes, you can use store-bought lemon curd. It saves time and effort. Store-bought curd can be very tasty. However, homemade lemon curd can taste fresher. You can control the sweetness and tang in homemade versions. If you are short on time, store-bought is a great choice.
How long do these tarts take to set?
These tarts need at least 2 hours to set in the fridge. This time allows the filling to firm up. The longer you chill them, the better they taste. You can prepare them ahead of time and enjoy later. Just make sure to keep them cold until serving.
Can I use a different crust?
Absolutely! You can try different crusts for your tarts. A cookie crust made from Oreos adds a rich flavor. You could also use a nut crust for a gluten-free option. If you want something crunchier, a shortbread crust works well too. Choose what you love best!
You learned how to make tasty lemon tarts from scratch. We covered the main parts, starting with the crust and filling. I shared tips for a perfect texture and ideas for fun flavor twists. You also discovered ways to store them for later use. Tarts can be mini or large, gluten-free or vegan. Keep experimenting with your lemon tarts. They’re fun to make and delicious to eat! Enjoy the process and share your tasty creations with others!