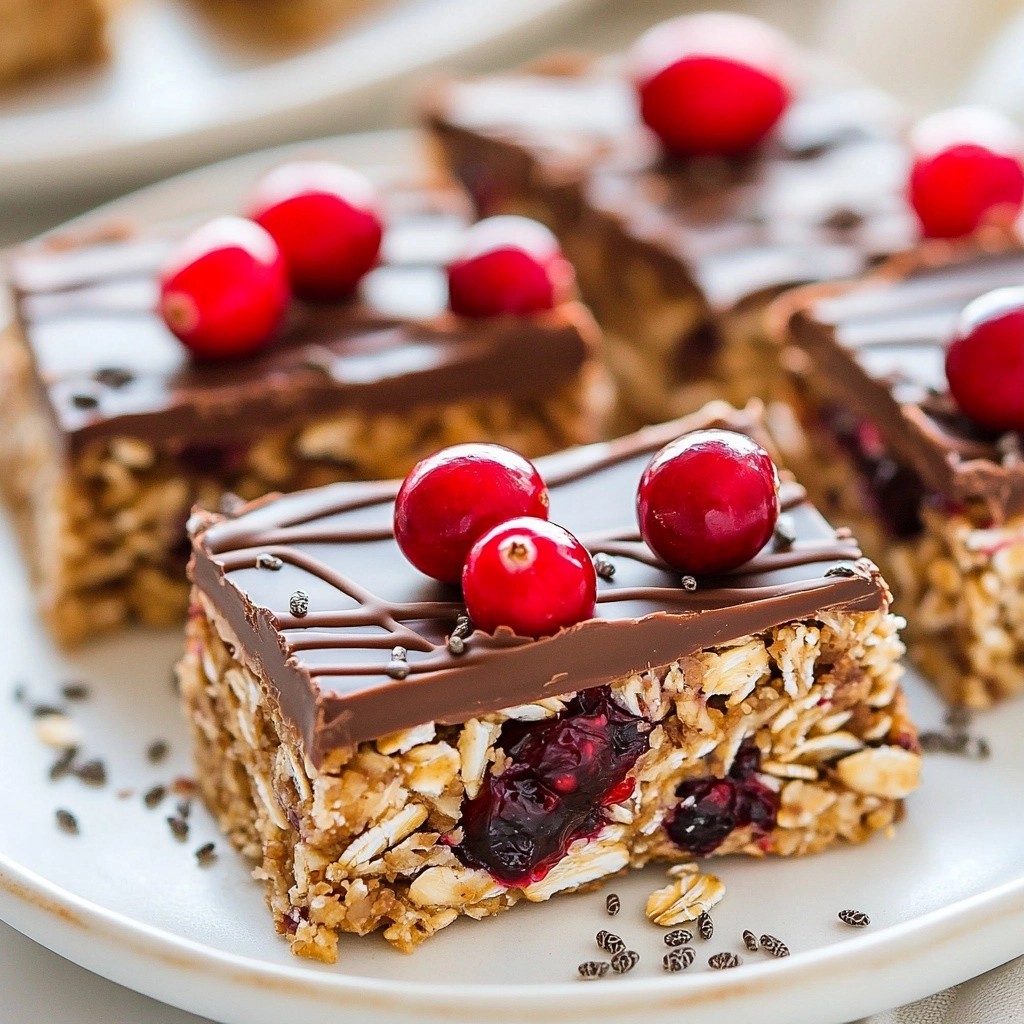
Looking for a delicious snack that’s quick and easy? My Chewy No-Bake Cranberry Chocolate Oat Bars are just what you need! These tasty treats combine oats, almond butter, and sweet cranberries with a rich touch of chocolate. Best of all, you won’t need an oven. Just follow my simple steps to create a nutritious bar that satisfies your cravings. Let’s dive into this fun recipe together!
Why I Love This Recipe
- Easy to Make: This recipe requires no baking, making it a quick and hassle-free option for a healthy snack or dessert.
- Nutritious Ingredients: Packed with fiber and protein from oats, nut butter, and seeds, these bars are not only delicious but also good for you.
- Customizable: You can easily swap out ingredients based on your preferences or what you have in your pantry, making them versatile.
- Perfect for On-the-Go: These bars are great for busy days, providing a quick energy boost that you can take anywhere.
Ingredients
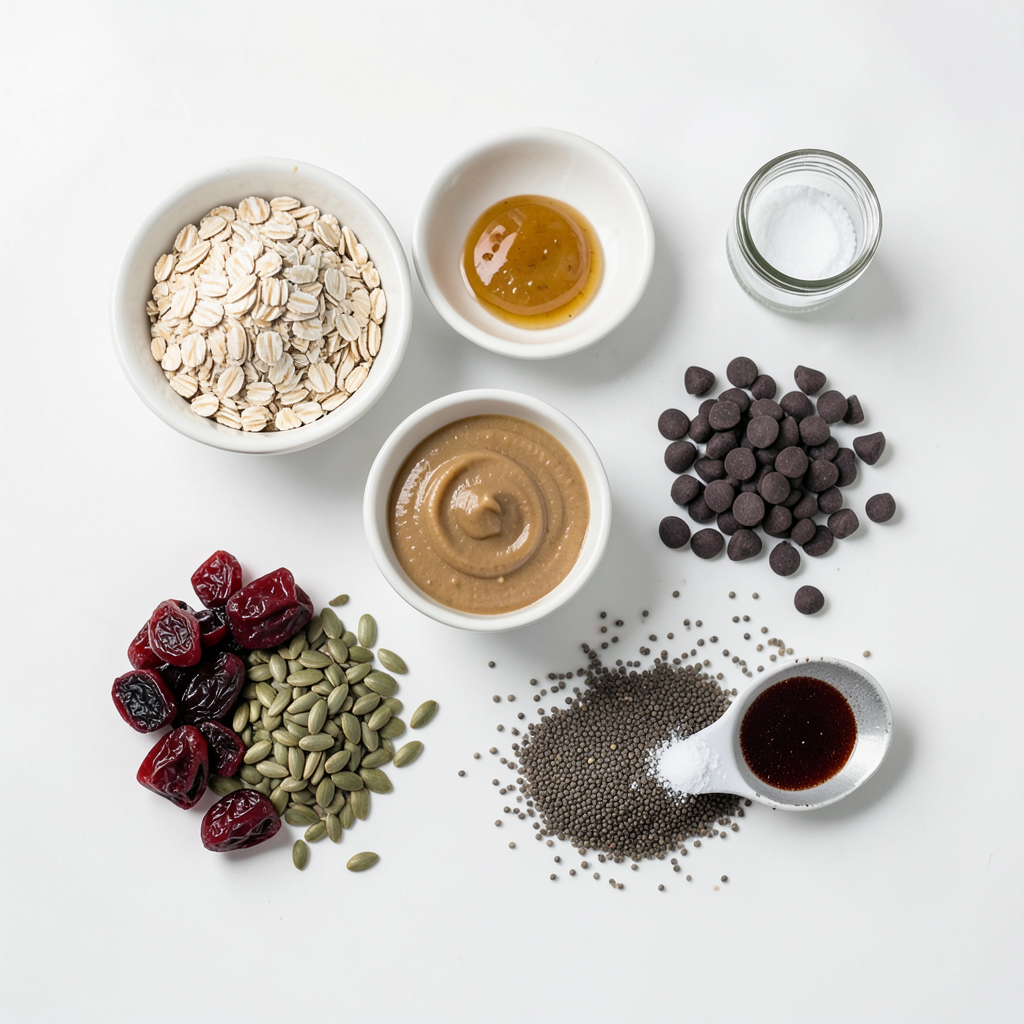
To make Chewy No-Bake Cranberry Chocolate Oat Bars, you will need a few simple ingredients. Here’s the list:
- 2 cups rolled oats
- 1 cup almond butter (or peanut butter)
- 1/2 cup honey (or maple syrup for a vegan option)
- 1/2 cup dried cranberries, roughly chopped
- 1/2 cup dark chocolate chips
- 1/4 cup sunflower seeds
- 1/4 cup chia seeds
- 1/2 teaspoon vanilla extract
- A pinch of salt
Measurement of Ingredients
- Rolled oats, almond butter, honey/maple syrup: Rolled oats form the base of these bars. They give a chewy texture. Almond butter adds richness and binds the bars. Honey or maple syrup sweetens and helps with stickiness.
- Dried cranberries, dark chocolate chips, sunflower seeds, chia seeds: Dried cranberries add a tart flavor. Dark chocolate chips bring sweetness and richness. Sunflower seeds add crunch and nutrition. Chia seeds provide fiber and healthy fats.
- Vanilla extract, salt: Vanilla enhances the flavor, while a pinch of salt balances the sweetness.
Step-by-Step Instructions
Preparation
1. First, grab a large mixing bowl.
2. In this bowl, mix together 2 cups of rolled oats, 1/4 cup of sunflower seeds, and 1/4 cup of chia seeds. Stir well. This helps spread the seeds evenly.
3. Next, take a small saucepan and set it on low heat.
4. Add 1 cup of almond butter and 1/2 cup of honey (or maple syrup) to the saucepan.
5. Stir the mixture continuously for about 2-3 minutes until it warms and becomes smooth.
6. Remove the saucepan from the heat. Now, stir in 1/2 teaspoon of vanilla extract and a pinch of salt. Mix until it is well combined.
Combining Ingredients
1. Pour the warm almond butter mixture over the dry oat mixture.
2. Stir everything together until all the dry ingredients are fully coated.
3. Now, add 1/2 cup of chopped dried cranberries and 1/2 cup of dark chocolate chips.
4. Carefully fold these into the mixture until they are evenly spread throughout.
Setting and Slicing
1. Line an 8x8 inch (20x20 cm) baking dish with parchment paper. Let some paper hang over the sides. This makes it easy to lift the bars later.
2. Pour the mixture into the lined dish. Use a spatula or your clean hands to press it down firmly. This helps create an even layer.
3. Now, place the dish in the refrigerator. Let it chill for at least 1 hour. This helps the bars firm up.
4. Once the bars are set, lift them out of the pan using the parchment paper.
5. Slice them into squares or rectangles. Enjoy your chewy, no-bake cranberry chocolate oat bars!
Tips & Tricks
Perfecting Texture
To get the best texture for your chewy no-bake bars, focus on the mixture's consistency. You want a thick and sticky blend. It should hold together well when pressed into the pan. If it's too dry, add a bit more almond butter or honey. If it's too wet, mix in some oats.
Refrigeration is key for these bars. After you press the mixture into the dish, chill it for at least one hour. This helps the bars set properly. They become firmer and easier to cut. Don’t skip this step!
Serving Suggestions
For a great presentation, arrange the bars on a colorful plate. Drizzle extra melted dark chocolate over the top. This adds a fancy touch. You can also sprinkle whole cranberries or chia seeds on top for color.
When it comes to pairing, these bars go well with hot tea or cold milk. They also make a great snack with fresh fruit. Enjoy them at breakfast or as an afternoon treat.
Pro Tips
- Chill for Better Texture: Refrigerating the bars longer than 1 hour can improve their texture, making them even chewier and easier to slice.
- Customize Your Mix-ins: Feel free to swap out dried cranberries for other dried fruits like raisins or apricots, or add nuts for extra crunch.
- Use Natural Sweeteners: If you prefer a less sweet option, reduce the honey or maple syrup by a tablespoon or two and increase the nut butter for creaminess.
- Perfect Portion Control: For even bars, consider using a pizza cutter to slice the mixture after it’s chilled, ensuring uniform sizes for easy serving.
Variations
Ingredient Substitutions
You can swap nut butters in this recipe. Almond butter gives a nutty flavor, but peanut butter works well too. If you are allergic to nuts, try sunflower seed butter. It provides a similar texture without nuts.
For sweeteners, honey is a classic choice. It adds a nice touch of sweetness. Maple syrup offers a vegan option and adds unique flavor. Both options work well, so choose what you like best.
Flavor Additions
Feel free to get creative with mix-ins. You can add nuts, seeds, or dried fruits. Chopped walnuts or pecans give a crunchy texture. You can also try dried cherries or apricots for a fruity twist.
Spices can take these bars to the next level. A sprinkle of cinnamon adds warmth. Nutmeg offers a cozy flavor, too. You can adjust the amount to fit your taste.
Storage Information
Best Practices for Storage
To keep your chewy no-bake cranberry chocolate oat bars fresh, choose the right container. A glass or plastic container with a tight lid works well. You can also wrap the bars in plastic wrap for added freshness.
For short-term storage, just refrigerate the bars. They remain tasty and chewy in the fridge. If you want to store them for longer, freezing is a great option. Just make sure they are wrapped well to prevent freezer burn.
Shelf Life
In the fridge, these bars last about one week. To maintain freshness, keep them sealed tightly. If you freeze them, they can last up to three months. Just remember to thaw them in the fridge overnight before enjoying.
To keep the bars from getting hard, avoid leaving them out at room temperature for too long. The key is to keep them cool and sealed. This way, you can enjoy their chewy texture and delicious flavor longer.
FAQs
Common Questions
Can I use quick oats instead of rolled oats? Yes, you can use quick oats instead of rolled oats. Quick oats will make the bars softer and chewier. They absorb moisture faster, so the bars may not hold together as well. If you prefer a firmer texture, stick with rolled oats.
How can I make these bars vegan? To make these bars vegan, simply swap honey for maple syrup. Maple syrup is a great natural sweetener. It works well in this recipe and keeps everything plant-based. Additionally, ensure your chocolate chips are dairy-free.
Nutritional Information
Caloric content per bar Each bar has about 150 calories. This can vary based on the brand of ingredients you use. Always check the labels for exact numbers. These bars offer a good mix of energy and nutrients.
Health benefits of ingredients
- Rolled oats provide fiber, which aids digestion and keeps you full.
- Almond butter offers healthy fats and protein.
- Cranberries are rich in antioxidants and vitamins.
- Chia seeds add omega-3s and fiber, promoting heart health.
- Dark chocolate chips can boost mood and provide antioxidants.
These ingredients combine to create a tasty and healthy snack!
This blog covered how to make delicious snack bars using simple ingredients. We discussed measuring key components like oats and seeds, preparing the mixture, and achieving the right texture. I shared tips for serving and storage, plus ways to personalize your bars.
In the end, these bars are easy to make and fun to customize. With these steps, you can enjoy a healthy snack that fits your taste. Choose your ingredients, follow the guide, and enjoy!