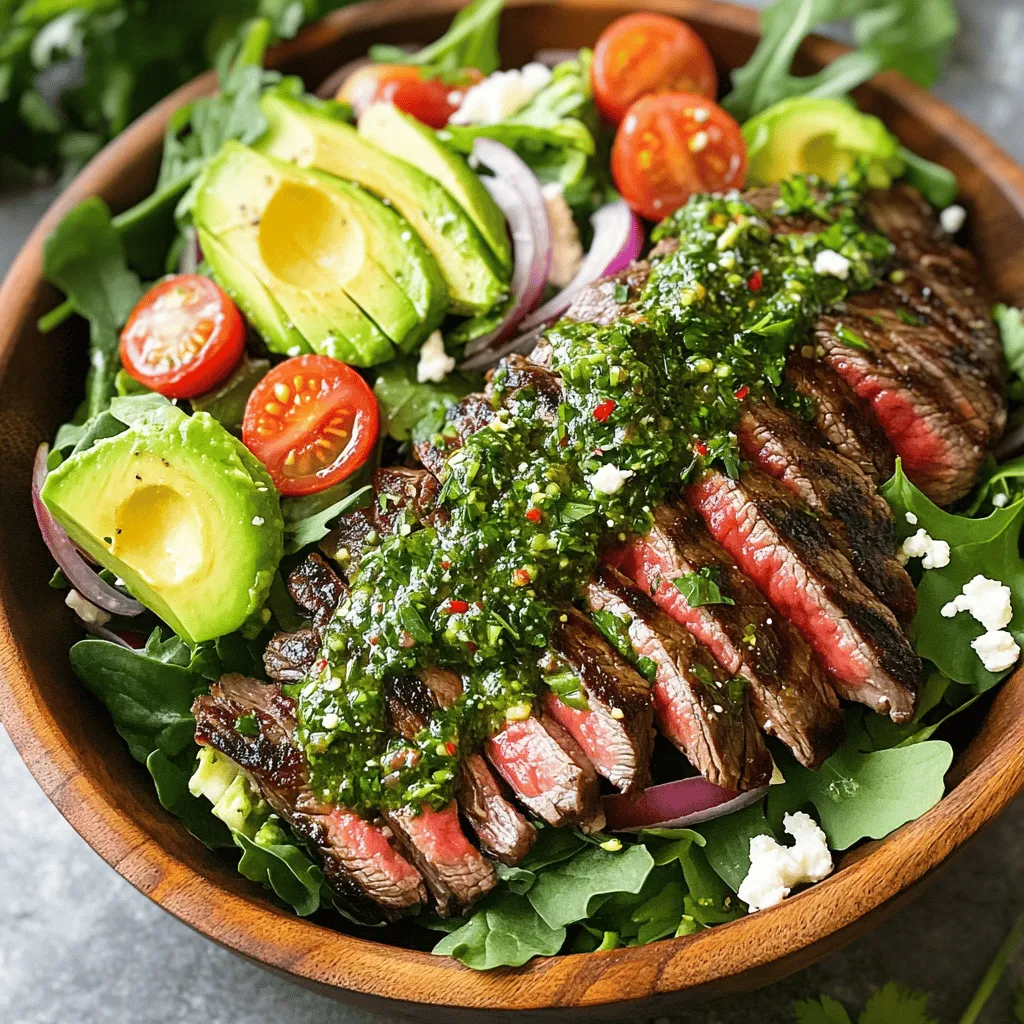
Chimichurri Steak Salad Fresh and Flavorful Meal
Looking for a fresh and flavorful meal? You’ve come to the right place! This Chimichurri Steak Salad combines juicy steak
Looking for a fresh and flavorful meal? You’ve come to the right place! This Chimichurri Steak Salad combines juicy steak
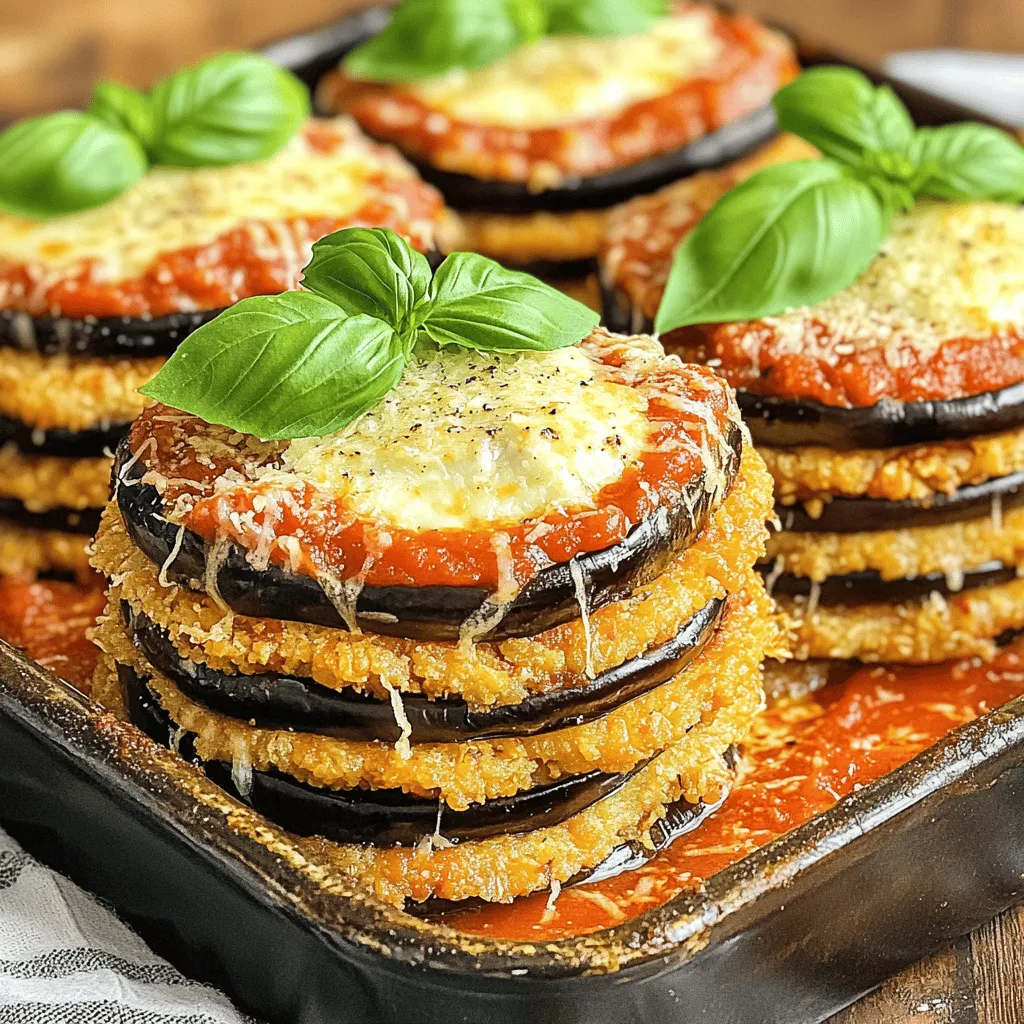
If you crave a dish that’s both tasty and easy to make, you’ll love Eggplant Parmesan Stacks. This fun twist
![To make Mango Black Bean Salsa, you need these simple ingredients: - 1 ripe mango, diced - 1 can black beans, rinsed and drained - 1 red bell pepper, finely chopped - 1/2 red onion, finely chopped - 1 jalapeño, seeded and minced - 1/4 cup fresh cilantro, chopped - Juice of 2 limes - 1 tablespoon olive oil - Salt and pepper to taste You can change this salsa to fit your taste. Here are some fun options: - Add corn for sweetness and crunch. - Use yellow or orange bell peppers for color. - Swap lime juice for lemon juice for a twist. - Add diced avocado for creaminess. - Use garlic for extra flavor. This salsa is not only tasty but also healthy. Here’s a quick look at the nutrition: - Calories: About 120 per serving - Protein: 5 grams - Carbohydrates: 25 grams - Fats: 3 grams - Fiber: 6 grams Mango Black Bean Salsa is fresh, vibrant, and packed with nutrients. It's a great choice for a snack or topping! For the full recipe, check out the [Full Recipe]. To start, gather your ingredients. You need a ripe mango, black beans, a red bell pepper, red onion, jalapeño, cilantro, lime juice, and olive oil. Make sure to rinse and drain the black beans. For the mango, peel and dice it into small pieces. Chop the bell pepper and onion finely. For a kick, remove the seeds from the jalapeño and mince it. This step helps control the heat. Fresh cilantro adds a nice touch, so chop it well too. Now, take a large mixing bowl. Add the diced mango, black beans, chopped red bell pepper, and red onion. Next, toss in the minced jalapeño and chopped cilantro. Drizzle the lime juice and olive oil over the mix. Use a spatula to gently toss everything together. Make sure all the flavors blend well. Season with salt and pepper to your taste. This is where you can adjust the flavor to your liking. Let the salsa sit at room temperature for at least 15 minutes. This resting time allows the flavors to meld. As the salsa sits, the lime juice and salt bring out the sweetness of the mango. The beans add creaminess, while the cilantro adds freshness. Stir the salsa gently before serving. This simple step makes a big difference. Serve it in a colorful bowl for a vibrant look. You can find the full recipe in the earlier sections. Enjoy! To keep your mango black bean salsa fresh, use ripe ingredients. A ripe mango should have a sweet smell and slight give when you press it. Always rinse your black beans well to remove extra salt and canning liquid. Store your salsa in an airtight container. This keeps it fresh for longer. One mistake is using unripe mango. It lacks sweetness and flavor. Another is not letting the salsa sit. Allowing it to rest helps the flavors mix well. Also, be careful with salt. Too much can overpower the fresh taste. Add a pinch of cumin for a warm touch. This spice pairs well with the beans. For a tangy kick, try a splash of vinegar. Fresh lime juice is key, but a bit of zest makes it pop. Lastly, taste as you go. Adjust the lime juice and salt until it feels just right. For more details on making this dish, check out the Full Recipe. {{image_2}} You can switch up the fruit in this salsa. Pineapple adds a sweet twist. Just chop it into small pieces like you do with mango. Avocado gives a creamy texture. Dice it and mix it in gently. Both options make this salsa even more fun and tasty. Want more heat? Add more jalapeño or try a serrano pepper. Dice it finely for a spicy kick. If you prefer less heat, leave out the jalapeño. You can also add a sweet kick with chopped bell pepper. Spice it according to your taste! This salsa shines in many roles. Use it as a dip with tortilla chips. It is great for parties or snacks. You can also top grilled fish or chicken with it. The fresh flavors really enhance the meal. I love adding it to tacos for a zesty touch. Try it with your favorite dishes and see how it brightens them up! For the full recipe, check out the [Full Recipe]. After enjoying your mango black bean salsa, you may have some left. Store it in an airtight container. This keeps the salsa fresh and tasty. You can put it in the fridge for up to three days. If you notice any changes in color or smell, it’s best to toss it out. You can freeze mango black bean salsa if you want to save it longer. First, place the salsa in a freezer-safe container. Leave some space at the top, as it will expand when frozen. It can last in the freezer for up to three months. When you’re ready to eat it, take it out and thaw it in the fridge overnight. After thawing, enjoy it within two days for the best taste. Mango black bean salsa is great fresh, but it does have a shelf life. In the fridge, it stays good for up to three days. If you freeze it, it can last for about three months. Always check for any signs of spoilage before eating. Enjoy this fresh and colorful dish while it's at its best! For the full recipe, check out the Mango Black Bean Fiesta Salsa. Yes, you can make Mango Black Bean Salsa ahead of time. It tastes even better after sitting for a bit. When you prepare it early, let the flavors blend. I recommend making it at least one hour before serving. Just store it in the fridge until you are ready to enjoy. You can serve Mango Black Bean Salsa in many fun ways. It pairs well with tortilla chips for a crunchy snack. You can also use it as a topping for grilled chicken or fish. Another great idea is to mix it into tacos or burritos. It adds a fresh and tasty twist to any meal. If you want to serve more people, simply double the ingredients. For example, use two ripe mangoes and two cans of black beans. You can keep the same ratios for all ingredients. This way, you ensure everyone enjoys this tasty salsa. Just remember to mix it in a bigger bowl to fit all the ingredients. For the full recipe, check out the recipe section above. This blog post covered the key ingredients and steps to make Mango Black Bean Salsa. You learned how to mix flavors and avoid common mistakes. Remember to customize your salsa with fruits and spices for your taste. Store leftovers properly to enjoy it later. Making this dish ahead saves time. Enjoy it as a dip or topping. Follow these tips to create a tasty salsa every time. Your kitchen adventures will impress friends and family!](https://lisadishes.com/wp-content/uploads/2025/07/550417e1-4d4d-465e-8b3e-d9a631fbc962.webp)
If you’re looking for a fresh and colorful dish, you’ve found it! This Mango Black Bean Salsa combines sweet mangoes
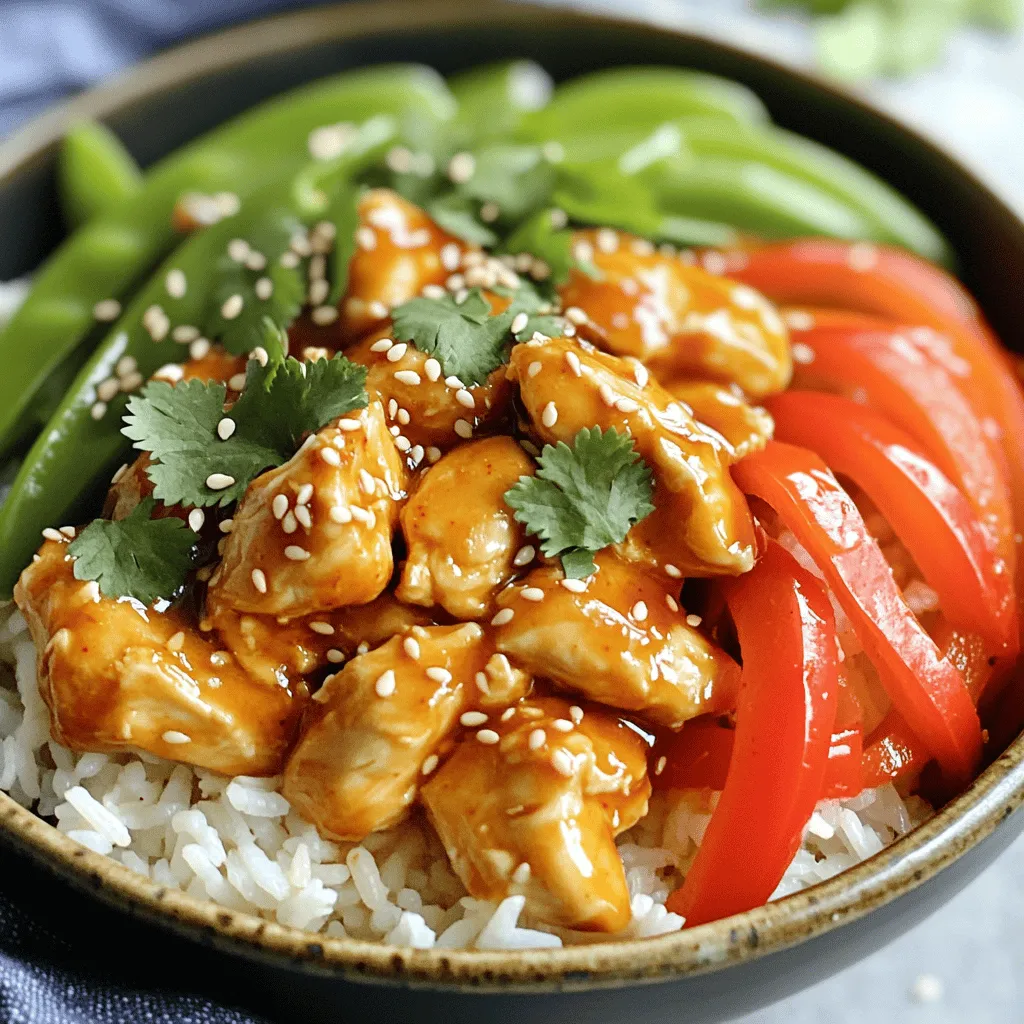
Looking for a quick and tasty dinner that will please everyone? Try my Sweet Chili Chicken Bowl! This meal is
![- 1 can (15 oz) chickpeas - 1 ripe avocado - 1 tablespoon lemon juice - 1 tablespoon tahini - 1 small red onion, finely chopped - 1 small cucumber, diced - 1/4 cup fresh cilantro, chopped - Salt and pepper to taste - 4 slices whole-grain bread - Lettuce leaves for garnish The main ingredients for this salad sandwich are simple yet tasty. First, you need one can of chickpeas. Rinse and drain them well. The chickpeas add protein and a nice texture. Next, grab one ripe avocado. Mash it with the chickpeas for creaminess and flavor. You also need some lemon juice and tahini to give a zesty and nutty taste. Chop one small red onion and one small cucumber for crunch. A bit of fresh cilantro adds a burst of freshness. Finish it off with salt and pepper for taste. Finally, use whole-grain bread for a healthy base and some crisp lettuce to top. This mix creates a delicious and filling sandwich that you will love. - Additional vegetables or herbs - Spices or seasoning variations You can customize your salad with optional add-ins. Feel free to add more veggies like bell peppers or carrots for extra crunch. Fresh herbs like dill or parsley can also boost the flavor. If you want a kick, try adding spices like paprika or chili powder. These changes keep the salad exciting and unique every time. - Mixing bowl - Fork - Knife - Cutting board To make this salad, you'll need a few tools. A mixing bowl is essential for mashing the chickpeas and avocado. Use a fork to get the right texture. A sharp knife will help you chop the veggies easily. Lastly, a cutting board keeps everything tidy and safe. Having these tools ready makes cooking smooth and fun. For the full recipe, you can check the details above. To start, take a medium bowl and your can of chickpeas. Drain and rinse them well. Then, use a fork to mash the chickpeas. Aim for a chunky texture; it adds a nice bite to the salad. Next, grab your ripe avocado. Peel it and remove the pit. Mash it into the bowl with the chickpeas until it blends well but still has some chunks. Now, we’ll add flavor! Pour in one tablespoon of lemon juice and one tablespoon of tahini. Mix these in well. They will give your salad a creamy texture and a zesty taste. It’s time to fold in our fresh ingredients. Add the finely chopped red onion, diced cucumber, and chopped cilantro. Stir everything together gently. Season with salt and pepper to taste. Your salad is ready! Now, let’s toast our whole-grain bread. Place the slices in a toaster or on a skillet over medium heat. You want them golden brown and crispy. This adds a great crunch to your sandwiches. Keep an eye on them to avoid burning. Toasting can take about 3-5 minutes. Flip or check them often for best results. Once the bread is toasted, it’s time to assemble! Take two slices of the warm bread. Spoon a generous portion of your avocado chickpea salad onto each slice. Spread it evenly for great flavor in every bite. Next, add fresh lettuce leaves on top of the salad. This adds a crisp texture. Finally, place the other two slices of toasted bread on top. Your sandwiches are now complete! If you want to enjoy them later, you can cut them in half and refrigerate for up to an hour. For the full recipe, check out the section above! To get the right texture for your avocado chickpea salad, mash the chickpeas and avocado together. Use a fork to create a chunky mix. You want it to be creamy but not too smooth. This gives your sandwich a nice bite. If you prefer more crunch, add diced cucumber or chopped nuts. These will make your salad fun to eat. To boost the taste of your salad, try adding spices. A pinch of garlic powder or cumin can add depth. Fresh herbs, like dill or parsley, also work well. They brighten up the salad. Don't forget the salt and pepper! These simple seasonings help all the flavors shine. Taste as you mix to find the perfect balance. How you present your sandwich matters. Serve it on a wooden cutting board for a rustic look. For color, add carrot sticks or a side of fresh fruit. You can also use a colorful plate to make your meal pop. Cutting the sandwich in half shows off the filling. It makes for a pretty, appetizing display. Follow the [Full Recipe] for more tips on making this dish. {{image_2}} You can easily make this sandwich vegan. Start by using plant-based mayonnaise instead of tahini. This swap keeps the creamy texture. If you want a tangy kick, add some pickles or relish. You can also replace whole-grain bread with any vegan bread. Just check the label to ensure it has no animal products. Want to spice things up? Try adding jalapeños for heat. You can also mix in sun-dried tomatoes for a Mediterranean twist. Fresh herbs like basil or dill add a bright flavor, too. For a herbed option, mix in some parsley or chives. These additions make the salad even more exciting. Pair your sandwich with crunchy carrot sticks or fresh fruit. They add color and texture to your meal. For drinks, a light iced tea or lemonade complements the salad well. Serving everything on a wooden cutting board enhances the rustic feel. You can also try it with a side of chips for some extra crunch. Each option makes your meal more fun! To keep your avocado chickpea salad fresh, place it in an airtight container. This helps prevent browning and keeps flavors strong. Store it in the fridge for up to three days. If you have leftover sandwiches, wrap them tightly in plastic wrap. This keeps the bread from getting too soggy. You can freeze the chickpea salad, but it may change the texture. To freeze, place the salad in a freezer-safe container. Leave some space at the top for expansion. It can last for about a month. When you’re ready to eat it, thaw it in the fridge overnight. To refresh the sandwich before serving, remove it from the fridge. Let it sit at room temperature for about 15 minutes. This helps bring back some flavor. If the bread feels dry, you can lightly toast it again. That will make it warm and crunchy. Enjoy your delicious meal! Check the Full Recipe if you need a reminder on how to make it. You can store Avocado Chickpea Salad Sandwiches in the fridge for up to three days. Make sure to keep them in an airtight container. The bread may get a bit soggy over time, so it's best to eat them fresh. If you plan to keep them longer, store the salad mix separately from the bread. This way, you can toast the bread just before serving for that perfect crunch. Yes, you can meal prep these sandwiches. Make the avocado chickpea salad ahead of time and store it in the fridge. This is great for busy lunches. I often prepare the salad on Sunday. I then pack it in small containers, so I’m ready for the week. Just remember to toast the bread when you’re ready to eat. This keeps everything fresh and tasty. These sandwiches pair well with many sides. Try serving them with: - Carrot sticks - Cucumber slices - Fresh fruit like apple or berries - A small side salad These options add crunch and nutrients to your meal. They also make your plate look colorful and fun! To make the recipe gluten-free, simply swap the whole-grain bread for gluten-free bread. Many stores offer a variety of gluten-free options. You can also use lettuce leaves as a wrap. This adds a fresh crunch while keeping the meal gluten-free. In this blog post, we covered how to make a delicious avocado chickpea salad sandwich. You learned about the main ingredients, optional add-ins, and the tools needed. I shared step-by-step instructions for preparation and toasting bread. We also discussed tips for perfecting texture, enhancing flavor, and presentation. You can easily customize this sandwich in many ways. Remember to store leftovers properly and enjoy this healthy recipe for lunch or snacks. Make it your own and have fun in the kitchen!](https://lisadishes.com/wp-content/uploads/2025/07/8785560b-f579-4766-a09e-0390cac2797e.webp)
Looking for a tasty and healthy lunch idea? Try my Avocado Chickpea Salad Sandwiches! They mix creamy avocado with protein-rich
![- 1 can (15 oz) chickpeas, drained and rinsed - 1 tablespoon olive oil - 1 teaspoon ground cumin - 1 teaspoon smoked paprika - ½ teaspoon garlic powder - ½ teaspoon onion powder - Salt and pepper to taste - 8 small corn or flour tortillas To make crispy chickpea tacos, start with the chickpeas. They create the base of your taco. Drain and rinse one 15 oz can of chickpeas. This step removes excess sodium and makes them clean. Next, toss them in a bowl with olive oil and spices. I love using ground cumin and smoked paprika for flavor. Garlic and onion powder add depth, while salt and pepper balance the taste. Now, let's talk about tortillas. Choose between corn or flour. They hold the crispy chickpeas and toppings well. Warm them up in a skillet for a few seconds. This makes them soft and easy to fold. - 1 ripe avocado, sliced - 1 cup shredded cabbage (green or purple) - ½ cup fresh cilantro, chopped - ½ cup salsa or pico de gallo Fresh toppings add color and taste. I love ripe avocado for creaminess. It contrasts nicely with the crispy chickpeas. Shredded cabbage adds crunch and freshness. You can use green or purple cabbage, based on your choice. Cilantro brightens up the dish and adds a hint of herbiness. Finally, a spoonful of salsa or pico de gallo brings tangy goodness. - Lime wedges - Alternate protein sources Extras can elevate your tacos even more. Lime wedges add zesty flavor. A squeeze of fresh lime juice on top is a must! If you want alternatives, consider other protein sources. Black beans or lentils work well if you need a change. These options keep the meal healthy and satisfying. For the full recipe, check the [Full Recipe]. First, preheat your oven to 425°F (220°C). Grab a baking sheet and line it with parchment paper. This helps with easy cleanup. Now, let’s season the chickpeas. In a mixing bowl, combine the drained chickpeas, olive oil, ground cumin, smoked paprika, garlic powder, onion powder, salt, and pepper. Toss everything together until the chickpeas are well coated. This step is key for flavor. Next, spread the seasoned chickpeas in a single layer on the prepared baking sheet. Make sure they are not crowded. This helps them get crispy. Roast the chickpeas in the oven for 20-25 minutes. Halfway through, shake the pan to ensure even cooking. You want them golden brown and crunchy. Keep an eye on them to avoid burning! While the chickpeas roast, prepare your tortillas. Warm them in a dry skillet over medium heat for about 30 seconds on each side. This makes them soft and easy to fold. Once the chickpeas are crispy, take them out and let them cool slightly. Now, it’s taco time! Place a generous spoonful of crispy chickpeas on each tortilla. Top with sliced avocado, shredded cabbage, and fresh cilantro. For the final touch, add a spoonful of salsa or pico de gallo and squeeze some fresh lime juice on top. Enjoy your tasty creation! For the complete recipe, check [Full Recipe]. To get crispy chickpeas, start with dry ones. After rinsing, pat them dry. Moisture makes them soft. Use a high heat, around 425°F (220°C). Spread them out on the baking sheet. This helps with even roasting. Shake the pan halfway through to cook all sides. Avoid overcrowding; it makes them steam instead of roast. Common mistakes include not drying the chickpeas well. Another mistake is using low heat. It takes longer and may not crisp them up. Lastly, don’t skip the oil; it helps with browning. Layer your tacos smartly. Start with chickpeas, then add avocado and cabbage. This keeps the toppings from sliding off. Place cilantro on top for a fresh burst of flavor. For extra zing, add salsa last. To make your tacos look great, use colorful ingredients. Mix green cabbage with purple for a pop. Use lime wedges on the side for a nice touch. These tacos can easily fit many diets. For vegans, they are already perfect. Just make sure your tortillas are also vegan. If you need gluten-free options, use corn tortillas. They hold up well and taste great too. You can also try lettuce wraps for a low-carb choice. {{image_2}} You can spice up your chickpeas in fun ways. Adding cayenne pepper gives them a nice kick. You can also mix in chili powder or smoked salt for extra flavor. Fresh herbs like parsley or basil can brighten the taste. Try adding lemon zest for a fresh touch. Mix and match these spices to find your favorite blend. Tortillas come in many types, and each brings its own charm. You can use corn tortillas for a classic taste or flour tortillas for a softer bite. For a twist, try lettuce wraps for a low-carb option. You can also fill your tacos with roasted veggies or black beans for added texture. Consider adding cheese or sour cream for creaminess. Pair your crispy chickpea tacos with tasty side dishes. A simple rice salad or guacamole works well. You can also enjoy them with a side of roasted sweet potatoes. For garnishes, try fresh jalapeños or pickled onions. A sprinkle of feta cheese adds a nice salty bite too. These little touches make your meal even better. For the full recipe, check out the Crispy Chickpea Tacos recipe above. To keep leftover chickpeas fresh, store them in an airtight container. Place them in the fridge. They will stay good for about 3 to 5 days. If you want to keep them longer, freeze them. Spread the chickpeas on a baking sheet and freeze them first. Once frozen, transfer them to a freezer-safe bag. They can last up to 3 months in the freezer. When you are ready to eat, reheat them in the oven for crispness. Set your oven to 400°F (200°C). Bake for about 10 minutes. This will help regain their crunch. You can also use an air fryer for quick reheating. Just cook them for about 5 minutes at 375°F (190°C). Assembled tacos are best eaten fresh. However, if you have leftovers, wrap them tightly in foil. Place them in the fridge to keep them fresh for up to 1 day. Keep in mind that the tortillas may get soggy. To avoid this, store the components separately. For the tortillas, place them in a sealed bag to keep them soft. Store toppings like avocado and cabbage in separate containers. This will help maintain their texture and flavor. Chickpeas can last for years if stored dry. Once you open a can, use them within 3 to 4 days. Fresh veggies like avocado should be used within a few days. Signs of spoilage include browning and mushiness. Check the cabbage and cilantro as well. They last about 5 to 7 days in the fridge. Always inspect for wilting or an off smell. Keeping track of these shelf lives will help you enjoy your crispy chickpea tacos to the fullest. For the full recipe, check out the other sections. You can easily make these tacos gluten-free by choosing the right tortillas. Look for corn tortillas, as they are naturally gluten-free. Some brands also offer gluten-free flour tortillas. Check the labels to ensure they meet your needs. Yes, you can prepare the chickpeas ahead of time. Store them in an airtight container in the fridge for up to three days. To reheat, spread them on a baking sheet and bake them at 350°F (175°C) for about 10 minutes. This keeps them crispy. If you want to switch things up, you can try other legumes. Black beans or lentils work well. You can also use shredded chicken or tofu for a different protein source. Each option adds its own flavor and texture. To spice things up, add hot sauce to your tacos. Sriracha or chipotle sauce are great choices. You can also sprinkle red pepper flakes on top. For a kick, mix jalapeños into your salsa or pico de gallo. Crispy chickpea tacos are easy and fun to make. Start with roasted chickpeas, tasty toppings, and fresh tortillas. Follow the steps we covered for perfect texture and flavor. Don't hesitate to play with spices and fillings to match your taste. Enjoy customizing each taco, whether you're vegan or gluten-free. With these simple tips for storage and reheating, your tacos can stay fresh. Now, get cooking and bring your friends together for a tasty meal!](https://lisadishes.com/wp-content/uploads/2025/07/e5d4f8ed-5327-4ada-bc8d-089f935798b7.webp)
Are you ready to spice up your taco night with a healthy twist? Crispy Chickpea Tacos are not just packed

Are you ready to transform your vegetable game? Roasted Brussels sprouts with balsamic glaze are here to steal the show!
![- 1 cup canned chickpeas, drained and rinsed - 4 cloves roasted garlic - 3 tablespoons tahini - 2 tablespoons lemon juice - 2 tablespoons olive oil, plus extra for drizzling - 1/2 teaspoon ground cumin - Salt to taste - Fresh parsley, for garnish - Paprika, for garnish - Food processor - Oven - Baking foil Getting the right ingredients is key to great roasted garlic hummus. I love using canned chickpeas because they are quick and easy. They provide a creamy base that blends well. Roasted garlic adds a sweet and rich flavor. It transforms the dish. To roast the garlic, I wrap it in foil and bake it until soft. Tahini is another must-have. It gives hummus a nutty taste and creamy texture. Fresh lemon juice brightens up the flavors. I always use fresh lemon juice instead of bottled. It makes a big difference. You can add olive oil for a smoother finish. Ground cumin adds warmth. Just a pinch of salt enhances all the flavors. For garnishing, I love using fresh parsley and a sprinkle of paprika. These add color and a hint of freshness. The tools are simple. A food processor makes blending easy. An oven is needed for roasting garlic. Baking foil helps keep the garlic moist while it cooks. Check out the Full Recipe for more details on how to make this delicious dish. First, you need to preheat the oven to 400°F (200°C). This step warms your kitchen and gets the garlic ready to roast. Next, slice the top off a whole head of garlic. Drizzle it with olive oil to add flavor. Then, wrap the garlic in foil to keep it moist. Roast it for about 30-35 minutes. You will know it’s done when the cloves feel soft and look caramelized. Once finished, let it cool for a bit. When cool enough to handle, squeeze the roasted cloves into a bowl. This will give your hummus a rich, sweet flavor. Now, it’s time to blend the hummus. In a food processor, combine the chickpeas, roasted garlic, tahini, lemon juice, olive oil, ground cumin, and a pinch of salt. Blend the mixture until it turns smooth. This should take about one minute. If you prefer a creamier hummus, keep blending. If it feels too thick, add water a little at a time. Blend again until you reach your desired consistency. You want it to be thick but still spreadable. After blending, taste your hummus. If it needs more flavor, add a little more salt or lemon juice. Blend again to mix in any additions. For serving, transfer the hummus to a nice bowl. Drizzle some olive oil on top. Then, sprinkle paprika and fresh parsley for a pop of color. This makes it look beautiful and adds extra flavor. For a great meal, serve the hummus with warm pita bread and crunchy veggie sticks like carrots and cucumbers. For the complete recipe, check out the [Full Recipe]. To make your roasted garlic hummus shine, you need to balance lemon juice and salt well. Start with the juice of one lemon. Taste your hummus, then add more if it needs a tang. Salt enhances the flavor, so sprinkle in a little at a time. Always taste as you go to get it just right. You can customize the garlic intensity based on your taste. If you love garlic, add an extra clove or two. If you prefer a milder flavor, use fewer cloves. Roasted garlic is sweet and nutty, so adjust until it feels perfect for you. For the best texture, adjust the consistency with water. If your hummus is thick, add water slowly. Blend after each addition, until you reach your desired creaminess. A smooth texture makes it easier to scoop up with pita or veggies. You can also include additional spices to enhance the flavor. For a kick, try adding cayenne pepper or smoked paprika. For freshness, mix in fresh herbs like cilantro or dill. These small changes can create exciting new flavors in your hummus. Serving suggestions can elevate your hummus. Place it in a shallow bowl for a beautiful look. Drizzle extra olive oil on top for shine and richness. Garnish with paprika and chopped parsley for a pop of color. For visual appeal, serve your hummus with warm pita bread and colorful veggie sticks like carrots, cucumbers, and bell peppers. The mix of colors makes it inviting. This makes your dish not just tasty but also a feast for the eyes! Refer to the [Full Recipe] for detailed steps on making this delicious hummus. {{image_2}} You can spice up your roasted garlic hummus with different flavors. For a kick, try adding red pepper flakes or jalapeños. This gives the hummus a nice heat. You can also blend in herbs like basil or cilantro for fresh notes. These herbed variations add depth and richness to the dish. If you need a nut-free option, sunflower seed tahini works well. It has a similar creamy texture. You can also use white beans instead of chickpeas. Cannellini or navy beans make great substitutes. They offer a different flavor but keep the hummus smooth. This hummus is naturally gluten-free and vegan-friendly. It fits many diets. You can serve it with gluten-free pita or veggie sticks. For a vegan twist, use agave syrup instead of honey in any dips. This keeps everything plant-based and delicious. For the Full Recipe, refer to the earlier section. To keep your roasted garlic hummus fresh, store it in airtight containers. This helps prevent spoilage. Place the hummus in the fridge as soon as you're done enjoying it. When stored properly, roasted garlic hummus lasts about five to seven days in the fridge. Always check for any off smells or changes in texture before eating. If you want to save some hummus for later, freezing is a great option. Portion it into small containers or freezer bags. This way, you can thaw only what you need. Roasted garlic hummus can stay good in the freezer for up to three months. When you are ready to eat it, simply place it in the fridge overnight to thaw. For a quicker method, you can use the microwave. Reheat in short bursts, stirring in between, until warm. Remember to taste and adjust the seasoning after thawing, as flavors may change slightly. To make roasted garlic hummus, follow these basic steps: 1. Roast the Garlic: Preheat your oven to 400°F (200°C). Cut the top off a head of garlic, drizzle with olive oil, and wrap it in foil. Roast for 30-35 minutes until soft. 2. Blend Ingredients: In a food processor, mix drained chickpeas, roasted garlic, tahini, lemon juice, olive oil, ground cumin, and salt. Blend until smooth. 3. Adjust Consistency: If the hummus is thick, add water one tablespoon at a time while blending. 4. Taste and Adjust: Taste your hummus and adjust the salt or lemon juice as needed. 5. Serve: Transfer to a bowl, drizzle olive oil on top, and garnish with paprika and parsley. For the full recipe, check the details above. The best pairings for roasted garlic hummus are: - Warm pita bread - Fresh veggie sticks like carrots, cucumbers, and bell peppers - Crackers or chips - Toasted bread slices This hummus makes a great dip for any of these options. Roasted garlic can last in the fridge for about one week. Store it in an airtight container to keep it fresh. You can also freeze it for up to three months. You can use raw garlic, but it will taste very different. Raw garlic adds a sharp bite, while roasted garlic is sweet and nutty. If using raw, start with one clove and adjust to your taste. Roasted garlic hummus is healthy and packed with nutrients. It contains protein from chickpeas, healthy fats from olive oil, and vitamins from garlic and lemon juice. A typical serving has about 100 calories, making it a nutritious snack option. You can find roasted garlic hummus at most grocery stores. Look for brands like Sabra or Tribe. Some local markets may also offer fresh, homemade versions. This post covered everything you need to know about making roasted garlic hummus. We discussed key ingredients, tools, and step-by-step instructions for the best results. I shared tips for perfecting flavor and texture, plus variations for different diets. Remember to store hummus correctly for freshness. With this knowledge, you can now make your own delicious hummus from scratch. Enjoy experimenting with flavors and impress your friends with your culinary skills!](https://lisadishes.com/wp-content/uploads/2025/07/25e969f9-f38b-460a-8d06-5add66795a72.webp)
Welcome to your new favorite snack—Roasted Garlic Hummus! This creamy, flavorful treat is both easy to make and perfect for
![To make these tasty energy bites, gather the following: - 1 cup rolled oats - 1/2 cup pumpkin puree - 1/4 cup almond butter (or peanut butter) - 1/4 cup honey or maple syrup - 1/2 teaspoon ground cinnamon - 1/2 teaspoon ground ginger - 1/4 teaspoon nutmeg - 1/4 teaspoon salt - 1/4 cup mini chocolate chips (optional) - 1/4 cup chopped nuts (such as walnuts or pecans, optional) You can personalize your energy bites easily. Here are some add-ins to consider: - Seeds: Add chia seeds or flaxseeds for extra nutrition. - Dried fruit: Try cranberries or raisins for a sweet touch. - Protein powder: Boost your bites with your favorite protein powder. - Coconut flakes: Add unsweetened coconut for a tropical vibe. These options let you tailor the bites to your taste and needs. Each ingredient in these energy bites offers health benefits: - Rolled oats: These provide fiber and energy. They help keep you full. - Pumpkin puree: Rich in vitamins A and C. It's low in calories but high in flavor. - Almond butter: This nut butter is a good source of healthy fats and protein. - Honey or maple syrup: Natural sweeteners that offer quick energy. - Spices (cinnamon, ginger, nutmeg): These add flavor and have anti-inflammatory properties. - Salt: A small amount helps balance the sweetness. - Chocolate chips and nuts: These can add a fun texture and extra nutrients. Each bite is not just tasty but also packed with good stuff! For the full recipe, refer to the earlier section. To make pumpkin spice energy bites, start by gathering all your ingredients. You will need rolled oats, pumpkin puree, almond butter, and honey. These ingredients form the base of your bites. 1. In a large mixing bowl, combine 1 cup rolled oats, 1/2 cup pumpkin puree, 1/4 cup almond butter, and 1/4 cup honey or maple syrup. Stir well until everything blends nicely. 2. Next, add 1/2 teaspoon ground cinnamon, 1/2 teaspoon ground ginger, 1/4 teaspoon nutmeg, and 1/4 teaspoon salt. Mix until you see no dry spots. 3. If you like a little crunch, fold in 1/4 cup mini chocolate chips and 1/4 cup chopped nuts. This step is optional but fun! 4. Use your hands to form small balls, about 1 inch in size. This part can get a bit sticky, but it’s worth it. 5. Place the bites on a baking sheet lined with parchment paper. This helps with easy cleanup. 6. Chill them in the fridge for at least 30 minutes. This step helps the bites firm up. 7. Finally, transfer your energy bites to an airtight container for storage. - Step 1: A bowl filled with the mixed base ingredients. - Step 2: Close-up of the spices being added to the mixture. - Step 3: A hand folding in the chocolate chips and nuts. - Step 4: Hands rolling the mixture into small balls. - Step 5: Bites arranged neatly on the lined baking sheet. - Step 6: A fridge with the baking sheet inside. - Step 7: A well-sealed container filled with the finished energy bites. - Use fresh pumpkin puree for the best taste. Canned works too but check for added sugars. - Adjust the spices to your liking; some might prefer more cinnamon or ginger. - If the mix feels too dry, add a splash of water or more nut butter. - Let the bites chill longer if they are still soft after 30 minutes. - Experiment with different nut butters if you have allergies or preferences. These steps help you create tasty and healthy pumpkin spice energy bites. For the complete recipe, refer to the earlier section. Enjoy your cooking! To make the best pumpkin spice energy bites, follow these tips. Always use fresh ingredients. Check the date on your spices, as old spices lose flavor. Measure your ingredients carefully. This ensures the right texture and taste. Mix the wet ingredients first. This helps blend the flavors well. When you add the dry ingredients, stir slowly to avoid spills. Serving your energy bites can be fun! Place them on a colorful plate. You can even use cupcake liners for a cute touch. If you want to impress guests, drizzle some melted chocolate on top. It adds a nice look and taste. You can also sprinkle some extra cinnamon on top for added flavor. Serve them with a warm drink like tea or coffee for a cozy snack. To make sure your energy bites are firm, chill them well. After mixing, form the balls and place them on a baking sheet. Refrigerate them for at least 30 minutes. This step is key to getting the right texture. If they are too soft, you can add more oats. This will help them hold their shape better. If they still feel sticky, put them back in the fridge for a bit longer. For the full recipe, check out the complete instructions above. {{image_2}} You can play with flavors to make energy bites that suit your taste. Try adding cocoa powder for a chocolate twist. If you love fruit, mix in dried cranberries or raisins. For a tropical touch, add shredded coconut. You can also swap the pumpkin puree for sweet potato or banana to change the base flavor. These small changes keep your snacks fresh and fun. If you have allergies, it's easy to adjust the recipe. Use sunflower seed butter instead of almond or peanut butter if you're allergic to nuts. If you can’t have honey, maple syrup works great as a sweetener. For gluten-free bites, make sure to choose certified gluten-free oats. These swaps make the recipe safe and tasty for everyone. Serving energy bites can be fun, too! Try stacking them on a cute plate for a snack display. You can also roll them in crushed nuts or seeds for extra crunch. Pair them with yogurt or fresh fruit for a balanced snack. For a festive look, place them in small treat bags as gifts. These ideas make your energy bites look as good as they taste. For the complete recipe, check the [Full Recipe]. To keep your pumpkin spice energy bites fresh, place them in an airtight container. This helps lock in moisture and flavor. You can store them in the fridge for best results. Make sure to separate layers with parchment paper if stacking them. These energy bites last about one week in the fridge. If you want to store them longer, freeze them! They can stay fresh in the freezer for up to three months. Just make sure to wrap each bite in plastic wrap or foil before placing them in a freezer bag. This prevents freezer burn. Use glass or plastic containers with tight lids for storage. I prefer glass since it does not absorb odors. Choose a container that fits the number of bites you have. If you have a large batch, use multiple containers. This way, you can grab a few bites easily. For freezing, a good-quality freezer bag works well too. Pumpkin spice energy bites are small, no-bake snacks. They mix oats, pumpkin puree, and nut butter. These bites are sweet, warm, and packed with energy. They are great for busy days or as a quick treat. The blend of spices like cinnamon and nutmeg gives them a cozy flavor. You can make them easily at home with the Full Recipe provided. Yes, you can use different nut butter! Almond butter works well, but peanut butter is also good. If you have nut allergies, try sunflower seed butter or soy nut butter. Each type adds its own unique flavor. Just make sure the texture is similar to keep the bites firm. These energy bites last about one week in the fridge. Store them in an airtight container for best results. You can also freeze them for up to three months. When you want a bite, just take one out and enjoy! They are perfect for meal prep and snacking. You can find pre-made pumpkin spice energy bites at local health food stores. Some grocery stores may also carry them. Check the snack or health food aisle. Online options are available too, like on Amazon or specialty food sites. Just read the labels to ensure they match your taste. In this post, we explored the delightful world of Pumpkin Spice Energy Bites. We discussed key ingredients, how each adds nutrition, and step-by-step instructions for making them. You learned tips for a perfect texture, creative variations, and how to store your bites well. Remember, these energy bites are not just tasty; they pack a nutritious punch. Customize them to fit your palate or dietary needs. Enjoy making these bites and sharing them with friends. They will love the flavors and benefits!](https://lisadishes.com/wp-content/uploads/2025/07/e2bb5d11-2483-417c-a5a0-a34659a0e970.webp)
Looking for a tasty and healthy snack to fuel your day? This Pumpkin Spice Energy Bites recipe is your answer!
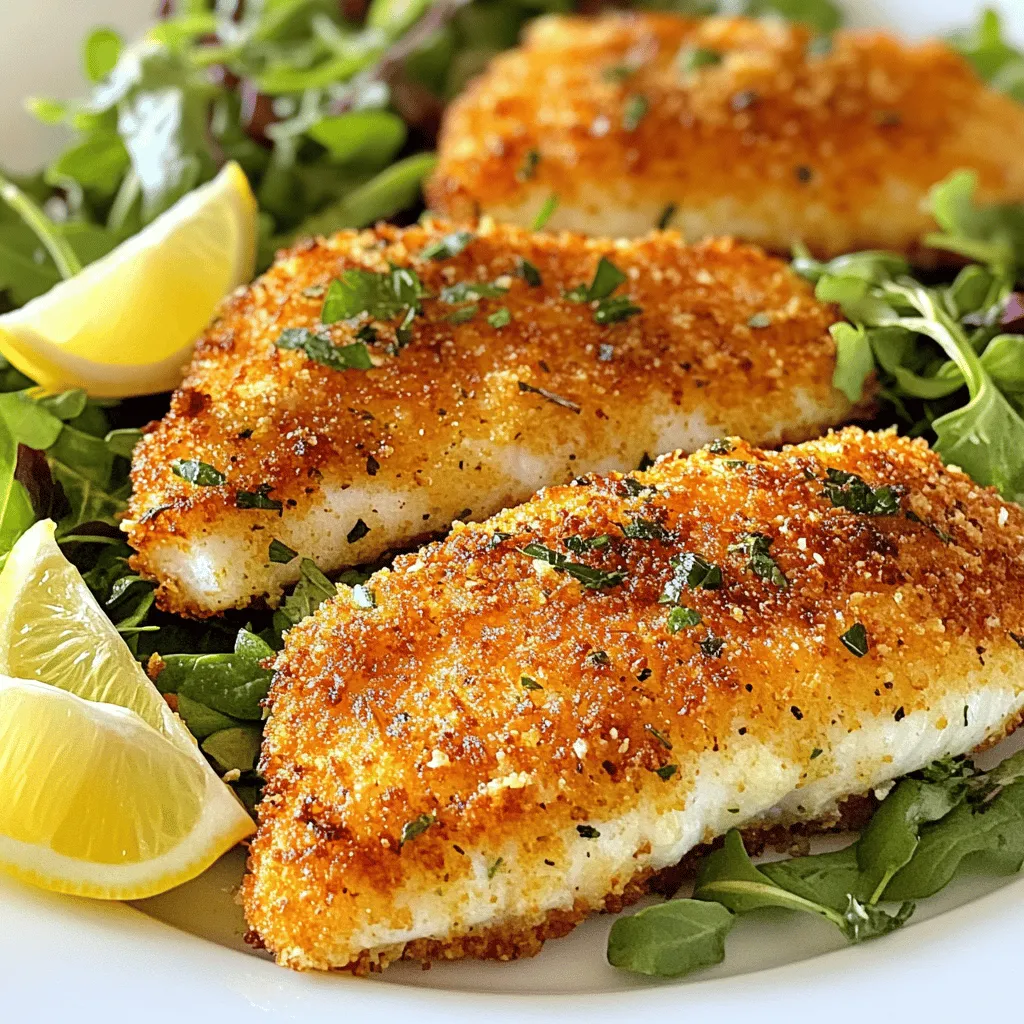
Are you ready to cook a meal that impresses without the fuss? My Parmesan Crusted Tilapia recipe is both flavorful
