Skip to content
DisclaimerTerms Of UseGDPR PolicyCookie Policy

Lisa Dishes

  • Home
  • Drinks
  • Appetizers
  • Dinner
  • Dessert
  • About
  • Contact
  • Privacy Policy
DisclaimerTerms Of UseGDPR PolicyCookie Policy

NO-ING-IMG

To make loaded veggie nachos, gather these tasty ingredients: - 1 bag of tortilla chips - 1 cup black beans, rinsed and drained - 1 cup corn (fresh or canned) - 1 large ripe avocado, diced - 1 large tomato, diced - 1 small red onion, finely chopped - 1 jalapeño, sliced (optional for spice) - 1 cup shredded cheddar cheese (or a dairy-free alternative) - 1 cup salsa - 1/2 cup sour cream (or yogurt for a lighter option) - Fresh cilantro, for garnish - Lime wedges, for serving - Salt and pepper to taste You can switch out some ingredients for a different taste. Here are some ideas: - Use tortilla strips instead of chips for a crunchier base. - Swap black beans for pinto beans or chickpeas for a twist. - Try grilled peppers or zucchini instead of corn for extra veggies. - Replace cheddar cheese with pepper jack for a spicy kick. - Use guacamole instead of diced avocado for creaminess. Using fresh, high-quality ingredients makes a big difference. Here are some tips: - Choose ripe avocados; they should be slightly soft. - Look for firm, bright tomatoes for the best flavor. - Use fresh herbs like cilantro for a bright taste. - Buy organic beans and corn for fewer chemicals. - Check the labels for low-sodium options. I encourage you to check out the Full Recipe for more details on making this fun dish! First, gather all your ingredients. You will need tortilla chips, black beans, corn, avocado, tomato, red onion, jalapeño, cheese, salsa, sour cream, cilantro, lime, salt, and pepper. 1. Preheat your oven to 375°F (190°C). This step helps melt the cheese well. 2. On a large baking sheet, spread out the tortilla chips evenly. Make sure they overlap as little as possible. 3. Add the black beans and corn on top of the chips. This makes a good base for your nachos. 4. Next, sprinkle the diced tomato, chopped red onion, and sliced jalapeño over the chips. If you like heat, add more jalapeño. 5. Finally, top it all with diced avocado and shredded cheese. The cheese is key for that gooey texture. Now it’s time to bake! 1. Place the baking sheet in the oven. Bake for about 10-12 minutes. You want the cheese to melt and bubble. 2. Keep an eye on them to avoid burning. Every oven is a little different. Once the cheese is melted, remove the nachos from the oven. Serving nachos is all about presentation. 1. Drizzle salsa over the top. This adds moisture and flavor. 2. Add dollops of sour cream for creaminess. A lighter yogurt is a great option, too. 3. Garnish with fresh cilantro. This gives a nice pop of color and flavor. 4. Season with salt and pepper to taste. You may want to serve lime wedges on the side for a zesty kick. For the full recipe, check out the detailed instructions above. Enjoy your loaded veggie nachos! To make the best loaded veggie nachos, follow a few simple steps. First, use fresh ingredients. Fresh veggies always taste better. Layer your toppings well. Start with chips, then beans, and finish with cheese. This helps the cheese melt evenly. Bake until the cheese is bubbly. Remove them fast to keep the chips crispy. Lastly, serve them hot for the best flavor. Many people make common mistakes with nachos. One big mistake is using too many toppings. This can make your nachos soggy. Another mistake is not heating the chips first. Cold chips don’t hold toppings well. Also, don’t forget to season your veggies. A pinch of salt will enhance their flavor. Lastly, avoid leaving nachos in the oven too long. You want melted cheese, not burnt chips. Want to take your nachos up a notch? Try adding some fun toppings. Fresh cilantro gives a nice herby taste. Squeeze fresh lime juice for a tangy kick. You can also mix in different cheeses. A smoky cheese adds depth to your dish. For heat, add more jalapeños or a spicy salsa. You can even top with pickled onions for a zesty touch. For the full recipe, check out the Loaded Veggie Nachos details above. {{image_2}} If you want a vegan twist, skip the cheese and sour cream. Use a dairy-free cheese alternative. You can also replace sour cream with cashew cream or non-dairy yogurt. These swaps keep the nachos creamy and delicious. Feel free to mix up the toppings! Here are some fun ideas: - Add sliced olives for a briny flavor. - Try roasted red peppers for a sweet twist. - Use pickled jalapeños for extra zing. - Sprinkle some green onions for freshness. - Toss in some fresh spinach for added nutrition. These toppings make your nachos unique every time! To adjust the heat, you can add more or less jalapeño. If you like it spicy, try using a hot salsa. For a milder taste, remove the seeds from the jalapeño. You can also add a dash of hot sauce before serving. Adjust these elements to fit your taste. Enjoy the heat your way! Storing leftover nachos is easy. First, let them cool. Then, place them in an airtight container. Make sure to cover them tightly. This helps keep them fresh. You can store them in the fridge for up to three days. Avoid stacking them too high to prevent sogginess. To reheat your nachos, use an oven or toaster oven. Preheat it to 350°F (175°C). Spread the nachos on a baking sheet. Heat for about 10 minutes. This will help them get crispy again. You can also use a microwave, but they will be softer. Heat in short bursts to avoid overheating. You can freeze nachos, but it is not the best method. The chips may lose their crunch. If you choose to freeze, place the nachos in a freezer-safe bag. Remove as much air as possible. They can last for one month. When ready to eat, thaw them in the fridge overnight and reheat. For more details on making this dish, check the Full Recipe. The best toppings add flavor and color. You can use: - Fresh jalapeños for heat - Sliced black olives for richness - Chopped green onions for crunch - Diced bell peppers for sweetness These toppings create a fun mix. They make each bite exciting! You can prep some parts ahead. Chop veggies and store them in the fridge. Do not bake the nachos until you are ready to eat. This keeps them crisp. Baking fresh nachos makes them taste great! To make nachos crispy, follow these tips: - Spread chips in a single layer - Bake them briefly before adding toppings - Use less cheese to avoid sogginess These steps help keep your nachos crunchy and delicious. Shredded cheddar cheese is a classic choice. It melts well and adds a nice flavor. You can also try pepper jack for a spicy kick. For a dairy-free option, use a plant-based cheese. To make nachos more filling, add protein-rich toppings like: - Black beans - Grilled chicken or beef - Quinoa for a twist These ingredients add substance and make nachos a complete meal. Yes, you can! Just use a grill-safe pan. Spread the chips and toppings. Grill on medium heat until the cheese melts. This adds a smoky flavor that is hard to beat! Store leftover nachos in an airtight container. Keep them in the fridge for up to two days. Reheat them in the oven for best results. This keeps them crispy, unlike the microwave. Yes, you can! Try pita chips, corn chips, or sweet potato chips. Each type adds a unique flavor. Experiment to find your favorite! The ideal serving size is about 1.5 to 2 cups per person. This amount allows everyone to enjoy without wasting food. Adjust based on your guests' appetite! You can find the full recipe for loaded veggie nachos in this article. Enjoy making this tasty dish! In this blog post, we explored the world of loaded veggie nachos. We covered essential ingredients, effective preparation steps, and baking techniques. I shared tips for perfecting your nachos and noted common mistakes to avoid. You can customize with various toppings or dietary options. Plus, I provided storage methods and answered frequently asked questions. With these insights, you can make delicious nachos that impress everyone. Enjoy creating your own tasty masterpiece!

Loaded Veggie Nachos Flavorful and Fun Dish

Get ready to dive into a world of taste with my Loaded Veggie Nachos! This dish is colorful, fun, and

To make Zucchini Noodle Alfredo, gather these fresh ingredients: - 4 medium zucchinis, spiralized - 1 cup cashews, soaked for at least 2 hours - 1 cup unsweetened almond milk - 1 garlic clove, minced - 2 tablespoons nutritional yeast - 1 tablespoon lemon juice - 1 teaspoon Italian seasoning - Salt and pepper to taste - 1 tablespoon olive oil - Fresh parsley, chopped (for garnish) Using fresh, high-quality ingredients makes a big difference in taste. When choosing zucchinis, look for firm ones with a shiny skin. Choose raw cashews, as they blend better. For the almond milk, pick unsweetened to control the flavor. Fresh garlic adds depth, while nutritional yeast gives a cheesy taste without dairy. This recipe is naturally vegan and gluten-free. If you want to replace cashews, try sunflower seeds for a nut-free option. For a creamier sauce, use coconut milk instead of almond milk. If you're not vegan, swap in cream or regular milk. Always check labels to ensure all ingredients meet your dietary needs. For the full recipe, click here. To make Zucchini Noodle Alfredo, follow these simple steps. First, spiralize the zucchinis to create noodles. You can use a spiralizer or a vegetable peeler. Once done, set the noodles aside. Next, gather your blender. Add the soaked cashews, almond milk, minced garlic, nutritional yeast, lemon juice, Italian seasoning, and a pinch of salt and pepper. Blend everything until it turns smooth and creamy. If the sauce is too thick, add more almond milk to reach the right texture. In a large skillet, heat olive oil over medium heat. Add the spiralized zucchini noodles and sauté them for about 3-4 minutes. You want them tender but still a bit firm. After that, pour the creamy cashew Alfredo sauce over the noodles. Stir gently to coat them evenly. Cook for an additional 2-3 minutes until the sauce is warm. Finally, taste the dish. You can adjust the seasoning with more salt or pepper if needed. Once everything is perfectly mixed and heated, transfer it to serving plates. Spiralizing zucchini can be easy with the right tools. Here are some tips to make it smoother: - Choose firm zucchinis: Look for firm, straight zucchinis. They spiralize better. - Trim ends: Cut off both ends of the zucchini before spiralizing. - Use a steady hand: Hold the zucchini firmly while spiralizing for even noodles. - Don’t force it: If the zucchini gets stuck, stop and adjust it instead of forcing it through. Timing is key for a great Zucchini Noodle Alfredo. Here’s how to get it just right: - Prep time: Aim for about 15 minutes to prepare your ingredients. - Cooking time: The total cooking time is around 30 minutes. - Watch the noodles: Sauté the zucchini just until tender, about 3-4 minutes. Overcooking will make them mushy. These steps and tips will help you create a creamy and flavorful Zucchini Noodle Alfredo that everyone will love. For the complete recipe, check the full recipe section. To make the best creamy Alfredo sauce, start with soaked cashews. Soaking softens them and helps create a smooth texture. Blend the cashews with unsweetened almond milk, garlic, and nutritional yeast. This mix gives a rich flavor without dairy. Use a high-speed blender for the creamiest sauce. Blend until it’s silky and smooth. If your sauce is too thick, add a little more almond milk. Always taste and adjust the seasoning. A little extra salt or pepper can make a big difference. One common mistake is overcooking the zucchini noodles. Cook them just until they are slightly tender and still firm. If you overcook, they can become mushy and watery. Another mistake is not blending the sauce long enough. Make sure to blend until it is completely smooth. If you see lumps, keep blending. Lastly, don't forget to taste your sauce! Adjusting flavors at the end is key to a great dish. You can boost the flavor of your Zucchini Noodle Alfredo with herbs and spices. Fresh basil or thyme adds a nice touch. Sprinkle in some red pepper flakes for heat. Consider adding lemon zest for a bright flavor. A bit of smoked paprika can bring a new depth. Experiment with your favorite herbs to make it your own. For a full recipe, check out the Zucchini Noodle Alfredo Delight 🥒. Enjoy creating this creamy and flavorful dish! {{image_2}} You can make a tasty vegan Zucchini Noodle Alfredo that everyone will enjoy. Instead of using cashews, try using silken tofu. It creates a creamy texture too. You can also add a splash of plant-based milk to make it smoother. For a fun twist, add a bit of smoked paprika. It gives a nice depth of flavor without any dairy. If you want to add protein to your dish, chicken or shrimp works great. Cook the chicken in olive oil until golden brown. For shrimp, sauté them in the same pan for just a few minutes. Toss your chosen protein into the Alfredo sauce. This step adds heartiness and makes the meal more filling. You can adjust the cooking time based on the protein you use. Zucchini noodles are naturally gluten-free, so you're already set! If you want more flavor, you can swap out the almond milk for coconut milk. It adds a hint of sweetness. You can also use gluten-free pasta if you prefer. Just make sure to follow the cooking instructions on the package. This way, you can enjoy all the creamy goodness without any gluten. For the full recipe, visit the provided link. To keep your Zucchini Noodle Alfredo fresh, you need the right storage. First, let the dish cool down. Then, transfer the leftovers to an airtight container. You can store it in the fridge for up to three days. If you expect to eat it later, consider separating the zucchini noodles from the sauce. This way, the noodles stay crisp. When you are ready to enjoy your leftovers, reheating is key. Use a skillet over medium heat for the best taste. Add a splash of almond milk to the sauce to help it rehydrate. Stir gently until it warms up. Avoid using the microwave, as it can make the noodles soggy. Freezing is a great option if you have extra portions. You can freeze the Alfredo sauce for up to two months. Pour it into a freezer-safe container and label it. For the zucchini noodles, I recommend freezing them uncooked. Place them in a single layer on a baking sheet until solid, then transfer to a freezer bag. When you are ready to use, thaw them in the fridge overnight before cooking. Try the full recipe to make this creamy and flavorful delight today! You can make zucchini noodles using a vegetable peeler. Just peel thin strips from the zucchini. Repeat until you have enough noodles. You can also use a box grater. Grate the zucchini into long strands. Both methods work well to create noodles. Yes, you can prepare Zucchini Noodle Alfredo ahead of time. Make the sauce and store it in the fridge. Keep the zucchini noodles raw until you are ready to eat. This keeps them crisp and fresh. You can combine them right before serving. Zucchini Noodle Alfredo pairs well with many dishes. Consider serving it with: - Grilled chicken or shrimp for added protein - A fresh green salad for crunch - Roasted cherry tomatoes for flavor - Garlic bread for a classic touch These sides add variety and balance to your meal. - Full Recipe Reference for Easy Access Zucchini Noodle Alfredo is a tasty, healthy dish. We covered the best ingredients, cooking steps, and tips. Quality matters, so choose fresh items. Remember to adjust the recipe for dietary needs. With practice, you can make tasty noodles and sauce. Store your leftovers well, so they stay fresh. You can easily reheat them later. Try the variations to keep meals exciting. Enjoy this dish for any occasion!

Zucchini Noodle Alfredo Creamy and Flavorful Delight

Zucchini Noodle Alfredo is a creamy and tasty dish that you can make at home. It’s a great choice if

- 2 ripe avocados - 4 slices of whole-grain bread - 1 small red onion, finely chopped - 1 small jalapeño, deseeded and minced - 1 clove of garlic, minced - Juice of 1 lime - Salt and black pepper, to taste - 1/4 cup feta cheese, crumbled - 1/4 cup fresh cilantro or parsley, chopped - Optional toppings: cherry tomatoes, radishes, or poached eggs To create a tasty smashed avocado toast, you need fresh ingredients. The key is ripe avocados. They should feel soft when you press them gently. Whole-grain bread adds a hearty base, giving your toast a nice crunch. Finely chopped red onion adds a sweet bite that balances the creaminess of the avocado. Next, for zing, add minced jalapeño. It gives a nice kick without being too spicy. The garlic adds depth, while lime juice brightens the mix. Don't forget to season with salt and black pepper for flavor. For garnishing, crumbled feta cheese adds creaminess and a bit of saltiness. Fresh cilantro or parsley gives a pop of color and freshness. Feel free to add optional toppings like cherry tomatoes or radishes for extra flavor and texture. You can even top with a poached egg for a protein boost. You can find the full recipe [here](#). Toast the whole-grain bread until golden brown. Use a toaster or a pan. Set the toasted bread aside. This gives it a nice crunch. Start by cutting the avocados in half. Remove the pit carefully. Scoop the flesh into a mixing bowl. Add minced garlic, chopped red onion, and minced jalapeño. Squeeze in the juice of one lime. Season with salt and black pepper. Mash the mixture with a fork. You can make it smooth or chunky—it's up to you! Taste it and adjust the seasoning if needed. Spread the avocado mixture generously onto each slice of toasted bread. Add crumbled feta cheese on top. Sprinkle with chopped cilantro or parsley for freshness. You can also get creative with toppings! Try cherry tomatoes, radishes, or even a poached egg for extra flavor. Enjoy your simple yet delicious smashed avocado toast! For a complete guide, check out the Full Recipe. To get the right texture for your smashed avocado, use a fork to mash. For a smooth mix, mash until creamy with no lumps. If you like it chunkier, mash less. Keep the skin and pit of the avocado to help it stay fresh longer. Fresh avocados make a big difference in taste. Look for ripe ones that yield slightly when pressed. Add a pinch of salt and pepper to boost flavor. You can also try red pepper flakes for heat. A sprinkle of cumin or smoked paprika adds depth. For a twist, mix in a splash of balsamic vinegar. Pair your toast with toppings like sliced cherry tomatoes or a poached egg for extra flavor. Fresh herbs like basil or dill brighten your dish. For a stunning plate, stack your toast on a wooden board. Add a colorful side salad or sliced fruit. Use a fork to create swirls when spreading avocado. Top with crumbled feta, herbs, or nuts for texture. A drizzle of olive oil or balsamic glaze adds shine and flavor. With these tips, your smashed avocado toast will look as good as it tastes. For the full recipe, check out the [Full Recipe]. {{image_2}} Smashed avocado toast is tasty on its own, but toppings make it even better. One popular choice is sliced cherry tomatoes. They add a sweet burst of flavor. Just slice them in half and sprinkle them on top. Another great option is radishes. To prepare them, wash and slice thinly. Their crunch adds texture, and they pair well with avocado. You can also sprinkle a little salt to enhance their taste. For a heartier meal, add protein. Poached or fried eggs work well. They add creaminess and a rich taste. To poach an egg, simmer water and add a little vinegar. Crack the egg in, and cook for three to four minutes. You can also try smoked salmon or bacon. Both give a savory flavor. Lay a few slices of smoked salmon on top for a gourmet feel. If you prefer bacon, cook it crispy and crumble it over the toast. If you're vegan, don't worry! You can still enjoy this dish. Skip the feta cheese and use a sprinkle of nutritional yeast instead. It gives a similar flavor without dairy. For those needing gluten-free options, choose gluten-free bread. Many brands offer tasty choices that hold up well with avocado. Just toast them like you would with regular bread, and enjoy your delicious meal. This recipe is all about personal taste. You can mix and match toppings to create the perfect smashed avocado toast. Check out the Full Recipe for more ideas! To store avocados, keep them whole until you're ready to use them. Once cut, squeeze lime juice on the flesh. This helps keep them green. Wrap the avocado tightly in plastic wrap or put it in an airtight container. You can store it in the fridge for one day. For leftover smashed avocado, keep it in a container with a lid. Press plastic wrap directly on the surface to reduce air exposure. It should last for up to two days in the fridge. To keep bread fresh before toasting, store it in a cool, dry place. Use a bread box or a paper bag. Avoid plastic bags as they trap moisture. If you have leftover toasted bread, reheat it in the oven or toaster. This makes it crispy again. Aim for about 5 minutes at 350°F (175°C). You can make the smashed avocado mixture ahead of time. Just store it in the fridge as mentioned before. When you are ready to eat, toast your bread and assemble it. For meal prepping, consider portioning the avocado mixture in small containers. This makes it easy to grab and go. Perfect for quick breakfasts or snacks! To keep your avocado fresh, use lime juice. The acid in lime slows browning. Always cover the avocado tightly if you have leftovers. You can also place it in an airtight container. Try pressing plastic wrap directly onto the surface of the avocado. This minimizes air exposure. Yes, you can use many types of bread. Whole-grain bread adds fiber and taste. Sourdough gives a nice tang. Gluten-free bread is also great for those who need it. Choose bread with a firm texture to hold toppings well. Healthy toppings boost the toast's nutrition. Consider adding sliced radishes for crunch. Cherry tomatoes add sweetness and color. A sprinkle of hemp seeds or chia seeds can add protein. You can also use microgreens for extra vitamins. Yes, Smashed Avocado Toast is vegan if you skip the feta cheese. Avocados are plant-based, making this dish suitable for vegans. You can use vegan cheese if you want a cheesy flavor without dairy. You can add protein in many ways. Top with a poached egg for a creamy texture. Sliced smoked salmon is also great. For a plant-based option, try chickpeas or black beans. These options enhance flavor and add nutrition. For the complete recipe, check out the Full Recipe. Smashed avocado toast is simple, tasty, and healthy. We explored the key ingredients, like ripe avocados and whole-grain bread. You learned how to prepare the bread, create the avocado mix, and assemble your dish for the perfect meal. Final thoughts: This toast is versatile with endless topping ideas. You can make it your own! Enjoy trying different flavors and combinations. Your breakfast, snack, or lunch will shine. Happy toasting!

Smashed Avocado Toast Easy Flavor-Packed Recipe

If you’re looking to elevate your meals with a trendy dish that’s both quick and delicious, look no further than

- 4 cups seedless watermelon, cubed - 1 cup feta cheese, crumbled - 1 small red onion, thinly sliced - 1/4 cup fresh mint leaves, chopped You will find that using seedless watermelon makes this salad easy to enjoy. Its sweet and juicy cubes give a refreshing bite with every forkful. Feta cheese adds a creamy texture and salty taste, which contrasts perfectly with the sweet watermelon. The red onion gives a slight crunch and a zingy flavor. Fresh mint leaves bring a burst of herbal freshness, making every bite feel like summer. - 2 tablespoons balsamic reduction - 2 tablespoons olive oil - Salt and pepper to taste The dressing is simple but elevates the dish. Balsamic reduction adds a sweet and tangy kick. Olive oil brings a smooth richness that ties everything together. A pinch of salt and pepper enhances the flavors without overpowering them. This balance is key to a perfect Fresh Watermelon Feta Salad, so don’t skip it! For the full recipe, check out the steps later. Enjoy creating this vibrant salad that makes summer meals feel special! Cubing the watermelon Start by choosing a ripe seedless watermelon. Cut it in half, then slice each half into wedges. Remove the rind and cube the flesh into bite-sized pieces. Aim for uniform cubes, as this helps with even mixing later on. Slicing the red onion Next, take a small red onion. Peel the outer layer and cut off the ends. Slice it thinly, aiming for even pieces. This will add a nice crunch and a bit of sharpness to the salad. Combining ingredients in a mixing bowl In a large mixing bowl, combine the cubed watermelon, crumbled feta cheese, and sliced red onion. Gently toss these ingredients to keep the feta from breaking apart too much. You want each bite to have a bit of everything for the best flavor. Drizzling the dressing and tossing the salad Now, in a small bowl, whisk together the balsamic reduction and olive oil until they blend well. Drizzle this mixture over the salad. Season with salt and pepper to taste. Toss everything gently to coat the ingredients evenly. This step brings all the flavors together. Allowing flavors to meld Let the salad sit for about 5 to 10 minutes. This resting time allows the flavors to meld, making each bite even tastier. The juices from the watermelon will mix with the dressing, creating a light sauce. Serving temperature options You can serve this salad chilled or at room temperature. Both options taste great, so choose what you prefer. For a nice touch, serve it in a large shallow bowl and garnish with extra mint leaves and a drizzle of balsamic reduction from the [Full Recipe]. To make the best Fresh Watermelon Feta Salad, you need good ingredients. Start with the watermelon. Look for a ripe one. It should feel heavy for its size. The skin should have a nice shine and a deep color. Tap it gently; a hollow sound means it's ripe. Next, pick quality feta cheese. Look for cheese that is creamy and crumbly. You can find it in blocks or crumbled. If you can, choose feta packed in brine. It keeps the cheese moist and adds flavor. Want to boost the taste? Try adding fresh herbs. Basil or cilantro work well with the salad. They add a fresh twist. You can also use flavored balsamic reductions. These come in different flavors like raspberry or fig. They add sweetness and depth to your salad. When serving, use a large shallow bowl. This makes the salad look inviting. Garnish with extra mint leaves on top. A drizzle of balsamic reduction adds a nice touch. To arrange the salad, layer the watermelon and feta. This creates a beautiful look. Use tongs or a large spoon to serve. This helps keep everything intact. Enjoy your salad as a bright centerpiece for any table! For the complete recipe, check out the Full Recipe. {{image_2}} If you want to change things up, try using goat cheese instead of feta. Goat cheese has a creamy texture that pairs well with watermelon. You can also switch out the fruits. Try adding berries, peaches, or even citrus slices for a fresh twist. Each fruit brings a unique flavor to the salad. You can explore different dressings for this salad. A creamy dressing like ranch can add a rich taste. If you prefer something zesty, a vinaigrette with lemon juice and olive oil gives a bright flavor. Feel free to experiment with herbs in the dressing, like basil or cilantro, for extra depth. To make this salad vegan, skip the cheese and use avocado for creaminess. For a vegetarian option, keep the feta. If gluten is a concern, this recipe is naturally gluten-free. You can enjoy it without worry. Everyone deserves a tasty salad that fits their diet! For the full recipe, check out the Refreshing Watermelon & Feta Delight section. To keep your Fresh Watermelon Feta Salad fresh, store it in an airtight container. This helps hold in the flavors and keep the ingredients crisp. You can refrigerate it for up to three days. After that, the salad may lose its texture and taste. You can make this salad ahead of time for gatherings. Prepare the watermelon, feta, and onion a day before. However, wait to add the mint and dressing until just before serving. This keeps everything fresh and bright. Serve it chilled for the best taste. Freezing this salad is not recommended. The watermelon has high water content. When you thaw it, the texture changes and may become mushy. It’s best enjoyed fresh, so make only what you plan to eat! If you want to switch feta cheese, you have great options. Goat cheese works well. It has a creamy texture and tangy flavor. You can also try ricotta. It adds a soft touch to the dish. For a vegan choice, use tofu. Crumbled firm tofu can mimic feta's texture. You can store the salad for about two days. Keep it in an airtight container in the fridge. This helps keep the watermelon fresh and crunchy. If you add dressing, the salad lasts only one day. The dressing can make the watermelon soggy. Absolutely! Adding ingredients can boost flavor and texture. Try diced cucumbers for crunch. You can use avocado for creaminess. Cherry tomatoes add sweetness and color. Nuts, like walnuts or almonds, add a nice crunch. Just remember to balance the flavors for the best taste. This blog post shows you how to make a tasty watermelon feta salad. We covered the key ingredients, like seedless watermelon and feta cheese, plus dressing options. I shared tips on picking ripe produce, enhancing the flavor, and making it look great. You can try variations with other cheeses and fruits, too! Lastly, I explained how to store leftovers and answered common questions. Enjoy this fresh salad at your next meal or gathering! It's a simple recipe that everyone will love.

Fresh Watermelon Feta Salad Delightful Summer Treat

Looking for a refreshing summer dish that’s easy to make? Let me introduce you to my Fresh Watermelon Feta Salad.

To make a simple Greek salad, gather these fresh and tasty ingredients: - Fresh arugula - Cucumber - Cherry tomatoes - Red onion - Kalamata olives - Feta cheese - Olive oil - Red wine vinegar - Dried oregano - Salt and pepper You will love how these ingredients blend together. The arugula adds a peppery taste, while the cucumber brings crunch. Cherry tomatoes add sweetness and color. Red onion gives a bit of zest. Kalamata olives offer a salty bite, and feta cheese adds creaminess. For the dressing, olive oil and red wine vinegar create a tangy flavor. Dried oregano adds an herbal note, while salt and pepper help balance everything. This mix makes an easy, healthy, and delicious salad. Check out the Full Recipe for step-by-step guidance to prepare this delight. To make your Simple Greek Salad, follow these easy steps. - Base with arugula: Start by adding 2 cups of fresh arugula to a large salad bowl. This green adds a nice peppery flavor and a healthy crunch. - Add vegetables: Next, dice 1 medium cucumber, halve 1 cup of cherry tomatoes, and thinly slice 1/2 red onion. Scatter these colorful veggies on top of the arugula. You can see how fresh and inviting it looks. - Sprinkle feta cheese: Now, take 1 cup of crumbled feta cheese and sprinkle it evenly over the salad. This cheese gives a creamy and salty taste that pairs well with the veggies. - Make the dressing: In a small bowl, whisk together 1/4 cup of extra-virgin olive oil, 2 tablespoons of red wine vinegar, and 1 teaspoon of dried oregano. Add salt and pepper to taste. This dressing adds a zesty kick to the salad. - Combine and toss the salad: Drizzle your dressing over the salad. Gently toss all the ingredients together. Make sure everything is coated well with that tasty dressing. - Adjust seasoning: Finally, taste the salad. If needed, adjust the seasoning. Add more salt, pepper, or vinegar to suit your taste buds. This salad is quick to make and packed with flavors. For the complete recipe, check out the full recipe. Enjoy this healthy and vibrant dish! - Pair with proteins: This salad shines with added proteins. Try grilled chicken, shrimp, or chickpeas. They elevate the dish and make it a full meal. - Best serve chilled: A chilled salad tastes fresh and crisp. Store it in the fridge before serving. This keeps the flavors lively and enjoyable. - Garnish ideas: Fresh herbs like parsley or mint brighten your salad. Add a sprinkle of fresh herbs just before serving. It adds color and flavor. - Overdressing the salad: Too much dressing can make the salad soggy. Use just enough to coat the ingredients lightly. You want to enhance flavors, not drown them. - Using stale ingredients: Fresh ingredients make a big difference. Always check your vegetables and cheese. Wilting or old items will ruin your salad's taste. - Not balancing flavors: A good salad needs balance. Ensure you have salty feta, sweet tomatoes, and crisp cucumbers. Taste as you go to adjust the flavors. {{image_2}} You can easily change your Greek salad to fit your taste. For protein, try adding grilled chicken or shrimp. These choices boost flavor and make the salad heartier. You can also use chickpeas for a vegetarian option. They add protein and texture. If you want a different cheese, switch to goat cheese. Goat cheese gives the salad a tangy taste. It pairs well with the veggies and olives. Another fun change is to use different olives. While Kalamata olives are classic, try green olives or Castelvetrano olives. Each olive type has its own flavor, adding a new twist to your dish. Seasonal ingredients can freshen up your Greek salad. In the summer, add fruits like peaches or watermelon. These sweet fruits contrast nicely with the salty feta and olives. They add a refreshing touch on hot days. In winter, consider adding roasted vegetables. Roasted bell peppers or zucchini can give warmth to your salad. You might also try adding nuts like walnuts for extra crunch and flavor. These variations keep your Greek salad exciting and full of flavor all year. For the full recipe, check the Mediterranean Bliss Salad section. To keep your Simple Greek Salad fresh, store it in the fridge. Use an airtight container to seal in the flavors. This will help prevent the veggies from getting soggy. If you have dressing left over, store it separately. This keeps everything crisp. In the fridge, your salad will stay good for about three days. If you notice any mushy veggies or a bad smell, it's time to toss it. Always trust your senses. If it doesn’t look or smell right, don’t eat it. Enjoy your Mediterranean Bliss Salad while it’s fresh! For the full recipe, check out the linked section above. The original Greek salad, or Horiatiki, uses fresh and simple ingredients. It typically includes tomatoes, cucumbers, red onion, green peppers, olives, and feta cheese. The dressing is just olive oil, salt, and oregano. The salad does not have lettuce, making it a true representation of Greek flavors. You can find a full recipe for a Mediterranean Bliss Salad that follows this tradition while adding a twist. Yes, you can prepare this salad ahead of time. I recommend cutting the vegetables and storing them separately. This keeps them fresh and crisp. Mix the dressing in another container. Combine everything just before serving. This way, your salad stays bright and tasty, not soggy. Making a simple Greek dressing is easy. You need just a few ingredients. Start with extra-virgin olive oil and red wine vinegar. Add salt, pepper, and dried oregano for flavor. Whisk these ingredients together in a bowl. Drizzle the dressing over your salad when ready to serve. This punchy dressing enhances the fresh flavors of your Greek salad. This blog post covered how to make a delicious Greek salad. We explored fresh ingredients, step-by-step instructions, and tips for the best flavors. Don't forget to adjust your dressing and watch for common mistakes like over-seasoning. You can add proteins or switch cheeses to make it your own. Proper storage is key to keeping leftovers fresh. Enjoy your salad chilled for the best taste experience. With these tips, you’ll impress everyone at your next meal. Dive into making your salad and enjoy every bite!

Simple Greek Salad Healthy and Flavorful Delight

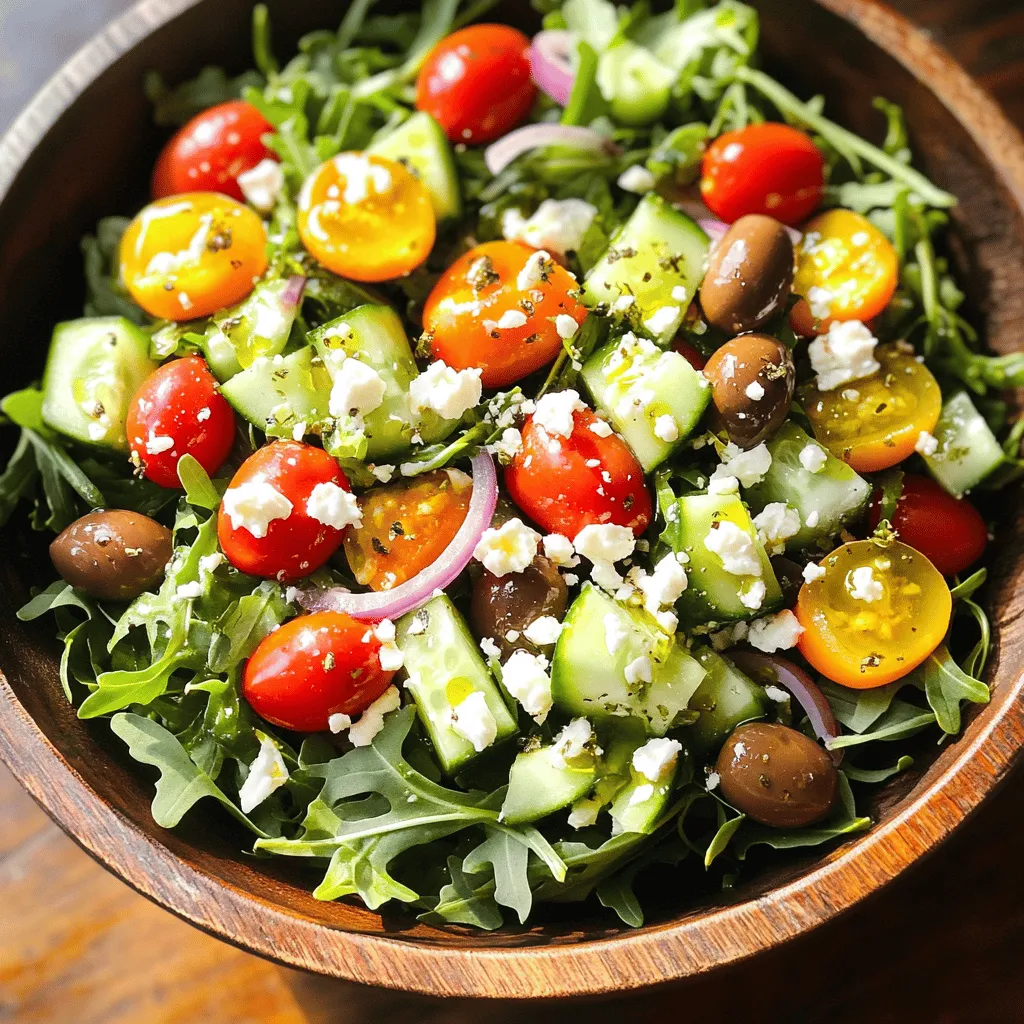
Are you ready to savor a dish that’s as simple as it is delicious? My Simple Greek Salad is a

- 4 salmon fillets (6 oz each) - 3 cloves garlic, minced - 1 large lemon (zested and juiced) - 4 tablespoons olive oil - 2 teaspoons fresh thyme (or 1 teaspoon dried) - 1 teaspoon salt - ½ teaspoon black pepper - Fresh parsley for garnish (optional) - Baking dish - Mixing bowl - Measuring spoons Making Lemon Garlic Roasted Salmon is simple if you have the right ingredients. First, you need fresh salmon fillets. Salmon is rich in omega-3 fatty acids and very tasty. Fresh garlic will give the dish a strong flavor. The lemon adds bright, zesty notes that balance the fish nicely. Olive oil will help cook the salmon and keep it moist. For seasoning, fresh thyme adds a nice herbal touch. Salt and black pepper enhance all the flavors. You can use fresh parsley as a garnish. It makes the dish look pretty and adds freshness. Gather your kitchen tools, too. You need a baking dish to roast the salmon, a mixing bowl for the marinade, and measuring spoons to get the right amounts of each ingredient. With these items, you're ready to make a meal that's both delicious and easy to prepare. Enjoy cooking! To start, gather your ingredients. In a bowl, I mix together minced garlic, lemon zest, lemon juice, olive oil, fresh thyme, salt, and pepper. This mix is your marinade. It adds strong and fresh flavors to the salmon. Make sure to stir it well so everything blends nicely. Next, take your salmon fillets and place them skin-side down in a baking dish. I pour the marinade over each fillet, ensuring they are fully coated. Let the salmon marinate for 15 minutes. This step is key. It allows the salmon to soak in those zesty flavors. Now, it’s time to cook! Preheat your oven to 400°F (200°C). Once hot, place the baking dish in the oven. Roast the salmon for 12-15 minutes. It should flake easily with a fork when done. For a crispy top, I recommend broiling the salmon for 2-3 minutes at the end. This gives it a lovely texture. Enjoy your delicious Lemon Garlic Roasted Salmon! When picking salmon, you can choose fresh or frozen. Fresh salmon has a bright color and smells like the sea. It should feel firm and moist. Frozen salmon can be a great option, too. It often comes flash-frozen right after catching. Look for wild-caught salmon if you can. It tends to taste better and is more sustainable. Marinating salmon is key to a tasty dish. I suggest marinating for at least 15 minutes. This lets the flavors soak in well. If you have time, marinate for up to an hour for even more flavor. Use a glass or ceramic dish for marinating. Avoid metal, as it can change the taste. To check if your salmon is done, look for the color. It should be opaque and easily flake with a fork. Use a meat thermometer if you have one. Aim for a temperature of 145°F (63°C). Avoid overcooking, as salmon can dry out quickly. If you see white albumin forming on the surface, your salmon is close to being overcooked. {{image_2}} You can make your meal even better by adding vegetables. Roasting veggies adds color and taste. Try these ideas: - Asparagus: It pairs well with salmon. Roast it for about 10 minutes. - Cherry tomatoes: These add sweetness. Toss them around the salmon while cooking. - Zucchini: Slice it into rounds. Add it to the dish for a tender bite. - Bell peppers: Their crunch and flavor brighten the plate. Slice and mix them in. You can switch up the flavors with herbs and spices. Here are some fun ideas: - Dill: This herb brings a fresh taste. Use it instead of thyme. - Paprika: It adds a nice, smoky flavor. Sprinkle some on before roasting. - Oregano: This herb can give the dish a Mediterranean twist. - Cumin: It offers a warm, earthy flavor. Use it for a unique touch. You don’t have to roast the salmon every time. Here are some other ways to cook it: - Grilling: This method gives the fish a nice char. Cook it for 6-8 minutes per side. - Pan-searing: This creates a crispy skin. Sear the fillets for 3-4 minutes on each side. - Baking: A gentler method, baking keeps the salmon moist. Set your oven to 375°F (190°C) and bake for 15-20 minutes. Feel free to explore these variations. They can make your Lemon Garlic Roasted Salmon even more delicious! For the full recipe and detailed instructions, visit [Full Recipe]. To keep your Lemon Garlic Roasted Salmon fresh, wrap it well. Use plastic wrap or foil. You can also place it in an airtight container. This helps keep moisture and flavor locked in. Store the salmon in the fridge. It stays fresh for up to three days. If you want to keep it longer, freeze it. Wrap each fillet tightly in plastic wrap and then in foil. This prevents freezer burn. When reheating salmon, you want to keep it moist. The best way is to use the oven. Preheat your oven to 275°F (135°C). Place the salmon on a baking sheet and cover it with foil. Heat for about 15 minutes. Check if it's warm enough. You can also use the microwave. Place the salmon on a microwave-safe plate. Cover it with a damp paper towel. Heat in short bursts of 30 seconds until warm. This keeps it from drying out. In the fridge, Lemon Garlic Roasted Salmon lasts up to three days. In the freezer, it can last for up to three months. For the best taste, eat it within one month. After that, the flavor and texture may change. Always check for signs of spoilage before eating leftovers. If it smells off or looks discolored, it's best to throw it away. You can tell when salmon is done by looking for a few signs. First, the salmon should change color to a light pink. Next, it should flake easily with a fork. If you have a meat thermometer, the thickest part should reach 145°F (63°C). This ensures it is safe to eat. Remember, overcooking can make salmon dry. Keep an eye on it as it cooks. Yes, you can use other fish for this dish. Good options include trout, tilapia, or cod. Each fish may cook at different times, so adjust accordingly. For thicker fish, increase the cooking time. For thinner fish, reduce it. The marinade works well with many fish types, so feel free to experiment. Lemon Garlic Roasted Salmon tastes great with several side dishes. Here are a few ideas: - Steamed asparagus - Roasted broccoli - Quinoa salad - Garlic mashed potatoes - Mixed green salad These sides balance the rich flavor of the salmon and add color to your plate. For the full recipe and detailed instructions, visit [Full Recipe]. This blog covered how to make lemon garlic roasted salmon with fresh ingredients and simple steps. By marinating salmon and exploring cooking tips, you ensure a tasty meal. Remember to check for doneness and try adding side dishes for balance. With these techniques, you can easily impress your guests or enjoy a great dinner. Cooking is fun, and you can always get creative with flavors. I hope this guide helps you enjoy the process and the dish!

Lemon Garlic Roasted Salmon Flavorful and Simple Dish

Are you ready to impress with a dish that’s both simple and bursting with flavor? Lemon Garlic Roasted Salmon is

- 2 cups fresh strawberries, hulled and sliced - 2 tablespoons sugar (for strawberries) - 2 cups all-purpose flour - 1 tablespoon baking powder - 1/2 teaspoon salt - 1/3 cup unsalted butter, cold and cubed - 1 cup heavy cream (plus extra for serving) - 1/4 cup sugar (for shortcake) - 1 teaspoon vanilla extract - Whipped cream for topping Gather these ingredients before you start. Fresh strawberries are key. The sugar helps sweeten them. The flour and baking powder create the shortcake base. Cold butter gives it a nice texture. Heavy cream adds richness. Lastly, whipped cream is a must for topping. You can find the full recipe above to guide you through each step. First, take 2 cups of fresh strawberries and hull them. Slice the strawberries into thin pieces. In a medium bowl, combine the sliced strawberries with 2 tablespoons of sugar. Mix gently and let them sit for at least 30 minutes. This process is called macerating. It helps the strawberries release their juices and become sweeter. While the strawberries are macerating, preheat your oven to 425°F (220°C). In another bowl, mix 2 cups of all-purpose flour, 1 tablespoon of baking powder, and 1/2 teaspoon of salt. Cut in 1/3 cup of cold unsalted butter using your fingers or a pastry cutter. The mixture should look like coarse crumbs. Now, in a separate bowl, mix 1 cup of heavy cream, 1/4 cup of sugar, and 1 teaspoon of vanilla extract. Pour this cream mixture into the flour mix. Stir just until combined. Be careful not to overmix. Turn the dough onto a floured surface. Knead it gently a few times until it holds together. Pat it into a rectangle about 1 inch thick. Use a biscuit cutter to cut the dough into rounds. Place the rounds on a baking sheet lined with parchment paper. Bake for 12-15 minutes or until they turn golden brown. Let them cool slightly on a wire rack. To put it all together, slice the baked shortcakes in half. Layer the bottom half with the macerated strawberries. Add a generous dollop of whipped cream on top of the strawberries. Place the top half of the shortcake back on. If you like, add more whipped cream and strawberries on top. Enjoy your easy strawberry shortcake! You can find the full recipe for this delicious dessert [here](#). To macerate strawberries effectively, start by hulling and slicing them. Add 2 tablespoons of sugar to the strawberries in a bowl. Toss them gently, then let them sit for at least 30 minutes. This process draws out the juices, making the strawberries sweet and syrupy. When selecting strawberries, look for bright red ones that are firm and plump. Avoid any with white or green spots. Fresh strawberries should have a sweet aroma. Choose organic if possible for better flavor and fewer chemicals. To achieve a light and fluffy texture, focus on using cold butter. Cut it into the flour until it resembles coarse crumbs. This helps create layers in the shortcake. Do not overmix the dough when combining ingredients. Stir just until everything comes together. Overmixing can make the shortcakes tough. A gentle touch is key here. To serve strawberry shortcake, slice the shortcakes in half and layer them with macerated strawberries. Add a generous dollop of whipped cream on top. For a beautiful presentation, use a dessert plate. Dust the shortcake with powdered sugar and add a few whole strawberries around it. This adds color and makes it look fancy. You can also drizzle some chocolate sauce for extra flair. {{image_2}} You can change the fruit in this shortcake. Try using blueberries or raspberries. These berries add a new taste and color. You can also use seasonal fruits. Peaches or cherries work well in summer. Apples or pears are great in fall. Mixing fruits can make your dessert fun and fresh. If you need a gluten-free option, use almond flour or a gluten-free mix. This way, everyone can enjoy the treat. You can also add flavors to your shortcake. Try lemon zest for a bright taste or a hint of almond for a nutty twist. These small changes can make a big difference. Toppings can change your shortcake too. Instead of whipped cream, try chocolate or caramel sauce. These toppings add sweetness and richness. You can also mix whipped cream with flavors. Add cocoa powder or a splash of coffee for a unique taste. Get creative and make it your own! To store leftover shortcakes, wrap them in plastic wrap. Place them in an airtight container. This keeps them fresh for up to three days. Avoid stacking them to prevent crushing. You can also freeze them for longer storage. Just place wrapped shortcakes in a freezer-safe bag. They will last for about three months this way. When you are ready to enjoy them, thaw at room temperature. For macerated strawberries, store them in the fridge. Use a covered bowl to keep them fresh. They are best eaten within two days for optimal flavor. To keep strawberries fresh longer, do not wash them until ready to eat. Store unwashed strawberries in the fridge in their original container. This prevents excess moisture that can cause mold. If you have extra strawberries, freeze them for later use. To reheat shortcakes, use the oven. Preheat it to 350°F (175°C). Place the shortcakes on a baking sheet and warm for about 10 minutes. This method helps keep their texture crisp. You can also use a microwave, but be careful. Heat them in short bursts to avoid sogginess. For best results, cover them with a damp paper towel while reheating. This keeps the moisture in and preserves flavor. Yes, you can make strawberry shortcake ahead of time. Prepare the shortcake and strawberries separately. Store the shortcake in an airtight container at room temperature. The strawberries can stay in the fridge after they macerate. Assemble the shortcakes just before serving. This keeps the shortcake fresh and fluffy. You have options if you need a substitute for heavy cream. You can use coconut cream for a dairy-free choice. Another option is to mix milk with butter. For a lighter version, use half-and-half or whole milk. These substitutes work well in the recipe, ensuring you still enjoy that creamy texture. To check if your shortcakes are done, look for a golden color on top. They should feel firm yet slightly soft when you press them. You can also insert a toothpick in the center. If it comes out clean, they are ready. These signs help guarantee perfect baking every time. You learned how to make a simple yet delicious strawberry shortcake. From selecting fresh strawberries to baking the perfect shortcake, each step matters. I shared tips for great texture and serving ideas. Remember, variations can add fun twists to your dish. Store leftovers properly for the best taste later. With these methods, you can enjoy this treat whenever you want. Happy baking, and enjoy every bite!

Easy Strawberry Shortcake Simple and Delicious Recipe

If you’re craving a sweet treat that’s both simple and delicious, look no further! My Easy Strawberry Shortcake recipe is

To make a great tabouli salad, you need fresh and simple ingredients. Here’s what you’ll need: - 1 cup bulgur wheat, rinsed and drained - 2 cups boiling water - 1 cup parsley, finely chopped - 1/2 cup fresh mint leaves, finely chopped - 2 medium tomatoes, diced - 1 small cucumber, diced - 1/4 cup red onion, finely chopped - 1/4 cup olive oil - 3 tablespoons lemon juice - Salt and pepper to taste These ingredients create a bright and refreshing dish. The bulgur wheat gives the salad a nice base. The herbs add a fresh taste. The tomatoes and cucumber bring in crunch. You can change the salad to suit your taste. Here are some fun options to try: - Feta cheese for creaminess - Kalamata olives for a salty touch - Bell peppers for extra color - Avocado for a rich flavor Feel free to mix and match these ingredients. You can make it your own! If you can’t find some ingredients, don’t worry. Here are some easy swaps: - Quinoa instead of bulgur for a gluten-free option - Green onions instead of red onion for a milder taste - Lime juice instead of lemon juice for a different zing - Any fresh herbs like cilantro or dill if you prefer These substitutions keep the spirit of tabouli while making it work for you. Enjoy exploring new flavors! For the full recipe, check out the details above. Start by rinsing one cup of bulgur wheat under cold water. This removes any grit. Next, place the rinsed bulgur in a large bowl. Pour two cups of boiling water over the bulgur. Cover the bowl with a lid or plastic wrap. Let it soak for 20 to 30 minutes. The bulgur will absorb the water and become tender. After soaking, fluff the bulgur with a fork. Allow it to cool for a few minutes before mixing it with other ingredients. Once the bulgur is cool, it's time to add fresh flavors. Chop one cup of parsley and half a cup of mint leaves finely. Dice two medium tomatoes and one small cucumber. Also, chop a quarter cup of red onion. Add all these fresh ingredients to the bowl with bulgur. Mixing these ingredients adds crunch and a burst of flavor to the salad. For the dressing, drizzle a quarter cup of olive oil and three tablespoons of lemon juice over the salad. Season with salt and pepper to taste. Toss everything gently to combine. This helps the flavors blend well. If you want a stronger taste, add more lemon juice or salt. Chill the salad in the fridge for at least 30 minutes. This step makes the flavors pop even more. For the full recipe, refer to the earlier section. Cut your vegetables small and even. This helps them blend well in the salad. For tomatoes, use a sharp knife. A serrated knife works best. Dice cucumbers into small cubes for a nice crunch. When chopping parsley and mint, use a rocking motion with your knife. This keeps the herbs fresh and bright. Always wash your veggies before cutting them. This step is key for food safety. To boost flavor, use fresh herbs. They add brightness and depth. Try adding a pinch of cumin for warmth. You can also add crushed garlic for a bolder taste. If you like spice, toss in some chopped chili peppers. This will give your salad a nice kick. You can drizzle more olive oil or lemon juice for added zest. Experiment with different seasonings to suit your taste. Chilling your tabouli salad is important. It allows the flavors to blend together. After mixing, let it sit in the fridge for at least 30 minutes. This makes the salad taste fresh and crisp. Serve it cold from the fridge, and it will be so refreshing. For best results, prepare it a few hours ahead of time. This way, you get a more flavorful dish. You can find the full recipe to make this easy. {{image_2}} You can make tabouli even more tasty by adding Mediterranean ingredients. Feta adds creaminess and a salty punch. Just crumble it over the top before serving. You can also toss in some olives for a briny flavor. Black or green olives both work great. These add-ins create a fun twist while keeping the fresh taste. If you need a gluten-free salad, don’t worry! You can swap the bulgur with quinoa or cauliflower rice. Quinoa cooks fast and has a nice nutty flavor. Cauliflower rice is low in carbs and adds a unique crunch. Both options keep the salad light and fresh, making it perfect for everyone. To make tabouli vegan, you can stick to the classic recipe. It is already plant-based! If you want to add a bit of creaminess, try using avocado. Just dice it and mix it in right before serving. This will give your salad a rich texture. You can also use a splash of apple cider vinegar for a tangy twist. For the full recipe, check the Refreshing Classic Tabouli Salad 🥗 section. To keep your tabouli fresh, place it in an airtight container. Store it in the fridge. It will stay good for about three days. Make sure to keep it covered. The salad will taste best when eaten fresh. However, if you have leftovers, storing is key. I do not recommend freezing tabouli. The texture of the fresh veggies changes when frozen. Bulgur wheat can freeze, but the herbs and tomatoes will become mushy. If you must freeze it, try only freezing the bulgur. When ready to use, thaw it in the fridge before mixing the fresh ingredients. For the best flavor and freshness, eat tabouli within three days. After this, the herbs may wilt and the flavors fade. Always check for any signs of spoilage before eating. The sooner you enjoy your salad, the better it will taste! If you want to make it ahead, prepare the bulgur and store it separately from the fresh ingredients. This keeps everything crisp. For the full recipe, check out the refreshing Classic Tabouli Salad. Tabouli salad is a bright and fresh dish from the Middle East. It mainly features bulgur wheat, parsley, mint, tomatoes, and cucumber. The mix of herbs and veggies gives it a unique flavor. Each bite feels like a garden party in your mouth. The lemon juice and olive oil add a lovely zest. You can easily make tabouli salad ahead of time. Follow the recipe as usual, then chill it in the fridge. This helps the flavors blend better. Make it a few hours or even a day in advance. Just remember to stir it before serving. Freshen it up with a bit more lemon juice if needed. Yes, you can make tabouli without bulgur wheat. Quinoa, cauliflower rice, or even couscous work well as substitutes. These options still keep your salad fresh and tasty. Just cook them according to the package instructions. Then, mix them with the herbs and veggies as in the recipe. This way, you can enjoy tabouli in many ways. Tabouli salad offers a mix of fresh flavors and textures. We explored key ingredients, from bulgur wheat to customizable options. I shared step-by-step instructions to prepare this dish with ease. You learned tips for cutting veggies and balancing flavors. Variations let you tweak it to your taste, whether you want Mediterranean touches or a vegan version. In closing, tabouli is versatile and fun to make. Enjoy your salads fresh, and don’t hesitate to experiment with your favorite ingredients. Happy cooking!

Classic Tabouli Salad Fresh and Flavorful Dish

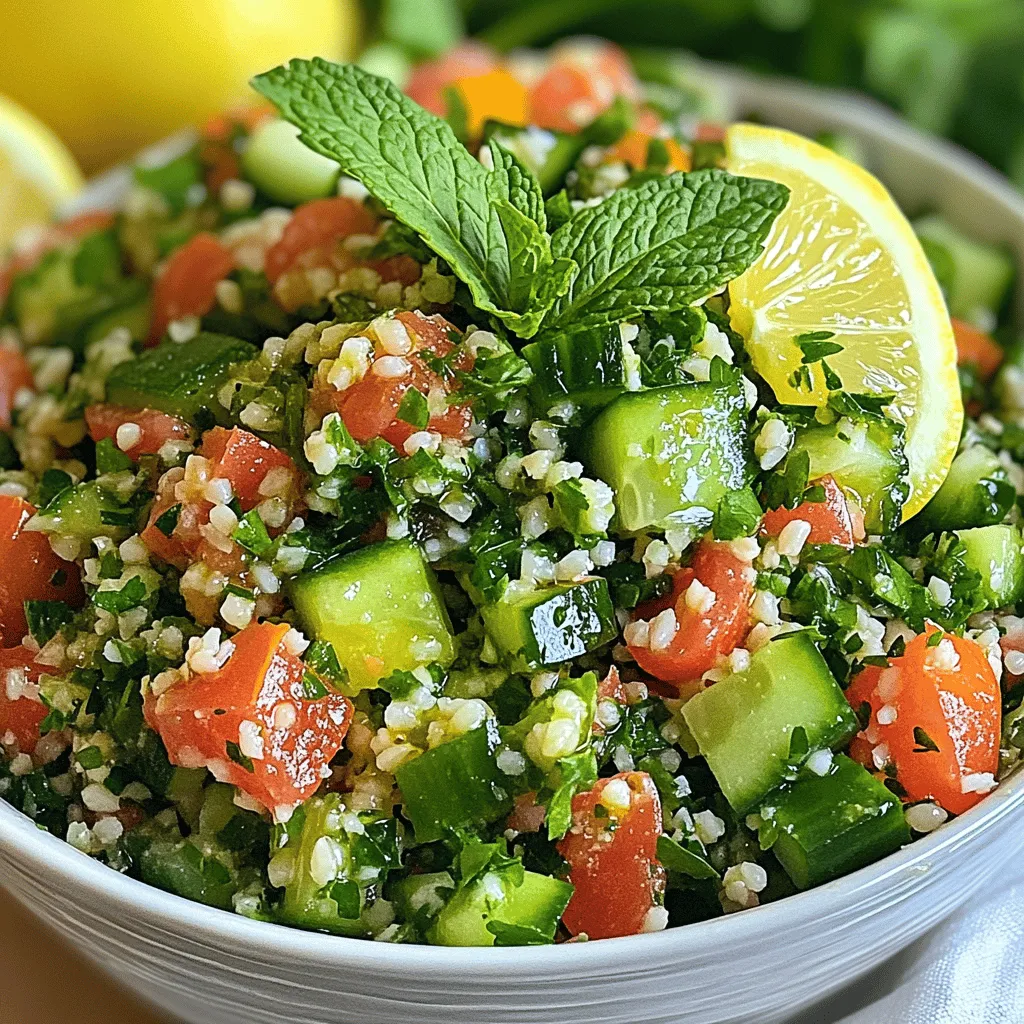
If you’re craving a fresh and vibrant dish, Classic Tabouli Salad is a must-try. This Middle Eastern staple bursts with

- Fresh spinach - Fresh strawberries Fresh spinach brings a crisp and healthy base to your salad. Use four cups, washed and dried. The spinach adds a lot of vitamins and minerals. Next, choose fresh strawberries. You will need about two cups, hulled and sliced. Strawberries add sweetness and a bright color. They balance the flavors nicely. - Feta cheese - Sliced almonds Cheese adds creaminess to the dish. Feta cheese works best here. Use half a cup, crumbled. It gives a nice tangy flavor. Now, let’s talk about nuts. Sliced almonds add crunch. Use a quarter cup, toasted for extra flavor. They boost the salad’s texture and nutrition. - Balsamic vinegar - Honey - Olive oil - Salt and pepper Next, we need dressing. Use balsamic vinegar, a quarter cup, for a sweet and tangy kick. Honey adds sweetness. Use three tablespoons. Olive oil adds richness. Use two tablespoons. Finally, season with salt and pepper to taste. Mix these ingredients well for a delicious dressing. For the full recipe and instructions, check out the [Full Recipe]. First, let's make the dressing. In a small bowl, add the balsamic vinegar, honey, olive oil, salt, and pepper. Use a whisk to mix everything together until it is smooth. This simple blend gives your salad a bright, tangy taste. Once combined, set the dressing aside. It will be ready when you need it. Now, it’s time to build your salad. In a large bowl, combine the fresh spinach, sliced strawberries, crumbled feta cheese, toasted almonds, and sliced red onion. Each ingredient adds its own flavor and texture. The spinach provides a crisp base, while strawberries add sweetness. Gently toss everything together. Be careful not to bruise the strawberries or break the feta. After tossing the salad, let it sit for about five minutes. This allows the flavors to meld together. For serving, you have options. You can plate the salad on individual dishes or offer it family-style in a large bowl. For a pretty touch, consider adding a few whole strawberries on top. This makes the salad look fresh and inviting. Enjoy your delicious creation! When you pick strawberries, look for ones that are bright red. They should feel firm but not hard. A sweet smell means they are ripe. Avoid ones with bruises or mold. Fresh spinach is the star of this salad. Always choose spinach that is vibrant and crisp. If you can, buy loose spinach instead of packaged. This way, you can check for freshness. If you want to make the salad ahead, store the dressing separately. This keeps the greens from wilting. You can mix the salad just before serving. It’s best to keep sliced strawberries in the fridge until serving. This prevents the salad from getting soggy. To make the salad even better, try adding fresh herbs like basil or mint. They give a nice twist to the taste. You can also play with different dressings. A citrus vinaigrette or yogurt dressing offers a fresh change. Experiment with what you like best to create your own version of this Strawberry Spinach Salad. For the full recipe, check out the Full Recipe section. {{image_2}} If you need gluten-free options, this salad works well. All the main ingredients are naturally gluten-free. However, check the labels on your balsamic vinegar and honey. They should be gluten-free too. For vegan alternatives, skip the feta cheese. You can use avocado or a vegan cheese instead. This keeps the salad creamy and delicious. You can play with different types of cheese. Try goat cheese for a tangy kick. Or use mozzarella for a mild flavor. If you want to swap nuts and seeds, consider walnuts or sunflower seeds. Both add a nice crunch and flavor to your salad. Try adding fruits like apples or pears. They give a sweet crunch that pairs well with spinach. Slice them thinly and mix them in. Incorporating other greens is a great idea too. You can add arugula or kale for a different taste. This adds more nutrients and texture to your salad. For the Full Recipe, check the earlier sections of this article. To keep your strawberry spinach salad fresh, store it in the fridge. Place leftovers in a sealed container. Glass or plastic containers work well. Keep the dressing separate if possible. This prevents the greens from wilting. When ready to eat, mix in the dressing just before serving. The salad lasts about three days in the fridge. Check the spinach and strawberries for spoilage. Look for slimy spinach or mushy strawberries. If you see these signs, it’s time to toss them. The feta cheese can last longer, up to a week. Always check for unusual smells or changes in color. You can get creative with leftover salad! Try mixing it into a wrap or sandwich. You can also add it to a grain bowl. Another fun idea is to make a smoothie. Blend the salad with some yogurt and a banana. This adds flavor and nutrition. Don't waste those tasty leftovers! To make this salad gluten-free, choose gluten-free dressings. Use balsamic vinegar that is labeled gluten-free. Most honey is gluten-free, but always check the label. You can also swap out feta cheese for a dairy-free cheese option if needed. Strawberry Spinach Salad is packed with nutrients. Spinach is rich in iron, vitamins A and C. Strawberries add fiber and antioxidants. Feta cheese gives calcium and protein. Almonds provide healthy fats. This salad supports heart health and boosts your immune system. Yes, you can prep this salad ahead of time. Store the dressing separately to avoid sogginess. Keep spinach, strawberries, and other ingredients in airtight containers. Mix everything just before serving. This keeps the salad fresh and crunchy. For the full recipe, check out the details above. This blog post covers how to make a delicious Strawberry Spinach Salad. We discussed key ingredients like fresh spinach, strawberries, feta cheese, and sliced almonds. I shared step-by-step instructions for creating the salad and tips to enhance its flavor. You can also explore variations, storage tips, and FAQs to address common questions. In closing, this salad is not just tasty; it also brings health benefits. Enjoy making it your own with different ingredients or styles!

Strawberry Spinach Salad Fresh and Flavorful Delight

If you’re looking for a light and tasty dish, the Strawberry Spinach Salad is a must-try! Fresh spinach and sweet

- 1 can (15 oz) chickpeas, rinsed and drained - 2 cups cooked quinoa or brown rice - 1 cup kale, chopped - 1 avocado, sliced - 1 carrot, shredded - 1/2 cup cucumber, diced Chickpeas form the base of this bowl. They add protein and fiber. Quinoa or brown rice gives you healthy carbs. Fresh vegetables bring crunch and color. They make the dish fun and vibrant. - 2 tablespoons olive oil - 1 teaspoon smoked paprika - 1 teaspoon garlic powder - 1 teaspoon ground cumin - Salt and pepper to taste - 1/4 cup tahini - 2 tablespoons lemon juice - 2 tablespoons water (to thin the tahini) Olive oil helps the chickpeas roast well. The spices boost flavor and warmth. Tahini adds creaminess, while lemon juice brightens the dish. This dressing is simple yet tasty. - Fresh cilantro or parsley for garnish - Additional toppings like nuts or seeds Fresh herbs add a pop of flavor. They make the bowl look pretty too. You can also try nuts or seeds for extra crunch. These small touches elevate your meal. For the full recipe, check out the Crispy Chickpea Buddha Bowl . First, rinse the chickpeas in a colander. Make sure to drain them well. Next, dry the chickpeas with a kitchen towel. This step is key for crispiness. Now, it’s time to season the chickpeas. In a large bowl, drizzle two tablespoons of olive oil over them. Then, add the spices: one teaspoon of smoked paprika, one teaspoon of garlic powder, and one teaspoon of ground cumin. Don’t forget salt and pepper to taste. Toss everything together until the chickpeas are well coated. Preheat your oven to 400°F (200°C). Spread the seasoned chickpeas on a large baking sheet in a single layer. Bake them for 20-25 minutes. Be sure to shake the pan halfway through. This helps them cook evenly. For the best crispy texture, check them often. If they start to smell good, they are close. You want them golden brown and crunchy. Now, let’s build the bowl! Start with a base of cooked quinoa or brown rice. Use about one cup for each serving. Next, add a layer of chopped kale, about one cup. Then, top it with a shredded carrot, diced cucumber, and those crispy chickpeas you just made. Don’t forget the sliced avocado on top. Finally, drizzle the tahini dressing over everything. To make the dressing, whisk together the tahini, lemon juice, and water in a small bowl. Adjust the thickness as you like. Garnish with fresh cilantro or parsley for a pop of flavor. Enjoy your vibrant Crispy Chickpea Buddha Bowl! For the full recipe, check the details above. To get crispy chickpeas, start by drying them well. I like to pat my chickpeas with a clean kitchen towel. Removing moisture is key. Next, toss them with olive oil and spices. My favorite combo is smoked paprika, garlic powder, and cumin. This blend gives a nice kick. Make sure to coat all chickpeas evenly for the best crunch. Want to spice things up? Try adding cayenne pepper for heat. You can also use curry powder for a different flavor. If you want a creamier tahini dressing, add more water or lemon juice. Taste the dressing and adjust to your liking. This makes a huge difference in flavor. This Buddha bowl is great with many dishes. You can pair it with roasted veggies or grilled chicken for extra protein. If you want to meal prep, make extra chickpeas and quinoa. Store them in separate containers for easy assembly later. This way, you can enjoy a fresh bowl any day of the week. Check out the Full Recipe for more ideas! {{image_2}} If you want to switch things up, try using other grains. Instead of quinoa, you can use farro, barley, or even millet. These grains add different textures and flavors. Brown rice is another great option. It’s hearty and pairs well with the crispy chickpeas. You can easily make this dish fit your dietary needs. The chickpeas and veggies are naturally vegan and gluten-free. For the dressing, just use tahini, lemon juice, and water. Make sure to check any packaged ingredients for gluten. Using seasonal veggies can add freshness to your bowl. In spring, try peas or asparagus. In summer, use ripe tomatoes or bell peppers. Fall is great for roasted sweet potatoes or butternut squash. In winter, root veggies like carrots and beets work well too. You can mix and match based on what you find at the market. This keeps your meal exciting and full of flavor. Store your Buddha bowl leftovers in an airtight container. This keeps food fresh. Place the chickpeas and grains separately to avoid sogginess. If you have tahini dressing left, store it in a small jar. To reheat roasted chickpeas, use an oven for the best texture. Spread them on a baking sheet and heat at 350°F for about 10 minutes. For grains, microwave them in a bowl with a splash of water. Cover with a damp paper towel to keep them moist. Stir halfway through for even heating. Crispy chickpeas last in the fridge for about 3 days. Cooked quinoa or rice stays good for about a week. Fresh veggies should be eaten within 3 to 5 days. Tahini dressing can last up to a week in the fridge. Always check for signs of spoilage before eating. You can use other legumes or proteins. Here are some great options: - Black beans - Kidney beans - Lentils - Edamame - Tofu or tempeh These choices add flavor and texture. They also keep the bowl nutritious and satisfying. Yes, you can prep this bowl in advance. Here are some tips: - Roast chickpeas and store them in an airtight container. - Cook quinoa or rice and refrigerate it. - Chop veggies and keep them in the fridge. Assemble the bowl just before eating. This keeps everything fresh and crunchy. To make your Buddha bowl heartier, consider these ideas: - Add more cooked quinoa or rice. - Include roasted sweet potatoes or butternut squash. - Top with nuts or seeds for crunch. - Use a protein source like grilled chicken or boiled eggs. These additions boost protein and calories, making the meal more satisfying. For the full recipe, check the earlier section! This blog post shared how to create a tasty Buddha bowl. You learned about key ingredients like chickpeas, grains, and fresh veggies. I provided steps for prepping, roasting, and assembling your bowl. Tips for achieving crispy chickpeas and enhancing flavor were also included. In summary, a Buddha bowl is versatile and easy. Adjust ingredients to fit your taste and needs. Enjoy experimenting with different grains and vegetables. Now, you have the tools to make a meal that nourishes both body and mind. Happy cooking!

Crispy Chickpea Buddha Bowl Energizing and Nutritious

Looking for a delicious, energizing meal? Try my Crispy Chickpea Buddha Bowl! Packed with protein, fresh veggies, and a zesty

Older posts
Newer posts
← Previous Page1 … Page59 Page60 Page61 … Page84 Next →

dsad

© 2026 Lisa Dishes • Built with GeneratePress

Our Policies

  • Copyright Policy
  • Cookie Policy
  • GDPR Policy
  • Privacy Policy
  • Disclaimer
  • Terms Of Use

More Information

  • Home
  • About
  • Contact
  • Appetizers
  • Dessert
  • Dinner
  • Drinks
©2026, Lisa Dishes About Back To Top