Skip to content
DisclaimerTerms Of UseGDPR PolicyCookie Policy

Lisa Dishes

  • Home
  • Drinks
  • Appetizers
  • Dinner
  • Dessert
  • About
  • Contact
  • Privacy Policy
DisclaimerTerms Of UseGDPR PolicyCookie Policy

NO-ING-IMG

- 2 cups cooked jasmine rice - 1 cup assorted bell peppers, diced - 1 cup snap peas, trimmed and halved - 1 cup carrots, julienned The main ingredients make this dish so colorful and full of flavor. I love using day-old jasmine rice. It is perfect for fried rice because it is less sticky. Diced bell peppers add sweetness and crunch. Snap peas give a nice snap, while julienned carrots add a bright color. - 3 cloves garlic, minced - 2 tablespoons soy sauce - 1 tablespoon sesame oil - 1 tablespoon olive oil - Salt and pepper to taste - 1 tablespoon sesame seeds (for garnish) Garlic brings a wonderful aroma and flavor. Soy sauce adds saltiness and depth. I use sesame oil for a nutty taste. Olive oil helps to cook the veggies evenly. Don’t forget to adjust salt and pepper to your liking. Sesame seeds finish the dish with a little crunch. - Additional veggies or proteins for customization You can change this dish up easily. Add any vegetable you like for more color. You can also include proteins like chicken, shrimp, or tofu. This makes it fun and personal. Customize it to fit your taste and diet! To start, make sure your rice is clump-free. If your rice is day-old, break up any clumps with your hands. This helps the rice stay fluffy when you cook it. Fresh rice can be sticky, so using day-old rice is best. It gives you that perfect texture for fried rice. Next, heat olive oil in a large skillet over medium-high heat. Add minced garlic and sauté for about 30 seconds. The smell is wonderful! Then, raise the heat to high and toss in the diced bell peppers, carrots, and snap peas. Stir-fry these veggies for about 3-4 minutes until they are tender-crisp. This means they should be cooked but still have a little crunch. It keeps the flavors bright and fresh. Now it's time to add the corn and green onions to the skillet. Keep stir-frying for another minute. Push the veggies to one side of the skillet. Pour in the sesame oil and soy sauce, allowing it to heat. Mix everything together until well combined. Then, add the cooked rice, breaking up any remaining clumps. Stir it all together until the rice is hot and colorful, about 2-3 minutes. Finally, season with salt and pepper to taste. Remove from heat and garnish with sesame seeds and reserved green onions. Enjoy your vibrant dish! - A good pan for stir-frying is a large wok or skillet. These pans allow even heat. They help cook veggies well without burning. - Set your heat to medium-high to start. This temperature helps the garlic sizzle and release flavor. Then, turn it to high when adding the veggies. This keeps them crisp and bright. - For extra flavor, try adding ginger or red pepper flakes. These spices add warmth and a kick. - You can customize your fried rice by adding proteins like chicken, shrimp, or tofu. This makes the dish more filling and nutritious. - Serve your fried rice in deep bowls. This keeps it warm and makes it look inviting. - Garnish with sesame seeds and extra green onions. You can also add lime slices for a zesty touch. These small details make your dish pop! {{image_2}} You can change up the veggies in your fried rice. Seasonal vegetables work best. In spring, try asparagus or zucchini. In summer, add fresh tomatoes or green beans. In fall, use sweet potatoes or squash. In winter, consider broccoli or Brussels sprouts. Feel free to swap any veggies you don't like. If you love mushrooms, toss them in. If you prefer a milder taste, use cucumbers instead. While jasmine rice is great, you can use other types too. Brown rice adds a nutty flavor and extra fiber. Cauliflower rice makes it low-carb and light. If you need gluten-free rice, choose white or brown rice. Quinoa is also a tasty option. It gives a chewy texture and packs protein. Boost your meal's nutrition by adding proteins. Tofu is a great choice and easy to cook. Tempeh has a firmer texture and is rich in fiber. You can also add chickpeas for a hearty bite. For garnish, try fresh herbs like cilantro or basil. A sprinkle of crushed peanuts adds crunch. You can even add an avocado slice on top for creaminess. To keep your veggie loaded fried rice fresh, let it cool first. Place it in an airtight container. This helps keep moisture in and prevents it from drying out. Make sure your rice cools to room temperature before sealing it. This avoids condensation inside the container. Store it in the fridge for up to three days. After that, it may lose flavor and freshness. When you’re ready to enjoy your leftovers, the best method is using a skillet. Heat a little oil over medium heat. Add your rice and stir it gently. This method helps keep the rice fluffy. If you prefer the microwave, use a bowl with a lid. Add a splash of water to keep it moist. Heat in short bursts, stirring in between. This helps avoid sogginess in the rice. To freeze your veggie fried rice, allow it to cool completely first. Portion it into freezer-safe bags. Squeeze out as much air as possible before sealing. This prevents freezer burn. You can freeze it for up to three months. When you want to eat it, thaw it in the fridge overnight. For reheating, use a skillet or microwave as mentioned before. Add a bit of water or oil to help restore its texture. Yes, you can use frozen veggies in your fried rice. They are quick and convenient. Look for mixed bags with bell peppers, peas, and corn. Just remember to thaw them first. Drain any excess water to avoid soggy rice. This helps keep your dish crisp and delicious. Fried rice can be healthy, especially with loads of veggies. The mix of bell peppers, snap peas, and carrots adds vitamins and fiber. Jasmine rice provides energy and is gluten-free. This dish is colorful and nutrient-rich. You get a tasty meal that fills you up without extra calories. If you want to skip soy sauce, try using coconut aminos. It's a great soy sauce alternative. You can also use tamari for a gluten-free option. Another choice is using a mix of vegetable broth and a splash of vinegar for flavor. Each option gives your rice a nice taste. Jasmine rice is my favorite for fried rice. It's soft and fragrant. Day-old rice works best because it’s less sticky. If you don’t have jasmine, use long-grain rice. This keeps the grains separate and fluffy. Avoid short-grain rice, as it can get clumpy. This blog post showed you how to make tasty veggie fried rice. We covered ingredients, cooking steps, and tips to make it great. You can customize it with your favorite veggies and proteins for a personal touch. Remember to store leftovers properly and reheat them well. Enjoy your new skill and impress others with your delicious dish. Cooking fun meals like this can help you eat healthier while enjoying every bite.

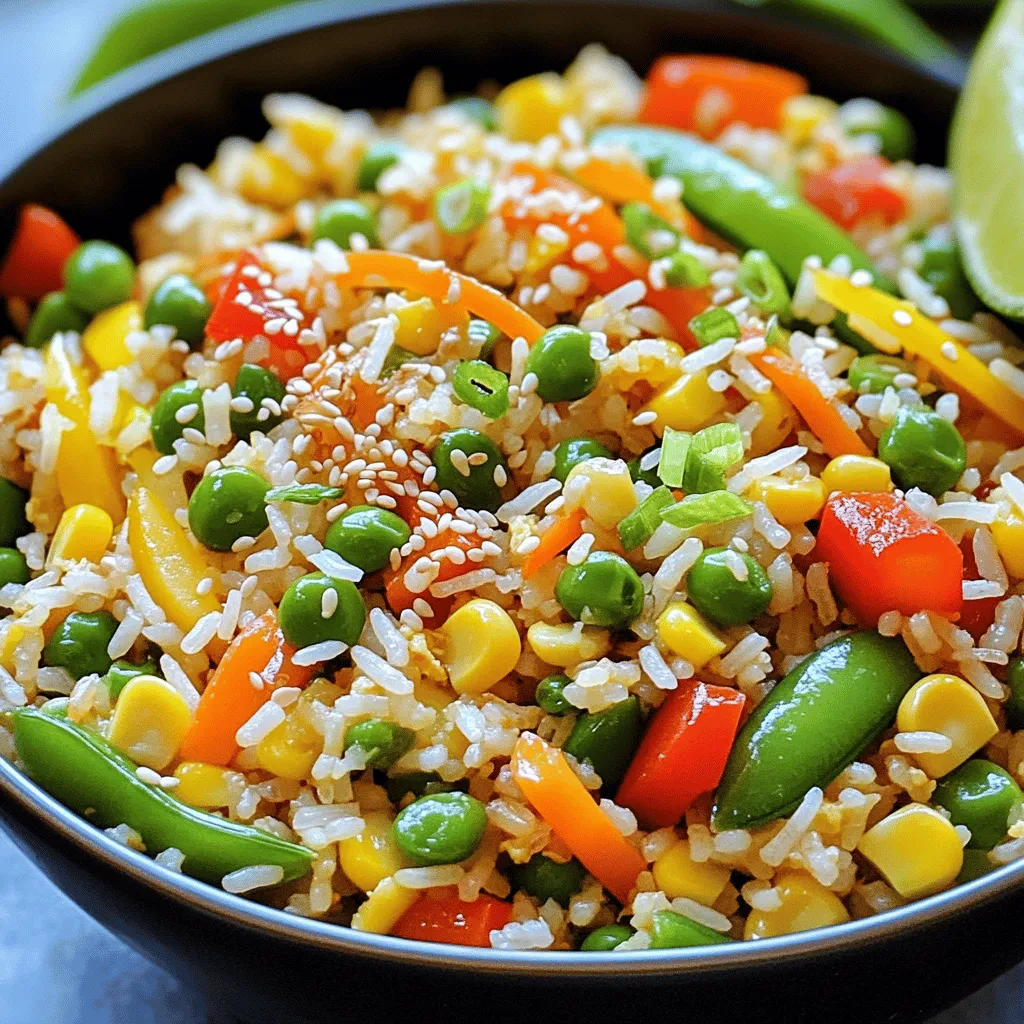
Veggie Loaded Fried Rice Flavorful and Nutritious Dish

Craving a dish that’s both tasty and packed with nutrients? Dive into my Veggie Loaded Fried Rice! This colorful meal

- 8 ounces spaghetti or linguine - 1 pound large shrimp, peeled and deveined - 4 cloves garlic, minced - 1/4 cup extra virgin olive oil - 1 lemon, zested and juiced - 1/2 teaspoon red pepper flakes - 1/4 cup fresh parsley, chopped - 1/4 cup grated Parmesan cheese (optional) - Salt and pepper to taste To make Lemon Garlic Shrimp Pasta, gather your ingredients first. Start with 8 ounces of spaghetti or linguine. Choose a good quality pasta for the best taste. You will need 1 pound of large shrimp. Make sure they are peeled and deveined. This saves time and effort. Next, you need 4 cloves of garlic, minced. Fresh garlic gives the best flavor. You will also need 1/4 cup of extra virgin olive oil. This adds richness to the dish. Don’t forget a lemon! You need to zest and juice it for a bright flavor. Add 1/2 teaspoon of red pepper flakes for a little heat. Adjust this to fit your taste. For freshness, chop 1/4 cup of parsley. This adds color and flavor. If you like cheese, you can use 1/4 cup of grated Parmesan. Lastly, have salt and pepper ready for seasoning. These ingredients come together to create a zesty and delicious meal. {{ingredient_image_1}} - Bring a large pot of salted water to a boil. - Cook 8 ounces of spaghetti or linguine until al dente. - Reserve 1 cup of pasta water, then drain the pasta and set it aside. Cooking pasta is simple. I always use salted water. It adds flavor to the noodles. The goal is to cook until al dente, which means firm to the bite. This gives the best texture when mixed with the shrimp. Saving some pasta water helps later to adjust the dish's moisture. - Heat 1/4 cup of extra virgin olive oil in a large skillet. - Sauté 4 cloves of minced garlic and 1/2 teaspoon of red pepper flakes. - Add 1 pound of large shrimp, peeled and deveined, and season with salt and pepper. I love the smell of garlic cooking. It brings warmth to the kitchen. The red pepper flakes add a hint of spice. When you add the shrimp, they should lay flat in the pan. Cook them for about 2-3 minutes on each side. You will know they are done when they turn pink and opaque. - Mix the cooked pasta with the shrimp in the skillet. - Incorporate the juice and zest of 1 lemon. - Adjust moisture with the reserved pasta water. Once the shrimp are ready, it's time to mix! Lower the heat and add the pasta. Pour in the fresh lemon juice and zest. This brightens the dish and adds zest. If it looks dry, add a splash of the reserved pasta water. Toss everything gently until well mixed. The flavors will blend beautifully, making your meal shine. - Choosing the right shrimp size: I recommend using large shrimp for this dish. They cook evenly and stay juicy. Look for shrimp labeled "U15" or "16-20" for the best size. - Cooking shrimp until just opaque: Cook shrimp for about 2-3 minutes on each side. They should turn pink and opaque. Overcooking makes them rubbery, so watch closely. - Using fresh versus dried herbs: Fresh herbs, like parsley, add bright flavor. Dried herbs can work too, but fresh gives the best taste. If using dried, cut the amount in half. - Balancing acidity with lemon juice: Fresh lemon juice brightens the dish. Start with half the juice and taste. You can always add more if you want a stronger flavor. - How to prevent the pasta from being too dry: To keep your pasta moist, reserve a cup of pasta water. Add it slowly while mixing. This helps create a nice sauce. - Recommended timing for combining ingredients: Mix the pasta with shrimp right after cooking. This way, the pasta absorbs the flavors while staying warm. Toss gently to combine everything well. Pro Tips Fresh Shrimp: Always opt for fresh shrimp when possible, as they provide a superior flavor and texture compared to frozen varieties. Perfect Pasta: To achieve the perfect al dente pasta, cook it just slightly less than the package instructions, as it will continue to cook when mixed with the hot shrimp and sauce. Adjusting Spice: If you prefer a milder dish, start with half the amount of red pepper flakes and adjust to your taste after everything is combined. Serving Tip: For a more elegant presentation, twirl the pasta into nests on the plate and top with shrimp and parsley for a restaurant-style look. {{image_2}} You can make this dish even better by adding veggies. Spinach adds nice color and nutrition. Cherry tomatoes bring sweetness and juiciness. Just toss them in when you cook the shrimp. You can also try different pasta types. Fettuccine or penne works great too. Each shape gives a new twist to the meal. Herbs can change the flavor a lot. You might want to try basil or oregano. They add a fresh taste that pairs well with shrimp. If you like a twist, swap lemon for lime. Lime gives a zesty kick that brightens the dish. Need a gluten-free option? Use gluten-free pasta. It tastes great and keeps the dish light. For a dairy-free version, skip the cheese. The lemon and shrimp provide enough flavor without it. Enjoy these options to fit your diet and still love this meal! To keep your Lemon Garlic Shrimp Pasta fresh, follow these tips: - Refrigerating: Place leftovers in an airtight container. Store them in the fridge for up to 3 days. Make sure the pasta cools down before sealing the lid. - Freezing: If you want to keep it longer, freeze the pasta. Use a freezer-safe container or bag. It stays good for about 2 months. To reheat, let it thaw in the fridge overnight. You can reheat your pasta in two main ways: - Microwave: This method is quick. Place the pasta in a microwave-safe dish. Cover it with a damp paper towel. Heat it in 30-second intervals until warm. - Stovetop: For better texture, use the stovetop. Add the pasta to a pan over low heat. Add a splash of water or olive oil to keep it moist. Stir until heated through. Knowing how long you can keep your Lemon Garlic Shrimp Pasta helps prevent waste. - Storage Duration: In the fridge, eat it within 3 days. If frozen, enjoy it within 2 months for the best taste. - Signs of Spoilage: Watch for changes in smell and color. If the pasta looks dry or has an off odor, it’s best to throw it away. Yes, you can use frozen shrimp. Thawing shrimp is easy. Here are some best practices: - Overnight Method: Place the shrimp in the fridge overnight. - Cold Water Method: Put shrimp in a sealed bag and submerge in cold water for 20-30 minutes. - Quick Method: Rinse shrimp under cold water for a few minutes. Make sure to drain them well before cooking. Avoid using hot water as it can cook the shrimp. Lemon Garlic Shrimp Pasta pairs well with several side dishes. Here are some great options: - Garlic Bread: Perfect for soaking up the sauce. - Caesar Salad: A crisp salad adds freshness. - Steamed Vegetables: Broccoli or asparagus add color and health. - Roasted Potatoes: A hearty side that complements the meal. These sides enhance the meal and make it more filling. The dish has a mild spice level thanks to red pepper flakes. You can adjust the heat easily: - For More Heat: Add more red pepper flakes. - For Less Heat: Use fewer flakes or skip them. Taste the dish as you go. Everyone has different spice preferences, so find what works for you. In this blog post, we explored a simple and tasty shrimp pasta recipe. We covered the key ingredients, step-by-step cooking, and helpful tips. You learned how to perfect your shrimp and add great flavors. Remember, you can tweak the recipe with your favorite veggies or seasonings. Store any leftovers properly for later enjoyment. Enjoy this dish with a side of your choice for a complete meal. Now, get cooking and share this easy recipe with others!

Lemon Garlic Shrimp Pasta Tasty Weeknight Dinner

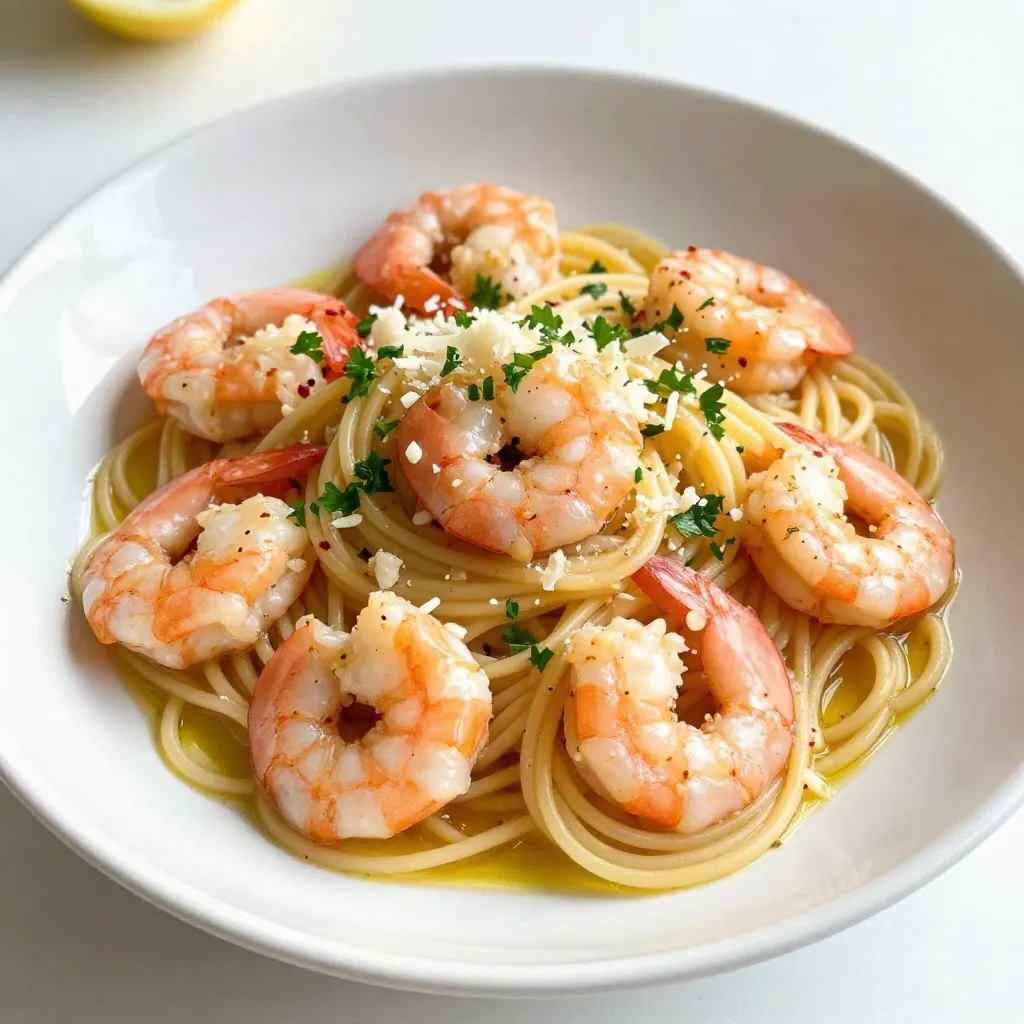
If you’re looking for a quick and delicious weeknight dinner, Lemon Garlic Shrimp Pasta is the answer. This dish is

- 1 cup fresh or frozen strawberries - 1/2 cup cream cheese, softened - 1/2 cup Greek yogurt (vanilla or plain) - 1 tablespoon honey or maple syrup (adjust to taste) - 1 teaspoon vanilla extract - 1/2 cup milk (dairy or non-dairy) - 1/4 cup graham cracker crumbs - Ice cubes (optional, for a thicker consistency) To make a delicious strawberry cheesecake smoothie, gather your ingredients first. You can use either fresh or frozen strawberries. Each option gives a lovely flavor. Cream cheese adds the cheesecake touch. Softened cream cheese blends well and gives a smooth texture. Greek yogurt adds creaminess and a little tang. You can choose vanilla or plain yogurt based on your taste. Honey or maple syrup sweetens the smoothie. You can adjust the sweetness by adding more or less. Vanilla extract adds depth to the flavor. Milk helps blend everything together. You can use regular milk or a non-dairy version, like almond or oat milk. Graham cracker crumbs bring in that classic crust flavor. Lastly, ice cubes are optional. They help make the smoothie thicker and colder. Gathering these ingredients is the first step to a tasty treat. The right mix creates a perfect balance of flavors, making your smoothie rich and creamy. Enjoy the process of making this easy and delicious smoothie! {{ingredient_image_1}} Using fresh strawberries gives your smoothie a bright taste. They add sweetness and freshness. If you use frozen strawberries, you get a thick and cold drink. Both types work well, so choose what you like. If you pick frozen strawberries, let them thaw for a few minutes. This makes blending easier. Just leave them out on the counter or place them in warm water. Make sure they soften a bit before you add them to the blender. Start by adding the strawberries to your blender. Then, put in the cream cheese and Greek yogurt. Next, pour in the honey or maple syrup, vanilla extract, and milk. This order helps the blender mix everything smoothly. Blend on high for about 30 to 60 seconds. You want a nice, creamy texture. If you like your smoothie thicker, toss in some ice cubes and blend again. Taste it afterward and add more sweetener if needed. For a fun touch, sprinkle graham cracker crumbs on top. This gives a nice crunch and that cheesecake flavor. Pour the smoothie into tall glasses for a great look. You can also garnish with a whole strawberry on the rim of the glass. This adds a pretty touch and makes it feel special. Enjoy your delicious strawberry cheesecake smoothie! You can make this smoothie even better! Try using mascarpone or ricotta if you want a change from cream cheese. These options give a nice flavor and texture. For sweeteners, honey works great. Maple syrup adds a unique taste. You can also try agave syrup or stevia for a healthier choice. Do you want a thicker smoothie? Add a few ice cubes when blending. This helps create a creamy, thick drink. If you find it too thick, just add more milk. For smoothness, blend on high until everything is mixed well. This usually takes about 30 to 60 seconds. Want to mix it up? You can swap out strawberries for other fruits like blueberries or raspberries. Each fruit offers a new flavor twist! If you want extra nutrition, consider adding protein powder or spinach. These additions boost health without losing taste. Pro Tips Use Frozen Strawberries: For a creamier texture and colder smoothie, frozen strawberries work great. They also eliminate the need for ice. Adjust Sweetness: Taste your smoothie before serving and adjust the sweetness with honey or syrup to suit your preference. Experiment with Flavors: Feel free to add other berries or fruits for a unique twist on the classic cheesecake flavor. Garnish Creatively: Add a sprinkle of crushed graham crackers or a dollop of whipped cream on top for an extra touch of cheesecake flavor. {{image_2}} You can change the taste of your smoothie by adding different fruits. Here are two fun ideas: - Strawberry Banana Cheesecake Smoothie: Add one ripe banana to the mix. It brings a sweet and creamy texture. The banana pairs well with strawberries, making it a hit for kids and adults alike. - Mixed Berry Cheesecake Smoothie: Use a mix of berries like blueberries, raspberries, and strawberries. This gives a tart and sweet flavor. You can also add a splash of orange juice for a fresh twist. If you're looking for a dairy-free smoothie, I have some easy swaps. Use non-dairy cream cheese made from almonds or cashews. For yogurt, try coconut yogurt or almond yogurt. This way, you keep the creamy texture without dairy. Make sure to choose unsweetened options to control the sugar. Want a low-sugar smoothie? You can use sugar substitutes like stevia or monk fruit. They give sweetness without extra sugar. You can also reduce the honey or maple syrup. Start with less and add more if needed. This way, you can enjoy the taste without the extra calories. To store leftover smoothie, place it in an airtight container. Glass jars work well. You can also use plastic containers, but make sure they seal tight. Keep the smoothie in the fridge. It stays fresh for about one day. If it separates, just stir it before drinking. Freezing is a smart way to save your smoothie for later. Pour the leftover smoothie into ice cube trays or freezer-safe containers. Leave a little space at the top because it will expand. When you want to enjoy it again, take out the cubes or container and let them thaw in the fridge for a few hours. For a faster option, place it in a bowl of warm water. The freshness of your ingredients matters. Fresh strawberries last about 3-7 days in the fridge. Cream cheese stays good for 1-2 weeks after opening. Greek yogurt is best used within 1-3 weeks. Honey and maple syrup can last for years when stored properly. Always check for signs of spoilage before use. A Strawberry Cheesecake Smoothie has about 250 calories per serving. Here’s the breakdown: - Fresh or frozen strawberries: 50 calories - Cream cheese (1/2 cup): 400 calories - Greek yogurt (1/2 cup): 100 calories - Honey (1 tablespoon): 64 calories - Milk (1/2 cup): 42 calories - Graham cracker crumbs (1/4 cup): 110 calories This adds up to approximately 766 calories for the entire recipe. Since it serves two, each serving has around 250 calories. It’s a tasty treat without too many calories! You can prepare this smoothie ahead of time. Here’s how: - Blend all the ingredients as usual. - Store it in an airtight container in the fridge. - It stays good for up to 24 hours. When you’re ready to drink it, shake or stir it a bit. You may need to add ice or blend it again for a smooth texture. If you need a substitute for Greek yogurt, here are some ideas: - Regular yogurt works well if you want something creamy. - For dairy-free options, use coconut yogurt or almond yogurt. - Silken tofu is a great choice for a protein boost and is also dairy-free. These alternatives keep your smoothie rich and tasty! This blog post covered how to make a delicious Strawberry Cheesecake Smoothie. We explored the key ingredients like strawberries, cream cheese, and yogurt. I shared tips for blending and serving, plus ways to customize your drink. You can create variations or keep it dairy-free and low-sugar. In closing, enjoy experimenting with your smoothie. Each version can bring a new taste to your day. This wholesome treat is simple to make and full of flavor.

Strawberry Cheesecake Smoothie Easy and Delicious Treat

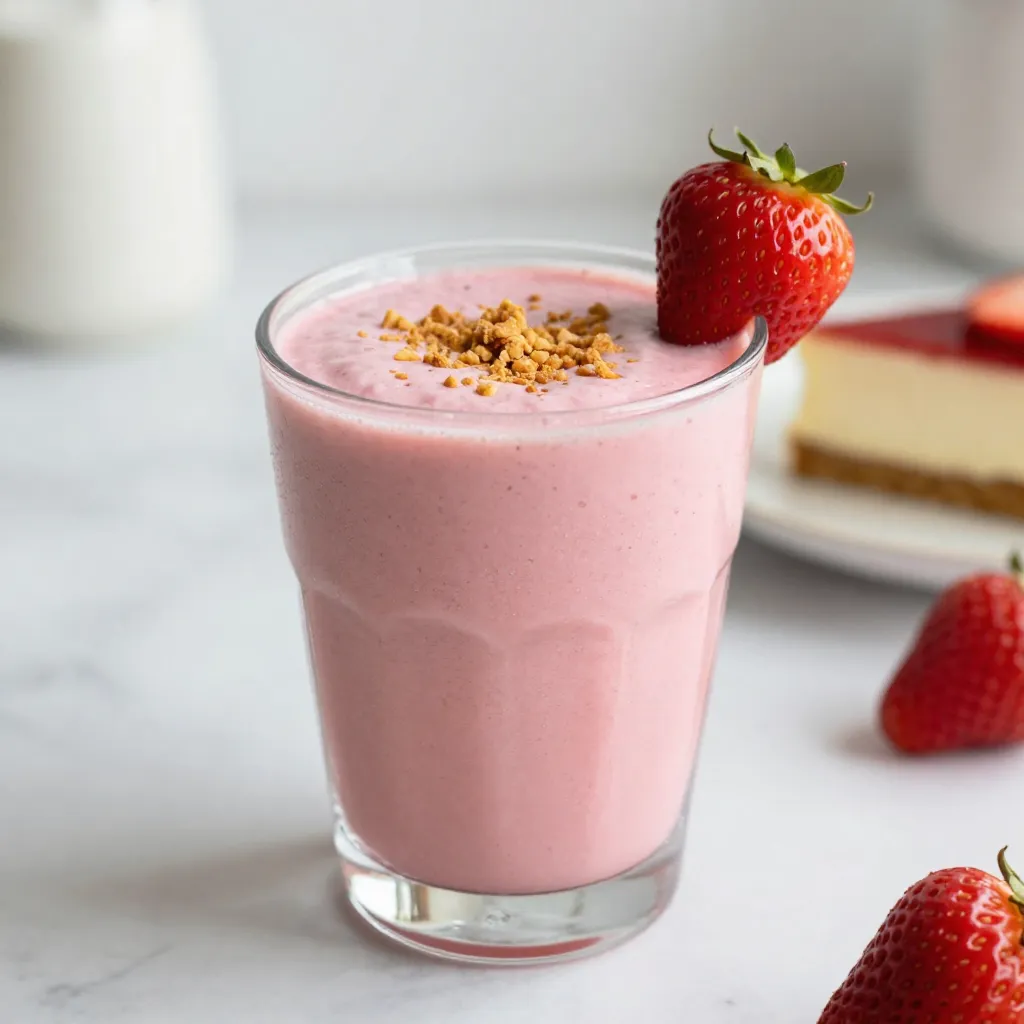
Looking for a tasty treat that packs a punch of flavor? The Strawberry Cheesecake Smoothie is your answer! It’s an

- 1 cup unsalted butter, softened - 1 cup brown sugar, packed - 1/2 cup granulated sugar - 2 large eggs - 2 teaspoons vanilla extract - 3 cups all-purpose flour - 1 teaspoon baking soda - 1/2 teaspoon salt - 2 cups white chocolate chips - 1 cup macadamia nuts, roughly chopped - Options for Butter: You can use coconut oil or margarine instead of butter. - Sugar Alternatives: Use coconut sugar or honey if you want a different flavor. - Nut Substitutes: If you dislike macadamia nuts, try walnuts or pecans for crunch. - Calories per Cookie: Each cookie has about 150 calories. - Fat, Carbs, and Protein Breakdown: Each cookie contains around 8g fat, 19g carbs, and 2g protein. These ingredients combine to create a rich and creamy cookie. Each bite gives a wonderful mix of sweet chocolate and crunchy nuts. You can mix and match ingredients based on what you have or prefer. Enjoy experimenting with your cookie creations! - Preheating the Oven Start by preheating your oven to 350°F (175°C). This helps ensure even baking. - Mixing Wet Ingredients In a large bowl, cream 1 cup of softened butter, 1 cup of brown sugar, and 1/2 cup of granulated sugar. Beat them together until light and fluffy, which takes about 3-4 minutes. Then, add 2 large eggs, one by one. Beat well after each egg. Finally, mix in 2 teaspoons of vanilla extract. - Combining Dry Ingredients In another bowl, whisk together 3 cups of all-purpose flour, 1 teaspoon of baking soda, and 1/2 teaspoon of salt. Slowly add this dry mix to the wet mixture. Stir until just combined. This step is key to avoiding tough cookies. - Forming Cookie Dough Balls Use a cookie scoop or tablespoons to drop rounded balls of dough onto the prepared baking sheets. Space them about 2 inches apart for even baking. - Baking Time and Temperature Bake your cookies in the preheated oven for 10-12 minutes. Look for lightly golden edges while centers remain soft. This balance gives you chewy cookies. - Cooling Instructions Once baked, remove the cookies from the oven. Let them cool on the baking sheets for about 5 minutes. This helps them set before moving them to a wire rack to cool completely. - Images for Each Step Visual aids can enhance your cooking experience. Consider taking pictures of each step to track your progress. - Tips for Best Results For the best cookies, ensure your butter is at room temperature. Avoid overmixing when combining wet and dry ingredients. This keeps your cookies light and airy. - Creaming Butter and Sugar Tips Start with softened butter. It mixes well with sugar. Cream them together until light. This takes about 3 to 4 minutes. The air you mix in makes the cookies fluffy. - Avoiding Overmixing Mix the dough just until combined. If you mix too much, cookies get tough. You want a smooth dough but not overworked. - How to Store Cookies Store cookies in an airtight container. This keeps them fresh longer. You can layer them with parchment paper to avoid sticking. - Keeping Cookies Soft Add a slice of bread in the container. The bread helps keep cookies moist. Change the bread slice every few days, if needed. - Pairing with Beverages Enjoy these cookies with milk or coffee. The sweetness of the white chocolate pairs well with both. You can also try them with tea for a nice twist. - Presentation Ideas Stack cookies on a tiered stand. This looks great for parties. You can also place them in a glass jar. Top with extra white chocolate chips for a fancy touch. {{image_2}} You can easily switch up the taste of these cookies! Here are some fun ideas: - Adding Different Nuts: Swap macadamia nuts for pecans, walnuts, or hazelnuts. Each nut brings a unique crunch and flavor. For a nutty twist, try a mix of nuts! - Incorporating Dried Fruit: Add dried cranberries or cherries for a sweet and tart bite. You can also use chopped dried apricots or figs. They add chewiness and extra flavor. You can make these cookies fit different diets. Here are some options: - Gluten-Free Adaptations: Use a gluten-free flour blend instead of all-purpose flour. This change keeps the cookies soft and delicious. Just make sure your chocolate chips are gluten-free too. - Vegan Alternatives: Replace butter with coconut oil or vegan butter. Use flax eggs instead of regular eggs. Mix one tablespoon of ground flaxseed with three tablespoons of water and let it sit. This will help bind the dough. Make these cookies special for any occasion with these fun ideas: - Holiday-Themed Ingredients: Add festive spices like cinnamon or nutmeg for a warm flavor. You can also try peppermint extract for a holiday touch. Use red and green sprinkles to make them look festive! - Creative Toppings for Occasions: Top cookies with a drizzle of dark chocolate or a sprinkle of sea salt. You can also add sprinkles for birthdays or special events. This small touch makes them even more fun! How to Fix Overly Dry Cookie Dough? If your cookie dough feels dry, add a bit of milk. Start with one tablespoon. Mix it in well. This small amount helps the dough come together. You can also try adding another egg. However, be careful not to make the dough too wet. You want it to stay thick and scoopable. Can I Freeze White Chocolate Macadamia Cookies? Yes, you can freeze these cookies! They freeze very well. Place the cookies in a single layer on a tray. After they freeze solid, move them to a freezer bag. This way, you can enjoy fresh cookies anytime. Just remember to let them cool completely before freezing. History and Popularity of the Cookies White chocolate macadamia cookies became popular in the 1990s. They stand out due to their creamy, sweet white chocolate and crunchy nuts. This cookie blends flavors from Hawaii, where macadamia nuts are grown. They quickly won hearts for their unique taste and chewy texture. Where to Find the Best Versions You can find great white chocolate macadamia cookies in many bakeries. Some coffee shops also serve them fresh. However, the best version often comes from your own kitchen. You can adjust the recipe to fit your taste. This makes baking fun and rewarding! Best Baking Sheets to Use Choose light-colored baking sheets for even baking. Dark sheets can cause burning. Also, use parchment paper for easy cleanup. It helps cookies bake more evenly and prevents sticking. If you have silicone mats, those work well too. How to Ensure Even Baking To ensure even baking, rotate your baking sheets halfway through. This helps all cookies bake uniformly. Avoid crowding the baking sheets; space them out! Give each cookie room to grow. This makes for a perfect batch every time. When baking white chocolate macadamia cookies, the butter is key. I recommend using high-quality unsalted butter. Here are some top brands: - KerryGold: This Irish butter has a rich flavor. It adds creaminess to your cookies. - Challenge Butter: Known for its fresh taste, this brand works well in baking. - Land O'Lakes: This brand offers consistent quality, making it a reliable choice. Using unsalted butter allows you to control the salt in your recipe. Always choose butter that is soft, but not melted. Choosing the right white chocolate chips makes a big difference. They should be sweet and creamy. Here are some brands I like: - Ghirardelli: Their chips have a smooth texture and rich flavor. They melt beautifully. - Guittard: This brand offers a more gourmet option. Their chips have a good balance of sweetness. - Nestlé Toll House: A classic choice that is easy to find. They work well in cookies. Try to avoid chips labeled as "baking morsels." They often contain less cocoa butter, which affects flavor. Macadamia nuts are the star in these cookies. Look for fresh nuts to enhance the taste. Here’s how to choose the best: - Buy Roasted Nuts: Roasted nuts have a deeper flavor. They also add a nice crunch. - Check for Freshness: Ensure they are not stale or soft. Fresh nuts should be firm and crunchy. - Purchase from Reputable Stores: Look for brands like Blue Diamond or Planters. They offer quality nuts. You can also find macadamia nuts at local farmers' markets. They often have fresher options. This blog post covers every aspect of making white chocolate macadamia cookies. We explored ingredients, from butter to nuts, plus swaps for different diets. I provided step-by-step instructions for easy baking and tips to enhance flavor and texture. Don’t forget about storage, serving ideas, and variations for fun twists. Baking cookies can be simple and rewarding, so don’t hesitate to try these recipes. Enjoy your baking journey and savor the sweet results!

White Chocolate Macadamia Cookies Delightful Treat

White chocolate macadamia cookies are a true delight! These sweet treats combine rich white chocolate with crunchy macadamia nuts, making

- 4 cups seedless watermelon, cubed - 1 cup feta cheese, crumbled - 1/2 cup fresh mint leaves, torn - 1/4 cup red onion, thinly sliced The main ingredients make this salad pop. Seedless watermelon is sweet and juicy. It gives the salad a fresh taste. Feta cheese adds a creamy and salty touch. The fresh mint leaves bring bright flavor and aroma. Lastly, the red onion adds a bit of sharpness. Together, they create a perfect balance. - 2 tablespoons olive oil - 1 tablespoon balsamic vinegar - Juice of 1 lime (optional) - Salt and black pepper to taste The dressing is simple but flavorful. Olive oil adds richness to the salad. Balsamic vinegar gives it a tangy kick. You can add lime juice for extra zest. Salt and black pepper enhance all the flavors. This mix brings the salad together. - Serve chilled or at room temperature. - Pair with grilled meats for a great meal. - Enjoy as a light snack on a hot day. This salad is versatile. You can serve it at summer picnics or barbecues. It pairs well with grilled chicken or fish. You can also enjoy it alone as a refreshing snack. Its bright colors make it a beautiful dish for any table. To start, you need to cube the watermelon. First, cut the watermelon in half. Then, cut each half into long strips. Finally, slice the strips into cubes. Aim for uniform sizes, about one-inch cubes. This makes the salad look nice and helps with even flavor. Next, crumble the feta cheese. Use your fingers or a fork. Break it into small pieces. Aim for a size that stays well with the watermelon. You don’t want it too small, as it can turn mushy. Now, let’s mix the salad. In a large bowl, combine the watermelon, crumbled feta, torn mint leaves, and thinly sliced red onion. Make sure to mix them gently. You want to keep the watermelon cubes intact for texture. For the dressing, use a small bowl. Whisk together the olive oil, balsamic vinegar, lime juice, salt, and black pepper. Mix until well combined. This dressing adds brightness to the salad. When it’s time to toss, drizzle the dressing over the watermelon mix. Gently fold the ingredients together. Be careful not to break the watermelon too much. You want it to stay crunchy. After tossing, let the salad sit for about 10 minutes. This helps the flavors blend well. For the best taste, serve it chilled or at room temperature. Adjust the seasonings if needed, and enjoy! - Alternative cheese options: If you want a different taste, try goat cheese or ricotta. These cheeses give a creamy texture and a unique flavor to the salad. - Fresh herbs and their impact: You can swap mint for basil or cilantro. Each herb adds its own twist. Basil gives a sweet note, while cilantro adds a fresh zing. - Adding citrus for extra freshness: Squeeze some lime juice into the salad. It brightens the flavors and keeps the salad feeling light. You can also use lemon juice for a different zest. - Spicing up with additional ingredients: Add a pinch of chili flakes for a kick. You can also mix in diced cucumber for extra crunch or avocado for creaminess. - Enhancing visual appeal for serving: Use a large, clear bowl to show off the bright colors. Layer the ingredients for a stunning effect. A sprinkle of extra mint on top adds a nice touch. - Creative plating suggestions: Serve the salad on a plate with a drizzle of balsamic glaze around it. You can also use a ring mold to shape the salad neatly. This makes the dish look more gourmet and inviting. {{image_2}} You can make this salad even better by adding seasonal fruits or veggies. In summer, consider ripe peaches or juicy strawberries. They bring a sweet touch that pairs well with the salty feta. You could also try cucumber for a crisp bite. Mix and match to find your favorite combo! If you want to make this salad vegan-friendly, swap feta for a plant-based cheese. You can also use tofu for creaminess. For those who need a gluten-free option, this salad is already safe as is. Just ensure your dressing is gluten-free, and you're good to go! Want to feed more people? You can easily scale the recipe up. Just double or triple the ingredients as needed. If you have fewer guests, cut the recipe in half. Remember to adjust the dressing ratio to keep the flavors balanced. Enjoy this salad no matter the size of your gathering! To keep your watermelon feta mint salad fresh, place it in an airtight container. This helps prevent moisture loss and keeps flavors intact. Make sure to store it in the fridge right after serving. You can also use a glass container for better preservation. It is easy to see what’s inside, which helps avoid food waste. The salad stays fresh for about 2 to 3 days in the fridge. After this time, it may lose its crunch. Look for signs of spoilage, like a sour smell or mushy watermelon. If the feta cheese looks slimy, it's best to toss it. Always check your food before eating. This salad is best served cold or at room temperature. If you want to enjoy it warm, be careful when reheating. Use a microwave with low heat for a few seconds. However, I do not recommend reheating it. The fresh taste of the watermelon and mint is what makes this dish special. Reheating can change the texture and flavor. Enjoy it fresh for the best experience! The Watermelon Feta Mint Salad has a sweet and salty taste. The watermelon gives a juicy sweetness. Feta cheese adds a salty and creamy touch. Fresh mint leaves bring a cool and refreshing flavor. Red onion offers a mild sharpness, balancing the sweetness. The olive oil and balsamic vinegar dressing ties it all together. Overall, it is a bright and vibrant dish that excites your taste buds. Yes, you can make this salad ahead of time. To prepare in advance, combine the watermelon, feta, mint, and onion in a bowl. Mix the dressing separately and store it in the fridge. Add the dressing just before serving. This keeps the salad fresh and crisp. If you let it sit too long, the watermelon may lose its crunch. This salad is quite healthy. Watermelon is low in calories and hydrating. It contains vitamins A and C, which are good for the skin and immune system. Feta cheese adds protein and calcium, which help with bone health. Mint aids in digestion and gives fresh breath. The olive oil provides healthy fats. Overall, this salad is a tasty way to enjoy nutritious ingredients. This blog post covered a refreshing watermelon feta mint salad, including key ingredients and tips. You learned about preparing each component, mixing them effectively, and serving ideas to wow any crowd. Remember to consider variations and substitutions to make it your own. Store leftovers properly to keep them fresh. With this simple recipe, you can enjoy a tasty dish that brightens any meal. Dive in and enjoy your creation!

Refreshing Watermelon Feta Mint Salad Recipe Guide

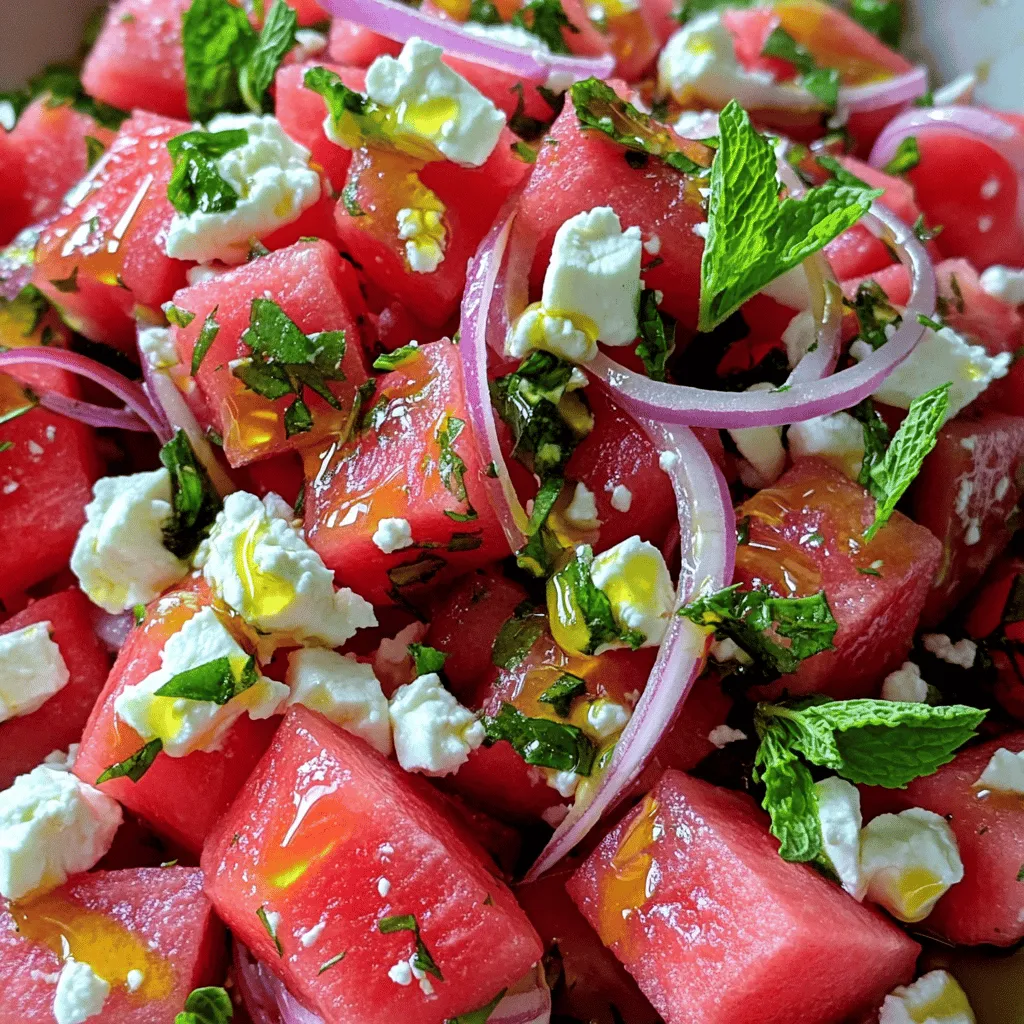
Looking for a bright, refreshing dish to brighten your meals? This Watermelon Feta Mint Salad is the answer! With juicy

- 200g udon noodles - 1 bell pepper, thinly sliced - 1 cup snap peas - 4 cloves garlic, minced - 1-2 red chilies, sliced Udon noodles are thick and chewy. They soak up flavors well. Bell peppers add sweetness and color. Snap peas provide a nice crunch. Garlic gives a bold taste, while red chilies add heat. You can adjust the chilies for your spice level. - 3 tablespoons soy sauce - 1 tablespoon sesame oil - 1 tablespoon rice vinegar - 1 teaspoon sugar Soy sauce brings umami flavor. Sesame oil adds a nutty aroma. Rice vinegar gives a tangy kick, balancing the dish. Sugar helps to enhance the overall taste. Together, these ingredients create a rich sauce that coats the noodles perfectly. - Chopped green onions - Sesame seeds Green onions add freshness and a mild bite. Sesame seeds provide a nice crunch and nutty flavor. These garnishes elevate the dish's presentation and taste. Sprinkle them on right before serving for the best effect. 1. Cook the udon noodles. Follow the package instructions until they are tender. 2. Drain the noodles and set them aside in a bowl. 1. In a large skillet or wok, heat 2 tablespoons of vegetable oil over medium-high heat. 2. Add 4 cloves of minced garlic and 1-2 sliced red chilies. Stir-fry for about 30 seconds until they smell good. Be careful not to burn the garlic. 1. Add 1 thinly sliced bell pepper and 1 cup of snap peas to the skillet. Stir-fry for 2-3 minutes until they are tender-crisp. 2. In a small bowl, mix 3 tablespoons of soy sauce, 1 tablespoon of sesame oil, 1 tablespoon of rice vinegar, and 1 teaspoon of sugar. 3. Pour the sauce over the veggies in the skillet and stir to mix well. 4. Toss in the cooked udon noodles and stir-fry for 2 more minutes. Make sure everything is well coated and heated through. To avoid sticky noodles, rinse them under cold water after cooking. This helps remove excess starch. Cook the udon noodles just until tender, following the package instructions. This gives them the best texture. For a mild dish, use one red chili or leave it out. If you want more heat, add two or more chilies. You can also try different chili options, like crushed red pepper or chili paste, to find what you like best. To save time, prep all your veggies before you start cooking. Slice the bell pepper and snap peas ahead of time. Use pantry staples like soy sauce and sesame oil to add flavor quickly. This keeps your meal fast and easy. {{image_2}} You can add chicken, shrimp, or tofu to your Chili Garlic Udon Noodles. Each option brings unique flavors. - Chicken: Use thinly sliced chicken breast. Cook it until golden brown before adding other ingredients. - Shrimp: Add peeled shrimp for a quick protein boost. They cook fast and soak up the sauce well. - Tofu: For a vegetarian option, use firm tofu. Cube it and pan-fry until crispy for added texture. Feel free to swap in seasonal or alternative vegetables. This allows you to customize the dish based on what you have. - Broccoli: Add small florets for crunch and nutrients. - Carrots: Thinly slice or julienne them for a sweet touch. - Zucchini: Slice it thin and add it during the last few minutes of cooking. If you're looking for gluten-free options, consider using rice noodles or alternative sauces. - Rice Noodles: These work great as a substitute. Follow package instructions for cooking. - Alternative Sauces: Look for gluten-free soy sauce or tamari. These will keep the flavor without gluten. These variations let you personalize your meal while keeping it simple and delicious! To store your chili garlic udon noodles, cool them first. Place the noodles in an airtight container. Add a little oil to prevent sticking. Seal the container tightly. Your leftovers will stay fresh for 3 to 4 days in the fridge. When ready to eat, check for any signs of spoilage before reheating. Reheat the noodles gently to keep their texture. You can use a microwave or a skillet. If using a microwave, add a splash of water. Heat in 30-second bursts, stirring in between. If using a skillet, add a bit of oil and heat on medium. Stir-fry for a few minutes until warmed through. This method helps the noodles stay nice and chewy. Yes, you can freeze udon noodles! To do this safely, cool the noodles completely first. Place them in a freezer-safe bag. Remove as much air as possible before sealing. Label the bag with the date. You can freeze them for up to 3 months. When ready to use, thaw in the fridge overnight. Reheat as described above for the best results. Udon noodles are thick, chewy noodles made from wheat flour. They are popular in Japanese cooking. Udon has a smooth texture and a neutral flavor. You can enjoy them in hot soups or stir-fries. They cook quickly and absorb flavors well, making them perfect for this dish. Yes, you can easily make this dish vegan. Simply swap out the following ingredients: - Use a plant-based soy sauce or tamari. - Replace the sesame oil with another vegetable oil if needed. - You can omit any animal-based toppings, like egg. These changes maintain flavor while keeping the dish vegan-friendly. To prepare this dish ahead, follow these steps: - Cook the udon noodles and vegetables. - Let them cool completely before storing. - Place them in an airtight container in the fridge. When ready to eat, reheat in a skillet or microwave. Add a splash of soy sauce for extra flavor. This keeps your meal quick and tasty! In this article, we explored how to prepare a delicious udon noodle dish. We covered key ingredients like udon noodles, fresh vegetables, and impactful sauces. The step-by-step instructions help ensure you’ll stir-fry with ease. Tips for perfect texture and spicy options are included for variety. Lastly, we discussed how to store and reheat your leftovers. Cooking udon at home is simple and rewarding. It’s time for you to enjoy this flavorful dish!

Chili Garlic Udon Noodles Quick and Flavorful Meal

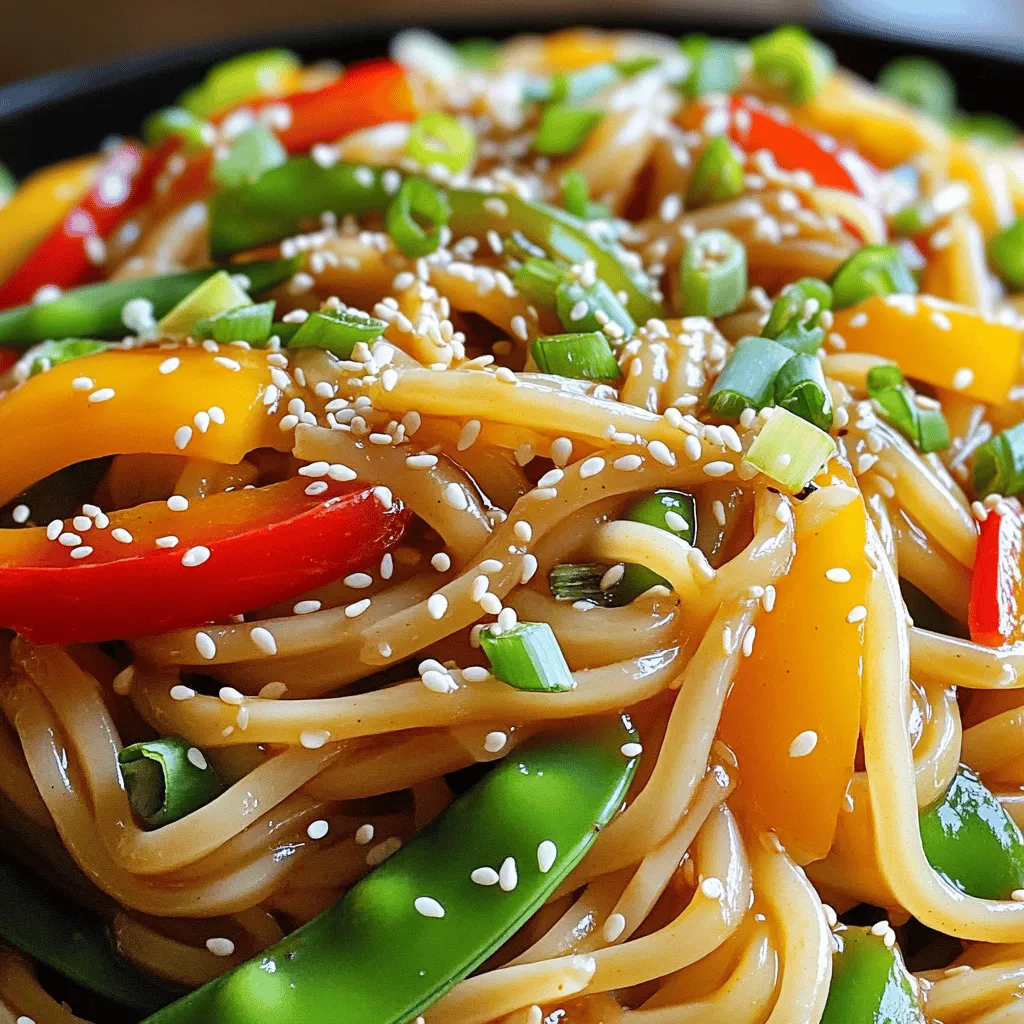
Are you ready to spice up your dinner routine? Chili Garlic Udon Noodles offer a quick and tasty meal that’s

- 1 pound boneless, skinless chicken breasts - 1 tablespoon olive oil - 1 small onion - 3 cloves garlic - 3 medium carrots - 2 celery stalks - 6 cups chicken broth - 1 teaspoon dried thyme - 1 teaspoon dried basil - Salt and pepper - 1 cup heavy cream - 1 pound gnocchi - 2 cups fresh spinach - Grated Parmesan cheese Choosing the right chicken Pick fresh, high-quality chicken breasts. Look for meat that is pink and firm. Frozen chicken works too, but fresh gives the best flavor. Best types of broth for flavor Use low-sodium chicken broth. This choice allows you to control the salt level. Homemade broth adds the best taste, but store-bought works well too. Substitutions for heavy cream If you want a lighter soup, use milk or a mix of milk and Greek yogurt. Coconut milk can add a nice twist if you want a dairy-free option. Cooking the chicken First, heat 1 tablespoon of olive oil in a large pot over medium heat. Add 1 pound of diced chicken breasts. Cook the chicken until it turns brown, about 5 to 7 minutes. Once done, take the chicken out and set it aside. This step builds a great base for your soup. Sautéing vegetables In the same pot, add 1 small diced onion, 3 minced garlic cloves, 3 diced carrots, and 2 diced celery stalks. Sauté these for about 5 minutes. You want the veggies to soften nicely. This adds depth to the flavor of your soup. Adding broth and seasonings Next, pour in 6 cups of chicken broth. Stir well to blend the flavors. Then, add 1 teaspoon of dried thyme and 1 teaspoon of dried basil. Season with salt and pepper to taste. Bring the mixture to a gentle boil. This process infuses the broth with rich flavors. Cooking the gnocchi Once it reaches a boil, add 1 pound of gnocchi to the pot. Cook according to the package directions, usually about 2 to 3 minutes. The gnocchi should float to the top when done. This means they are ready to absorb all the delicious broth. Combining all ingredients Return the cooked chicken to the pot. Lower the heat to keep it warm. Stir in 1 cup of heavy cream and let the soup simmer for 5 more minutes. This gives it that creamy texture we all love. Incorporating spinach Just before serving, stir in 2 cups of fresh spinach. Let it wilt into the soup. This adds a lovely color and freshness to your dish. Adjusting seasonings Taste the soup and adjust the seasonings if needed. This final touch ensures your soup is just right for your palate. Serving suggestions Serve the soup hot in bowls, topped with grated Parmesan cheese. It pairs well with crusty bread or a light salad. Enjoy this cozy comfort food! *Preventing the chicken from drying out:* To keep the chicken juicy, cook it just until it turns brown. Remove it from the pot before adding other ingredients. This helps lock in moisture. The chicken will cook more when you return it to the soup. *Achieving the perfect soup consistency:* For a creamy texture, add the heavy cream after cooking the gnocchi. This keeps the cream from breaking apart. Stir it in gently and allow the soup to simmer a bit. This helps blend the flavors well. *Adding herbs and spices:* Dried thyme and basil work great in this soup. They add a warm, earthy flavor. You can also try adding a pinch of nutmeg or a dash of cayenne for a kick. Fresh herbs like parsley or chives can brighten the dish when served. *Recommended garnishes:* Grated Parmesan cheese is a must. It adds richness and depth. A sprinkle of fresh herbs on top makes it look nice. You could also add a drizzle of olive oil for extra flavor. *Overcooking gnocchi:* Gnocchi cooks fast, usually in just 2-3 minutes. If you leave it in too long, it can become mushy. Keep an eye on it and taste to check doneness. *Ingredient ratios:* Too much broth can make the soup too watery. Stick to the recipe for the best balance. If you want it richer, add more cream but adjust the broth to keep it from being too thin. {{image_2}} If you want to make this soup fit your needs, consider these options: - Gluten-free gnocchi options: Look for gnocchi made with potato or rice flour. Many brands offer gluten-free versions that taste just as good. This way, you can enjoy the soup without worry. - Dairy-free alternatives: Swap heavy cream for coconut milk or a dairy-free cream. This change keeps the soup creamy while making it safe for those avoiding dairy. You can add fun twists to this soup’s flavor: - Adding mushrooms or bell peppers: Sauté sliced mushrooms or diced bell peppers with the onions and garlic. These veggies add depth and a nice texture. - Using different proteins: Feel free to switch the chicken for turkey or even shrimp. Each protein brings its unique taste, keeping the soup exciting. Pairing your soup with the right sides makes it even better: - Pairing with bread or salad: Serve the soup with crusty bread or a fresh salad. This adds a nice crunch and balances the creamy soup. - Storage and reheating options: Store leftover soup in an airtight container in the fridge for up to three days. When reheating, gently warm it on the stove to avoid overcooking the gnocchi. Enjoy the flavors again! You can keep Creamy Chicken Gnocchi Soup in the fridge for up to three days. Store it in an airtight container to keep it fresh. Glass containers or BPA-free plastic ones work best. They seal well and prevent spills. Always let the soup cool down before placing it in the fridge. This helps it stay safe and tasty. To freeze the soup, let it cool completely first. Then, pour it into freezer-safe containers. Leave some space at the top, as the soup will expand when frozen. You can also use freezer bags for easy storage. When you want to enjoy it later, thaw it in the fridge overnight. To reheat, pour the soup into a pot and warm it over low heat. Stir it often to prevent sticking. If it seems thick, add a little water or broth to loosen it up. Enjoy the warmth and comfort of this soup any time! Can I use frozen gnocchi? Yes, you can use frozen gnocchi. Just add it directly to the soup without thawing. It will cook as the soup simmers. How can I make this soup spicy? To spice up the soup, add red pepper flakes while cooking. You can also mix in diced jalapeños for extra heat. What if I don’t have chicken broth on hand? If you lack chicken broth, use vegetable broth instead. It will still give the soup great flavor. How do I make it thicker? To thicken the soup, mix in a cornstarch slurry. Combine equal parts water and cornstarch, then stir it in while simmering. Can I make it a day ahead? Yes, you can make this soup a day ahead. Store it in the fridge, and the flavors will deepen overnight. What’s the best way to reheat leftovers? Reheat leftovers on the stove over low heat. Stir gently and avoid boiling to keep the cream from separating. This blog post outlined a hearty chicken soup recipe. You learned about the main ingredients and preparation steps. I provided tips for cooking, flavor enhancements, and variations. Remember to avoid common mistakes like overcooking gnocchi. Incorporating fresh ingredients and following the steps can yield a comforting dish. Use this guide to experiment and make the soup your own. Enjoy the process and the delicious results!

Creamy Chicken Gnocchi Soup Cozy Comfort Food Delight

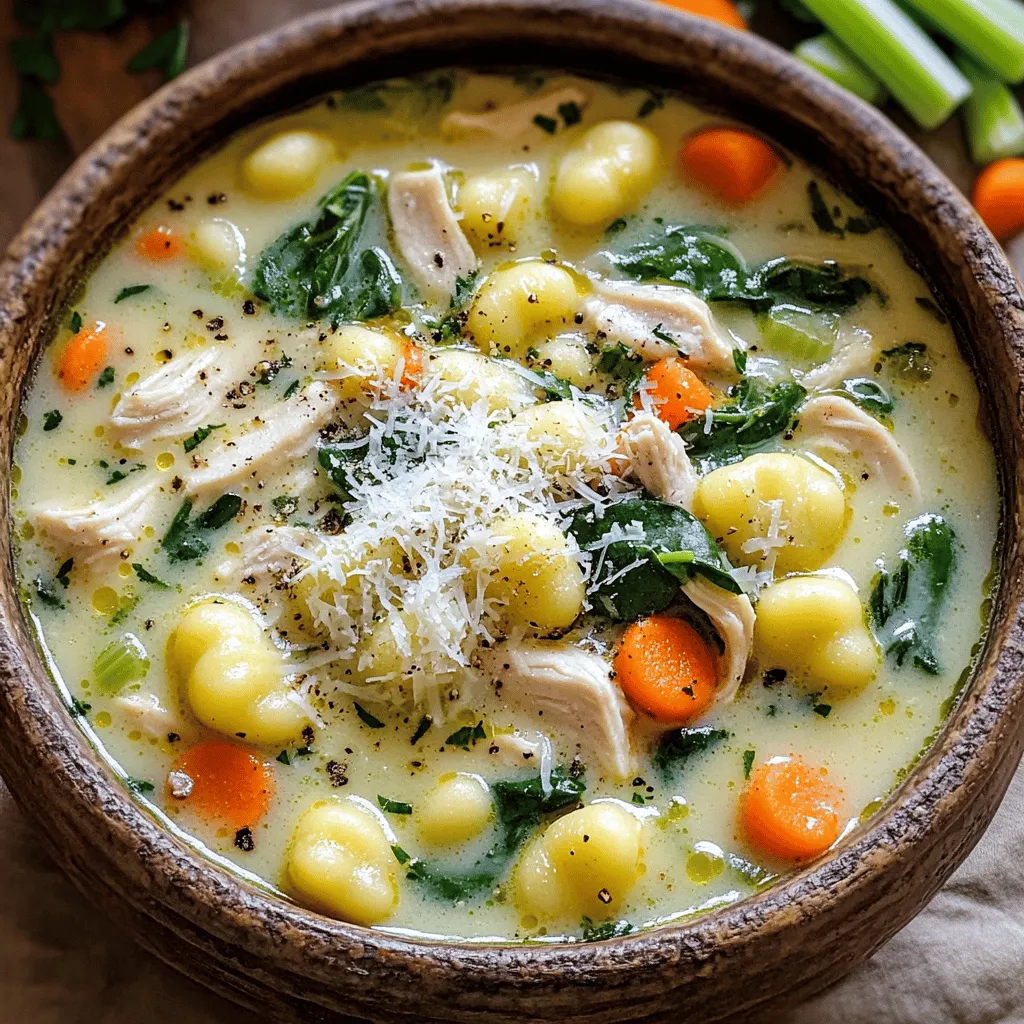
When the weather gets chilly, there’s nothing quite like a warm bowl of Creamy Chicken Gnocchi Soup. This dish brings

- 14 oz firm tofu, drained and pressed - 1 bell pepper, sliced (red or yellow) - 1 cup broccoli florets - 1 cup snap peas, trimmed - 3 cloves garlic, minced - 1 tablespoon fresh ginger, grated - 2 green onions, sliced - 1/4 cup low-sodium soy sauce - 2 tablespoons maple syrup - 1 tablespoon rice vinegar - 1 teaspoon sesame oil - Sesame seeds for garnish When making teriyaki tofu stir fry, I focus on fresh and vibrant ingredients. Firm tofu gives the dish a great base. I love using colorful bell peppers, broccoli, and snap peas. These vegetables add crunch and nutrition. I always use fresh garlic and ginger for a punch of flavor. For the sauce, I prefer low-sodium soy sauce to keep it healthier. Maple syrup adds a touch of sweetness that balances the salty soy sauce. Rice vinegar brightens the dish, while sesame oil gives a nutty aroma that enhances the stir fry. Finally, a sprinkle of sesame seeds on top makes it look appealing. These ingredients come together to create a dish that is not only tasty but also visually delightful. First, drain and press the 14 oz of firm tofu. This step removes excess moisture. Next, cut the tofu into cubes. Aim for bite-sized pieces for even cooking. Now, toss the cubes in 2 tablespoons of cornstarch. This coating helps the tofu become crispy when fried. Heat 1 tablespoon of vegetable oil in a large skillet or wok over medium-high heat. Once the oil is hot, carefully add the tofu cubes. Fry them for about 5-7 minutes. Turn them occasionally. You want them to be golden and crispy on all sides. Once done, remove the tofu from the skillet and set it aside. In the same skillet, add the remaining tablespoon of vegetable oil. Now, toss in the sliced bell pepper, broccoli florets, and snap peas. Stir-fry the veggies for 3-4 minutes. They should be bright and tender-crisp. Next, add 3 cloves of minced garlic and 1 tablespoon of grated fresh ginger. Cook for another minute until fragrant. In a small bowl, whisk together 1/4 cup of low-sodium soy sauce, 2 tablespoons of maple syrup, 1 tablespoon of rice vinegar, and 1 teaspoon of sesame oil. Pour this sauce over the stir-fried vegetables. Bring the mixture to a gentle simmer. Now, add the cooked tofu back to the skillet. Gently toss everything together. Ensure the tofu is evenly coated with the sauce. Cook for an additional 2 minutes. Remove from heat and stir in 2 sliced green onions. Serve the dish hot, garnished with sesame seeds for a lovely finish. To make crispy tofu, start by pressing it. Pressing removes excess water. This step is key for texture. After pressing, cut the tofu into cubes. Coat each cube with cornstarch. This helps to create a crunchy outside when frying. Use a large skillet or wok for stir-frying. Heat is important here. Start with medium-high heat for best results. Add oil and let it heat up. Once hot, add the tofu and fry until golden. Turn the tofu only a few times. This helps each side get crispy. To boost flavor, try adding spices. A dash of red pepper flakes adds heat. You can also use soy sauce variations. Consider adding fresh herbs like cilantro or basil. These herbs bring brightness to your dish. They make each bite more exciting. {{image_2}} You can mix up the veggies in your stir fry. Try using: - Zucchini - Carrots - Bell peppers (other colors) - Cauliflower - Spinach Using seasonal vegetables adds flavor and nutrition. In spring, use fresh asparagus. In fall, add hearty squash. Seasonal choices keep your dish vibrant and fresh. If you want to switch the protein, tempeh or seitan work well. Both add texture and flavor. You can omit tofu for a vegan option. Use beans like chickpeas or black beans for extra protein. Feel free to adapt the sauce to your taste. You can swap low-sodium soy sauce for coconut aminos. Add hot sauce or crushed red pepper to make it spicy. For a sweeter twist, try hoisin sauce. Mixing sauces makes your dish unique and exciting. To keep your Teriyaki Tofu Stir Fry fresh, store it in airtight containers. Make sure to let it cool down before sealing. This helps prevent moisture buildup. You can keep it in the fridge for up to three days. If you want to enjoy it later, freezing is a great option. When it's time to eat your leftovers, reheat them on the stove. Use a non-stick skillet over medium heat. Stir frequently to warm it evenly. This method helps maintain the texture. Avoid the microwave if you can, as it can make the tofu soggy. To freeze your stir fry, place it in freezer-safe containers. Leave some space at the top for expansion. You can freeze it for up to two months. When you're ready to eat, move it to the fridge overnight to defrost. Reheat it in a skillet for the best results. This keeps the flavors and texture intact. Yes, you can make Teriyaki Tofu Stir Fry in advance. To do this, follow these best practices: - Cook the tofu: Prepare the tofu and vegetables as instructed. - Store separately: Keep the tofu and vegetables in separate containers. This helps keep the tofu crispy. - Sauce on the side: Store the sauce in a small jar. Add it fresh when you're ready to eat. This method allows you to enjoy a quick meal without losing flavor or texture. You can pair Teriyaki Tofu Stir Fry with several delicious side dishes: - Rice: Steamed jasmine or brown rice complements the stir fry well. - Noodles: Try it with soba or rice noodles for a hearty option. - Salad: A simple cucumber or seaweed salad adds a refreshing crunch. - Spring rolls: These can be a fun and tasty addition to your meal. Mix and match these to create a balanced and colorful plate. Yes, this recipe works well for meal prep. Here are some considerations and recommendations for storage: - Refrigeration: Store leftovers in airtight containers. They can last for up to 3 days. - Reheat carefully: To avoid sogginess, reheat in a skillet over medium heat. - Freezing: You can freeze the stir fry, but the texture may change. Store it in freezer-safe containers for up to 2 months. By following these tips, you can enjoy your Teriyaki Tofu Stir Fry throughout the week! This blog post covered how to make a tasty Teriyaki Tofu Stir Fry. We discussed the main ingredients, like firm tofu and fresh veggies. You learned tips for crispy tofu and cooking techniques, plus variations to try. Remember, this dish is fun to customize with your favorite flavors. Whether you keep it simple or try new ingredients, it’s a dish you’ll enjoy making and eating. So grab your tofu and veggies, and get cooking!

Teriyaki Tofu Stir Fry Vibrant and Flavorful Dish

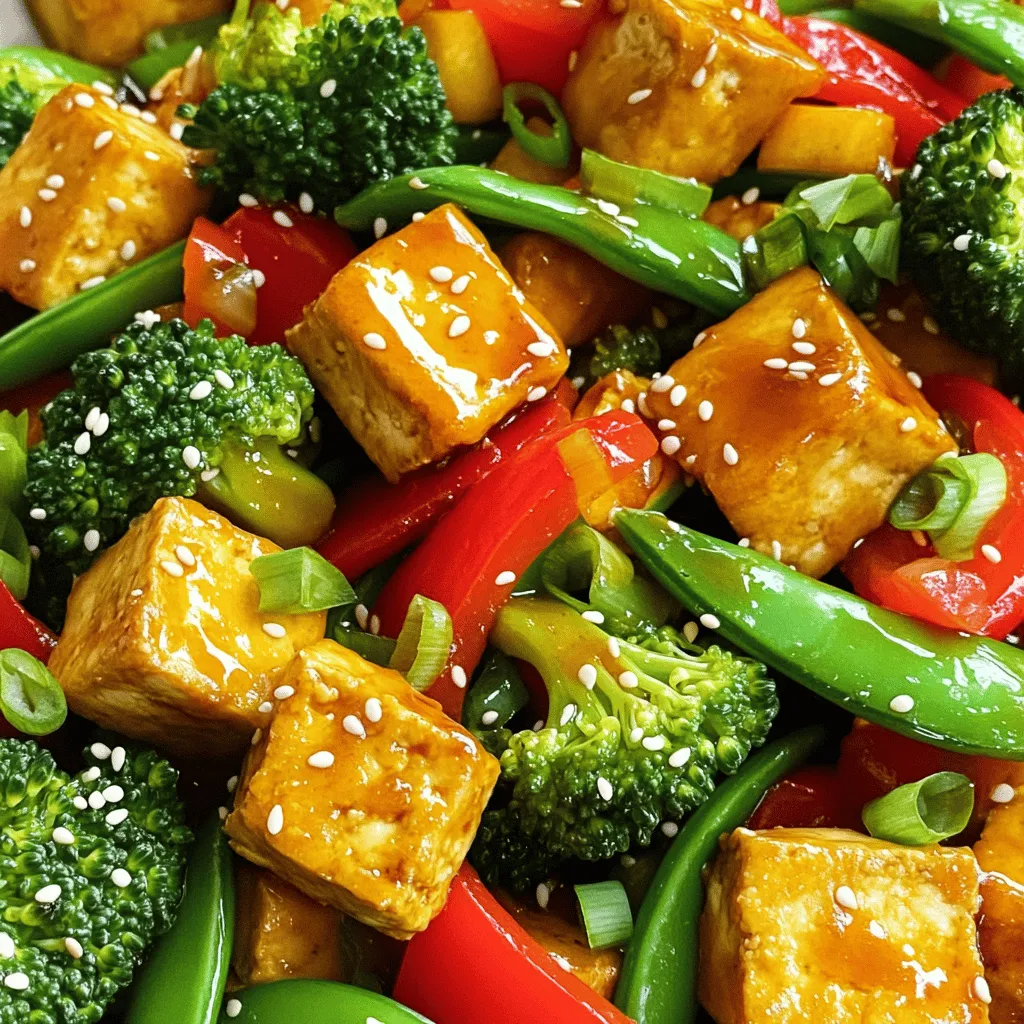
Are you ready to elevate your dinner game with a delicious Teriyaki Tofu Stir Fry? This vibrant dish combines crispy

- Whole turkey (10-12 pounds) - Unsalted butter (1 cup, softened) - Minced garlic (6 cloves) - Fresh herbs: rosemary (2 tbsp), thyme (2 tbsp), sage (2 tbsp) - Lemon zest (from 1 lemon) - Salt (1 tbsp) and black pepper (1 tsp) - Low-sodium chicken broth (4 cups) - Vegetables: onions (2, quartered), carrots (4, cut into large chunks), celery (4 stalks, cut into large chunks) - Fresh herbs for garnish (rosemary, thyme, or parsley) I love using fresh ingredients for this turkey. They make a world of difference. Start with a whole turkey that weighs between ten and twelve pounds. This size fits well in most ovens and serves a good group of people. Next, grab a cup of unsalted butter. Softening it helps blend in the other flavors nicely. You will need six cloves of garlic, minced. Garlic adds a rich flavor to the butter. For herbs, use fresh rosemary, thyme, and sage. You will need two tablespoons of each. They brighten the dish and bring out the turkey's natural taste. Don't forget the zest of one lemon. It adds a refreshing twist. Season the turkey with one tablespoon of salt and one teaspoon of black pepper. These simple seasonings enhance all the other flavors. You will also need four cups of low-sodium chicken broth. This adds moisture and helps cook the turkey evenly. Finally, prepare some vegetables. Use two onions, quartered, four carrots in large chunks, and four celery stalks cut into large pieces. These vegetables not only flavor the turkey but also create a lovely base in the pan. To finish, keep fresh herbs on hand for garnish. Rosemary, thyme, or parsley work great. These herbs make the turkey look beautiful when served. Gathering these ingredients sets you up for a flavorful delight that everyone will enjoy. {{ingredient_image_1}} Set your oven temperature to 325°F (165°C). This low heat helps cook the turkey evenly. In a medium mixing bowl, combine the softened butter, minced garlic, and chopped herbs. Use rosemary, thyme, and sage. Add lemon zest, salt, and black pepper. Mix well until everything blends together. This herb butter gives the turkey its rich flavor. Take the turkey from the fridge and pat it dry with paper towels. This step is crucial for crispy skin. Next, carefully loosen the skin on the turkey breast. Use your fingers to slide underneath it. Take half of the herb butter and spread it under the skin. Then, rub the rest of the butter all over the turkey, covering the legs and wings. Place quartered onions, carrot chunks, and celery pieces in a large roasting pan. They create a flavorful base for the turkey. Set the turkey on top of the vegetables. Pour the chicken broth around the turkey, making sure not to wash off the butter. Cover the turkey loosely with foil. Roast in the preheated oven for about 2 to 2.5 hours. Check the internal temperature at the thickest part of the thigh; it should reach 165°F (74°C). Remove the foil during the last 45 minutes. This helps the skin brown and crisp. Baste the turkey with pan juices every 15-20 minutes for extra flavor and moisture. Once cooked, take the turkey out of the oven and let it rest for 20-30 minutes. This step allows the juices to redistribute. After resting, carve the turkey and arrange it on a serving platter. Pour some pan juices over the turkey to keep it moist. Garnish with fresh herbs for a beautiful finish. To get crispy skin on your turkey, start by drying it well. Use paper towels to pat the turkey dry. This step helps remove moisture. Moisture will steam the skin, making it soft. Next, remove the foil during the last part of roasting. This allows the skin to brown and crisp up nicely. Roasting a turkey takes skill and care. Baste the turkey every 15 to 20 minutes. Use the pan juices for added flavor and moisture. Check the turkey's temperature with a meat thermometer. Aim for 165°F (74°C) in the thickest part of the thigh. This ensures your turkey is fully cooked and safe to eat. You can mix and match herbs to change the flavor. If you want a different taste, try using thyme and oregano. For a bolder flavor, add fresh dill or tarragon. Each herb brings its own unique touch to the turkey. Feel free to experiment with what you have at home! Pro Tips Resting is Key: Allow the turkey to rest after roasting. This helps the juices redistribute, ensuring a moist and flavorful turkey. Crispy Skin Secret: Make sure to pat the turkey dry before applying the herb butter. A dry surface helps achieve that perfectly crispy skin. Flavorful Basting: Use the pan juices to baste the turkey during the last 45 minutes of cooking. This enhances the flavor and keeps the meat moist. Internal Temperature Check: Always check the internal temperature at the thickest part of the thigh. It should reach 165°F (74°C) to ensure it's fully cooked. {{image_2}} You can switch up the herbs in your butter. Try using basil or oregano for new tastes. Chives and parsley also add a fresh twist. If you love a spicy kick, add some crushed red pepper. Each herb brings a unique flavor that can change your turkey game. Roasting is great, but you can try other methods too. Brining your turkey first can make it juicy and flavorful. Simply soak the turkey in saltwater for several hours. Frying is another fun option. It gives a crisp skin and can cook faster. Just make sure your turkey fits in the fryer! Stuffing adds even more flavor to your turkey. You can use traditional bread stuffing with herbs and spices. For a twist, try rice or quinoa mixed with veggies. Adding fruits like apples or cranberries gives a sweet touch. Remember to pack your stuffing lightly so it cooks well. To keep your turkey fresh, cool it quickly. Let it sit for no more than two hours. Wrap the turkey in plastic wrap or foil. You can also place it in an airtight container. This helps keep moisture in and prevents it from drying out. Store it in the fridge. It will stay good for up to four days. To reheat your turkey, you want to keep it moist. Preheat your oven to 325°F (165°C). Place the turkey in a baking dish. Add a little chicken broth or water to the bottom of the dish. Cover it with foil to trap steam. Heat it for about 20 minutes or until warm. This method keeps the turkey juicy and tasty. If you have a lot of turkey left, freezing is a great option. Slice the turkey into portions for easy meals later. Wrap each piece tightly in plastic wrap. Then, place it in a freezer bag. Squeeze out all the air before sealing. You can freeze turkey for up to six months. To thaw, move it to the fridge overnight. This way, the turkey stays safe and flavorful. A turkey needs about 13 minutes per pound at 325°F. For a 10-12 pound turkey, this means cooking for 2 to 2.5 hours. Always check the thickest part of the thigh for an internal temperature of 165°F. This ensures it is safe to eat and juicy. Basting helps keep the turkey moist and adds flavor. It is not strictly necessary. If you are short on time, you can skip it. However, if you have the time, baste every 15 to 20 minutes for the best taste and texture. Yes, you can prepare garlic herb butter ahead of time. Mix the butter, garlic, and herbs, then store it in the fridge for up to a week. You can also freeze it for longer storage. Just let it thaw before using. Some great sides include mashed potatoes, green beans, and stuffing. Roasted carrots and cranberry sauce also work well. Each dish adds flavor and color to your meal. Serve them alongside your turkey for a complete feast. In this article, we explored how to prepare a delicious garlic herb butter roasted turkey. We covered the key ingredients, step-by-step instructions, helpful tips, and variations for your feast. Remember, using fresh herbs and techniques like proper drying ensures crispy skin and adds flavor. Don’t forget to store leftovers properly for later enjoyment. With these tips, you can create a memorable meal. Enjoy your cooking adventure and impress your family with your turkey skills!

Garlic Herb Butter Roasted Turkey Flavorful Delight

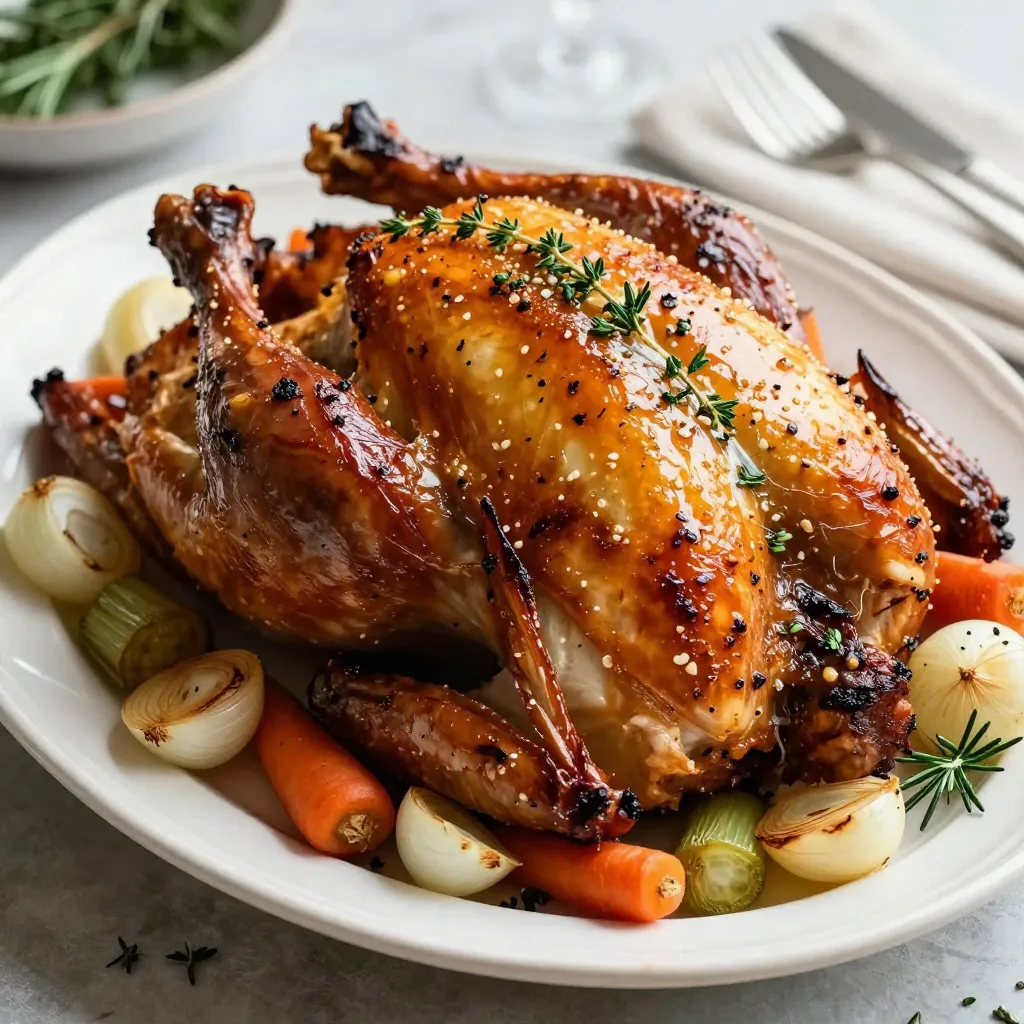
Looking to impress your guests with a mouthwatering turkey? Look no further! My Garlic Herb Butter Roasted Turkey brings unbeatable

- 1 ½ cups all-purpose flour - 1 teaspoon baking powder - ½ teaspoon baking soda - ¼ teaspoon salt For the cupcakes, I start with the dry ingredients. The all-purpose flour gives the cupcakes structure. Baking powder and baking soda help them rise. Salt enhances the flavors in the batter. - ½ cup unsalted butter, softened - 1 cup granulated sugar - 2 large eggs - ½ cup freshly squeezed lemon juice - Zest of 1 lemon - 1 teaspoon vanilla extract - ½ cup buttermilk - 1 cup fresh strawberries, chopped Next, I gather the wet ingredients. Softened butter and granulated sugar create a creamy base. Eggs add richness and moisture. Fresh lemon juice and zest provide that zesty kick. Vanilla extract adds warmth, while buttermilk keeps the cupcakes tender. Finally, chopped strawberries add fruity bursts in every bite. - 1 cup unsalted butter, softened - 4 cups powdered sugar - 2-3 tablespoons freshly squeezed lemon juice - 1 teaspoon lemon zest - Fresh strawberries for garnish For the frosting, I use softened butter and powdered sugar as the base. Lemon juice and zest keep it fresh and tangy. I top each cupcake with a fresh strawberry for a pretty finish and extra flavor. 1. First, preheat your oven to 350°F (175°C). Line a 12-cup muffin tin with cupcake liners. 2. In a medium bowl, whisk together the all-purpose flour, baking powder, baking soda, and salt until mixed well. 3. In a large bowl, cream the softened butter with granulated sugar. Use an electric mixer and mix until light and fluffy, about 3 minutes. 4. Add the eggs one at a time. Mix well after each addition. Pour in the lemon juice, lemon zest, and vanilla extract. Mix until it is all combined. 1. Next, alternate adding the dry flour mixture and buttermilk to the butter mixture. Start and end with the flour mixture. Mix just until combined. 2. Gently fold in the chopped strawberries with a spatula until they are evenly spread throughout the batter. 1. Divide the batter evenly among the cupcake liners. Fill each about 2/3 full. 2. Bake for 18-20 minutes. Check doneness by inserting a toothpick in the center. If it comes out clean, they are ready. 3. Remove the cupcakes from the oven and let them cool in the tin for 5 minutes. After that, transfer them to a wire rack to cool completely. 1. In a large bowl, beat the softened butter until creamy using an electric mixer. 2. Gradually add the powdered sugar. Mix on low speed until combined. 3. Add 2 tablespoons of lemon juice and lemon zest. Mix on medium speed until the frosting is fluffy. If needed, adjust the consistency with more lemon juice. 1. Once the cupcakes are completely cool, generously frost each cupcake with the lemon frosting. 2. To finish, garnish each cupcake with a fresh strawberry on top. This adds flavor and makes them look pretty! To make great cupcakes, measure your ingredients carefully. Use a kitchen scale for precise measurements. If measuring cups, spoon flour into the cup without packing it down. Level it off with a knife for accuracy. Room temperature ingredients are key. Softened butter mixes better with sugar, creating a light batter. Eggs and buttermilk should also be at room temperature. This helps them blend smoothly and gives your cupcakes a nice rise. For a beautiful finish, use a piping bag. This makes frosting easy and fun. Choose a star or round tip for different designs. Practice on a plate if you need to before frosting your cupcakes. Adjust the sweetness of your frosting to fit your taste. Add more powdered sugar for sweetness, or more lemon juice for tartness. Taste as you go, and find the right balance for your palate. Want to boost the flavor? Try adding fresh herbs like mint or basil. A small amount can give your cupcakes a unique twist. You can also swap strawberries for other fruits. Raspberries or blueberries can add a fun burst of flavor. Mix and match to find your favorite combination. {{image_2}} You can change up the flavor of your cupcakes. Try adding different fruits for a fun twist. Raspberries or blueberries work well with lemon. You can mix them into the batter just like the strawberries. This gives you a new flavor burst in every bite. You can also add herbs for a unique touch. Basil and mint add a fresh flavor. Chop them finely and fold them into the batter. It surprises people when they taste the herbs with the sweet lemon. If you need gluten-free cupcakes, use a gluten-free flour blend. Many blends work well in cupcake recipes. Just make sure to check the package for tips on baking. For a dairy-free option, use plant-based butter and milk. Coconut or almond milk can replace buttermilk. This way, everyone can enjoy these tasty treats. You can make mini cupcakes for a fun party treat. They bake faster, so keep an eye on them. Bake for about 12-15 minutes, checking doneness with a toothpick. You can use different molds too. Bundt pans create a lovely shape for a cake version. Just adjust your baking time, as larger cakes need more time to cook. Enjoy experimenting with sizes and shapes! To keep your Strawberry Lemonade Cupcakes fresh, store them in an airtight container. This method helps retain moisture. You can keep them at room temperature for a few days. If your kitchen is warm, consider refrigerating them to prevent spoilage. If you have extra frosting, store it in a sealed container in the fridge. It can last for up to a week. Before using, let the frosting sit at room temperature for about 15 minutes. If it feels too stiff, mix in a teaspoon of lemon juice or milk to restore its creamy texture. The cupcakes last for about three days at room temperature. In the fridge, they can last up to a week. For the frosting, it lasts a week in the fridge. Look for signs of spoilage such as mold, off smells, or changes in texture. Always trust your senses; if something seems off, it's best to throw it away. Strawberry Lemonade Cupcakes stay fresh for about 3 to 5 days. Store them in an airtight container at room temperature. If you keep them in the fridge, they may last a bit longer. However, the fridge can dry them out. Yes, you can freeze Strawberry Lemonade Cupcakes. Here’s how: 1. Let the cupcakes cool completely. 2. Wrap each cupcake in plastic wrap tightly. 3. Place the wrapped cupcakes in a freezer-safe bag or container. 4. Label and date the container. 5. Freeze for up to 3 months. When you want to enjoy them, thaw them in the fridge overnight and let them come to room temperature before serving. If you don’t have buttermilk, you can make a substitute. Here are a few options: - Mix 1/2 cup milk with 1/2 tablespoon vinegar or lemon juice. Let it sit for 5 minutes. - Use plain yogurt or sour cream, thinned with a little milk. - Almond milk can work, too, with a splash of vinegar. Absolutely! Sprinkles add color and fun. You can also use: - Shredded coconut for a tropical touch. - Edible flowers for a fancy look. - Crushed graham crackers for a crunch. Serve the cupcakes at room temperature for the best flavor. Pair them with: - A glass of chilled lemonade. - Fresh fruit like berries or a fruit salad. - A scoop of vanilla ice cream for a special treat. In this article, we explored how to make delicious Strawberry Lemonade Cupcakes. We covered key ingredients, from dry flour to fresh strawberries. Step-by-step, you learned how to mix, bake, and frost. Remember to measure your ingredients carefully for the best results. You can also experiment with flavors, sizes, and storage tips to keep your cupcakes fresh. Enjoy your baking journey and make these treats your own! They are sure to bring joy to your table.

Strawberry Lemonade Cupcakes Delightful and Fresh Treat

Looking for a sweet treat that bursts with flavor? Strawberry Lemonade Cupcakes are the perfect choice! With vibrant strawberries and

Older posts
Newer posts
← Previous Page1 … Page36 Page37 Page38 … Page84 Next →

dsad

© 2026 Lisa Dishes • Built with GeneratePress

Our Policies

  • Copyright Policy
  • Cookie Policy
  • GDPR Policy
  • Privacy Policy
  • Disclaimer
  • Terms Of Use

More Information

  • Home
  • About
  • Contact
  • Appetizers
  • Dessert
  • Dinner
  • Drinks
©2026, Lisa Dishes About Back To Top