Skip to content
DisclaimerTerms Of UseGDPR PolicyCookie Policy

Lisa Dishes

  • Home
  • Drinks
  • Appetizers
  • Dinner
  • Dessert
  • About
  • Contact
  • Privacy Policy
DisclaimerTerms Of UseGDPR PolicyCookie Policy

NO-ING-IMG

- 1 block firm tofu (14 oz), pressed and drained - 1/2 cup cornstarch - 1/4 cup honey - 1/4 cup fresh orange juice - Zest of 1 orange - 2 tablespoons soy sauce - 1 tablespoon fresh ginger, grated - 2 cloves garlic, minced - 1 tablespoon sesame oil - Salt to taste - Chopped green onions and sesame seeds for garnish In this recipe, firm tofu stands out. It holds its shape and absorbs flavors well. The cornstarch gives the tofu its crispy coating. Honey adds sweetness, while fresh orange juice brightens the dish. For seasonings, orange zest enhances the citrus flavor. Soy sauce adds umami. Fresh ginger and garlic create depth. Sesame oil brings a rich, nutty taste. Finally, garnishes like green onions and sesame seeds add freshness and crunch. {{ingredient_image_1}} To start, we need to press the tofu. This step removes excess water and helps the tofu get crispy. Wrap the tofu in a clean kitchen towel. Place a weight, like a heavy plate, on top. Let it sit for about 30 minutes. This makes a big difference in texture. After pressing, it’s time to cut the tofu. Slice it into bite-sized cubes. Aim for even pieces to ensure they cook at the same rate. Now we need to dredge the tofu in cornstarch. In a shallow dish, add 1/2 cup of cornstarch. Lightly sprinkle some salt for flavor. Take each tofu cube and coat it in cornstarch. Make sure to shake off any extra. This coating gives the tofu its crispy texture. For the best crispy coating, make sure the oil is hot before adding the tofu. This helps create a nice crunch. Next, we will fry the tofu in sesame oil. Heat a large skillet over medium-high heat. Add 1 tablespoon of sesame oil. Once hot, add the tofu cubes in a single layer. Cook them for about 3-4 minutes on each side. You want them golden brown and crispy. When done, move the tofu to paper towels to drain excess oil. Now it’s time for the orange sauce. In a small saucepan, combine the honey, orange zest, orange juice, soy sauce, grated ginger, and minced garlic. Bring this mixture to a simmer over medium heat. Let it cook for about 5 minutes. This will help it thicken slightly and blend the flavors. To finish, we need to coat the tofu in the orange sauce. Add the crispy tofu to the saucepan. Gently toss to coat each piece evenly. Cook for another 2-3 minutes until heated through. Finally, serve the dish immediately. Garnish with chopped green onions and sesame seeds for a touch of flair. Enjoy your crispy honey orange tofu! To get the best crispiness from your tofu, pressing is key. Pressing removes extra moisture. This helps the tofu fry better. Wrap your tofu in a clean towel. Then, place a weight on it for about 30 minutes. This simple step makes a big difference. Frying temperature is also important. Heat your sesame oil to medium-high. This ensures the tofu cooks evenly and gets crispy. If the oil is too cool, the tofu will soak up oil and become soggy. You can adjust the sweetness of the sauce. If you like it sweeter, add more honey. For a less sweet taste, use less honey. Play around with the sweetness to fit your taste. Want a kick? Add red chili flakes to the sauce. This gives your dish a nice heat. Just a pinch can transform the flavors. Pair your crispy honey orange tofu with rice or noodles. Both options soak up the sauce well. This makes each bite even more delicious. For presentation, serve it in a bowl. Sprinkle chopped green onions and sesame seeds on top. This adds color and crunch. You can also add orange slices for a fresh touch. Pro Tips Press Tofu Well: Ensure the tofu is pressed for at least 30 minutes to remove excess moisture, allowing it to absorb flavors better and achieve maximum crispiness. Use Fresh Ingredients: Fresh ginger and garlic elevate the dish's flavor. If possible, always opt for fresh over powdered or jarred alternatives. Control the Heat: Maintain a medium-high heat when cooking the tofu to achieve a perfect golden color without burning it. Adjust the heat as necessary during cooking. Garnish for Flavor: Don't skip the green onions and sesame seeds as they add not only a pop of color but also a delightful crunch and additional flavor to the dish. {{image_2}} You can swap honey for maple syrup or agave nectar. Both add sweetness. You might also try brown rice syrup. For sauces, teriyaki or peanut sauce works well. These add a new layer of flavor. They can change the whole dish. Consider adding bell peppers or broccoli. They add color and crunch. You can also use seasonal vegetables like zucchini or snap peas. This keeps the dish fresh and fun. Mixing in veggies boosts the meal's nutrition too. Get creative with how you serve this dish. You can turn it into a salad bowl. Just add greens, grains, and your crispy tofu on top. It’s a great lunch! You can also use the tofu in wraps or sandwiches. It adds protein and flavor. Try adding some fresh herbs to enhance the taste. To keep your crispy honey orange tofu fresh, store it in the fridge. Place it in an airtight container. This helps prevent moisture loss and keeps the tofu tasty. Use it within three days for the best flavor. If you have extra sauce, store it in a separate container. When it’s time to eat again, you want that crispy texture. The oven is the best choice. Preheat it to 375°F (190°C). Place the tofu on a baking sheet and heat for about 10 minutes. This keeps it crunchy. If you use the microwave, the tofu will get soft. Heat it on low for a short time if you must. You can freeze crispy honey orange tofu, but it changes texture. Freeze uncooked tofu for better results. Cut it into cubes before freezing. When ready to cook, thaw it in the fridge overnight. To prepare it, press it again to remove moisture. Then, cook as directed in the recipe. Yes, you can use extra-firm tofu for this recipe. It holds its shape well. This type has less moisture, which helps achieve that nice crispiness. Just remember to press it too. Pressing will remove any extra water and make it even better. Absolutely! You can use maple syrup or agave nectar instead. Both give a sweet flavor. They will work well in the orange sauce. Just swap them in a 1:1 ratio for the honey. To make this dish gluten-free, use gluten-free soy sauce or tamari. Check the cornstarch too, as most are gluten-free. This way, you can enjoy the dish without worry. Crispy Honey Orange Tofu pairs well with many sides. Try serving it with: - Steamed rice - Quinoa - Stir-fried veggies - Noodles These sides complement the flavors and add to the meal. Tofu is perfectly cooked when it is golden brown and crispy. It should feel firm and have a nice crunch on the outside. If you press it gently, it should spring back. This means it’s ready to enjoy! You now know how to make Crispy Honey Orange Tofu step by step. From selecting main ingredients to cooking methods, each stage is key to tasty results. You can easily adjust flavors with sauces or add veggies. Don't forget these tips for the best texture and taste. Store, reheat, or freeze to enjoy later. This dish is simple, fun, and perfect for everyone. Enjoy your cooking and impress your friends and family with this delicious meal!

Crispy Honey Orange Tofu Simple Flavorful Delight

Are you ready to savor a dish that’s both crispy and sweet? My Crispy Honey Orange Tofu is a flavor

- Baguette, sliced into 1/2 inch pieces - 4 ripe tomatoes, diced - 1 head of garlic, roasted - 2 tablespoons fresh basil, chopped - 2 tablespoons balsamic vinegar - 3 tablespoons olive oil - Salt and pepper to taste - Optional: 1/4 cup grated Parmesan cheese - Grated Parmesan cheese When making this bruschetta, use the best tomatoes you can find. Heirloom tomatoes add great flavor and color. Also, fresh basil makes a big difference. It gives your dish a bright taste. Use high-quality olive oil for the best results. Olive oil adds richness and depth to the bruschetta. Avoid old or cheap oils. Always choose fresh, vibrant ingredients to make your bruschetta shine. {{ingredient_image_1}} First, you need to preheat your oven to 400°F (200°C). Take a whole head of garlic and wrap it in aluminum foil. Drizzle one tablespoon of olive oil on it. This will help the garlic become soft and sweet. Roast it in the oven for 30-35 minutes. You will know it's ready when it feels soft to touch. Let it cool before you handle it. Next, grab a mixing bowl. Dice four ripe tomatoes and add them to the bowl. Then, chop two tablespoons of fresh basil and toss that in too. Pour in two tablespoons of balsamic vinegar and three tablespoons of olive oil. Now, squeeze the roasted garlic cloves from their skins into the bowl. Mash them up and mix everything well. Finally, season with salt and pepper to your taste. While your tomato mixture sits, it’s time to toast the baguette. Slice your baguette into half-inch pieces. Lay them on a baking sheet. Drizzle some olive oil over the slices. Toast them in the oven for about 5-7 minutes. Watch them closely until they turn lightly golden and crisp. This will give your bruschetta a nice crunch. When choosing tomatoes, I prefer either heirloom or Roma. Heirloom tomatoes offer great flavor and color. They add a unique touch to your bruschetta. Roma tomatoes are firm and juicy. They hold up well when chopped. Both types work great, so pick what you like best. Timing is key when roasting garlic. Preheat your oven to 400°F (200°C) for the best results. Wrap the garlic in foil and drizzle it with olive oil. Roast for 30-35 minutes. When done, the garlic should be soft and caramelized. Let it cool before using. This garlic will add a sweet and rich taste to your dish. Layering is important for flavor and looks. Start with the toasted baguette slices. Spoon a generous amount of the tomato and garlic mix on top. Make sure each slice gets a good amount. If you like cheese, sprinkle some Parmesan on top. This adds a nice finish and extra flavor that everyone will enjoy. Pro Tips Choose the Right Tomatoes: For the best flavor, use ripe, in-season tomatoes. Heirloom or vine-ripened tomatoes add a wonderful sweetness and depth to your bruschetta. Perfectly Roasted Garlic: Make sure to roast your garlic until it is golden and soft for a sweeter, more mellow flavor. This will enhance the overall taste of your bruschetta. Olive Oil Drizzle: Drizzling high-quality extra virgin olive oil over the finished bruschetta adds richness and enhances the dish's flavors. Don’t skip this step! Customize Your Toppings: Feel free to add other toppings like diced avocado, olives, or feta cheese for a twist on the classic bruschetta. Get creative! {{image_2}} You can get creative with your bruschetta! Here are some fun ideas for toppings: - Cheese options: Try goat cheese, feta, or mozzarella. Each cheese gives a unique taste. - Vegetables: Add sliced olives, roasted red peppers, or even arugula for a fresh crunch. - Spreads: A thin layer of pesto or hummus can add depth to your bruschetta. If you're looking for gluten-free options, you can swap the baguette. Here are some ideas: - Gluten-free baguette: Many stores sell gluten-free bread. Look for ones with good texture. - Rice cakes: They can be a light, crispy base for your toppings. - Polenta rounds: Cook and slice polenta, then toast for a unique twist. Want to make your bruschetta even tastier? Here are some spices and herbs to add: - Basil: Fresh basil is great, but try adding dried oregano for a different flavor. - Red pepper flakes: A pinch of these can add a nice kick to your dish. - Lemon zest: Adding this gives a bright, fresh flavor that wakes up the taste buds. Feel free to mix and match these options. Each variation can turn your bruschetta into a new delight! To keep your bruschetta fresh, store each component separately. Place the tomato mixture in an airtight container. It will last for 2-3 days in the fridge. For the toasted baguette, use a paper bag to keep it crisp. Avoid plastic bags, as they trap moisture. If you have leftover roasted garlic, store it in a small container. It lasts about a week in the fridge. To revive the toasted bread, preheat your oven to 350°F (175°C). Place the baguette slices on a baking sheet. Heat for about 5-7 minutes until warm and crisp again. For the tomato mix, warm it gently in a pan over low heat. Stir it often to keep it fresh. You can also enjoy the mixture cold, straight from the fridge! You can freeze the tomato mixture, but it may lose some texture. Place it in a freezer-safe container for up to 3 months. When ready to use, thaw it overnight in the fridge. Toasted baguette slices do not freeze well. They become soggy when thawed. Instead, toast a fresh batch for the best taste! Roasted garlic lasts about 1 week in the fridge. Store it in an airtight container to keep it fresh. You can also freeze roasted garlic for up to 3 months. To freeze, place cloves in a freezer bag. This way, you can enjoy it later. Yes, you can prep bruschetta ahead of time. Make the tomato mixture and store it in the fridge for up to 2 days. Just remember to toast the baguette right before serving. Toasting keeps the bread crispy and tasty. Bruschetta pairs well with many meals and snacks. You can serve it with a fresh salad or as a starter before pasta. It also works great with cheese and wine. For a fun twist, try it with hummus or olive tapenade. This post guided you through making delicious bruschetta. You learned about fresh ingredients like tomatoes and garlic. You also discovered great techniques for roasting and toasting. Plus, we talked about storage tips and fun variations. In the end, making bruschetta is simple and fun. Enjoy your tasty creation! Experiment with flavors and find what you love best. Let your creativity shine in the kitchen.

Roasted Garlic Tomato Bruschetta Delightful Bites

If you’re craving a tasty appetizer, let me introduce you to Roasted Garlic Tomato Bruschetta! This dish combines sweet tomatoes

- 1 ½ cups graham cracker crumbs - ½ cup unsalted butter, melted - 1 tablespoon sugar - 16 oz cream cheese, softened - ½ cup granulated sugar - 2 large eggs - 1 teaspoon vanilla extract - Zest of 1 orange - ½ cup fresh cranberries, roughly chopped - ¼ cup orange juice - 1 tablespoon cornstarch These ingredients are key for making delicious cranberry orange cheesecake bars. The graham cracker crumbs form a tasty crust. The unsalted butter helps bind the crumbs together. Sugar adds sweetness to both the crust and filling. For the filling, cream cheese gives a rich texture. Granulated sugar sweetens the mixture, while eggs help it set. Vanilla extract adds depth to the flavor. The zest of an orange brings a bright, fresh note. Fresh cranberries give a tart contrast to the sweet filling. Orange juice enhances the orange flavor. Cornstarch helps the filling firm up nicely. To make this dessert shine, you can focus on the quality of your ingredients. Use fresh cranberries for the best taste. Softening cream cheese is also essential for a smooth filling. This simple list will help you create a treat everyone will love. {{ingredient_image_1}} 1. Preheat your oven to 350°F (175°C). This helps the crust bake evenly. 2. Prepare an 8x8 inch baking dish. Line it with parchment paper. Leave some paper hanging over the edges. This makes it easy to lift out the bars later. 3. Mix graham cracker crumbs, melted butter, and sugar in a bowl. Stir until everything combines well. You want a sandy texture. 4. Press the crust mixture into the bottom of the dish. Use your hands or the back of a cup. Make sure it is even. 1. Beat the softened cream cheese and granulated sugar together. Use a mixer on medium speed until it is smooth and creamy. This takes about 2-3 minutes. 2. Add the eggs one at a time. Mix well after each addition. This helps to keep the filling light. 3. Stir in the vanilla extract and orange zest. Mix until everything is fully combined. The zest adds a nice touch of flavor. 1. Prepare the cranberry mixture. In a small bowl, combine the chopped cranberries, orange juice, and cornstarch. This helps to thicken the filling. 2. Gently fold this mixture into the cheesecake batter. Use a spatula to combine. Be careful not to break the cranberries. 3. Pour the cheesecake mixture over the pre-baked crust. Use a spatula to smooth the top. This ensures even baking. 4. Bake in the oven for 25-30 minutes. You want the edges set, but the center should still jiggle slightly. It will firm up as it cools. Once baked, let it cool at room temperature before chilling in the fridge for at least 2 hours. This step is key for a tasty treat! - Ensure cream cheese is properly softened: Take your cream cheese out of the fridge. Let it sit for about 30 minutes. It should feel soft and easy to mix. This step helps create a smooth filling. - Cool the crust before adding filling: After baking the crust, let it cool for a few minutes. This helps the filling set well. If the crust is too hot, it can warm the filling and make it runny. - Test for doneness: When baking, keep an eye on the edges. They should feel set while the center is still slightly jiggly. This means your cheesecake will firm up nicely as it cools. - Ideas for garnishing: Top your cheesecake bars with a sprinkle of orange zest. You can also add fresh cranberries for color. A drizzle of honey or maple syrup adds a nice touch too. - Pairing options: Serve these bars with a dollop of whipped cream. It adds creaminess that pairs well with the tart cranberries. You can also serve them with a side of orange slices for extra flavor. Pro Tips Chill the Cream Cheese: Make sure your cream cheese is at room temperature before mixing. This ensures a creamy, smooth filling without lumps. Use Fresh Cranberries: For the best flavor and texture, use fresh cranberries instead of dried ones. Their tartness complements the sweetness of the cheesecake. Don’t Overbake: Keep an eye on the cheesecake bars while baking. They should be slightly jiggly in the center when you take them out; they will set as they cool. Lift with Parchment: Using parchment paper overhang makes it easy to lift the bars out of the pan without breaking them, allowing for clean, even cuts. {{image_2}} You can switch up the flavors in your cranberry orange cheesecake bars by adding different fruits. For example, try using blueberries or strawberries. These fruits will add sweetness and a nice color. You can also mix in some lemon or lime zest for a zesty twist. This will brighten the taste and make it even more refreshing. If you need gluten-free options, use gluten-free graham crackers. They work just as well and keep the crust tasty. For those who want a dairy-free version, swap the cream cheese with a dairy-free cream cheese alternative. This keeps the creamy texture while meeting your dietary needs. You can enjoy these cheesecake bars no matter your diet! To keep your cranberry orange cheesecake bars fresh, store them in the refrigerator. Use an airtight container or wrap them tightly with plastic wrap. This helps keep the bars moist and prevents them from absorbing other smells from the fridge. If you want to store them for a longer time, freezing is a great option. First, cut the bars into squares. Then, wrap each piece in plastic wrap and place them in a freezer-safe bag. Remove as much air as possible before sealing. These bars can last up to three months in the freezer. In the fridge, cranberry orange cheesecake bars can last about five days. Make sure to check for signs of spoilage. If you see any mold or if they smell off, it’s best to throw them away. Signs of spoilage include: - Unpleasant smell - Change in color - Visible mold Always ensure your bars are stored properly to enjoy their delicious taste! Can I use frozen cranberries for this recipe? Yes, you can use frozen cranberries. Just chop them while still frozen. There’s no need to thaw them first. They will bake well in the cheesecake bars. The flavor stays fresh and bright. How can I prevent cracks in my cheesecake? To prevent cracks, mix the batter slowly. Avoid overmixing. This keeps air bubbles out. Also, let the cheesecake cool slowly in the oven after baking. Don’t rush the cooling process. A gentle temperature change helps keep the surface smooth. Can I make this recipe ahead of time? Absolutely! You can make these cheesecake bars a day before you serve them. Just chill them in the fridge. They taste even better after a night in the fridge. This lets the flavors meld and deepen. This cheesecake bars recipe combines tasty ingredients like cranberries and orange zest. You learned how to prepare the crust and mix the filling step-by-step. I shared tips for perfect results and ways to change flavors. You can even modify it for different diets and store it for later. This dessert is easy and fun to make. Enjoy sharing your delicious cheesecake bars with others; they’ll love them!

Cranberry Orange Cheesecake Bars Delicious and Easy

Are you looking for a dessert that’s both easy to make and bursting with flavor? Look no further than these

- 8 oz rotini or penne pasta - 1 cup cherry tomatoes, halved - 1 cup cucumber, diced - 1/2 cup red bell pepper, diced - 1/4 cup red onion, finely chopped - 1/2 cup black olives, sliced - 1/2 cup mozzarella balls, halved - 1/4 cup fresh basil leaves, chopped - 1/4 cup olive oil - 2 tablespoons red wine vinegar (substitute with apple cider vinegar if preferred) - 1 teaspoon dried oregano - 1 teaspoon garlic powder - Salt and pepper to taste - Grated Parmesan cheese for garnish (optional) When I make Zesty Italian Pasta Salad, I love to gather fresh ingredients. The pasta, whether rotini or penne, forms the base of this dish. I always choose bite-sized shapes to make it easy to eat. The cherry tomatoes add a burst of sweetness, while the cucumber provides a nice crunch. I often include red bell pepper for a pop of color. Red onion gives it a slight zing, and black olives add a briny flavor. The mozzarella balls bring creaminess to each bite. Fresh basil leaves are a must for that aromatic touch. For the dressing, I mix olive oil and red wine vinegar. If you prefer, you can swap the vinegar with apple cider vinegar. Dried oregano and garlic powder add depth to the flavor. I always season with salt and pepper to bring everything together. You can also customize this dish. Use other vegetables or different pasta types to suit your taste. Adding alternative toppings can make it even more exciting. The options are endless! {{ingredient_image_1}} First, boil water in a large pot. Add a pinch of salt for flavor. Next, add 8 oz of rotini or penne pasta to the boiling water. Cook according to the package instructions until it is al dente. This usually takes around 8-10 minutes. After cooking, drain the pasta in a colander. Rinsing the pasta under cold water is very important. This cools it down and stops the cooking process. It also prevents the pasta from sticking together. While the pasta cools, it's time to prepare the salad. In a large mixing bowl, combine the following ingredients: - 1 cup cherry tomatoes, halved - 1 cup cucumber, diced - 1/2 cup red bell pepper, diced - 1/4 cup red onion, finely chopped - 1/2 cup black olives, sliced - 1/2 cup mozzarella balls, halved - 1/4 cup fresh basil leaves, chopped Mix these ingredients well. The colors and textures will make your salad pop. Fresh herbs add a burst of flavor, so don’t skip the basil. In a small bowl, whisk together the dressing ingredients. Use: - 1/4 cup olive oil - 2 tablespoons red wine vinegar (you can use apple cider vinegar instead) - 1 teaspoon dried oregano - 1 teaspoon garlic powder - Salt and pepper to taste Whisk until everything is well blended. If you want more flavor, feel free to adjust the seasoning. Add more salt, pepper, or herbs as you like. Now it’s time to combine everything! Add the cooled pasta to the bowl with your vegetables and cheese. Pour the dressing over the top. Toss gently to combine. Be careful not to break the pasta, as you want it to stay intact. After mixing, taste the salad. Adjust the seasoning if needed. Transfer the salad to a serving dish or individual bowls. You can also top it with grated Parmesan cheese for an added treat! To make the best pasta salad, cook your pasta al dente. This means it should be firm when bitten. Overcooked pasta can become mushy and ruin the dish. Once cooked, it’s key to rinse the pasta under cold water. This stops the cooking process and cools the pasta quickly. Rinsing also helps remove extra starch, making your salad less sticky. To boost the taste, try adjusting the seasoning. You can add more salt, pepper, or herbs based on your liking. Fresh herbs add a bright flavor. They can make a big difference compared to dried ones. If you use dried herbs, remember, they are stronger. Use less than you would with fresh. When serving, presentation matters. Use a large bowl to showcase the colorful veggies and pasta. You can also serve individual portions in small bowls. For a fun touch, sprinkle grated Parmesan on top. It adds a nice flavor and looks fancy. Pair your salad with grilled chicken or shrimp for a complete meal. This adds protein and makes it filling. Pro Tips Tip Title: Cook Pasta Al Dente: Cooking pasta until just al dente ensures it retains a firm texture and doesn't become mushy when combined with the dressing and other ingredients. Tip Title: Fresh Herbs Matter: Using fresh basil instead of dried can elevate the flavor of your salad significantly. Always opt for fresh when possible for a vibrant taste. Tip Title: Chill Before Serving: Letting the salad chill in the refrigerator for at least 30 minutes before serving allows the flavors to meld beautifully. Tip Title: Customize Your Add-ins: Feel free to add other vegetables like artichokes, or proteins such as grilled chicken or chickpeas for a heartier meal. {{image_2}} You can easily swap out veggies in this salad. Try bell peppers in different colors, like yellow or green. Fresh spinach or arugula adds a nice touch too. For cheese, use feta or goat cheese instead of mozzarella. These swaps give your salad a whole new vibe! If you need gluten-free options, use gluten-free pasta. There are many brands that make great pasta. For a vegan version, replace the cheese with avocado. You can also make the dressing with lemon juice instead of vinegar. This keeps the flavor bright and fresh! Want to add protein? Grilled chicken or shrimp works great in this dish. You can even mix in chickpeas for a meatless option. For a spicy kick, try adding sliced pepperoncini or jalapeños. Both add heat and excitement to your salad. To keep your Zesty Italian Pasta Salad fresh, use an airtight container. Glass or plastic containers both work well. Make sure to let the salad cool before sealing the container. This prevents moisture buildup, which can lead to sogginess. Store the salad in the fridge for best results. You can freeze pasta salad, but I do not recommend it for this dish. Freezing can change the texture of the vegetables and cheese. If you choose to freeze it, do so without the dressing. To freeze, place the salad in a freezer-safe bag. Squeeze out all the air to prevent freezer burn. When ready to eat, thaw in the fridge overnight. In the fridge, your pasta salad stays fresh for about 3 to 5 days. Always check for signs of spoilage before eating. Look for changes in color or a sour smell. If you notice these signs, it's best to throw it away. Enjoy your pasta salad while it's fresh for the best flavor! Yes, you can make this salad ahead of time. It tastes great when chilled. To prep in advance, cook the pasta and let it cool. Mix the veggies and dressing separately. Combine everything just before serving. This keeps the pasta fresh and the veggies crisp. Rotini or penne pasta are best for this salad. Their shapes hold the dressing well. You can also try fusilli or farfalle. These shapes add fun textures and make each bite enjoyable. This pasta salad lasts about three to five days in the fridge. Make sure to store it in an airtight container. If you see any signs of spoilage, like off smells or sliminess, toss it out. Freshness is key for the best taste. Absolutely! You can switch up the dressing to suit your taste. Try adding lemon juice for a zestier flavor. You can also use balsamic vinegar instead of red wine vinegar. For a creamy option, mix in some Greek yogurt or mayonnaise. This blog post detailed how to make a tasty Zesty Italian Pasta Salad. We covered the essential ingredients, step-by-step cooking instructions, and helpful tips to perfect your dish. Remember, you can mix and match ingredients based on your taste. Don't hesitate to try new flavors or options. This salad is refreshing, easy to make, and great for any occasion. Enjoy your pasta salad and impress your friends and family! It's a dish that's simple yet full of flavor, making it a crowd-pleaser.

Zesty Italian Pasta Salad Flavorful and Fresh Dish

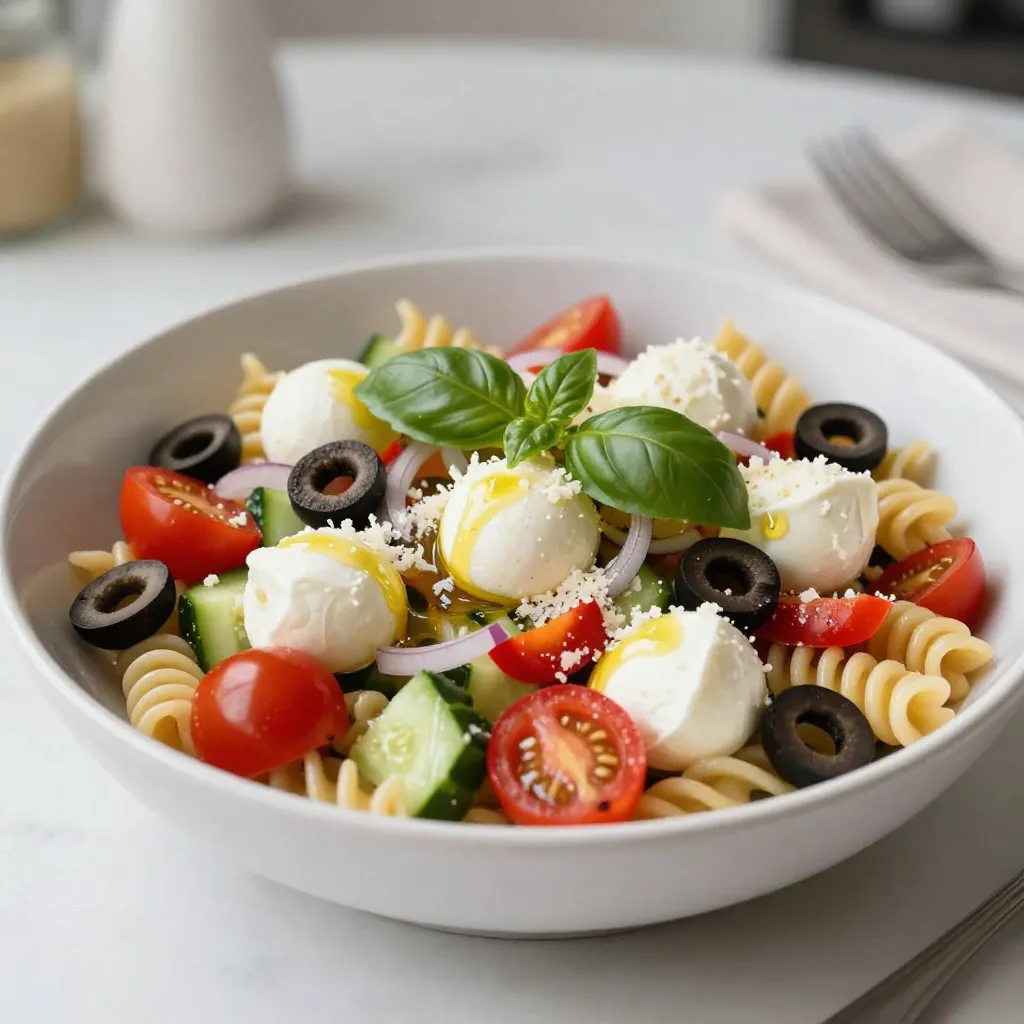
If you’re searching for a fresh, vibrant dish that bursts with flavor, look no further! My Zesty Italian Pasta Salad

- Turkey Breast Specification - 1 (3-4 lb) turkey breast, bone-in and skin-on - Herb Butter Components - 1/2 cup unsalted butter, softened - 4 cloves garlic, minced - 2 tablespoons fresh rosemary, chopped - 2 tablespoons fresh thyme, chopped - 1 tablespoon fresh sage, chopped - 1 tablespoon lemon zest - Additional Seasoning Needs - Salt and pepper to taste - 1 cup chicken broth To make a great herb butter roasted turkey breast, you need to gather key ingredients. Start with a bone-in, skin-on turkey breast weighing between 3 to 4 pounds. This will ensure a juicy and tender end product. Next, you'll need to prepare your herb butter. You’ll use half a cup of unsalted butter that is softened to room temperature. This helps blend in the flavors easily. Add four cloves of minced garlic, two tablespoons each of fresh rosemary and thyme, and one tablespoon of sage. Lemon zest adds a bright note that enhances the herbs. Don’t forget about seasoning! You should have salt and pepper ready to taste. Finally, keep one cup of chicken broth on hand. This will keep the turkey moist while it roasts. With these ingredients, you're all set to create a flavorful, tender turkey breast that will impress everyone at your table! {{ingredient_image_1}} - Preheat the Oven: First, set your oven to 350°F (175°C). This heat cooks the turkey evenly and keeps it juicy. - Prepare the Turkey Breast: Take a 3-4 lb turkey breast with bone and skin. Pat it dry using paper towels. This step helps the skin get crispy. - Make the Herb Butter Mixture: In a bowl, mix 1/2 cup softened butter with 4 minced garlic cloves, 2 tablespoons chopped rosemary, 2 tablespoons chopped thyme, 1 tablespoon chopped sage, 1 tablespoon lemon zest, salt, and pepper. Stir until well combined. - Loosening the Skin: Gently push your fingers under the turkey skin. Be careful not to tear it. This helps the butter flavor seep into the meat. - Spreading Herb Butter Under the Skin: Take some of the herb butter and spread it carefully under the skin. Cover the breast area evenly. This adds flavor and moisture. - Covering the Skin with Butter: Use the rest of the herb butter on top of the skin. This creates a flavorful crust when roasted. - Preparing the Roasting Pan: Place the turkey breast in a roasting pan. Add 1 cup of chicken broth to keep the turkey moist. - Cooking Time and Temperature Guidelines: Roast in the preheated oven for 1.5 to 2 hours. Use a meat thermometer to check for 165°F (74°C) internal temperature. - Resting Period After Roasting: When done, remove the turkey from the oven. Cover it loosely with foil and let it rest for 15-20 minutes. This allows the juices to settle, making each slice tender and juicy. Choosing the Right Turkey Breast Pick a bone-in and skin-on turkey breast. This type adds flavor and keeps the meat juicy. Aim for a size between 3 to 4 pounds. Smaller breasts dry out easier. Larger ones may take longer to cook. Tips for Moisture Retention Always pat the turkey breast dry. This helps the skin crisp up nicely. Use chicken broth in the roasting pan. It adds moisture and flavor. Cover the turkey loosely with foil while it rests. This keeps it warm without steaming. Using a Meat Thermometer Effectively Insert the thermometer into the thickest part of the breast. Avoid touching the bone, as it can give a false reading. You want the internal temperature to reach 165°F (74°C). This ensures the turkey is safe to eat and juicy. Additional Herbs and Spices Suggestions Feel free to mix in other herbs. Try tarragon, oregano, or dill for extra taste. A pinch of paprika or cayenne can add some heat. Fresh herbs give the best flavor, but dried herbs work too. Marinade Suggestions For added flavor, marinate the turkey breast overnight. A mix of olive oil, lemon juice, and garlic works well. You can also add mustard or honey for a sweet touch. This helps to tenderize and flavor the meat deeply. Making Use of Leftover Herb Butter Don’t waste any leftover herb butter! Use it on vegetables or bread. You can also melt it into sauces or drizzle it over cooked meats. This adds a burst of flavor to any dish. Pro Tips Resting is Key: Allow the turkey breast to rest for at least 15-20 minutes after roasting. This helps the juices redistribute, ensuring each slice is moist and flavorful. Butter Temperature Matters: Make sure your butter is softened but not melted. This allows it to be easily spread under the skin without tearing it. Season Generously: Don’t be shy with the seasoning! Make sure to salt the turkey breast both inside and out for the best flavor. Use a Meat Thermometer: For perfect doneness, use a meat thermometer to check the internal temperature. It should reach 165°F (74°C) for safe consumption. {{image_2}} Citrus Herb Blend Variation For a fresh twist, add citrus zest. Use orange or lime zest. Mix it into your herb butter. This adds a bright flavor to the turkey. It makes each bite pop with zest. Spicy Herb Butter Option If you like heat, add chili flakes. Mix these into your herb butter for a spicy kick. This will give your turkey a nice warmth. Perfect for those who enjoy bold flavors. Herb Butter with Garlic and Parmesan For a rich taste, add grated Parmesan. Mix it with minced garlic in your herb butter. This creates a savory, cheesy flavor. It enhances the turkey and makes it even more delicious. Slow Cooker Herb Butter Turkey Breast Use a slow cooker for a tender turkey. Spread the herb butter on the turkey as usual. Place it in the slow cooker with chicken broth. Cook on low for 6-8 hours. This method keeps the meat very moist. Grilled Herb Butter Turkey Breast Grilling adds a smoky flavor. Prepare the turkey as usual, then grill it. Cook on medium heat until the internal temperature reaches 165°F. This method gives a nice char and tasty crust. Instant Pot Herb Butter Turkey Breast For a quick meal, use an Instant Pot. Spread the herb butter on the turkey. Add 1 cup of broth and seal the pot. Cook on high pressure for about 30 minutes. This makes a juicy turkey in no time. Storing in the Refrigerator After you enjoy your turkey, let it cool. Slice the turkey breast and place it in an airtight container. Keep it in the fridge for up to four days. If you want to keep it longer, consider freezing. Freezing Options To freeze, wrap the turkey tightly in plastic wrap. Then, place it in a freezer bag or container. This method helps keep air out. You can freeze it for up to three months. Label the bag with the date for easy tracking. Best Methods for Reheating The best way to reheat turkey is in the oven. Preheat the oven to 325°F (165°C). Place the turkey in a baking dish. Add a bit of chicken broth in the dish to keep it moist. Cover it with foil to trap steam. Heat for about 20 to 30 minutes or until warm. Tips to Retain Juiciness To keep your turkey juicy, don’t rush the process. Reheating too fast can dry it out. If you use a microwave, cover the turkey with a damp paper towel. This helps prevent it from becoming dry. Always check the temperature to ensure it’s warm but not overcooked. How long to cook a turkey breast per pound? You need to cook a turkey breast for about 20 minutes per pound. For a 3-4 pound turkey breast, this means a cooking time of about 1.5 to 2 hours. Always check the internal temperature with a meat thermometer. It should reach 165°F (74°C) for safety. Can I use frozen turkey breast? Yes, you can use frozen turkey breast. However, make sure to thaw it completely before cooking. The best way to thaw is in the refrigerator for 24 hours per 5 pounds. If you are in a hurry, you can use the cold water method. Submerge the turkey in cold water, changing it every 30 minutes. What's the best way to check for doneness? The best way to check for doneness is to use a meat thermometer. Insert it into the thickest part of the breast without touching the bone. Look for a temperature of 165°F (74°C). If it’s not there yet, return it to the oven and check again. What sides pair well with turkey breast? Turkey breast goes well with many sides. Some popular choices are mashed potatoes, green beans, and cranberry sauce. You can also serve it with stuffing or roasted vegetables for a complete meal. How to serve turkey breast for a holiday meal? For a holiday meal, slice the turkey breast into even pieces. Arrange the slices on a large platter. Drizzle some pan juices over the turkey for added flavor. Garnish with fresh herbs like rosemary or thyme for a festive touch. Can I use this recipe for turkey thighs or legs? Yes, you can use this recipe for turkey thighs or legs. Just adjust the cooking time. Legs and thighs may take longer to cook, around 1.5 to 2.5 hours. Always check the internal temperature like with the breast to ensure they are done. Roasting a turkey breast can be easy and fun. We covered the needed ingredients, from the turkey itself to the rich herb butter. You learned step-by-step instructions for preparing and roasting. I shared tips to enhance flavor and prevent dryness. You also explored various cooking methods and storage options. Now, you can confidently roast a turkey breast that impresses everyone. Enjoy the process, and remember, practice makes perfect. Your delicious turkey is just a recipe away!

Herb Butter Roasted Turkey Breast Tender and Juicy Meal

Ready to serve up a turkey breast that’s both tender and juicy? In this post, I’ll share my foolproof recipe

You need 2 cups of fresh strawberries for this jam. Make sure they are ripe and sweet. Hull them and cut them into quarters. This helps them cook down nicely. Next, grab 1/2 cup of coconut milk. This adds a creamy texture and a light coconut taste. It pairs wonderfully with strawberries. Use 1/4 cup of honey or maple syrup for sweetness. You can adjust this amount based on your taste. If you like it sweeter, feel free to add a bit more. Add 1/4 cup of chia seeds. These tiny seeds help thicken the jam. They also add a nice crunch and boost the nutrition. You will also need 1 teaspoon of vanilla extract. This enhances the flavor of the jam. It makes everything taste richer and more delicious. Finally, add a pinch of salt. This small amount balances the sweetness. It brings out the flavors of the strawberries and coconut nicely. {{ingredient_image_1}} Start by taking a medium saucepan. Add 2 cups of fresh strawberries, hulled and quartered, and 1/2 cup of coconut milk. This mix gives your jam a creamy texture and a sweet taste. Turn on the heat to medium. Stir the mixture gently as it warms. This step helps the strawberries soften and release juices. Cook for about 5 to 7 minutes. You want to see some bubbling but not boiling. Once the strawberries are soft, take the pan off the heat. Use a fork or potato masher to mash the strawberries slightly. Leave some chunks for texture. This way, you get a mix of smooth and chunky bits in your jam. Next, add 1/4 cup of honey or maple syrup to sweeten. Adjust this amount to fit your taste. Then, stir in 1/4 cup of chia seeds, 1 teaspoon of vanilla extract, and a pinch of salt. Mix well until all is combined. Let the mixture sit for 5 to 10 minutes. During this time, the chia seeds absorb moisture. This helps thicken the jam. Afterward, transfer your jam to a clean jar. Allow it to cool to room temperature. Cover and refrigerate for at least 2 hours, or overnight for best results. Look for strawberries that are bright red. The berries should be firm yet slightly soft. Avoid any with green or white spots. The best strawberries smell sweet and fresh. You want them to feel heavy for their size. This means they are juicy and full of flavor. Taste your strawberries first. If they are sweet, you may not need much honey or maple syrup. Start with a little and add more if needed. Mix well and check again. You can always add more, but you can't take it out. This helps you make the jam just right for your taste. Chia seeds will thicken the jam as they soak. After mixing, let the jam sit for 5-10 minutes. The mixture should be thick, but not too stiff. If it’s too runny, add a bit more chia seeds. Let it sit longer to thicken. You want a spreadable jam that holds shape but still has some texture. Serve this jam on toasted bread for breakfast. It also pairs well with yogurt or pancakes. Use it as a topping for ice cream for a sweet treat. You can even spoon it on oatmeal for added flavor. Garnish with a fresh strawberry for a pretty touch. Pro Tips Freshness is Key: Use ripe, sweet strawberries for the best flavor. The riper they are, the sweeter your jam will be. Adjust Sweetness: Taste your jam mixture before refrigeration. You can always add more honey or maple syrup if you prefer a sweeter jam. Texture Control: For a smoother jam, blend the strawberry mixture instead of mashing. For a chunkier texture, simply mash lightly. Storage Tips: Store the jam in an airtight container in the fridge. It can last up to 2 weeks, so make small batches to enjoy fresh! {{image_2}} You can swap out strawberries for other berries. Raspberries, blueberries, or blackberries work great. Each berry brings its own taste. Raspberries add a tart kick. Blueberries add a sweet flavor. Blackberries provide a deep, rich taste. Just follow the same steps in the recipe. The jam will still be delicious! You can add fun flavors to your jam. Try lemon zest for a bright note. It will add freshness and zing. Cinnamon also works well for warmth. Just add a pinch to the mix. These flavors enhance the jam without taking over. Feel free to experiment with your favorite spices! If you want a vegan jam, use maple syrup. It replaces honey perfectly. The taste stays sweet and rich. You can also use agave syrup if you prefer. This keeps the jam vegan-friendly. Enjoy your tasty treat without any animal products! I recommend using clean glass jars for storing your jam. Glass jars seal well and keep flavors fresh. Make sure the jars have tight-fitting lids. You can also use plastic containers if you prefer. Just ensure they are food-safe and clean before use. You can keep Strawberry Coconut Chia Jam in the fridge for up to two weeks. The jam will thicken more as it sits. Always store it in a well-sealed container. If you see any signs of spoilage, such as mold or off-smells, discard it right away. If you want to store the jam longer, freezing is a great option. Pour the jam into freezer-safe containers or bags. Leave some space at the top for expansion. Label the container with the date. It can last up to three months in the freezer. To thaw, place it in the fridge overnight before using. Strawberry Coconut Chia Jam lasts about one week in the fridge. Store it in a clean, airtight container. If you want it to last longer, you can freeze it. Just make sure to leave some space in the jar because it will expand when frozen. Yes, you can use frozen strawberries! Just thaw them first. Drain any excess liquid before adding them to your pan. This helps keep the jam from being too watery. The flavor will still be great! Chia jam is healthy! Chia seeds are rich in fiber, protein, and omega-3 fatty acids. Strawberries add vitamins and antioxidants. This jam has no added preservatives, unlike store-bought options. You can enjoy it guilt-free. You can serve this jam on toast, pancakes, or waffles. It pairs well with yogurt or cottage cheese too. Try it as a topping on oatmeal or in smoothies. The options are endless, so get creative! We explored how to make Strawberry Coconut Chia Jam using simple, fresh ingredients. You learned how to combine strawberries, coconut milk, and chia seeds into a tasty jam. I shared tips on selecting ripe berries and adjusting sweetness. You can even experiment with different fruits and flavors. Remember to store your jam in the right containers for freshness. This easy recipe can become a fun kitchen project! Enjoy spreading your homemade jam on toast or adding it to yogurt. Get creative and have fun with it!

Strawberry Coconut Chia Jam Simple and Sweet Recipe

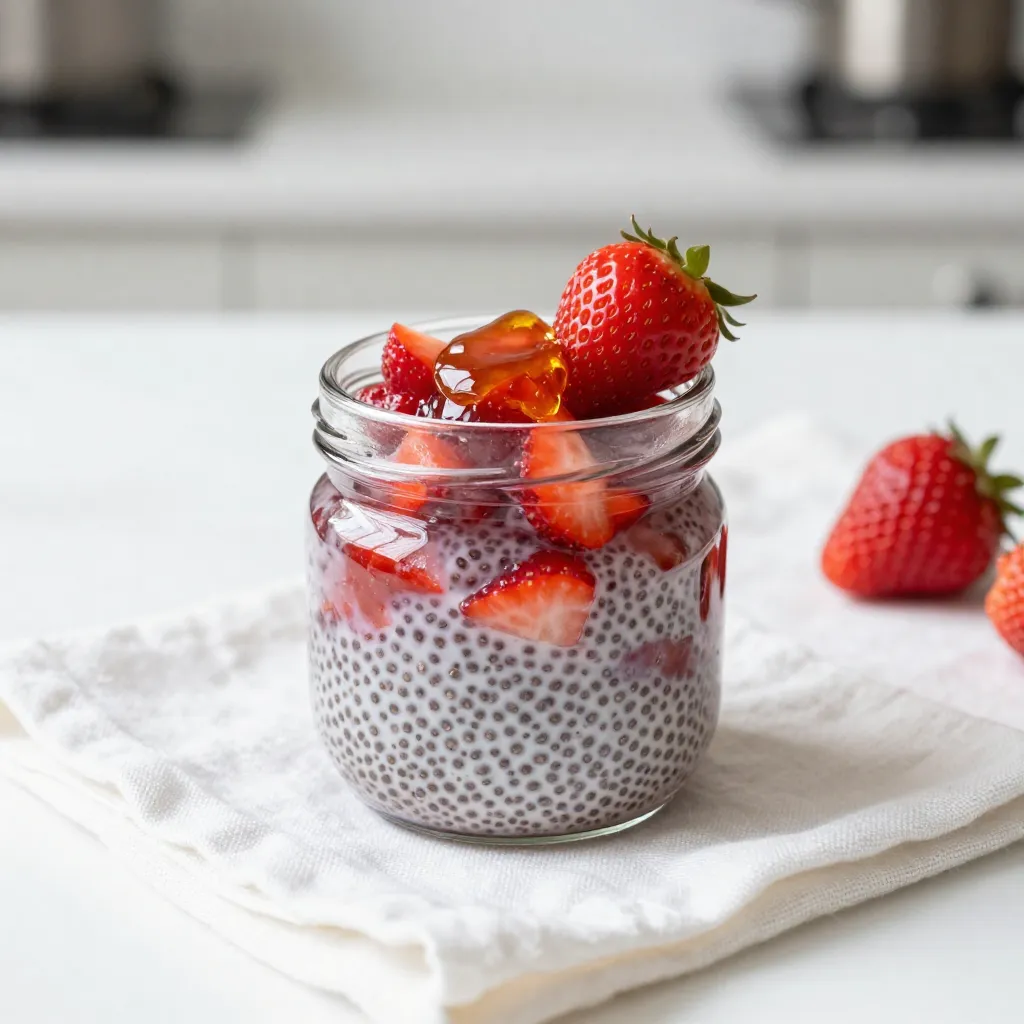
Are you ready to make a delicious and easy Strawberry Coconut Chia Jam? This simple recipe combines fresh strawberries with

- 2 cups rolled oats - 2 cups almond milk (or milk of your choice) - 1/2 cup maple syrup - 1/4 cup melted coconut oil - 2 teaspoons vanilla extract - 1 teaspoon baking powder - 1 teaspoon cinnamon - 1/2 teaspoon salt - 2 cups fresh or frozen blueberries - 1/4 cup chopped walnuts - 1 tablespoon chia seeds The base of this Blueberry Oatmeal Breakfast Bake is simple yet nourishing. I start with rolled oats. They provide great texture and fiber. Next, I add almond milk. You can use any milk you like. Maple syrup adds a touch of sweetness, making each bite delightful. Melted coconut oil brings a rich flavor and helps bind the ingredients. I also mix in vanilla extract. It adds a lovely aroma and enhances the overall taste. To give the bake a little lift, I add baking powder. A sprinkle of cinnamon adds warmth, and salt balances the flavors. You can customize the bake with optional ingredients. I love folding in blueberries, either fresh or frozen. They burst with flavor as they cook. If you want extra crunch, add walnuts. Chia seeds are a great addition for added nutrition and a slight crunch. They also help to thicken the mixture, making it even heartier. These ingredients come together to create a tasty, healthy breakfast. Each bite is packed with nutrients and flavor. This dish is perfect for families or meal prep. You can easily serve it warm or cold. Enjoy the wholesome goodness! {{ingredient_image_1}} Start by preheating your oven to 350°F (175°C). Grease a 9x13-inch baking dish with coconut oil or cooking spray. This step helps prevent the bake from sticking. In a large mixing bowl, combine the rolled oats, almond milk, maple syrup, melted coconut oil, vanilla extract, baking powder, cinnamon, and salt. Stir the mixture well until everything blends together smoothly. This base is the heart of the dish. Now it’s time to add the blueberries. Gently fold in the fresh or frozen blueberries, along with walnuts and chia seeds if you want them. Make sure the blueberries spread evenly throughout the mixture. This ensures every bite is bursting with flavor. Pour the oatmeal mixture into your prepared baking dish. Spread it out evenly with a spatula. Bake in the preheated oven for 30-35 minutes. Look for a golden-brown top and a set center. This means your bake is ready. Once the bake is done, take it out of the oven and let it cool for about 10 minutes. This cooling time helps it firm up a bit. When ready, slice it into squares for serving. You can top each square with Greek yogurt, a drizzle of maple syrup, and fresh blueberries for a colorful touch. Enjoy your warm, hearty breakfast! Bake time may vary with different ovens. Most ovens heat unevenly. If your oven runs hot, check the bake at 25 minutes. You want a golden top and a firm center. Use a toothpick to test doneness. It should come out clean when inserted in the center. If it has wet batter, bake for a few more minutes. Spices can boost the flavors in your bake. Try adding nutmeg or ginger for warmth. You can also mix in some vanilla bean for a richer taste. For sweeteners, consider using honey or agave syrup instead of maple syrup. Each option gives a unique flavor twist. Top your baked oatmeal with Greek yogurt for creaminess. You can also sprinkle chopped nuts on top for crunch. Fresh fruits like banana slices can add sweetness. Pair your breakfast bake with coffee or a cold glass of almond milk. This adds a nice balance to your meal. Pro Tips Choose Your Oats Wisely: Use rolled oats for the best texture. Quick oats can make the bake mushy, while steel-cut oats will require a longer baking time. Experiment with Sweetness: Adjust the amount of maple syrup according to your taste. You can also substitute with honey or agave syrup for different flavors. Customize Your Add-ins: Feel free to add other fruits like bananas or apples, or substitute walnuts with pecans or almonds for a different crunch! Storage Tips: This bake can be stored in the fridge for up to 5 days. Reheat individual portions in the microwave for a quick breakfast. {{image_2}} You can switch up the berries in this dish. Raspberries or strawberries add a nice twist. If you want more sweetness, try adding bananas or diced apples. These fruits bring a fresh taste that makes each bite exciting. Mixing fruits can also add different textures. If you follow a vegan diet, you can easily adapt this recipe. Use plant-based milk like oat or soy milk instead of almond milk. For those who need gluten-free options, choose gluten-free oats. This keeps the dish safe for everyone while still being tasty. Want to add some fun to your bake? Mix in chocolate chips or coconut flakes. These add extra sweetness and texture. If you prefer savory flavors, toss in herbs or cheese. This unique twist can turn your breakfast bake into a hearty meal. To keep your Blueberry Oatmeal Breakfast Bake fresh, store it in the fridge. Place it in an airtight container. This will help prevent it from drying out. The bake stays good for up to five days. If you notice any off smells or mold, toss it right away. You can freeze leftovers too! Cut the bake into squares before freezing. Wrap each square in plastic wrap, then place them in a freezer-safe bag. This way, you can grab a piece anytime. When you want to eat it, let it thaw overnight in the fridge. To reheat, pop it in the microwave for about 1-2 minutes. You can also heat it in the oven at 350°F for 10 minutes. Always check for signs of spoilage. If the bake smells sour or has a strange texture, it is best to discard it. Aim to eat your leftovers within five days for the best taste. If you freeze it, enjoy it within three months for optimal flavor. You can use quick oats, but the texture will change. Quick oats absorb liquid faster, which can make the bake softer. If you want a chewier texture, stick with rolled oats. Quick oats will also cook faster, so check your bake after 25 minutes. Look for a golden brown top. The center should feel firm to the touch. You can also insert a knife into the middle. If it comes out clean, your bake is ready. Let it cool slightly before cutting it into squares. Yes, you can use other milk types. Soy, coconut, or oat milk work well. Each will add a different flavor. If you use dairy milk, the bake might taste richer but still be delicious. Just keep the same amount of liquid. This blog post covered a delicious oatmeal bake recipe. We went through the main ingredients, various options, and clear instructions. I shared tips to perfect your bake and enhance the flavor. You learned about storing leftovers and freezing options. For variations, you can choose fruit or even savory twists. Try out these ideas and make this recipe your own. Happy baking!

Blueberry Oatmeal Breakfast Bake Nourishing Start

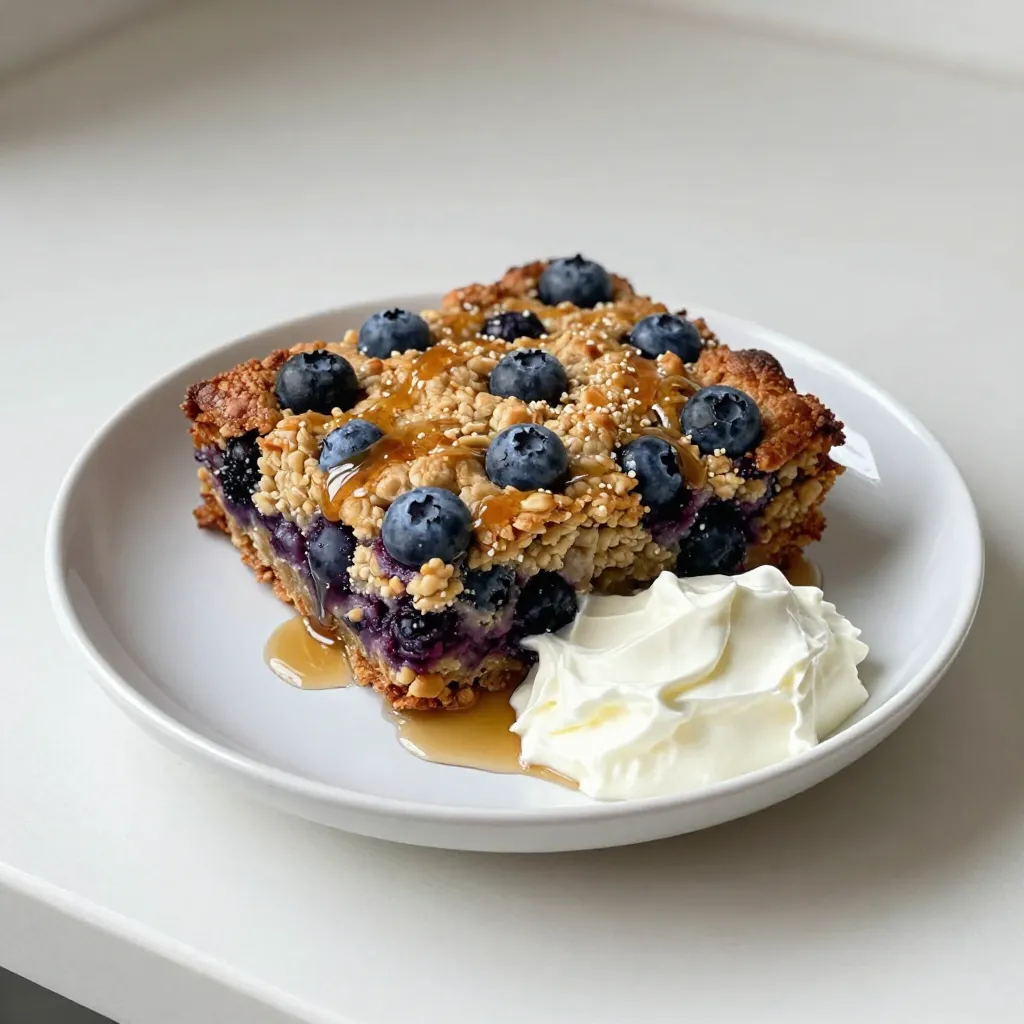
Start your day with a warm, wholesome treat! My Blueberry Oatmeal Breakfast Bake is both easy to make and packed

- 2 boneless, skinless chicken breasts, diced - 2 tablespoons chipotle in adobo sauce, minced - 1 teaspoon cumin - 1 teaspoon smoked paprika - 1 tablespoon olive oil - 1 onion, chopped - 1 bell pepper, diced (red or green) - 1 can (15 oz) black beans, rinsed and drained - 1 cup corn (fresh or frozen) - 1 cup cooked rice (white or brown) - 1 cup shredded cheese (cheddar or a Mexican blend) - 4 large flour tortillas - Fresh cilantro, chopped (for garnish) - Sour cream and salsa (for serving on the side) - Avocado slices for creaminess - Jalapeños for more heat - Lime wedges for brightness - Extra cheese for a cheesy bite - Chopped green onions for freshness {{ingredient_image_1}} To start, take your diced chicken and place it in a bowl. Add 2 tablespoons of chipotle in adobo sauce. This sauce packs a punch! Mix in 1 teaspoon of cumin and 1 teaspoon of smoked paprika. These spices bring great flavor. Stir well to coat all the chicken pieces evenly. Let it marinate for at least 10 minutes. This time allows the flavors to soak in. Next, heat 1 tablespoon of olive oil in a large skillet over medium heat. Once hot, add 1 chopped onion and 1 diced bell pepper. Sauté them until they soften, which takes about 4-5 minutes. You want them to be tender and fragrant. Then, add the marinated chicken to the skillet. Cook it for 6-8 minutes or until the chicken turns white and is no longer pink. After that, stir in 1 can of rinsed and drained black beans and 1 cup of corn. This adds texture and fiber. Cook for 2-3 minutes more until everything is hot. Finally, remove the skillet from heat. Mix in 1 cup of cooked rice and half of your shredded cheese. Let it sit for a minute so the cheese melts slightly. Now, take a large flour tortilla and lay it flat on a clean surface. Spoon a generous amount of the chicken mixture into the center. Don’t forget to sprinkle the remaining cheese on top! To roll the burrito, fold in the sides first. Then, start rolling from the bottom. Make sure to roll tightly to keep everything inside. Repeat this process with the rest of your tortillas and filling. If you want a crispy outside, toast the burritos in a dry skillet for 2-3 minutes on each side. It adds a nice crunch! Serve them cut in half, garnished with chopped cilantro, and with small bowls of sour cream and salsa on the side for dipping. To make crispy burritos, toast them in a dry skillet. This adds a nice crunch. Heat the skillet on medium heat. Place the burrito seam-side down. Cook for 2-3 minutes until golden brown. Flip and repeat. You can also use a grill for added flavor. Just be careful not to burn them. You can prepare these burritos ahead of time. Make the filling in advance and store it. Once cool, place it in an airtight container. You can refrigerate for 3-4 days. To assemble, just warm the filling. Wrap the burritos and toast them before serving. You can also freeze them for longer storage. Just thaw them in the fridge before reheating. Serve your burritos with fresh sides. Sour cream and salsa are great choices. You can also add guacamole for a creamy touch. Chopped cilantro adds freshness on top. A simple green salad pairs well, too. It balances the spice and adds color to your plate. Enjoy with a side of tortilla chips for crunch! Pro Tips Marinate for Flavor: For an even deeper flavor, marinate the diced chicken in the chipotle mixture for at least 30 minutes or up to overnight in the refrigerator. Customize Your Heat: Adjust the amount of chipotle in adobo sauce based on your spice preference. Start with less if you’re unsure, as it can pack a punch! Cheese Choices: Experiment with different types of cheese, such as pepper jack for extra spice or queso fresco for a milder taste. Make Ahead: Prepare the chicken filling in advance and store it in the fridge. Just reheat it when you're ready to assemble the burritos for a quick meal. {{image_2}} If you want to change the chicken, you can use turkey or tofu. Both options work well. For a vegetarian twist, try black beans or lentils. You can also replace the tortillas with lettuce wraps for a low-carb choice. Add more spices for extra heat or flavor. Consider using garlic powder or onion powder. You can mix in some lime juice for brightness. Try adding jalapeños for a fresh kick. Fresh herbs like oregano or thyme can also enhance the taste. To make these burritos gluten-free, swap the flour tortillas for corn tortillas. For a vegetarian version, just leave out the chicken and increase the beans or add more veggies. You can also use dairy-free cheese if you're avoiding dairy. To store your spicy chipotle chicken burritos, let them cool first. Wrap each burrito in foil or plastic wrap. Place them in an airtight container or a zip-top bag. This keeps them fresh for up to three days. When you're ready to eat, reheat them in the microwave for about 1-2 minutes. You can also use an oven at 350°F for about 10-15 minutes. This method helps keep the tortilla crispy. If you want to freeze your burritos, wrap them tightly in foil or plastic wrap. Then, place them in a freezer-safe bag. This way, they can last up to three months. When you want one, take it out and thaw in the fridge overnight. Reheat in the microwave for 2-3 minutes or in a 350°F oven for 20-25 minutes. This keeps the flavors fresh and tasty. To reduce the heat in your burritos, you can try these tips: - Use less chipotle in adobo sauce. Start with one tablespoon. - Add more rice or beans to the filling to balance the spice. - Substitute a milder cheese, like mozzarella, instead of cheddar. - Serve with a generous dollop of sour cream to cool down the heat. Absolutely! You can swap the chicken for other proteins. Here are some tasty options: - Ground beef works great if you want a heartier flavor. - Tofu is a good choice for a vegetarian option. - Shrimp adds a nice twist and cooks quickly. - Pork can also bring a savory depth to your burritos. Here’s a quick breakdown of the nutritional values per serving: - Calories: About 600 calories per burrito. - Protein: Approximately 30 grams from chicken and beans. - Carbs: Around 70 grams from tortillas and rice. - Fat: Roughly 20 grams, depending on the cheese used. These burritos offer a good mix of protein and carbs while packing flavor. Adjust the ingredients for your dietary needs. In this post, we explored how to make delicious burritos. You learned about key ingredients, from chicken to spices and vegetables. I shared step-by-step instructions, tips for perfecting texture, and variations for different diets. Remember, you can customize your burrito to fit your tastes. Enjoy experimenting with flavors and fillings to find your ideal burrito. Whether you make them fresh or for meal prep, burritos are always a great choice.

Spicy Chipotle Chicken Burritos Flavorful and Easy Recipe

Spicy Chipotle Chicken Burritos are tasty and simple to make. You can whip up these flavorful wraps in no time.

- 1 lb boneless, skinless chicken breasts, sliced into thin strips - 2 tablespoons olive oil - 1 teaspoon ground cumin - 1 teaspoon smoked paprika - 2 cloves garlic, minced - Juice of 2 limes - Zest of 1 lime - 1 teaspoon salt - 1/2 teaspoon black pepper - 1 red bell pepper, sliced - 1 green bell pepper, sliced - 1 large onion, sliced - Fresh cilantro, chopped, for garnish The main ingredients in cilantro lime chicken fajitas create a burst of flavor. The chicken provides protein, while the vibrant bell peppers and onions add color and crunch. The marinade with lime juice and spices brings everything together. - Tortillas, for serving - Toppings, such as extra cilantro, salsa, or avocado Tortillas are key for serving. Choose between flour or corn based on your taste. Toppings like salsa or avocado add creaminess and freshness. Feel free to get creative with your favorites! - Serving size: This recipe serves 4. - Portioning: After cooking, divide the chicken and veggies among the tortillas. Each serving can have about 1/4 of the mix. Knowing how much to serve helps keep portions balanced. Adjust based on your needs or appetite! {{ingredient_image_1}} To start, you need to make the marinade. In a large bowl, combine these ingredients: - 2 tablespoons olive oil - 1 teaspoon ground cumin - 1 teaspoon smoked paprika - 2 cloves garlic, minced - Juice of 2 limes - Zest of 1 lime - 1 teaspoon salt - 1/2 teaspoon black pepper Mix them well until they blend. Then, add the sliced chicken. Make sure each piece is well-coated. Cover the bowl and let it marinate. I suggest at least 30 minutes in the fridge. For more flavor, you can marinate for up to 2 hours. Next, it’s time to cook the chicken. You have two options: a skillet or a grill pan. Heat your chosen pan over medium-high heat. Once it’s hot, add the marinated chicken strips. Cook them for 5-7 minutes. They should no longer be pink inside. Use a meat thermometer to check for 165°F. Once cooked, remove the chicken and set it aside. Now, let’s sauté the veggies. Slice one red and one green bell pepper and one large onion. In the same skillet, add these veggies after the chicken. Sauté them for about 5-6 minutes. You want them tender and slightly caramelized. Stir them often to prevent sticking. Once they are ready, return the chicken to the skillet. Mix everything together and cook for an additional minute. This helps the flavors blend. To boost the taste of your cilantro lime chicken fajitas, try adding a few spices. A pinch of cayenne pepper gives a nice kick. If you love fresh herbs, consider adding fresh oregano or thyme. These additions can really make your dish pop. Always use fresh ingredients whenever possible. Fresh limes add a bright zing that dried ones can't match. Fresh cilantro gives a burst of flavor that enhances every bite. You can cook chicken in different ways. Grilling adds a smoky flavor, while pan-searing keeps it juicy. If you’re busy, you can use a slow cooker. Just make sure to adjust cooking times. To avoid dry chicken, don’t overcook it. Aim for an internal temperature of 165°F. Letting chicken rest for a few minutes after cooking also helps keep it moist. Fajitas taste great with various sides. Consider serving them with Mexican rice or black beans. These add color and nutrition to your meal. When choosing tortillas, soft flour tortillas work well for wrapping. Corn tortillas are a gluten-free option and add a nice texture. Don't forget to add your favorite toppings. Salsa, guacamole, and extra cilantro make a tasty finish. Pro Tips Marinate Longer for More Flavor: Allowing the chicken to marinate for up to 2 hours will enhance the flavors significantly, making each bite more delicious. Use Fresh Ingredients: Fresh limes, garlic, and cilantro will elevate the taste of your fajitas, giving them a vibrant and authentic flavor. Cook in Batches: If you have a lot of chicken, cook it in batches to avoid overcrowding the pan. This will ensure even cooking and a nice sear on the chicken. Customize Your Toppings: Experiment with various toppings like guacamole, sour cream, or pickled jalapeños to create your perfect fajita experience. {{image_2}} You can switch out chicken for beef or shrimp. Beef works well with the same marinade. Choose flank steak or sirloin for the best taste. For shrimp, marinate them for just 15 minutes. Cook quickly to avoid overcooking. If you want a vegetarian option, try using portobello mushrooms or tofu. Both absorb flavors well. Slice them and marinate like you would the chicken. Cook until tender, and you'll have a tasty meat-free meal. To add heat, include jalapeños or your favorite hot sauce. Sauté jalapeños with the veggies for a spicy kick. You can also drizzle hot sauce on top when serving. For sweet variations, use pineapple or mango. Chop them up and add them to the skillet during the last few minutes of cooking. This adds a fun contrast to the savory flavors. Get creative with how you serve fajitas. Instead of traditional plates, use a large platter for a family-style meal. Lay out warm tortillas and toppings for a fun build-your-own fajita night. Meal prep is also a great option. Store cooked chicken and veggies in containers. You can easily grab them for quick lunches or dinners during the week. Just reheat and serve in tortillas for a fast meal. To store leftovers, place the chicken and veggies in an airtight container. This keeps them fresh. You can store them in the fridge for up to three days. If you want to keep them longer, freezing is a better option. For freezing, pack the fajita mixture in freezer-safe bags. Remove as much air as possible to prevent freezer burn. You can store them in the freezer for up to three months. When you’re ready to eat, thaw them overnight in the fridge. For quick reheating, use a microwave on high for 1-2 minutes. If you prefer, you can heat them in a skillet over medium heat for about 5 minutes. To keep flavors and textures, add a splash of water or broth while reheating. This will help retain moisture, making your fajitas taste fresh. To check if the chicken is cooked, use a meat thermometer. The safe internal temperature for chicken is 165°F (75°C). Insert the thermometer into the thickest part of the chicken. If it reads 165°F, it is safe to eat. If you don’t have a thermometer, cut the chicken open. It should be white and no longer pink inside. Yes, you can make this recipe ahead of time. Marinate the chicken up to two hours before cooking for best flavor. You can also cook the chicken and veggies in advance. Store them in an airtight container in the fridge for up to three days. Reheat in a skillet or microwave before serving. This makes meal prep easy and quick. Many toppings can enhance your chicken fajitas. Here are some great options: - Fresh cilantro - Salsa - Avocado or guacamole - Sour cream - Shredded cheese - Lime wedges Feel free to mix and match your favorites. These toppings add flavor and texture to your meal. Enjoy exploring different combinations! This blog post covered how to make delicious chicken fajitas. We explored main ingredients, marinade ideas, and tasty toppings. I shared tips for cooking chicken and sautéing veggies just right. You learned how to store any leftovers and how to reheat them perfectly. Remember, you can switch up the protein or spices for unique flavors. Fajitas are fun to make and share. Enjoy your cooking and savor every bite!

Cilantro Lime Chicken Fajitas Flavorful Quick Meal

Looking for a quick, flavorful meal that impresses? Look no further! Today, I’ll guide you through making Cilantro Lime Chicken

- 1 ½ cups all-purpose flour - ½ cup unsweetened cocoa powder - ½ cup unsalted butter, softened - ¼ cup granulated sugar - 1 large egg yolk - 1 tablespoon cold water - 1 cup granulated sugar - 6 tablespoons unsalted butter - ½ cup heavy cream - 1 teaspoon sea salt - 1 cup semi-sweet chocolate chips - 2 tablespoons butter for chocolate layer To make this salted caramel chocolate tart, you need to gather the right ingredients. The tart crust needs flour, cocoa powder, butter, sugar, egg yolk, and cold water. This mix gives the tart a rich, chocolatey base. For the salted caramel, you need granulated sugar, butter, heavy cream, and sea salt. This mix creates a sweet and salty treat that pairs perfectly with chocolate. The chocolate layer requires semi-sweet chocolate chips and some butter. This layer adds a smooth, chocolatey finish to the tart. With these ingredients, you can create a dessert that impresses everyone. Each part plays a key role in making this tart a delicious delight. {{ingredient_image_1}} To start, gather your ingredients. In a food processor, combine the following: - 1 ½ cups all-purpose flour - ½ cup unsweetened cocoa powder - ½ cup unsalted butter, softened - ¼ cup granulated sugar Pulse everything together until it looks like coarse crumbs. Next, add in one egg yolk and 1 tablespoon of cold water. Pulse again until the dough forms. Wrap the dough in plastic wrap and put it in the fridge for 30 minutes. This step makes the crust nice and flaky. Preheat your oven to 350°F (175°C). Roll out the chilled dough on a floured surface. Fit it into a 9-inch tart pan. Prick the bottom with a fork so it won’t puff up. Chill it for another 15 minutes to set. Once ready, bake the crust for 15 minutes. Take it out and let it cool completely. In a medium saucepan, melt 1 cup of granulated sugar over medium heat. Stir constantly until it turns a golden brown. Carefully add 6 tablespoons of unsalted butter and stir until it melts. Gradually whisk in ½ cup of heavy cream. This creates a smooth caramel. Finally, mix in 1 teaspoon of sea salt and let it cool slightly. In another bowl, melt 1 cup of semi-sweet chocolate chips with 2 tablespoons of butter. Heat in the microwave in 30-second bursts, stirring between each. Once it’s smooth, pour the melted chocolate into the cooled tart shell. Spread it evenly and let it set for about 10 minutes. Now, it’s time to layer! Pour the salted caramel over the chocolate layer. Spread it evenly to cover the chocolate. Once done, place the tart in the fridge for at least 2 hours. This helps the caramel to firm up. Enjoy the process; the end result will be worth it! To make a great tart crust, avoid overworking the dough. When you mix it, just pulse until it looks crumbly. This keeps the crust light and flaky. After forming the dough, chill it. It helps to prevent shrinkage while baking. For blind baking, prick the bottom of the crust with a fork. This lets steam escape and keeps the crust flat. Use pie weights or dry beans on parchment paper to hold it down. Bake at 350°F (175°C) for about 15 minutes, then cool completely before adding the filling. The key to smooth caramel is heat control. Melt the sugar slowly over medium heat. Stir constantly for an even melt. If the sugar begins to clump, keep stirring. Once golden brown, add the butter. It will bubble up, so be careful! When adding cream, do it gradually while whisking. This prevents graininess. If your caramel seems too thick, add a splash of water to thin it out. Let it cool slightly before pouring it over the chocolate layer. Garnishing your tart makes it shine. A light sprinkle of sea salt on top adds flavor and contrast. Fresh berries like raspberries or strawberries can give a nice touch too. For pairings, consider serving it with a dollop of whipped cream. A scoop of vanilla ice cream also works well. For drinks, a rich coffee or dessert wine complements the tart nicely. Enjoy each bite! Pro Tips Chill Your Dough: Make sure to chill your tart dough long enough to prevent it from shrinking during baking. Perfect Caramel: Stir the sugar constantly while melting to avoid burning and ensure an even golden color. Layering Technique: Allow the chocolate layer to set before adding the caramel to keep the layers distinct. Garnish Wisely: Sprinkle sea salt just before serving to enhance the flavors and maintain its crunch. {{image_2}} You can switch up the crust for your tart. Instead of a cocoa crust, try using a graham cracker crust. Crush the crackers and mix them with melted butter. Press this mixture into your tart pan. For a fun twist, an Oreo crust also works great. Just crush Oreos and blend them with melted butter. This adds a unique flavor. If you need a gluten-free option, use gluten-free cookies for the crust. This way, everyone can enjoy the tart. Want to make the caramel even better? Add some chopped nuts, like pecans or walnuts, to the salted caramel. This adds crunch and flavor. You can also mix in a splash of vanilla extract for a warm, rich taste. When it comes to chocolate, explore different types. Use dark chocolate for a bittersweet touch or milk chocolate for a sweeter flavor. Each choice gives a new spin to your tart. Change the tart with seasonal fruits. In summer, add fresh berries on top. In fall, consider sliced apples or pears. They add a nice touch and a burst of flavor. For winter holidays, use festive garnishes. Sprinkle crushed peppermint or drizzle with white chocolate. These little changes make your tart fun and special for any occasion. To keep your salted caramel chocolate tart fresh, store it in the fridge. Use an airtight container or cover it with plastic wrap. This helps prevent the tart from drying out or absorbing other flavors. When stored properly, it lasts for about 5 days in the fridge. Yes, you can freeze the tart! It’s best to freeze it before adding the caramel layer. Wrap the cooled tart tightly in plastic wrap, then place it in a freezer bag. This method keeps the tart safe from freezer burn. When you're ready to enjoy it, thaw the tart in the fridge overnight. After thawing, add the caramel layer and chill until set. Enjoy your delicious treat! This tart lasts about 4 to 5 days when you keep it in the fridge. The cold helps the tart stay fresh. Make sure to cover it well to avoid drying out. Yes, you can make the tart a day or two before you plan to serve it. Just store it in the fridge. This way, you save time on the actual day. It also allows the flavors to blend nicely. If you don't have heavy cream, you can use coconut cream or full-fat milk. Keep in mind that coconut cream will add a hint of flavor. Full-fat milk may not be as rich but works in a pinch. You can use chocolate bars instead of chips. Just chop them into small pieces. This will melt well and still create a smooth layer. Look for semi-sweet chocolate for the best taste. You now know how to make a salted caramel chocolate tart from scratch. We covered the key ingredients, like the tart crust, caramel, and chocolate layers. I shared step-by-step instructions to guide you through the process. Remember the tips for perfecting your tart. Variations let you get creative, while proper storage ensures freshness. This tart is not just a dessert; it's a showstopper. Dive in and impress your friends and family with this delicious treat!

Salted Caramel Chocolate Tart Decadent Dessert Delight

Craving something rich and indulgent? Our Salted Caramel Chocolate Tart is a dessert dream come true! Packed with layers of

Older posts
Newer posts
← Previous Page1 Page2 Page3 … Page84 Next →

dsad

© 2026 Lisa Dishes • Built with GeneratePress

Our Policies

  • Copyright Policy
  • Cookie Policy
  • GDPR Policy
  • Privacy Policy
  • Disclaimer
  • Terms Of Use

More Information

  • Home
  • About
  • Contact
  • Appetizers
  • Dessert
  • Dinner
  • Drinks
©2026, Lisa Dishes About Back To Top