Skip to content
DisclaimerTerms Of UseGDPR PolicyCookie Policy

Lisa Dishes

  • Home
  • Drinks
  • Appetizers
  • Dinner
  • Dessert
  • About
  • Contact
  • Privacy Policy
DisclaimerTerms Of UseGDPR PolicyCookie Policy

NO-ING-IMG

To make the best chocolate zucchini bread, you need a few key ingredients. Each one plays a big role in creating that rich and moist delight. - 1 medium zucchini (about 1 cup grated) - 1 cup all-purpose flour - 1/2 cup cocoa powder - 1 teaspoon baking soda - 1/4 teaspoon baking powder - 1/4 teaspoon salt - 1/2 cup granulated sugar - 1/2 cup brown sugar, packed - 1/2 cup vegetable oil - 2 large eggs - 1 teaspoon vanilla extract - 1/2 cup semi-sweet chocolate chips - Optional: 1/4 cup walnuts or pecans, chopped The zucchini adds moisture and a slight sweetness. The all-purpose flour and cocoa powder create the base for the bread. The sugars help to balance the flavors and keep the bread sweet. The vegetable oil keeps the texture nice and soft, while the eggs bind everything together. You can also add chocolate chips for extra chocolate flavor. If you like nuts, toss in some walnuts or pecans for a crunchy contrast. 1. Preheat the oven and prepare the loaf pan: Start by setting your oven to 350°F (175°C). Grease a 9x5 inch loaf pan or line it with parchment paper. This will help the bread come out easily after baking. 2. Grate zucchini and wring out excess moisture: Take a medium zucchini and use a box grater to grate it. You need about one cup of grated zucchini. Once grated, place it in a clean kitchen towel and wring out any extra moisture. This step makes sure your bread is not soggy. 3. Combine dry ingredients in a bowl: In a large mixing bowl, measure out the flour, cocoa powder, baking soda, baking powder, and salt. Whisk them together until they are well mixed. This helps to evenly distribute the leavening agents and cocoa. 1. Whisk sugars and oil until fluffy: In another bowl, combine the granulated sugar, brown sugar, and vegetable oil. Whisk them together until the mixture looks fluffy. This adds air and helps the bread rise well. 2. Incorporate eggs and vanilla extract: Crack two large eggs into the sugar mixture, adding them one at a time. Mix well after each addition. Then, stir in the vanilla extract to infuse flavor into the batter. 1. Combine wet and dry ingredients, fold in zucchini and chocolate chips: Gradually add the dry mix to the wet mixture. Stir gently until just combined. Be careful not to over-mix! Then, gently fold in the grated zucchini and semi-sweet chocolate chips. If you like, you can add chopped walnuts or pecans for some crunch. 2. Pour batter into loaf pan and smooth out: Pour the thick batter into your prepared loaf pan. Use a spatula to smooth out the top. This ensures an even bake and a nice shape. Now you're ready to bake your chocolate zucchini bread. Enjoy the rich and moist delight that awaits! For the best Chocolate Zucchini Bread, timing is key. Bake it for 50 to 60 minutes at 350°F (175°C). To check if it’s done, use a toothpick. Insert it into the center of the bread. If it comes out clean, your bread is ready. Cooling is also important for texture. After baking, let the bread cool in the pan for about 10 minutes. This helps it set. Then, move it to a wire rack. Allow it to cool completely before slicing. This gives you nice, clean slices. Want to kick up the flavor? Add nuts! Chopped walnuts or pecans work great. They add crunch and richness. You can also sprinkle in some spices. Cinnamon or nutmeg can enhance the taste. For a twist, try adding extracts. Almond or orange extract can add a fun layer of flavor. Serve your bread warm, with powdered sugar on top. A drizzle of chocolate glaze makes it even more special. Enjoy it with a cup of coffee or tea for a perfect snack! {{image_2}} If you want to make Chocolate Zucchini Bread fit your diet, you have options. - Gluten-free ingredient substitutions: You can use gluten-free all-purpose flour. This swap keeps the bread soft and moist. Make sure the flour blend has xanthan gum for best results. - Vegan modifications: Replace eggs with flaxseed meal or applesauce. For every egg, mix 1 tablespoon of flaxseed with 3 tablespoons of water. Let it sit until it thickens. Use a plant-based oil instead of vegetable oil. Adding different flavors can make your Chocolate Zucchini Bread even better. - Adding fruits like banana or berries: Mashed bananas add natural sweetness and moisture. You can also mix in berries for a fresh twist. They add a nice burst of flavor with each bite. - Different types of chocolate chips or add-ins: You can switch semi-sweet chocolate chips for dark chocolate or white chocolate. Try adding nuts like walnuts or pecans for a crunchy texture. For a fun twist, mix in a pinch of cinnamon or a dash of espresso powder to enhance the chocolate flavor. To keep your Chocolate Zucchini Bread fresh at room temperature, follow these steps: - Allow the bread to cool completely on a wire rack. - Wrap the bread tightly in plastic wrap or aluminum foil. - Store the wrapped bread in a cool, dry place. This method will keep your bread moist for about 3 to 4 days. Avoid storing it in the fridge, as that can dry it out. If you want to save your Chocolate Zucchini Bread for later, freezing is a great option. Here’s how: - Once the bread is fully cooled, slice it into portions. - Wrap each slice in plastic wrap or aluminum foil. - Place the wrapped slices in a freezer-safe bag or container. Label the bag with the date. Your bread will stay fresh in the freezer for up to 3 months. When you’re ready to enjoy it, simply thaw at room temperature or heat it in the oven for a warm treat. How long does Chocolate Zucchini Bread last? Chocolate Zucchini Bread lasts about 3 to 4 days at room temperature. Store it in an airtight container. You can also refrigerate it for up to a week. Just remember to wrap it well to avoid drying out. Can I replace zucchini with another vegetable? Yes, you can swap zucchini for other veggies. Carrots work well and add a sweet touch. You can even use shredded butternut squash for a different flavor and texture. What can I do if my bread is too dense? If your bread turns out dense, check your mixing method. Make sure not to over-mix the batter. Also, ensure your baking soda is fresh and measure your flour accurately. Adding extra zucchini can also help lighten the texture. Is it possible to make this recipe in muffin form? Absolutely! You can make muffins with this recipe. Fill your muffin tin about two-thirds full. Bake at the same temperature for 20 to 25 minutes. Check for doneness with a toothpick; it should come out clean. Enjoy your chocolatey treats! This blog covered how to make delicious Chocolate Zucchini Bread. You learned about key ingredients, preparation steps, and mixing tips. We discussed variations, dietary alternatives, and how to store your bread. In the end, this recipe is flexible and fun. You can customize it to your taste. Enjoy baking and sharing this tasty treat! Happy cooking!

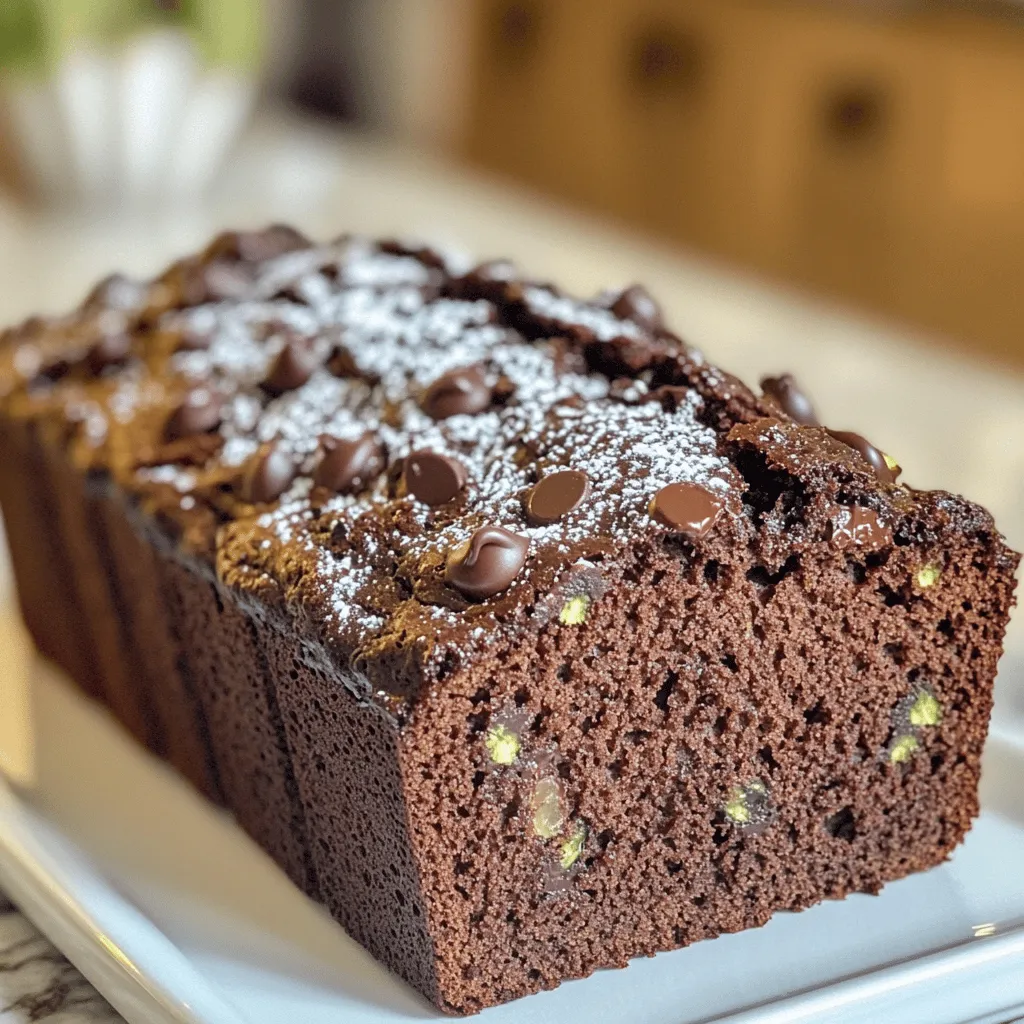
Chocolate Zucchini Bread Rich and Moist Delight

Imagine biting into a slice of Chocolate Zucchini Bread that’s rich, moist, and oh-so-delicious. Trust me, your family will never

To create this delicious meal, you will need the following ingredients: - 2 ribeye steaks (about 1 inch thick) - 4 medium Yukon Gold potatoes, diced - 4 tablespoons unsalted butter - 4 cloves garlic, minced - 1 teaspoon fresh rosemary, chopped - 1 teaspoon fresh thyme, chopped - 1 teaspoon paprika - Salt and pepper to taste - 2 tablespoons olive oil Each ingredient plays a key role in making this dish special. The ribeye steaks offer rich flavor, while Yukon Gold potatoes provide a creamy texture. Unsalted butter adds richness, and minced garlic gives warmth. Fresh herbs like rosemary and thyme enhance the taste, while paprika adds a gentle spice. Finally, salt and pepper are essential for balancing flavors. Gather these items before you start cooking to ensure a smooth process. Enjoy the experience of creating this delightful dinner! To start, boil the potatoes. In a large pot, fill it with salted water and bring it to a boil. Once boiling, add the diced Yukon Gold potatoes. Cook them for 10 to 12 minutes. You want them tender but not mushy. After boiling, drain the potatoes and let them cool for a few minutes. While the potatoes cook, it's time to season your steaks. Take the ribeye steaks and sprinkle salt, pepper, and paprika on both sides. Use your hands to rub the spices in well. This ensures the seasoning spreads evenly, enhancing the steak's flavor. Next, let’s crisp the potatoes. Heat 2 tablespoons of olive oil in a large cast-iron skillet over medium-high heat. After the oil is hot, add in the boiled potatoes. Fry them for about 5 to 7 minutes. You want them to turn golden and crispy. Stir occasionally and add more salt and pepper for extra taste. Once ready, remove the potatoes and set them aside. Now, cook the steaks. Lower the heat to medium in the same skillet. Add 2 tablespoons of butter, then the minced garlic, rosemary, and thyme. Let these cook until fragrant. Place the seasoned steaks in the skillet. Cook each side for about 4 to 5 minutes for a medium-rare finish. You can adjust the time based on your taste. Don’t forget to baste the steaks with the garlic butter as they cook. This adds rich flavor and keeps the meat juicy. After cooking, take the steaks out of the skillet and let them rest for 5 minutes. Resting is key; it helps the meat stay tender. While the steak rests, return the crispy potatoes to the skillet. This reheats them and allows them to soak up the garlic butter flavor. When ready to serve, slice the rested steak against the grain. Arrange it nicely on a plate next to the crispy potatoes. Drizzle any leftover garlic butter from the skillet over both for extra flavor. If you like, garnish with fresh herbs and a sprinkle of paprika for a beautiful touch. Enjoy your delightful dinner! To achieve the perfect medium-rare steak, follow these steps: - Use a meat thermometer: Aim for 130°F (54°C). - Cook on medium heat: This gives a nice crust on the outside. - Baste often: Use the garlic butter to add flavor and keep it moist. Letting the steak rest is key. It allows the juices to settle, making each bite juicy. Rest for about 5 minutes after cooking. This simple step makes a big difference. To boost flavor, try these herbs and spices: - Thyme: Adds a fresh, earthy taste. - Rosemary: Gives a piney aroma. - Paprika: Adds a smoky kick. You can also add sauces or toppings for more depth. A drizzle of balsamic glaze or a sprinkle of blue cheese can elevate your dish. Feel free to experiment and find what you love! {{image_2}} You can cook garlic butter steak and potatoes in different ways. Grilling is an option. Grilling gives steaks a smoky flavor. It also adds nice grill marks. To grill, heat your grill to medium-high. Cook the steaks for about 4-5 minutes on each side. Keep a close eye to avoid overcooking. If you want to use the oven, you can bake the potatoes. Start by preheating your oven to 425°F (220°C). Toss the diced Yukon Gold potatoes with olive oil, salt, and pepper. Spread them on a baking sheet and bake for about 25-30 minutes. Flip them halfway through for even cooking. You can easily make this dish gluten-free. Just ensure all your ingredients are gluten-free. Most seasonings and oils are fine. If you want a low-carb meal, use cauliflower instead of potatoes. Simply steam or roast cauliflower florets until tender and enjoy the same great flavors. If you don’t have ribeye steaks, you can use other cuts. Sirloin or flank steak works well too. These cuts may cook faster, so watch them closely. For potatoes, you can try red potatoes or even sweet potatoes. Each type brings its own unique taste and texture to the dish. To keep leftover steak and potatoes fresh, follow these steps: - Cool them down: Let the steak and potatoes cool to room temperature. - Use airtight containers: Place them in separate airtight containers. This helps keep the flavors intact. - Refrigerate promptly: Store the containers in the fridge within two hours. They will last for 3 to 4 days. - Avoid stacking: Do not stack the steak on top of the potatoes. This keeps them from getting soggy. Reheating your meal can be easy if you follow these tips: - Use the oven: Preheat your oven to 350°F (175°C). Place the steak and potatoes on a baking sheet. Heat for about 15-20 minutes until warm. - Skillet method: Heat a skillet over medium heat. Add a bit of butter and place the steak and potatoes in the pan. Cook for about 5-7 minutes, turning them halfway. - Avoid microwaving: Microwaving can make steak tough. If you must, use low power and short intervals. This helps keep it tender. Using these techniques will ensure your delicious garlic butter steak and crispy potatoes taste great when you enjoy them again! To know when your steak is done, use a meat thermometer. Insert it into the thickest part of the steak. For medium-rare, aim for 130°F. For medium, look for 140°F. For well-done, check for 160°F. Always remember that the steak keeps cooking after you take it off the heat. So, pull it slightly before it hits the target temperature. Yes, you can prep this meal in advance. You can boil the potatoes earlier. After boiling, cool them and store them in the fridge. You can also season the steaks ahead of time. Just cover them and keep them in the fridge until you're ready to cook. This will save you time and add flavor. Some great side dishes include: - A simple green salad with vinaigrette - Steamed broccoli or green beans - Garlic bread or dinner rolls - Roasted vegetables like carrots or Brussels sprouts These sides add color and balance to your meal, making it feel complete. This guide covered everything you need for cooking ribeye steak and potatoes. You learned about essential ingredients, step-by-step instructions, and useful tips. Cooking steak can be fun, and I hope my tips help you enjoy this meal. Remember to let your steak rest for the best flavor. Try different herbs or cooking methods to make it your own. With practice, you’ll create delicious meals every time. Happy cooking!

Min Garlic Butter Steak And Potatoes Delightful Dinner

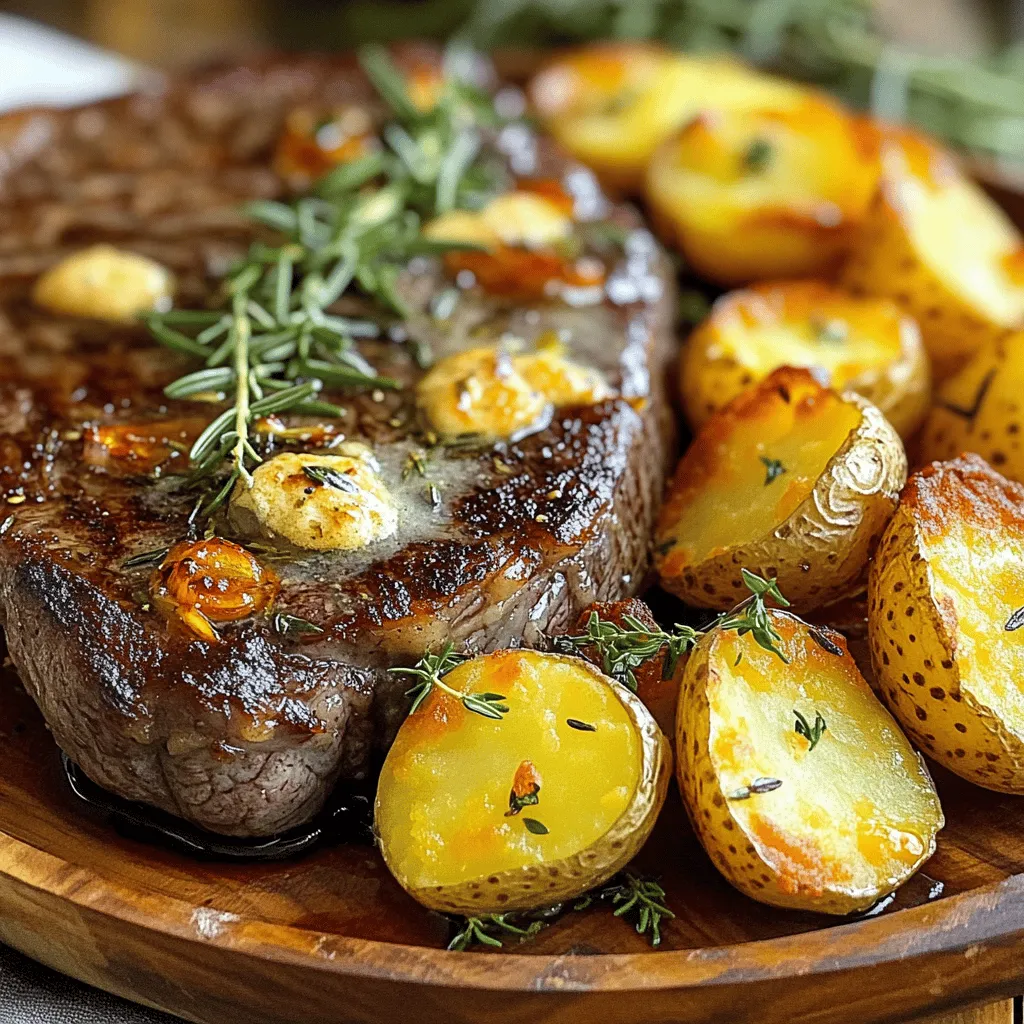
Craving a hearty meal? My Min Garlic Butter Steak and Potatoes is the perfect answer. This dish features juicy ribeye

- 1 medium head of cauliflower - 1 cup shredded mozzarella cheese - 1/2 cup grated parmesan cheese - 1/2 cup all-purpose flour - 1/2 teaspoon garlic powder - 1/2 teaspoon onion powder - 1/2 teaspoon smoked paprika - 1 cup buttermilk or non-dairy milk substitute - 1/2 cup buffalo sauce - Salt and pepper to taste - Fresh parsley for garnish For Cheesy Buffalo Cauliflower Bites, I love using fresh, high-quality ingredients. The heart of this dish is the cauliflower. Choose a medium head, and cut it into bite-sized florets for the best texture. The cheese mix is key; I use one cup of shredded mozzarella and half a cup of grated parmesan. Together, they create a rich, gooey topping. Next, I prepare the batter. I mix half a cup of all-purpose flour with spices: half a teaspoon each of garlic powder, onion powder, and smoked paprika. This blend gives the bites a savory kick. I also season with salt and pepper. For the sauce, I recommend one cup of buttermilk or a non-dairy milk substitute mixed with a tablespoon of vinegar. This helps the batter stick. The buffalo sauce, at half a cup, adds that iconic spicy flavor. Don’t forget to adjust the sauce to your taste! Finally, I love to sprinkle fresh parsley on top for a pop of color and freshness. - Preheat the oven to 425°F (220°C). - Line a baking sheet with parchment paper. - In a large bowl, mix flour, garlic powder, onion powder, smoked paprika, salt, and pepper. - Dip each cauliflower floret into buttermilk. Let any extra liquid drip off. Then, coat it with the flour mixture. Make sure each floret is covered well. Place them on the prepared baking sheet. - Bake the cauliflower for 20 minutes. Remember to flip them halfway through to ensure even cooking. They should be golden and crispy. - While the cauliflower bakes, mix the melted mozzarella and parmesan cheese in a bowl. - After 20 minutes, take the cauliflower out of the oven. Pour buffalo sauce over the bites. Toss gently to coat them evenly. - Sprinkle the cheese mixture over the cauliflower. Return it to the oven for another 10-15 minutes. Watch for the cheese to melt and bubble. - Once done, take them out and let them cool slightly. Garnish with chopped parsley before serving. These steps will guide you to make a tasty and fun snack! Enjoy the savory flavor hit of cheesy buffalo cauliflower bites. To make your cauliflower bites crispy, start by drying the florets well. This helps the coating stick better. After washing, use a clean towel to pat them dry. For even baking, spread the coated florets apart on the baking sheet. This allows hot air to flow around each piece. Flipping them halfway through cooking ensures they brown evenly. For that gooey, stretchy cheese, use mozzarella and parmesan. Mozzarella melts smoothly, while parmesan adds a nice flavor. Grate both cheeses finely for best results. When you add cheese, make sure the cauliflower is hot. This helps the cheese melt quickly and become bubbly. Adjusting buffalo sauce to your taste is easy. Start with half a cup, then taste. If you want more heat, add more sauce. For extra flavor, consider adding spices like cayenne or smoked paprika to the flour mix. Fresh herbs, like cilantro or chives, can also boost the taste. These small changes can take your bites to the next level. {{image_2}} You can make these bites vegan easily. Start by swapping the buttermilk. Use non-dairy milk mixed with 1 tablespoon of vinegar. This works well and keeps the flavor. Next, replace mozzarella and parmesan with vegan cheese alternatives. There are many good options available now. Look for ones that melt well for that cheesy goodness. If you like heat, change up the hot sauce. Different brands offer unique flavors. You can also add spices to the flour mix. Try cayenne pepper or chili powder for an extra kick. This lets you control the spice level to your liking. Don’t stop at just cheese. You can add more garnishes. Fresh herbs like cilantro or chives work great. For dips, try ranch or blue cheese dressing. Salsas also pair well with these bites. They add a fresh twist and enhance the flavor. To keep your Cheesy Buffalo Cauliflower Bites fresh, store them in an airtight container. This helps prevent them from getting soggy. Place the container in the fridge within two hours of cooking. These bites are best eaten within three to four days. After that, they may lose their crunch and flavor. For reheating, use an oven or air fryer to keep the bites crispy. Preheat your oven to 350°F (175°C) and bake for about 10 minutes. If using an air fryer, cook them at 350°F (175°C) for 5-7 minutes. Avoid microwaving, as it makes them soft. You can freeze the bites for up to three months. Just make sure to let them cool completely before freezing. To reheat from frozen, follow the same oven or air fryer method. These bites are great for parties and gatherings. Prepare them ahead of time to save effort on the day. You can batch cook and store them in the fridge or freezer. For easy reheating, portion the bites into smaller containers. This way, you can quickly grab a serving whenever you want a tasty snack. Cheesy Buffalo Cauliflower Bites can last about 3 to 4 days in the fridge. Make sure to store them in an airtight container. This keeps them fresh and helps avoid sogginess. Yes, you can prep these bites ahead of time. Coat the cauliflower florets and store them in the fridge. Bake them just before serving. This way, you have a hot snack ready in no time. Some tasty dipping sauces include ranch, blue cheese, or a creamy garlic sauce. These add a nice contrast to the spicy buffalo flavor. You can also try a tangy yogurt sauce for a refreshing twist. Yes, you can freeze them. Freeze the uncooked coated florets on a baking sheet. Once frozen, transfer them to a bag. They can last up to 2 months in the freezer. Bake them straight from the freezer; just add a few extra minutes to the cooking time. These bites pair well with celery sticks, carrot sticks, or a light salad. They make a great appetizer for game day or any party. Friends and family will love the flavors and textures. In this post, we explored how to make Cheesy Buffalo Cauliflower Bites. We covered the key ingredients, step-by-step instructions, tips for success, and tasty variations. Whether you choose to go vegan or spice it up, these bites are a hit. Storing and reheating them properly ensures they stay delicious. Try different flavors and enjoy these bites at your next gathering. You now have the tools to create a crowd-pleaser that everyone will love. Make sure to share your creations!

Cheesy Buffalo Cauliflower Bites Savory Flavor Hit

Looking for a snack that packs a punch? You’re in the right place! My Cheesy Buffalo Cauliflower Bites give you

- 2 large apples (Granny Smith or Honeycrisp) - 1 tablespoon ground cinnamon - 1 tablespoon sugar (optional) - Pinch of salt - Cooking spray or a small amount of oil To make Air Fryer Cinnamon Apple Chips, you only need five simple ingredients. Choosing the right apples is key. I recommend using Granny Smith or Honeycrisp apples. They add a nice balance of tartness and sweetness. Granny Smith gives a nice crispness, while Honeycrisp offers a juicy bite. Next is ground cinnamon. It brings warmth and flavor to the chips. If you want them sweeter, add one tablespoon of sugar. Adjust the sugar based on your taste. A pinch of salt helps enhance all the flavors. Finally, you’ll need cooking spray or a little oil. This helps the seasoning stick to the apple slices. Make sure your ingredients are fresh. Quality ingredients lead to better taste. So, grab your apples and let’s get started on this tasty treat! First, wash the apples well under cold water. This step is key to remove dirt. After washing, dry them with a clean towel. Next, slice the apples into thin rings, about 1/8 inch thick. A sharp knife or a mandoline works best for this. Remember to remove any seeds from the slices. This ensures each bite is safe and tasty. Now, grab a small bowl. In it, mix one tablespoon of ground cinnamon with one tablespoon of sugar. If you want less sweetness, just skip the sugar. Add a pinch of salt to the mix as well. This simple blend enhances the flavor of the apples. Stir well until everything is combined. Preheat your air fryer to 300°F (150°C). This step takes about five minutes. While it heats up, place the apple slices in a large bowl. Lightly spray them with cooking spray or toss them with a tiny bit of oil. This helps the seasoning stick. Next, sprinkle your cinnamon-sugar mix over the apple slices. Toss them gently to coat all pieces evenly. When your air fryer is ready, arrange the apple slices in a single layer in the basket. Depending on your air fryer’s size, you may need to do this in batches. Cook the apple slices for about 15 to 20 minutes. Flip them halfway through to ensure they cook evenly. Keep a close eye on them at the end. Cooking time can vary, so check for a crisp and golden look. Once done, let the apple chips cool on a wire rack. Store them in an airtight container for a crunchy snack later! To make your apple chips crispy, slicing is key. Aim for slices about 1/8 inch thick. If they are too thick, they may not crisp up well. Thin slices allow for even cooking and better texture. Pay close attention to cooking time. Start at 15 minutes, but check them often. Flip the slices halfway through to ensure even crispiness. Cooking time may vary based on your air fryer model. Always monitor toward the end to avoid burning. For extra flavor, consider adding vanilla or nutmeg to your cinnamon mix. These spices can create a unique twist that adds depth to your apple chips. Just a pinch can elevate your snack. Adjust sugar based on the apple variety you choose. Granny Smith apples are tart, so you may want less sugar. Honeycrisp apples are sweeter, so you might add more. Taste as you go, and find the right balance for your palate. {{image_2}} You can use various apples to make chips. Each type gives a unique taste. I love using Fuji apples for their sweetness. Gala apples also work great. They have a nice balance of sweet and tart. Just remember, the type of apple changes the flavor. Try different apples to find your favorite! Spices can make your apple chips even better. Pumpkin spice adds warmth and comfort. It’s great for fall snacks! Cardamom brings a floral note that surprises your taste buds. You can mix these spices with the cinnamon for a fun twist. Just a little sprinkle can change the whole chip! To keep your apple chips fresh, use airtight containers. This simple step helps keep them crunchy. Place the chips in a single layer if possible. If you have a lot, use multiple containers. For the best taste, store them at room temperature. They will stay fresh for up to one week. If you want them to last longer, you can put them in the fridge. However, they may lose some crispiness over time. If your apple chips lose their crunch, don’t worry! You can easily bring back their crispiness. The best way to do this is to air fry them again. Preheat your air fryer to 300°F (150°C). Place the apple chips in the basket in a single layer. Heat them for about 3-5 minutes. Keep an eye on them to avoid burning. This method works great and makes them taste like new! Air fryer cinnamon apple chips can last up to one week. To keep them fresh, store them in an airtight container. If the chips get soft, they may not be good to eat. Always check for taste and texture before snacking. Yes, you can use other fruits! Pears and bananas work well too. Just slice them thinly, like the apples. Different fruits may need slight changes in cooking time. Keep an eye on them while they cook for the best results. If your apple chips are not crispy, try a few tips. First, ensure your apple slices are thin enough. Thin slices crisp up better. Second, increase the cooking time by 2-3 minutes. Lastly, make sure to spread the slices in a single layer in the basket. This helps them cook evenly. In this article, we covered how to make air fryer cinnamon apple chips. We listed the ingredients, shared step-by-step instructions, and provided tips for perfect crispiness. We explored variations using different apple types and spices. Finally, we talked about storage and reheating for the best taste. These apple chips are easy to make and a healthy snack. Enjoy experimenting with flavors, and remember to keep those apple slices thin for that perfect crunch. Happy cooking!

Air Fryer Cinnamon Apple Chips Simple and Delicious

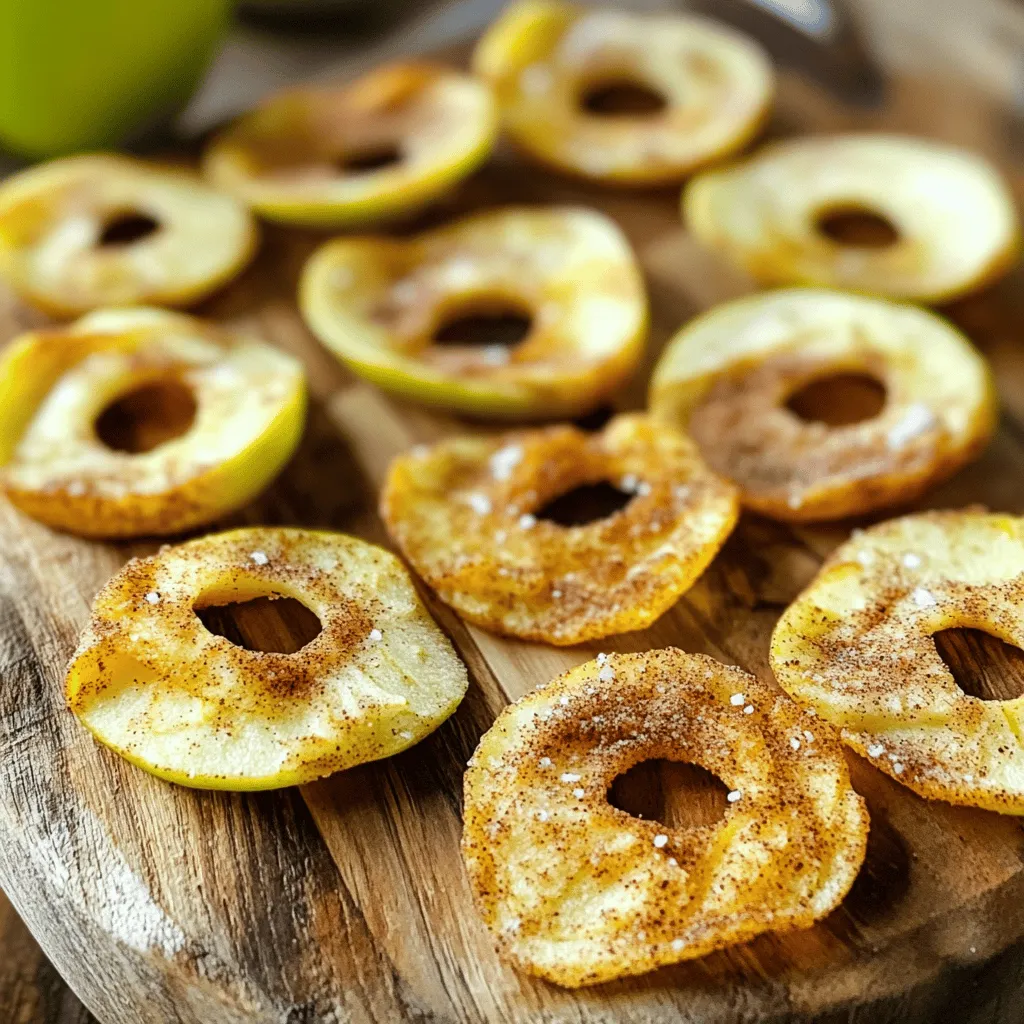
Are you ready to enjoy a tasty, healthy snack? My Air Fryer Cinnamon Apple Chips recipe is simple and delicious!

- 1 lb Brussels sprouts, trimmed and halved - 1/4 cup walnuts, roughly chopped - 1/4 cup dried cranberries - 1/4 cup feta cheese, crumbled Brussels sprouts are the star of this dish. They bring a nice crunch and earthy flavor. When you roast them, they get golden and crispy. This makes the salad exciting. The walnuts add a nutty taste, while cranberries give it a sweet touch. Feta cheese adds creaminess and saltiness, making it even better. - 3 tablespoons honey - 2 tablespoons Dijon mustard - 1 tablespoon apple cider vinegar - 1/4 teaspoon garlic powder For the dressing, I love using honey and Dijon mustard. They blend well to create a sweet and tangy mix. Apple cider vinegar adds brightness, while garlic powder gives a hint of savory flavor. This dressing ties all the ingredients together and makes each bite tasty. - 1 tablespoon olive oil - Salt and pepper to taste Olive oil is key for roasting the Brussels sprouts. It helps them get crispy and adds a nice flavor. Don’t forget the salt and pepper! They bring out the best in the sprouts and all the other ingredients. Adjust the seasoning to your taste as you mix everything together. 1. First, preheat your oven to 400°F (200°C). This step is key for roasting. 2. Next, trim and halve 1 lb of Brussels sprouts. Make sure they are fresh and firm. 1. In a bowl, toss the halved Brussels sprouts with 1 tablespoon of olive oil. Add salt and pepper to taste. 2. Spread the sprouts on a baking sheet in a single layer. Roast them for about 20-25 minutes. Stir halfway through to ensure even cooking. Look for a golden brown color and crispy edges. 1. While the sprouts roast, mix the dressing. In a small bowl, whisk together 3 tablespoons of honey, 2 tablespoons of Dijon mustard, 1 tablespoon of apple cider vinegar, and 1/4 teaspoon of garlic powder. 2. Taste the dressing. Adjust the seasoning if needed. You want a balance of sweet and tangy flavors. This process creates a delicious, warm salad that combines the nutty taste of Brussels sprouts with the sweet and zesty dressing. Enjoy incorporating these steps into your cooking! To make your Brussels sprouts crispy, roast them at high heat. Set your oven to 400°F (200°C). This helps get that golden brown color. Spread the sprouts in a single layer on the baking sheet. If they are too close, they will steam and not crisp. Stir them halfway through roasting. This ensures even cooking and browning. For a beautiful presentation, use a large, shallow dish. Arrange the salad nicely and sprinkle extra walnuts and feta on top. You can also add a sprig of fresh parsley for color. Chill the salad in the fridge for 15-20 minutes before serving. This lets the flavors mix well and makes it refreshing. You can boost the flavor of your salad with extra ingredients. Consider adding sliced apples or pears for a sweet crunch. You could also mix in some cooked bacon for a savory touch. This salad balances sweetness from honey with acidity from the vinegar. Adjust the dressing as needed to find your perfect mix. {{image_2}} For a vegan version, skip the feta cheese and use a plant-based alternative. You can also add more nuts or seeds to keep the crunch. For gluten-free options, ensure your mustard and vinegar are gluten-free. Most brands are safe, but always check labels. If you can’t find Brussels sprouts, try using kale or broccoli instead. Both give a nice crunch and flavor. For nuts, you can swap walnuts for almonds or pecans. Each will add its own twist. If feta isn't your favorite, use goat cheese or omit cheese altogether. In spring, add fresh peas for sweetness. In summer, try diced cucumbers for crunch. In fall, roasted butternut squash adds warmth. You can also toss in seasonal fruits like apple slices or pomegranate seeds for a sweet burst of flavor. Each choice makes the salad unique and fresh. To keep your Honey Mustard Brussels Sprout Salad fresh, store it in a clean, airtight container. This method helps to lock in moisture and flavor. I suggest using glass containers. They are safe, and you can see the salad inside. - Best methods for storing leftovers: Place the salad in the fridge right after serving. If you have leftover dressing, keep it in a separate container. This keeps the salad crisp. - Container suggestions: Use a glass or plastic container with a tight lid. Avoid using metal containers, as they can affect the taste. This salad stays fresh for about 3 days when stored correctly. After this time, the sprouts may become soggy. - How long the salad lasts: Generally, it lasts up to 3 days in the fridge. - Tips for maintaining quality: Avoid adding dressing until you're ready to eat. This keeps the Brussels sprouts crunchy. You might not need to reheat this salad, as it's best served cold. However, if you want to warm it up, here’s how: - Best practices for reheating if applicable: Place the salad in a pan on low heat. Stir gently until warm. Be careful not to overcook the sprouts. They can become mushy. Following these tips will keep your salad delicious for days! Yes, you can prepare this salad ahead of time. Just make the dressing and roast the Brussels sprouts first. Keep the dressing in an airtight container in the fridge. Let the roasted Brussels sprouts cool completely before mixing them with the other ingredients. You can then toss everything together right before serving. This keeps the salad fresh and the textures nice. Absolutely! Fresh Brussels sprouts taste better and have a crisp texture. They are also more nutrient-rich than frozen ones. When using fresh sprouts, trim off the ends and cut them in half. This helps them roast evenly and absorb the flavors of the dressing. This salad pairs well with grilled chicken or fish. You can also serve it with quinoa for a healthy grain option. For a vegetarian option, try it with lentils or chickpeas. These foods complement the salad’s sweet and tangy notes. Plus, they add protein to your meal. This post showed you how to make a tasty Brussels sprouts salad with a honey mustard dressing. You learned about the main ingredients, the step-by-step cooking process, and tips for perfecting your dish. Remember, you can adjust the recipe to fit your diet and use seasonal veggies. Store leftovers well and enjoy them later. With these easy steps, you can impress your family or friends with a fresh salad that’s fun to eat. Make it your own and enjoy every bite!

Honey Mustard Brussels Sprout Salad Delightful Recipe

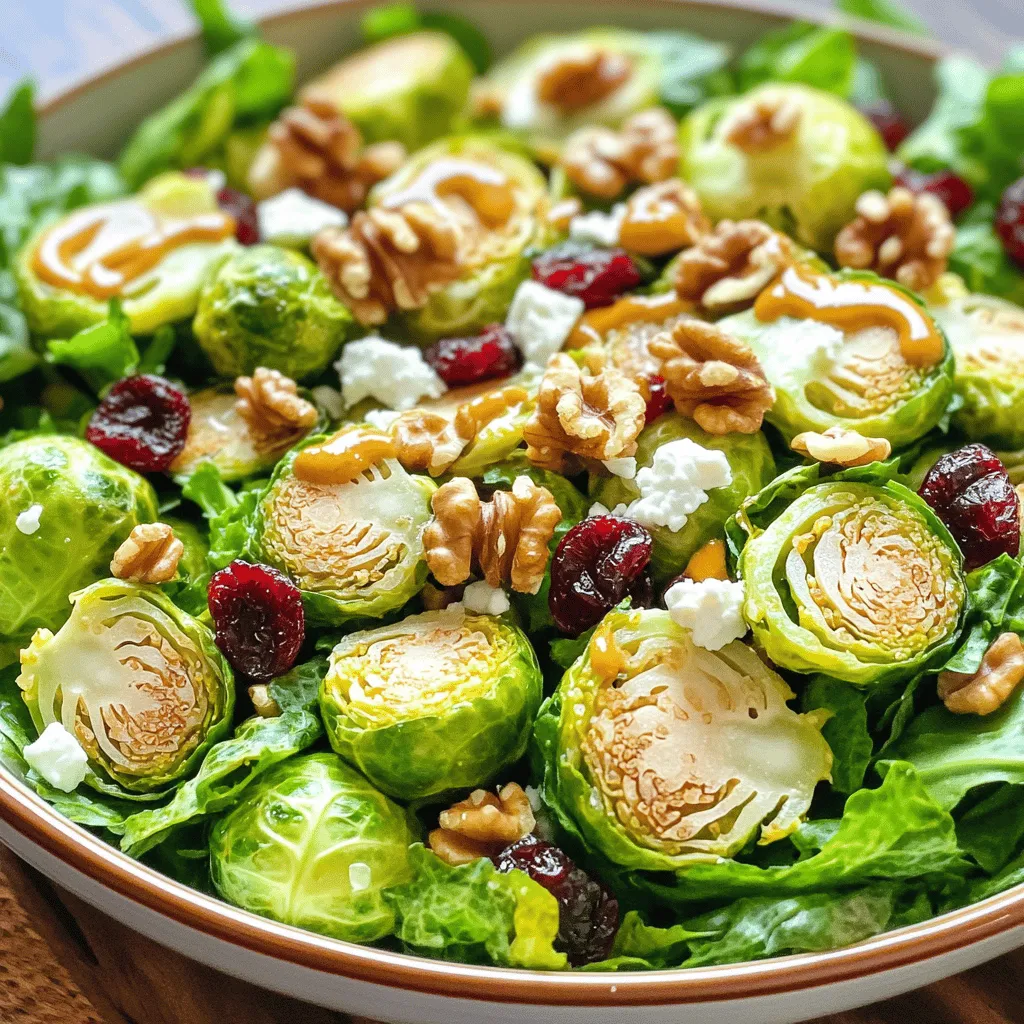
Are you ready to elevate your salad game? My Honey Mustard Brussels Sprout Salad is a crunchy, sweet, and savory

- 8 oz fettuccine pasta - 1 lb large shrimp, peeled and deveined - 1/2 cup store-bought basil pesto Fettuccine pasta forms the base of this dish. It cooks nicely and holds the sauce well. Using large shrimp adds both flavor and a great texture. Basil pesto brings a wonderful herbal taste that makes this dish special. - 3 cloves garlic, minced - 1 tablespoon olive oil - 2 cups baby spinach - 1 cup cherry tomatoes, halved Garlic adds a rich flavor. Sauté it in olive oil to bring out its taste. Spinach adds color and nutrition, while cherry tomatoes provide a sweet burst. These ingredients make the dish lively and fresh. - 1 cup heavy cream - Grated Parmesan cheese for serving - Salt and pepper to taste Heavy cream gives the sauce its creamy texture. Grated Parmesan cheese adds a salty, nutty flavor. Season with salt and pepper to balance all the tastes. Together, these ingredients make a satisfying meal. Cooking the garlic and shrimp Start by heating the olive oil in a large pot over medium heat. Add the minced garlic and cook for one minute. You want it fragrant but not browned. Next, toss in the shrimp, seasoning them with salt and pepper. Cook until the shrimp turn pink, which takes about three to four minutes. Once done, remove the shrimp and set them aside. Cooking the pasta In the same pot, add the fettuccine pasta. Pour in enough water to cover the pasta by about two inches. Bring the water to a boil. Cook the pasta according to package instructions until it’s al dente. This usually takes around eight to ten minutes. Adding cream and pesto Once the pasta is cooked, lower the heat to low. Stir in the heavy cream and basil pesto. Mix everything well so that the pasta gets evenly coated. The sauce should be creamy and rich. Incorporating spinach and tomatoes Now, fold in the baby spinach and halved cherry tomatoes. Cook this mixture for two to three minutes, just until the spinach wilts and the tomatoes soften a bit. This step adds color and freshness to your dish. Reintroducing the shrimp It’s time to add the cooked shrimp back into the pot. Gently stir to combine everything and heat the shrimp through. This should take only a minute or two. Seasoning and serving suggestions Taste your pasta and add more salt and pepper if needed. When serving, sprinkle grated Parmesan cheese on top. For a nice touch, serve in shallow bowls. You can garnish with extra cheese and a drizzle of olive oil for added flavor and visual appeal. - Achieving perfect pasta texture: Cook fettuccine until it is al dente. This means it should be firm when bitten. Start checking the pasta a minute or two before the package time ends. This way, you avoid mushy pasta. - How to prevent shrimp from overcooking: Shrimp cook fast. Once they turn pink, they are done. Remove them from the heat right away. This keeps them tender and juicy. - Alternative pasta types: You can swap fettuccine for spaghetti, penne, or gluten-free pasta. Each type will change the dish's feel slightly, but they will all work well with the sauce. - Dairy-free options: To make this dish dairy-free, use coconut cream instead of heavy cream. You can also use vegan cheese instead of Parmesan for a great flavor. - Serving suggestions: Serve the pasta in shallow bowls. This makes it easy to eat and looks nice. - Enhancing visual appeal: Add an extra sprinkle of Parmesan on top. A few fresh basil leaves will add color, too. A drizzle of olive oil over the dish can make it shine and look appetizing. {{image_2}} You can swap shrimp for chicken or scallops. Both options work well. Chicken gives a hearty taste. Scallops add a sweet flavor. For a vegetarian twist, use mushrooms or zucchini. These options make the dish lighter and still tasty. Want to kick up the flavor? Try adding sun-dried tomatoes. They bring a rich taste and a pop of color. Mixing in fresh herbs like parsley or thyme can also brighten the dish. Just chop them up and stir them in at the end. If you want to try something different, make your pesto at home. Blend fresh basil, nuts, garlic, and olive oil for a bright flavor. You can also use arugula or spinach for unique pesto flavors. Each option gives a fresh twist to your creamy pesto shrimp pasta. To keep your creamy pesto shrimp pasta fresh, store it in an airtight container. Place it in the fridge. It stays good for about 3 days. Make sure it cools down before sealing. For longer storage, you can freeze the pasta. Use a freezer-safe container. It will last for up to 2 months. When you want to eat it, thaw it in the fridge overnight. The best way to reheat this dish is on the stove. Use low heat to warm it gently. Add a splash of cream or water to keep it creamy. Stir often to prevent sticking. You can also use the microwave. Heat in short bursts, stirring in between. This helps keep the shrimp and pasta from getting tough. Avoid overheating, as this can change the texture. To make creamy pesto shrimp pasta, start by cooking fettuccine. Boil it in salted water until al dente. While the pasta cooks, heat olive oil in a large pot. Add minced garlic and sauté for one minute. Then, add shrimp, season with salt and pepper, and cook until pink. Remove the shrimp and set aside. After the pasta is done, stir in heavy cream and basil pesto. Mix until the pasta is coated. Fold in baby spinach and cherry tomatoes. Cook until spinach wilts. Finally, add the shrimp back, mix, and top with Parmesan cheese. Yes, you can use frozen shrimp. Just thaw them before cooking. Place the frozen shrimp in a bowl of cold water for about 15-20 minutes. Once thawed, peel and devein them if needed. Then, follow the same cooking steps as fresh shrimp. This makes the recipe easy and quick! You can serve this pasta with a simple side salad. A fresh green salad with lemon vinaigrette pairs well. Garlic bread is another great option. It adds a nice crunch and complements the creamy sauce. For drinks, a light white wine or sparkling water can enhance the meal. Enjoy! This post covered how to make creamy pesto shrimp pasta. We explored essential ingredients like fettuccine, shrimp, and fresh herbs. I shared cooking steps, tips for perfect texture, and options for variations. You can use chicken or even skip the meat. We discussed storage and reheating for the best taste. Now, you can create a delicious meal that impresses everyone. Enjoy trying out these recipes!

Creamy Pesto Shrimp Pasta One Pot Delight Recipe

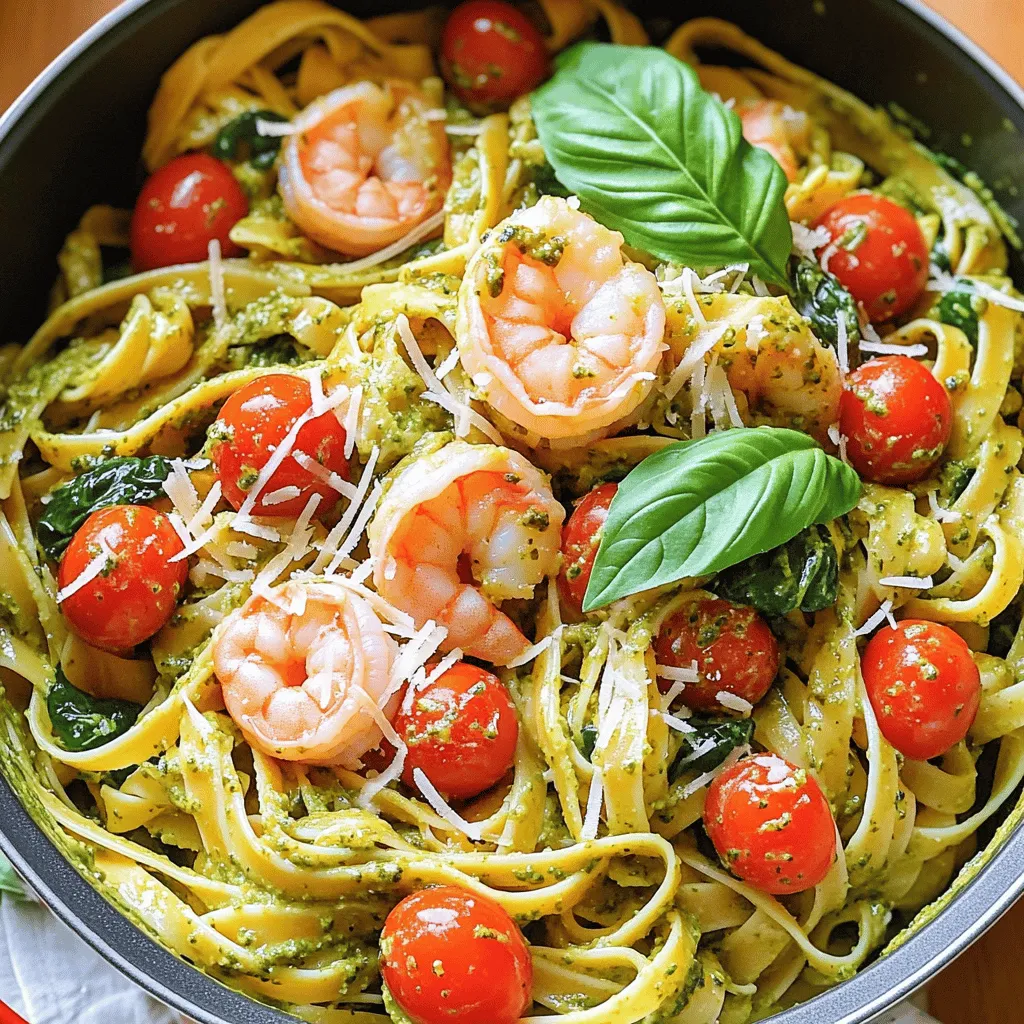
Are you ready to elevate your dinner game? This Creamy Pesto Shrimp Pasta One Pot Delight Recipe packs bold flavors

- 2 cans of refrigerated biscuit dough - 2 medium apples (Granny Smith or Honeycrisp) - 1 cup granulated sugar - 1 tablespoon ground cinnamon - 1/2 cup unsalted butter, melted The main ingredients form the base of our apple cinnamon monkey bread. The biscuit dough gives it a soft, fluffy texture. I love using Granny Smith or Honeycrisp apples for their sweet and tart balance. Granulated sugar and ground cinnamon bring rich flavor. Finally, melted butter binds everything together and adds moisture. - 1/2 cup brown sugar - 1 teaspoon vanilla extract - 1/4 teaspoon salt - 1/2 cup chopped pecans or walnuts (optional) - 1 cup powdered sugar for icing (optional) Optional ingredients can elevate the dish even more. Brown sugar adds deeper sweetness. Vanilla extract gives a warm aroma that enhances the apples. A pinch of salt balances the sweetness, while nuts add crunch. If you want a sweet finish, drizzle some icing made from powdered sugar on top. - Preheat your oven to 350°F (175°C) and grease a bundt pan. - In a mixing bowl, combine 1 cup of granulated sugar with 1 tablespoon of ground cinnamon. Set this aside for later. - Open the cans of refrigerated biscuit dough. Cut each biscuit into quarters and roll each piece into a ball. - Take 2 diced apples and toss them in half of the cinnamon sugar mixture until fully coated. - In the greased bundt pan, layer half of the dough balls at the bottom. Spread half of the apple mixture over these dough balls. - Pour half of the melted butter over the first layer. If you like, sprinkle half of the chopped nuts over this layer. - Repeat with the remaining dough balls, apples, melted butter, and nuts. - In a bowl, mix 1/2 cup of brown sugar, 1 teaspoon of vanilla extract, and 1/4 teaspoon of salt. Drizzle this sweet mixture over the top before baking. - Bake in the preheated oven for 40 to 45 minutes, until golden brown. - After baking, let the monkey bread cool in the pan for 10 minutes. Then, invert it onto a serving plate. For the best results, ensure even baking. Here are some tips: - Grease your bundt pan well. Use non-stick spray, so the bread comes out easily. - Layer the dough balls evenly. This helps them cook through without sogginess. - Bake at the right temperature. Preheat your oven to 350°F for a perfect rise. When it comes to apples, choose wisely. I love using: - Granny Smith apples. They add a nice tartness. - Honeycrisp apples. Their sweetness balances the cinnamon well. Both types keep their shape and flavor during baking. Once your monkey bread is done, it's time to serve! Here are some tasty ideas: - Garnish with cinnamon sugar. A sprinkle adds a sweet touch. - Dust with powdered sugar. This makes it look extra special. Pair your monkey bread with warm drinks. I recommend: - Coffee or hot cocoa. These drinks complement the sweetness. - Apple cider. It enhances the apple flavor in the bread. These tips will help you create a delightful experience for everyone at your table! {{image_2}} You can change the taste of your monkey bread by adding other fruits. Try pears or blueberries for a new twist. Each fruit brings its own unique flavor and texture. You can also add spices like nutmeg or allspice. These spices will enhance the warmth of the cinnamon and apples. If you need gluten-free options, you can use gluten-free biscuit dough. Many brands offer great choices that taste just as good. For vegan diets, swap out the butter for coconut oil or a vegan butter. Instead of regular milk, use almond or oat milk. These simple changes keep the monkey bread delicious for everyone! To keep your leftover monkey bread fresh, store it properly. You can refrigerate it or freeze it. For refrigeration, wrap the monkey bread in plastic wrap or foil. It can last up to 3 days in the fridge. If you want to store it longer, freezing is the way to go. Just place the wrapped monkey bread in an airtight container. It will stay good for up to 2 months in the freezer. When you’re ready to enjoy your monkey bread again, reheating is key. Preheat your oven to 350°F (175°C). Place the monkey bread in a baking dish. Cover it with foil to keep it moist. Heat it for about 10-15 minutes. If you prefer, you can also microwave individual pieces. Just warm them for about 20-30 seconds. Enjoy the soft, warm goodness without losing flavor! Can I use frozen biscuit dough? Yes, you can use frozen biscuit dough. Just thaw it first. Follow the same cutting and rolling steps as fresh dough. What type of apples are best for this recipe? Granny Smith and Honeycrisp apples are the best choices. They add a nice balance of sweet and tart flavors. How can I make the glaze for the monkey bread? To make the glaze, mix 1 cup of powdered sugar with water or milk. Stir until smooth. Drizzle it over the warm monkey bread. Can I prepare this recipe ahead of time? Yes, you can prep the monkey bread the night before. Keep it covered in the fridge. Bake it in the morning for a fresh treat. What is the best way to serve monkey bread? Serve the monkey bread warm. Let guests pull apart the sticky pieces. You can add a sprinkle of cinnamon sugar for extra flavor. Apple Cinnamon Monkey Bread is easy and fun to make. You start with two kinds of apples and some biscuit dough. You layer them with cinnamon and sugar for sweet goodness. Remember to add nuts for crunch and drizzle melted butter for richness. You can even try different fruits or make it gluten-free. In the end, this treat is perfect for sharing or enjoying alone. Now, gather your ingredients and make your own tasty version!

Irresistible Apple Cinnamon Monkey Bread Recipe

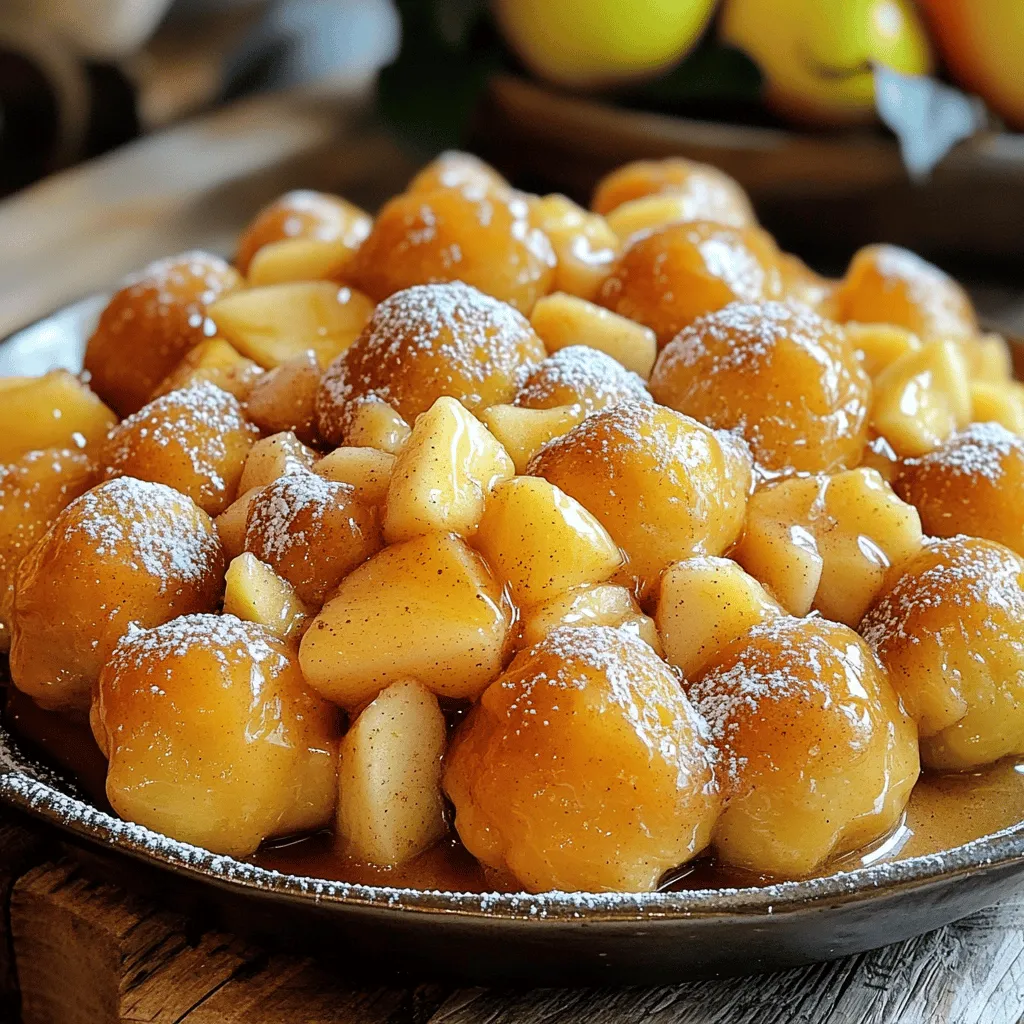
Get ready for a mouthwatering treat that combines sweet, tender apples with warm cinnamon. My Irresistible Apple Cinnamon Monkey Bread

- 2 large russet potatoes - 4 tablespoons unsalted butter, melted - 4 cloves garlic, minced - 1/2 teaspoon dried oregano - 1/2 teaspoon smoked paprika - Salt and black pepper, to taste - 1/2 cup freshly grated Parmesan cheese - Fresh parsley, chopped (for garnish) Gathering good ingredients is key to great fries. I love using russet potatoes. They are perfect for fries because they are starchy and turn crispy. You want to choose large ones for enough fries to share. Next, you need unsalted butter. It adds a rich flavor that pairs well with garlic. Speaking of garlic, you’ll need four cloves. Fresh garlic gives the best taste in this recipe. Adding dried oregano and smoked paprika brings extra flavor to the mix. Don't forget salt and black pepper; they boost the taste of everything. Finally, freshly grated Parmesan cheese is a must-have. It melts perfectly on hot fries. Chopped fresh parsley adds a nice touch and bright color. Having fresh herbs makes the dish look even better. Make sure you have all these ingredients ready before you start cooking! Start by washing your russet potatoes. Use cold water to scrub them well. Once clean, cut the potatoes into sticks about 1/4 inch thick. This size helps them cook evenly. After cutting, soak the potato sticks in a bowl of water for at least 30 minutes. Soaking removes extra starch. This step is key for crispy fries. After soaking, drain them and pat them dry with a clean towel. In a small bowl, mix 4 tablespoons of melted unsalted butter with 4 minced cloves of garlic. Add 1/2 teaspoon of dried oregano and 1/2 teaspoon of smoked paprika. Season with salt and black pepper to taste. Stir this mixture until it combines well. The aroma will be inviting! First, preheat your air fryer to 400°F (200°C) for about 5 minutes. This step ensures even cooking. Once preheated, place the coated fries in a single layer in the air fryer basket. If your air fryer is small, cook in batches. Air fry the fries for 15-20 minutes. Shake the basket halfway through to promote even cooking. The fries should turn golden and crispy. When they are done, sprinkle 1/2 cup of freshly grated Parmesan cheese over the fries right away. The heat will help the cheese melt slightly. Remove the fries from the air fryer and garnish with chopped parsley before serving. Enjoy your delicious garlic butter Parmesan fries! To make the best fries, start with soaking the potatoes. Place the cut fries in a bowl of water for at least 30 minutes. This step helps remove excess starch. Less starch means crispier fries. After soaking, it is crucial to dry the potatoes well. Use a clean towel to pat them dry. Moisture can make the fries soggy in the air fryer. To boost the flavor, think about adding spices. Consider garlic powder, onion powder, or cayenne pepper for some heat. These spices can make your fries even tastier. If you want to switch things up, try alternatives to Parmesan cheese. Nutritional yeast gives a cheesy flavor without dairy. Crumbled feta or cheddar can also work great. Get creative and find what you love! {{image_2}} You can play with different potatoes to mix things up. Sweet potatoes are a great choice. They add a tasty, sweet flavor. Simply follow the same steps as with russet potatoes. Other types of potatoes, like Yukon Gold or red potatoes, also work well. Each type gives a unique taste and texture. For a twist, try adding different herbs. You can use fresh rosemary or thyme. These herbs pair well with garlic. If you want more garlic flavor, add a bit more minced garlic to the mix. After cooking, sprinkle on some spicy toppings like chili flakes or fresh herbs. These will kick up the flavor even more. Enjoy being creative with your fries! To keep your garlic butter parmesan fries fresh, follow these steps: - Place leftover fries in an airtight container. - Store them in the fridge for up to three days. - Make sure they cool down before sealing the container to prevent steam. For reheating, you want to keep that crispy texture. Here’s how: - Preheat your air fryer to 350°F (175°C). - Place the fries in a single layer in the basket. - Heat for about 5-7 minutes. - Shake the basket halfway through to ensure even heating. If you want to save some fries for later, freezing is a great option. Here’s a simple guide: - Allow the fries to cool completely. - Spread them out on a baking sheet in a single layer. - Freeze for about 1-2 hours until solid. - Transfer them to a freezer-safe bag or container. When you’re ready to cook from frozen: - Preheat your air fryer to 400°F (200°C). - No need to thaw; just cook frozen fries for 20-25 minutes. - Shake the basket halfway through for crispiness. Yes, you can use frozen fries. Frozen fries save time and work well in the air fryer. Just adjust the cooking time. Cook them for about 10-15 minutes at 400°F (200°C). Shake the basket halfway through to get even crispiness. Garlic butter fries taste great with many dipping sauces. Here are some choices: - Garlic aioli - Ketchup - Ranch dressing - Spicy mayo - Barbecue sauce Try out different sauces and find your favorite! To make vegan garlic butter fries, replace the butter with vegan butter or olive oil. Use nutritional yeast instead of Parmesan cheese for a cheesy flavor. Follow the same steps in the recipe. Enjoy a tasty vegan treat! We explored how to make crispy garlic butter Parmesan fries using simple steps. You learned about the key ingredients, including russet potatoes, butter, and garlic, and how to prep them for air frying. We shared tips for achieving that perfect crunch and suggested tasty variations. Finally, I provided storage tips to keep leftovers fresh. Cooking fries at home can be fun and rewarding. Get creative and enjoy the process!

Garlic Butter Parmesan Fries Air Fryer Delight

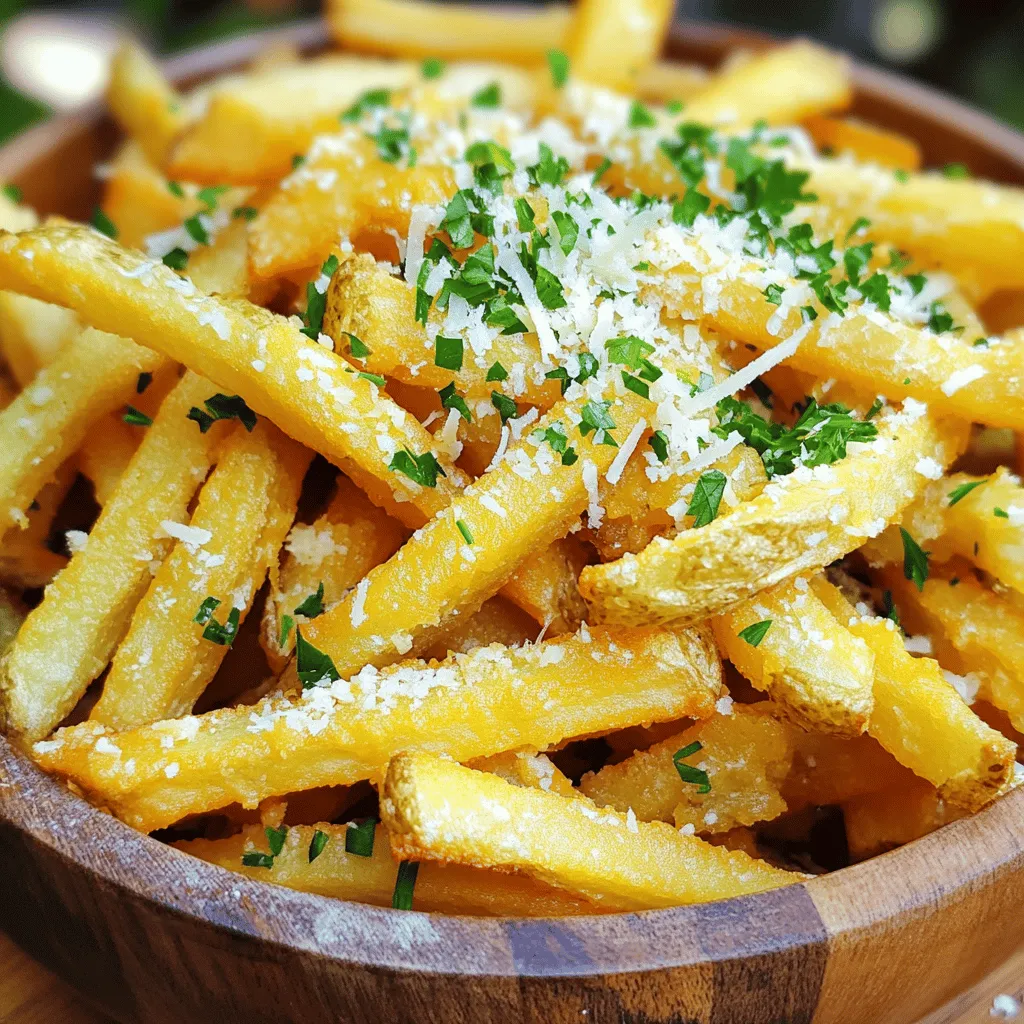
If you’re craving a crunchy, flavorful snack, you’ve come to the right place! Today, I’m sharing my easy Garlic Butter

To make the perfect pumpkin spice granola bars, gather these ingredients: - 2 cups rolled oats - 1 cup pumpkin puree - 1/2 cup honey or maple syrup - 1/4 cup almond butter (or any nut butter) - 1 teaspoon vanilla extract - 1 teaspoon cinnamon - 1/2 teaspoon nutmeg - 1/4 teaspoon ginger powder - 1/4 teaspoon salt - 1/2 cup chopped nuts (walnuts or pecans) - 1/2 cup dried fruits (cranberries or raisins) - 1/4 cup mini chocolate chips (optional) Each granola bar has about 150 calories. They contain healthy fats, fiber, and natural sweetness. Here’s a quick breakdown: - Calories: 150 - Protein: 3g - Carbohydrates: 25g - Fat: 5g - Fiber: 2g - Sugar: 6g Pumpkin spice is not just tasty; it has many health perks. Here’s what the key ingredients do: - Pumpkin puree: Rich in vitamins and minerals. Packed with beta-carotene, it helps your vision and immune system. - Cinnamon: May lower blood sugar and has anti-inflammatory properties. It adds warmth and flavor to the bars. - Nutmeg: Supports digestion and can help relieve pain. Its sweet and spicy flavor enhances the overall taste. - Ginger: Helps with nausea and has antioxidant effects. It gives a lovely warmth to your granola bars. - Nuts: Provide healthy fats and protein. They help keep you full and satisfied. - Dried fruits: Packed with fiber and natural sugars. They add sweetness and chewiness to the bars. With these ingredients, each bite is not only delicious but also good for you! 1. First, preheat your oven to 350°F (175°C). This helps the bars bake evenly. 2. Grab a 9x9 inch baking dish and line it with parchment paper. Leave some paper hanging over the edges. This makes it easy to lift the bars out later. 3. In a big mixing bowl, combine 2 cups of rolled oats, 1/2 cup chopped nuts, and 1/2 cup dried fruits. I like using walnuts and cranberries, but you can choose your favorites. Mix these dry ingredients well. 4. Take another bowl and whisk together 1 cup of pumpkin puree, 1/2 cup honey or maple syrup, 1/4 cup almond butter, and 1 teaspoon vanilla extract. Then, add 1 teaspoon cinnamon, 1/2 teaspoon nutmeg, 1/4 teaspoon ginger powder, and 1/4 teaspoon salt. This mix adds great flavor. Whisk until it’s all smooth. 5. Now, pour the pumpkin mixture over the dry ingredients. Stir it all together until everything is coated well. It should look delicious already! 6. Next, transfer the mixture into your lined baking dish. Press it down firmly and evenly. This step helps the bars stick together once baked. 7. Bake in your preheated oven for about 25-30 minutes. Look for the edges to turn lightly golden. That’s when you know they’re ready! 8. Once baked, remove the dish from the oven. Let the granola bars cool completely in the dish. This cooling time is very important. 9. After the bars have cooled, use the parchment overhang to lift them out. Place the slab on a cutting board. 10. Cut into bars or squares as you like. If you want extra sweetness, sprinkle mini chocolate chips on top while the bars are warm. Gently press them in so they stick. 11. For a lovely presentation, serve the granola bars on a rustic wooden board. You can garnish with a sprinkle of cinnamon or place small pumpkins around for a festive look. Enjoy your tasty snack! To get the best texture in your granola bars, use fresh ingredients. Old oats or nut butter can change the taste. Mix the dry and wet ingredients well. Make sure every oat is coated for a great bite. Press the mixture firmly into the pan. This helps the bars hold together after baking. Bake until the edges are golden, but not too dark. This gives a nice crunch while keeping the center soft. One big mistake is not measuring ingredients correctly. Use measuring cups for accuracy. Too much or too little can change the bars' texture. Another mistake is not pressing the mixture enough. If you leave it loose, the bars will crumble. Also, don't skip cooling the bars before cutting. This step helps them set properly. Lastly, avoid baking too long. Overbaking can make the bars dry and hard. When pressing the mixture into the pan, use a flat spatula or your hands. Press down evenly across the entire surface. This ensures a uniform thickness. If you find the mixture sticky, lightly wet your hands before pressing. This will help you flatten it without sticking. Make sure the edges are pressed down well, as they tend to lift during baking. A well-pressed mixture leads to better bars. {{image_2}} You can switch the almond butter for any nut butter you like. Peanut butter will work great. Sunflower seed butter is a good choice for nut-free options. Each nut butter brings its own flavor and texture. Try them out to find your favorite! If you want to change the sweetener, use agave syrup or brown rice syrup. These sweeteners will keep the bars sticky and sweet. You can also try coconut sugar for a lower glycemic option. Just remember, each sweetener has a different flavor. Choose one that fits your taste! Feel free to get creative with your flavorings! You can add vanilla bean or a splash of almond extract. Chia seeds or flaxseeds can add nutrition and a nice crunch. For a fun twist, try adding pumpkin seeds or coconut flakes. Dried apples or apricots will also give a fruity touch. Mix and match until you find your perfect blend! To keep your pumpkin spice granola bars fresh, place them in an airtight container. This helps prevent them from drying out. If you want to enjoy them later, you can refrigerate them. The cool temperature keeps them fresh for longer. If you stack them, use parchment paper between layers. This keeps them from sticking together. Freezing is a great option if you want to save some bars for later. Start by cutting the bars into squares. Then, wrap each piece in plastic wrap. Place the wrapped bars in a freezer-safe bag or container. They can last up to three months in the freezer. When you're ready to eat one, just let it thaw at room temperature. To keep your granola bars fresh, store them in a cool, dry place. Avoid areas with humidity, as this can make them soggy. For added flavor, consider adding extra spices or nuts when you make them. This can add a new twist each time you enjoy a bar. Regularly check for any signs of spoilage. If they smell off or look strange, it’s best to toss them. To make these bars vegan, swap honey for maple syrup. Use almond butter or any nut butter that is vegan-friendly. Check your nut butter for added ingredients. The rest of the recipe is already vegan! Yes, you can use gluten-free oats. Just check the package to make sure they are certified gluten-free. This will help avoid cross-contamination. The texture and taste will still be great! If you don't have pumpkin puree, use applesauce or mashed banana. These options will keep the bars moist. They will also add a nice flavor twist. You can even try sweet potato puree for a different taste! You learned about the key ingredients in pumpkin spice granola bars and their health benefits. We covered easy steps for preparation and baking, along with tips for serving. I shared mistakes to avoid and the best techniques for texture. You also discovered fun variations and how to store these bars to keep them fresh. In the end, these bars are simple, tasty, and great for any time. Enjoy making and sharing them!

Pumpkin Spice Granola Bars Healthy and Tasty Snack

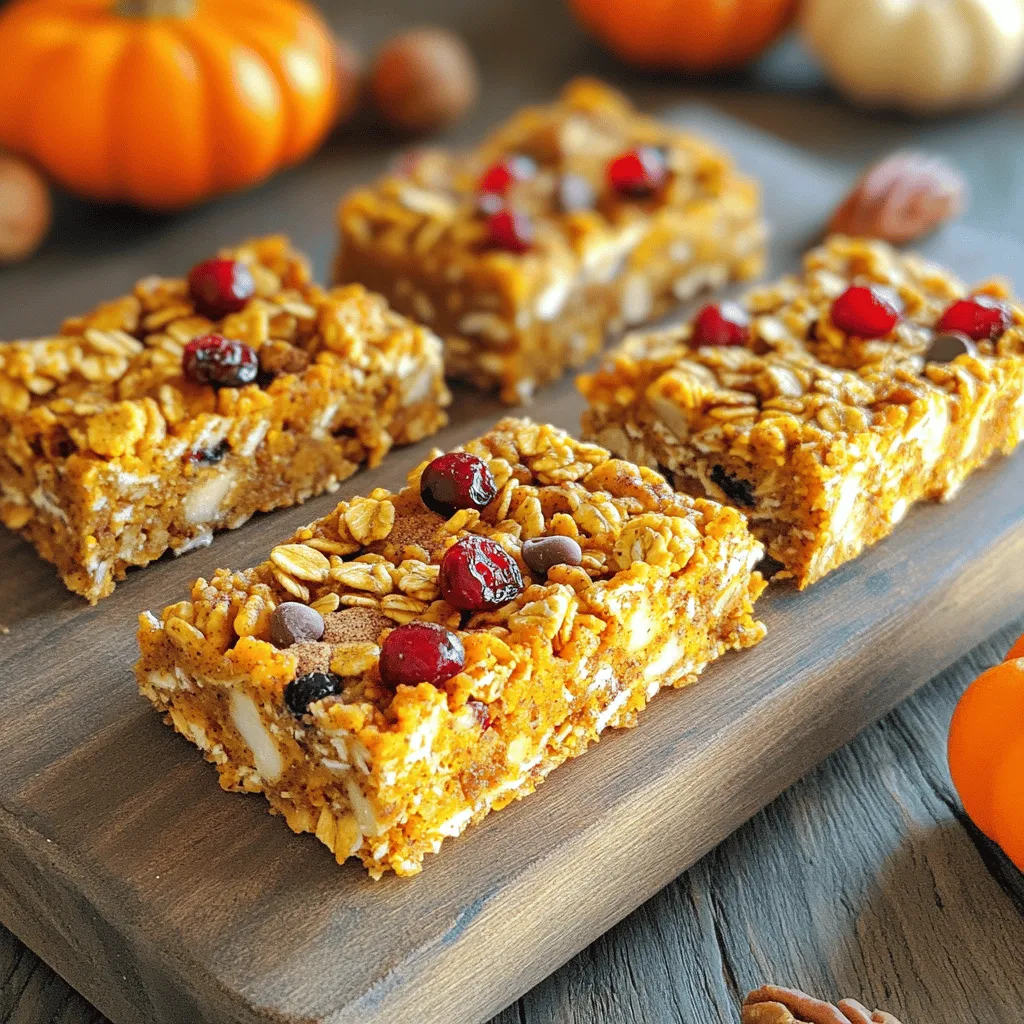
Looking for a snack that is both healthy and delicious? You’ve landed in the right place! These Pumpkin Spice Granola

- 1 cup cottage cheese, well-drained - 1/2 cup unsweetened cocoa powder - 1/3 cup honey or maple syrup (adjust to taste) - 1 teaspoon vanilla extract Cottage cheese is the star here. It gives the mousse a rich texture. I always use well-drained cottage cheese for the best results. The cocoa powder adds a deep chocolate flavor, which is essential. For sweetness, you can choose honey or maple syrup. I often start with 1/3 cup and adjust based on my taste. A touch of vanilla extract brightens up the dish. - 1/4 cup Greek yogurt for creaminess - Garnishes (dark chocolate shavings or berries) If you want a creamier texture, add Greek yogurt. It makes the mousse even smoother. For garnishing, dark chocolate shavings or fresh berries add flair. They make your dessert look fancy and inviting. - Blender or food processor - Individual serving cups or bowls To make this mousse, you'll need a blender or food processor. It helps blend all the ingredients smoothly. Individual cups or bowls are perfect for serving. They make each portion special and easy to enjoy. - First, gather all your ingredients. You need cottage cheese, cocoa powder, honey or maple syrup, vanilla extract, Greek yogurt, and salt. - Next, put the cottage cheese, cocoa powder, honey, vanilla, Greek yogurt, and salt in a blender. - Blend the mixture on high speed. Keep blending until it is smooth and creamy. - Stop and taste the mousse. If it needs more sweetness, add a bit more honey or maple syrup. Blend again to mix. - Once your mousse is smooth, pour it into small serving cups or bowls. - Place the cups in the fridge. Let them chill for at least 30 minutes. This helps the flavors mix well. - After chilling, take the mousse out. If it looks too thick, stir it gently before serving. - For a nice touch, add dark chocolate shavings or berries on top before serving. Enjoy your treat! Start with cottage cheese that is well-drained. This step is key. If the cheese has extra liquid, it will make your mousse runny. Use a fine mesh strainer to get rid of any excess water. Blend the cottage cheese until it is completely smooth. This makes a creamy texture that feels great when you eat it. Adjust the cocoa powder to your taste. If you like it sweeter, add more honey or maple syrup. Always taste the mix. Make changes to get the flavor just right. You can add more flavors to the mousse. Consider mixing in some espresso for a rich taste. A pinch of cinnamon can add warmth. You can also use flavored extracts, like almond or hazelnut, for a twist. For sweeteners, honey or maple syrup works well. If you want less sugar, try stevia or erythritol. These options can keep it sweet while lowering calories. The mousse pairs great with fresh fruits or nuts. Try topping it with berries for color and taste. Chopped nuts add a nice crunch. This dessert is perfect for gatherings or special occasions. Serve it at a dinner party or a family meal. It also works well for a treat after school. Make it a fun dessert that everyone can enjoy. {{image_2}} You can make this mousse even healthier. Try using lower-calorie sweeteners like stevia or monk fruit. These options can cut sugar without losing flavor. You can also make this dessert dairy-free. Use silken tofu instead of cottage cheese for a creamy base. This keeps the mousse light and tasty. Want a new twist on this mousse? Add a shot of espresso or a splash of coffee. This gives the mousse a rich mocha flavor. You can also sprinkle in spices like cinnamon or nutmeg. These spices add warmth and depth to the dessert. Presentation matters! Layer the mousse in clear cups with fresh fruits. This adds color and freshness to each bite. You can also use chocolate cups for serving. These add an elegant touch and make each bite special. To keep your cottage cheese chocolate mousse fresh, store it in the fridge. Use airtight containers to seal in the flavor. The mousse stays fresh for about 3 to 5 days. Always check for any changes in smell or texture before serving. You can freeze the mousse if you have leftovers. Scoop it into a freezer-safe container. Leave some space at the top since it may expand. It can last up to 2 months in the freezer. When ready to eat, thaw it in the fridge overnight for the best texture. Avoid reheating in the microwave, as it changes the mousse’s creaminess. If you have extra mousse, get creative! Spread it on toast or use it as a cake filling. You can mix it into smoothies for a chocolatey twist. Another fun idea is to layer it with fruits and granola for a parfait. Enjoy exploring these tasty options! Yes, you can use flavored cottage cheese. Options like vanilla or strawberry can add a fun twist. Just remember to adjust the sweetener. Flavored varieties can make the mousse taste even better. You may want to reduce the added honey or maple syrup to avoid it being too sweet. Experimenting with these flavors can lead to exciting new tastes. To make this mousse vegan, use dairy-free alternatives. Substitute cottage cheese with silken tofu or a nut-based cheese. Use maple syrup for sweetness, and choose plant-based yogurt for creaminess. For cocoa powder, ensure it’s vegan-friendly. The texture will be smooth and creamy using these substitutes. This way, everyone can enjoy this tasty treat. Yes, this mousse is great for kids. Cottage cheese is high in protein and calcium, which helps build strong bones. It's a healthy dessert choice. The sweet taste from honey or maple syrup makes it appealing. Plus, you can add fruit for extra vitamins. Your kids will love this treat, and you can feel good serving it. This article covered the key ingredients for a tasty mousse, like cottage cheese and cocoa powder. I shared steps for preparation, chilling, and serving. You learned tips to enhance flavor and texture, plus tasty variations to try. In conclusion, making this mousse is simple and fun. You can customize it to fit your taste. Enjoy your delicious and healthy treat!

Cottage Cheese Chocolate Mousse Delightful Dessert

Are you ready to indulge in a rich and creamy treat that won’t ruin your diet? This Cottage Cheese Chocolate

Older posts
Newer posts
← Previous Page1 … Page18 Page19 Page20 … Page84 Next →

dsad

© 2026 Lisa Dishes • Built with GeneratePress

Our Policies

  • Copyright Policy
  • Cookie Policy
  • GDPR Policy
  • Privacy Policy
  • Disclaimer
  • Terms Of Use

More Information

  • Home
  • About
  • Contact
  • Appetizers
  • Dessert
  • Dinner
  • Drinks
©2026, Lisa Dishes About Back To Top