Skip to content
DisclaimerTerms Of UseGDPR PolicyCookie Policy

Lisa Dishes

  • Home
  • Drinks
  • Appetizers
  • Dinner
  • Dessert
  • About
  • Contact
  • Privacy Policy
DisclaimerTerms Of UseGDPR PolicyCookie Policy

NO-ING-IMG

To make raspberry chocolate chip muffins, gather these simple ingredients: - 1 cup fresh raspberries - 1 cup all-purpose flour - 1/2 cup rolled oats - 1/2 cup brown sugar - 1/4 cup granulated sugar - 1/2 cup chocolate chips (dark or semi-sweet) - 1/2 teaspoon baking powder - 1/2 teaspoon baking soda - 1/4 teaspoon salt - 1/2 teaspoon vanilla extract - 1/2 cup buttermilk (or milk + 1/2 tablespoon lemon juice) - 1/4 cup vegetable oil - 1 large egg You can swap some ingredients based on your taste or what you have at home: - Use whole wheat flour for a healthier option. - Try honey instead of brown sugar for sweetness. - Substitute almond milk for buttermilk if needed. - Replace chocolate chips with nuts or seeds for crunch. These muffins are not just tasty; they also offer good nutrition. Each muffin contains: - Approximately 180 calories - 5 grams of protein - 6 grams of fat - 30 grams of carbohydrates - 3 grams of fiber These values may change based on your ingredient choices. Enjoy these muffins as a fun and tasty treat! {{ingredient_image_1}} 1. Preheat your oven to 375°F (190°C). Line a muffin tin with paper liners or spray it with non-stick cooking spray. 2. In a bowl, mix 1 cup of all-purpose flour, 1/2 cup of rolled oats, 1/2 teaspoon of baking powder, 1/2 teaspoon of baking soda, and 1/4 teaspoon of salt. Whisk these dry ingredients together until they blend well. 3. In another bowl, beat together 1/2 cup of brown sugar, 1/4 cup of granulated sugar, and 1 large egg until the mixture is smooth and creamy. 4. Add 1/2 cup of buttermilk, 1/4 cup of vegetable oil, and 1/2 teaspoon of vanilla extract to the egg mixture. Whisk until everything is well mixed. 5. Now, carefully stir the dry ingredients into the wet ingredients. Mix just until combined. Be careful not to overmix! 6. Gently fold in 1 cup of fresh raspberries and 1/2 cup of chocolate chips. Make sure they are evenly spread in the batter. 7. Scoop the batter into the muffin tin, filling each cup about 2/3 full. This will help them rise nicely. 8. Place the muffin tin in the oven and bake for 18-20 minutes. You want them to be golden brown. 9. To check if they are done, insert a toothpick into the center of a muffin. If it comes out clean, they are ready! 10. Once baked, take them out and let them cool in the pan for 5 minutes. After that, transfer the muffins to a wire rack to cool completely. - Use a toothpick to check if the muffins are done. A clean toothpick means they are ready. - If the toothpick has wet batter on it, give them a few more minutes. - Muffins may look slightly moist but should not be sticky when done. - Trust your nose! If they smell great, they are likely ready to come out. To get that soft and fluffy muffin, do not overmix your batter. Mix just until the dry ingredients blend in. It’s okay if some lumps remain. This keeps the muffins light. Adding rolled oats gives a nice texture. They soak up moisture and add a bit of chew. To keep your muffins fresh, store them in an airtight container. They last for up to three days at room temperature. If you want them to last longer, freeze them. Wrap each muffin in plastic wrap, then place them in a zip-top bag. They can stay frozen for up to three months. Just thaw them at room temperature before serving. Serve these muffins warm for the best taste. A dusting of powdered sugar makes them look special. Pair them with a cup of tea or coffee for a cozy treat. You can also serve them with a scoop of vanilla ice cream for a fun dessert. Try adding a handful of fresh raspberries on the side for a pop of color and flavor. Pro Tips Choose Ripe Raspberries: Select fresh, ripe raspberries for the best flavor and sweetness in your muffins. Avoid Overmixing: Mix the batter until just combined to ensure your muffins remain fluffy and tender. Cool Before Serving: Let the muffins cool for a few minutes in the pan to help them set and make them easier to remove. Experiment with Mix-ins: Feel free to add nuts or other berries for added texture and flavor variations. {{image_2}} You can make these muffins gluten-free! Use a gluten-free flour blend. Look for blends that include xanthan gum. This helps give the muffins a nice rise and texture. You can use almond flour or coconut flour too. Just mix them with other gluten-free flours for the best results. Feel free to get creative! You can swap out raspberries for blueberries or strawberries. Chopped apples or peaches work well too. Adding nuts like walnuts or pecans adds great crunch. Just remember to adjust the quantity so the batter stays balanced. To make these muffins vegan, you can replace the egg with a flax egg. Just mix one tablespoon of ground flaxseed with three tablespoons of water. Let it sit for five minutes to thicken. Use almond milk or soy milk instead of buttermilk. This keeps the muffins moist and tasty. To keep your Raspberry Chocolate Chip Muffins fresh, store them in an airtight container. Place them at room temperature for up to three days. If you want them to last longer, put them in the fridge for a week. This helps maintain their flavor and texture. Always check for mold before eating, especially if they sit for a while. Freezing is a great option if you want to save some muffins for later. First, let the muffins cool completely. Then, wrap each muffin tightly in plastic wrap. Place them in a freezer-safe bag or container. Label with the date. You can freeze them for up to three months. When ready to eat, simply thaw them in the fridge overnight. Reheating your muffins can bring back their fresh-baked taste. For the best results, use an oven. Preheat the oven to 350°F (175°C). Place the muffin on a baking sheet and heat for about 5-10 minutes. You can also use a microwave. Heat on medium power for 15-20 seconds. This method works well if you're in a hurry. Enjoy your warm muffins! Yes, you can use frozen raspberries. They work well in muffins. Just keep them frozen until you mix them in. If they thaw, they may turn mushy. This can change the texture of your muffins, but they will still taste great. To reduce sweetness, cut back on the sugars. You can use only 1/4 cup of brown sugar. You can also try adding more oats. This will balance the flavors and keep the muffins tasty. Another option is to add a pinch of salt. Salt can enhance the flavors and make the muffins less sweet. You can mix it up with different flavors. Try adding blueberries or chopped strawberries. Nuts like walnuts or pecans also work well. For a fun twist, add spices like cinnamon or nutmeg. You can even try swapping chocolate chips for white chocolate or peanut butter chips. In this article, we explored making delicious muffins. You learned the key ingredients and possible substitutions. I shared step-by-step instructions and tips to check doneness. We also looked at storage and freezing practices. Don't forget the fun variations, like gluten-free and vegan options. Muffins are flexible and tasty, making them great for any occasion. With these guidelines, you can bake perfect muffins tailored to your taste every time. Enjoy your baking journey!

Raspberry Chocolate Chip Muffins Delightful and Easy

Craving a sweet treat that’s both easy and delicious? You’re in the right place! Raspberry Chocolate Chip Muffins are a

- Chickpeas - Roasted Red Bell Pepper - Tahini - Olive Oil - Lemon Juice - Garlic - Ground Cumin - Salt - Water - Garnishes To make roasted red pepper hummus, you need simple, fresh ingredients. First, grab a can of chickpeas. You want 15 ounces, drained and rinsed. Chickpeas give hummus its creamy texture and protein. Next, use one large roasted red bell pepper. This adds a sweet, smoky flavor. You can roast it yourself or buy it jarred. Add two tablespoons of tahini. This sesame paste gives hummus a rich taste. Then, include two tablespoons of extra-virgin olive oil. This adds healthy fat and smoothness. Freshness matters, so squeeze in two tablespoons of lemon juice. It brightens up the flavor. One minced garlic clove will add a nice kick. You also need 1/2 teaspoon of ground cumin. This spice enhances the warmth of the dish. Don’t forget salt! Add it to taste. Finally, have some water on hand. You’ll use this to adjust the hummus's thickness. For garnishes, fresh parsley and paprika can make your dish look pretty. Gather these ingredients, and you’re ready to create a tasty dip that everyone will love! {{ingredient_image_1}} Combining the Ingredients Start by gathering all your ingredients. In your food processor, add the chickpeas, chopped roasted red pepper, tahini, olive oil, lemon juice, minced garlic, and ground cumin. This mix creates a tasty base for your hummus. Blending Process Blend the mixture on high until smooth. You may need to stop and scrape down the sides. If the hummus is too thick, add water one tablespoon at a time. Blend after each addition until it reaches a creamy texture. Achieving Desired Consistency Keep blending until you get the texture you like. If it feels too dry, just add more water. Aim for a dip that is smooth but not runny. Seasoning the Hummus Taste your hummus. Now is the time to add salt. Blend it a bit more to mix in the salt. This step is key to bringing out the flavors. Transferring to Serving Dish Scoop the hummus into a serving bowl. Use a spatula to smooth the top. This makes it look nice and inviting. Optional Garnishes For some extra flair, drizzle a little olive oil on top. Sprinkle paprika and fresh parsley for color. These garnishes add flavor and make your hummus pop. - Tips for Blending: Start with your chickpeas and roasted red pepper in the food processor. Blend them until smooth. This step gives your hummus a nice base. If you want it creamier, blend longer. - Adjusting Consistency: If your hummus is thick, add water one tablespoon at a time. Blend after each addition. Keep going until you reach a smooth texture. You want it spreadable, not runny. - Flavor Enhancements: Add a pinch of salt for taste. Ground cumin adds warmth. If you like a kick, try adding a bit of cayenne pepper. Lemon juice brightens the flavor too. - Best Pairings: Serve your hummus with pita chips or fresh veggies. Carrots, cucumbers, and bell peppers make great dippers. You can also spread it on sandwiches or wraps. - Creative Serving Ideas: Use hummus as a dip for a veggie platter. Top it with olive oil and a sprinkle of paprika for flair. You can even add nuts for a crunchy twist. - Presentation Tips: Serve in a shallow bowl. Drizzle olive oil in the center. Add colorful garnishes like fresh parsley for a pop. A well-presented dish makes your hummus even more appealing. Pro Tips Choose quality peppers: Opt for jarred roasted red peppers for convenience, or roast your own fresh bell peppers for a deeper flavor. Adjusting consistency: If your hummus is too thick, add water slowly to achieve your desired creaminess without making it watery. Experiment with spices: Feel free to add other spices like smoked paprika or cayenne pepper for a unique twist on the classic flavor. Serving suggestions: Pair your hummus with a variety of dippers like carrot sticks, cucumber slices, or whole grain crackers for a healthy snack. {{image_2}} You can change the taste of roasted red pepper hummus in fun ways. - Spicy Roasted Pepper Hummus: Add a pinch of cayenne pepper or a few slices of jalapeño. This gives a nice kick. You can also mix in some hot sauce for extra heat. - Herb-Infused Variants: Blend in fresh herbs like basil or cilantro. This adds a fresh taste. Try dried herbs like oregano or thyme for a different twist. - Other Vegetable Hummus Options: Use other veggies like roasted beets or carrots. These give your hummus a new color and flavor. You can even mix in spinach for a healthy green twist. This hummus fits many diets. - Gluten-Free Options: All ingredients are gluten-free. Serve with gluten-free crackers or fresh veggies for a safe snack. - Vegan-Friendly Substitutions: The recipe is already vegan! You can use maple syrup instead of honey for sweetness if needed. - Nut-Free Alternatives: Tahini is made from sesame seeds, not nuts. If you have a nut allergy, this hummus is safe! For a creamier texture, you can add more olive oil or use sunbutter. These variations and considerations make the roasted red pepper hummus even more enjoyable! You can mix and match to find your favorite flavors. Refrigeration Instructions After making your hummus, store it in an airtight container. Put it in the fridge right away. This keeps it fresh and tasty. Homemade hummus lasts for about a week in the fridge. When you want to eat it, just grab it from the fridge. Freezing Tips You can freeze hummus too! To do this, scoop the hummus into a freezer-safe container. Leave some space at the top, as it will expand when frozen. Cover it tightly and freeze for up to three months. When you want to use it, thaw it in the fridge overnight. Stir it well before serving. How Long Does It Last? Homemade roasted red pepper hummus lasts about one week in the fridge. If you freeze it, it can last up to three months. Always check the date you made it to keep track. Signs of Spoilage Watch for changes in color or texture. If you see mold or it smells bad, toss it out. Also, if it tastes off or sour, don’t eat it. Fresh hummus should be smooth and creamy. To make roasted red pepper hummus, follow these simple steps: 1. Combine Ingredients: In a food processor, mix chickpeas, chopped roasted red pepper, tahini, olive oil, lemon juice, minced garlic, and ground cumin. 2. Blend: Blend the mix on high until smooth. If it’s too thick, add water a tablespoon at a time until it’s just right. 3. Season: Taste your hummus and add salt as needed. Blend for a few more seconds to mix. 4. Serve: Spoon the hummus into a bowl. Drizzle with olive oil and sprinkle paprika and parsley on top if you like. Yes, you can use store-bought roasted red peppers. Pros: - Saves time and effort. - Convenient when fresh peppers aren't available. Cons: - They may have added preservatives. - Flavor might not be as fresh as homemade. You can serve hummus in many fun ways. Here are some ideas: - Dipping: Pair with pita chips or fresh veggies like carrots and cucumbers. - Spreading: Use it as a spread in wraps or sandwiches. - Platter: Create a mezze platter with olives, cheeses, and dips. Roasted red pepper hummus offers many health benefits: - High in Protein: Chickpeas provide good protein. - Rich in Fiber: Supports digestion and keeps you full. - Vitamins: Red peppers are high in vitamins A and C, boosting immunity. If you need to swap ingredients, here are some options: - Tahini: Use almond butter or sunflower seed butter for a nut-free option. - Olive Oil: Avocado oil or sesame oil can work as good alternatives. - Garlic: You can use garlic powder if fresh garlic is not available. This article covered how to make delicious roasted red pepper hummus from scratch. We explored key ingredients like chickpeas, tahini, and garlic, plus easy step-by-step instructions. I shared tips for the perfect texture and fun serving ideas. Whether you want to spice it up or keep it classic, there’s a version for everyone. Finally, proper storage and shelf life will help you enjoy your hummus longer. With this knowledge, you can create tasty hummus and impress your family and friends. Enjoy your culinary journey!

Roasted Red Pepper Hummus Simple and Flavorful Dip

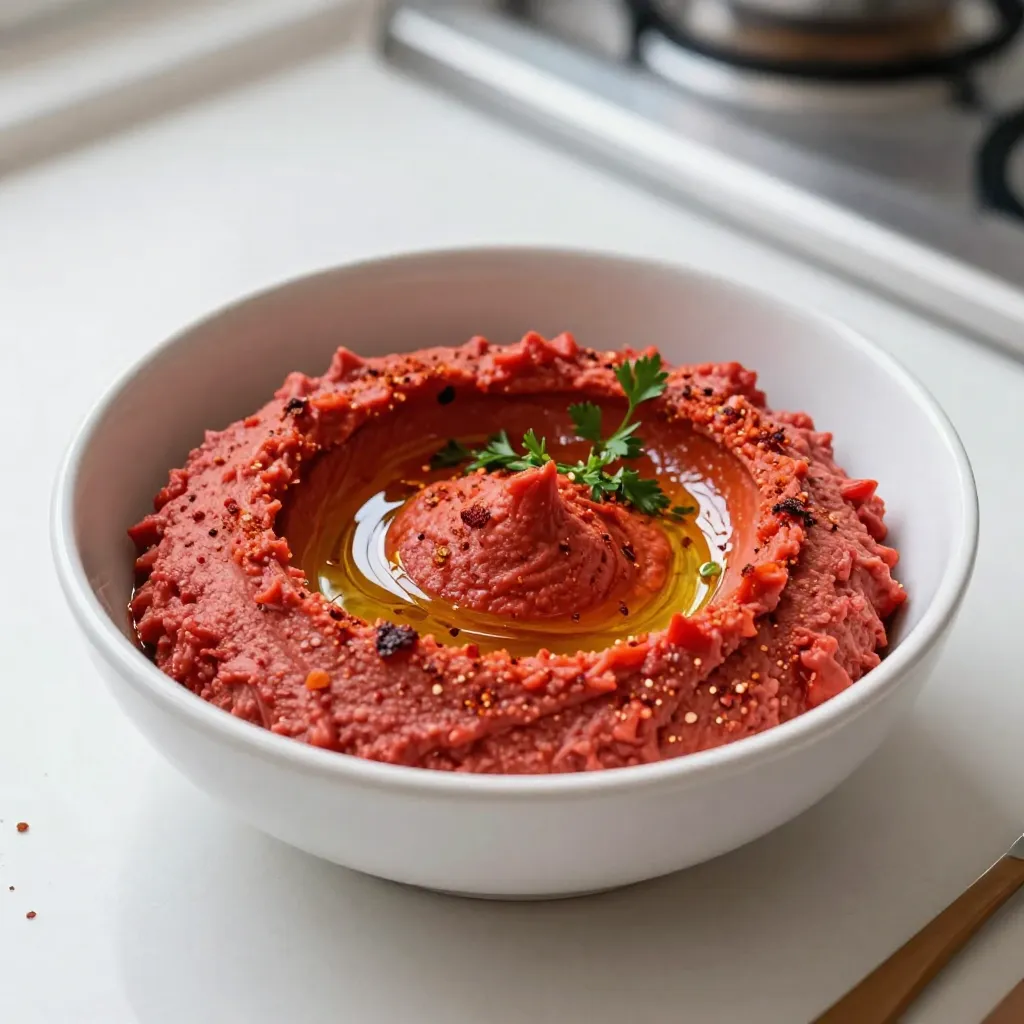
Looking for a tasty and simple dip? Roasted Red Pepper Hummus is your answer! With just a few ingredients, you

- 4 cups mixed salad greens (arugula, spinach, and romaine) - 1 cup fresh strawberries, hulled and sliced - 1/2 cup crumbled feta cheese - 1/4 cup walnuts, toasted and roughly chopped - 1/4 cup balsamic glaze - 2 tablespoons olive oil - 1 tablespoon honey - Salt and pepper to taste Gather these fresh ingredients for a vibrant Balsamic Strawberry Salad. Start with mixed salad greens. I love using a mix of arugula, spinach, and romaine. Each green adds a different taste and texture. Next, pick ripe strawberries. They should be bright red and sweet. Slice them up and toss them into the bowl. The strawberries give a juicy pop to each bite. Now, add crumbled feta cheese. This cheese brings a nice creaminess and tanginess to the salad. Don’t skip it! To add some crunch, toss in toasted walnuts. Toasting brings out their nutty flavor. Just chop them roughly before adding them in. For the dressing, you’ll need balsamic glaze, olive oil, and honey. The glaze adds sweetness and depth. Use good-quality olive oil for the best taste. A touch of honey balances the flavors well. Finally, season with salt and pepper. They enhance the taste of all the fresh ingredients. {{ingredient_image_1}} - Combine greens and strawberries: Take a large bowl. Add 4 cups of mixed salad greens. Use arugula, spinach, and romaine for great flavor. Slice 1 cup of fresh strawberries and add them to the bowl. Mix gently to blend the greens and strawberries. - Add feta and walnuts: Next, sprinkle 1/2 cup of crumbled feta cheese on top. Add 1/4 cup of toasted walnuts, roughly chopped. This adds a nice crunch and rich flavor. Make sure the feta and walnuts are spread evenly. - Prepare dressing: In a small bowl, whisk together the balsamic glaze, olive oil, honey, and a pinch of salt and pepper. Use 1/4 cup of balsamic glaze, 2 tablespoons of olive oil, and 1 tablespoon of honey. Mix until everything is well combined. - Drizzle and toss: Drizzle the dressing over the salad in the large bowl. Gently toss the salad to mix all the ingredients. Ensure the greens, strawberries, cheese, and nuts are evenly coated. Taste and add more salt and pepper if needed. Serve right away on chilled plates for a fresh, tasty dish. Choosing ripe strawberries Select strawberries that are deep red and firm. Look for ones that smell sweet. Avoid berries with green or white spots. These are not fully ripe. Ripe strawberries taste better and add more flavor. Selecting quality feta cheese Pick feta that is creamy and fresh. Crumbly feta adds texture to the salad. You can find feta in blocks or crumbled. I prefer buying blocks for better quality. Crumble it just before adding to the salad. Toasting walnuts for flavor Toasting walnuts enhances their flavor. Place them in a dry pan over medium heat. Stir them for about 5 minutes until they are golden. Watch closely to prevent burning. Toasted walnuts add a nice crunch to your salad. Presentation ideas Serve your salad on chilled plates for a fresh look. Arrange greens, strawberries, and feta in layers. Scatter walnuts on top for a pop of color. Drizzle dressing just before serving to keep it crisp. Best times to serve This salad is perfect for summer picnics or light lunches. Serve it as a side dish at barbecues. It also works well for a light dinner. Enjoy it as a snack when you want something healthy and tasty. Pro Tips Freshness is Key: Always use the freshest strawberries you can find for the best flavor and texture in your salad. Toast Your Nuts: Toasting walnuts enhances their flavor and adds a delightful crunch to your salad. Chill Your Plates: Serve the salad on chilled plates to keep it refreshing and cool for longer. Dress Wisely: Drizzle the dressing just before serving to prevent the greens from wilting and maintain their crispiness. {{image_2}} You can boost this salad with protein. Grilled chicken adds a savory touch. Use boneless, skinless chicken breasts for best results. Simply grill them until cooked through and slice them thinly. Quinoa is another great option. It's a superfood packed with nutrients. Cook it according to the package instructions, then let it cool before adding it to your salad. Quinoa adds a nice crunch and fills you up. Feel free to switch up the cheese. Goat cheese offers a creamy texture and tangy flavor. You can even use mozzarella for a milder taste. When it comes to nuts, try pecans or almonds. Both add a unique flavor and crunch. Toast them lightly for even more taste. This way, you can personalize your salad to fit your taste. To keep your Balsamic Strawberry Salad fresh, store leftovers right away. Place the salad in an airtight container. This helps prevent wilting and sogginess. Use a container that fits snugly. Glass or plastic containers work well. Make sure the lid seals tightly. You can keep it in the fridge for up to two days. If you notice the greens getting brown or mushy, it’s time to toss them. Prepping ingredients in advance makes this salad easy to enjoy. You can wash and slice strawberries ahead of time. Store them in a separate container. This keeps them fresh and ready to use. You can also mix the salad greens and walnuts together. Keep them in another container. When you are ready to eat, assemble the salad just before serving. This keeps everything crisp and fresh. Drizzle the dressing on top at the last minute. Toss gently to combine all the flavors. This way, your salad stays bright and tasty! Can I make this salad ahead of time? Yes, you can prepare some parts in advance. Slice the strawberries and mix the greens. Keep the dressing separate. Toss it all together just before serving. This keeps the salad fresh and crunchy. Is balsamic glaze the same as balsamic vinegar? No, they are different. Balsamic glaze is thicker and sweeter. It cooks balsamic vinegar down to a syrupy texture. You can use balsamic vinegar, but the glaze adds a richer taste. How do I keep salad greens fresh longer? Store greens in a clean, dry container. Use a paper towel to absorb extra moisture. Seal it well and place it in the fridge. This helps keep them crisp for several days. This salad combines fresh ingredients to create a delightful dish. You learned how to mix greens, strawberries, feta, and walnuts for a tasty salad. I shared tips on selecting ripe fruit and high-quality cheese. You can save time by prepping ingredients ahead. Finally, feel free to tweak and customize the salad to fit your taste. Enjoy trying this refreshing and healthy dish!

Balsamic Strawberry Salad Fresh and Flavorful Dish

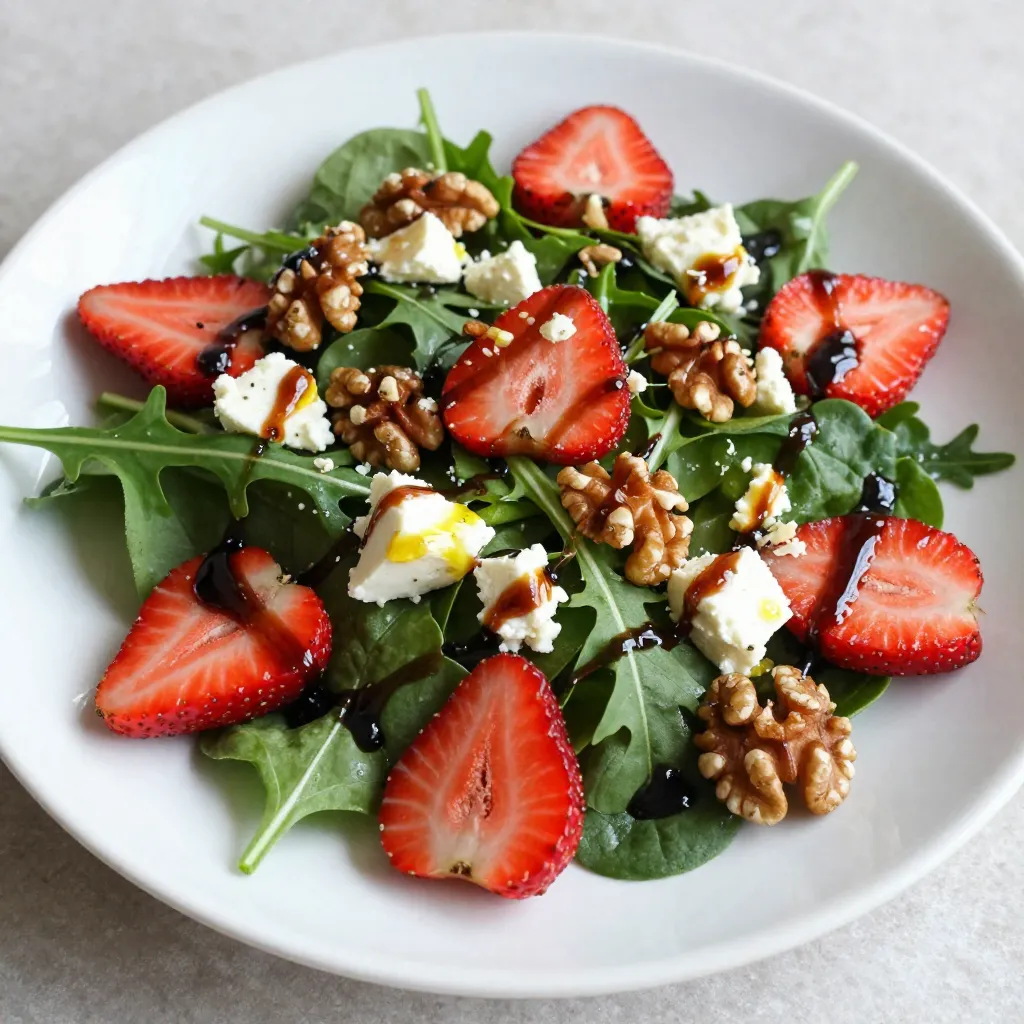
Looking for a fresh and vibrant dish that bursts with flavor? This Balsamic Strawberry Salad is your answer! Packed with

To make the best chocolate chip pumpkin muffins, gather these tasty items: - 1 cup canned pumpkin puree - 1/2 cup unsalted butter, melted - 1 cup brown sugar - 1/2 cup granulated sugar - 2 large eggs - 1 teaspoon vanilla extract - 1 1/2 cups all-purpose flour - 1 teaspoon baking soda - 1 teaspoon baking powder - 1 teaspoon ground cinnamon - 1/2 teaspoon ground nutmeg - 1/4 teaspoon salt - 1 cup chocolate chips (semi-sweet or milk chocolate) - 1/2 cup chopped walnuts (optional) Sometimes, you might want to switch up measurements. Here are some common conversions: - 1 cup = 16 tablespoons - 1/2 cup = 8 tablespoons - 1 teaspoon = 5 milliliters - 1 tablespoon = 15 milliliters Using these conversions can help if you need to adjust portions or use different measuring tools. If you run out of an ingredient, no worries! Here are some easy swaps: - Canned pumpkin puree: You can use fresh pumpkin puree or mashed sweet potatoes. - Unsalted butter: Use coconut oil or vegetable oil for a dairy-free option. - Granulated sugar: Try using honey or maple syrup, but adjust the liquid in the recipe. - All-purpose flour: Substitute with almond flour or gluten-free flour for a gluten-free version. - Chocolate chips: Use dark chocolate chips, white chocolate, or even dried fruit for a twist. These substitutions can help you customize the muffins to your taste or dietary needs. {{ingredient_image_1}} First, preheat your oven to 350°F (175°C). This heat makes the muffins rise well. Next, line your muffin tin with paper liners. If you don’t have liners, lightly grease the tin with butter or cooking spray. This step keeps the muffins from sticking. In a large bowl, take 1 cup of canned pumpkin puree. Add 1/2 cup of melted unsalted butter, 1 cup of brown sugar, and 1/2 cup of granulated sugar. Whisk these together until they are smooth. Next, crack in 2 large eggs, one at a time. Mix well after each egg. Finally, stir in 1 teaspoon of vanilla extract for extra flavor. In a separate bowl, sift together 1 1/2 cups of all-purpose flour, 1 teaspoon of baking soda, 1 teaspoon of baking powder, 1 teaspoon of ground cinnamon, 1/2 teaspoon of ground nutmeg, and 1/4 teaspoon of salt. Sifting helps blend the ingredients well. This mix adds a nice rise and flavor to your muffins. Now, gradually add the dry mix to the wet ingredients. Use a spatula to fold until just combined. Be careful not to overmix, as this can make your muffins tough. Gently fold in 1 cup of chocolate chips and 1/2 cup of chopped walnuts, if you like. This adds a tasty crunch. Spoon the batter into your prepared muffin cups. Fill each cup about 3/4 full to allow space for rising. Place the muffin tin in the oven and bake for 18-20 minutes. To check for doneness, insert a toothpick into the center. If it comes out clean, your muffins are ready. After baking, let the muffins cool in the tin for about 5 minutes. This step helps them firm up. Then, transfer them to a wire rack to cool completely. Enjoy them warm or at room temperature! To get soft and fluffy muffins, you need the right balance of wet and dry. The canned pumpkin puree gives moisture and flavor, while the butter adds richness. Use both brown and granulated sugar for sweetness and depth. This mix helps create a tender crumb. Overmixing is a common mistake. It makes muffins tough instead of light. When you combine the wet and dry ingredients, mix until just combined. A few lumps are okay. Gently fold in the chocolate chips and walnuts, if you choose to add them. Let your muffins cool completely on a wire rack. Store them in an airtight container at room temperature for up to three days. For longer storage, freeze them in a zip-top bag. Just reheat them in the oven or microwave when you want a warm treat. Pro Tips Use Fresh Spices: For the best flavor, use freshly ground spices like cinnamon and nutmeg instead of pre-ground. This will enhance the aroma and taste of your muffins. Check Doneness Carefully: To avoid overbaking, check your muffins a minute or two before the suggested time. A toothpick should come out with a few moist crumbs, not wet batter. Substitute for Health: You can substitute half of the all-purpose flour with whole wheat flour for a healthier option without compromising taste. Storage Tips: Store leftover muffins in an airtight container at room temperature for up to 3 days, or freeze them for longer storage. Just reheat in the oven for a warm treat! {{image_2}} You can easily make these muffins dairy-free. Substitute the unsalted butter with coconut oil or a dairy-free margarine. Use almond milk or oat milk instead of any dairy milk if a recipe calls for it. The muffins will still taste amazing and moist. Want to add more flavors? Here are some great ideas: - Chopped nuts: Walnuts or pecans add a nice crunch. - Dried fruit: Raisins or cranberries bring in sweetness. - Spices: Try adding ginger or cloves for a spicy kick. - Zest: A little orange or lemon zest brightens the flavors. Feel free to mix and match these add-ins to suit your taste. You can change these muffins for different seasons. In the fall, add some apple chunks for a harvest twist. In winter, sprinkle in some peppermint chips for a festive treat. For spring, consider adding fresh berries like blueberries or strawberries. Each season brings fresh flavors to enjoy! To keep your chocolate chip pumpkin muffins fresh, store them in an airtight container. They stay best at room temperature for up to three days. If you want them to last longer, place them in the fridge. Just remember, they may dry out a bit in the fridge. You can freeze these muffins for later enjoyment. First, let them cool completely. Wrap each muffin in plastic wrap tightly. Then, place them in a freezer bag or container. They can stay in the freezer for up to three months. When you are ready to eat, just take them out and thaw. To enjoy your muffins warm, preheat your oven to 350°F (175°C). Place the muffins on a baking sheet and heat for about 5 to 10 minutes. If you prefer the microwave, heat each muffin for about 15 to 20 seconds. This keeps them soft and tasty! Yes, you can use fresh pumpkin. Start by roasting a small pumpkin. Cut it in half, scoop out the seeds, and place it cut-side down on a baking sheet. Roast it at 350°F for about 45 minutes, or until soft. Once cool, scoop the flesh and mash it until smooth. This fresh puree gives a nice taste, but it may add a bit more moisture. You might need to adjust the flour slightly to balance the texture. If you need a butter substitute, try using coconut oil. Melt the coconut oil and use the same amount as the butter. You can also use applesauce for a healthier option. Use half the amount of applesauce compared to butter. This swap reduces fat and adds a bit of sweetness. To make gluten-free muffins, replace the all-purpose flour with a gluten-free flour blend. Look for a blend that works well for baking, like one with xanthan gum. You might also use almond flour or oat flour, but adjust the liquid as needed. Gluten-free muffins can be a bit denser, so keep an eye on the baking time. These muffins stay fresh for about 3 days at room temperature. Store them in an airtight container to keep them moist. For longer storage, place them in the fridge for up to a week. You can also freeze them for up to 3 months. Just let them cool completely, then wrap them tightly before freezing. In this blog post, we explored the key ingredients, mixing steps, and tips for perfect muffins. You learned how to prep the oven, combine wet and dry ingredients, and avoid overmixing. We shared fun variations and storage tips too. Muffins can be simple and fun to make. Enjoy experimenting and personalizing your recipes. Happy baking!

Chocolate Chip Pumpkin Muffins Delicious and Easy Recipe

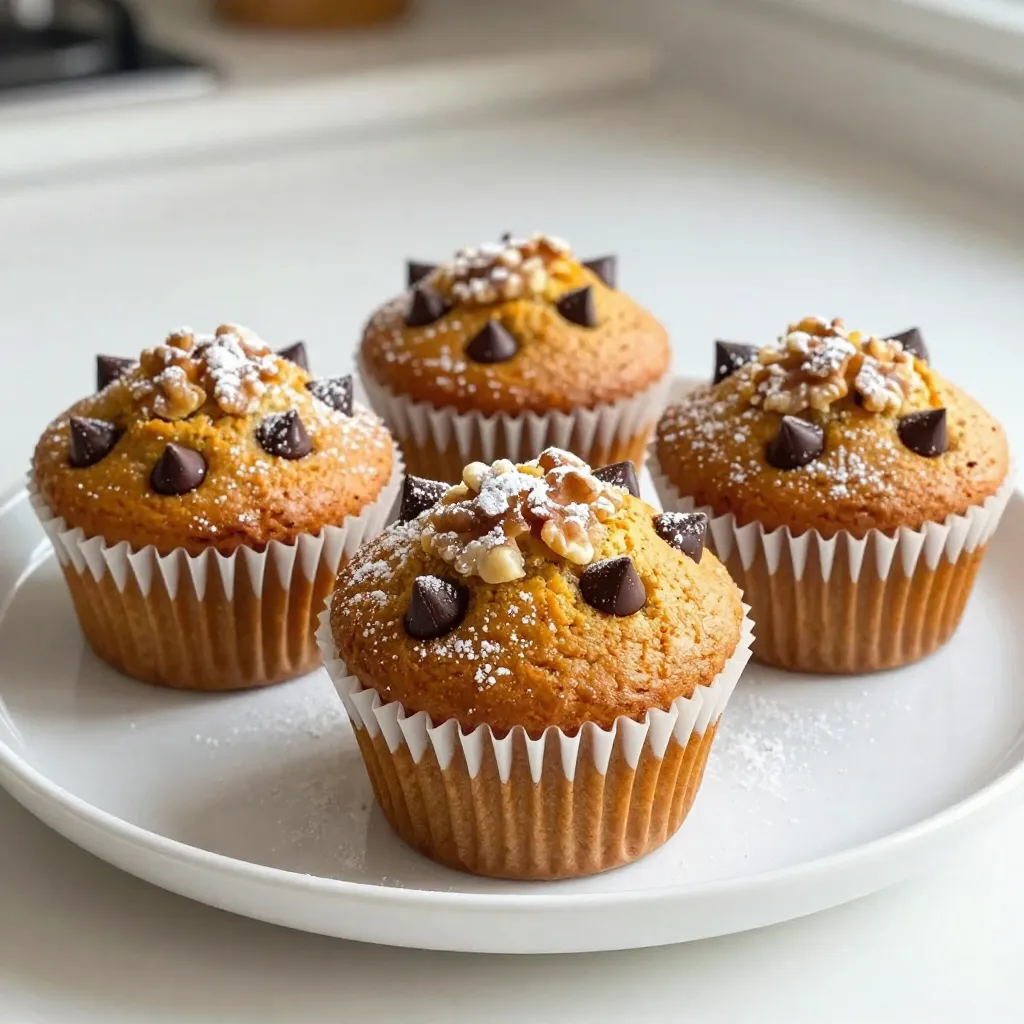
Get ready to indulge in fall flavors with my easy Chocolate Chip Pumpkin Muffins recipe! This delightful treat combines rich

- 8 ounces fettuccine or spaghetti noodles - 4 cups vegetable or chicken broth - 1/4 cup unsalted butter - 1 cup grated Parmesan cheese - 3 cloves garlic, minced - 1 teaspoon onion powder - 1/2 teaspoon crushed red pepper flakes (adjust to taste) - Salt and pepper to taste - Fresh parsley, chopped (for garnish) To make this dish, you only need a few simple ingredients. The main items are the noodles, broth, butter, and cheese. You can use fettuccine or spaghetti. Both work well and taste great. The broth can be vegetable or chicken. Both choices add flavor. I like using vegetable broth for a lighter taste. Butter and cheese are vital for the creamy texture. Unsalted butter gives you control over the salt. Grated Parmesan cheese brings a rich taste. Next, we have the seasoning. Garlic is key for flavor. It adds depth to the dish. Onion powder gives a nice base flavor, too. Crushed red pepper flakes add a little heat. You can adjust this to your taste. Salt and pepper are also important. They help enhance all the flavors. Finally, fresh parsley is a great garnish. It adds color and freshness. You can sprinkle it on top when serving for a beautiful finish. With these ingredients, you can create a dish that is quick, easy, and full of flavor. {{ingredient_image_1}} - Start by adding 4 cups of broth to the pot. - Place 8 ounces of fettuccine noodles flat in the broth. - If needed, break the noodles in half to fit. - Combine 1 teaspoon of onion powder, 1/2 teaspoon crushed red pepper flakes, and a pinch of salt and pepper with the noodles. - Stir gently to mix and ensure the noodles are fully submerged in the broth. - Close the Instant Pot lid, setting the vent to sealing. - Select the Manual or Pressure Cook setting for 4 minutes. - Once done, let the pressure release naturally for 2 minutes. - Carefully switch the vent to venting to release any remaining pressure. - Open the lid carefully and stir the noodles. - Add 3 cloves of minced garlic and 1/4 cup of unsalted butter. - Mix well until the butter melts and blends into the noodles. - Gradually stir in 1 cup of grated Parmesan cheese until it melts into a creamy sauce. - Taste the noodles, adjusting salt and pepper as needed. To avoid clumpy pasta, lay the noodles flat in the pot. If they don’t fit, break them in half. This helps them cook evenly. Stir gently to make sure they are submerged in the broth. This step is key for perfect noodles. Understand how pressure settings work. Use the Manual or Pressure Cook setting. Set the timer for 4 minutes. This timing gives you tender noodles. After cooking, let the pressure release naturally for 2 minutes. This method helps keep the noodles soft. Pair these noodles with grilled chicken or shrimp for a full meal. A fresh salad makes a great side. For drinks, a light white wine or sparkling water works well. These options balance the rich flavors of the dish. Don’t forget to sprinkle fresh parsley on top for color! Pro Tips Use High-Quality Pasta: Opt for a good brand of fettuccine or spaghetti for the best texture and flavor. Quality pasta absorbs the sauce better. Don't Skip the Garlic: Fresh garlic adds a robust flavor to the dish. Make sure to add it after cooking to keep its aromatic qualities intact. Adjust Heat Levels: Customize the crushed red pepper flakes to your heat preference. Start with less if you're unsure, and add more after tasting. Garnish for Freshness: Adding freshly chopped parsley not only brightens the dish visually but also adds a fresh flavor that complements the richness of the butter and cheese. {{image_2}} You can easily add protein to your Butter Parmesan Noodles. Chicken, shrimp, or tofu work well. For chicken, cut it into bite-sized pieces. Sauté it first for better flavor. If you use shrimp, add them just before the noodles finish cooking. Tofu should be cubed and can be mixed in at the start. These proteins add great taste and nutrition. While Parmesan cheese shines in this dish, you can try different cheeses too. Pecorino Romano offers a salty kick. Mozzarella adds creaminess, while cheddar brings a sharp taste. Mixing cheeses can create an exciting flavor profile. Just combine them before adding to the noodles for the best results. Adding vegetables boosts the nutrition of your noodles. Spinach, peas, or broccoli are great choices. You can add them during the last minute of cooking. This keeps them crisp and colorful. Balance flavors by using veggies that complement the cheese. A touch of lemon juice can brighten the dish, enhancing the overall taste. Store leftover noodles in an airtight container. This keeps them fresh. You can keep them in the fridge for up to three days. If they sit longer, they might lose flavor and texture. To freeze the noodles, let them cool first. Place them in a freezer bag, removing as much air as possible. You can freeze them for up to three months. When ready to eat, thaw overnight in the fridge. To reheat, add a splash of broth and warm them on the stove. This helps keep them moist. Enjoy your noodles just like fresh! To avoid sticky noodles, use a few simple tricks. First, stir the noodles gently after adding them to the pot. This helps separate them. Second, ensure the noodles are fully submerged in broth. This keeps them moist during cooking. If the noodles still stick, you can stir them after cooking. This breaks up any clumps that form. Yes, you can use different liquids instead of broth. Water is an easy swap, but it won't add as much flavor. You can also use a mix of water and a splash of soy sauce. This adds a nice umami taste. For a richer flavor, try using white wine or even mushroom broth. Each option will change the taste slightly, so choose what you like best. If you lack Parmesan, there are good substitutes. Grated Pecorino Romano cheese works well and has a strong flavor. Nutritional yeast is a great option too for a dairy-free choice. It gives a cheesy taste without the cheese. You could also use cheddar, but it will change the dish’s flavor. Choose based on what you have on hand and your taste preference. We covered how to make delicious pasta in your Instant Pot. You learned the key ingredients like noodles, broth, and seasonings. I shared steps to prepare, cook, and finish your dish perfectly. You also got tips for avoiding clumps and ideas for variations with protein and veggies. Remember to store leftovers properly for later! With these insights, you're ready to create a tasty meal that's easy and fun. Enjoy your cooking!

Instant Pot Butter Parmesan Noodles Quick and Easy Dish

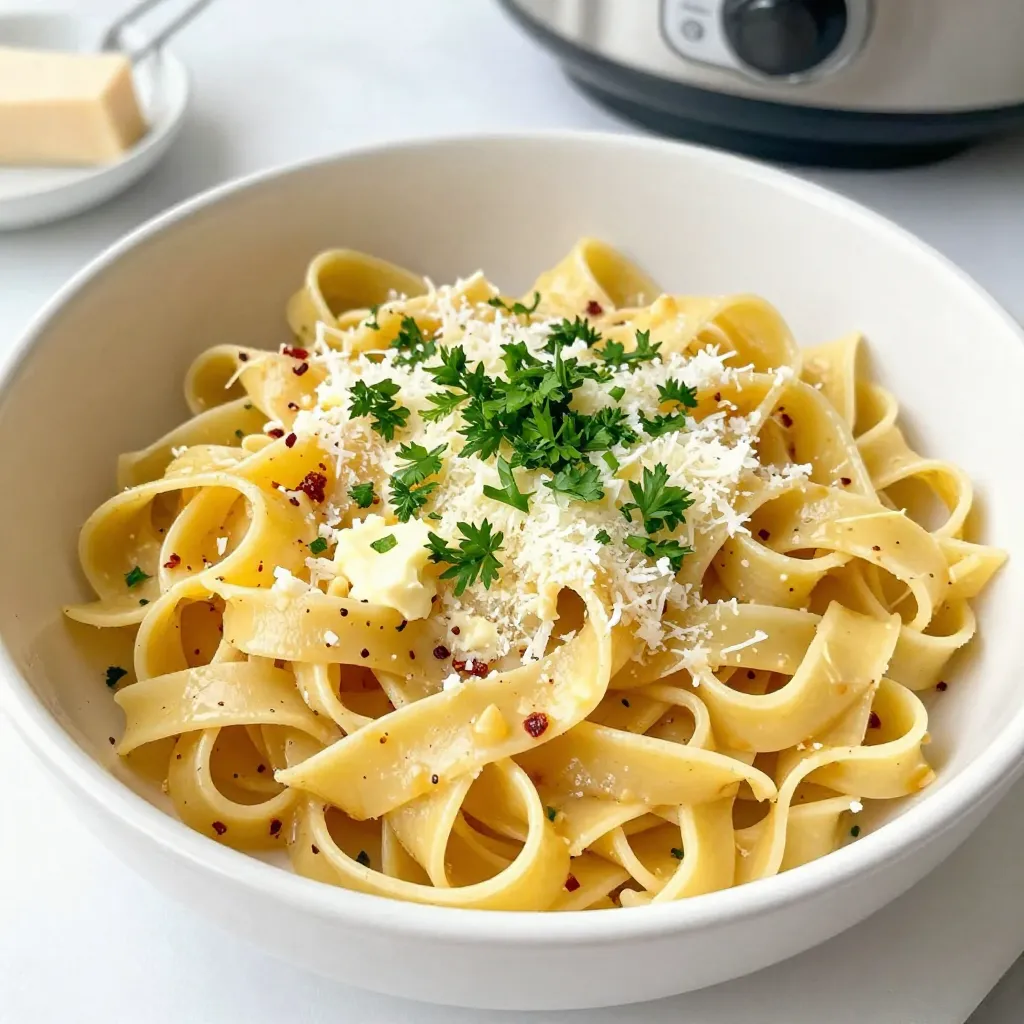
Are you ready to transform your dinner routine with a quick and easy dish? Instant Pot Butter Parmesan Noodles are

- 1 can (15 oz) white beans (cannellini or navy), drained and rinsed - 1 head of garlic - 2-3 tablespoons olive oil - 1 tablespoon lemon juice - 1 teaspoon fresh rosemary, chopped - Optional: pinch of red pepper flakes - Salt and pepper to taste - Fresh vegetables and pita chips for serving To make a fantastic roasted garlic white bean dip, you need a few simple ingredients. First, you will use a can of white beans, either cannellini or navy. These beans give the dip its creamy texture. Next, grab a head of garlic. Roasting the garlic makes it sweet and soft. It adds a rich flavor to the dip. You will also need olive oil, which helps blend everything together and adds a nice taste. Lemon juice brings a bright flavor, balancing the richness. Fresh rosemary adds a lovely herbal note. If you like a bit of heat, add a pinch of red pepper flakes. Finally, don't forget salt and pepper. These will enhance all the flavors. When serving, fresh vegetables and pita chips make great dippers. The colorful veggies and crunchy chips make your dip look fun and inviting. {{ingredient_image_1}} - Preheat your oven to 400°F (200°C). - Take the head of garlic and slice the top off. Drizzle with 1-2 teaspoons of olive oil. I love this part because the smell of garlic fills the kitchen. It's a simple task that makes a big impact. Use a sharp knife and cut just enough to expose the cloves. This helps the garlic roast well. - Wrap the garlic in aluminum foil and roast for 30-35 minutes. Roasting the garlic brings out its sweet flavor. After 30 minutes, check if the cloves are soft. If they are, they are ready to come out. If not, give them a few more minutes. Let the garlic cool after you take it out. - In a food processor, combine white beans, lemon juice, rosemary, salt, and pepper. - Squeeze the roasted garlic into this mixture and blend until smooth. This is where the magic happens! The white beans add creaminess. The lemon juice brightens the dip. After adding the roasted garlic, blend it until smooth. If it feels too thick, add a splash of water or more olive oil to get the right texture. Always taste and adjust the seasoning. You want it just right! This dip is not just tasty; it’s also simple to make. Enjoy it with fresh veggies or pita chips! To get the dip just right, focus on its thickness. You can make it thinner by adding water or olive oil. Start with a small amount, then blend. If it's still thick, add a little more. While blending, make sure to scrape down the sides of the food processor. This step helps mix everything evenly. It ensures no chunky bits are left behind. Want to jazz up your dip? Consider adding spices or herbs. A dash of smoked paprika or a sprinkle of fresh thyme could boost the flavor. Always remember to taste your dip as you go. Adjust the salt, pepper, or lemon juice based on your preference. This small step makes a big difference in flavor. Enjoy the process of making it yours! Pro Tips Roasting Garlic: When roasting garlic, be sure to wrap it tightly in foil to trap steam, which helps soften the cloves and enhance their sweetness. Consistency Control: If your dip is too thick, gradually add water or olive oil while blending to achieve your preferred creamy texture without diluting the flavor. Flavor Boost: For an extra layer of flavor, consider adding a teaspoon of tahini or a splash of balsamic vinegar to the dip before blending. Presentation Matters: Garnish your dip with fresh herbs or a drizzle of high-quality olive oil before serving to make it visually appealing and enhance the taste. {{image_2}} You can change up this dip by adding new flavors. Try different herbs like thyme or parsley. These herbs give the dip a fresh taste. You can also mix in sun-dried tomatoes. They add a lovely sweetness and richness. For a twist, try adding roasted red peppers. Each addition makes the dip unique and exciting. If you need a vegan dip, this recipe is already perfect! It has no animal products. For gluten-free diets, serve with fresh veggies or gluten-free pita chips. You can also adjust for low-sodium diets. Just use low-sodium beans and limit added salt. This way, everyone can enjoy this tasty dip! To keep your roasted garlic white bean dip fresh, store leftovers in the refrigerator. Place the dip in an airtight container. Make sure the lid fits tightly to keep air out. This helps maintain flavor and texture. If you want to freeze the dip, first let it cool completely. Then, transfer it to a freezer-safe container. Leave some space at the top, as it may expand when frozen. You can also use freezer bags. Just squeeze out excess air before sealing. In the refrigerator, this dip stays fresh for about 3 to 5 days. If you freeze it, the dip can last for up to 3 months. When you are ready to eat it, thaw it in the fridge overnight. To refresh the texture, blend it again with a little olive oil or water. Yes, you can use dried beans. Just soak them overnight. Drain and cook them until soft. This adds a fresh taste to the dip. However, using canned beans saves time. If you're in a hurry, canned is a great choice. To spice up your dip, add a pinch of red pepper flakes. You can also use cayenne pepper for more heat. Mix in diced jalapeños for a fresh kick. Start with a small amount, then taste and adjust. This way, you can find the right spice level for you. You can serve this dip with fresh vegetables. Carrots, cucumbers, and bell peppers work well. Pita chips add a nice crunch. You can also use crackers or toasted baguette slices. Arrange them around the dip for a beautiful presentation. In this post, we explored how to make a delicious roasted garlic white bean dip. You learned about the key ingredients and step-by-step instructions, from prepping the garlic to blending the dip. I also shared tips for achieving the perfect texture and flavor, along with variations to try. Finally, I provided storage info to keep your dip fresh. By following these simple steps, you can enjoy a tasty, healthy snack anytime. Make it your own with different flavors, and share with friends and family. Happy dipping!

Roasted Garlic White Bean Dip Simply Delicious Snack

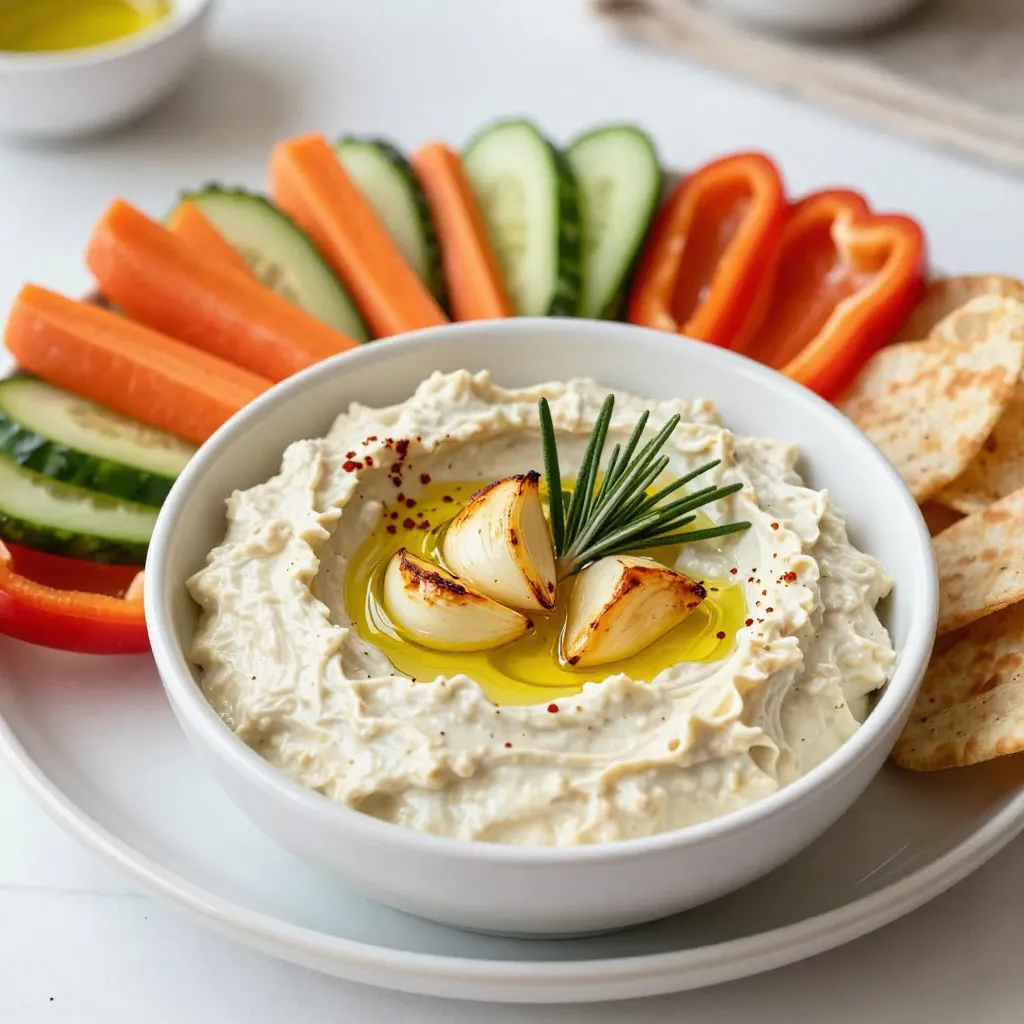
Are you ready to elevate your snack game? This Roasted Garlic White Bean Dip is a creamy delight that’s simple

- 1 ripe banana, frozen and sliced - 1 cup frozen blueberries - 1/2 cup unsweetened almond milk - 1 tablespoon peanut butter or almond butter - 1 tablespoon honey or maple syrup (optional) - 1/4 teaspoon vanilla extract To make this smoothie bowl, you need simple ingredients. The ripe banana gives it a creamy base. I always use frozen blueberries for a cold and refreshing taste. Unsweetened almond milk adds smoothness without added sugar. Peanut butter or almond butter adds great flavor and healthy fats. You can sweeten it with honey or maple syrup if you like. Lastly, a touch of vanilla extract rounds off the flavors nicely. - Fresh blueberries - Sliced banana - Granola - Chia seeds - Shredded coconut Toppings make your smoothie bowl fun and tasty. Fresh blueberries and sliced banana add color and freshness. Granola gives a nice crunch, while chia seeds boost nutrition. Shredded coconut adds a tropical flair. Feel free to mix and match toppings to suit your taste. Enjoy creating your perfect smoothie bowl! {{ingredient_image_1}} Start by gathering your ingredients. In a blender, combine: - 1 ripe banana, frozen and sliced - 1 cup frozen blueberries - 1/2 cup unsweetened almond milk - 1 tablespoon peanut butter - 1 tablespoon honey or maple syrup (optional) - 1/4 teaspoon vanilla extract Next, blend the mixture on high speed until it is smooth and creamy. If it feels too thick, add a bit more almond milk to reach the texture you like. Once your smoothie is ready, pour it into a bowl. Use a spatula to smooth out the surface. This makes it look nice and inviting. Now comes the fun part! Decorate the top of your smoothie bowl with: - Fresh blueberries - Sliced banana - Granola - Chia seeds - Shredded coconut Feel free to get creative with your toppings. You can arrange them in patterns or just sprinkle them on top. Serve it right away. Grab a spoon and enjoy this tasty, nutritious treat! To blend the smoothie well, use a high-speed blender. Start on low speed to mix the ingredients. Gradually increase the speed to high. This helps break down the frozen fruit easily. If your smoothie is too thick, add a bit more almond milk. A little liquid goes a long way for the right texture. For a natural sweetener, consider honey or maple syrup. You can also skip sweeteners if you prefer a more fruit-forward taste. Adjust the sweetness by adding more or less of your chosen sweetener. Taste as you go to find your perfect balance. Make your smoothie bowl pop with colorful toppings. Arrange fresh blueberries, sliced bananas, and a sprinkle of granola on top. You can add chia seeds and shredded coconut for extra crunch and flavor. The more colors, the more fun! Use a spatula to smooth out the surface before adding the toppings for a neat look. Pro Tips Tip Title: Choose Ripe Bananas: Using a ripe banana enhances the natural sweetness of your smoothie bowl, making it more delicious while also providing essential nutrients. Tip Title: Adjust Consistency: If your smoothie bowl is too thick, gradually add more almond milk until you achieve your desired creamy texture. Tip Title: Layer Your Toppings: For an aesthetically pleasing bowl, layer your toppings in a visually appealing manner, making it more inviting to eat. Tip Title: Freeze for Extra Chill: For an extra refreshing experience, consider freezing your toppings (like bananas or blueberries) before adding them to the bowl. {{image_2}} You can swap fruits in your smoothie bowl. Try strawberries or raspberries for a twist. In summer, use peaches or cherries. In winter, consider apples or pears. Each fruit brings unique flavors and health benefits. Feel free to experiment with your favorite fruits. Boost your smoothie with protein. Add a scoop of protein powder for more energy. You can also include Greek yogurt. It makes your bowl creamy and adds protein. Both options help keep you full longer. Looking for dairy-free choices? Use almond milk or coconut milk instead of regular milk. There are many plant-based milk options available. For toppings, use nuts, seeds, or granola. These keep the meal vegan and tasty. Enjoy your delicious smoothie bowl! You can store any leftover smoothie bowl in the fridge. Place it in an airtight container. This keeps it fresh for up to two days. However, the texture may change slightly. For best taste, enjoy it right away. If you plan to save toppings, store them separately. This way, they stay crunchy and fresh. Keep fresh fruit in the fridge. Granola should stay in a cool, dry place. You can freeze pre-portioned smoothie packs for a quick breakfast. Just put the banana, blueberries, almond milk, and peanut butter in bags. Label them and store them in the freezer. When you’re ready to blend, thaw the pack in the fridge overnight. You can also use the microwave for a quick thaw. After thawing, blend as usual for a tasty smoothie bowl. To make your smoothie bowl thicker, focus on the following tips: - Use frozen fruits, like bananas and blueberries. - Add less almond milk when blending. - Consider adding a handful of oats or chia seeds. - Blend less to keep some texture. These tips help create a creamy base that holds toppings well. Yes, you can use fresh blueberries. However, they will change the texture and flavor. Fresh blueberries make the smoothie bowl thinner and more liquid. If you want a cold treat, consider freezing them first. This keeps the bowl thick and icy, just like you want. You can store your smoothie bowl for up to one day. Keep it in an airtight container in the fridge. For the best taste and texture, enjoy it fresh. If you plan to store it, add toppings just before eating. This keeps them crunchy and tasty. This article outlines the steps for making a tasty smoothie bowl. We covered the main ingredients like bananas and blueberries, plus optional toppings to enhance your dish. I shared tips for blending, sweetening, and storing your smoothie bowl. You can even experiment with different fruits and protein sources. Remember, making a smoothie bowl can be fun and creative. Your unique touch will make it special. Enjoy crafting your delicious bowl today!

Blueberry Banana Smoothie Bowl Nourishing Breakfast Treat

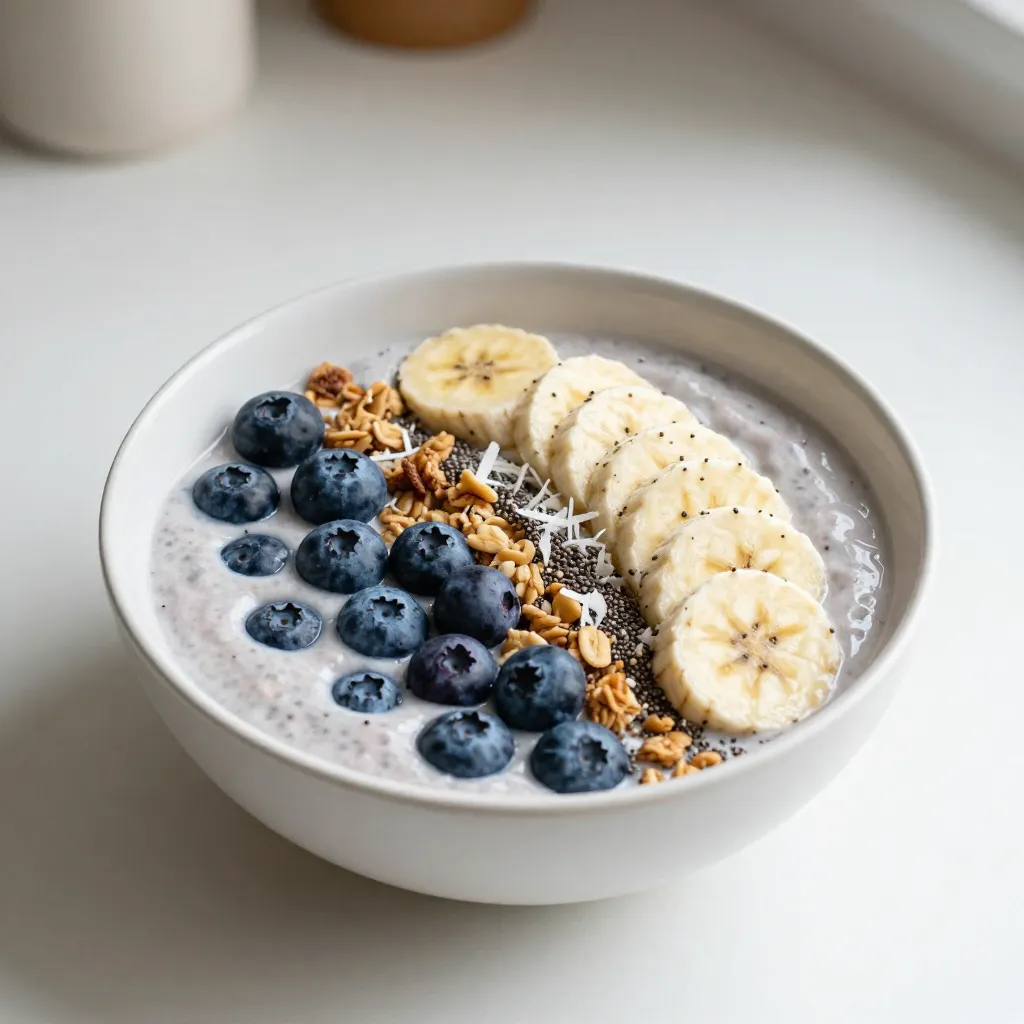
Start your day with a vibrant Blueberry Banana Smoothie Bowl! This easy recipe blends ripe bananas with creamy almond milk

- 4 ripe peaches, peeled and sliced - 1 cup fresh raspberries - 1/2 cup granulated sugar - 1 teaspoon vanilla extract - 1 teaspoon lemon juice - 1 cup rolled oats - 1 cup all-purpose flour - 1/2 cup brown sugar - 1/2 teaspoon cinnamon - 1/4 teaspoon salt - 1/2 cup unsalted butter, melted The key to a great Peach Raspberry Crisp is using fresh, ripe fruit. I love using peaches that are juicy and sweet. They give the crisp a lovely flavor. Raspberries add a tart touch that balances the sweetness. You can find these fruits during summer, making this dessert perfect for the season. The sugar helps sweeten the fruit mixture. It also brings out the natural juices of the peaches and raspberries. Vanilla extract adds a warm flavor that blends perfectly with the fruit. Lemon juice brightens the dish, enhancing the fruit's taste. For the crispy topping, rolled oats give that delightful crunch. All-purpose flour holds everything together. Brown sugar adds a rich, caramel note, while cinnamon and salt enhance the flavors. The melted butter brings it all together, making a crumbly topping that bakes beautifully. - Vanilla ice cream - Fresh raspberries for garnish Serving this crisp warm with vanilla ice cream is a game-changer. The cold ice cream melts into the warm fruit topping. Fresh raspberries on top add a pop of color and flavor. This simple touch makes the dish even more inviting. {{ingredient_image_1}} - Preheat the oven to 350°F (175°C). - Prepare the baking dish by greasing it. - Combine sliced peaches and raspberries in a large bowl. - Add sugar, vanilla extract, and lemon juice, then gently mix. - Transfer fruit mixture to the baking dish. - Mix rolled oats, flour, brown sugar, cinnamon, and salt in another bowl. - Pour in melted butter and combine until crumbly. - Sprinkle topping over the fruit mixture. - Bake for 30-35 minutes. - Check for golden brown top and bubbly fruit. - Let cool before serving. This method ensures you get a crisp that is both sweet and tart. The peaches bring a lovely softness, while the raspberries add a nice zing. Each layer builds flavor and texture. Enjoy the fresh taste of summer in every bite! - Use ripe peaches for optimal sweetness. Ripe peaches make the dish taste better. - Adjust sugar based on fruit ripeness. Too sweet fruit needs less sugar. - Mix dry ingredients thoroughly for even topping. This helps the crisp bake evenly. - Serve warm with vanilla ice cream. The cold ice cream pairs nicely with warm crisp. - Add fresh raspberries as garnish. They add color and flavor to your dish. - Drizzle with honey or caramel for extra sweetness. This makes every bite more special. These tips will help you create a Peach Raspberry Crisp that shines at any summer gathering. Enjoy each bite! Pro Tips Fresh Fruit is Best: Use ripe, seasonal peaches and fresh raspberries for optimal flavor and sweetness. Customize the Crisp Topping: Feel free to add nuts or seeds to the topping for added crunch and nutrition. Serve with Ice Cream: A scoop of vanilla ice cream complements the warm crisp perfectly and adds a delightful creaminess. Store Properly: Store leftovers in an airtight container in the fridge for up to 3 days. Reheat in the oven for the best texture. {{image_2}} You can have fun with different fruits in your crisp. - Substitute peaches with nectarines or plums for a unique twist. - Incorporate blueberries or strawberries for a mixed berry crisp that bursts with flavor. These changes keep the dessert fresh and exciting. Each fruit brings its own taste and texture, making your crisp special every time. Want a healthier option? You can make a few simple swaps. - Use whole wheat flour instead of all-purpose flour. This adds fiber and nutrients. - Substitute coconut oil for butter to make it dairy-free. This also adds a nice flavor. These changes do not sacrifice taste. They help you enjoy your dessert while feeling good about what you eat. To take your crisp to the next level, try these flavor boosts. - Add a pinch of nutmeg to the topping for warmth and spice. - Mix in chopped nuts or seeds for added crunch and nutrition. These enhancements make your Peach Raspberry Crisp even more delicious. They add layers of flavor and texture that everyone will love. Store your peach raspberry crisp in an airtight container at room temperature. It stays fresh for up to 2 days. This is a great way to enjoy it right after baking. You can refrigerate the crisp for up to a week. This method keeps it cool and tasty. If you want to save it longer, freeze the crisp. Use a freezer-safe container and it will last up to 3 months. Just remember to label the container with the date. When you want to enjoy your crisp again, reheat it in the oven at 350°F. This warms it up nicely. If you're in a hurry, you can use the microwave. Heat in short intervals to avoid overcooking. Yes, you can prepare and refrigerate it before baking. This saves time on busy days. Just cover it well. When ready, bake it straight from the fridge. Serve warm, ideally with ice cream or whipped cream. The cold cream balances the warm crisp. You can also add fresh raspberries on top for color. Yes, but adjust baking time and sugar. Frozen fruit tends to be sweeter. You may need less sugar. Also, check the crisp a few minutes early. The top should be golden brown, and the fruit should be bubbling around the edges. This shows the fruit is cooked and the topping is crisp. This blog post covered the rich flavors of Peach Raspberry Crisp. We explored key ingredients, easy steps, and creative tips. You learned how to mix fresh fruit with a crumble topping, bake it to perfection, and even store leftovers. Remember, using ripe fruit and experimenting with flavors can make this dessert your own. Serve it warm with ice cream, and enjoy every bite safely. Happy baking and savoring!

Peach Raspberry Crisp Irresistible Summer Dessert Delight

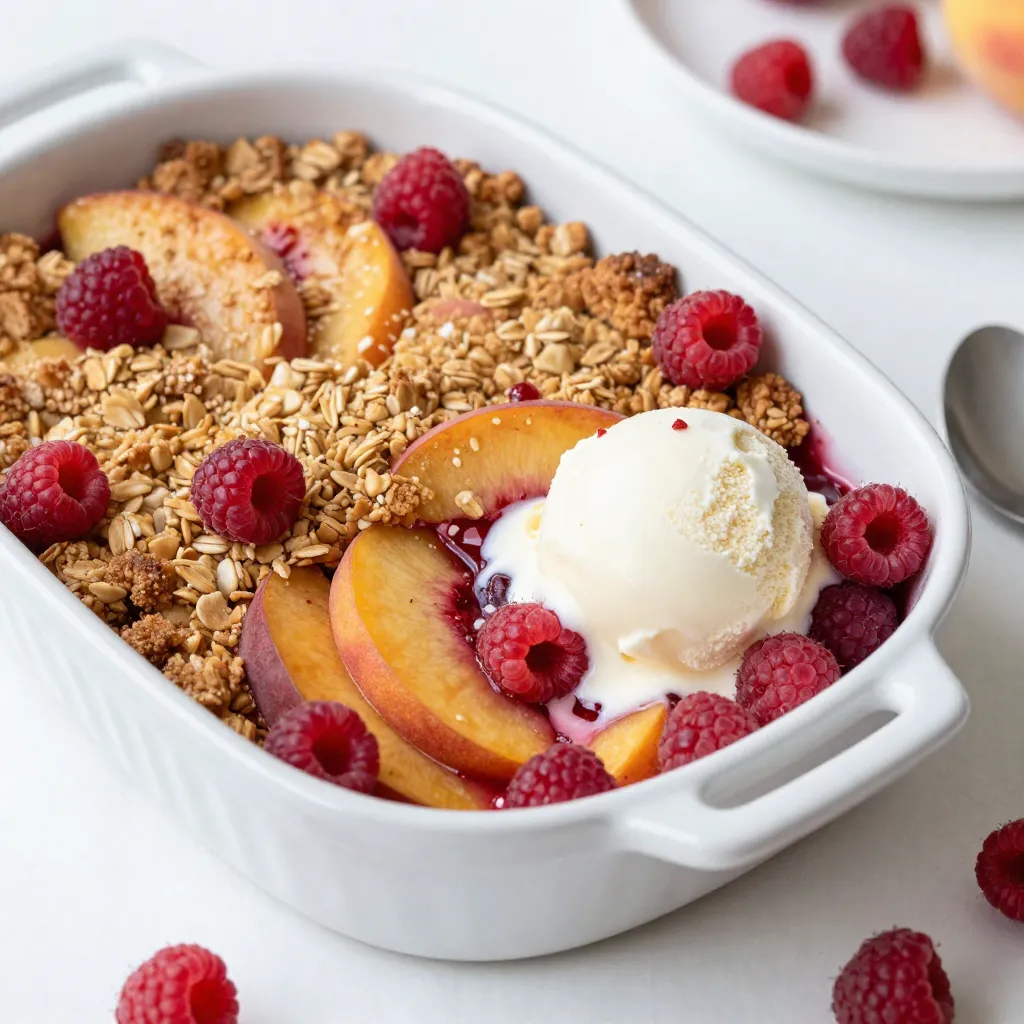
Summer is here, and it’s the perfect time to indulge in a Peach Raspberry Crisp. This warm, fruity dessert will

- 1 cup rolled oats - 1/2 cup natural peanut butter - 1/4 cup honey or maple syrup These three main ingredients make a tasty and healthy base for your energy balls. Rolled oats give a nice chewy texture and provide fiber. Natural peanut butter adds protein and creaminess. Honey or maple syrup brings sweetness and helps bind everything together. - 1/4 cup dark chocolate chips - 1/4 cup ground flaxseed - Shredded coconut or crushed nuts You can customize your energy balls with optional add-ins. Dark chocolate chips add a rich flavor. Ground flaxseed boosts the nutrition with omega-3 fatty acids. Shredded coconut or crushed nuts give a nice crunch and taste. - 1 teaspoon vanilla extract - A pinch of salt Vanilla extract enhances the overall flavor, making it more inviting. A pinch of salt balances the sweetness and adds depth to the taste. These small but mighty flavor enhancers make your energy balls even better! {{ingredient_image_1}} First, grab a mixing bowl. Combine 1 cup of rolled oats, 1/4 cup of ground flaxseed, and a pinch of salt. Stir these together until they mix well. This blend gives our energy balls a nice texture and adds fiber. Now, take another bowl. In it, mix 1/2 cup of natural peanut butter, 1/4 cup of honey or maple syrup, and 1 teaspoon of vanilla extract. Stir until you have a smooth and creamy mix. This step adds rich flavor and sweetness. Pour the peanut butter mixture into the dry ingredients. Then, add 1/4 cup of dark chocolate chips. Mix everything well, using your hands if needed. Ensure all the ingredients stick together nicely. This is where the magic happens! Next, refrigerate the mixture for about 30 minutes. This makes it easier to form into balls. After chilling, scoop out tablespoon-sized portions. Roll them into balls with your hands. Place the energy balls on a parchment-lined tray. Keep going until you finish the mixture. You can roll them in shredded coconut or crushed nuts for a fun twist. Enjoy your tasty, healthy snacks! To get the right texture for your energy balls, focus on stickiness. If the mixture feels too dry, add a bit more peanut butter or honey. These ingredients help bind everything together. If it’s too sticky, add more rolled oats or ground flaxseed. You want the mixture to hold together easily but not be too gooey. You can enhance the taste of your energy balls in many ways. Try adding spices like cinnamon or nutmeg for warmth. A splash of almond extract can bring a lovely twist. You can also mix in some chopped nuts or dried fruit for added flavor. Don't be afraid to experiment and find your favorite combination! For a fun twist, roll your energy balls in different coatings. Cocoa powder gives them a rich, chocolatey taste. Shredded coconut adds a tropical touch, while crushed nuts give a nice crunch. These options not only change the flavor but also add visual appeal. Choose what you like best to make your snack even more enjoyable! Pro Tips Chill for Easier Rolling: Refrigerating the mixture for about 30 minutes not only helps the flavors meld but also makes it easier to roll into balls. Customize Your Add-Ins: Feel free to substitute or add to the chocolate chips with dried fruits, seeds, or other nut butters for a personalized twist. Storage Tips: Store the energy balls in an airtight container in the refrigerator to maintain their freshness for up to a week. Perfect Portioning: Use a cookie scoop for evenly sized energy balls, ensuring consistent portioning for snacking or meal prep. {{image_2}} You can still enjoy energy balls without peanut butter. Use sun butter or soy nut butter instead. Both options offer a similar taste and texture. They also provide healthy fats. You can make these energy balls nut-free while keeping them delicious and satisfying. If you want to make these energy balls vegan, swap honey for maple syrup. Maple syrup adds sweetness without any animal products. You can also use agave syrup as another option. It works well as a binder, helping hold your energy balls together. Want to boost protein? You can add protein powder, such as pea or hemp protein. Mix in a scoop while combining the wet and dry ingredients. You can also use almond butter or cashew butter for added protein. These options keep your energy balls tasty and nutritious. To keep your peanut butter chocolate energy balls fresh, store them in an airtight container. This helps keep them moist and tasty. You can use a glass jar or a plastic container with a tight lid. Make sure to seal it well after each use. Place the container in the refrigerator. This will help slow down spoilage and keep your snacks ready to eat. In the refrigerator, these energy balls last about one week. If you want to keep them longer, you can freeze them. In the freezer, they stay good for up to three months. Just remember to use an airtight container or freezer bag to prevent freezer burn. Label the container with the date so you know when you made them. If you freeze your energy balls, thaw them before eating. Simply take them out of the freezer and let them sit at room temperature for about 15-20 minutes. You can also put them in the fridge overnight for a slower thaw. If you want a warm treat, you can microwave them for about 10 seconds. This will make them soft and delicious again! Yes, you can change some ingredients. Here are some common swaps: - Peanut Butter: Use almond or sunflower seed butter. - Honey: Maple syrup works great too. - Dark Chocolate Chips: You can use milk chocolate or even dried fruit. - Rolled Oats: Quick oats can be used, but they may change the texture. - Ground Flaxseed: You can swap with chia seeds at a 1:1 ratio. These energy balls stay fresh for about one week in the fridge. Store them in an airtight container to keep them moist. If you want them to last longer, freeze them for up to three months. Just let them thaw for a few minutes before eating. Yes, these energy balls are a healthy snack choice. They are rich in protein, fiber, and healthy fats. Here’s a quick look at their benefits: - Rolled Oats: Provide fiber, which helps digestion. - Peanut Butter: Offers protein and healthy fats for energy. - Honey or Maple Syrup: Adds natural sweetness and energy boosts. - Dark Chocolate Chips: Give antioxidants and flavor. - Ground Flaxseed: Packed with omega-3 fatty acids, good for heart health. These ingredients make a tasty snack that fuels your day! In this blog post, I shared a simple guide for making energy balls. You learned about the main ingredients, optional add-ins, and how to enhance flavors. The step-by-step instructions made the process easy to follow. Remember to adjust textures and customize flavors to suit your taste. These no-bake snacks are fun and full of nutrition. Store them well for freshness. Enjoy your energy balls for an easy energy boost anytime. Now, get creative and make these tasty snacks your own!

Peanut Butter Chocolate Energy Balls Quick Healthy Snack

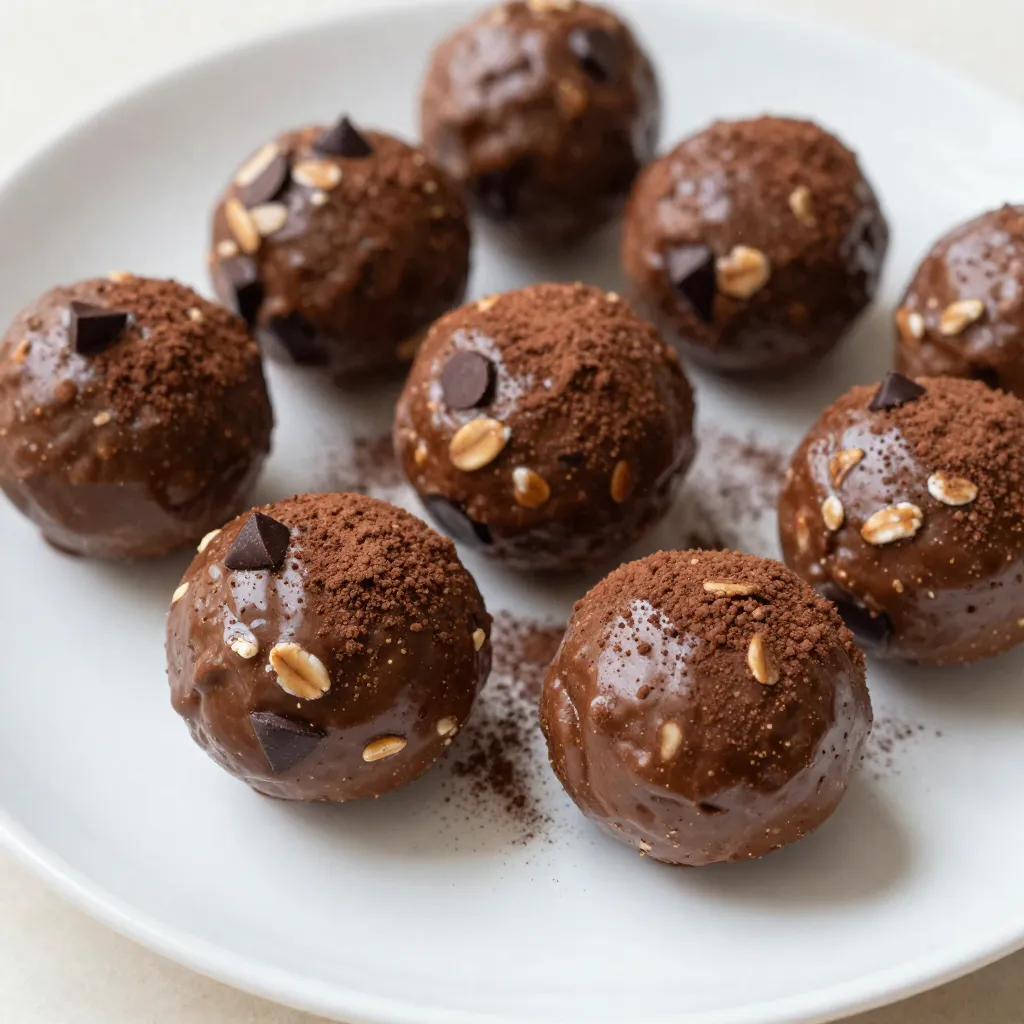
Are you looking for a quick, healthy snack that bursts with flavor? Peanut Butter Chocolate Energy Balls are your go-to

- 1 cup long-grain white rice - 1 lb turkey sausage, casings removed - 1 onion, finely chopped - 1 bell pepper (red or green), diced - 2 celery stalks, diced - 3 cloves garlic, minced - 1 cup chicken broth In this dish, the main ingredients form a hearty base. The long-grain rice cooks up fluffy and absorbs all the flavors. Turkey sausage adds protein and a nice savory taste. The mix of onion, bell pepper, and celery gives the dish a fresh crunch. Garlic adds a burst of flavor that makes everything pop. - 1 tablespoon Cajun seasoning - 1 teaspoon dried thyme - 1/2 teaspoon cayenne pepper (adjust to taste) - Salt and pepper to taste Cajun seasoning brings warmth and depth. It often contains paprika, garlic powder, and herbs. Dried thyme adds an earthy note that balances the spices. Cayenne pepper gives a kick, but you can adjust it for your taste. Salt and pepper enhance all the flavors, making the dish sing. - 1 green onion, chopped (for garnish) - Fresh parsley, chopped (for garnish) Garnishes make your dish look bright and fresh. Chopped green onions add a mild onion flavor. Fresh parsley brings a pop of color and a hint of earthiness. These garnishes not only enhance taste but also make your plate more inviting. {{ingredient_image_1}} Start by heating two tablespoons of olive oil in a large skillet over medium heat. Once the oil is hot, add one finely chopped onion, one diced bell pepper, and two diced celery stalks. Sauté these vegetables for about five minutes. You want them soft but not brown. Next, stir in three minced garlic cloves and cook for one more minute. This will give your dish a great flavor. Now, add one pound of turkey sausage, with the casings removed. Use a spatula to break the sausage into small pieces as it cooks. Brown the meat for about five to seven minutes. Make sure it’s cooked through and mixed well with the veggies. This step adds a hearty texture to your dirty rice. Once your meat is browned, it’s time to toast the rice. Add one cup of long-grain white rice to the skillet along with one tablespoon of Cajun seasoning, one teaspoon of dried thyme, and half a teaspoon of cayenne pepper. Stir everything together and cook for two to three minutes. This toasting step enhances the rice’s flavor. Next, pour in one cup of chicken broth and season with salt and pepper. Bring this mixture to a boil. After it boils, reduce the heat to low. Cover the skillet and let it simmer for about 20 to 25 minutes. The rice should be tender and absorb all the liquid. Afterward, fluff the rice with a fork and let it rest for five minutes. This makes it light and fluffy. Enjoy your meal! To make your Cajun dirty rice shine, adjust the spice levels to fit your taste. If you want more heat, add more cayenne pepper. If you prefer it milder, cut back. Test your mix as you go to find the perfect balance. For Cajun seasonings, I recommend using a blend that has paprika, garlic powder, and onion powder. This combo gives that rich taste you want. Use a heavy skillet or a Dutch oven for even cooking. These types of pots distribute heat well, helping all your ingredients cook at the same time. To prevent sticky rice, rinse it under cold water before cooking. This removes excess starch and keeps the grains separate. Make sure to fluff the rice with a fork after cooking; this helps it stay light and fluffy. To enhance your meal, serve dirty rice with cornbread or a side salad. These sides add texture and balance to the dish. You can also pair it with fried green tomatoes for a classic Southern touch. If you want something simple, just serve it with a slice of lemon. The fresh citrus brings out the flavors in the rice. Pro Tips Use Quality Sausage: Choose a flavorful turkey sausage to enhance the dish's taste. A good quality sausage can make a significant difference in the overall flavor. Toast the Rice: Toasting the rice for a few minutes before adding the broth adds a nutty flavor and helps to keep the grains separate. Adjust the Spice Level: Feel free to adjust the cayenne pepper according to your spice preference. Start with less and add more if you like it spicier. Let it Rest: Allowing the rice to rest after cooking lets the flavors meld and makes for a better texture. Don't skip this step! {{image_2}} You can switch up the protein in Cajun dirty rice. Using chicken or shrimp works well. For chicken, use diced breast or thighs. Cook them until they are no longer pink. If you choose shrimp, add them later to avoid overcooking. They should turn pink and curl up when done. If you want a vegetarian option, try using mushrooms or lentils. Both add texture and flavor. Chop mushrooms finely and sauté them like sausage. Lentils can be cooked separately and mixed in before serving. This keeps the dish hearty and satisfying. Rice is key to dirty rice. While the recipe calls for long-grain white rice, you can use brown rice for a healthier twist. Brown rice takes longer to cook, so adjust your broth and simmer time. It will add a nutty flavor that pairs nicely with the spices. You can also try quinoa as a substitute. Quinoa cooks faster and adds protein. Use the same amount as rice. The texture will differ, but it absorbs flavors well. Experimenting with rice types can lead to fun new flavors. Changing seasonings can create unique tastes in your dish. If you love heat, try adding smoked paprika or chili powder. These spices give depth and warmth. You can mix in fresh herbs like parsley or cilantro for a fresh kick. Adding extra ingredients can also enhance the dish. Bell peppers give a sweet crunch. You could toss in diced tomatoes for moisture and acidity. Each addition can change the overall flavor, making the meal fun and exciting. To keep your Cajun dirty rice fresh, store it properly. First, let it cool to room temperature. Place it in an airtight container. This keeps out moisture and air. You can refrigerate the rice for up to four days. If you want to save it for longer, freeze it. Use freezer-safe bags or containers. Make sure to remove as much air as possible. This helps prevent freezer burn. When you’re ready to eat, reheating is key. You want to avoid drying it out. The stovetop works best for reheating. Add a splash of chicken broth. Heat on low and stir gently. If using the microwave, cover the bowl with a damp paper towel. This keeps moisture in while it heats. Heat for 1-2 minutes, checking to see if it's warm throughout. In the fridge, your Cajun dirty rice lasts about four days. If you freeze it, it can last up to three months. Always check for signs of spoilage before eating. Look for an off smell or discoloration. If you see either, it’s best to toss it. Enjoy your meal safely! Dirty rice is a traditional dish from Louisiana. It gets its name from the way it looks. The rice absorbs the color from the meat and spices, making it look "dirty." This dish has roots in Creole cooking. It often includes ground meats, spices, and vegetables. People love it for its rich flavors and satisfying texture. It is a comfort food that brings families together. Yes, you can easily prep this dish ahead of time. Cook the dirty rice and let it cool. Store it in an airtight container in the fridge. It stays fresh for about three days. When you are ready to eat, reheat it in a pan. Add a splash of broth for moisture. This makes meal prepping simple and quick. The spice level in dirty rice is up to you. This recipe includes cayenne pepper, which adds heat. If you prefer a milder taste, you can reduce the amount. On the other hand, if you love spice, feel free to add more! You can also use hot sauce at the table. This lets everyone adjust the heat to their liking. This blog post shared a tasty dirty rice recipe using turkey sausage and fresh veggies. You learned about essential ingredients, step-by-step cooking, and helpful tips for flavor and texture. Remember, you can swap proteins or rice types for variety. Storing leftovers right ensures they stay fresh longer. This dish is full of flavor and easy to customize. Dive into your kitchen and make this meal your own!

Cajun Dirty Rice with Turkey Sausage Easy Comfort Meal

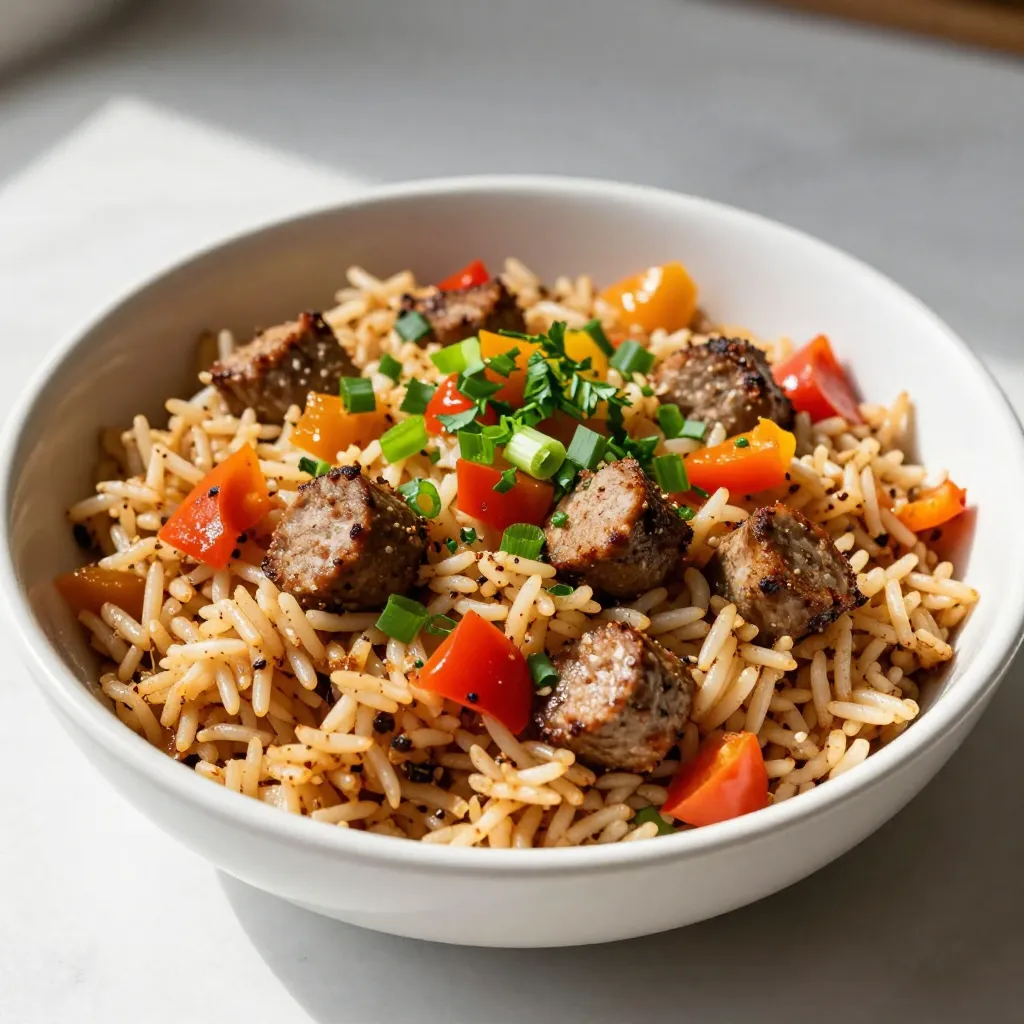
If you’re craving a delicious, easy comfort meal, let me introduce you to Cajun Dirty Rice with Turkey Sausage. This

Older posts
Page1 Page2 … Page84 Next →

dsad

© 2026 Lisa Dishes • Built with GeneratePress

Our Policies

  • Copyright Policy
  • Cookie Policy
  • GDPR Policy
  • Privacy Policy
  • Disclaimer
  • Terms Of Use

More Information

  • Home
  • About
  • Contact
  • Appetizers
  • Dessert
  • Dinner
  • Drinks
©2026, Lisa Dishes About Back To Top