Are you ready for a sweet treat that’s easy to make and tastes divine? You’ll love this Smooth No-Bake Honey Peach Cheesecake Delight! It combines creamy cheesecake, ripe peaches, and a touch of honey—all without an oven. Perfect for summer, this dessert will impress your friends and family. Follow me as we dive into simple steps and tips to create this dreamy cheesecake that everyone will rave about!
Why I Love This Recipe
- Effortless Delight: This cheesecake requires no baking, making it a simple and stress-free dessert to whip up.
- Fresh and Fruity: The combination of ripe peaches and honey adds a lovely sweetness and freshness to every bite.
- Creamy Texture: The smooth, creamy filling is balanced perfectly with the crunchy graham cracker crust.
- Perfect for Any Occasion: This cheesecake is versatile enough to serve at parties, gatherings, or as a special treat at home.
Ingredients
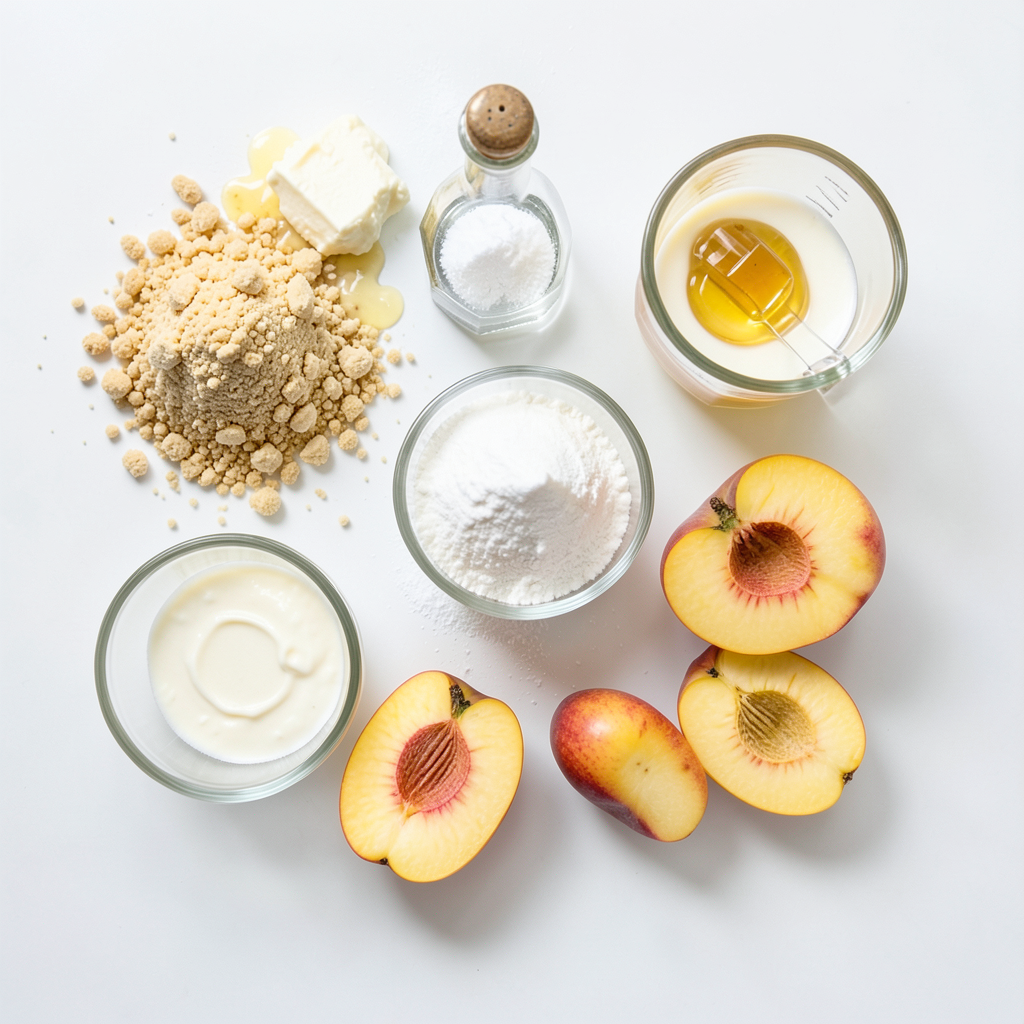
To create the Smooth No-Bake Honey Peach Cheesecake, you will need the following ingredients:
- 1 ½ cups graham cracker crumbs
- ½ cup unsalted butter, melted
- 2 (8 oz) packages cream cheese, softened
- 1 cup powdered sugar
- 1 teaspoon vanilla extract
- 1 cup heavy whipping cream
- ½ cup honey
- 2 ripe peaches, peeled and sliced
- Pinch of salt
Each ingredient plays a key role in the overall taste and texture of the cheesecake. The graham cracker crumbs will form a buttery crust that adds crunch. The melted butter binds the crumbs together, creating a solid base. Cream cheese gives the cheesecake its smooth and creamy texture, while powdered sugar adds sweetness. Vanilla extract enhances the flavor, and a pinch of salt balances it all.
Heavy whipping cream is essential for lightening the filling. It makes the cheesecake airy and soft. Honey infuses a natural sweetness and pairs perfectly with peaches. Finally, the ripe peaches not only add a fresh burst of flavor but also make the dessert visually appealing.
When you gather these ingredients, you set the stage for a delightful dessert that is simple to make yet elegant in taste.
Step-by-Step Instructions
Preparing the Crust
1. In a medium bowl, combine graham cracker crumbs and melted butter. Mix well.
2. Press the crumb mixture into the bottom of a 9-inch springform pan.
3. Chill the crust in the fridge for 20 minutes to set.
Making the Cheesecake Filling
1. In a large bowl, beat the softened cream cheese until smooth. This takes about 2-3 minutes.
2. Gradually add the powdered sugar while mixing.
3. Mix in the vanilla extract and a pinch of salt.
4. In another bowl, whip the heavy cream until stiff peaks form.
Assembling the Cheesecake
1. Gently fold the whipped cream into the cream cheese mixture. Be careful not to deflate it.
2. Drizzle in the honey and fold gently until mixed.
3. Pour the filling over the chilled crust and spread it evenly.
4. Arrange the sliced peaches on top, pressing them slightly into the filling.
Setting and Serving
1. Cover the cheesecake and refrigerate for at least 4 hours, or overnight, until set.
2. Once set, carefully release the sides of the springform pan.
3. Slice and serve chilled.
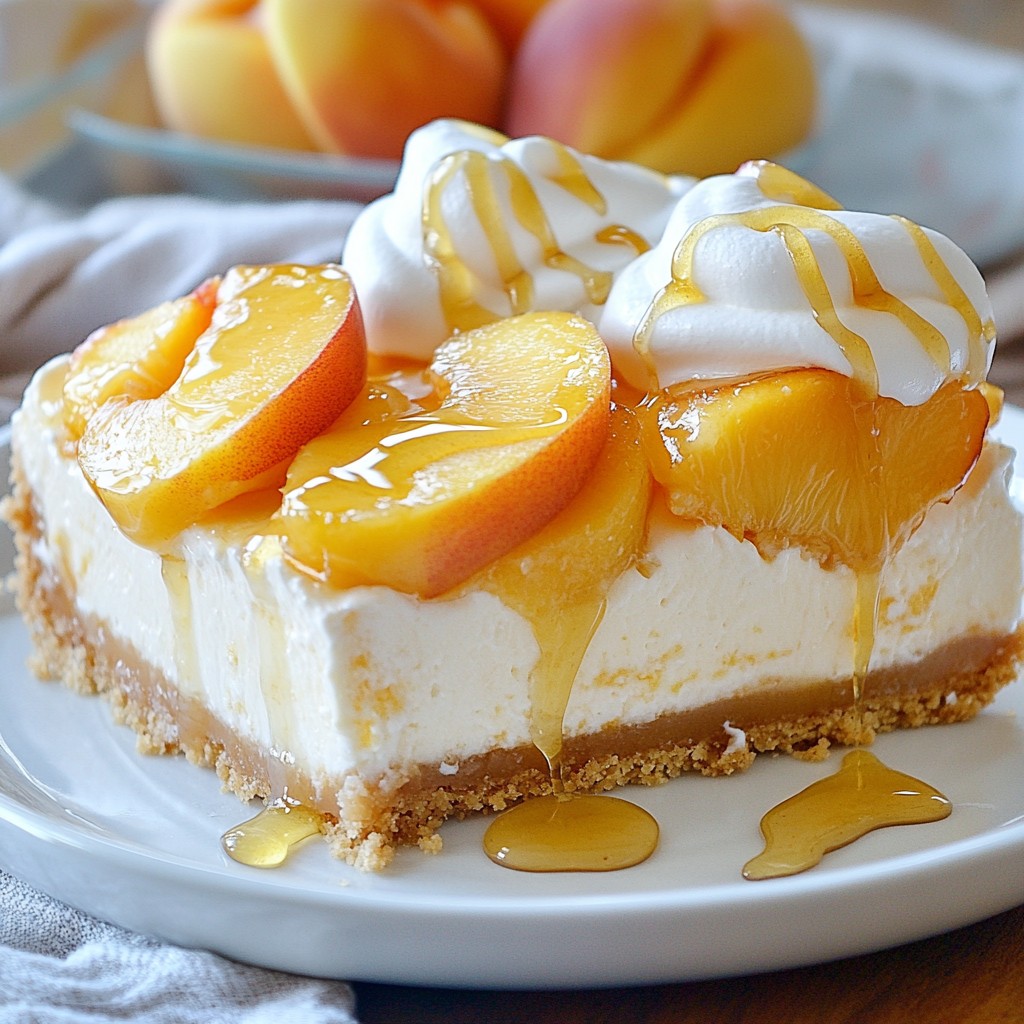
Serve slices on plates with a drizzle of honey and a few peach slices. Add a dollop of whipped cream for extra delight.
Tips & Tricks
Achieving a Smooth Consistency
To get that perfect smooth texture, start with softened cream cheese. Cold cream cheese can clump and create lumps in your filling. Leave it out for about an hour before using it. This step is key for a creamy cheesecake.
Whipping the cream properly is also important. Use a clean bowl and beaters. Start on low speed and gradually increase to high. Beat until you see stiff peaks. This means the cream holds its shape. Gently fold the whipped cream into the cream cheese mixture. Avoid deflating the whipped cream for the best texture.
Presentation Suggestions
When serving, think garnish! Drizzle honey on top for sweetness. Add a few peach slices for color. This adds freshness and makes your dish pop.
Consider serving each slice on a plate. A dollop of whipped cream on the side will impress your guests. It makes the dish look fancy without extra work.
Common Mistakes to Avoid
One big mistake is overmixing the filling. This can make your cheesecake dense and heavy. Mix just until combined to keep it light.
Another mistake is not chilling long enough. If you don’t chill it for at least four hours, it won’t set properly. For the best results, chill it overnight. This allows the flavors to develop and the cheesecake to firm up.
Pro Tips
- Use Fresh Peaches: For the best flavor, choose ripe, in-season peaches that are fragrant and slightly soft to the touch.
- Chill the Cream Cheese: Ensure your cream cheese is softened at room temperature for easier blending; this helps achieve a smooth filling.
- Whip the Cream to Stiff Peaks: When whipping the heavy cream, ensure you achieve stiff peaks to maintain the light and airy texture of the cheesecake.
- Let It Set Overnight: For the best texture and flavor, refrigerate the cheesecake overnight; this allows the flavors to meld beautifully.
Variations
Flavor Swaps
You can easily change the fruit in this cheesecake. If you want a twist, try strawberries or blueberries. These fruits add bright colors and different tastes. You can also swap honey for maple syrup. This change gives a rich flavor. Experiment with what you love!
Dietary Adjustments
Need a gluten-free crust? Use gluten-free graham crackers or almond flour instead. Mix these with melted butter, just like the regular crust. For a vegan option, replace cream cheese with soaked cashews or a vegan cream cheese. Use coconut cream instead of heavy cream, and maple syrup instead of honey. These swaps keep the taste delicious!
Mini Cheesecake Version
Want smaller treats? You can make mini cheesecakes in muffin tins. Just press the crumb mixture into each cup. Pour the cheesecake filling on top and add peach slices as you would in the larger version. Chill them in the fridge and serve as fun, bite-sized desserts!
Storage Info
Best Storage Practices
To keep your cheesecake fresh, store it in the fridge. Place any leftover cheesecake in an airtight container. This helps prevent it from drying out. You can also cover the cheesecake with plastic wrap. Just make sure it’s tightly sealed. If you use a springform pan, cover it with a lid or foil. This will keep the flavors intact and the texture smooth.
Freezing Instructions
You can freeze your cheesecake for later enjoyment. To do this, let it chill first. Then, slice the cheesecake into pieces. Wrap each piece tightly with plastic wrap. After that, place the wrapped slices in a freezer-safe bag. This keeps out air and prevents freezer burn. The cheesecake can last up to three months in the freezer. When you’re ready to eat, take it out and let it thaw in the fridge overnight. This way, it stays creamy and delicious.
FAQs
Can I use other sweeteners instead of honey?
Yes, you can use other sweeteners in this cheesecake. Maple syrup, agave nectar, or even stevia work well. Each sweetener adds a different flavor. Maple syrup gives a rich taste, while agave is milder. If you choose stevia, use less, as it is much sweeter than honey. Always adjust the amount to suit your taste.
How long does the cheesecake need to chill?
The cheesecake needs to chill for at least 4 hours. This time helps the cheesecake set properly. If you want the best texture, chill it overnight. It allows the flavors to blend beautifully. So, plan ahead if you can.
Can I make this cheesecake in advance?
Yes, you can make this cheesecake in advance. It stays fresh in the fridge for about 3 days. Just cover it well to keep it from drying out. If you want to prepare it even earlier, consider freezing it. It can last up to a month in the freezer. Just thaw it in the fridge before serving.
This cheesecake recipe is simple and fun to make. You learned about the ingredients, like peaches and cream cheese, and how to prepare the crust and filling. We covered tips for a smooth texture, presentation, and common mistakes to skip. Variations let you customize flavors and dietary needs.
With proper storage, your cheesecake will last longer. Don’t forget, it can also freeze well. Now, you’re ready to enjoy a delicious peach cheesecake. Happy baking!