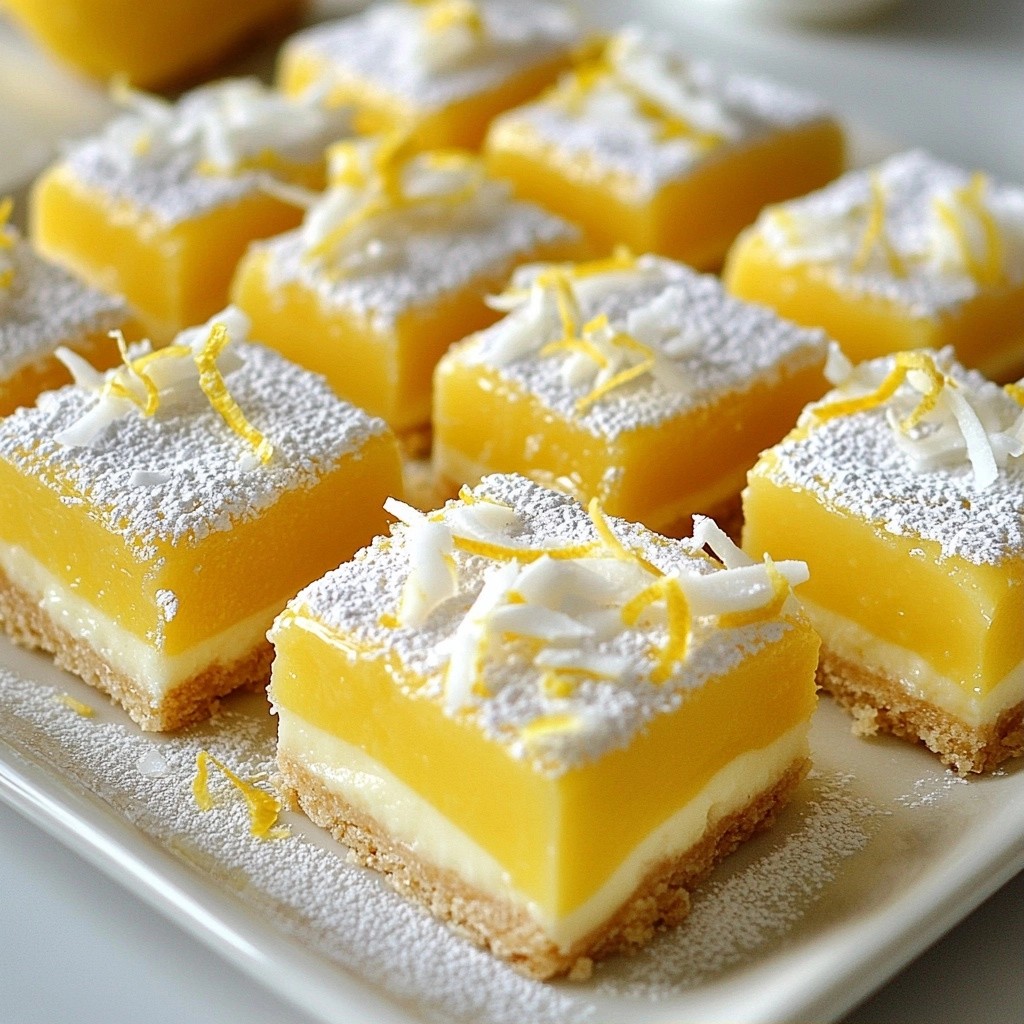
Looking for a bright and tasty treat that’s super easy to make? These no-bake lemon coconut bars are just the thing! With simple ingredients like almond flour, coconut, and maple syrup, you can whip up a refreshing dessert in no time. Perfect for gatherings or a sweet snack, these bars will brighten your day. Let’s dive into the ingredients and make these delightful bites together!
Why I Love This Recipe
- Delightfully Refreshing: The combination of lemon and coconut creates a bright, zesty flavor that is perfect for warm days.
- No Baking Required: This recipe is quick and easy, as it requires no oven time—just mix, press, and chill!
- Healthy Ingredients: Made with almond flour and coconut, these bars are a nutritious treat that satisfies your sweet tooth.
- Customizable Toppings: Add a dusting of powdered sugar or extra coconut to make these bars visually appealing for any occasion.
Ingredients
Required Ingredients
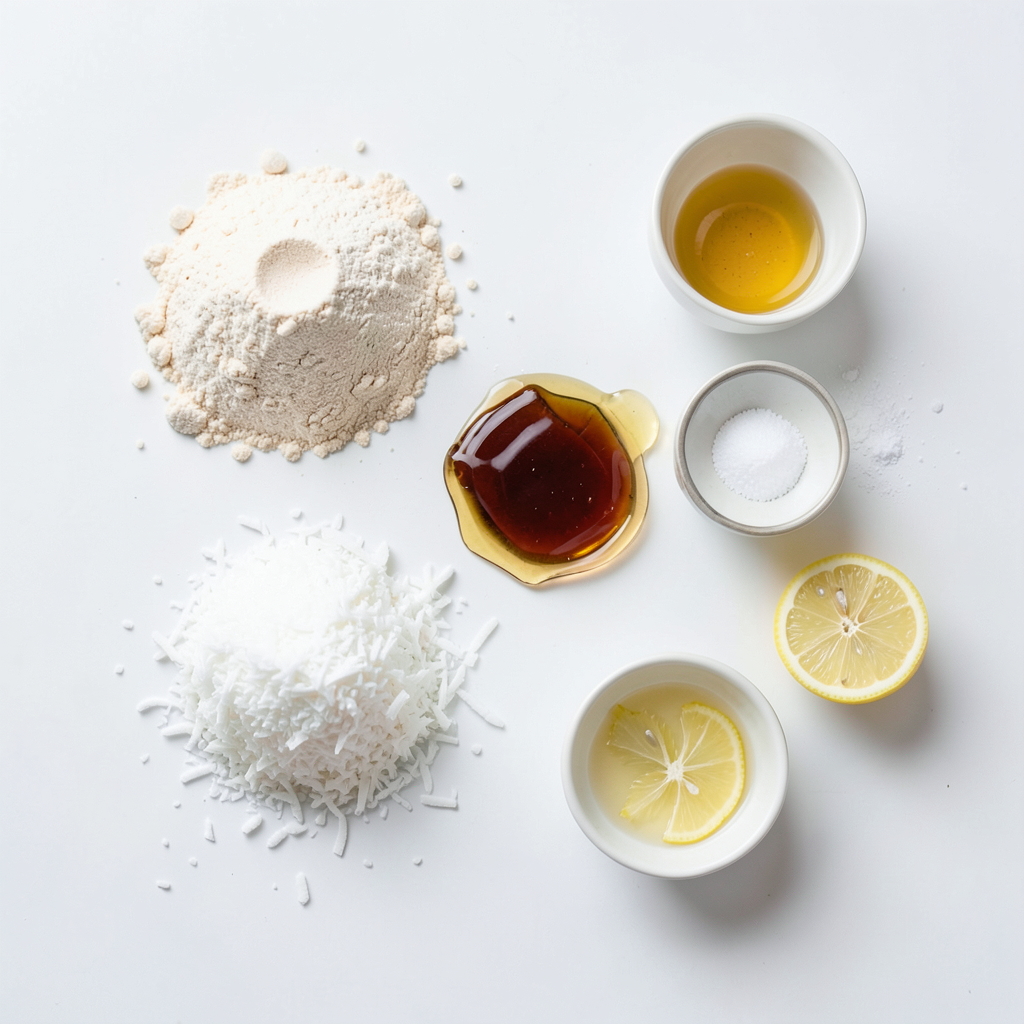
- 1 ½ cups almond flour
- ½ cup shredded unsweetened coconut
- ¼ cup maple syrup
- ¼ cup coconut oil, melted
To make these bars, you need a few key ingredients. Almond flour gives the bars a nice base. Shredded coconut adds texture and flavor. Maple syrup sweetens them up just right. Melted coconut oil helps bind everything together.
Optional Ingredients
- Powdered sugar for dusting
- Additional coconut for garnish
You can add powdered sugar for a sweet dusting. Extra coconut on top makes the bars look pretty. These options are fun but not needed.
Tools & Equipment
- Mixing bowl
- 8x8 inch baking dish
- Parchment paper
Use a mixing bowl to combine all your ingredients. An 8x8 inch baking dish works well for shaping the bars. Parchment paper helps you lift the bars out once they are set. This makes cutting them much easier.
Step-by-Step Instructions
Preparation Steps
First, gather all your ingredients. You need almond flour, shredded coconut, maple syrup, and coconut oil. Also, you will need lemon juice, lemon zest, vanilla extract, and a pinch of salt.
In a mixing bowl, combine almond flour, shredded coconut, melted coconut oil, and maple syrup. Add the lemon juice, lemon zest, and vanilla extract. Then, sprinkle in a pinch of salt. Stir it well until everything mixes together. The mixture should feel like dough. If it crumbles too much, add more coconut oil or syrup. This helps it hold better.
Setting Up the Dish
Now, take an 8x8 inch baking dish. Line it with parchment paper. Make sure some paper hangs over the sides. This will help you lift the bars out later.
Next, take your mixed ingredients and press them into the dish. Use your fingers or the back of a measuring cup. Pack it tightly and evenly. This step is important for a good texture.
Chilling and Serving
Place the baking dish in the refrigerator. Let it chill for at least two hours. This helps the bars set and firm up.
After chilling, lift the bars out using the parchment paper. Cut them into squares or rectangles. If you like, dust the bars with powdered sugar or extra shredded coconut. This makes them look even more appealing. Enjoy your refreshing treat!
Tips & Tricks
Achieving the Perfect Texture
To get the right texture, focus on moisture. If the mixture feels too dry, add more melted coconut oil or maple syrup. This helps it hold together nicely. Press the mixture firmly into the baking dish. Use the back of a measuring cup or your fingers to pack it down evenly. This step ensures you get a solid base for your bars.
Flavor Enhancements
Want a stronger flavor? Add more lemon juice or zest. You can also boost the coconut taste by mixing in extra shredded coconut. If you want to change the sweetness, try different sweeteners. You can use honey or agave syrup as a substitute for maple syrup. Each option adds its unique twist.
Presentation Ideas
When serving, think about special occasions. Arrange the bars on a colorful plate for a fun look. You can also sprinkle extra lemon zest or coconut flakes on top. This adds a nice touch and makes your treat more appealing. Remember, a great presentation makes everything taste better!
Pro Tips
- Use Fresh Lemons: For the best flavor, always use fresh lemons instead of bottled lemon juice. Fresh juice provides a vibrant and zesty taste that enhances the bars.
- Adjust Sweetness: Depending on your preference, you can adjust the amount of maple syrup. Taste the mixture before pressing it into the dish and add more if you like it sweeter.
- Chill for Best Texture: Allow the bars to chill for the full 2 hours to achieve the perfect texture. This ensures they hold together well when cut.
- Experiment with Toppings: Feel free to get creative with toppings! Try adding chopped nuts, cacao nibs, or a drizzle of dark chocolate for an extra special touch.
Variations
Flavor Variations
You can switch up the citrus flavor in these bars. Try using lime or orange juice instead of lemon. Lime gives a zesty twist, while orange adds sweetness. You can also add chocolate or berries for a fun twist. Just fold in melted chocolate or fresh berries before pressing the mixture into the dish.
Dietary Modifications
If you need nut-free options, swap almond flour for sunflower seed flour. This keeps the bars safe for those with nut allergies. For a vegan treat, use maple syrup and ensure your coconut oil is vegan. This way, everyone can enjoy these tasty bars!
Serving Suggestions
These bars taste great with fresh fruits. Slices of strawberries or blueberries add color and flavor. You can also serve them with whipped coconut cream for a creamy touch. Another idea is to use these bars as a topping for yogurt or parfaits. They will add crunch and a burst of flavor!
Storage Info
Recommended Storage Conditions
To keep your lemon coconut bars fresh, refrigerate them right after making. Place the bars in an airtight container. This helps keep moisture out. If you don’t have an airtight container, wrap the bars tightly in plastic wrap. This keeps them safe from drying out.
Freezing Instructions
You can freeze these bars for later enjoyment. Cut the bars into squares before freezing. Wrap each square in plastic wrap, then place them in a freezer bag. This method helps maintain their flavor and texture. When ready to eat, take a bar out and let it thaw in the fridge. This keeps the taste and texture just right.
Shelf Life
These bars last about one week in the fridge. After that, they may spoil. Look for signs like a change in color or an off smell. If you see any mold, it’s best to toss them. Enjoy them while they are fresh for the best taste!
FAQs
Common Questions
Can I make these No-Bake Lemon Coconut Bars gluten-free? Yes, you can! Use gluten-free almond flour to keep these bars gluten-free.
What can I use instead of maple syrup? You can swap maple syrup with honey or agave nectar. Both work well.
How long do I need to chill the mixture? Chill the mixture for at least 2 hours. This helps the bars set.
Troubleshooting
What to do if the mixture is too crumbly? If the mixture is crumbly, add a little more melted coconut oil or syrup. This will help it hold together.
How to adjust the flavor if it's too tart? If the bars are too tart, add a bit more sweetener. Try extra maple syrup or honey.
Serving and Enjoyment
Are these bars suitable for kids? Yes, these bars are great for kids. They love the sweet and tangy flavor.
Can I use them as a healthy snack option? Absolutely! These bars make a healthy snack. They have wholesome ingredients and natural sweetness.
You learned how to make delicious No-Bake Lemon Coconut Bars. We covered required and optional ingredients, plus handy tools for success. You now know preparation steps, chilling, and serving methods. We also explored tips for texture, flavor, and presentation ideas, along with fun variations and storage best practices.
Remember, you can adjust flavors and try new ingredients. Enjoy creating your own tasty bars!