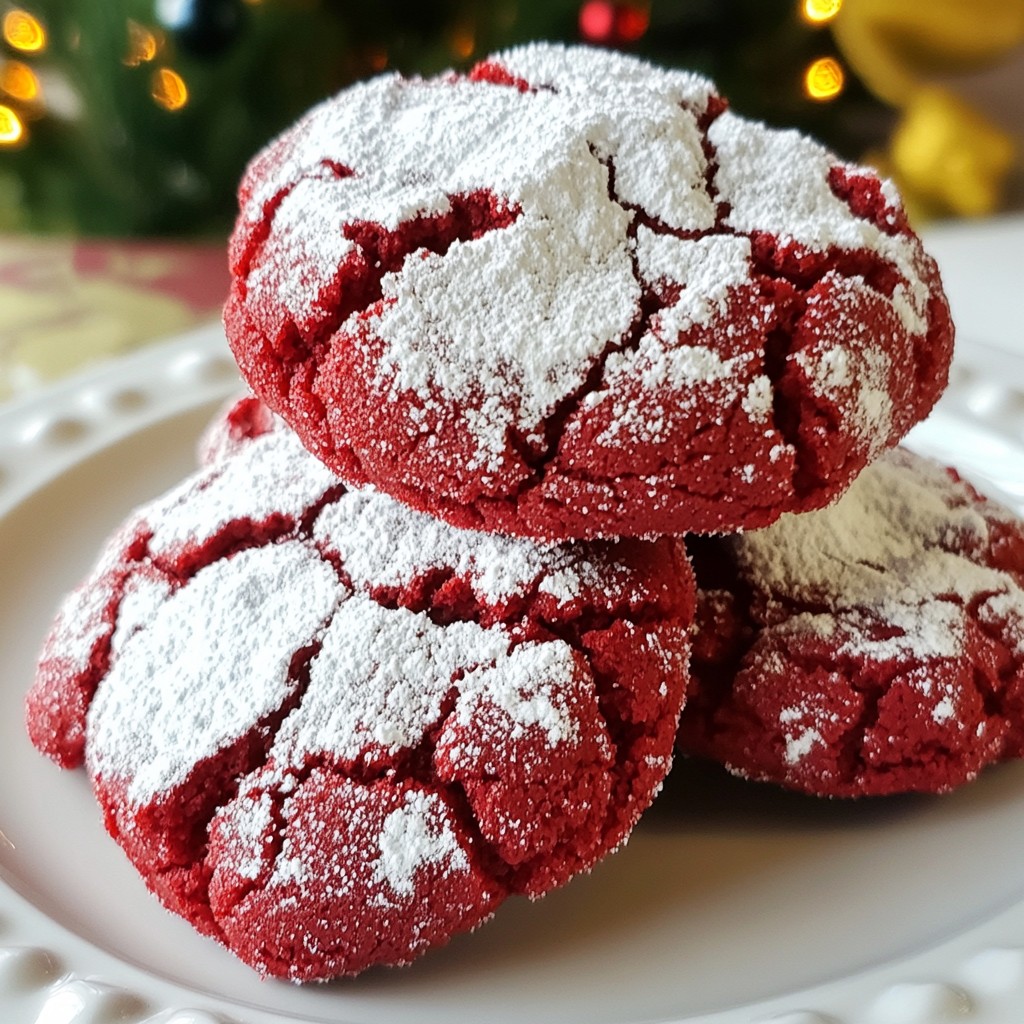
If you crave a sweet treat that's both easy and eye-catching, you've come to the right place! Red Velvet Crinkle Cookies are soft, chewy, and packed with flavor. These delightful cookies stand out with their stunning red hue and festive crinkle tops. In this guide, I’ll walk you through each step, from gathering your ingredients to baking the perfect batch. Get ready to impress your friends and family with these delicious cookies!
Why I Love This Recipe
- Delicious Flavor: The rich cocoa combined with the hint of vanilla and the vibrant red color makes these cookies not just tasty but visually appealing.
- Unique Texture: The crinkle effect gives these cookies a soft and chewy interior, while the powdered sugar adds a delightful sweetness.
- Perfect for Celebrations: The festive color and flavor profile make them ideal for holidays, parties, or special occasions.
- Easy to Make: With simple ingredients and straightforward steps, these cookies are a breeze to whip up, even for beginner bakers.
Ingredients
Main Ingredients for Red Velvet Crinkle Cookies
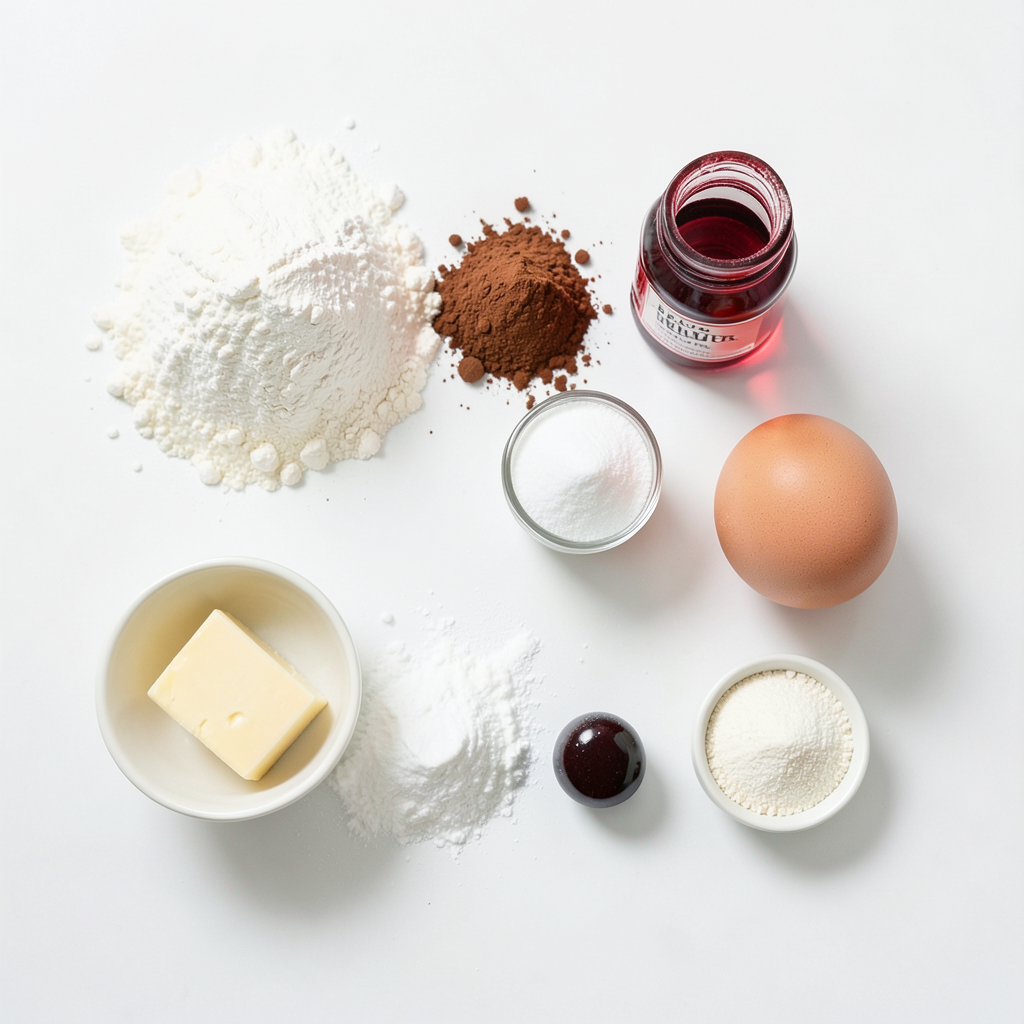
To make these tasty cookies, you need a few key ingredients. Here’s what you’ll need:
- 1 1/2 cups all-purpose flour
- 1/2 cup cocoa powder
- 1 teaspoon baking powder
- 1/2 teaspoon baking soda
- 1/4 teaspoon salt
- 1/2 cup unsalted butter, softened
- 1 cup granulated sugar
- 1 large egg
- 2 teaspoons vanilla extract
- 1 tablespoon red food coloring
- 1/2 cup powdered sugar (for rolling)
These ingredients blend together to create a soft, chewy cookie with a stunning red color. The cocoa powder adds richness, while the butter gives a nice texture.
Baking Essentials
You will need some tools for baking. Here’s a quick list:
- Mixing bowls
- Whisk
- Baking sheets
- Parchment paper
- Cookie scoop or tablespoon
These tools help you mix and bake your cookies with ease. They ensure your cookies turn out perfectly every time.
Optional Add-ins
Feel free to get creative! Here are some fun add-ins:
- Chocolate chips
- Chopped nuts
- Sprinkles
These add-ins can make your cookies even more fun. You can mix them in the dough before chilling it.
Step-by-Step Instructions
Preparing the Dough
Start by preheating your oven to 350°F (175°C). Line two baking sheets with parchment paper. In a medium bowl, mix the flour, cocoa powder, baking powder, baking soda, and salt. This mix creates a great base for our cookies. In a large bowl, cream the softened butter and sugar together. Do this until the blend is light and fluffy, which takes about 3-4 minutes. Then, beat in one egg, vanilla extract, and red food coloring. Make sure everything is well mixed. Gradually add the dry mix to the wet mix. Stir until just combined. The dough will feel soft and sticky.
Chilling and Shaping the Cookies
Cover the dough with plastic wrap and chill it in the fridge for about 30 minutes. Chilling makes the dough easier to handle. Once chilled, scoop out tablespoon-sized portions of dough. Roll each portion into a ball. Next, roll each ball in powdered sugar until it is fully coated. This gives the cookies a nice, sweet crust. Place the sugar-coated balls on your baking sheets, making sure to space them about 2 inches apart.
Baking and Cooling Process
Now, it’s time to bake! Put the baking sheets in your preheated oven. Bake for 10-12 minutes. Look for edges that are set and tops that are crackled. Once done, remove the cookies from the oven. Let them cool on the baking sheets for about 5 minutes. After that, transfer the cookies to a wire rack to cool completely. Enjoy the delightful aroma while you wait!
Tips & Tricks
Achieving the Perfect Crinkle Effect
To get that lovely crinkle on your cookies, roll them well in powdered sugar. This sugar acts like a coat and helps the cracks form as they bake. Make sure your dough is chilled for at least 30 minutes. A cold dough spreads less, creating those beautiful cracks. Bake them until the edges are firm but the centers are soft. This gives the cookies a chewy texture.
Common Mistakes to Avoid
One big mistake is not chilling the dough. If the dough is warm, cookies will spread too much. Another mistake is adding too much flour. Measure flour correctly by spooning it into a cup and leveling it off. Mixing too long can also lead to tough cookies. Just mix until the ingredients are combined. Lastly, don’t skip the powdered sugar coating. It’s key for that signature look and taste.
Serving Suggestions
These cookies shine at any gathering. Serve them fresh on a festive plate. They pair well with milk or hot cocoa. For a fun twist, add a scoop of vanilla ice cream between two cookies for an easy sandwich treat. You can also sprinkle extra powdered sugar on top before serving. This adds a lovely touch and makes them look fancy.
Pro Tips
- Chill the Dough: Refrigerating the dough for at least 30 minutes makes it easier to handle and helps the cookies maintain their shape while baking.
- Use Gel Food Coloring: For a more vibrant red color, opt for gel food coloring instead of liquid. It will give the cookies a richer hue without altering the dough's consistency.
- Don't Overbake: Keep an eye on the cookies while baking. They should be slightly soft in the center when you take them out, as they will continue to cook on the baking sheet.
- Store Properly: To keep the cookies fresh, store them in an airtight container at room temperature. They can also be frozen for longer storage.
Variations
Gluten-Free Red Velvet Crinkle Cookies
To make gluten-free red velvet crinkle cookies, swap all-purpose flour for a gluten-free blend. Look for a blend that works well in cookies. This change keeps the flavor, while ensuring everyone can enjoy them. The texture may vary but will still be delicious!
Adding Mix-ins (Chocolate Chips, Nuts)
Want to add some fun? Try mixing in chocolate chips or nuts. Dark or white chocolate chips work great. For nuts, use chopped walnuts or pecans. These add crunch and extra flavor. Just fold them into the dough before chilling.
Flavor Variations (Mint, Almond)
Add a twist with flavor variations! For mint, use mint extract instead of vanilla. This gives a fresh taste. If you prefer almond, swap the vanilla for almond extract. Both options make your cookies unique and tasty. Experiment to find your favorite!
Storage Info
How to Store Leftover Cookies
To keep your red velvet crinkle cookies fresh, place them in an airtight container. You can stack them in layers, using parchment paper between layers. This method keeps them moist and soft. Store the container at room temperature for up to five days.
Freezing Instructions
If you want to save some cookies for later, freezing works well. First, let the cookies cool completely. Then, line a baking sheet with parchment paper. Place the cookies in a single layer on the sheet. Freeze them for about two hours. Once they are frozen, transfer the cookies to a freezer bag. Remove as much air as possible before sealing. They will stay fresh for up to three months.
Best Practices for Keeping Cookies Fresh
To maintain freshness, keep your cookies in a cool, dry place. Avoid direct sunlight or heat sources. If you live in a humid area, consider adding a slice of bread in the container. The bread helps absorb moisture and keeps the cookies soft. Remember to check on them often to ensure they stay tasty.
FAQs
How to make Red Velvet Crinkle Cookies from scratch?
To make these cookies, start by mixing dry and wet ingredients. In a bowl, whisk together 1 ½ cups of flour, ½ cup of cocoa powder, 1 teaspoon of baking powder, ½ teaspoon of baking soda, and ¼ teaspoon of salt. In another bowl, cream together ½ cup of softened butter and 1 cup of sugar until fluffy. Add in 1 large egg, 2 teaspoons of vanilla, and 1 tablespoon of red food coloring. Then, mix the dry ingredients into the wet ones. Chill the dough, roll it in powdered sugar, and bake.
What makes these cookies crinkle?
The crinkle effect comes from the baking process. When the dough bakes, steam forms inside. This steam causes the cookies to expand, and the tops crack, creating that signature crinkle. Using powdered sugar on the surface helps enhance this look, giving the cookies a beautiful contrast.
Can I use liquid food coloring instead of gel?
Yes, you can use liquid food coloring. However, gel coloring is more concentrated. This means you may need to use more liquid dye to achieve the same vibrant color. Keep an eye on the dough's consistency, as too much liquid can affect it.
How long do Red Velvet Crinkle Cookies last?
These cookies can stay fresh for about one week when stored in an airtight container. If you want them to last longer, freeze them. They can hold up well for up to three months in the freezer. Just make sure to seal them tightly!
Can I substitute ingredients in this recipe?
Yes, you can make some swaps. For a dairy-free option, use plant-based butter. You can also replace all-purpose flour with gluten-free flour for a gluten-free version. Feel free to experiment with different types of sugar or cocoa powder, but be aware that this may change the final taste and texture.
Red velvet crinkle cookies pair rich flavors with a fun texture. We covered key ingredients, steps for baking, and tips for that perfect crinkle. Remember to chill the dough and avoid common mistakes for the best results. You can even try gluten-free or flavored variations. These cookies are easy to store and will stay fresh if kept right. With these insights, you’re ready to bake delicious cookies that impress! Enjoy every bite and share your creations!