


Latest & Greatest

Skillet Chili Mac Comforting Family Meal Idea
Looking for a family meal that packs flavor and comfort? Let me introduce you to Skillet Chili Mac! This one-pan
Read more…
Lasagna Soup Flavorful and Simple Comfort Dish
Lasagna soup combines all the comfort of traditional lasagna in a warm bowl of goodness. This dish packs rich flavors
Read more…
Bang Bang Shrimp Pasta Flavorful and Quick Meal
Bang Bang Shrimp Pasta is a fun and tasty dish that you can make at home. In just a few
Read more…
Frosty S’more Cups Delightful and Easy Treat Recipe
Get ready for a sweet treat that’s perfect for any occasion! Frosty S’more Cups are easy to make and even
Read more…
Crispy Oven Baked French Fries Easy and Tasty Recipe
Are you ready to make the crispiest oven-baked French fries ever? With just a few simple ingredients and easy steps,
Read more…
Mini Pineapple Upside Down Cakes Delightful Treats
Are you ready for a sweet twist on a classic dessert? Mini Pineapple Upside Down Cakes are easy, fun, and
Read more…
Loaded Buffalo Chicken Casserole Tasty and Simple Dish
Looking for a dish that packs a flavorful punch? This Loaded Buffalo Chicken Casserole is both tasty and simple to
Read more…
Honey Garlic Chicken and Veggies Flavorful Meal Prep
Want a tasty meal that’s easy to prepare? Look no further! Honey Garlic Chicken and Veggies is your answer. You
Read more…browse recipes


![- 1 lb chicken breast, cut into bite-sized pieces - 1 cup orange marmalade - 2 tablespoons soy sauce The main ingredients are simple. Chicken breast gives a juicy base. Orange marmalade adds sweetness and tang. Soy sauce brings in that savory depth. These three ingredients work together to create a sweet and savory flavor that is hard to resist. - Mixing bowl - Baking dish - Parchment paper You need a few tools to make this dish. A mixing bowl helps you combine the marmalade and soy sauce. Use a baking dish to cook the chicken. Parchment paper keeps the chicken from sticking and makes cleanup easy. - Green onions - Sesame seeds - Rice or vegetables for serving For extra flavor, add green onions on top. They give a nice crunch and color. Sesame seeds add a nutty taste and look great. Serve the chicken over rice or with veggies for a complete meal. You can find the Full Recipe for more details on making this dish. - In a large mixing bowl, combine 1 cup orange marmalade and 2 tablespoons soy sauce. - Use a whisk or spoon to mix until well blended. This creates a tasty glaze for your chicken. - Take 1 lb chicken breast, cut into bite-sized pieces, and coat them in the marinade. - Make sure all pieces are fully covered. For the best flavor, marinate for at least 30 minutes. If you have time, marinate overnight in the fridge. - Preheat your oven to 400°F (200°C) while the chicken marinates. - Line a baking dish with parchment paper for easy cleanup. - Place the marinated chicken pieces in a single layer in the dish. - Bake for 20-25 minutes. Check the chicken halfway through and turn them for even cooking. The chicken should be cooked through and have a nice glaze. - After baking, let the chicken cool for a few minutes before serving. Try serving this dish over rice or with steamed veggies. For a fun touch, drizzle any extra glaze on top! You can find the Full Recipe linked earlier for more details. To get the best taste, marinate the chicken for at least 30 minutes. If you have more time, let it sit overnight in the fridge. This helps the chicken soak up all the flavors. You can also adjust the sweetness of the dish. If you like it sweeter, add more orange marmalade. For a less sweet taste, use less. This way, you control the flavor just how you want it. To check if the chicken is done, use a meat thermometer. The internal temperature should reach 165°F (75°C). If you don’t have a thermometer, cut a piece open. The juice should run clear, and the meat should look white, not pink. To avoid dry chicken, keep an eye on the cooking time. Bake it for 20-25 minutes, turning halfway through. This keeps the chicken juicy and tender. For serving, place the orange chicken over a bed of fluffy white rice or steamed broccoli. This adds color and texture to your plate. After plating, drizzle any extra glaze from the baking dish on top. For added flair, garnish with chopped green onions or sesame seeds. These little touches make your meal look and taste even better. {{image_2}} You can switch the chicken for pork or tofu. For pork, use tenderloin or chops. Cut them into small pieces like the chicken. For tofu, press it to remove water, then cube it. Both options work well with the orange glaze. They soak up the flavor just like chicken. Add garlic or ginger to boost the taste. Garlic adds a nice kick, while ginger gives warmth. You can chop or grate them before mixing with the glaze. Another fun twist is adding veggies. Try bell peppers or snap peas. They add color and crunch. Toss them in the baking dish with the chicken for a complete meal. You can also use a slow cooker. Simply mix the glaze and coat your protein. Pour everything into the slow cooker. Cook on low for 4-6 hours. If you prefer, an Instant Pot is quick. Add the chicken and glaze, then seal the pot. Cook on high pressure for 10 minutes. Both methods yield juicy, tasty results. Check the [Full Recipe] for detailed instructions. To keep your three-ingredient orange chicken fresh, follow these steps. First, allow the chicken to cool completely. This prevents moisture buildup in storage. Next, place the chicken in an airtight container. You can store it in the refrigerator for up to three days. If you want to keep it longer, consider freezing it. For freezing, use freezer-safe bags. Remove as much air as possible before sealing. This helps prevent freezer burn. The chicken can last in the freezer for up to three months. When you're ready to enjoy your leftovers, reheating is key. To avoid dry chicken, use the oven or stove. For oven reheating, preheat it to 350°F (175°C). Place the chicken in a baking dish, cover it with foil, and heat for about 15 minutes. This keeps the moisture in. If you prefer the stovetop, add a splash of water or broth in a pan. Heat on medium-low, stirring gently until warmed through. This method also helps maintain the flavor. Enjoy your tasty meal again with ease! If you don't have orange marmalade, you can try using other fruit jams. Apricot or peach jam works well. You can also mix orange juice with sugar and cornstarch to make a quick glaze. This will mimic the sweet and tangy flavor of orange marmalade. Yes, you can make this dish gluten-free. Look for gluten-free soy sauce. Brands like Tamari and coconut aminos are great choices. They provide the same salty flavor without gluten. Always check the label to make sure it meets your needs. To make this recipe healthier, use less marmalade. Cut the sugar by using only half a cup. You can also add veggies like bell peppers or broccoli. This will boost the nutrients and add color. Consider using chicken thighs for more flavor and moisture. This article showed you how to make easy orange chicken with just three main ingredients. We covered essential tools and some optional flavors to boost taste. I gave you step-by-step instructions, tips for cooking, and ideas for variations. Don't forget how to store leftovers and reheat them right. Cooking should be fun and simple. Try out new flavors and find what you love. Enjoy your meal and share it with others!](https://lisadishes.com/wp-content/uploads/2025/04/62629ab1-643e-41f5-a4c8-61ce796c59a9.webp)
Savory 3 Ingredient Orange Chicken Quick and Easy Meal
Looking for a quick and easy meal that packs a punch of flavor? This Savory 3 Ingredient Orange Chicken is your answer! With just…
My Latest Desserts

Pumpkin Spice Energy Bites Tasty and Healthy Snack
Looking for a tasty and healthy snack to fuel your day? This Pumpkin Spice Energy Bites recipe is your answer! Read Full Recipe-
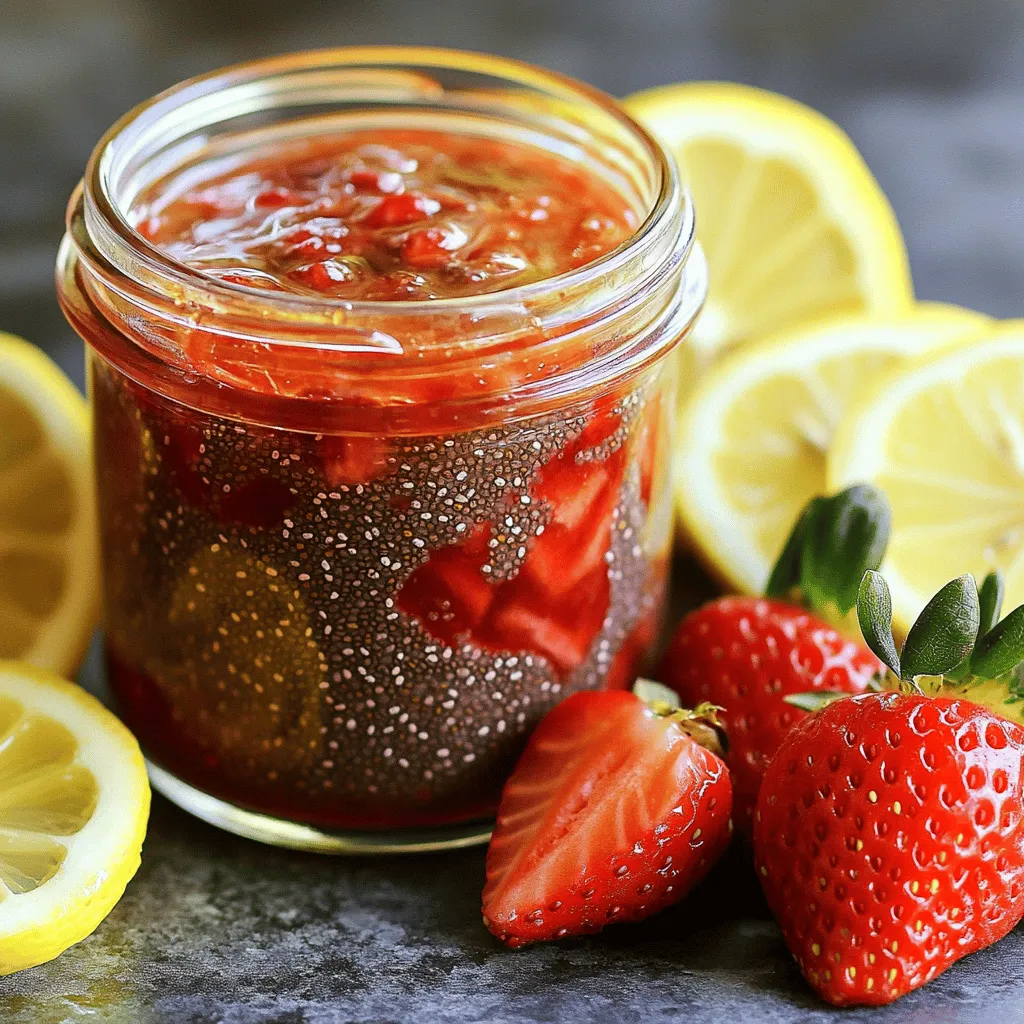
Strawberry Chia Seed Jam Tasty and Healthy Treat
If you’re craving a sweet treat that’s also good for you, I’ve got just the thing: Strawberry Chia Seed Jam! Read Full Recipe -
Mango Coconut Chia Pudding Healthy and Easy Recipe
Are you ready to indulge in a delicious, healthy treat? Mango Coconut Chia Pudding is simple to make and packed Read Full Recipe -
Pumpkin Spice Muffins Warm and Cozy Fall Treat
Fall is the perfect time for warm and cozy treats, and nothing says autumn like pumpkin spice muffins. These fluffy Read Full Recipe -
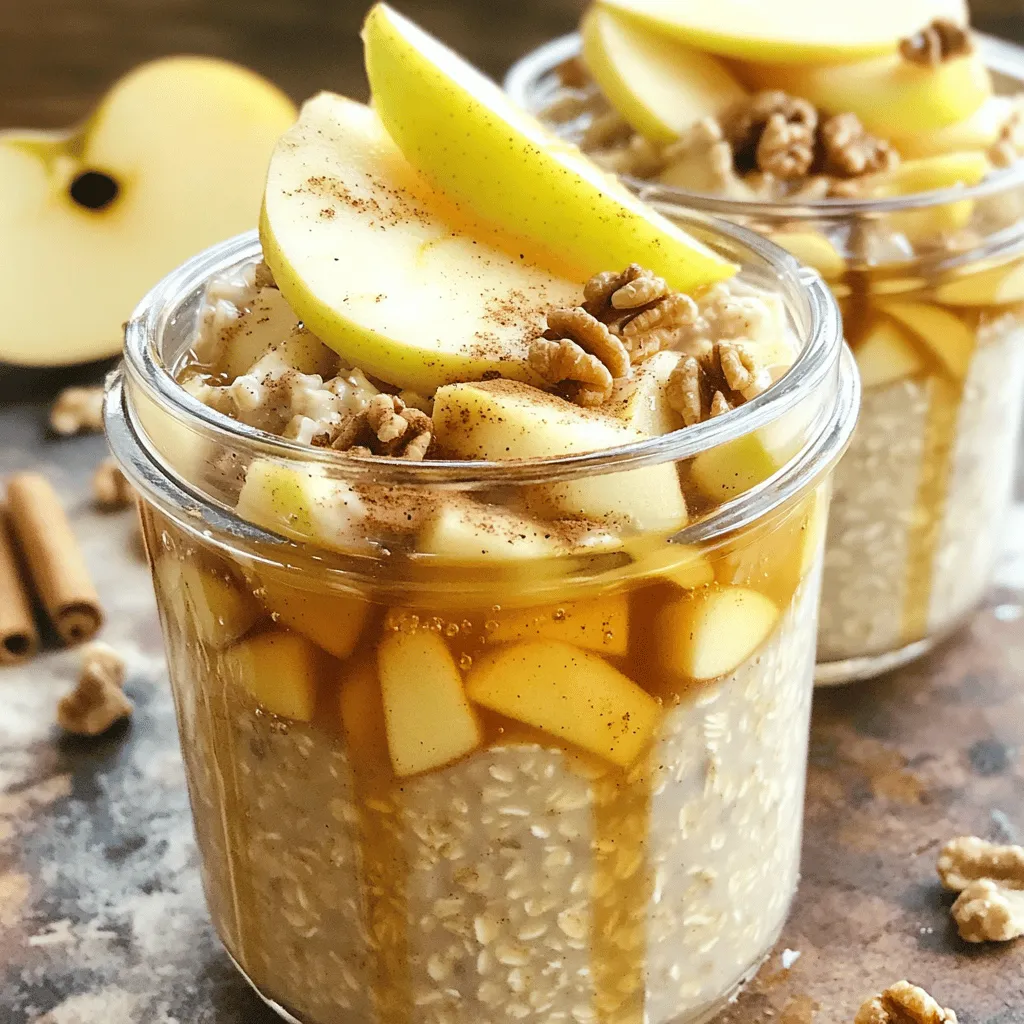
Apple Cinnamon Overnight Oats Healthy Breakfast Option
Looking for a quick and healthy breakfast? You’ve found it! Apple Cinnamon Overnight Oats are the perfect choice for busy Read Full Recipe -
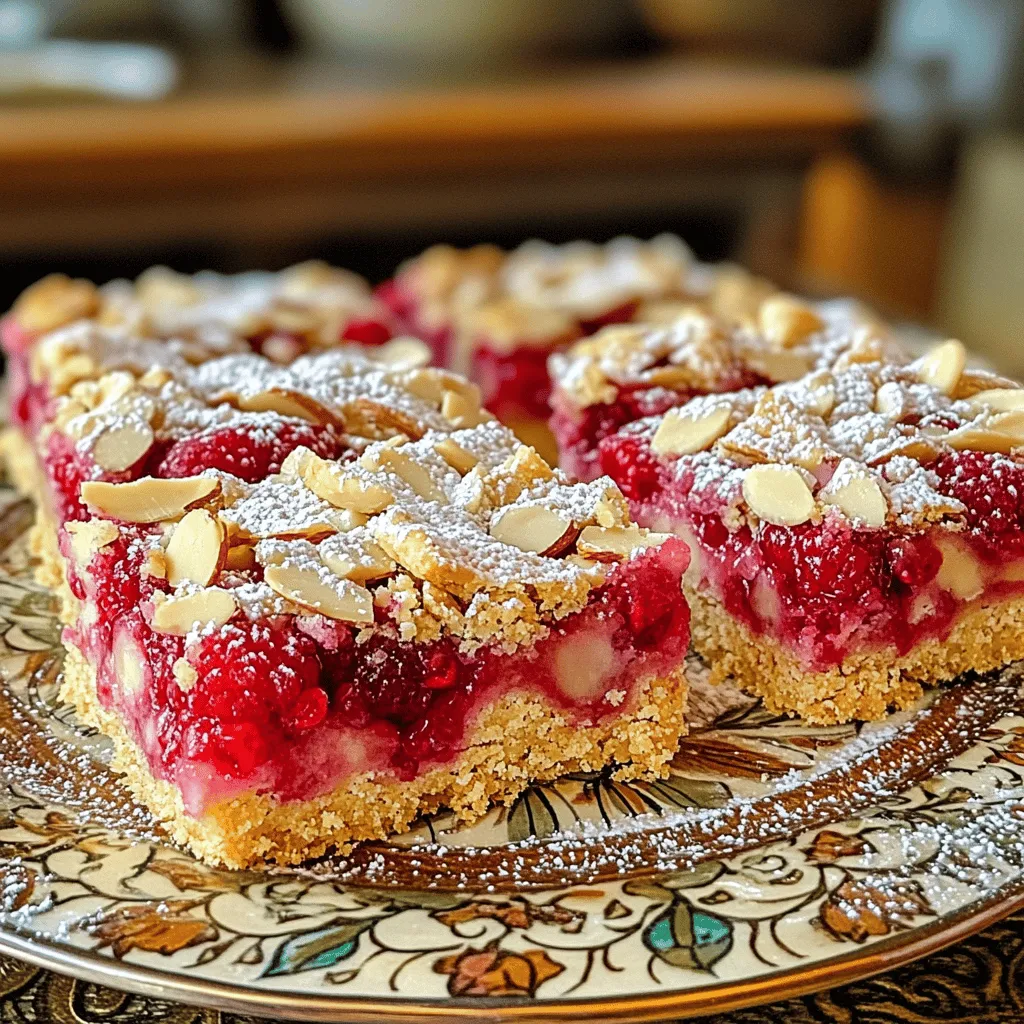
Raspberry Almond Shortbread Bars Simple and Tasty Treat
Looking for a sweet treat that’s easy to make and perfect for any occasion? Raspberry Almond Shortbread Bars are your Read Full Recipe -
Chocolate Covered Strawberry Pops Delightful Treats
Are you ready for a sweet treat? Chocolate Covered Strawberry Pops are delicious and fun to make. I’ll guide you Read Full Recipe -
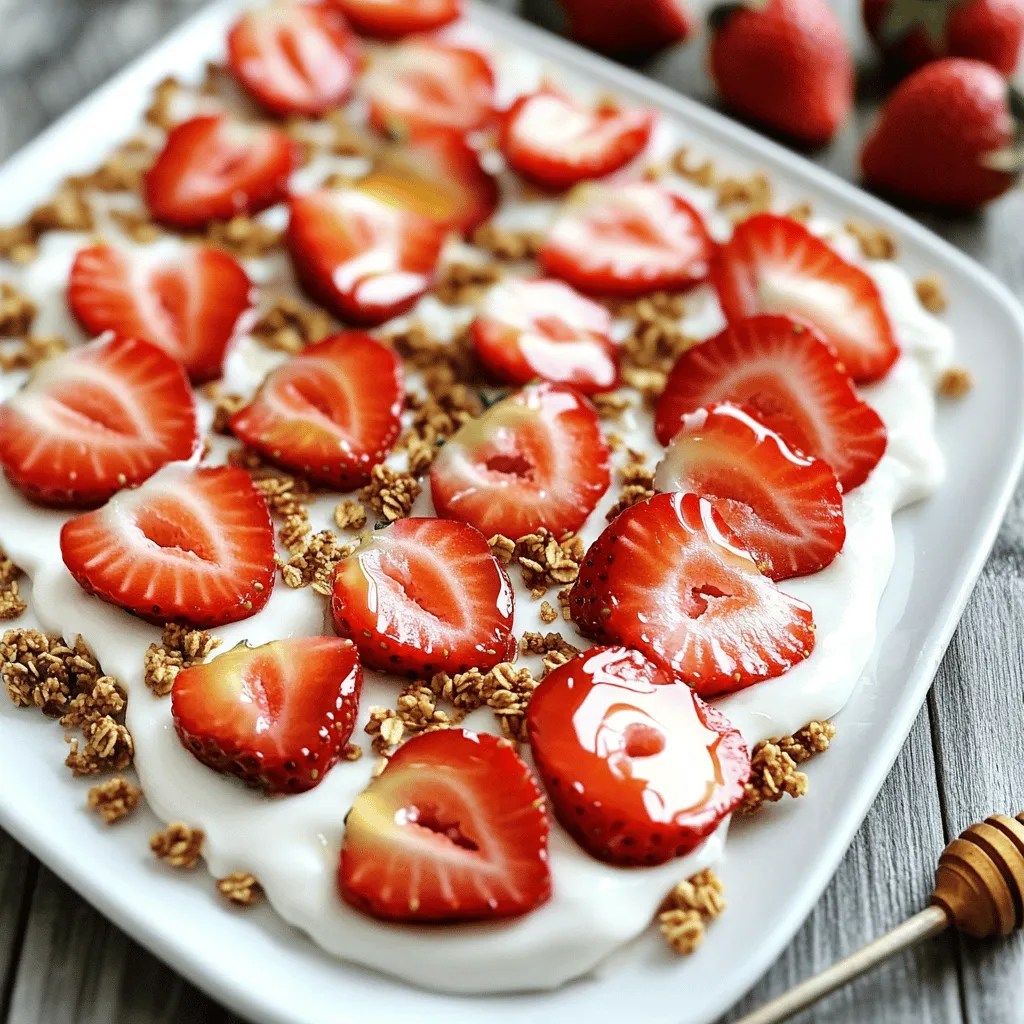
Fresh Strawberry Yogurt Bark Delicious and Easy Treat
Looking for a quick and tasty treat? Fresh Strawberry Yogurt Bark is your answer! This easy recipe combines creamy Greek Read Full Recipe -
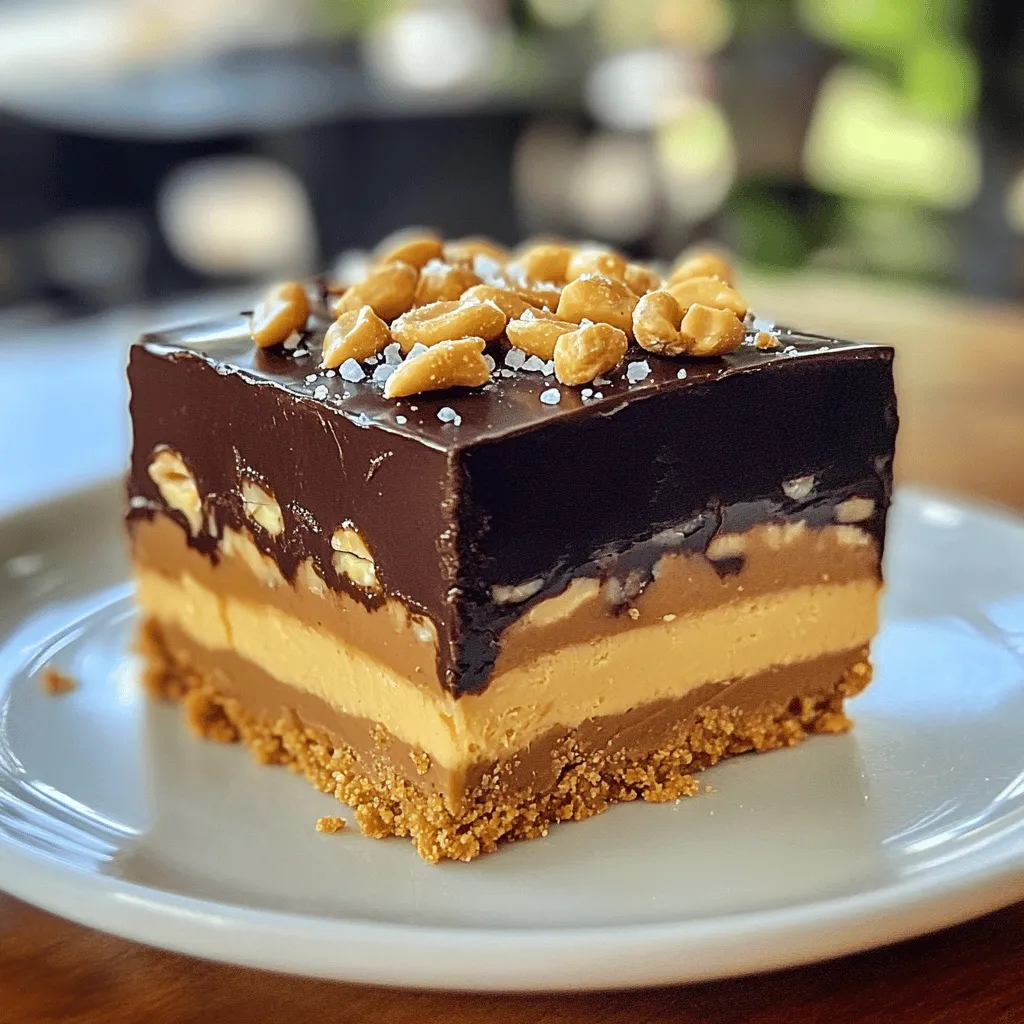
No-Bake Snickers Bars Simple and Decadent Treat
Indulge in a simple and delicious treat with my No-Bake Snickers Bars recipe! These bars come together fast and need Read Full Recipe -
Lemon Blueberry Energy Bites Nourishing Snack Idea
Looking for a tasty, energy-packed snack? Try my Lemon Blueberry Energy Bites! These little balls are the perfect blend of Read Full Recipe


My Latest Recipes

hey,
i’m !
I’m so happy you’re here!
Each recipe I share is a little piece of love from my kitchen. May they fill your heart and home with warmth. Let’s cook up something wonderful together.
![For your savory cheese scones, gather these key ingredients: - 2 cups all-purpose flour - 1 tablespoon baking powder - 1/2 teaspoon salt - 1/4 teaspoon black pepper - 1/4 teaspoon cayenne pepper (optional) - 1/2 cup cold unsalted butter, cubed - 1 cup shredded sharp cheddar cheese - 1/2 cup grated Parmesan cheese - 1/2 cup whole milk (or buttermilk) - 1 egg, beaten (for egg wash) - Fresh chives, finely chopped (for garnish) Using quality cheese is vital for flavor. Sharp cheddar brings a rich taste. Parmesan adds depth and a hint of nuttiness. Always choose fresh, high-quality cheese for the best results. You can enhance your scones with some fun add-ins. Consider these herbs and spices: - Fresh rosemary - Thyme - Garlic powder For cheese varieties, try: - Gruyère for a nutty twist - Feta for a tangy kick - Mozzarella for a gooey texture These options let you explore new flavors and keep your scones exciting. Enjoy experimenting! For the full recipe, check out the detailed instructions above. 1. Start by preheating your oven to 400°F (200°C). Line a baking sheet with parchment paper to prevent sticking. 2. In a large bowl, mix 2 cups of all-purpose flour, 1 tablespoon of baking powder, 1/2 teaspoon of salt, 1/4 teaspoon of black pepper, and 1/4 teaspoon of cayenne pepper. This blend gives your scones a nice kick. 3. Add 1/2 cup of cold, cubed unsalted butter to the flour mix. Use your fingers or a pastry cutter to blend until it looks like coarse crumbs. 4. Stir in 1 cup of shredded sharp cheddar cheese and 1/2 cup of grated Parmesan cheese. Make sure the cheese is spread evenly. 5. Slowly pour in 1/2 cup of whole milk (or buttermilk). Use a fork to mix until the dough sticks together. Be careful not to overmix; it should feel slightly sticky but easy to handle. 6. Turn the dough onto a floured surface. Gently knead it a few times until it forms a ball. Remember, you want a soft dough, not tough. 7. Pat the dough into a rectangle about 1 inch thick. Use a knife or pizza cutter to cut it into squares or triangles. 8. Place your cut scones on the prepared baking sheet, leaving about 1 inch of space between them. 9. Brush the tops with a beaten egg to give them a golden look when baked. 10. Bake the scones for 15-20 minutes. Keep an eye on them; they should turn lightly golden. 11. To check if they are ready, insert a toothpick into the center. If it comes out clean, your scones are perfect. 12. Remove the scones from the oven and let them cool on a wire rack for a bit. 13. While they are still warm, sprinkle some finely chopped chives on top for a fresh touch. These simple steps will lead you to delicious, savory cheese scones. For the complete recipe, refer to the Full Recipe. To make the best savory cheese scones, avoid common mistakes. Here are some tips: - Overmixing the dough: Mix just enough until the dough comes together. Overmixing makes scones tough. - Using warm butter: Always use cold butter. It helps create a flaky texture. - Skipping the chill: If time allows, chill the dough for a bit. It helps the scones rise better. For a flaky texture, keep these techniques in mind: - Cut in butter correctly: Use a pastry cutter or your fingers. Aim for coarse crumbs. - Use cold ingredients: Cold milk or buttermilk helps the dough stay cool. - Pat, don’t roll: Pat the dough into shape instead of rolling it out. This keeps layers intact. Savory cheese scones pair well with many drinks and spreads. Here are my favorites: - Pairing with soup: Serve these scones with a warm bowl of tomato basil or creamy potato soup. - Cheese and charcuterie boards: Include scones on a board with cured meats and fresh fruits. - Beverages: Enjoy with herbal tea, coffee, or a light white wine. For presentation, try these ideas: - Garnish with herbs: Sprinkle fresh chives or parsley on top for color. - Serve warm: Warm scones taste best. Serve them right out of the oven. - Use rustic dishes: Place scones on a wooden board or in a woven basket for a cozy look. For the full recipe and more details, check out the [Full Recipe]. {{image_2}} You can play with many cheese flavors in savory cheese scones. While sharp cheddar gives a nice bite, other cheeses can add depth. Here are some great choices: - Gruyère: This Swiss cheese adds a nutty twist. - Feta: Crumbled feta brings a salty taste that pairs well with herbs. - Blue cheese: If you like bold flavors, try adding blue cheese for a rich profile. - Goat cheese: This cheese adds creaminess and a tangy flavor. Combining cheeses can make your scones gourmet. For example, use half cheddar and half Gruyère. This mix creates a tasty balance. Experimenting with different cheeses can lead to fun and unique scone experiences. You can create sweet or savory variations with add-ins. Fresh herbs like rosemary or thyme can brighten the flavor. If you want a sweet twist, try adding dried cranberries or chopped apples. Seasonal fruits and vegetables also work great. In spring, add fresh asparagus or peas for a fresh touch. In the fall, try pumpkin puree or grated zucchini for moisture and flavor. Adding these elements allows you to customize your scones. Each season can bring new flavors to your kitchen. For the full recipe, check out the detailed steps. To keep your savory cheese scones fresh, store them in an airtight container. This helps maintain their texture and flavor. Place a piece of parchment paper between layers to prevent sticking. Keep them at room temperature for up to two days. If you need to store them longer, consider freezing. To freeze, let the scones cool completely. Wrap each one in plastic wrap and place them in a freezer bag. They will stay fresh for about three months. When you want to enjoy them, simply thaw them overnight in the fridge. To warm up your scones, the oven is the best method. Preheat it to 350°F (175°C). Place the scones on a baking sheet and heat for about 10 minutes. This keeps them crispy on the outside while soft inside. If you prefer a softer texture, microwave them for 15-20 seconds. However, this may make them a bit chewy. For the best results, try both methods and see which you like most! To boost the cheese flavor, choose sharp cheddar and aged Parmesan. You can also mix in herbs like rosemary or thyme for an extra kick. Adding a pinch of garlic powder can enhance the taste, too. For dairy-free or vegan options, use plant-based butter and non-dairy milk. Nutritional yeast can mimic the cheese flavor well. You can also try vegan cheese made from nuts or soy, which can add a nice creaminess. Yes, you can make the dough ahead. Wrap it tightly and keep it in the fridge for up to 24 hours. When ready, just cut and bake as usual. If baked, store scones in an airtight container at room temperature for up to two days. For longer storage, freeze them. Just reheat in the oven for a few minutes to bring back the freshness. Savory cheese scones pair well with soups or salads. A rich tomato soup or a fresh garden salad makes a great match. You can also serve them with dips like hummus or a spicy salsa for extra flavor. Consider a spread like herb-infused butter or cream cheese to enjoy on the side. These options elevate your scone experience, making it even more delightful. For more ideas, check the Full Recipe. In this post, we covered how to make delicious cheese scones. We discussed key ingredients, especially the importance of using quality cheese, and optional add-ins like herbs. The step-by-step guide helped you knead the dough and bake it to perfection. We shared tips for achieving a flaky texture and offered serving ideas. Finally, I hope you feel ready to experiment with variations and enjoy fresh scones at home. Your tasty creations await!](https://lisadishes.com/wp-content/uploads/2025/05/114e49dc-e499-45f9-b5b6-09447f836f54-300x300.webp)


Roasted Brussels Sprouts with Balsamic Glaze Delight
Are you ready to transform your vegetable game? Roasted Brussels sprouts with balsamic glaze are here to steal the show! This easy recipe brings…

