
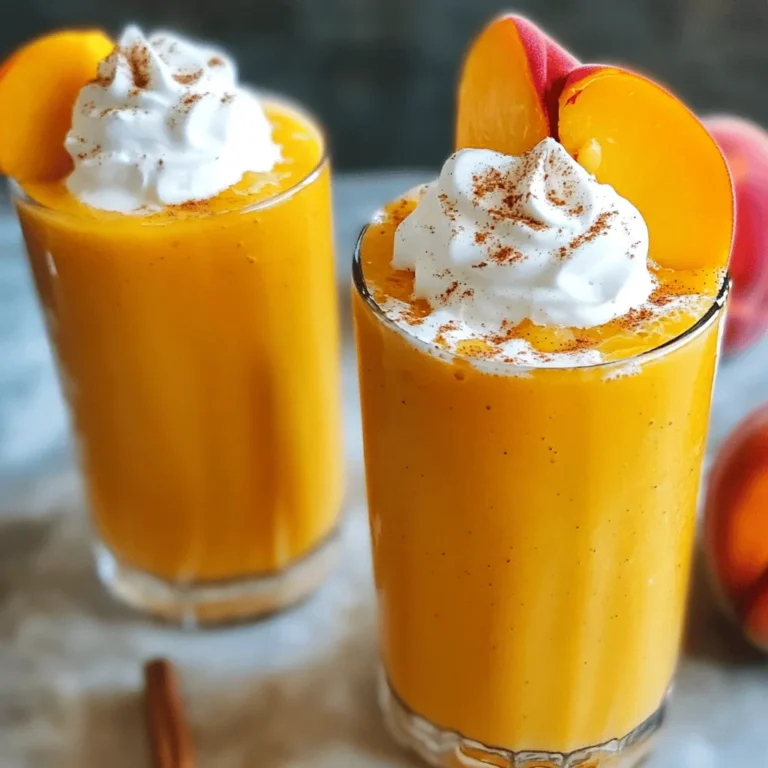
Latest & Greatest

Creamy Parmesan Sausage Ditalini Soup Delight
Get ready to warm your belly with my Creamy Parmesan Sausage Ditalini Soup Delight! This dish is packed with savory
Read more…
Meaty Texas Trash Dip for Bold Flavor Lovers
Are you ready to dive into a world of bold flavors? My Meaty Texas Trash Dip is the ultimate crowd-pleaser.
Read more…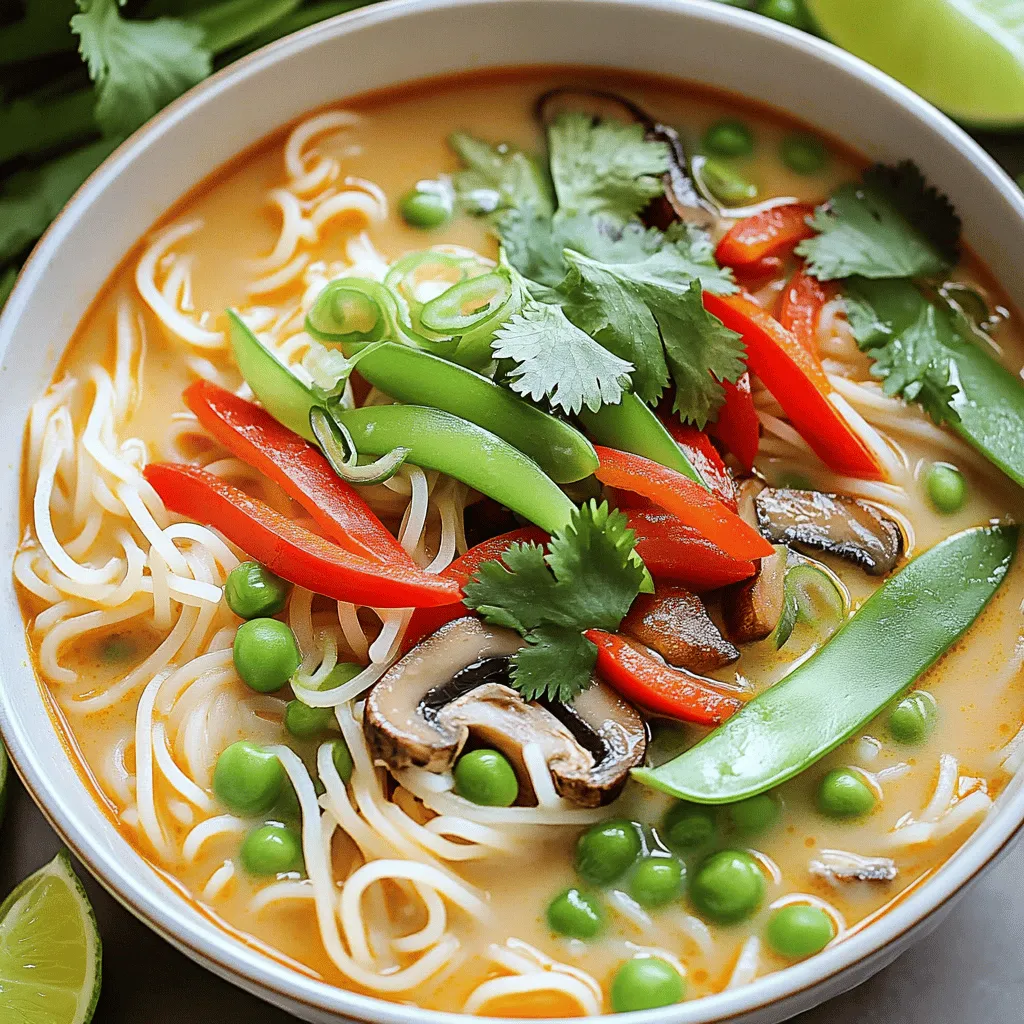
Easy Thai Noodle Soup Comforting and Simple Recipe
Craving a bowl of warm, soothing soup? You’re in the right place! My Easy Thai Noodle Soup recipe is simple
Read more…
Creamy Chicken and Rice Simple Comfort Food Delight
Welcome to your new favorite comfort dish: Creamy Chicken and Rice! This meal will warm your heart and fill your
Read more…
One Pot Chicken and Dirty Rice Flavorful Meal Idea
Looking for a tasty meal that’s easy to make? You’ve found it! One Pot Chicken and Dirty Rice is a
Read more…
Indian Pumpkin Curry Flavorful One Pot Recipe Guide
Are you ready to explore a delicious and simple way to enjoy pumpkin? My Indian Pumpkin Curry recipe is a
Read more…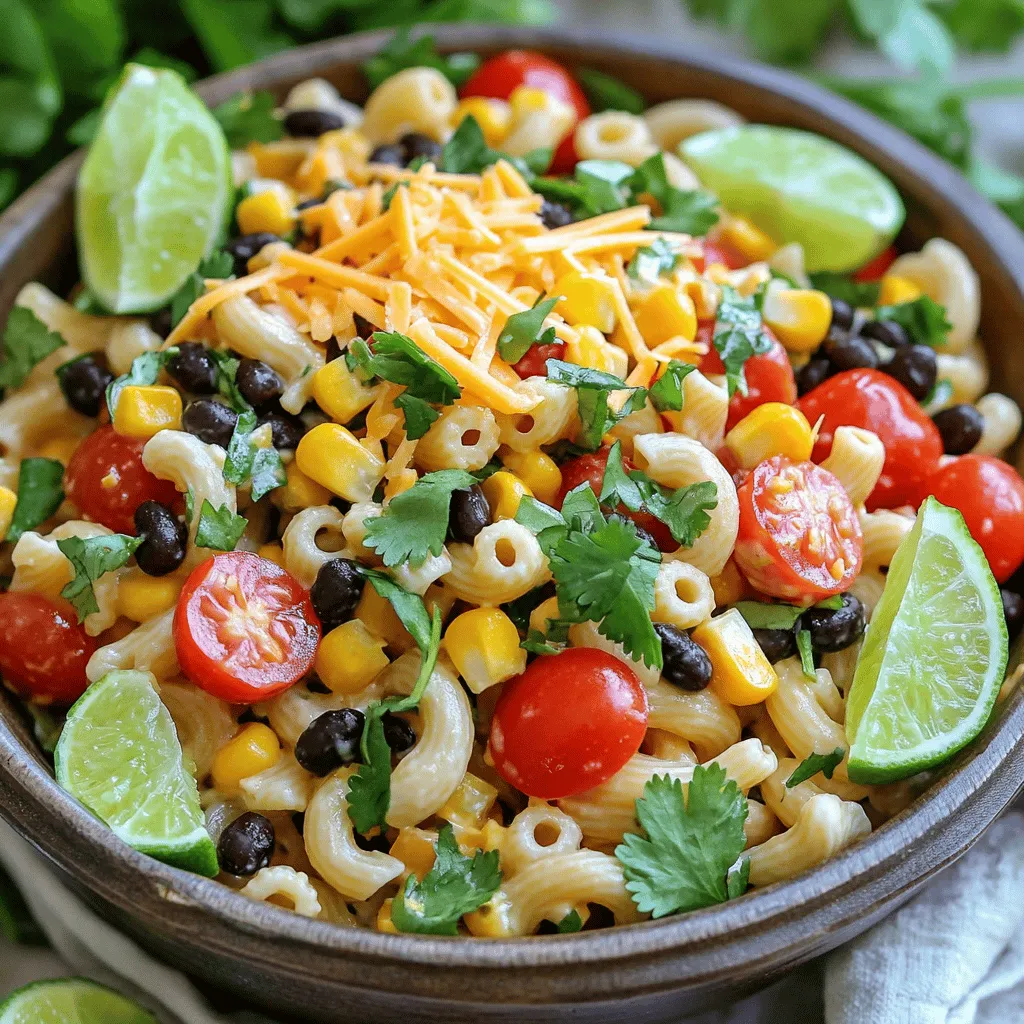
Cowboy Pasta Salad Fresh and Flavorful Delight
Are you ready for a fresh and flavorful dish that screams summer? Cowboy Pasta Salad is the perfect blend of
Read more…
Easy Poke Cake Recipes Simple and Delicious Treats
Looking for a fun and easy dessert? Poke cakes are your answer! They are simple to make and bursting with
Read more…browse recipes


Crispy Oven-Baked Fish Simple and Flavorful Dish
Looking for a simple and tasty dish? You’re in the right place! This Crispy Oven-Baked Fish is easy to make and packed with flavor.…
My Latest Desserts

Pumpkin Spice Energy Bites Tasty and Healthy Snack
Looking for a tasty and healthy snack to fuel your day? This Pumpkin Spice Energy Bites recipe is your answer! Read Full Recipe-
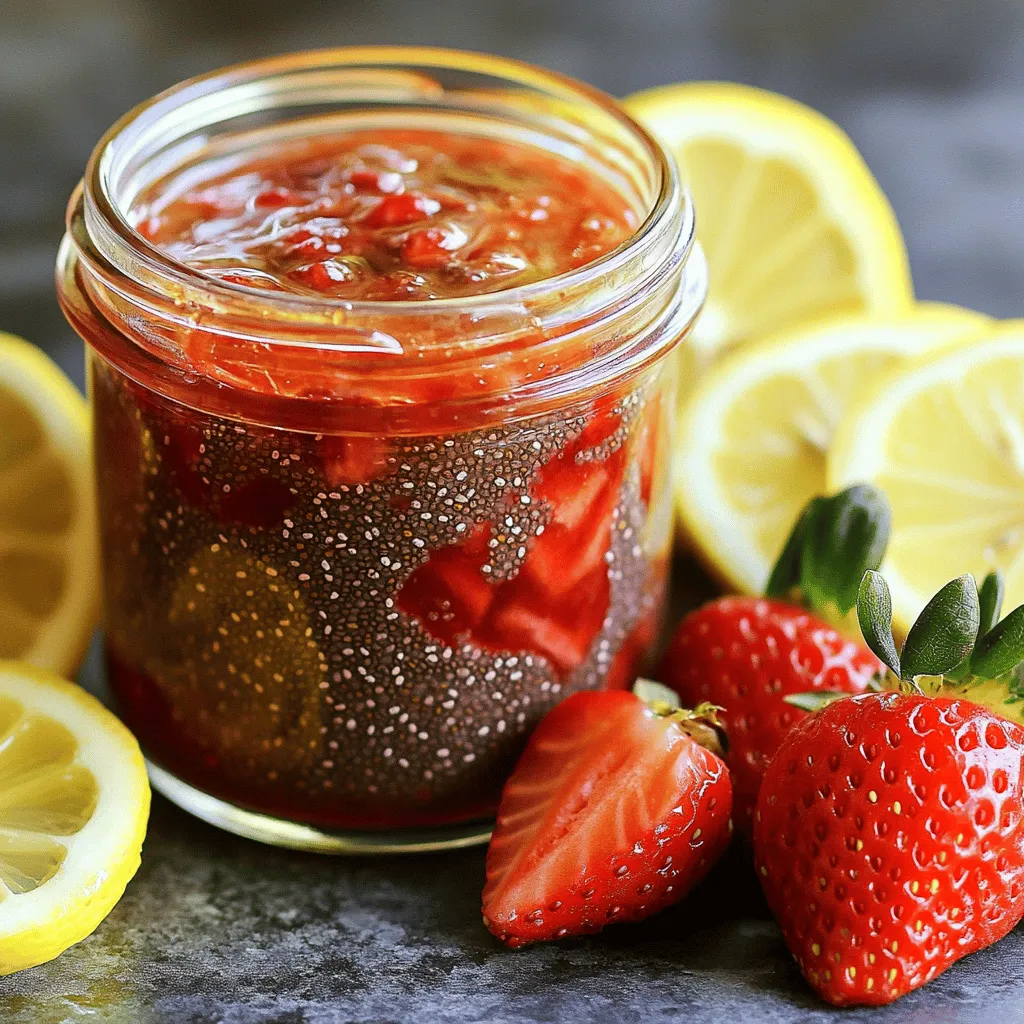
Strawberry Chia Seed Jam Tasty and Healthy Treat
If you’re craving a sweet treat that’s also good for you, I’ve got just the thing: Strawberry Chia Seed Jam! Read Full Recipe -
Pumpkin Spice Muffins Warm and Cozy Fall Treat
Fall is the perfect time for warm and cozy treats, and nothing says autumn like pumpkin spice muffins. These fluffy Read Full Recipe -
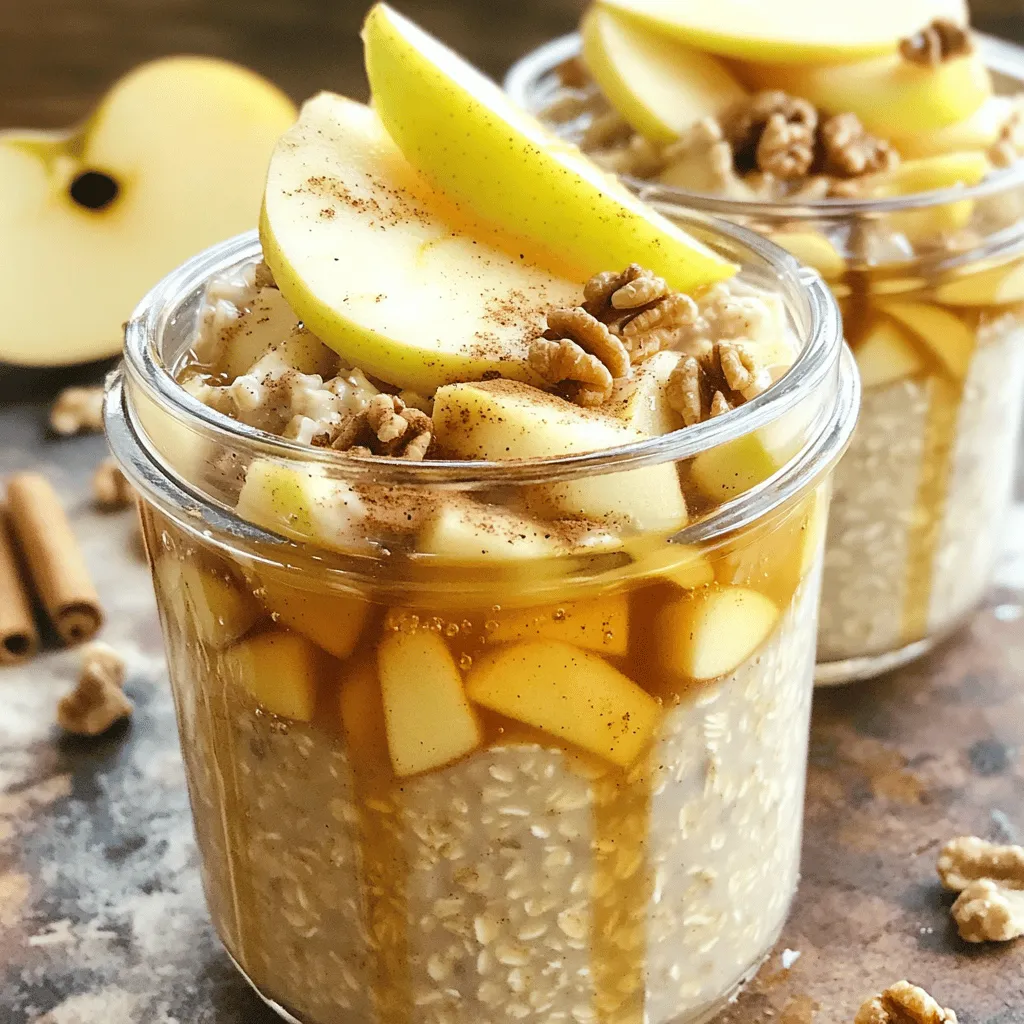
Apple Cinnamon Overnight Oats Healthy Breakfast Option
Looking for a quick and healthy breakfast? You’ve found it! Apple Cinnamon Overnight Oats are the perfect choice for busy Read Full Recipe -
Raspberry Almond Shortbread Bars Simple and Tasty Treat
Looking for a sweet treat that’s easy to make and perfect for any occasion? Raspberry Almond Shortbread Bars are your Read Full Recipe -
Chocolate Covered Strawberry Pops Delightful Treats
Are you ready for a sweet treat? Chocolate Covered Strawberry Pops are delicious and fun to make. I’ll guide you Read Full Recipe -
Fresh Strawberry Yogurt Bark Delicious and Easy Treat
Looking for a quick and tasty treat? Fresh Strawberry Yogurt Bark is your answer! This easy recipe combines creamy Greek Read Full Recipe -
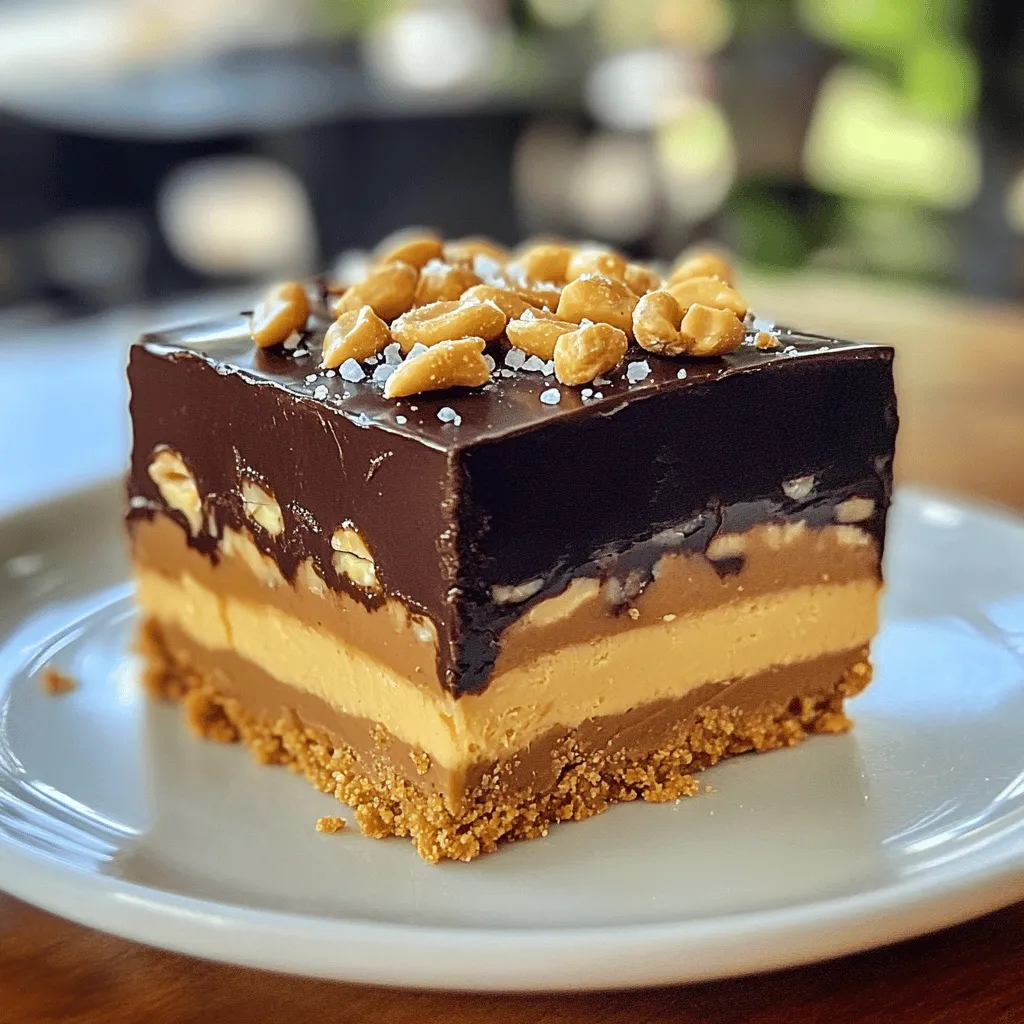
No-Bake Snickers Bars Simple and Decadent Treat
Indulge in a simple and delicious treat with my No-Bake Snickers Bars recipe! These bars come together fast and need Read Full Recipe -
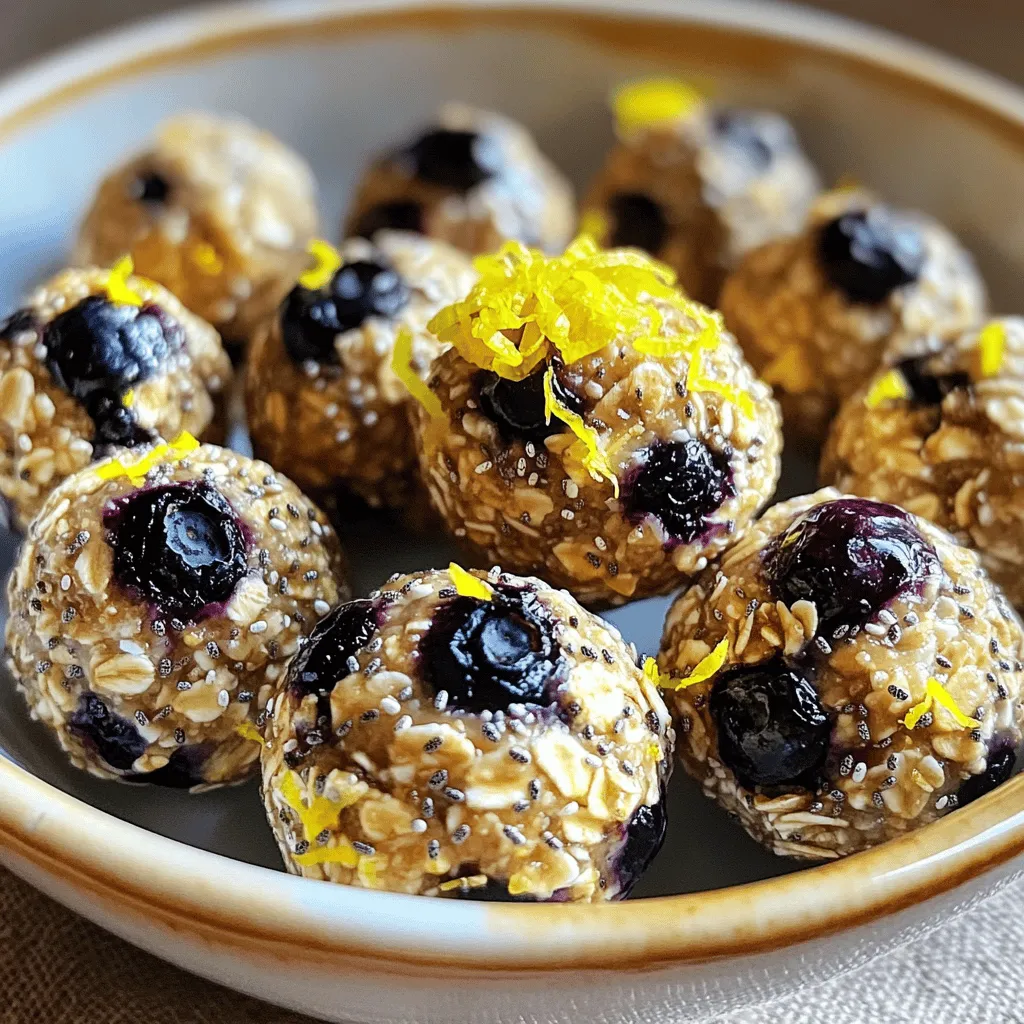
Lemon Blueberry Energy Bites Nourishing Snack Idea
Looking for a tasty, energy-packed snack? Try my Lemon Blueberry Energy Bites! These little balls are the perfect blend of Read Full Recipe -
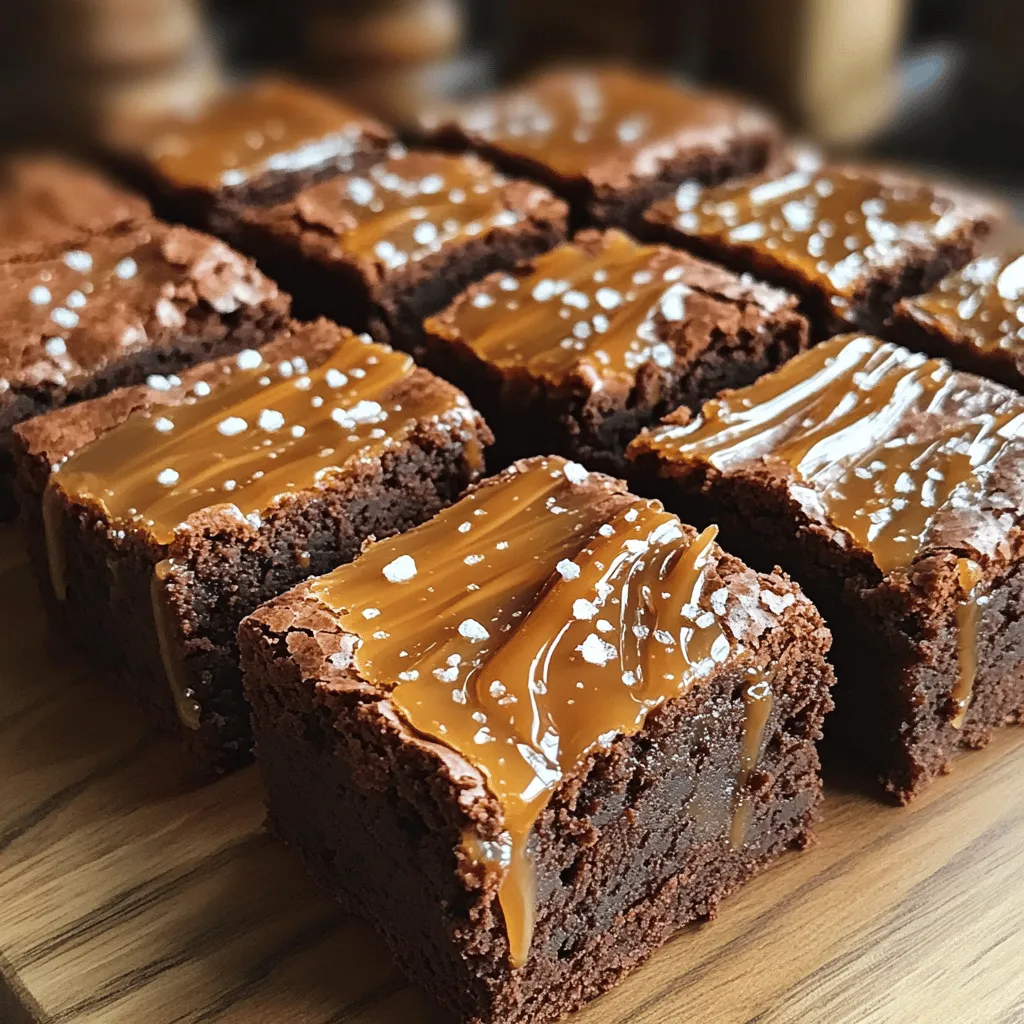
Fudgy Salted Caramel Brownies Rich and Indulgent Treat
Love brownies? Get ready to elevate your dessert game with these Fudgy Salted Caramel Brownies! They combine rich chocolate with Read Full Recipe -
Pumpkin Chocolate Chip Muffins Tasty and Simple Treat
Looking for a delicious treat that’s easy to make? You’re in the right place! These Pumpkin Chocolate Chip Muffins are Read Full Recipe -
Healthy Apple Crisp Flavorful and Nutritious Treat
Are you ready for a delicious treat that’s both flavorful and nutritious? In this post, I’ll show you how to Read Full Recipe


hey,
i’m !
I’m so happy you’re here!
Each recipe I share is a little piece of love from my kitchen. May they fill your heart and home with warmth. Let’s cook up something wonderful together.

![Making Coconut Curry Lentil Soup is simple and fun. You only need a few key ingredients to create this warm and rich dish. Here's what you'll need: - 1 cup red lentils, rinsed - 1 can (14 oz) coconut milk - 4 cups vegetable broth - 1 medium onion, diced - 2 cloves garlic, minced - 1 inch ginger, grated - 1 tablespoon red curry paste - 1 teaspoon turmeric powder - 1 teaspoon cumin powder - 1 bell pepper, diced - 2 cups spinach (fresh or frozen) - 1 tablespoon olive oil - Salt and pepper to taste - Fresh cilantro, for garnish - Lime wedges, for serving These ingredients create a tasty and hearty soup. I love the way the coconut milk adds creaminess. The spices give it a nice kick. Don't forget to check the [Full Recipe] for all the steps to make this delicious soup. 1. First, heat 1 tablespoon of olive oil in a large pot over medium heat. 2. Add the diced onion. Sauté it until it becomes translucent, about 3-4 minutes. The onion should soften and smell sweet. 1. Next, stir in 2 cloves of minced garlic and 1 inch of grated ginger. Cook them for about 1-2 minutes until they smell fragrant. This step adds a nice depth of flavor. 2. Now, mix in 1 tablespoon of red curry paste. Stir it well with the onion mixture. Let it cook for 1-2 minutes to let the flavors develop. 3. Pour in 4 cups of vegetable broth and 1 can (14 oz) of coconut milk. Stir until everything combines. This creates a creamy, rich base. 1. Add 1 cup of rinsed red lentils, 1 teaspoon of turmeric, 1 teaspoon of cumin, and 1 diced bell pepper. Bring the mixture to a boil. 2. Once boiling, reduce the heat to a simmer. Cover the pot and let it cook for 20-25 minutes. Stir occasionally until the lentils are tender. 3. After the lentils are cooked, stir in 2 cups of spinach until it's wilted. Season with salt and pepper to taste. 4. Remove from heat and let the soup rest for a few minutes before serving. You can find the full recipe to make this delicious soup. Enjoy the warmth and flavor of this dish! To make the best coconut curry lentil soup, rinse your lentils well. This step removes dust and small stones. It also helps the lentils cook evenly. You can adjust the curry paste based on your taste. Start with one tablespoon, and add more if you like it spicier. You can add extra spices for more depth. Consider cumin or coriander. Fresh herbs like basil or mint can brighten the dish. For garnishing, use fresh cilantro. A squeeze of lime makes a big difference in taste. Watch the cooking time for lentils. Overcooking can make them mushy. Taste and adjust your seasonings as needed. Don’t skip this step; it’s key for great flavor. Explore the [Full Recipe] for the complete list of ingredients and steps! {{image_2}} You can swap out red lentils for chickpeas or quinoa. Chickpeas add a hearty texture. Quinoa boosts protein and gives a nice crunch. You can also mix in veggies like carrots, zucchini, or mushrooms. Each choice adds a new layer of flavor to your soup. To spice things up, consider adding more heat. Red pepper flakes or fresh chili can make the soup hotter. You can also try different curries. Green curry paste will give a fresh taste, while massaman curry provides a sweet and nutty flavor. This soup can easily become vegan or gluten-free. The recipe is already vegan since it uses coconut milk. For gluten-free, just check your curry paste. You can also lower the calories by using less coconut milk or adding more veggies. This keeps it tasty without the extra fat. To store your leftovers, let the soup cool first. Pour the soup into an airtight container. It keeps well in the fridge for up to five days. Always label your container with the date. This way, you'll know when to enjoy it again! For long-term storage, freezing works great. Use a freezer-safe container or zip-top bag. Leave some space at the top of the container, as the soup will expand when frozen. Your soup can last up to three months in the freezer. When you're ready to eat, thaw it in the fridge overnight. To reheat frozen soup, warm it on the stove over low heat. Stir often to prevent sticking. You can also use the microwave, but stir halfway through to heat it evenly. This soup pairs well with many side dishes. Try serving it with crusty bread for dipping. Rice is another excellent option, as it soaks up the flavors. You can also add a simple salad for freshness. Each bite will be a delight! Coconut curry lentil soup lasts about 4 to 5 days in the fridge. Make sure to store it in a tightly sealed container. If you freeze it, it can last up to 3 months. Just thaw it overnight in the fridge before reheating. Yes, you can make this soup ahead of time. Prepare the soup and let it cool completely. Then, store it in the fridge or freeze it. If you freeze it, portion it out for easy meals later. Reheat it on the stove or in the microwave before serving. If you want to avoid coconut milk, try almond milk or soy milk. Both can add creaminess to the soup. You can also use vegetable broth with a splash of olive oil for richness. Remember to adjust seasonings to match your choice! This blog post covered making a delicious coconut curry lentil soup. We listed the essential ingredients, shared step-by-step cooking instructions, and highlighted tips for perfecting your dish. Remember to rinse your lentils and adjust flavors to your taste. You can also swap ingredients and make it fit your diet. Don’t be afraid to get creative with flavors and variations. Enjoy this warming soup, and share it with friends and family. Happy cooking!](https://lisadishes.com/wp-content/uploads/2025/05/1ed8cadb-5150-4aaa-9830-007084de16a5-300x300.webp)

. {{image_2}} You can easily make these cookies gluten-free. Instead of almond flour, use gluten-free oat flour. This keeps the texture light and fluffy. You can also try using coconut flour. Just remember, coconut flour absorbs more moisture. You may need to adjust the liquid in the recipe to keep it moist. To make these cookies vegan, swap honey for maple syrup. This simple change keeps the sweetness while making it plant-based. You can also use applesauce instead of coconut oil. This adds moisture and sweetness without any animal products. Just use 1/4 cup of unsweetened applesauce in place of the oil. Adding spices can elevate the flavor of your cookies. Try mixing in cinnamon or nutmeg for a warm taste. A pinch of ginger gives a nice kick too. You can also add a dash of vanilla extract for a deeper flavor. These small changes can transform the cookies into a unique treat. For the complete recipe, check out the Full Recipe section. To keep your healthy blueberry cookies fresh, place them in an airtight container. Make sure they cool completely before you store them. This helps prevent sogginess. Store the cookies at room temperature for up to five days. If you want to enjoy them longer, consider freezing them. Freezing is a great way to save your cookies for later. First, let the cookies cool down fully. Then, arrange them in a single layer on a baking sheet. Place the baking sheet in the freezer for about two hours. This step helps the cookies freeze without sticking. Once frozen, transfer them to a freezer bag or container. They can last up to three months in the freezer. To keep your cookies fresh and tasty, follow these tips: - Use parchment paper between layers if stacking cookies. - Keep cookies away from heat and moisture. - For chewy cookies, add a slice of bread to the container. - For a fun twist, try adding a little citrus zest to enhance flavor. By following these tips, your healthy blueberry oatmeal cookies will always be a delightful treat! For the full recipe, check the previous sections. Yes, you can use frozen blueberries. They work well in this recipe. Just remember to gently fold them into the dough while still frozen. This helps keep the dough from turning blue. Frozen blueberries may release more juice, giving the cookies a nice color and taste. To make cookies chewy, add a little extra honey or maple syrup. You can also use more oats. For crispy cookies, bake them a bit longer. Keep an eye on them. If you like, you can flatten the dough more before baking. This helps them spread. Blueberries are very healthy. They are full of vitamins and antioxidants. These help our bodies fight off sickness. Blueberries may also boost brain health. Eating them can improve memory and mood. They are low in calories, making them a smart choice for snacks. This blog covered how to make healthy blueberry cookies, from essential ingredients to serving tips. We discussed step-by-step instructions and variations to fit your needs. Remember to store your cookies well to keep them fresh. If you want to try something new, consider the gluten-free or vegan options. With these ideas, you'll make delicious cookies that everyone loves. Enjoy baking and sharing your tasty treats!](https://lisadishes.com/wp-content/uploads/2025/06/e590740f-2b44-4cfa-ab8c-6f04f7f3f2f4-300x300.webp)
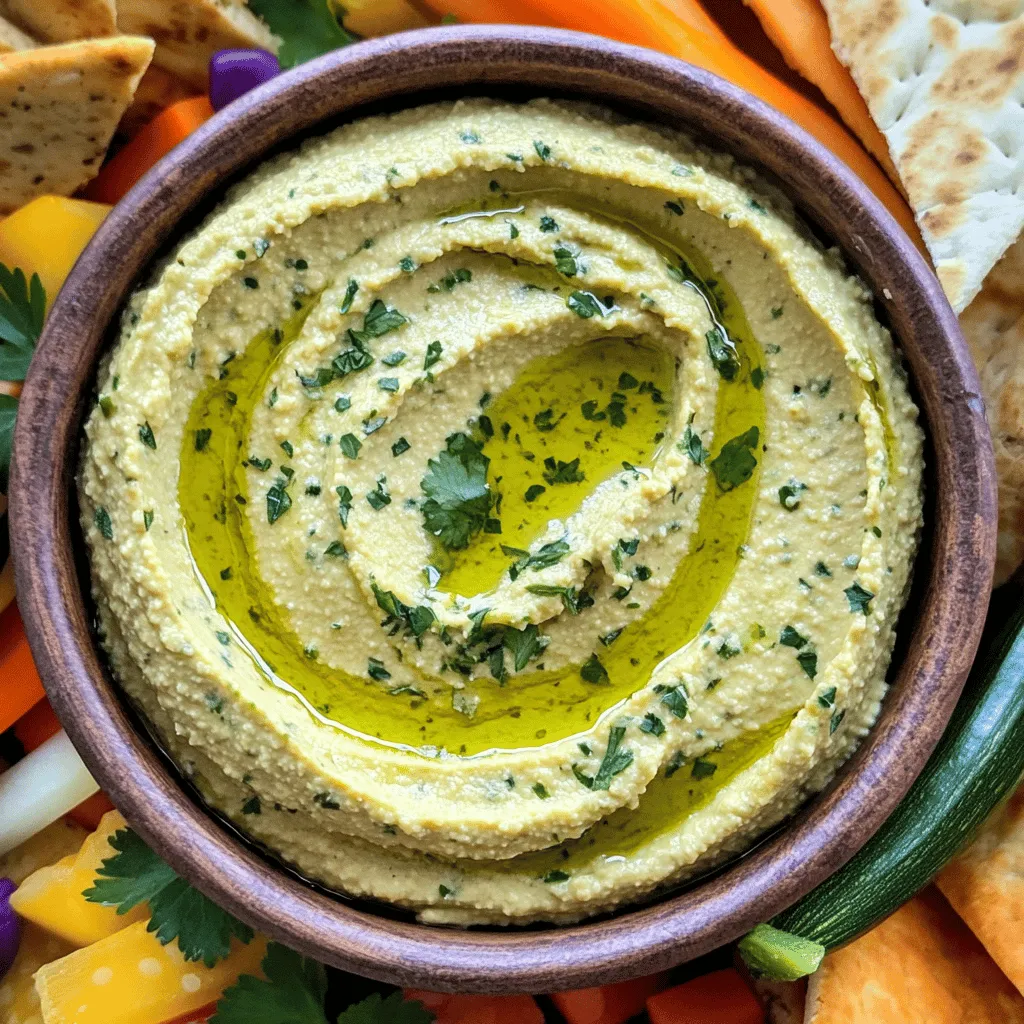
Easy Hummus Recipe Simple and Flavorful Delight
If you’re looking for a quick and tasty snack, this easy hummus recipe is perfect for you! I’ll show you how to create a…
My Latest Dinners
-
Barbecue Chicken Pizza Delightful and Easy Recipe
Craving a tasty and easy meal? Barbecue Chicken Pizza is the answer! This delightful dish combines tender chicken, zesty barbecue Read Full Recipe -
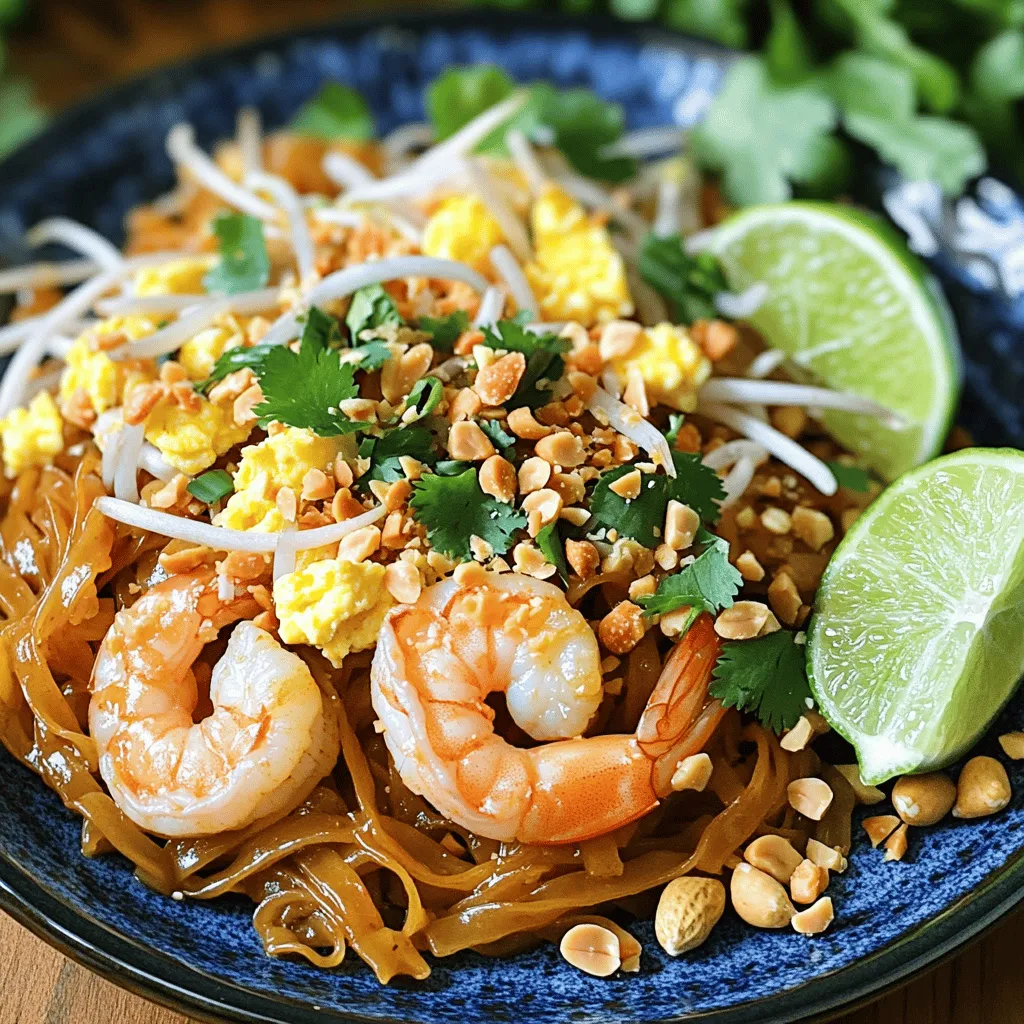
Easy Pad Thai Simple and Flavorful Home Recipe
Craving a delicious meal that’s easy to make at home? Look no further! In this post, I’ll guide you through Read Full Recipe -
Jalapeño Popper Chicken Flavorful and Easy Recipe
If you crave a dish that’s packed with flavor but easy to make, you’ll love Jalapeño Popper Chicken. This recipe Read Full Recipe -
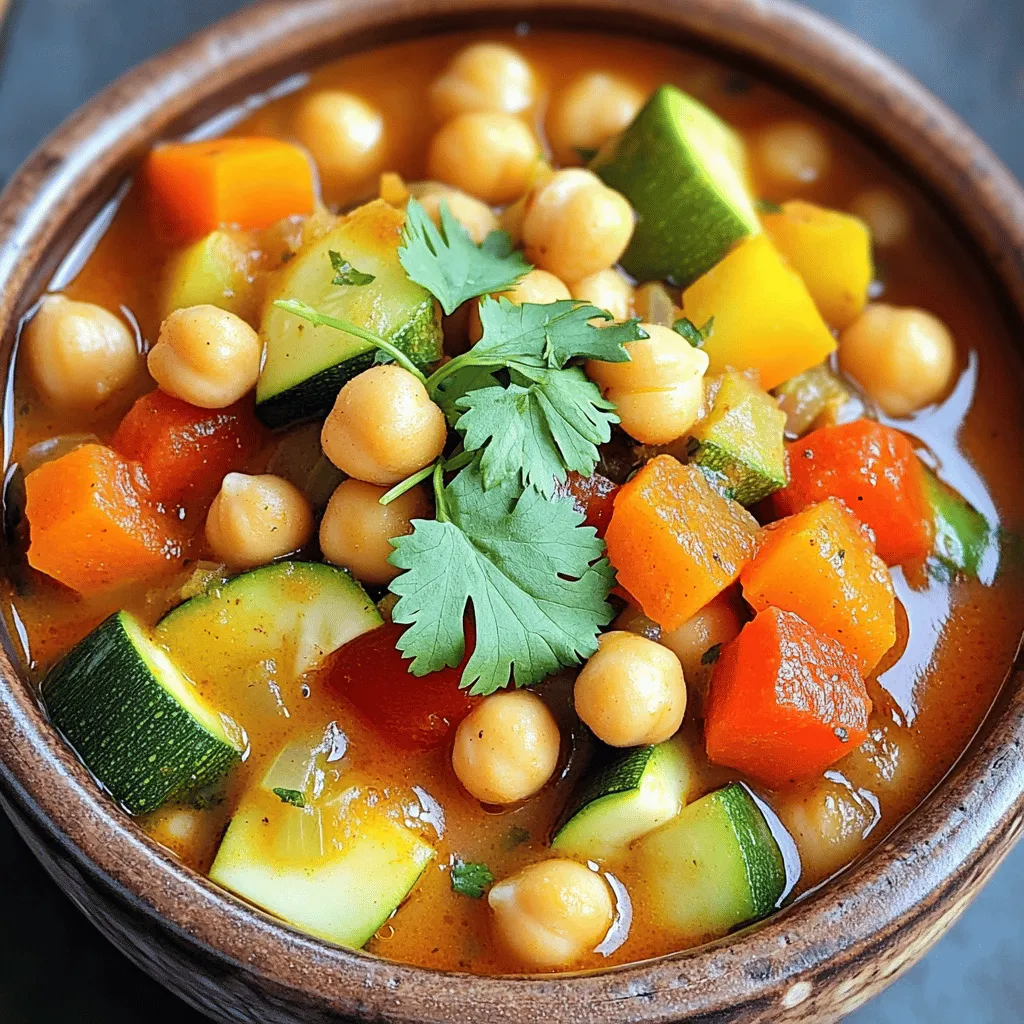
Moroccan Chickpea Stew Flavorful and Hearty Meal
Are you ready to enjoy a hearty meal that bursts with flavor? Moroccan Chickpea Stew is a delicious blend of Read Full Recipe -
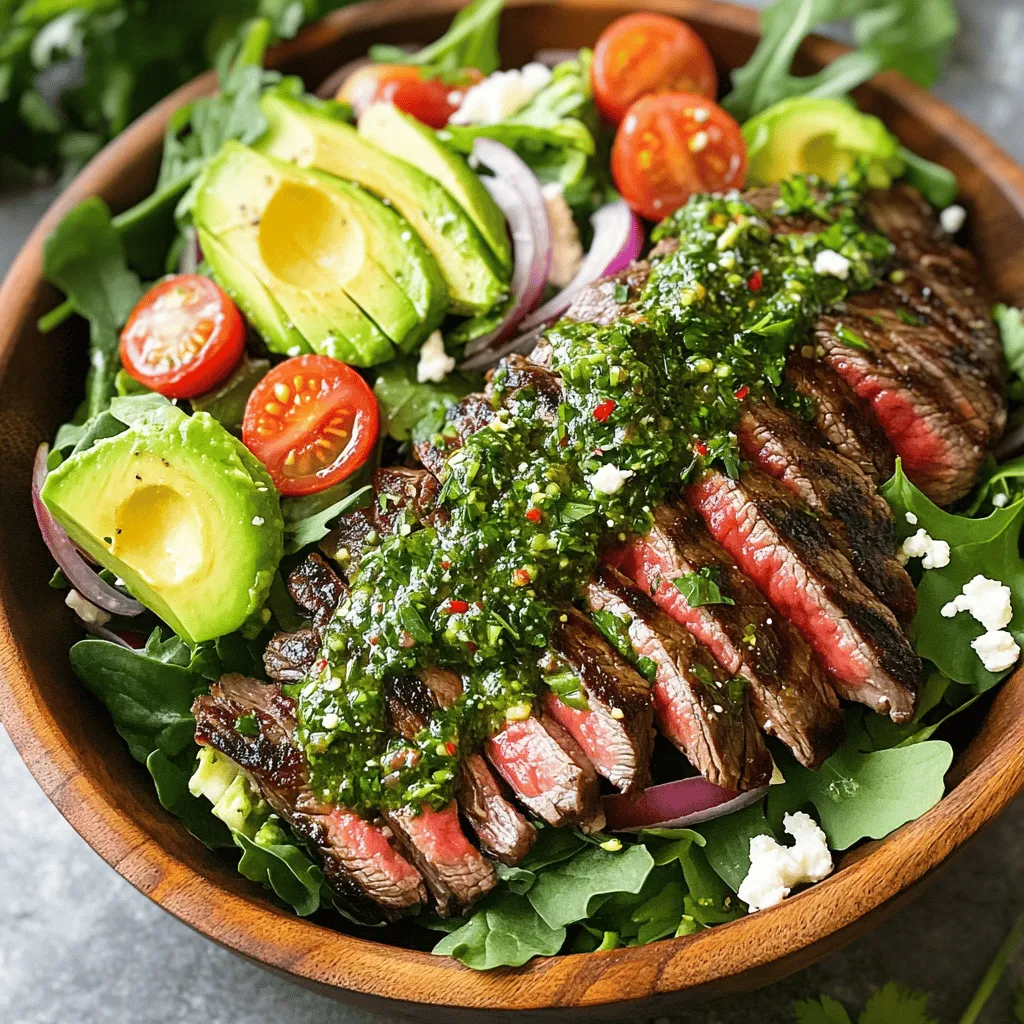
Chimichurri Steak Salad Fresh and Flavorful Meal
Looking for a fresh and flavorful meal? You’ve come to the right place! This Chimichurri Steak Salad combines juicy steak Read Full Recipe -
Eggplant Parmesan Stacks Flavorful and Easy Recipe
If you crave a dish that’s both tasty and easy to make, you’ll love Eggplant Parmesan Stacks. This fun twist Read Full Recipe