

Latest & Greatest

Crispy Greek Chicken Tenders Flavorful Easy Delight
If you’re craving a tasty, easy meal, these crispy Greek chicken tenders are a must-try! Packed with flavor from simple
Read more…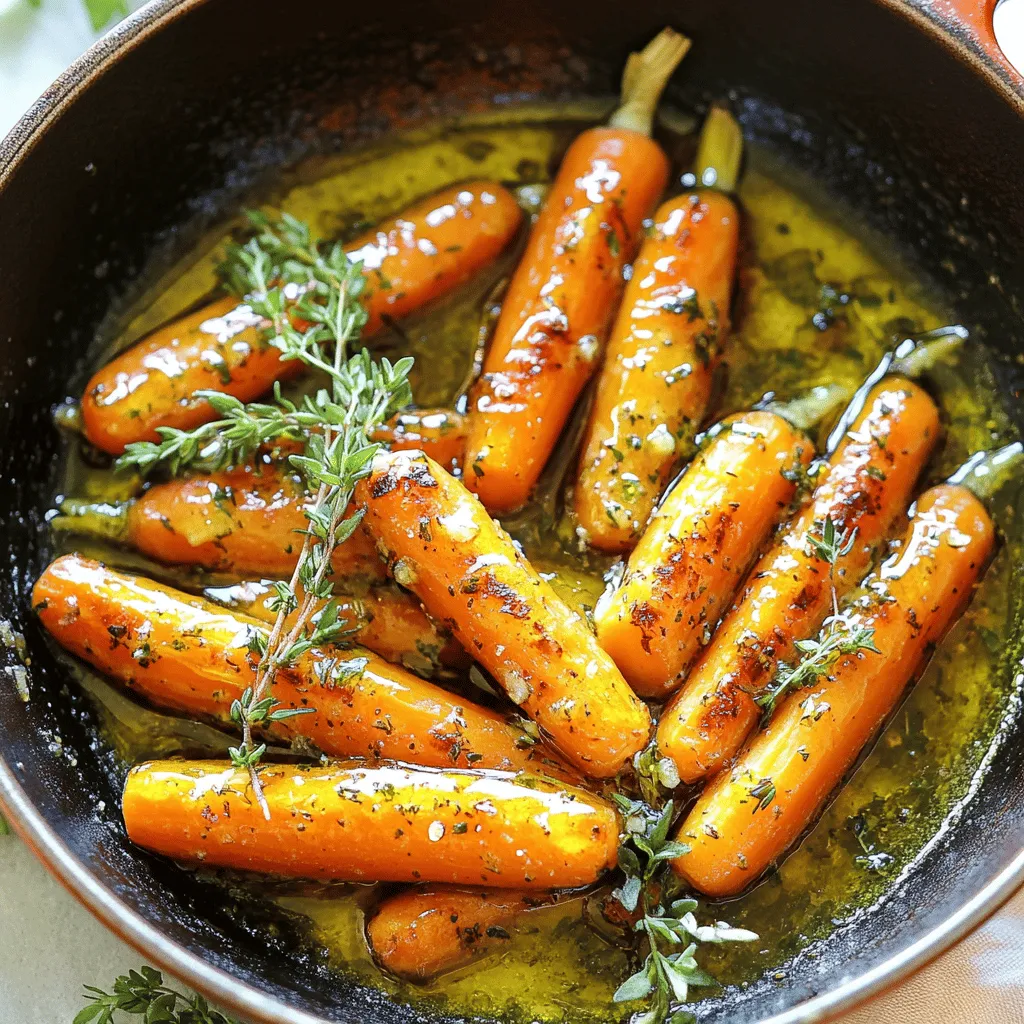
Honey Garlic Butter Carrots Simple and Tasty Dish
Looking for a quick, tasty side dish? Honey Garlic Butter Carrots are here to save your mealtime! With just a
Read more…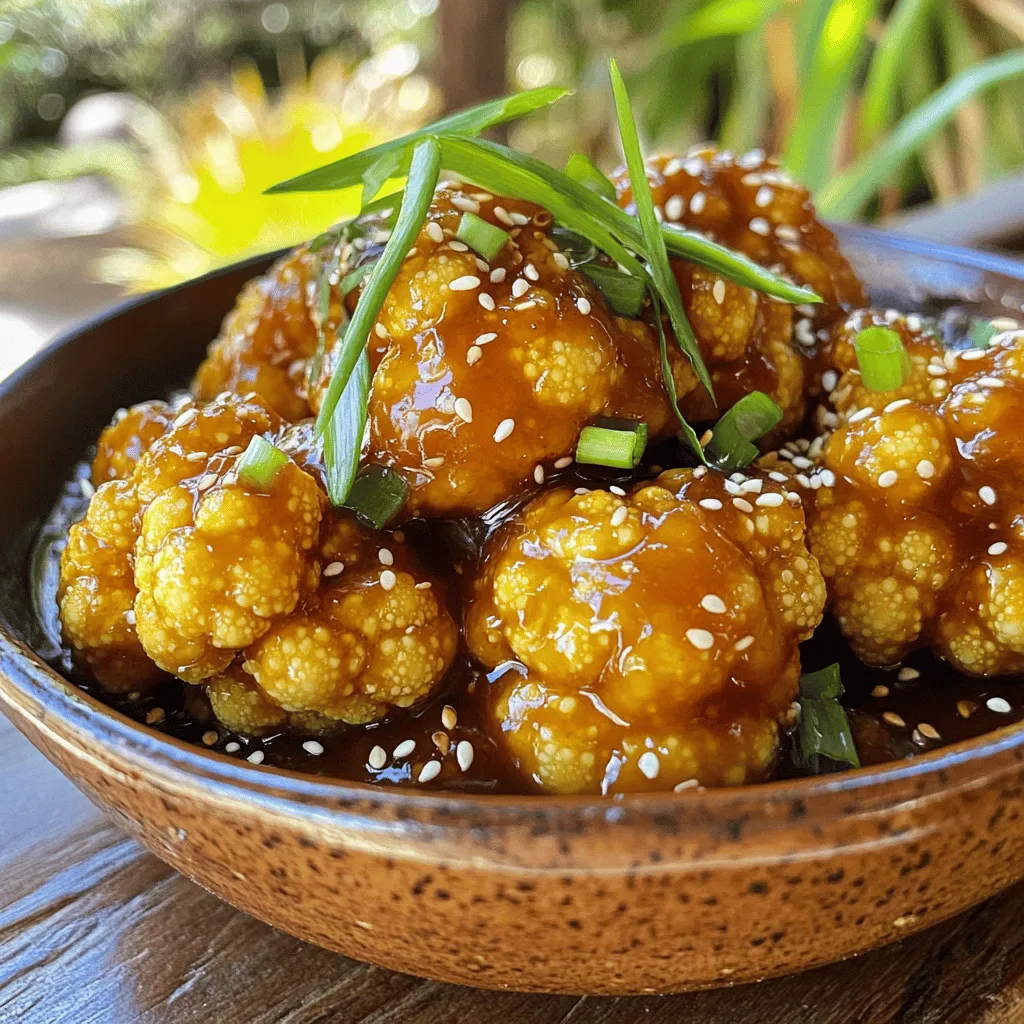
General Tso’s Cauliflower Easy and Flavorful Recipe
Are you ready to turn your dinner into a flavorful feast? In this easy recipe for General Tso’s Cauliflower, I’ll
Read more…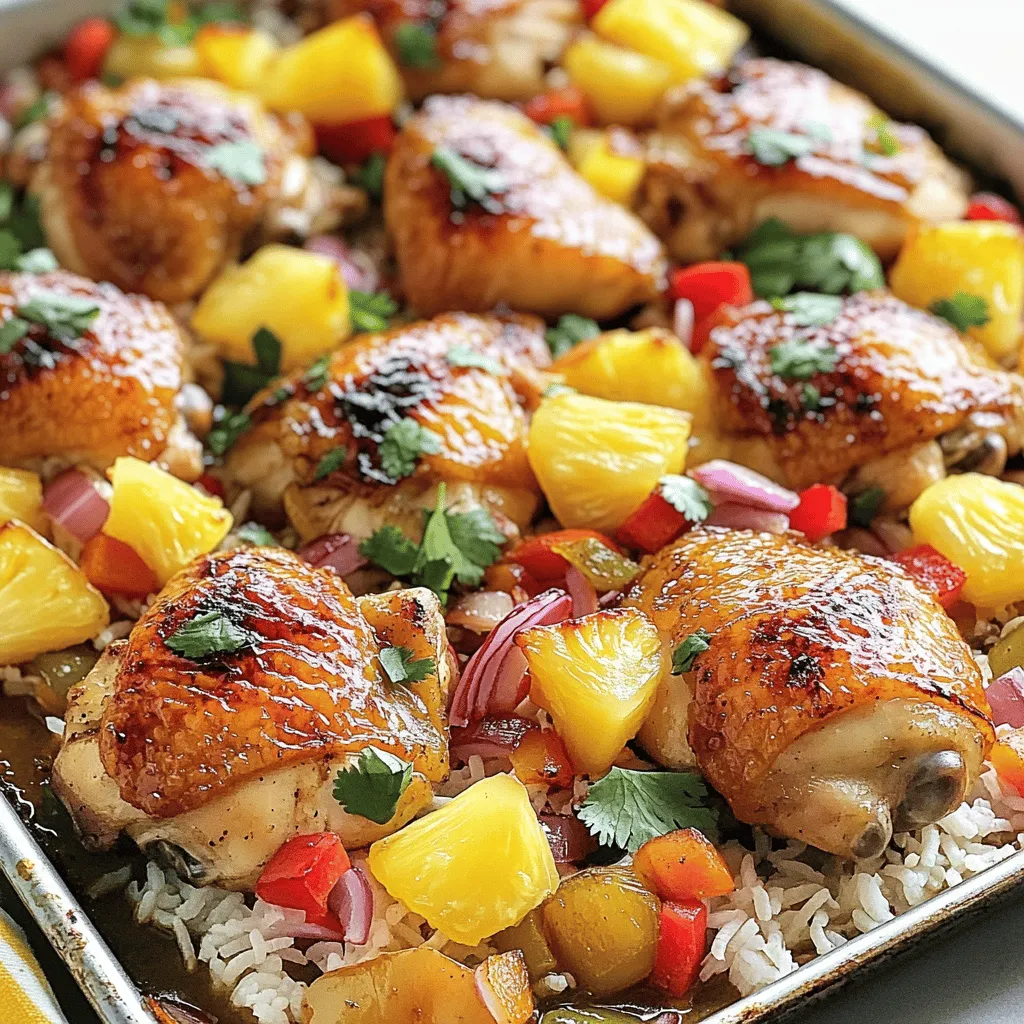
Sheet Pan Hawaiian Chicken Easy and Flavorful Meal
Looking for a quick and tasty dinner idea? You’ve come to the right place! Sheet Pan Hawaiian Chicken is an
Read more…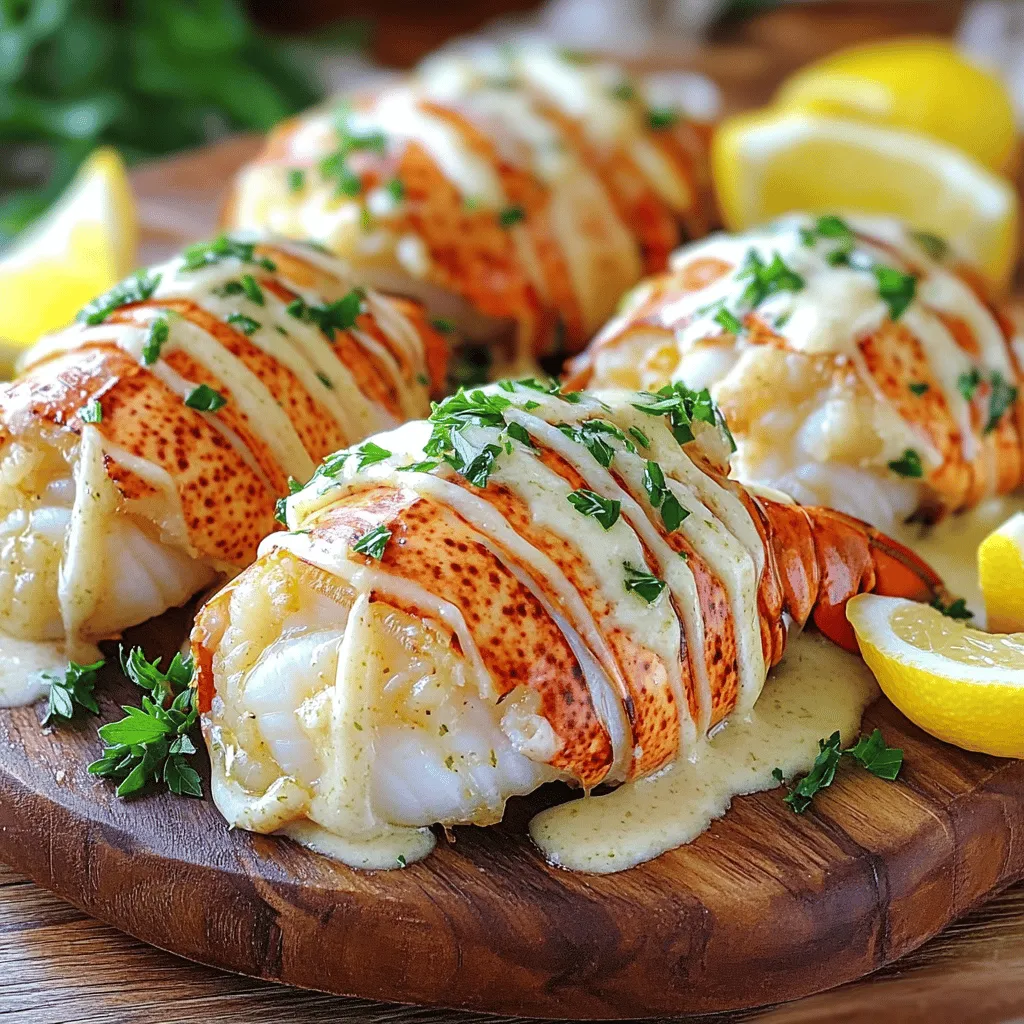
Creamy Garlic Butter Lobster Tails Delightful Dinner
Get ready to impress at dinner with Creamy Garlic Butter Lobster Tails! This dish is simple and full of rich
Read more…
Mouthwatering Mongolian Beef Noodles Easy Stir-Fry Recipe
Craving a tasty dish that’s quick and easy? Look no further! My Mouthwatering Mongolian Beef Noodles recipe will satisfy your
Read more…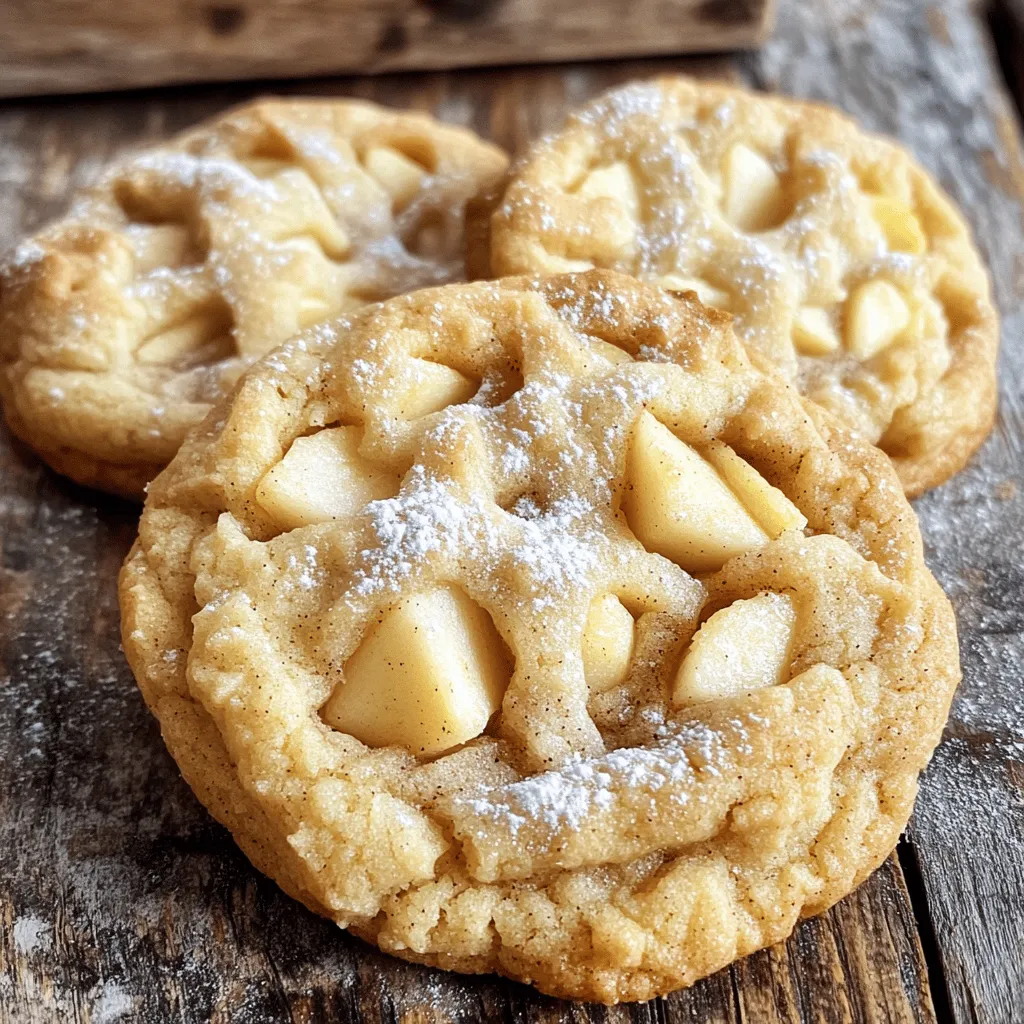
Perfect Apple Pie Cookies Simple and Tasty Treat
Craving a delicious dessert that combines warm apples with a flaky cookie? You’re in for a treat! These Perfect Apple
Read more…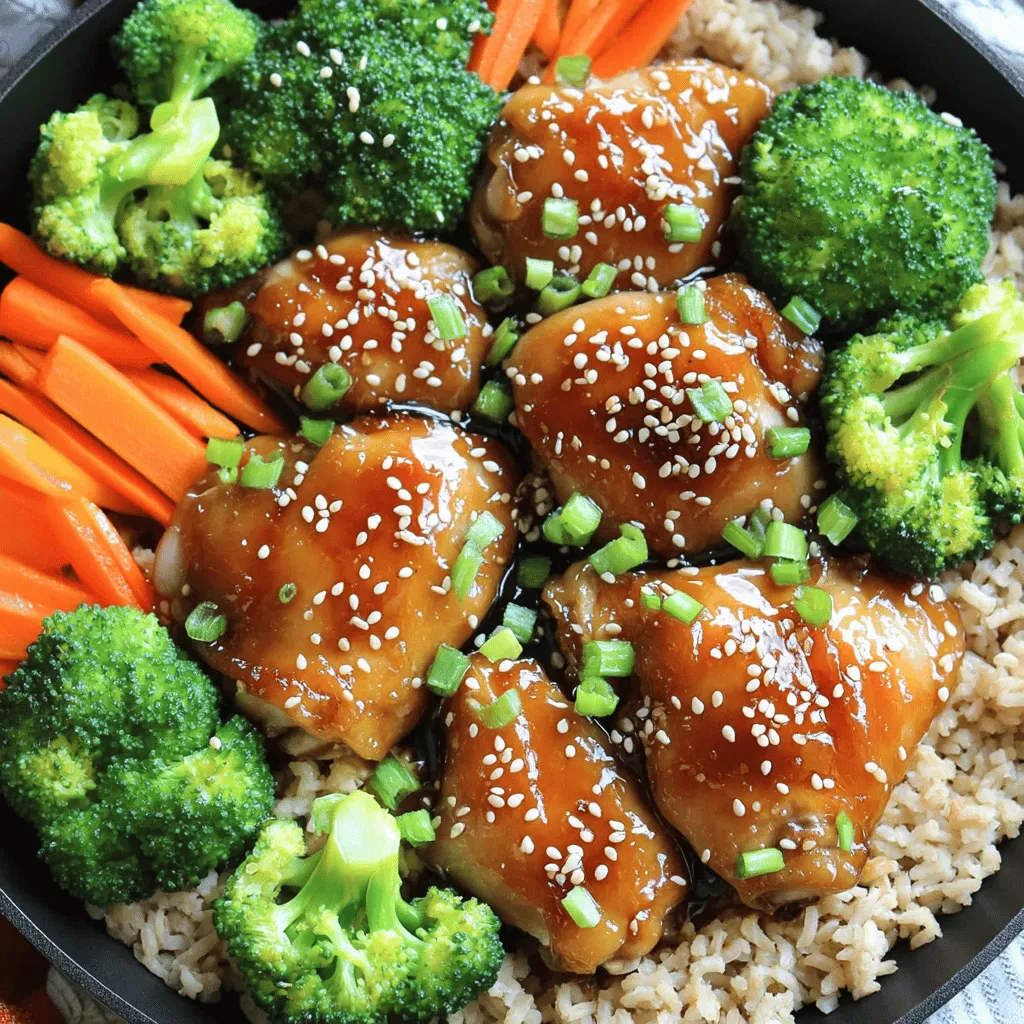
Easy Teriyaki Chicken Meal Prep Quick and Simple Dish
If you’re looking for a quick and tasty meal prep option, you’ve found it! This Easy Teriyaki Chicken recipe is
Read more…browse recipes


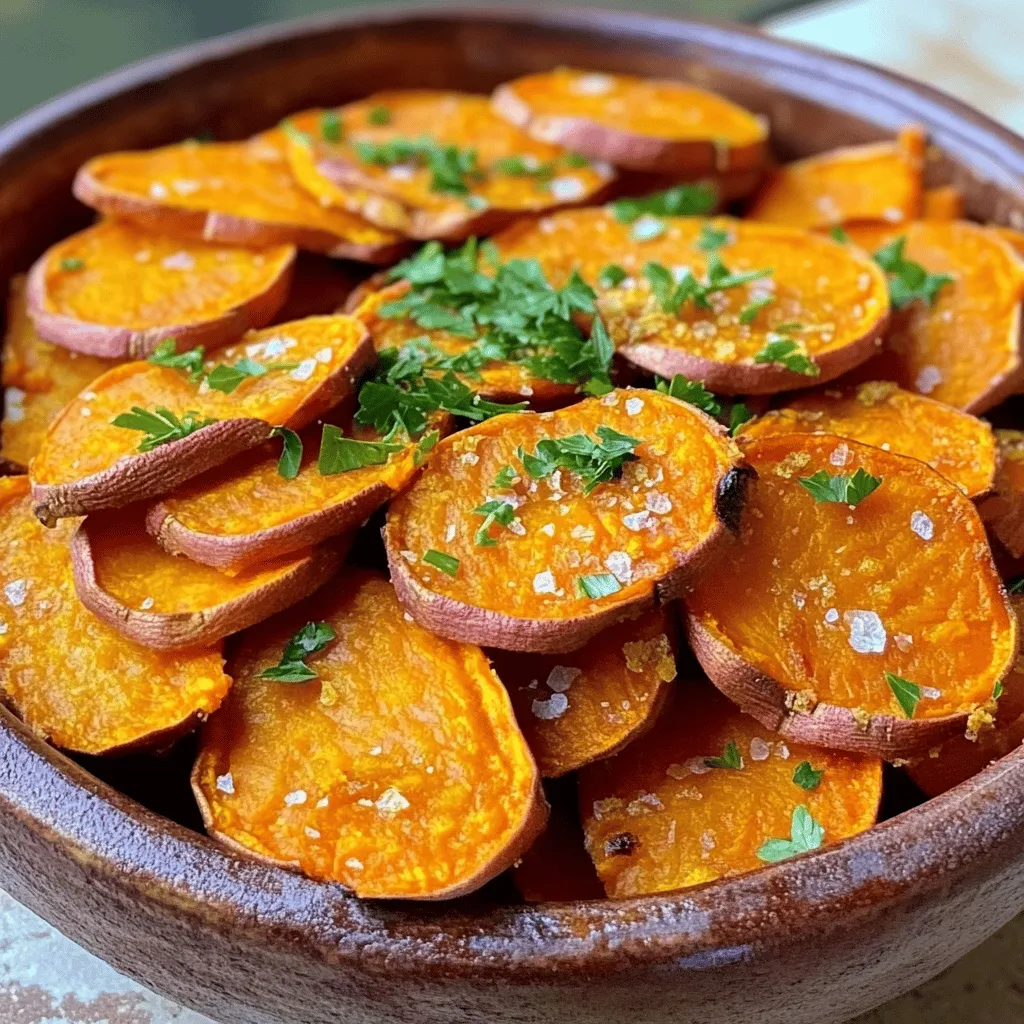
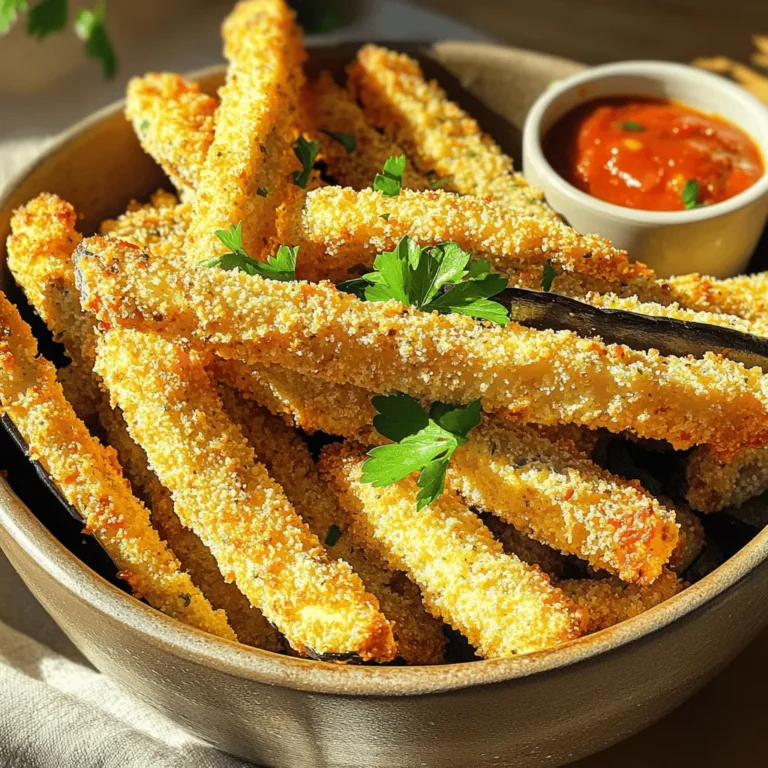
Baked Sweet Potato Fries Crunchy and Flavorful Snack
If you love a crunchy snack that bursts with flavor, you need to try baked sweet potato fries! These fries are easy to make…
My Latest Desserts

Pumpkin Spice Energy Bites Tasty and Healthy Snack
Looking for a tasty and healthy snack to fuel your day? This Pumpkin Spice Energy Bites recipe is your answer! Read Full Recipe-
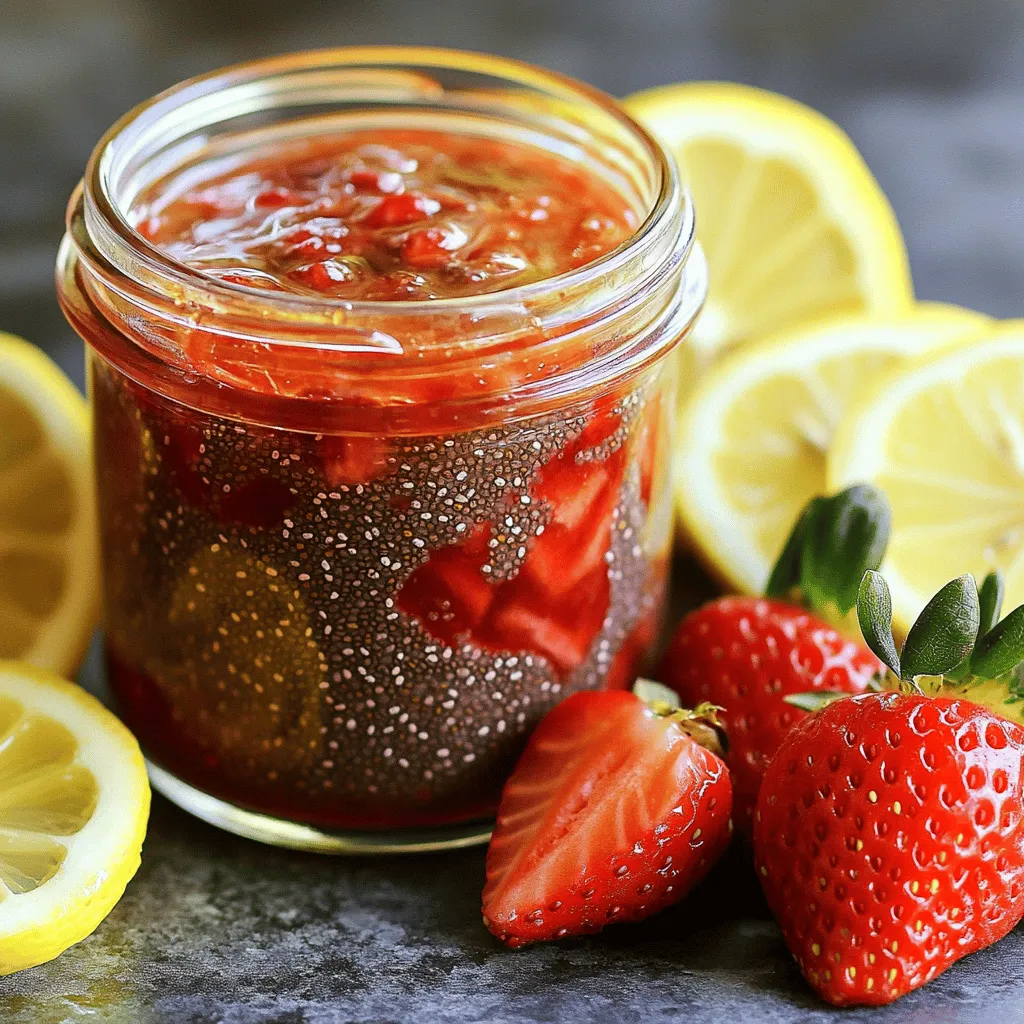
Strawberry Chia Seed Jam Tasty and Healthy Treat
If you’re craving a sweet treat that’s also good for you, I’ve got just the thing: Strawberry Chia Seed Jam! Read Full Recipe -
Pumpkin Spice Muffins Warm and Cozy Fall Treat
Fall is the perfect time for warm and cozy treats, and nothing says autumn like pumpkin spice muffins. These fluffy Read Full Recipe -
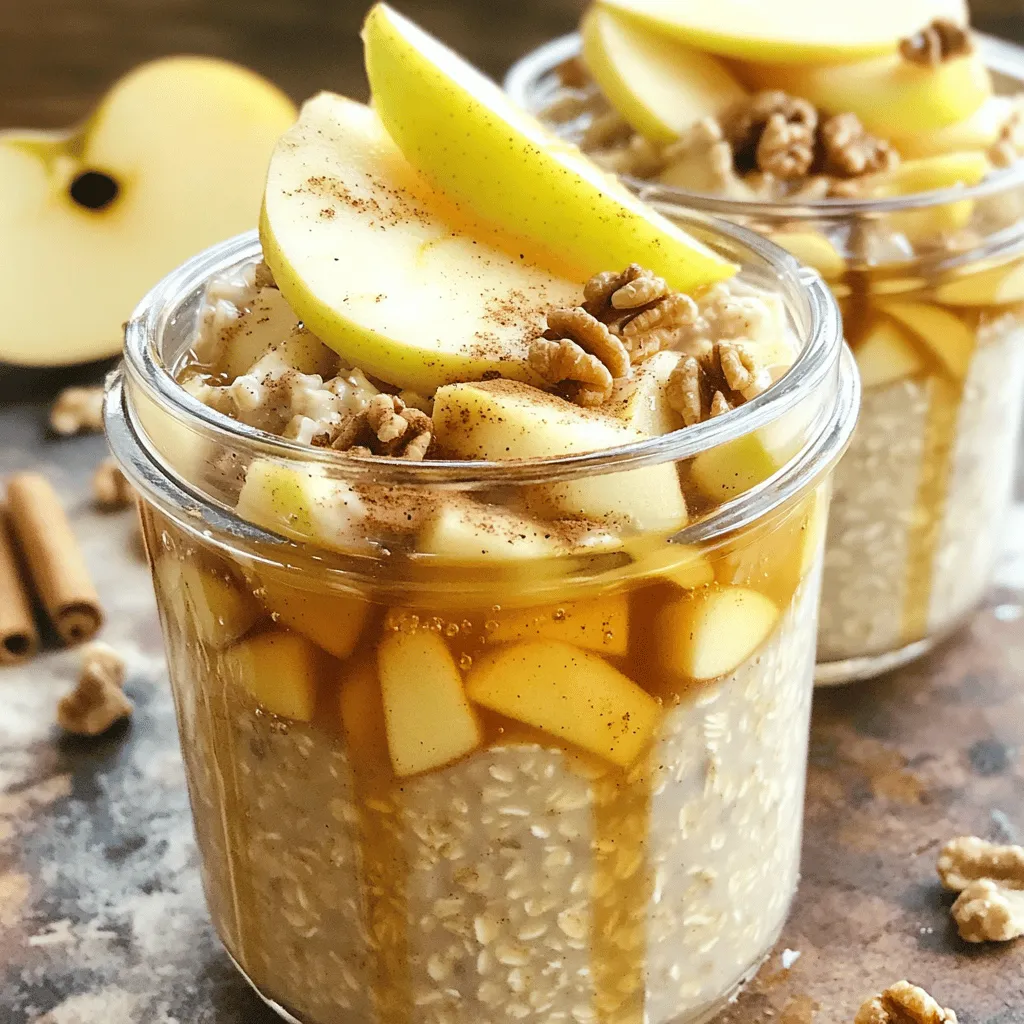
Apple Cinnamon Overnight Oats Healthy Breakfast Option
Looking for a quick and healthy breakfast? You’ve found it! Apple Cinnamon Overnight Oats are the perfect choice for busy Read Full Recipe -
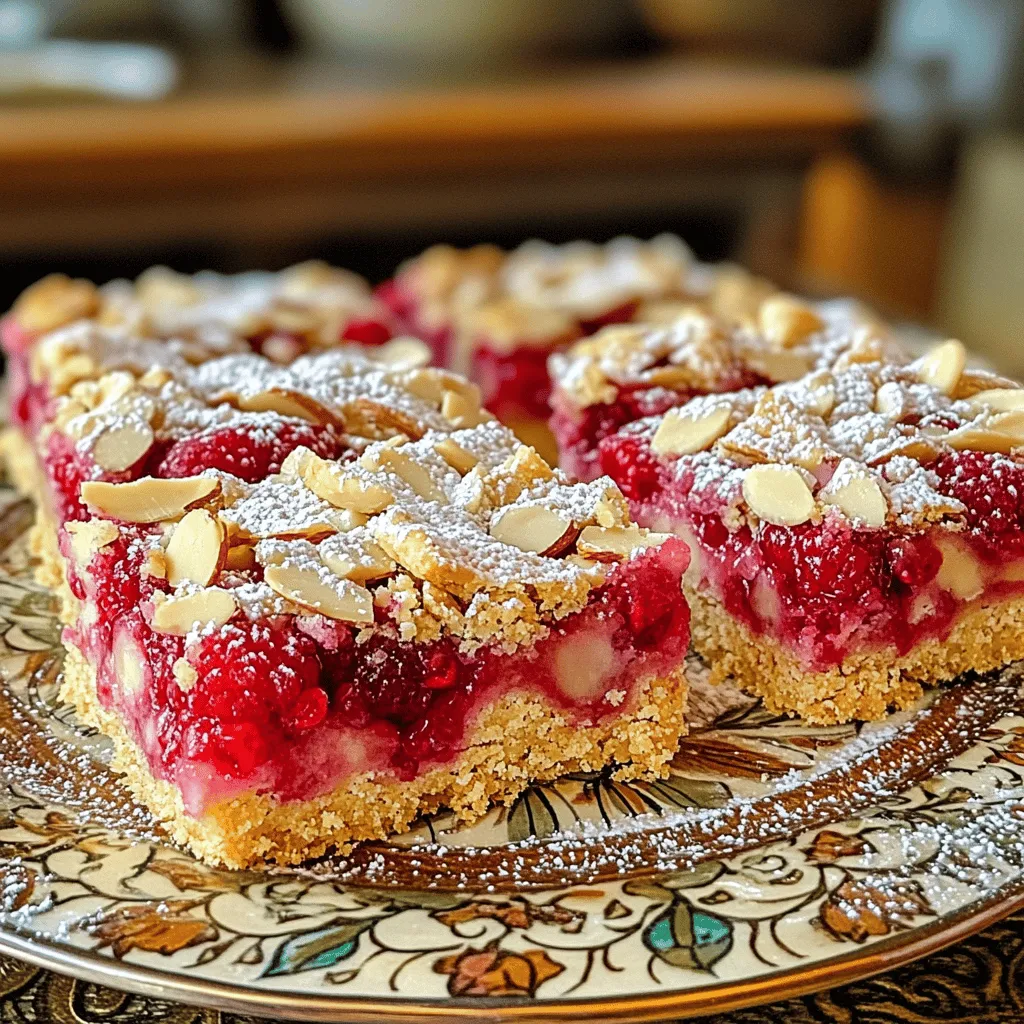
Raspberry Almond Shortbread Bars Simple and Tasty Treat
Looking for a sweet treat that’s easy to make and perfect for any occasion? Raspberry Almond Shortbread Bars are your Read Full Recipe -
Chocolate Covered Strawberry Pops Delightful Treats
Are you ready for a sweet treat? Chocolate Covered Strawberry Pops are delicious and fun to make. I’ll guide you Read Full Recipe -
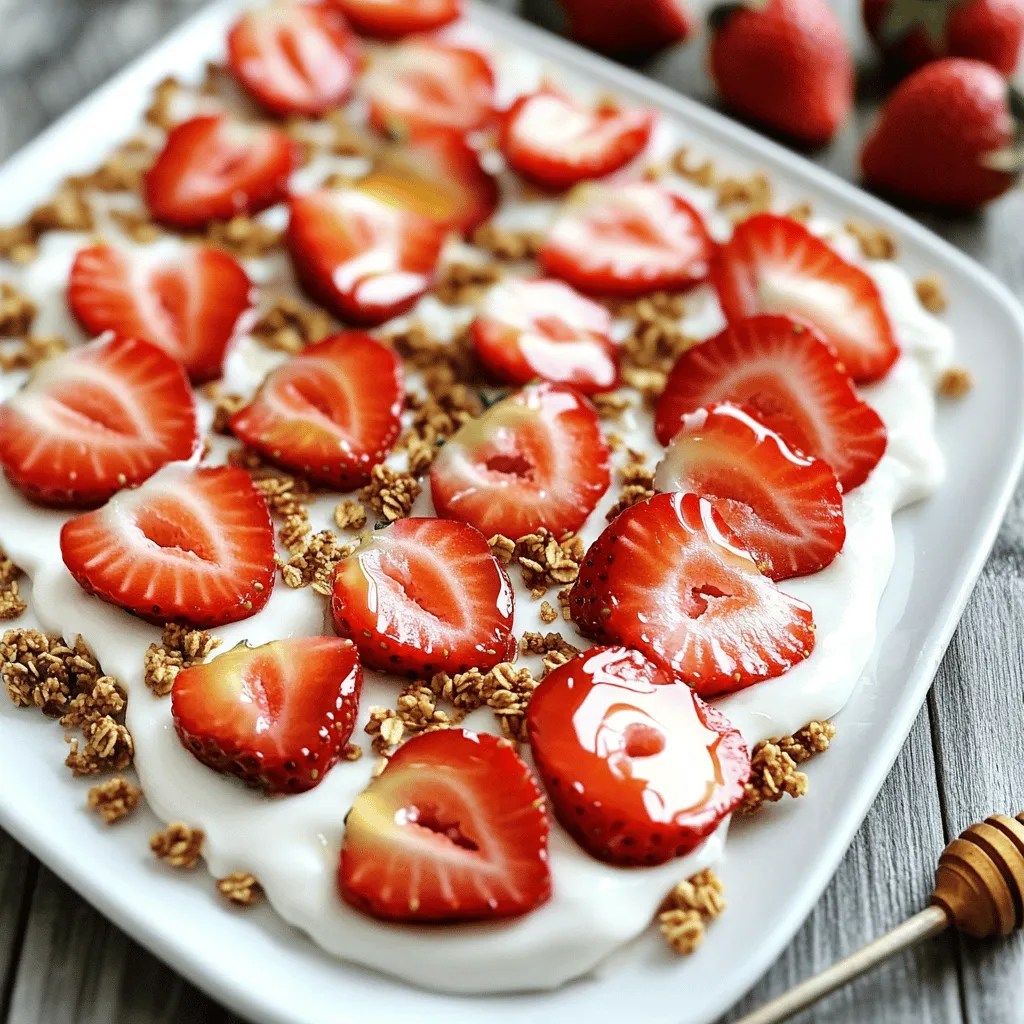
Fresh Strawberry Yogurt Bark Delicious and Easy Treat
Looking for a quick and tasty treat? Fresh Strawberry Yogurt Bark is your answer! This easy recipe combines creamy Greek Read Full Recipe -
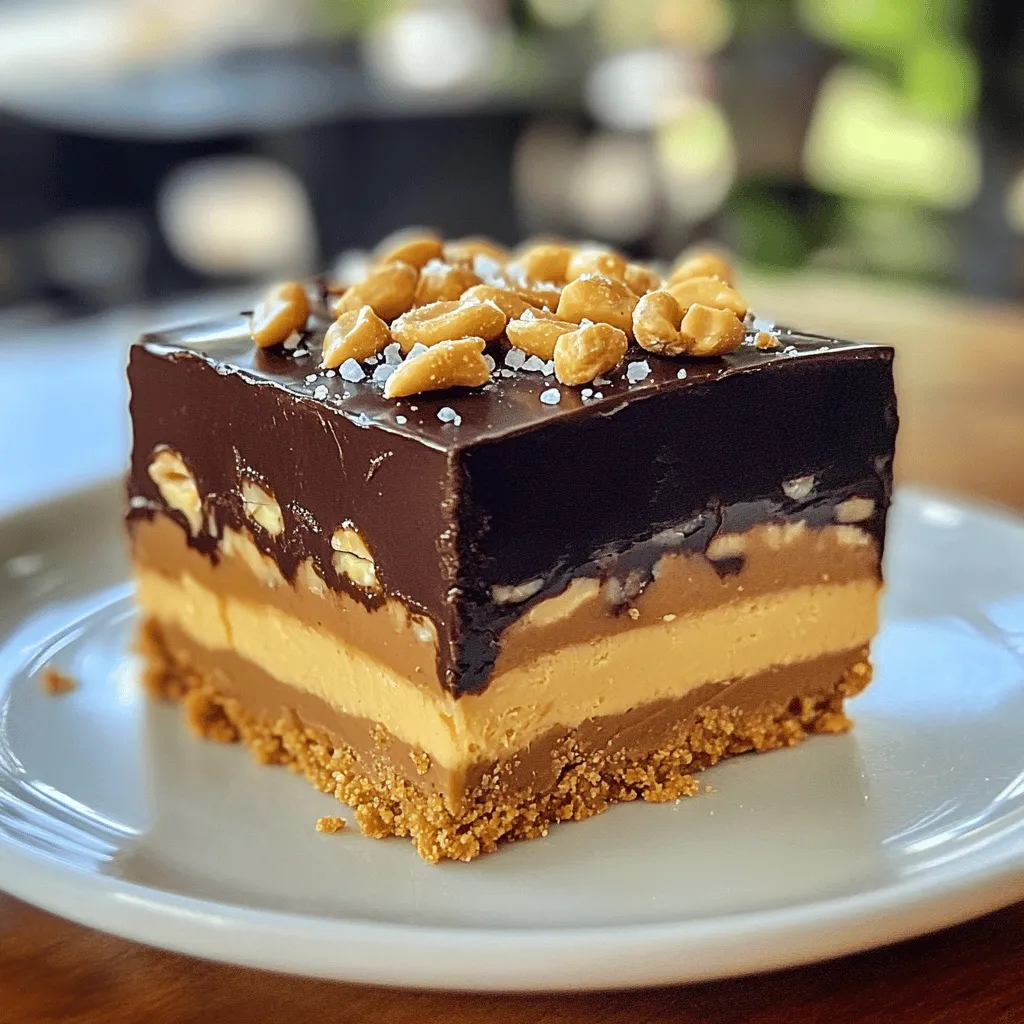
No-Bake Snickers Bars Simple and Decadent Treat
Indulge in a simple and delicious treat with my No-Bake Snickers Bars recipe! These bars come together fast and need Read Full Recipe -
Lemon Blueberry Energy Bites Nourishing Snack Idea
Looking for a tasty, energy-packed snack? Try my Lemon Blueberry Energy Bites! These little balls are the perfect blend of Read Full Recipe -
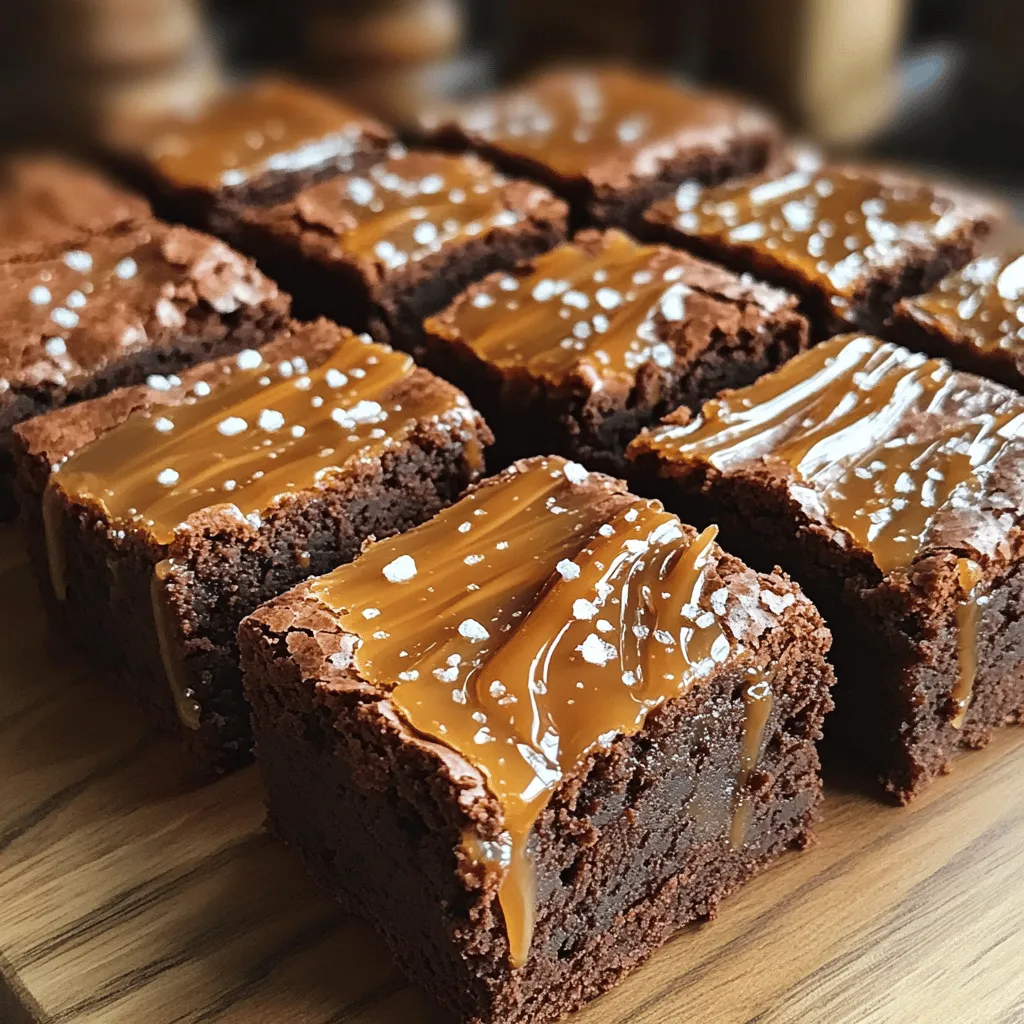
Fudgy Salted Caramel Brownies Rich and Indulgent Treat
Love brownies? Get ready to elevate your dessert game with these Fudgy Salted Caramel Brownies! They combine rich chocolate with Read Full Recipe -
Pumpkin Chocolate Chip Muffins Tasty and Simple Treat
Looking for a delicious treat that’s easy to make? You’re in the right place! These Pumpkin Chocolate Chip Muffins are Read Full Recipe -
Healthy Apple Crisp Flavorful and Nutritious Treat
Are you ready for a delicious treat that’s both flavorful and nutritious? In this post, I’ll show you how to Read Full Recipe


hey,
i’m !
I’m so happy you’re here!
Each recipe I share is a little piece of love from my kitchen. May they fill your heart and home with warmth. Let’s cook up something wonderful together.
![- 2 pounds chicken wings - Necessary kitchen tools: baking sheet, wire rack, large bowl - 2 tablespoons baking powder - 1 tablespoon smoked paprika - 1 tablespoon garlic powder - 1 tablespoon onion powder - 1 teaspoon salt - 1 teaspoon black pepper - 1 teaspoon cayenne pepper - 1 teaspoon dried thyme - 1 teaspoon brown sugar - 1 teaspoon lemon zest When it comes to making crispy dry rub chicken wings, the right ingredients are key. First, you need fresh chicken wings. I prefer using two pounds for a good serving. Make sure you have a baking sheet and a wire rack. These tools help the wings cook evenly and get extra crispy. Next, let’s talk about the dry rub. This mix gives your wings that amazing flavor. You will need baking powder, smoked paprika, garlic powder, onion powder, salt, and black pepper. For some heat, add cayenne pepper. Dried thyme adds a nice touch of earthiness. Brown sugar brings a hint of sweetness, and lemon zest brightens everything up. Gather these ingredients, and you are ready to make the best crispy wings. You can find the full recipe to guide you through every step. - Preheat oven to 425°F (220°C). - Line a baking sheet with aluminum foil. Place a wire rack on top. This rack helps air circulate and makes the wings crispy. - Pat the chicken wings dry with paper towels. This helps with crispiness. You want no moisture left. - In a bowl, mix the dry rub ingredients. Use baking powder, smoked paprika, garlic powder, onion powder, salt, black pepper, cayenne, dried thyme, brown sugar, and lemon zest. - Coat the wings with the dry rub. Make sure every wing gets a good amount of rub. - Place the wings on the wire rack. Make sure they are in a single layer. This helps them cook evenly. - Bake for 40-45 minutes. Flip the wings halfway through cooking for even crispiness. - Broil for 2-3 minutes at the end. This step gives your wings that extra crunch. Watch closely to avoid burning. For the full recipe, check the details above. Enjoy the crispy wings! To get the best crispy chicken wings, drying them is key. First, pat the wings with paper towels until they are very dry. This step makes a huge difference in texture. Moisture creates steam, which prevents crisping. Baking powder is another secret weapon. It helps to create a light and crisp skin. When you mix it with the spices, it reacts with the moisture in the chicken. This reaction leads to a wonderful crispiness. You can easily customize your chicken wings. Add spices like cumin or coriander for a twist. A little chili powder can bring the heat if you like spice. Feel free to experiment until you find your perfect mix! For oils, consider using avocado or peanut oil. They can add a rich flavor and help achieve that crispy finish. If you prefer, you can marinate the wings in a mix of your favorite sauces. Just remember to dry them well after marinating. Serve your crispy wings with delicious dips. Ranch or blue cheese dressing are great choices. They add a creamy contrast that pairs well with the wings. You can also try a spicy sriracha sauce for a kick! For a lovely presentation, use a rustic wooden platter. Arrange the wings neatly and add celery sticks for crunch. A sprinkle of fresh parsley on top adds color and freshness. Your guests will be impressed with both taste and look! For the full recipe, check out the [Full Recipe]. {{image_2}} To mix things up, you can try different dry rubs for your wings. Here are two great options: - Spicy buffalo dry rub alternative: If you love heat, add cayenne pepper and crushed red pepper flakes. This mix will give your wings a fiery kick. Combine it with garlic powder and onion powder for a robust flavor. - Sweet and smoky dry rub option: For a sweeter taste, use brown sugar and smoked paprika. This blend offers a nice balance of sweetness and smokiness. You can add cinnamon for a unique twist. You can also change how you cook your wings. Here are two popular methods: - Air fryer method for quick cooking: Use an air fryer for crispy wings in less time. Cook them at 400°F (200°C) for about 25-30 minutes. Flip halfway for even cooking. The air fryer gives you that crunch without much oil. - Grill adaptation for summer barbecues: Grill your wings for a smoky flavor. Preheat your grill to medium heat. Cook wings for 20-25 minutes, turning often. This method adds a nice char and flavor to your wings perfect for outdoor gatherings. Pairing sides with your wings makes for a complete meal. Here are some great options: - Recommended sides to serve with chicken wings: Serve wings with crispy celery sticks, carrot sticks, or a fresh salad. These add crunch and freshness. - Perfect drink pairings for a complete meal: Enjoy your wings with a cold beer or a tangy lemonade. Both drinks balance the spicy and smoky flavors, making your meal more enjoyable. For the full recipe, check out the Crispy Dry Rub Chicken Wings section above! To keep your leftover crispy dry rub chicken wings tasty, store them right. Use airtight containers to lock in flavor. Allow the wings to cool first. This step helps prevent moisture buildup. Refrigerate them within two hours of cooking. They will stay fresh for up to three days. Reheating wings can be tricky. You want them crispy, not soggy. The best method is the oven. Preheat it to 350°F (175°C). Place the wings on a baking sheet. Bake for about 10-15 minutes until heated through. Check that they are hot in the middle. You can use the microwave, but they might lose crispiness. If you must, heat them for 30 seconds. Flip them halfway for even warmth. If you want to save wings for later, freezing is a great option. Start by letting them cool completely. Next, place them in a single layer on a baking sheet and freeze for about an hour. Once frozen, transfer them to a freezer-safe bag. Remove as much air as possible. They can stay in the freezer for up to three months. When ready to eat, thaw them overnight in the fridge. This keeps them juicy and tasty. To get chicken wings extra crispy, you need to use a few key techniques: - Pat wings dry: Remove moisture with paper towels. This step is vital for crispiness. - Use baking powder: It helps draw moisture out and makes the skin crisp. - Bake on a wire rack: This allows air to circulate around the wings, promoting even cooking. - Flip halfway: Turning the wings at the halfway mark ensures they crisp evenly on both sides. - Broil at the end: Broiling for a few minutes gives that extra crunch. By following these steps, you can achieve a perfect texture every time. Yes, you can use fresh herbs in the dry rub! Fresh herbs add a vibrant flavor. Here are some great options: - Parsley: Adds freshness and a pop of color. - Thyme: Offers an earthy taste that pairs well with chicken. - Oregano: Gives a slightly sweet, aromatic flavor. - Rosemary: Adds a piney touch, great for roasting. When using fresh herbs, chop them finely and mix them into your dry rub. Just remember to adjust the amount, as fresh herbs are stronger in flavor. The best temperature for baking chicken wings is 425°F (220°C). This temperature helps achieve crispy skin while cooking the meat thoroughly. Here’s why: - High heat: It provides a good sear on the outside for crispiness. - Even cooking: It helps cook the wings all the way through without drying them out. If you want different outcomes, you can experiment with lower or higher temperatures, but 425°F gives the best balance. You learned how to make delicious, crispy chicken wings at home. With a simple dry rub, you can enhance flavor and texture. Using the right tools and techniques is key. Don't forget the tips for storing and reheating leftovers. Experiment with different spices and cooking methods to make wings your way. Enjoy the journey of crafting the perfect wing dish for friends and family. Happy cooking!](https://lisadishes.com/wp-content/uploads/2025/05/954fb762-1a88-4a9c-97dd-6ad561b8efd6-300x300.webp)

![- 2 cups frozen corn kernels, thawed - 1 cup cream cheese, softened - 1 cup shredded Monterey Jack cheese - 1/2 cup grated cotija cheese - 1/2 cup sour cream - 1/4 cup mayonnaise - 2 tablespoons lime juice - 1 teaspoon chili powder - 1 teaspoon garlic powder - 1/2 teaspoon smoked paprika - 1/4 teaspoon cayenne pepper (optional) - 1/4 cup fresh cilantro, chopped - Salt and pepper to taste - Tortilla chips for serving Gather these ingredients for a tasty party dish. The corn brings sweetness, while the cheeses add creaminess. Cream cheese gives a rich base, and Monterey Jack melts perfectly. Cotija cheese adds a salty punch, making the dip special. You'll also need lime juice for a zesty flavor. Chili powder, garlic powder, smoked paprika, and cayenne add warmth and depth. Fresh cilantro brightens the dish and gives it a fresh taste. Don't forget salt and pepper to balance all the flavors. This dip is perfect with tortilla chips. The crunch pairs well with the creamy dip. You can also serve it with veggies for a healthy option. For the full recipe, check out the detailed steps! - Set to 350°F (175°C) First, you start by preheating your oven. This step is key for a perfect dip. It helps cook the dip evenly and makes it bubbly. - Combine corn kernels, cream cheese, Monterey Jack, cotija, sour cream, and mayonnaise Next, grab a big mixing bowl. Add the thawed corn kernels, softened cream cheese, shredded Monterey Jack, grated cotija cheese, sour cream, and mayonnaise. Mix these ingredients well. You want a smooth and creamy texture. Each bite should be rich and cheesy. - Mix in lime juice, chili powder, garlic powder, smoked paprika, cayenne (if using), and cilantro Now it's time to spice things up! Squeeze in the lime juice and sprinkle the chili powder, garlic powder, and smoked paprika. If you like it spicy, add cayenne. Toss in the chopped cilantro too. These flavors make the dip pop! Stir until everything blends nicely. - Transfer to baking dish and bake for 20-25 minutes After mixing, transfer your dip to a baking dish. Spread it evenly for even cooking. Bake it in your preheated oven for 20 to 25 minutes. Look for a bubbly top and a golden edge. This is when your Cheesy Mexican Street Corn Dip is ready! For the complete recipe, check the Full Recipe section. Serve this dip warm for the best flavor. When it’s hot, the cheeses melt nicely. This creates a rich and creamy texture that makes each bite delightful. If it cools down, it may not taste as good. So, keep it in the oven until ready to serve. Add extra cilantro and cotija cheese on top. This not only adds color but also boosts the flavor. Fresh cilantro brings a bright taste, while cotija adds a salty kick. You can even sprinkle some chili powder for a pop of color and heat. I recommend crispy tortilla chips for dipping. They add the perfect crunch to each bite. The chips also balance the creamy dip well. You can use store-bought chips or make your own for a fresher taste. Try cutting tortillas into triangles and baking them until crispy. Enjoy your dip! For the full recipe, check out the complete details and step-by-step guide! {{image_2}} You can spice up your Cheesy Mexican Street Corn Dip easily. Just add chopped jalapeños or a sprinkle of cayenne pepper. These spicy additions bring a nice kick to the dip. If you love heat, try both for a fiery twist. Adjust the amount to fit your taste. Cheese lovers can enjoy different cheesy options. Swap in queso blanco for a creamier feel. You can also use pepper jack for a spicy bite. Mixing cheeses can create a fun flavor experience. Don't hesitate to experiment and find the perfect blend for your taste buds. If you want a vegetarian option, replace sour cream with a vegan alternative. You can use cashew cream or coconut yogurt. These options keep the dip creamy without dairy. They also add unique flavors that can enhance the dish. Enjoy the same great taste while keeping it plant-based! To keep your Cheesy Mexican Street Corn Dip fresh, store it in an airtight container. Place it in the refrigerator. This helps preserve its creamy texture and flavors. When you want to enjoy leftovers, the oven is your best friend. Preheat it to 350°F (175°C). Place the dip in a baking dish, cover it with foil, and heat for about 15-20 minutes. This method keeps the dip creamy and prevents it from drying out. You can freeze the dip for later use, but it may change in texture. To freeze, place the dip in a freezer-safe container. When ready to eat, thaw it in the fridge overnight. Reheat it in the oven for the best results. Enjoy this tasty dip anytime! For the full recipe, check out the [Full Recipe]. Yes, you can prepare this dip a day in advance. Just mix all the ingredients and store it in the fridge. This dip tastes even better after the flavors blend overnight. When you're ready to serve, just bake it until hot and bubbly. Tortilla chips are a classic choice for dipping. You can also serve it with fresh veggies like carrots or bell peppers. Pita chips add a nice crunch too. This dip pairs well with anything that can scoop up its cheesy goodness. Typically, it lasts up to 3-4 days in an airtight container. Just make sure it's sealed tight to keep it fresh. If the dip looks or smells off, it's best to throw it out. Enjoy it while it's still creamy and delicious! This blog post shared the easy steps to make Cheesy Mexican Street Corn Dip. You learned about the simple ingredients, from corn to rich cheeses. I covered how to prepare, bake, and serve it. The tips offered help you enjoy it warm, with crispy chips and beautiful garnishes. Whether you keep it mild or spice it up, this dish fits all tastes. Remember, it’s great to make ahead and can even be frozen. Enjoy this tasty dip at your next gathering. It's sure to impress!](https://lisadishes.com/wp-content/uploads/2025/06/adcad653-9d67-4be4-a203-0bae8ef94a61-300x300.webp)
![To make Baked Garlic Lemon Tilapia, you need these main ingredients: - 4 tilapia fillets - 4 cloves garlic, minced - 2 tablespoons olive oil - 2 tablespoons fresh lemon juice - 1 teaspoon lemon zest - Salt and pepper to taste - 1 teaspoon dried oregano - Fresh parsley for garnish - Lemon slices for serving These ingredients bring bright flavors to the dish. The garlic adds depth, while the lemon gives it a fresh kick. Tilapia is a mild fish that pairs well with these strong flavors. You can add a few optional ingredients to enhance the dish: - Red pepper flakes for heat - A splash of white wine for richness - Capers for a briny touch - Cherry tomatoes for added sweetness These additions can make the dish even more fun and exciting. Feel free to mix and match these options based on your taste. Each serving of Baked Garlic Lemon Tilapia has: - Calories: about 180 - Protein: 26g - Fat: 8g - Carbohydrates: 2g - Fiber: 0g This meal is light yet filling. It’s a great source of protein and healthy fats. Enjoy this dish as part of a balanced diet. For the full recipe, check the [Full Recipe] link. First, preheat your oven to 400°F (200°C). This heat will cook the fish evenly. While your oven heats, prepare your baking dish. You can line it with parchment paper. If you don't have that, lightly grease it with cooking spray. This step helps prevent sticking and makes cleanup easier. Next, grab a small bowl. In it, mix together the olive oil, lemon juice, and lemon zest. Add the minced garlic, dried oregano, salt, and pepper. Use a whisk to combine all the ingredients well. This mixture is key to adding flavor to your fish. The aroma alone will make your mouth water! Now, take your tilapia fillets and place them in the baking dish. Brush both sides of the fillets with your garlic lemon mixture. If you want extra zing, squeeze more lemon juice over the top. Bake the tilapia in your preheated oven for 12 to 15 minutes. The fish is done when it flakes easily with a fork. Once baked, let it rest for a couple of minutes. Finally, garnish with fresh parsley and serve with lemon slices. For the full recipe, check out the details shared earlier. To get perfectly flaky tilapia, cook it at the right temperature. The oven should be set to 400°F (200°C). This heat cooks the fish evenly without drying it out. Check your tilapia after 12 minutes. It should flake easily with a fork. If it does, it’s done! Seasoning is key with tilapia. Use fresh garlic for the best flavor. Combine garlic with lemon juice, lemon zest, olive oil, salt, and pepper. Brush this mix on both sides of the fish. This adds flavor and moisture. Don’t skip the oregano; it gives a nice herbal touch. Baked garlic lemon tilapia pairs well with many sides. Try serving it with a fresh salad or steamed veggies. Rice or quinoa also make excellent choices. If you want something light, serve with lemon slices and parsley. This keeps the dish fresh and bright. For more ideas, check the Full Recipe. {{image_2}} You can easily swap tilapia for other fish. Try using cod, haddock, or even salmon. Each fish has a unique taste and texture. Cod is flaky and mild, while salmon offers a rich flavor. Just adjust the cooking time based on the thickness of the fish. For thicker fillets, bake a little longer. Always watch for that flaky texture to know when it's done. Feel free to get creative with herbs and spices. You can add dill or thyme for a fresh twist. A pinch of red pepper flakes can give it a spicy kick. If you love smokiness, try smoked paprika. Mixing these flavors can enhance your dish. Just remember, start with a little, then taste as you go. This way, you can find your perfect balance. If you need gluten-free options, this recipe is already perfect. All the ingredients are naturally gluten-free. For low-carb choices, keep it simple. Serve the tilapia with veggies like zucchini or asparagus instead of rice. You can also add a fresh salad for crunch. These options keep your meal light and full of flavor, making dinner both healthy and tasty. After enjoying your baked garlic lemon tilapia, let the leftovers cool. Place the fillets in an airtight container. This keeps the fish fresh and tasty. You can store them in the fridge for up to three days. Make sure to cover them well to avoid any strong fridge odors. When you are ready to eat the leftovers, you have a few options. The oven works best for reheating. Preheat it to 350°F (175°C). Place the tilapia on a baking sheet and cover it with foil. Heat for about 10 minutes. This keeps the fish moist. You can also use the microwave, but be careful not to overcook it. Heat in short bursts of 30 seconds, checking often. If you want to save some tilapia for later, freezing is a great option. Wrap the cooled fillets tightly in plastic wrap. Then place them in a freezer-safe bag. Remove as much air as you can. You can freeze tilapia for up to two months. When you're ready to cook it, thaw it overnight in the fridge. This helps keep the texture nice. For best results, bake it from fresh rather than refreezing it after thawing. Yes, you can use frozen tilapia. Just make sure to thaw it first. Place the frozen fillets in the fridge overnight. If you're in a hurry, you can also run them under cold water. Using thawed tilapia helps the flavors absorb better. Baked Garlic Lemon Tilapia lasts for about 3 days in the fridge. Store it in an airtight container. It’s best to eat it fresh, but you can enjoy it later too. Just reheat it gently to keep it moist. Great sides for Baked Garlic Lemon Tilapia include: - Steamed broccoli - Roasted asparagus - Rice or quinoa - A fresh garden salad These sides complement the light flavor of the fish and add nutrition. The best way to check if the fish is done is to use a fork. Gently flake the fish at the thickest part. If it flakes easily and looks opaque, it’s ready. The internal temperature should reach 145°F (63°C) for safety. This article outlined how to make Baked Garlic Lemon Tilapia. We covered the key ingredients, steps for preparation, and tips for perfecting your dish. Remember, flaky fish and bold flavors make all the difference. You can also try different fish or flavors for variety. Storing leftovers properly keeps your meal fresh and tasty. I hope these insights inspire you to cook confidently and enjoy this healthy dish. Explore, experiment, and make this recipe your own!](https://lisadishes.com/wp-content/uploads/2025/07/640a7138-8387-47d4-8e6f-0adbcbff6689-300x300.webp)
Caramel Apple Cheesecake Delightful and Easy Recipe
Ready to indulge in a mouthwatering treat? This Caramel Apple Cheesecake is simple to make and perfect for any gathering! You’ll love the creamy…

My Latest Dinners
-
Baked Lemon Garlic Tilapia Simple and Tasty Meal
Are you ready to whip up a meal that’s both simple and bursting with flavor? Baked Lemon Garlic Tilapia is Read Full Recipe -
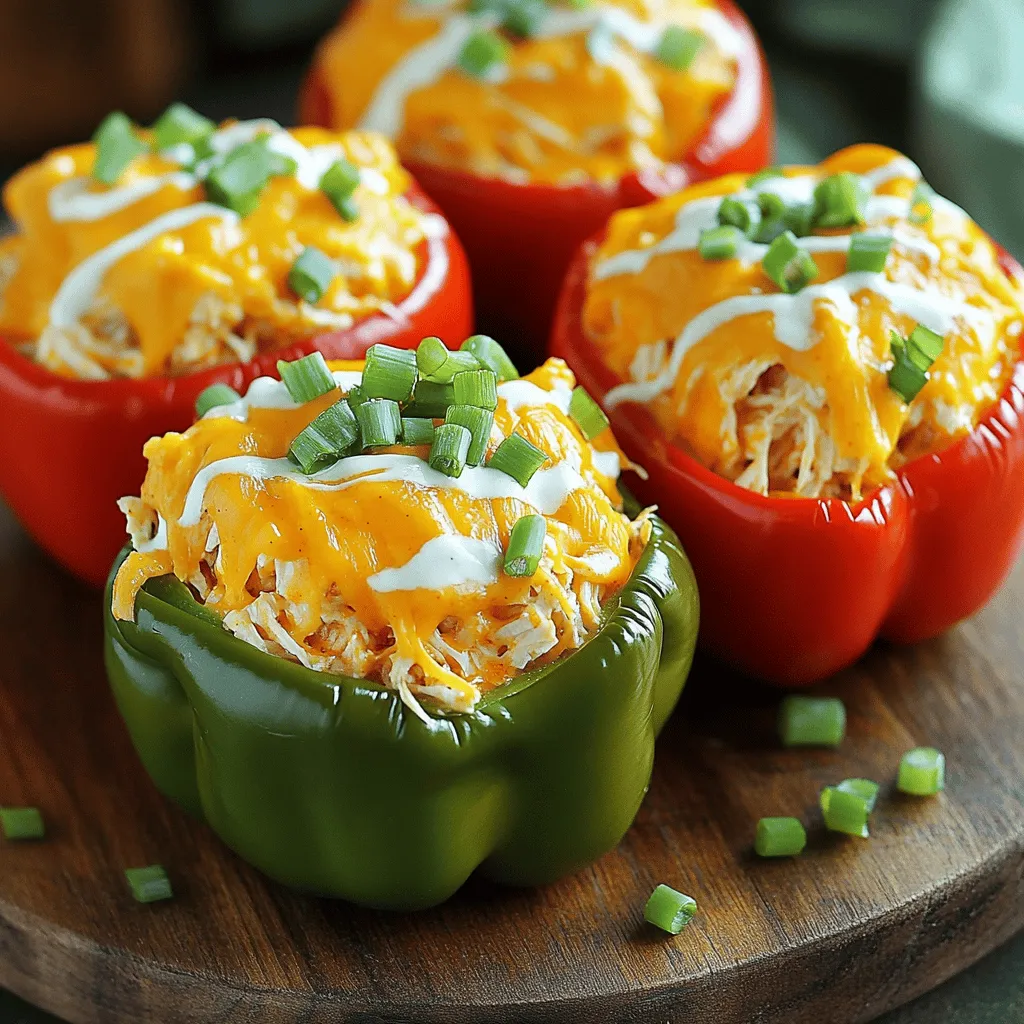
Buffalo Chicken Stuffed Peppers Tasty and Easy Recipe
Are you craving a meal that’s both tasty and easy to make? Look no further! This Buffalo Chicken Stuffed Peppers Read Full Recipe -
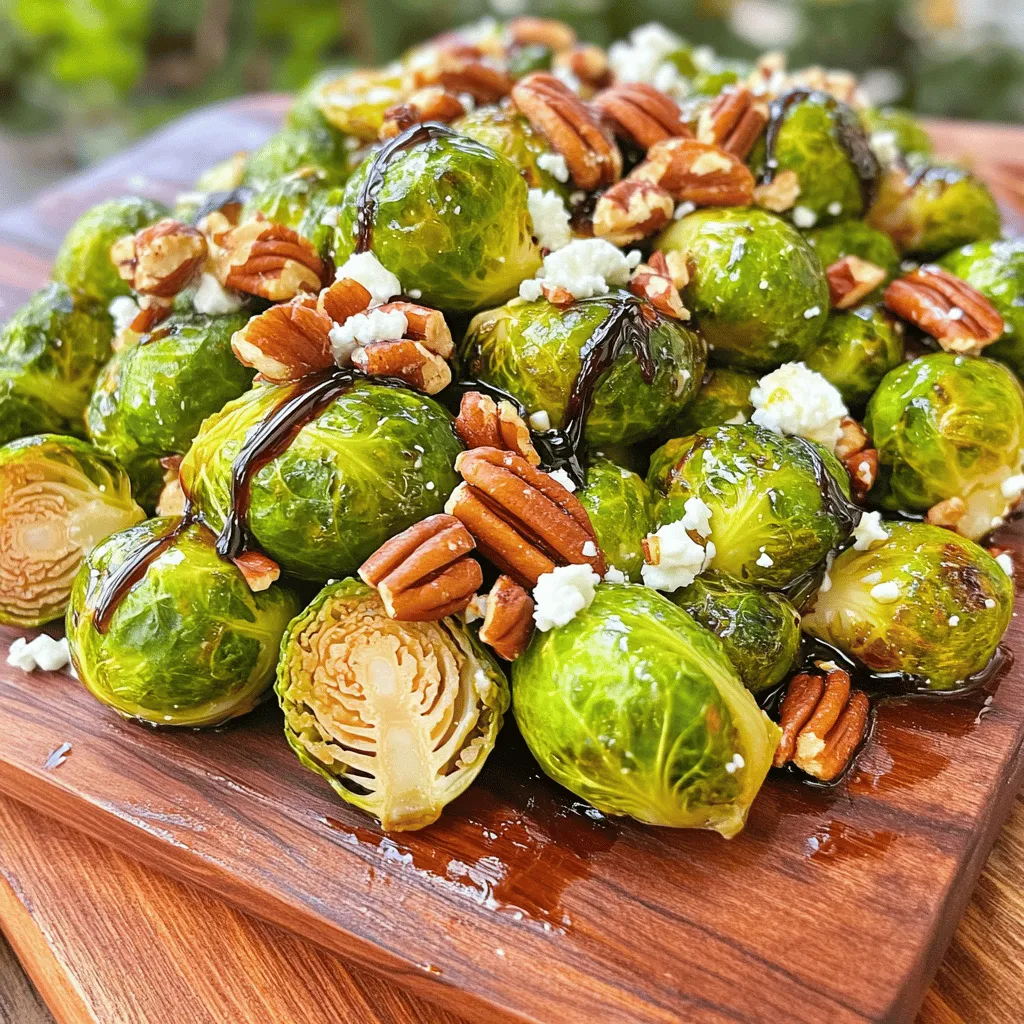
Roasted Brussels Sprouts with Balsamic Glaze Delight
Are you ready to elevate your veggie game? Roasted Brussels Sprouts with Balsamic Glaze Delight will transform this often-overlooked vegetable Read Full Recipe -
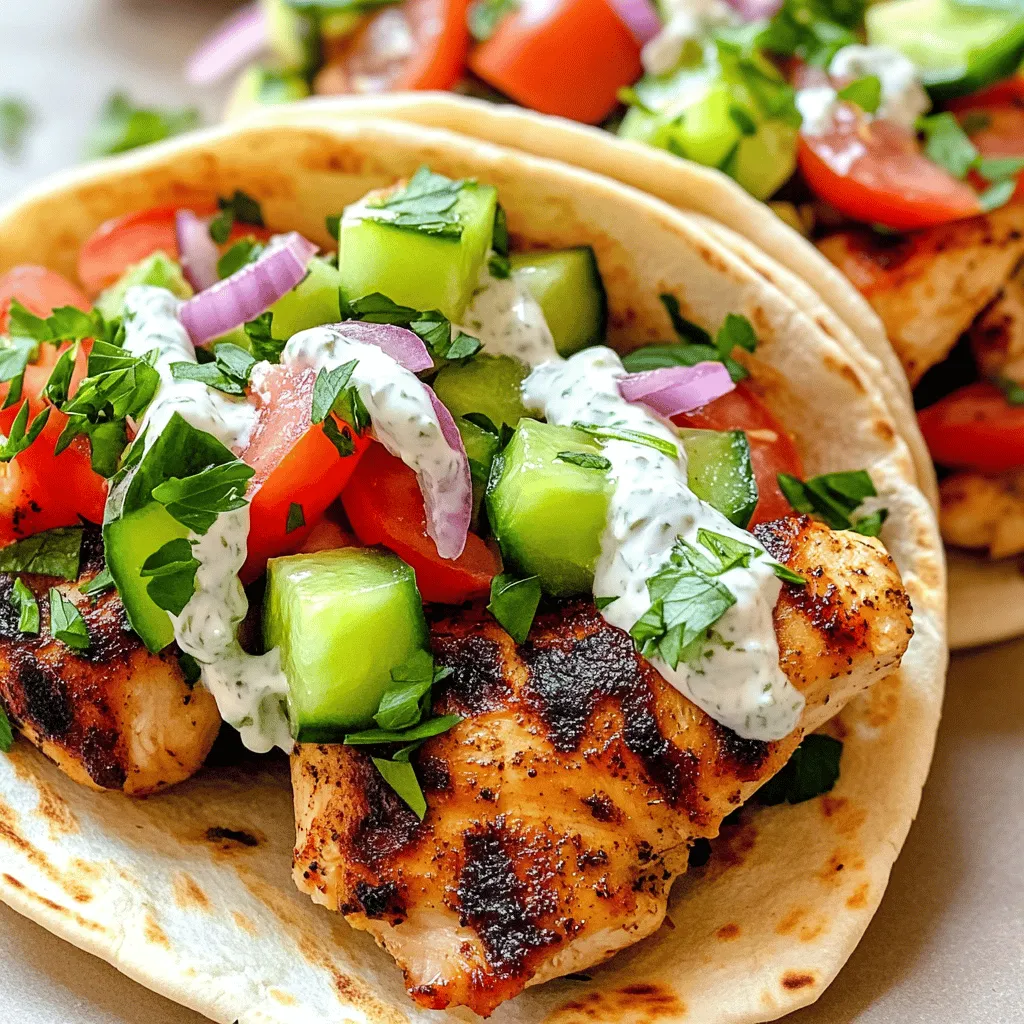
Easy Chicken Gyros Flavorful Homemade Delight
Are you craving a quick and tasty meal? Look no further than these Easy Chicken Gyros! With juicy chicken marinated Read Full Recipe -
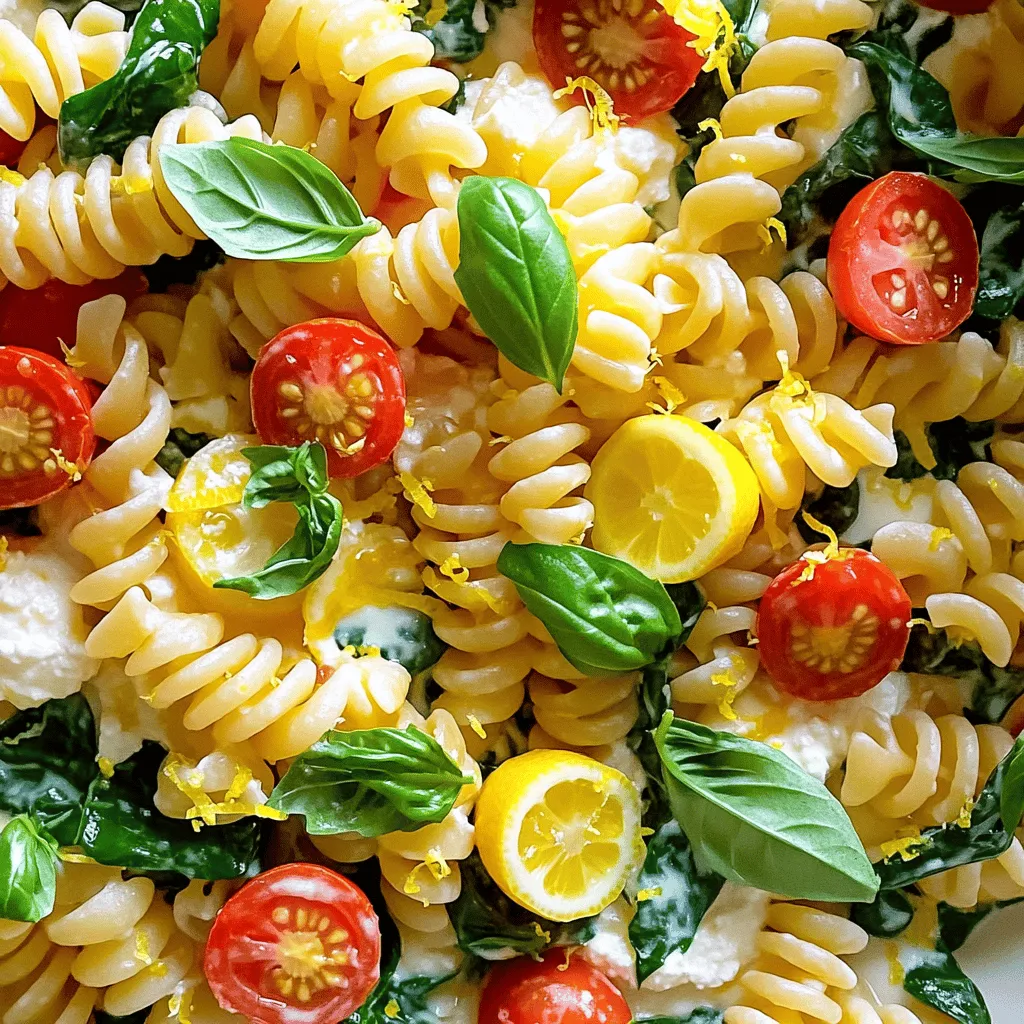
One-Pot Lemon Ricotta Pasta Easy Weeknight Meal
Are you looking for a quick, tasty meal? This One-Pot Lemon Ricotta Pasta is just what you need. With fresh Read Full Recipe -
Barbecue Chicken Pizza Delightful and Easy Recipe
Craving a tasty and easy meal? Barbecue Chicken Pizza is the answer! This delightful dish combines tender chicken, zesty barbecue Read Full Recipe