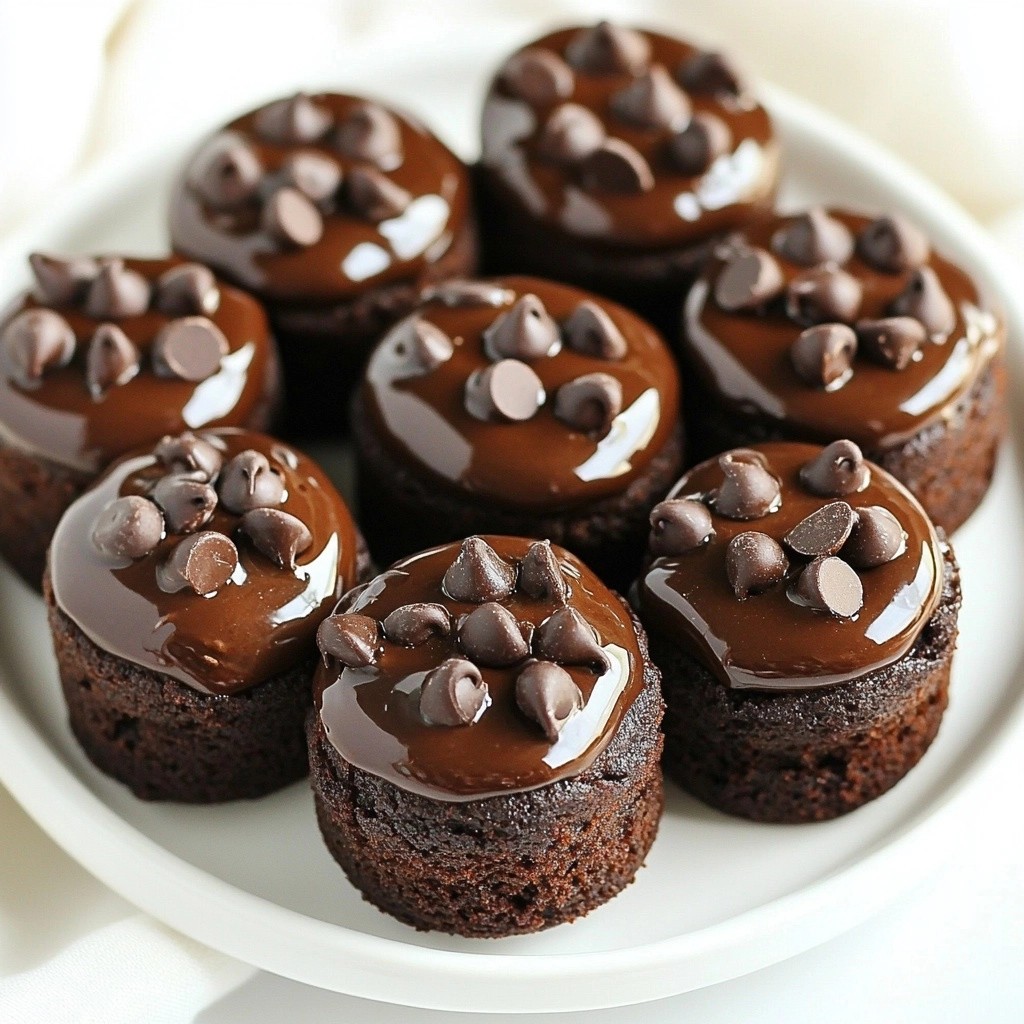
Indulge your sweet tooth with my No-Bake Triple Chocolate Brownie Bites Delight! These easy treats are packed with rich, chocolatey flavor and require no oven. Whether you’re short on time or just want something sweet, these bites are the perfect solution. I’ll guide you through simple steps, ingredient tips, and delicious variations. Get ready to satisfy your cravings with a fun and tasty treat that everyone will love!
Why I Love This Recipe
- Healthy Indulgence: These brownie bites are made with wholesome ingredients like medjool dates and walnuts, making them a guilt-free treat.
- No Baking Required: Skip the oven! These bites come together quickly without any baking, perfect for those last-minute cravings.
- Chocolate Lover's Dream: With three types of chocolate, these bites will satisfy any chocolate craving and leave you wanting more.
- Customizable: Feel free to add your favorite mix-ins or toppings, making each batch uniquely yours!
Ingredients
Complete List of Ingredients
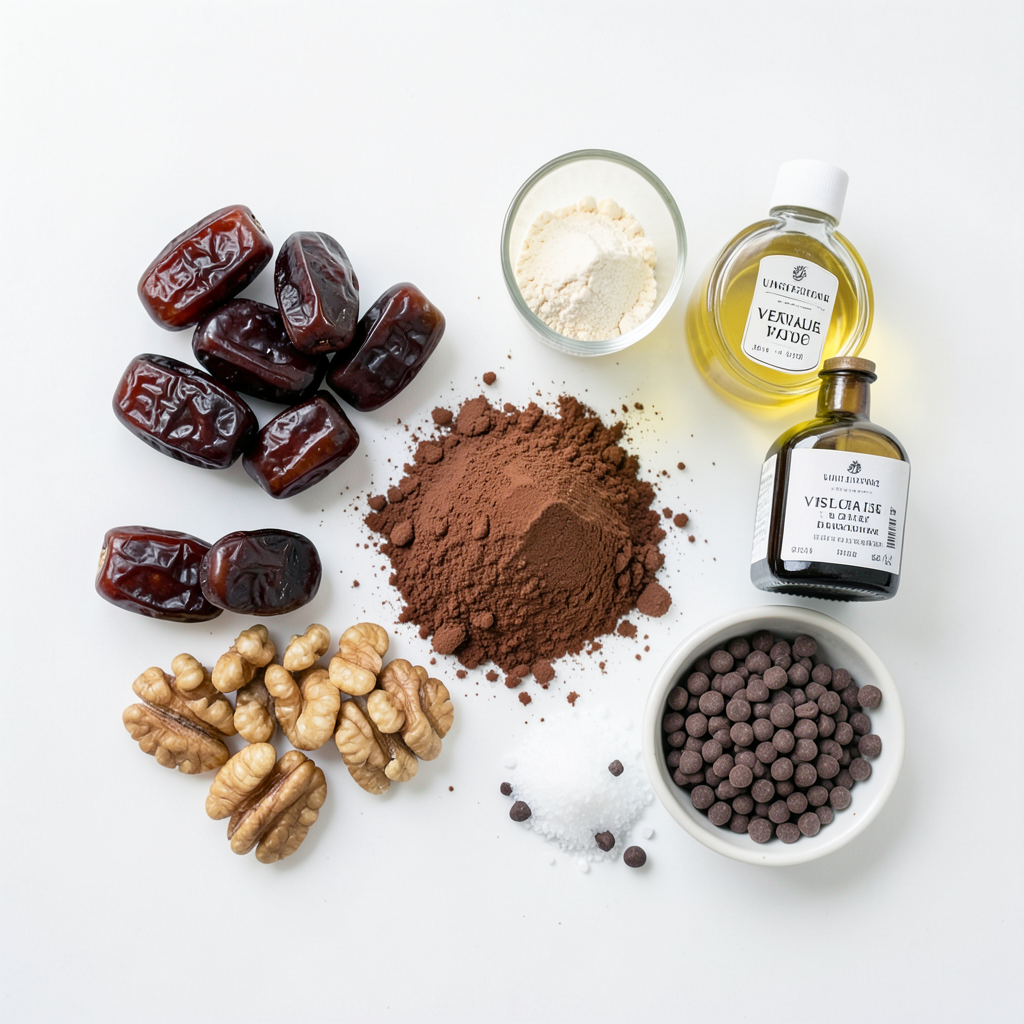
For my no-bake triple chocolate brownie bites, I use the following ingredients:
- 1 cup medjool dates, pitted
- 1 cup walnuts
- 1/2 cup unsweetened cocoa powder
- 1/4 cup almond flour
- 1/4 cup dark chocolate chips (dairy-free if preferred)
- 1/4 cup coconut oil, melted
- 1 teaspoon vanilla extract
- 1/4 teaspoon sea salt
- 1/4 cup mini chocolate chips, for topping
Substitutions and Additions
You can swap ingredients based on what you have. For dates, try dried figs or prunes. If you need nuts out, use sunflower seeds or pumpkin seeds. You can also use any nut butter in place of coconut oil.
Feel free to add extras. Try a pinch of cinnamon for warmth or some shredded coconut for texture.
Tips for Choosing Quality Ingredients
Pick fresh medjool dates for the best flavor. Look for dates that are soft and plump. Select raw walnuts that are not bitter. Fresh walnuts taste better and blend well.
For cocoa powder, choose unsweetened and organic if possible. This ensures rich chocolate flavor. When buying chocolate chips, check for high cocoa content for deeper taste. Always opt for quality ingredients. They make a big difference in your brownie bites.
Step-by-Step Instructions
Preparing the Base Mixture
Start by grabbing a food processor. Add 1 cup of pitted medjool dates and 1 cup of walnuts. Pulse these until they form a sticky dough. This is the base for your brownie bites. Next, add 1/2 cup of unsweetened cocoa powder. Then, add 1/4 cup of almond flour, 1/4 cup of melted coconut oil, 1 teaspoon of vanilla extract, and 1/4 teaspoon of sea salt. Pulse again until you have a thick batter. This mixture is rich and chocolatey.
Forming the Brownie Bites
Now it’s time to form your bites. Line a baking tray with parchment paper. This helps with cleanup. Scoop out about one tablespoon of the brownie mixture. Roll it into a ball with your hands. Place it on the tray. Repeat this until you use all the mixture. You should have around 12 bites. To make them extra special, sprinkle mini chocolate chips on top of each bite. Press them in gently for a nice look and added crunch.
Chilling and Serving Tips
Chill the brownie bites in the fridge for at least 30 minutes. This helps them firm up nicely. Once chilled, you can enjoy them straight from the fridge or let them sit at room temperature for a bit. For a fun presentation, arrange the bites on a nice platter. You can even drizzle some melted chocolate on top for a sweet touch. Enjoy your tasty no-bake treats!
Tips & Tricks
How to Achieve the Perfect Texture
To get the best texture, pulse the dates and walnuts until they form a smooth mix. This helps create that sticky base. When adding cocoa powder and almond flour, make sure to combine them well. The melted coconut oil adds moisture, so don’t skip it. After mixing, your dough should be thick but moldable. If it feels too dry, add a bit more coconut oil.
Common Mistakes to Avoid
One common mistake is over-processing the dough. If you turn it into a paste, your bites will be dense. Another pitfall is not chilling the bites long enough. Chilling firms them up and makes them easier to eat. Also, don’t forget to adjust the salt. A little salt enhances the chocolate flavor. Lastly, be careful not to skip the mini chocolate chips on top. They add a nice crunch and boost the flavor.
Serving Suggestions for Maximum Appeal
For a stunning presentation, place the brownie bites on a colorful platter. You can also use cute muffin liners to add charm. Drizzle a bit of melted chocolate over the bites for flair. If you want to impress guests, serve with fresh fruit or a scoop of dairy-free ice cream. This adds a fun contrast and makes your bites feel extra special. Enjoy them chilled or at room temperature for the best taste!
Pro Tips
- Use Fresh Dates: Ensure your medjool dates are fresh and soft for the best texture and sweetness in your brownie bites.
- Chill for Best Results: Allow the brownie bites to chill for at least 30 minutes; this helps them firm up and enhances the flavors.
- Customize Your Mix-ins: Feel free to add nuts, seeds, or dried fruits for extra texture and flavor variations.
- Presentation Matters: Serve your brownie bites in colorful muffin liners or on a decorative platter for an appealing presentation.
Variations
Nut-Free Version
You can make these brownie bites nut-free. Simply swap walnuts with rolled oats. Use the same amount of oats, one cup. This keeps the texture and taste great. The oats add fiber, too. You can still enjoy a rich chocolate flavor without nuts.
Flavored Options (Mint, Orange, etc.)
Want to mix it up? Try adding flavors! For mint chocolate brownie bites, add one teaspoon of mint extract. For a citrus twist, mix in one teaspoon of orange zest. These flavors will brighten your bites and give them a fun twist. Just remember to adjust the cocoa a little to keep the balance.
Adding Superfoods or Nutritional Boosts
You can boost nutrition easily! Add a tablespoon of chia seeds or flaxseeds to the mix. These superfoods add fiber and omega-3s. You can also mix in protein powder or a scoop of spirulina. This way, you get a healthy treat that’s still sweet and satisfying.
Storage Info
Recommended Storage Methods
To keep your no-bake triple chocolate brownie bites fresh, store them in an airtight container. I prefer using glass containers, as they help keep the bites moist. You can also wrap them in plastic wrap for added protection. If you want to keep them for longer, use a freezer-safe bag.
Shelf Life and Freezing Tips
These brownie bites last about a week in the fridge. If you want to freeze them, they can last up to three months. Just make sure to separate the layers with parchment paper to avoid sticking. When you're ready to eat, thaw them in the fridge overnight. They will taste just as good!
How to Reheat or Use in Other Desserts
You don’t need to reheat these bites, as they are delicious cold. However, you can chop them up and use them as toppings. They work great on ice cream or yogurt. You can also mix them into a smoothie for a chocolatey boost. Enjoy experimenting with these bites in your favorite desserts!
FAQs
Can I make these gluten-free?
Yes, you can make these brownie bites gluten-free. The key is to use almond flour, which is naturally gluten-free. Make sure your cocoa powder and chocolate chips are also gluten-free. This way, you can enjoy delicious bites without gluten.
How do I make them vegan?
To make these brownie bites vegan, ensure you use dairy-free chocolate chips. The main ingredients are already plant-based, so you are almost there. Just swap regular chocolate chips for dairy-free ones. This keeps the bites tasty and suitable for a vegan diet.
What’s the best way to enjoy No-Bake Triple Chocolate Brownie Bites?
The best way to enjoy these bites is chilled. After refrigerating them for 30 minutes, you get rich, firm flavors. You can eat them straight from the fridge. For a fun touch, drizzle some melted chocolate on top or serve them on a nice platter. They look great and taste even better!
This blog post shared how to make delicious no-bake triple chocolate brownie bites. We covered ingredients, step-by-step instructions, and tips for the perfect texture. Remember to experiment with flavors and find great substitutions. Store your bites properly to keep them fresh. With the right choices, these treats can fit into various diets like gluten-free and vegan. Enjoy these bites in many ways. You’ll impress everyone with your skills. Now, it’s time to try making your own!