No-Bake Orange Creamsicle Cheesecake Delight Recipe

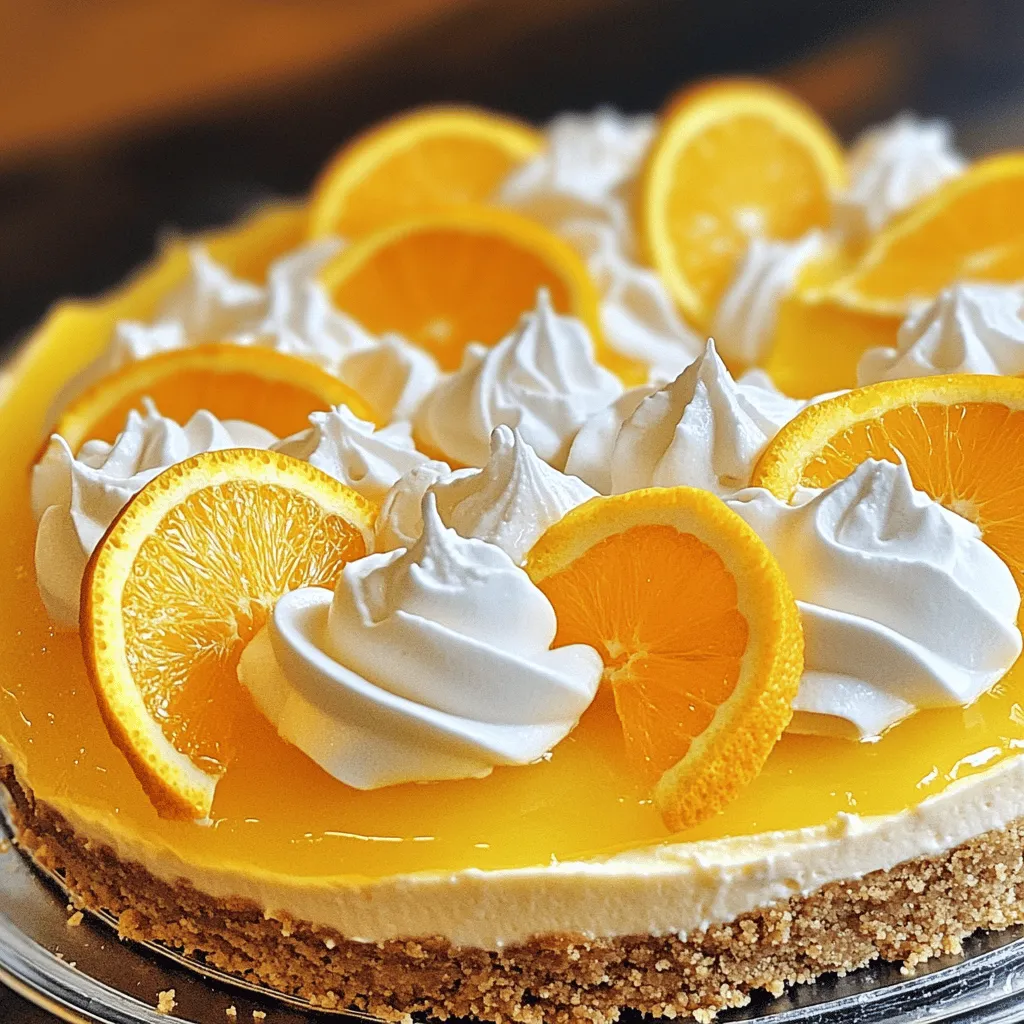
Get ready to treat your taste buds with a delightful No-Bake Orange Creamsicle Cheesecake! This easy recipe combines creamy cheesecake with vibrant orange flavor, perfect for any occasion. I’ll guide you through simple steps to create a dessert that’s sure to impress. Plus, I’ll share tips for choosing the best ingredients and fun variations! Let’s dive into this yummy dessert that you can whip up in no time!

Ingredients

Essential Ingredients for No-Bake Orange Creamsicle Cheesecake

To create this delightful cheesecake, you need a few key ingredients. Here is what you will need:

– 1 ½ cups graham cracker crumbs

– ½ cup unsalted butter, melted

– 2 cups cream cheese, softened

– 1 cup powdered sugar

– 1 cup heavy whipping cream

– ½ cup orange juice (freshly squeezed if possible)

– Zest of 1 orange

– 1 teaspoon vanilla extract

– Optional: Whipped cream and orange slices for garnish

Each of these ingredients plays a special role. The graham cracker crumbs form a tasty crust. The cream cheese gives the cheesecake its rich and creamy texture. Fresh orange juice and zest add bright flavor, making each bite refreshing.

Tips for Choosing Quality Ingredients

Choosing the best ingredients can make a big difference. Here are my tips:

Cream Cheese: Look for full-fat cream cheese. It gives a creamy texture and rich taste.

Butter: Use unsalted butter for more control over the saltiness.

Orange Juice: Freshly squeezed orange juice tastes brighter than store-bought.

Whipping Cream: Choose heavy whipping cream. It whips better and gives a fluffier texture.

Quality ingredients enhance the flavor and texture of your cheesecake, making it a true delight.

Substitutions for Dietary Needs

If you have dietary needs, you can still enjoy this cheesecake. Here are some easy swaps:

Gluten-Free: Use gluten-free graham cracker crumbs for the crust.

Dairy-Free: Substitute cream cheese and heavy cream with plant-based alternatives.

Lower Sugar: Use a sugar substitute in place of powdered sugar for a lighter option.

These substitutions help you create a cheesecake that fits your lifestyle while keeping the delicious taste. For the complete recipe, check the Full Recipe.

Step-by-Step Instructions

Preparing the Crust

Start with a medium bowl. Add 1 ½ cups of graham cracker crumbs and ½ cup of melted butter. Mix these until the crumbs are coated. The texture should feel like wet sand. Now, take a 9-inch springform pan. Press the crumb mixture into the bottom. Use a measuring cup or your fingers to pack it tightly. Make sure it’s even all around. This crust will hold the cheesecake filling well.

Making the Cheesecake Filling

In a large bowl, beat 2 cups of softened cream cheese until smooth. Use a hand mixer on medium speed. Next, add 1 cup of powdered sugar, ½ cup of orange juice, the zest of 1 orange, and 1 teaspoon of vanilla extract. Mix until everything is creamy and well combined. In another bowl, whip 1 cup of heavy whipping cream until it forms stiff peaks. Gently fold this whipped cream into your cream cheese mixture. Be careful, as you do not want to lose the air in the whipped cream. This gives your cheesecake a light texture.

Assembling and Setting the Cheesecake

Pour the cheesecake filling over the prepared crust in the springform pan. Use a spatula to smooth the top. Cover the pan with plastic wrap and refrigerate. Let it chill for at least 4 hours, or overnight for the best set. When ready, carefully release the sides of the pan. Slice the cheesecake into wedges. For a fun touch, you can add whipped cream and orange slices on top. This makes it look extra special. Check out the Full Recipe for more details!

Tips & Tricks

How to Achieve a Fluffy Cheesecake Texture

To get that perfect fluffy texture, I suggest using room temperature cream cheese. Cold cream cheese will create lumps in your mix. Beat it well until smooth before adding other ingredients. When you fold in the whipped cream, do it gently. This keeps the air in and helps the cheesecake rise.

Best Practices for Refrigeration

Chill your cheesecake for at least four hours, but overnight is best. This time allows the flavors to blend well. Make sure to cover it tightly with plastic wrap. This prevents any fridge odors from sneaking in. If you want a firmer slice, let it chill a bit longer.

Serving Suggestions for Presentation

To make your cheesecake look fancy, add a dollop of whipped cream on each slice. A slice of fresh orange on top adds color and zest. You can also sprinkle some orange zest around the plate for a lovely touch. For an extra treat, serve it with a scoop of vanilla ice cream. This No-Bake Orange Creamsicle Cheesecake is sure to impress!

Variations

Add-Ins for Extra Flavor

You can add fun flavors to your cheesecake! Try folding in mini chocolate chips or crushed candy. For a citrus twist, add lemon zest or lime juice. These small changes can make a big difference! Experiment with your favorite flavors to find your perfect mix.

Alternative Crust Ideas

If you’re not a fan of graham crackers, try using crushed cookies. Oreo cookies make a great crust that adds a chocolatey touch. You can also use nut-based crusts for a gluten-free option. Blend nuts with a bit of butter to form a tasty base. The crust can change the whole vibe of the cheesecake!

Vegan or Dairy-Free Option

Want a vegan version? Swap cream cheese for cashew cream or silken tofu. Use coconut cream instead of heavy cream for a rich texture. You can find dairy-free cream cheese in stores too. With these swaps, everyone can enjoy this creamy treat!

For full details on making the No-Bake Orange Creamsicle Cheesecake, check out the Full Recipe.

Storage Info

How to Properly Store Leftover Cheesecake

To keep your No-Bake Orange Creamsicle Cheesecake fresh, cover it well. Use plastic wrap or foil to seal the top. This helps keep the flavors in and prevents drying out. You can store it in the fridge for up to five days. Just make sure it’s in a cool spot. If you notice a change in texture or smell, it’s best to toss it.

Freezing Tips for Long-Term Storage

Want to save some cheesecake for later? You can freeze it! First, let the cheesecake set in the fridge for at least four hours. Once set, slice it into pieces. Wrap each piece in plastic wrap, then place them in a freezer bag. This keeps them safe from freezer burn. Your cheesecake can last in the freezer for about three months. When you’re ready to enjoy, thaw it in the fridge overnight.

Best Container Choices for Storage

The right container makes a big difference. For short-term storage, a covered cake stand works well. It keeps the cheesecake fresh while allowing easy access. For longer storage, use airtight containers. Glass containers are great as they are sturdy and keep odors out. Avoid using metal containers, as they can react with the cheesecake’s ingredients. Always remember to label your containers with the date to track freshness.

For the complete No-Bake Orange Creamsicle Cheesecake recipe, check out the [Full Recipe].

FAQs

Can I use store-bought crust instead of homemade?

Yes, you can use a store-bought crust. It saves time and effort. Look for a graham cracker crust for the best flavor. Just make sure it fits your pan well. This way, you can focus on the creamy filling.

How long does the No-Bake Orange Creamsicle Cheesecake last in the fridge?

This cheesecake lasts about 5 days in the fridge. Keep it covered with plastic wrap or a lid. This helps it stay fresh and tasty. After 5 days, the flavor might fade. So, eat it while it’s still delicious!

Can I make this cheesecake in advance?

Absolutely! You can make this cheesecake a day or two ahead. Just store it in the fridge. This gives the flavors time to blend, making it even better. Plus, it saves you time on the day you want to serve it. For the full recipe, check the details above.

In this blog post, we explored how to make a No-Bake Orange Creamsicle Cheesecake. We covered essential ingredients, tips for selecting quality items, and adjustments for dietary needs. The step-by-step guide helped you prepare the crust, make the filling, and assemble the cheesecake. Remember to check out the storage tips to keep leftovers fresh and tasty. Try different variations to make this dessert your own. With these simple steps, you can enjoy a delicious treat anytime. Happy baking!

To create this delightful cheesecake, you need a few key ingredients. Here is what you will need: - 1 ½ cups graham cracker crumbs - ½ cup unsalted butter, melted - 2 cups cream cheese, softened - 1 cup powdered sugar - 1 cup heavy whipping cream - ½ cup orange juice (freshly squeezed if possible) - Zest of 1 orange - 1 teaspoon vanilla extract - Optional: Whipped cream and orange slices for garnish Each of these ingredients plays a special role. The graham cracker crumbs form a tasty crust. The cream cheese gives the cheesecake its rich and creamy texture. Fresh orange juice and zest add bright flavor, making each bite refreshing. Choosing the best ingredients can make a big difference. Here are my tips: - Cream Cheese: Look for full-fat cream cheese. It gives a creamy texture and rich taste. - Butter: Use unsalted butter for more control over the saltiness. - Orange Juice: Freshly squeezed orange juice tastes brighter than store-bought. - Whipping Cream: Choose heavy whipping cream. It whips better and gives a fluffier texture. Quality ingredients enhance the flavor and texture of your cheesecake, making it a true delight. If you have dietary needs, you can still enjoy this cheesecake. Here are some easy swaps: - Gluten-Free: Use gluten-free graham cracker crumbs for the crust. - Dairy-Free: Substitute cream cheese and heavy cream with plant-based alternatives. - Lower Sugar: Use a sugar substitute in place of powdered sugar for a lighter option. These substitutions help you create a cheesecake that fits your lifestyle while keeping the delicious taste. For the complete recipe, check the Full Recipe. Start with a medium bowl. Add 1 ½ cups of graham cracker crumbs and ½ cup of melted butter. Mix these until the crumbs are coated. The texture should feel like wet sand. Now, take a 9-inch springform pan. Press the crumb mixture into the bottom. Use a measuring cup or your fingers to pack it tightly. Make sure it’s even all around. This crust will hold the cheesecake filling well. In a large bowl, beat 2 cups of softened cream cheese until smooth. Use a hand mixer on medium speed. Next, add 1 cup of powdered sugar, ½ cup of orange juice, the zest of 1 orange, and 1 teaspoon of vanilla extract. Mix until everything is creamy and well combined. In another bowl, whip 1 cup of heavy whipping cream until it forms stiff peaks. Gently fold this whipped cream into your cream cheese mixture. Be careful, as you do not want to lose the air in the whipped cream. This gives your cheesecake a light texture. Pour the cheesecake filling over the prepared crust in the springform pan. Use a spatula to smooth the top. Cover the pan with plastic wrap and refrigerate. Let it chill for at least 4 hours, or overnight for the best set. When ready, carefully release the sides of the pan. Slice the cheesecake into wedges. For a fun touch, you can add whipped cream and orange slices on top. This makes it look extra special. Check out the Full Recipe for more details! To get that perfect fluffy texture, I suggest using room temperature cream cheese. Cold cream cheese will create lumps in your mix. Beat it well until smooth before adding other ingredients. When you fold in the whipped cream, do it gently. This keeps the air in and helps the cheesecake rise. Chill your cheesecake for at least four hours, but overnight is best. This time allows the flavors to blend well. Make sure to cover it tightly with plastic wrap. This prevents any fridge odors from sneaking in. If you want a firmer slice, let it chill a bit longer. To make your cheesecake look fancy, add a dollop of whipped cream on each slice. A slice of fresh orange on top adds color and zest. You can also sprinkle some orange zest around the plate for a lovely touch. For an extra treat, serve it with a scoop of vanilla ice cream. This No-Bake Orange Creamsicle Cheesecake is sure to impress! {{image_2}} You can add fun flavors to your cheesecake! Try folding in mini chocolate chips or crushed candy. For a citrus twist, add lemon zest or lime juice. These small changes can make a big difference! Experiment with your favorite flavors to find your perfect mix. If you're not a fan of graham crackers, try using crushed cookies. Oreo cookies make a great crust that adds a chocolatey touch. You can also use nut-based crusts for a gluten-free option. Blend nuts with a bit of butter to form a tasty base. The crust can change the whole vibe of the cheesecake! Want a vegan version? Swap cream cheese for cashew cream or silken tofu. Use coconut cream instead of heavy cream for a rich texture. You can find dairy-free cream cheese in stores too. With these swaps, everyone can enjoy this creamy treat! For full details on making the No-Bake Orange Creamsicle Cheesecake, check out the Full Recipe. To keep your No-Bake Orange Creamsicle Cheesecake fresh, cover it well. Use plastic wrap or foil to seal the top. This helps keep the flavors in and prevents drying out. You can store it in the fridge for up to five days. Just make sure it's in a cool spot. If you notice a change in texture or smell, it’s best to toss it. Want to save some cheesecake for later? You can freeze it! First, let the cheesecake set in the fridge for at least four hours. Once set, slice it into pieces. Wrap each piece in plastic wrap, then place them in a freezer bag. This keeps them safe from freezer burn. Your cheesecake can last in the freezer for about three months. When you’re ready to enjoy, thaw it in the fridge overnight. The right container makes a big difference. For short-term storage, a covered cake stand works well. It keeps the cheesecake fresh while allowing easy access. For longer storage, use airtight containers. Glass containers are great as they are sturdy and keep odors out. Avoid using metal containers, as they can react with the cheesecake's ingredients. Always remember to label your containers with the date to track freshness. For the complete No-Bake Orange Creamsicle Cheesecake recipe, check out the [Full Recipe]. Yes, you can use a store-bought crust. It saves time and effort. Look for a graham cracker crust for the best flavor. Just make sure it fits your pan well. This way, you can focus on the creamy filling. This cheesecake lasts about 5 days in the fridge. Keep it covered with plastic wrap or a lid. This helps it stay fresh and tasty. After 5 days, the flavor might fade. So, eat it while it's still delicious! Absolutely! You can make this cheesecake a day or two ahead. Just store it in the fridge. This gives the flavors time to blend, making it even better. Plus, it saves you time on the day you want to serve it. For the full recipe, check the details above. In this blog post, we explored how to make a No-Bake Orange Creamsicle Cheesecake. We covered essential ingredients, tips for selecting quality items, and adjustments for dietary needs. The step-by-step guide helped you prepare the crust, make the filling, and assemble the cheesecake. Remember to check out the storage tips to keep leftovers fresh and tasty. Try different variations to make this dessert your own. With these simple steps, you can enjoy a delicious treat anytime. Happy baking!

No-Bake Orange Creamsicle Cheesecake

Celebrate dessert time with a No-Bake Orange Creamsicle Cheesecake that's as refreshing as it is delicious! This easy recipe combines creamy cheesecake with zesty orange flavors, all on a crunchy graham cracker crust. Perfect for summer gatherings or any sweet craving, this cheesecake requires no baking and is simple to prepare. Click through to discover the full recipe and elevate your dessert game today!

Ingredients
  

1 ½ cups graham cracker crumbs

½ cup unsalted butter, melted

2 cups cream cheese, softened

1 cup powdered sugar

1 cup heavy whipping cream

½ cup orange juice (freshly squeezed if possible)

Zest of 1 orange

1 teaspoon vanilla extract

Optional: Whipped cream and orange slices for garnish

Instructions
 

In a medium bowl, combine the graham cracker crumbs and melted butter. Stir until the crumbs are fully coated and resemble wet sand.

    Press the mixture into the bottom of a 9-inch springform pan to form a crust. Use the back of a measuring cup or your fingers to ensure it’s packed tightly and evenly.

      In a large mixing bowl, beat the softened cream cheese with a hand mixer on medium speed until smooth and creamy.

        Add the powdered sugar, orange juice, orange zest, and vanilla extract to the cream cheese mixture. Beat until fully combined and creamy.

          In a separate bowl, whip the heavy whipping cream until stiff peaks form. Then gently fold the whipped cream into the cream cheese mixture using a spatula until fully combined, being careful not to deflate the whipped cream.

            Pour the cheesecake filling over the prepared crust in the springform pan. Smooth the top with a spatula.

              Cover the pan with plastic wrap and refrigerate for at least 4 hours or until set. For best results, refrigerate overnight.

                Once set, carefully release the sides of the springform pan. Slice the cheesecake into wedges.

                  Optional: Top each slice with a dollop of whipped cream and a slice of orange for an extra touch.

                    Prep Time: 30 minutes | Total Time: 4 hours 30 minutes | Servings: 8-10 slices

                      Leave a Comment

                      Recipe Rating