Are you ready to impress your friends and family with a mind-blowing dessert? Today, I’ll show you how to create a luscious no-bake cherry cheesecake that will steal the show! This easy recipe combines creamy cheese, a tasty graham cracker crust, and sweet cherry topping. With simple ingredients and quick steps, you'll enjoy a delicious treat without the hassle of baking. Let’s dive in and make some magic!
Why I Love This Recipe
- Easy Preparation: This no-bake cheesecake is incredibly simple to make, requiring minimal cooking skills and just a few easy steps.
- Creamy Texture: The combination of cream cheese and whipped cream creates a rich, fluffy texture that melts in your mouth.
- Delicious Flavor: The sweet and tangy cherry topping perfectly complements the creamy cheesecake, making each bite a delightful experience.
- Perfect for Any Occasion: Whether it's a family gathering or a special celebration, this cheesecake is always a crowd-pleaser.
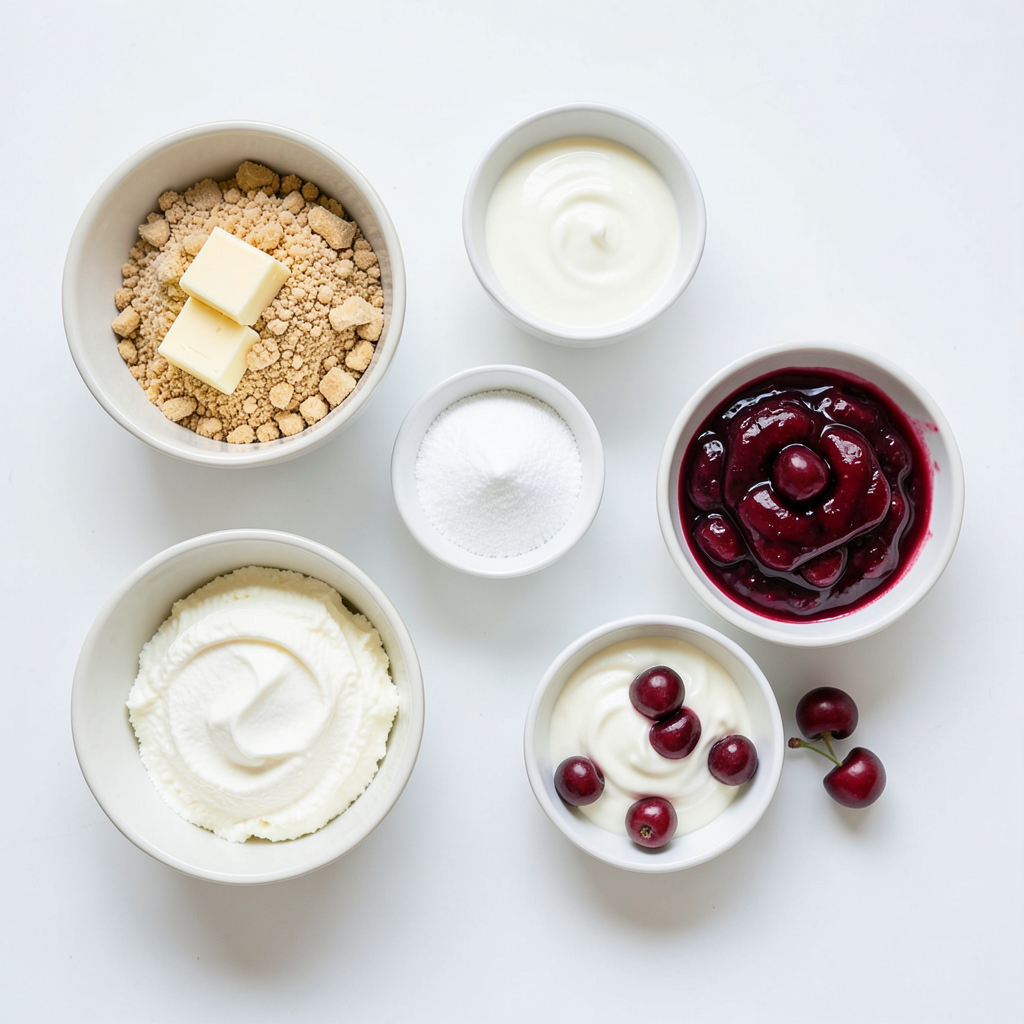
Ingredients
List of Ingredients
- 1 ½ cups graham cracker crumbs
- ½ cup unsalted butter, melted
- 2 cups cream cheese, softened
- 1 cup powdered sugar
- 1 teaspoon vanilla extract
- 1 cup heavy whipping cream
- 2 cups cherry pie filling (store-bought or homemade)
- Fresh cherries for garnish (optional)
Gather these ingredients before you start. The graham cracker crumbs create a tasty crust. Use unsalted butter to keep the flavor balanced. Cream cheese gives the filling its rich texture. Powdered sugar adds sweetness. Vanilla extract brings warmth to the taste. Heavy whipping cream makes the cheesecake light and fluffy. Cherry pie filling provides a sweet and tart topping. Fresh cherries can add a nice touch if you want to garnish your dessert.
Having everything ready helps you make the cheesecake smoothly. This way, you can focus on mixing and layering the flavors. Trust me, each ingredient plays a role in making this cheesecake a delight.
Step-by-Step Instructions
Preparing the Crust
To make the crust, start by taking a medium bowl. Combine 1 ½ cups of graham cracker crumbs with ½ cup of melted unsalted butter. Mix well until the crumbs soak up the butter. This helps the crust stick together. Next, press the mixture firmly into the bottom of a 9-inch springform pan. Use the back of a measuring cup to pack it tightly. This step is key for a sturdy base. Chill the pan in the refrigerator for about 30 minutes while you prepare the filling.
Making the Filling
Now, let’s create the creamy filling. In a large mixing bowl, take 2 cups of softened cream cheese. Beat it with an electric mixer on medium speed until smooth and creamy. This should take about 2-3 minutes. Slowly add 1 cup of powdered sugar and 1 teaspoon of vanilla extract as you mix. Keep mixing until everything blends well. The filling should be sweet and flavorful.
Assembling the Cheesecake
Next, whip 1 cup of heavy cream in a separate bowl until stiff peaks form. This means it should hold its shape well. Gently fold the whipped cream into the cream cheese mixture. Be careful to keep the air in the whipped cream; this makes your cheesecake light and fluffy. Once combined, pour the cream cheese filling over the chilled crust. Use a spatula to smooth the top.
Now, it's time for the cherry topping. Spoon 2 cups of cherry pie filling evenly over the cheesecake. Spread it gently so it covers the top. Finally, cover the pan with plastic wrap and chill it in the refrigerator for at least 4 hours, or overnight for the best results. Once set, release the springform pan, slice, and enjoy!
Tips & Tricks
Achieving the Perfect Texture
To fold whipped cream, gently scoop the cream from the bottom using a spatula. Turn the spatula over as you fold. This keeps the whipped cream light. Make sure to stop folding when you no longer see white streaks. This keeps the air in the mixture, giving your cheesecake its fluffy feel.
For a smooth filling, beat the cream cheese until it is very creamy. If it is still lumpy, the filling will not be smooth. Gradually add sugar and vanilla while mixing. This helps blend everything well.
Presentation Tips
For an elegant finish, serve your cheesecake slices on pretty dessert plates. You can drizzle some extra cherry filling on the side of each slice. This makes a colorful display. Top each slice with a dollop of whipped cream. This adds a nice touch.
For garnishing, use fresh cherries. Place them on top of the cheesecake or beside the slice. This makes the dessert look fresh and inviting.
Common Mistakes to Avoid
One common mistake is overmixing the filling. This can make the cheesecake dense. Mix until just combined to keep it light and airy.
Another mistake is not chilling the cheesecake long enough. It needs at least 4 hours in the fridge. For best results, chill it overnight. This helps the flavors blend and the filling set properly.
Pro Tips
- Use Fresh Ingredients: For the best flavor, opt for fresh cherries when garnishing. They add a vibrant touch and enhance the overall presentation.
- Chill Thoroughly: Allow the cheesecake to chill for at least 4 hours or overnight. This ensures it sets properly and develops a richer flavor.
- Whip Cream Correctly: When whipping the cream, ensure it reaches stiff peaks. This will help create a light and airy cheesecake filling.
- Customize the Toppings: Feel free to get creative with toppings! Consider adding chocolate shavings or crushed nuts for added texture and flavor.
Variations
Flavor Variations
You can change the fruit toppings to fit your taste. Strawberries, blueberries, or raspberries work well. Each fruit gives a new twist to the cheesecake. You can also try different flavors for the cheesecake base. Consider adding lemon juice for a tart touch or almond extract for a nutty flavor. Each option opens up a new world of taste.
Crust Alternatives
If you want a unique crust, try using chocolate cookies instead of graham crackers. This creates a rich and tasty base. Almond flour can also work well for a nutty crust. For those who need gluten-free options, use gluten-free graham cracker crumbs or nut-based crusts. These options keep your dessert delightful without compromising taste.
Serving Suggestions
This cheesecake pairs nicely with whipped cream or a drizzle of chocolate sauce. Both add a fun layer of flavor. For special occasions, serve it with fresh fruit or edible flowers. They make the dessert look stunning and festive. You can also place the cheesecake on a dessert table at gatherings. It is sure to impress your guests and leave them wanting more.
Storage Info
How to Store
To keep your no-bake cherry cheesecake fresh, store it in the fridge. Use an airtight container or cover it with plastic wrap. This helps keep out air and moisture. Always place it on a flat surface so it doesn’t get squished.
Your cheesecake lasts about five days in the fridge. After that, the texture and taste might change. If you want to keep it longer, consider freezing.
Freezing Instructions
You can freeze this cheesecake for later enjoyment. First, let it chill in the fridge for at least four hours. After that, carefully wrap it in plastic wrap and foil. This helps prevent freezer burn.
When you are ready to eat it, take it out of the freezer. Place it in the fridge for about six hours or overnight to thaw. Avoid using the microwave, as it can ruin the texture. When thawed, your cheesecake should still taste great and have a nice, creamy texture.
FAQs
Can I use other fruits instead of cherries?
Yes, you can! Feel free to switch the cherry topping. Here are some great options:
- Blueberries
- Strawberries
- Raspberries
- Peaches
- Mixed berries
These fruits can be fresh or in pie filling. Each will add its unique flavor. You can also mix and match for a fun twist!
How long does it take to set?
The cheesecake needs at least four hours to chill. This time helps it firm up. I recommend chilling it overnight for the best results. The longer it rests, the richer the flavor gets.
Can I make this cheesecake in advance?
Absolutely! This cheesecake is perfect for making ahead. You can prepare it one or two days in advance. Just store it in the fridge until you’re ready to serve. Make sure to cover it well. This will keep it fresh and tasty.
This blog post outlined a simple and tasty cheesecake recipe. We covered ingredients, step-by-step instructions, and tips for the best results. You learned how to customize flavors and store your cheesecake. Remember to chill it for the right amount of time. Avoid common mistakes like overmixing. With practice, you can impress your friends and family with this dessert. Now, get in the kitchen and start baking your delicious cheesecake! Enjoy every bite!