Are you ready to impress your friends and family with mouthwatering garlic knots? These soft, buttery delights are not only easy to make, but they’ll also satisfy any craving. In this guide, I’ll walk you through every step, from mixing the perfect dough to baking golden knots that are bursting with flavor. Let’s dive into the world of garlic knots and make something unforgettable!
Ingredients
To make garlic knots that satisfy any craving, gather these simple ingredients:
– 2 cups all-purpose flour
– 1 teaspoon instant yeast
– 1 teaspoon sugar
– ¾ teaspoon salt
– ¾ cup warm water (about 110°F)
– 2 tablespoons olive oil (plus extra for brushing)
– 4 cloves garlic, minced
– ¼ cup unsalted butter, melted
– 2 tablespoons fresh parsley, chopped
– ½ teaspoon dried oregano
– ½ teaspoon red pepper flakes (optional)
– Grated Parmesan cheese for garnish (optional)
These ingredients work together to create tender knots that burst with flavor. The all-purpose flour gives the right texture, while instant yeast ensures a quick rise. Sugar feeds the yeast, helping the dough become light and airy. Warm water activates the yeast, making the dough rise perfectly.
Olive oil adds richness, and garlic brings that strong, savory kick. Fresh parsley and dried oregano boost the taste, while red pepper flakes give a little heat if you like. Finally, Parmesan cheese can elevate the dish, adding a salty finish when you sprinkle it on top.
Step-by-Step Instructions
Detailed instructions for making garlic knots
1. Mixing and forming the dough: Start by taking a big bowl. Add 2 cups of all-purpose flour, 1 teaspoon of instant yeast, 1 teaspoon of sugar, and ¾ teaspoon of salt. Mix these dry ingredients well. Now, slowly pour in ¾ cup of warm water and 2 tablespoons of olive oil. Stir until you see a soft dough form.
2. Kneading and rising process: Place your dough on a lightly floured surface. Knead it for about 5 minutes until it feels smooth and elastic. Next, put the dough in a greased bowl. Cover it with a clean kitchen towel. Let it rise in a warm spot for about 1 hour or until it doubles in size.
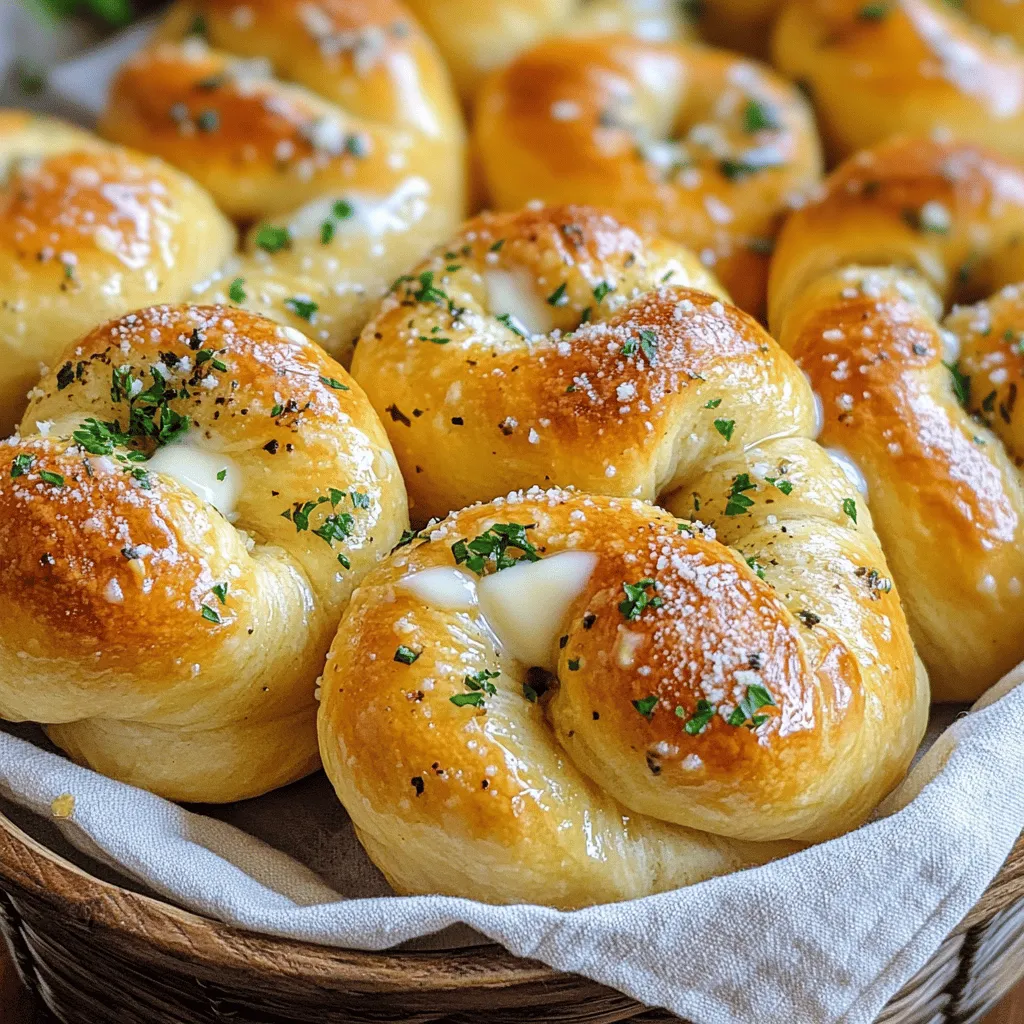
3. Shaping the garlic knots: Once your dough has risen, punch it down gently. Move it to a floured surface and divide it into 12 equal pieces. Roll each piece into a rope about 6-8 inches long. Tie each rope into a knot and place them on a baking sheet lined with parchment paper.
Baking the knots
1. Preheat the oven: While the dough rises, preheat your oven to 425°F (220°C). This helps the knots bake evenly.
2. Baking times and visual cues for doneness: Place the knots in the oven and bake them for 12-15 minutes. Look for a golden brown color on the knots. This is your sign that they are ready!
Finishing touches
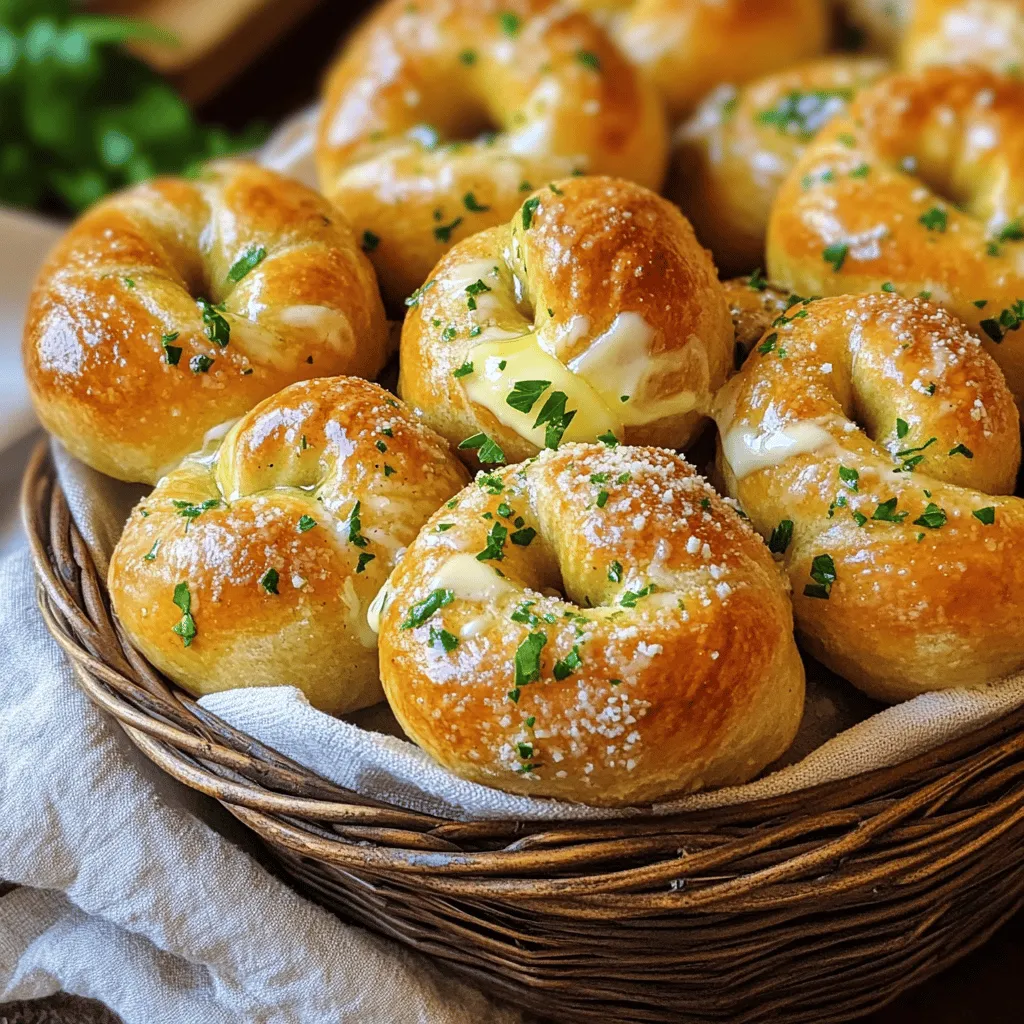
1. Applying the garlic butter mixture: In a small bowl, combine ¼ cup of melted unsalted butter, 4 cloves of minced garlic, 2 tablespoons of chopped fresh parsley, ½ teaspoon of dried oregano, and ½ teaspoon of red pepper flakes if you want a kick. Brush this mixture generously over the knots right after they come out of the oven.
2. Optional garnishes: For an extra touch, sprinkle some grated Parmesan cheese on top of the knots. You can also add more chopped parsley for color.
Enjoy these tasty garlic knots and share them with friends or family!
Tips & Tricks
Achieving the perfect texture
Kneading your dough is key for great garlic knots. It helps develop gluten, which gives the knots their chew. Knead for about five minutes until smooth.
Letting the dough rise is just as important. Place it in a warm spot, around 75-80°F. This helps the yeast grow and makes your knots light and fluffy.
Flavor enhancements
You can play with herbs and spices to make your knots unique. Try adding fresh basil or thyme for a twist. Red pepper flakes can add a nice kick if you like spice.
Customizing your garlic butter mixture is also fun. Mix in some grated Parmesan or a dash of lemon zest. These little changes can make a big difference in flavor.
Presentation suggestions
Serve your garlic knots warm for the best taste. Place them in a breadbasket lined with a soft napkin. This keeps them cozy and inviting.
Get creative with serving ideas. Offer dips like marinara sauce or garlic aioli. This adds a fun element and enhances the eating experience.
Variations
Different types of garlic knots
You can play with garlic knots in fun ways. One tasty option is to add cheese. Try stuffing the dough with mozzarella. As the knots bake, the cheese melts and makes the center gooey. You’ll love the stretchy cheese paired with garlic.
Another fun twist is to make spicy garlic knots. Just add more red pepper flakes to the garlic butter mix. This will give your knots a nice kick. You can also add jalapeños for extra heat. These spicy knots are perfect for those who enjoy bold flavors.
Alternative ingredients
If you need a gluten-free option, try using gluten-free flour. Look for blends that can replace all-purpose flour. They work well and keep the texture light. You may need a bit more water, so adjust as needed.
For vegan garlic knots, simply swap out the butter with olive oil. Use a plant-based cheese if you’re adding cheese. This way, you can enjoy the same great taste while sticking to your diet.
Cultural variations
Garlic knots have a few regional twists. In New York, you often find them served with marinara sauce. This tasty dip adds a nice touch to the soft knots. In Italy, you might see them served with fresh herbs or different cheeses. Each culture brings its own flair to this classic treat.
Storage Info
Best practices for storing garlic knots
To keep your garlic knots fresh, store them right. First, let them cool completely. This step helps prevent steam from making them soggy.
– Refrigeration tips: Place the cooled knots in an airtight container. They stay fresh for up to three days in the fridge. If you want to enjoy them longer, consider freezing.
– Freezing instructions: Wrap the knots tightly in plastic wrap. Then, put them in a freezer-safe bag. They can last for up to three months in the freezer. When you’re ready to eat them, just thaw and reheat.
Reheating methods
To enjoy your garlic knots again, reheating is key. You want them warm and soft, not dry.
– Best ways to reheat for optimal taste: The oven works best. Preheat the oven to 350°F (175°C). Place the knots on a baking sheet and heat for about 10 minutes. This method keeps them crispy on the outside.
– Avoiding sogginess: If you use a microwave, be careful. Heat them for just 10-15 seconds. Too much time can make them chewy and soggy. If you want to avoid this, cover them with a paper towel to help keep some moisture away.
FAQs
Common questions about garlic knots
How to prevent garlic knots from becoming tough?
To keep your garlic knots soft, knead the dough gently. Over-kneading can make them tough. Also, ensure you let the dough rise until it doubles in size. This helps the knots stay light.
Can I make dough ahead of time?
Yes! You can make the dough and let it rise. After the first rise, cover it and place it in the fridge. Use it within 24 hours. Just let it come to room temperature before shaping.
What can I serve garlic knots with?
Garlic knots pair well with marinara sauce for dipping. They also go great with soups and salads. Try serving them with a fresh garden salad for a complete meal.
Troubleshooting tips
Why are my garlic knots flat?
Flat garlic knots may come from not enough rising time. Make sure your dough doubles in size. Also, if you roll the knots too thin, they won’t puff up while baking.
How to adjust for high altitude baking?
At high altitudes, you may need to reduce yeast slightly. Increase the flour by a couple of tablespoons to achieve the right dough consistency. Monitor the rising time, as it can vary.
In this post, we covered how to make delicious garlic knots. You learned about the ingredients, the step-by-step process, and key tips for perfect results. Remember to knead well for the right texture and feel free to customize with your favorite herbs. Whether you want to store them or create variations, the options are endless. Enjoy your warm garlic knots with dips or as a side. With a bit of practice, you can impress friends and family anytime. Happy baking!