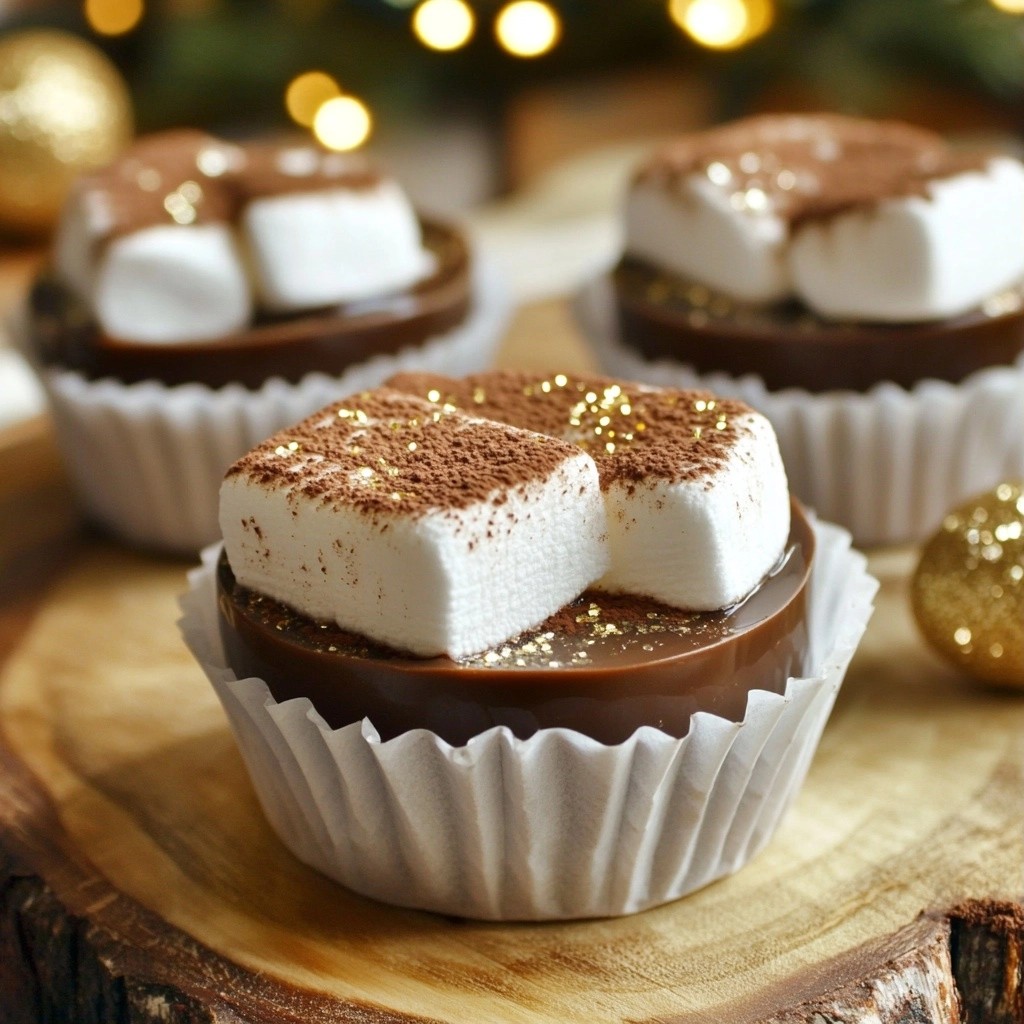
If you crave a sweet treat that’s simple and satisfying, you’re in the right place! My Dreamy No-Bake Marshmallow Fudge Cups will impress anyone lucky enough to try them. With just a few ingredients, you can create a delicious dessert that requires no baking. From rich chocolate to fluffy marshmallows, this recipe has it all. So, grab your mini muffin tin and let’s make something truly delightful!
Why I Love This Recipe
- Easy Preparation: This no-bake recipe is quick and simple, making it perfect for last-minute dessert cravings.
- Decadent Flavor: The combination of chocolate and marshmallows creates a rich, indulgent taste that everyone will love.
- Customizable: You can easily modify the recipe by adding different nuts or toppings to suit your taste.
- Fun Presentation: These fudge cups look adorable and festive, making them a hit for parties and gatherings.
Ingredients
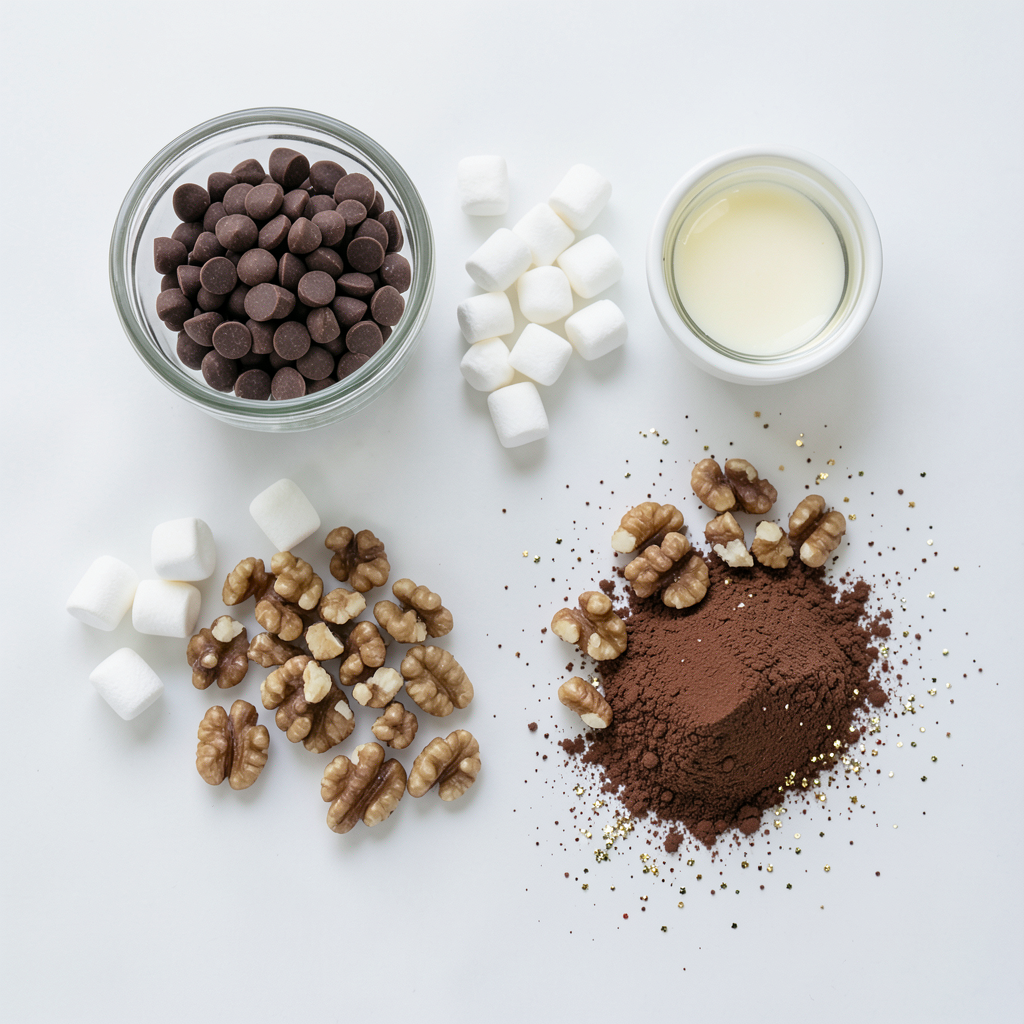
To make the Dreamy No-Bake Marshmallow Fudge Cups, gather the following ingredients:
- 1 cup semi-sweet chocolate chips
- 1 cup sweetened condensed milk
- 1 teaspoon vanilla extract
- 2 cups mini marshmallows
- 1/2 cup chopped walnuts or pecans (optional)
- 1/4 cup unsweetened cocoa powder (for dusting)
- Edible glitter or sprinkles (optional for garnish)
These ingredients create a rich and creamy fudge that melts in your mouth. The semi-sweet chocolate chips provide a deep chocolate flavor. The sweetened condensed milk adds sweetness and richness. Vanilla extract enhances the overall taste, while mini marshmallows give that fluffy texture. You can add walnuts or pecans if you like some crunch. The cocoa powder adds a lovely touch on top, and sprinkles make it festive.
When you gather these ingredients, make sure they are fresh. Quality ingredients lead to a better taste.
Step-by-Step Instructions
Preparing the Mini Muffin Tin
- First, line the mini muffin tin with paper liners. This makes it easy to remove the fudge later.
- If you don't have paper liners, lightly grease the tin with cooking spray. This helps the fudge cups pop out smoothly.
Melting the Chocolate Mixture
- In a medium saucepan, combine 1 cup of semi-sweet chocolate chips and 1 cup of sweetened condensed milk.
- Cook this mixture over low heat. Stir continuously until the chocolate melts and the mixture is smooth.
Mixing in Marshmallows
- Once melted, remove the saucepan from the heat. Stir in 1 teaspoon of vanilla extract for extra flavor.
- Next, fold in 2 cups of mini marshmallows and 1/2 cup of chopped walnuts or pecans, if you like. Mix until everything is evenly combined.
Filling and Smoothing the Muffin Cups
- Spoon the chocolate-marshmallow mixture into each muffin cup. Fill them about 3/4 full.
- Use the back of a spoon or spatula to smooth the tops. This gives them a nice look.
Dusting with Cocoa Powder
- For an elegant touch, sprinkle a light dusting of unsweetened cocoa powder on top of each cup. It adds flavor and style.
Chilling the Fudge Cups
- Place the muffin tin in the fridge for at least 2 hours. This allows the fudge cups to set properly.
- When they are firm, carefully remove the cups from the tin. If you want, add edible glitter or sprinkles for a fun finish.
Tips & Tricks
Best Practices for Melting Chocolate
- Avoiding burning the chocolate: Melt chocolate slowly. Use low heat. Stir often. If you see steam, lower the heat.
- Ensuring a smooth consistency: Make sure your saucepan is dry. Water can cause the chocolate to seize. Stir until it's creamy and shiny.
Customizing Your Fudge Cups
- Altering add-ins and toppings: You can mix in crushed cookies or dried fruit. Try different nuts or even coconut.
- Making it nut-free: Leave out the nuts or use seeds. Sunflower seeds add a nice crunch without allergens.
Serving Suggestions
- Pairing with beverages: Serve with milk, coffee, or hot cocoa. These drinks balance the sweetness.
- Presentation ideas: Use colorful cupcake liners. Add a sprinkle of edible glitter. It makes the fudge cups look fun and fancy!
Pro Tips
- Use Quality Chocolate: For the best flavor, opt for high-quality semi-sweet chocolate chips. They will melt better and provide a richer taste.
- Chill Before Serving: Allow the fudge cups to chill in the refrigerator longer if possible. This will help them firm up nicely and enhance the texture.
- Experiment with Mix-ins: Feel free to get creative with mix-ins like dried fruits, coconut, or different nuts. This will add variety to your fudge cups.
- Serve with Style: Consider serving these fudge cups on a decorative platter and adding a drizzle of chocolate sauce for an elegant presentation.
Variations
Flavor Variations
You can add fun flavors to your fudge cups. One great option is peppermint extract. Just a few drops will give your treats a fresh, minty taste. This works well, especially during the holidays. You can also use white chocolate instead of semi-sweet chocolate. White chocolate adds a creamy and sweet flavor that pairs well with the marshmallows. This twist makes the fudge cups feel extra special.
Allergy-Friendly Options
If you need vegan substitutes, use dairy-free chocolate chips and coconut cream instead of sweetened condensed milk. This keeps the fudge creamy while being plant-based. For gluten-free options, make sure to check your chocolate chips. Most brands are gluten-free, but it's always good to double-check. This way, everyone can enjoy these tasty treats!
Seasonal Twists
You can make your fudge cups festive with holiday-themed toppings. Try adding crushed candy canes for Christmas or colorful sprinkles for birthdays. You can even use seasonal fruits like raspberries or strawberries on top. These small changes make your treats look and taste great for any occasion. Don’t be afraid to get creative and have fun with your fudge cups!
Storage Info
Best Storage Practices
To keep your fudge cups fresh, use airtight containers. This helps block air and moisture. Store them in a cool, dark place or in the fridge. This keeps the texture smooth and the flavor rich. Avoid using regular plastic wrap as it can let air in.
Freezing Instructions
You can freeze the fudge cups for later enjoyment. Place them in a single layer in a freezer-safe container. Separate each layer with parchment paper to prevent sticking. When ready to eat, take them out and let them thaw in the fridge overnight. This keeps them creamy and delicious.
Shelf Life
In the fridge, these fudge cups last about one week. Look for any signs of spoilage, like an off smell or change in texture. If they feel hard or dry, it's time to toss them out. Always trust your senses; they guide you well!
FAQs
How long do no-bake marshmallow fudge cups last?
No-bake marshmallow fudge cups last about one week in the fridge. Keep them in an airtight container. They will stay fresh and tasty. If you freeze them, they can last up to three months. Just thaw them in the fridge before serving.
Can I replace the chocolate chips?
Yes, you can replace the chocolate chips if you want. Try using dark chocolate, milk chocolate, or even white chocolate. Each option brings a new flavor. Just make sure to use the same amount, one cup, for the best results.
What can I use instead of sweetened condensed milk?
You can use coconut milk or a homemade version as a swap. To make a homemade version, mix one cup of milk with one cup of sugar. Cook it over low heat until it thickens. This will give you a similar creamy texture.
Are there any vegan options for this recipe?
Yes, there are vegan options you can use. Choose dairy-free chocolate chips and a plant-based sweetened condensed milk. You can find this in stores or make your own with coconut milk. This way, you keep the creamy vibe without dairy.
Can I use larger marshmallows instead of mini ones?
You can use larger marshmallows, but you will need to chop them. Cut the larger marshmallows into smaller pieces. This will help them mix well in your fudge. It also ensures you get that sweet marshmallow flavor in each bite.
These no-bake marshmallow fudge cups are fun and easy to make. We covered all the ingredients, from chocolate chips to sprinkles. The step-by-step guide simplifies the process, ensuring tasty treats every time. Remember to chill them well and store in airtight containers for freshness. You can customize the fudge cups with different flavors or toppings for any occasion.
Experiment with your ideas and enjoy these sweet bites!