Craving a sweet treat that balances rich chocolate with a fresh mint flavor? Look no further than my Chocolate Mint Oreo Truffles! This easy recipe combines just a handful of simple ingredients, including Oreo cookies and cream cheese, to create a delightful dessert everyone will love. Perfect for parties or a cozy night in, let’s dive into this deliciously fun recipe that will impress your friends and family!
Why I Love This Recipe
- Easy to Make: With just a few simple ingredients and steps, these truffles come together quickly, making them perfect for any occasion.
- Decadent Flavor: The combination of chocolate, mint, and cream cheese creates a rich and indulgent treat that everyone loves.
- Customizable: You can easily adjust the decorations or even the flavor profile by using different extracts or toppings.
- Perfect for Gifting: These truffles look elegant and taste divine, making them an ideal homemade gift for family and friends.
Ingredients
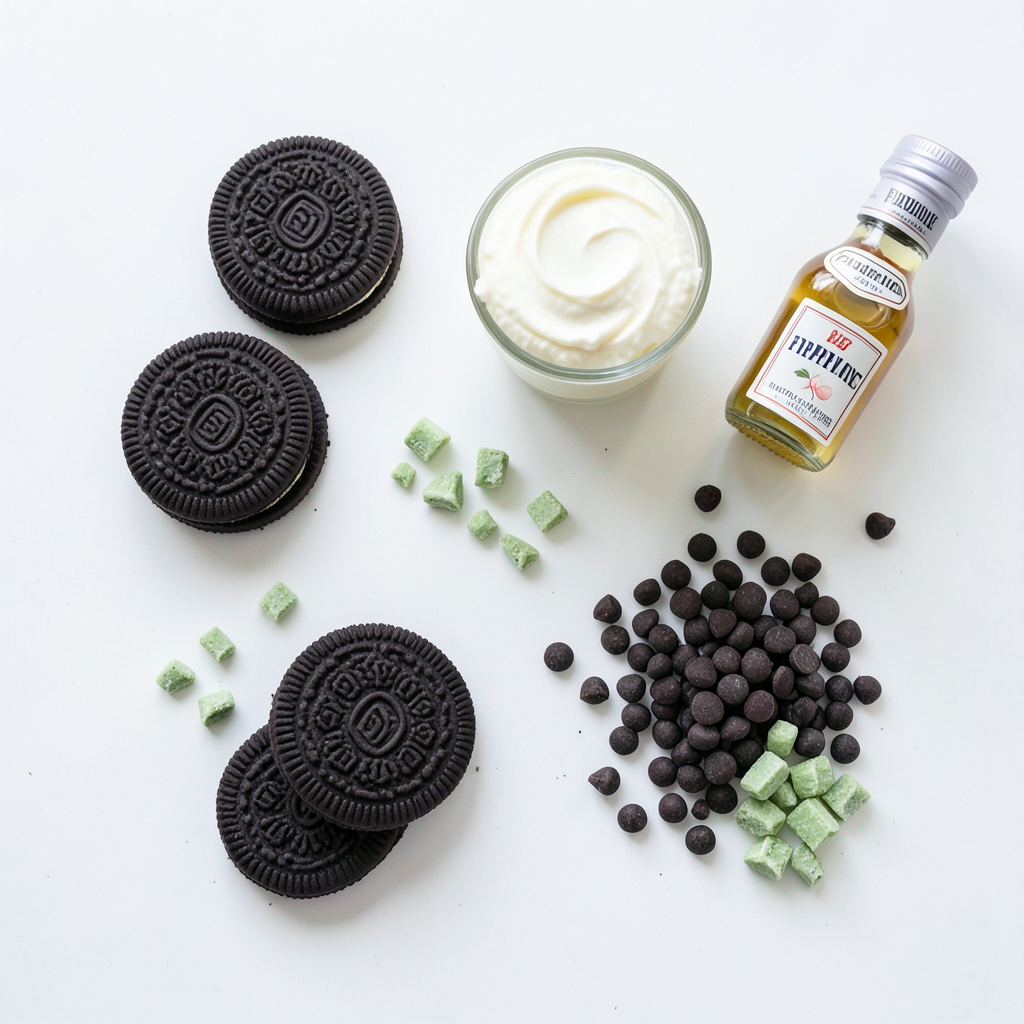
To make these tasty Chocolate Mint Oreo Truffles, you'll need a few simple ingredients:
- Oreo Cookies
- Cream Cheese
- Peppermint Extract
- Dark Chocolate Chips
- Coconut Oil
- Mint Candies or Sprinkles
Each ingredient plays a key role in creating the perfect truffle. The Oreo cookies give a rich, chocolatey base. Cream cheese adds creaminess and helps bind the mixture. Peppermint extract gives that cool minty flavor, making these truffles refreshing. Dark chocolate chips provide a smooth coating, while coconut oil helps the chocolate melt evenly. Finally, mint candies or sprinkles add a festive touch and crunch on top. This mix of flavors and textures makes these truffles a delightful treat!
Step-by-Step Instructions
Preparing the Oreo Mixture
First, grab your food processor. Add the Oreo cookies and pulse them until they turn into fine crumbs. This step is key. You want the crumbs to mix well with the cream cheese. Next, take a large bowl and combine the Oreo crumbs with the softened cream cheese and peppermint extract. Mix it until everything blends together and feels sticky. This mix will become the base for your truffles.
Rolling the Truffles
Now, it’s time to roll the mixture into truffles. Use your hands to form small balls, about one inch in diameter. Don’t worry about making them perfect; a little shape variation adds charm. Once you’ve shaped them, place the truffles on a baking sheet lined with parchment paper. This keeps them from sticking.
Melting the Chocolate
Next, we’ll melt the chocolate. Take a microwave-safe bowl and add the dark chocolate chips and coconut oil. Heat them in the microwave in 30-second bursts. Stir the mixture between each interval until it becomes completely smooth. Be careful not to overheat; you want a nice, glossy chocolate.
Coating the Truffles
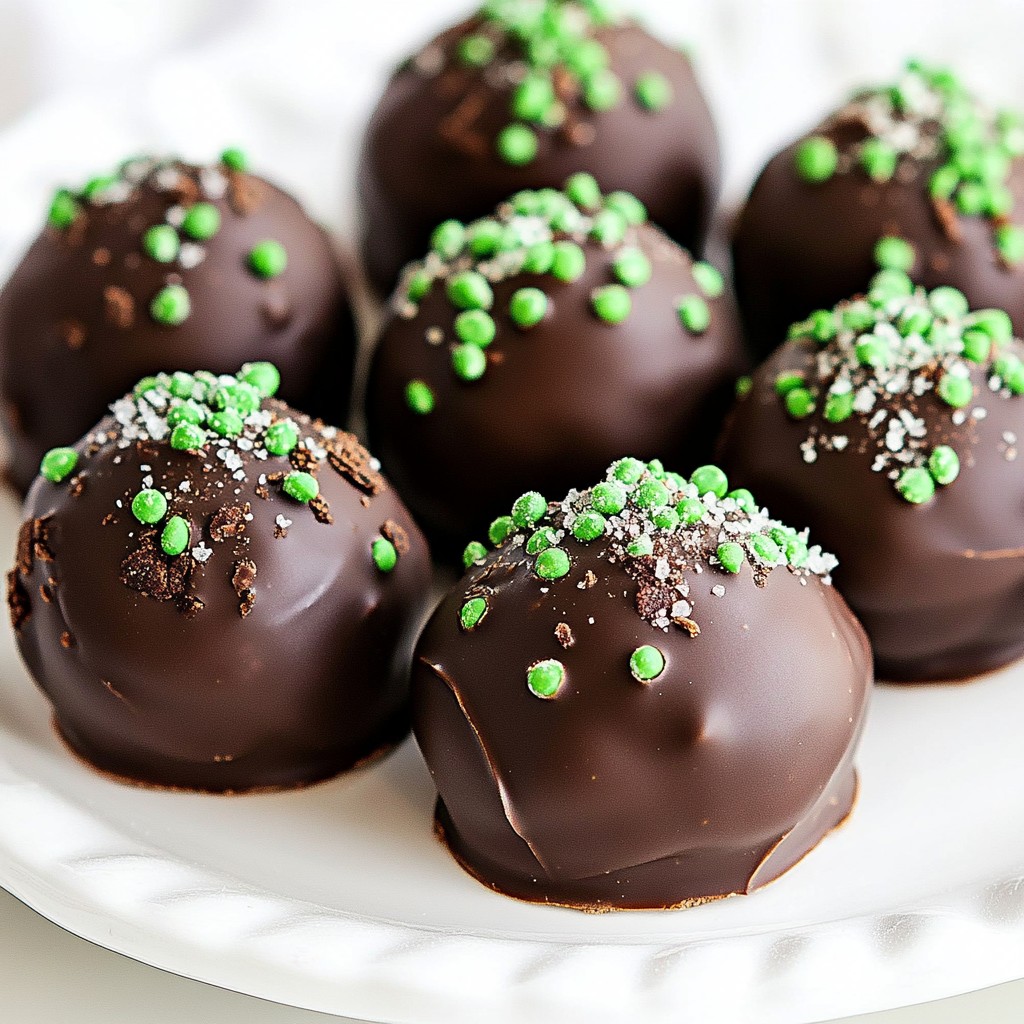
After melting the chocolate, it's time to coat the truffles. Remove the truffles from the fridge and dip each one into the melted chocolate. Use a fork to help coat them evenly. Make sure to tap off any extra chocolate before placing them back on the lined baking sheet. While the chocolate is still wet, sprinkle crushed mint candies or decorative sprinkles on top. This adds a fun touch!
Setting the Chocolate
Finally, place the truffles back in the refrigerator. Let them chill for about 15 to 20 minutes. This helps the chocolate set and firm up nicely. Once they are set, your chocolate mint Oreo truffles will be ready to enjoy!
Tips & Tricks
Perfecting the Truffle Texture
To get the right consistency for your truffles, you want a sticky mix. First, you pulse the Oreo cookies until they are fine crumbs. Then, mix these crumbs with softened cream cheese and peppermint extract. When you blend them, the mix should hold together well. If it feels too dry, add a little more cream cheese. This helps the truffles stay moist and tasty.
Optimal Melting Techniques
Melting chocolate can be tricky. To avoid burning it, use gentle heat. I recommend a microwave-safe bowl. Start by adding dark chocolate chips and a bit of coconut oil. Heat it in 30-second bursts. Stir the chocolate after each interval. This way, it melts evenly. When smooth, it’s ready for dipping. Remember, patience is key here!
Decoration Ideas
Garnishing your truffles makes them pop! While the chocolate is still wet, add crushed mint candies or colorful sprinkles on top. You could even drizzle white chocolate over them for a fun twist. For a neat touch, place each truffle in a small cupcake liner. Fresh mint leaves also add a nice look. Get creative and make your truffles shine!
Pro Tips
- Chill for Better Coating: Make sure to chill the truffles sufficiently before dipping them in chocolate. This helps them hold their shape and makes the coating process easier.
- Use Quality Chocolate: For the best flavor, opt for high-quality dark chocolate. It will enhance the overall taste of your truffles and provide a smooth coating.
- Experiment with Flavors: Feel free to customize your truffles by adding different extracts or fillings, such as almond or orange, to give them a unique twist.
- Store Properly: Keep the truffles in an airtight container in the refrigerator to maintain their freshness and texture for up to two weeks.
Variations
Alternate Flavor Profiles
You can change the flavor of your truffles. Use white chocolate or milk chocolate instead of dark chocolate. This switch gives a sweeter taste and a different look. White chocolate adds a creamy touch. Milk chocolate offers a classic flavor. Both options work well with the mint taste.
Unique Add-ins
Get creative by adding nuts, dried fruit, or flavored extracts. Chopped nuts like almonds or walnuts add crunch. Dried fruits like cranberries or raisins add chewiness and sweetness. You can also try different extracts, like vanilla or orange, to give a twist to your truffles.
Seasonal Variations
Make your truffles festive for holidays or special events. For Christmas, add red and green sprinkles. In the fall, use pumpkin spice to change the flavor. You can also shape the truffles into holiday-themed designs, like hearts for Valentine’s Day or pumpkins for Halloween. These small changes make your treats special for any occasion.
Storage Info
Best Storage Practices
Store your Chocolate Mint Oreo Truffles in an airtight container. This keeps them fresh and moist. You can layer them with parchment paper to avoid sticking. Place the container in the fridge to maintain the best taste and texture.
Freezing Truffles
Freezing truffles is easy. First, place them on a baking sheet in a single layer. Freeze for about an hour until firm. Then, transfer them to a freezer-safe bag or container. To thaw, just take them out and let them sit at room temperature for about 15 minutes.
Shelf Life
These truffles last about one week in the fridge. If you freeze them, they can stay fresh for up to three months. Use these time frames to enjoy your treats at their best!
FAQs
Can I use low-fat cream cheese?
Yes, you can use low-fat cream cheese. It will change the texture a bit. The truffles may not be as rich, but they will still taste good. Just make sure it is softened for easy mixing.
How do I make these truffles in advance?
You can make these truffles a day before you want to serve them. Just follow the steps and then store them in the fridge. Keep them in an airtight container. This will keep them fresh and ready to enjoy!
What can I use instead of Oreos?
If you want a different flavor, you can use any chocolate wafer cookies. Some people like to use chocolate graham crackers too. Just make sure they are finely crushed to mix well with the cream cheese.
Is there a way to make these truffles gluten-free?
Yes, you can make these truffles gluten-free. Use gluten-free chocolate cookies instead of Oreos. Look for cookies that have a similar taste and texture to Oreos.
Can I decorate truffles without mint candy?
Absolutely! You can use sprinkles, crushed nuts, or even colored sugar. Get creative with your toppings! You can also leave them plain for a simple look.
In this blog post, you learned how to make delicious chocolate truffles using simple ingredients. We covered each step, from mixing the Oreo base to coating the truffles in smooth chocolate. I also shared tips for achieving the perfect texture and decoration ideas to impress. Remember, you can customize your truffles by trying different flavors or add-ins. These treats are easy to store and great for sharing. Enjoy making these sweet delights and feel free to experiment!