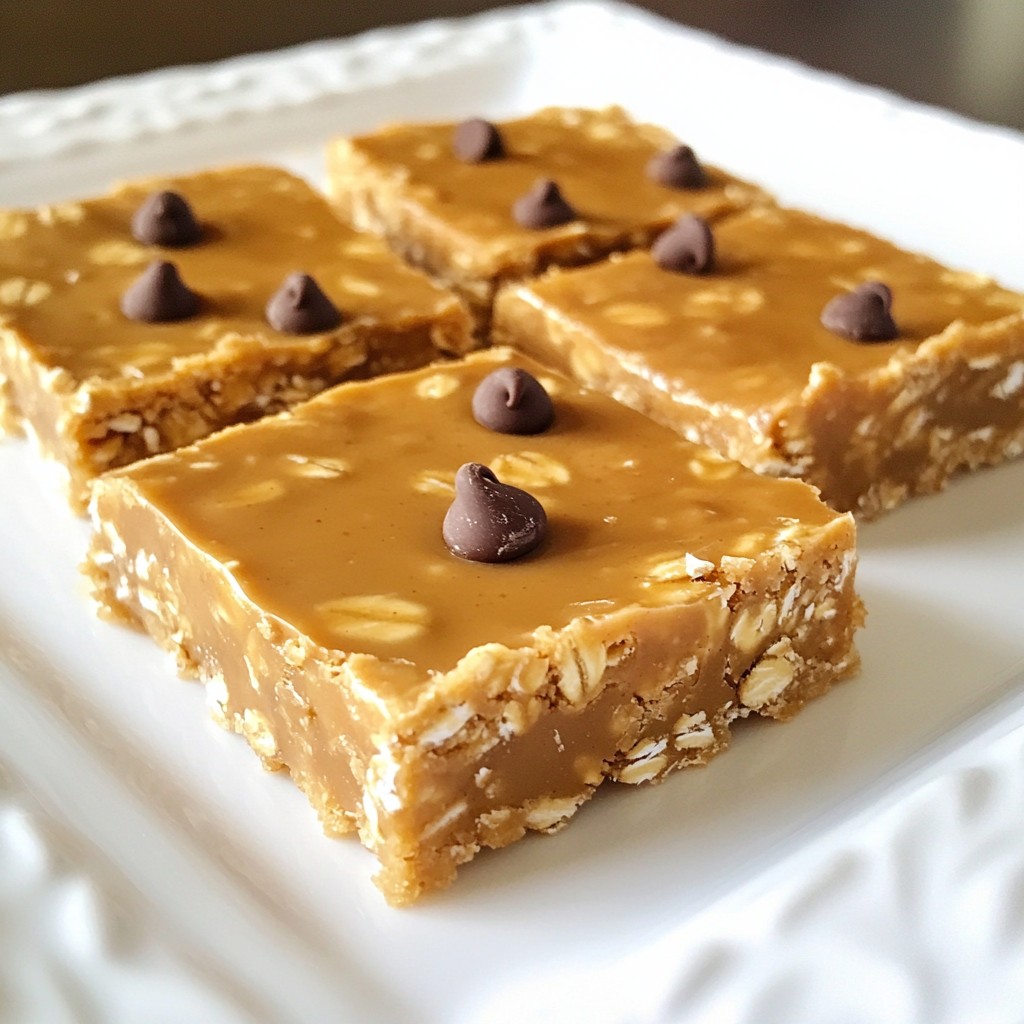
If you’re craving a healthy snack that’s quick and easy, look no further! These Chewy No-Bake Peanut Butter Oat Bars are not only delicious but also packed with wholesome ingredients. With just a few simple steps, you can whip up a treat that will satisfy your sweet tooth and fuel your day. Ready to dive into this tasty recipe? Let’s get started!
Why I Love This Recipe
- Quick and Easy: This recipe takes just 10 minutes to prepare, making it perfect for busy days when you need a healthy snack fast.
- Nutritious Ingredients: Packed with oats, peanut butter, and flaxseed, these bars are not only delicious but also provide essential nutrients and energy.
- Customizable: Feel free to swap out the chocolate chips for dried fruits, nuts, or seeds to suit your taste or dietary preferences.
- Perfect for Meal Prep: These bars can be made ahead of time and stored in the fridge, making them a convenient grab-and-go snack throughout the week.
Ingredients
The key to making Chewy No-Bake Peanut Butter Oat Bars is simple and wholesome ingredients. Each one plays a part in making these bars tasty and healthy. Here’s what you need:
- 1 cup rolled oats
- 1/2 cup creamy peanut butter
- 1/2 cup honey or maple syrup
- 1/4 cup ground flaxseed (optional for added nutrition)
- 1/2 cup mini chocolate chips
- 1/4 teaspoon salt
- 1/2 teaspoon vanilla extract
Using rolled oats is crucial. They provide a chewy texture. Creamy peanut butter gives the bars a rich flavor and healthy fats. Honey or maple syrup adds sweetness and binds the mix. Ground flaxseed boosts the nutrition, but it’s optional.
Mini chocolate chips add a fun touch. They melt slightly, making the bars even more delicious. Salt enhances all the flavors, while vanilla extract gives a warm, inviting aroma.
These ingredients make for a snack that is easy to prepare. They are great for kids and adults alike. You can store them in the fridge and enjoy them all week.
Step-by-Step Instructions
Preparation Overview
Making chewy no-bake peanut butter oat bars is simple. It takes just 10 minutes of prep time. You will need a few bowls and an 8x8 inch pan. Gather your ingredients first. This helps you stay organized and efficient.
Mixing Dry Ingredients
Start by mixing the dry ingredients. In a large bowl, add 1 cup of rolled oats, 1/4 cup of ground flaxseed, and 1/4 teaspoon of salt. Stir these together until they blend well. This step gives the bars a solid foundation.
Combining Wet Ingredients and Incorporating Them Together
Next, we’ll make the wet mix. In a separate bowl, warm 1/2 cup of creamy peanut butter and 1/2 cup of honey (or maple syrup) in the microwave for about 20-30 seconds. Stir them until they melt and combine smoothly. Then, pour this mix into the dry ingredients. Add 1/2 teaspoon of vanilla extract too. Mix everything well until the oats are coated.
Setting Bars in the Pan
Now it’s time to set the mixture in the pan. Line an 8x8 inch pan with parchment paper. Leave some paper hanging over the sides for easy removal later. Transfer the oat mixture into the pan. Use a spatula or your hands to press it down firmly. Make sure it is even and compact.
Cutting and Serving the Bars
After pressing down the mixture, place the pan in the refrigerator for at least 1 hour. This helps the bars set. Once they are firm, lift them out using the parchment paper. Cut them into squares or rectangles. Store any leftovers in an airtight container in the fridge for up to a week. Enjoy your tasty and healthy snack!
Tips & Tricks
Ensuring Perfect Chewiness
To make your bars chewy, use creamy peanut butter. Creamy peanut butter gives a smooth texture. You can also add a bit more honey or maple syrup. This extra sweetness helps bind everything together. Press the mixture firmly into the pan. The more you pack it down, the chewier the bars will be.
Substitutions for Dietary Preferences
You can easily tweak this recipe. If you need it vegan, replace honey with maple syrup. For nut allergies, use sunflower seed butter. You can skip the chocolate chips if you want less sugar. Ground flaxseed is optional but adds good nutrition. Feel free to mix in other seeds or dried fruits.
Storing and Freezing for Longevity
These bars stay fresh in an airtight container. Keep them in the fridge for up to a week. If you want to save some for later, freeze them. Cut them into squares before freezing for easy snacking. Just wrap each piece tightly in plastic wrap. Enjoy them anytime you need a tasty snack!
Pro Tips
- Use Natural Peanut Butter: Opt for natural peanut butter without added sugars or oils for a healthier option that still provides great flavor.
- Customize Your Sweetness: Adjust the amount of honey or maple syrup based on your taste preference. You can also use a sugar substitute if desired.
- Chill for Best Texture: Make sure to refrigerate the bars for at least an hour to achieve the perfect chewy texture and to help them hold their shape.
- Add Extra Ingredients: Feel free to include dried fruits, nuts, or seeds for added texture and nutrition. Just be mindful of the overall balance in the recipe.
Variations
Adding Nuts or Seeds for Extra Crunch
You can easily add nuts or seeds to your bars. Almonds, walnuts, or pumpkin seeds work great. Just chop them up and fold them in with the chocolate chips. This adds a nice crunch and boosts nutrition. Nuts are rich in healthy fats, and seeds add fiber. Both improve the taste and texture of your bars.
Flavor Variations: Chocolate or Cranberry
If you love chocolate, try using cocoa powder. Mix in 2 tablespoons with the dry ingredients. This gives your bars a rich chocolate flavor. For a fruity twist, add dried cranberries. Just fold in half a cup with the other mix-ins. The tartness of cranberries pairs well with the sweet peanut butter. You can also swap mini chocolate chips for dark chocolate chunks for a different taste.
Vegan Options Using Maple Syrup
For a vegan version, simply use maple syrup instead of honey. Maple syrup adds a unique sweetness and keeps the bars sticky. You can also choose almond butter or sunflower seed butter instead of peanut butter. This keeps the flavor delicious and plant-based. Enjoy these options while still keeping your snack healthy and fun!
Nutritional Information
Breakdown of Nutritional Values per Serving
Each serving of these Chewy No-Bake Peanut Butter Oat Bars has about:
- Calories: 160
- Protein: 5g
- Fat: 7g
- Carbs: 22g
- Fiber: 3g
- Sugar: 6g
Serving sizes are based on cutting the bars into 12 pieces. Adjust the size to fit your needs.
Health Benefits of Key Ingredients
These bars have many healthy ingredients.
- Rolled Oats: They provide energy and fiber. They help keep you full.
- Peanut Butter: This nut butter is a good source of protein and healthy fats. It can support heart health.
- Honey or Maple Syrup: These natural sweeteners add flavor and offer some vitamins and minerals.
- Ground Flaxseed: This optional ingredient boosts omega-3s and fiber. It’s great for digestion.
These ingredients work together to make a snack that is both tasty and healthy.
Comparison with Store-Bought Snack Bars
Store-bought bars can be high in added sugars and artificial ingredients.
- Control Over Ingredients: You know what goes into your bars. You can choose natural and fresh options.
- Cost-Effective: Making your bars at home can save money compared to buying them.
- Less Waste: Homemade bars can reduce packaging waste. You can use reusable containers for storage.
Choosing to make these Chewy No-Bake Peanut Butter Oat Bars gives you a healthier, tastier snack option.
FAQs
How long do Chewy No-Bake Peanut Butter Oat Bars last?
These bars last up to one week in the fridge. You can store them in an airtight container. This keeps them fresh and chewy for snacking. They also freeze well for up to three months. Just wrap them tightly to avoid freezer burn.
Can I use other nut butters in this recipe?
Yes, you can use other nut butters. Almond butter or cashew butter work great too. Each nut butter adds a unique flavor. Just make sure it is creamy for easy mixing. You can even try sun butter if you need a nut-free option!
Are these bars gluten-free?
Yes, these bars can be gluten-free. Just use certified gluten-free oats. Most rolled oats are naturally gluten-free but may have cross-contamination. Always check the label to be safe. With the right oats, you can enjoy these bars worry-free.
How can I make these bars more nutritious?
To boost nutrition, add ground flaxseed or chia seeds. These add fiber and omega-3 fatty acids. You can also mix in nuts or seeds for extra crunch. Dried fruits like cranberries or raisins can add natural sweetness. Use less sweetener if you like them less sweet.
You learned how to make tasty chewy no-bake peanut butter oat bars. We covered ingredients, easy steps, and helpful tips. You can switch ingredients to fit your needs. Remember, you can add nuts or change flavors. These bars are better than store-bought options. They are simple, healthy, and fun to make. Enjoy these treats with friends and family anytime. You now have a great recipe that meets your needs!