Skip to content
DisclaimerTerms Of UseGDPR PolicyCookie Policy

Lisa Dishes

  • Home
  • Drinks
  • Appetizers
  • Dinner
  • Dessert
  • About
  • Contact
  • Privacy Policy
DisclaimerTerms Of UseGDPR PolicyCookie Policy

lisa

To make a Loaded Veggie Omelette, gather these tasty ingredients: - 4 large eggs - 1/4 cup milk (or plant-based alternative) - 1/2 cup bell peppers, diced (mixed colors) - 1/4 cup red onion, finely chopped - 1/2 cup spinach, roughly chopped - 1/4 cup mushrooms, sliced - 1/2 cup shredded cheese (cheddar or your choice) - 1 tablespoon olive oil - Salt and pepper to taste - Fresh herbs (like parsley or chives) for garnish This mix of veggies and eggs creates a bright, colorful dish. Each bite bursts with flavor. The cheese adds creaminess, while the herbs give it a fresh touch. Feel free to adjust the veggies based on your taste. I love using seasonal produce for the best taste. You can find the full recipe [here]. Start by gathering your ingredients. In a medium bowl, whisk together 4 large eggs and 1/4 cup milk. This will make your omelette fluffy. Next, season the mixture with salt and pepper to taste. Mix well so that the flavors blend. Heat 1 tablespoon of olive oil in a large non-stick skillet over medium heat. Once hot, add 1/2 cup of diced bell peppers and 1/4 cup of finely chopped red onion. Sauté these for about 2 to 3 minutes until they soften. Now, add 1/4 cup of sliced mushrooms and 1/2 cup of roughly chopped spinach to the skillet. Cook for an additional 2 minutes until the spinach wilts down. The colors will brighten up your dish! Next, pour the egg mixture evenly over the sautéed veggies in the skillet. Reduce the heat to low. Cook the omelette for about 4 to 5 minutes, until the edges start to set. Sprinkle 1/2 cup of shredded cheese over half of the omelette. Then, carefully fold the other half over the cheese. Let it cook for another 2 minutes. The cheese will melt nicely inside. Once it's done, gently slide the omelette onto a plate. Garnish with fresh herbs, like parsley or chives, to add a pop of color and flavor. Enjoy your loaded veggie omelette! For a full recipe, check out the details above. To make a great omelette, you need the right pan. A non-stick skillet works best. It helps prevent sticking and makes flipping easier. Choose one that is 8 to 10 inches wide. This size is perfect for a two-egg omelette. Temperature management is key. Start with medium heat to cook your omelette evenly. If the heat is too high, the eggs will cook too fast. This can lead to a dry omelette. Lower the heat once you pour in the eggs. This ensures a fluffy texture. Herbs and spices can elevate your dish. Fresh parsley or chives add a nice touch. Consider adding a pinch of paprika for warmth or a dash of black pepper for a kick. These little extras can make a huge difference in taste. Cheese alternatives can also change the flavor. Cheddar is a classic choice, but feel free to mix it up. Try feta for a tangy twist or pepper jack for some heat. You can even go dairy-free with almond or cashew cheese. These options add creaminess without the dairy. Want a thicker omelette? Just use more eggs. Adjust the cooking time too. A thicker omelette needs a few extra minutes. Keep an eye on it so it cooks through without burning. If you’re cooking for more people, it’s easy to scale up. Just use more eggs and veggies. You might need a larger pan or two skillets. Cook each omelette separately for the best results. This way, everyone enjoys a hot, fresh meal. For the full recipe, check out the Loaded Veggie Omelette section. {{image_2}} You can make your Loaded Veggie Omelette even better by adding more veggies. Consider using: - Zucchini, diced small - Juicy tomatoes, chopped - Fresh kale, roughly chopped Feel free to pick seasonal vegetables too. This way, you use what’s fresh and tasty. You can switch up flavors and textures. The sky's the limit with your veggie choices. Want to add protein? You can easily mix in some cooked sausage or crispy bacon. If you prefer a plant-based option, try crumbled tofu. Also, consider using dairy-free cheese. It melts nicely and adds flavor without the dairy. Protein options make your omelette more filling and satisfying. If you enjoy global tastes, you can give your omelette an international twist. For an Italian vibe, add fresh basil, sun-dried tomatoes, and mozzarella. The mix gives a rich, savory taste. For a Mexican-style loaded omelette, use black beans, salsa, and avocado. This combo brings a fun, zesty flavor to your dish. Explore these variations to make your omelette exciting! For the complete recipe, check out the Full Recipe. To keep your loaded veggie omelette fresh, store it in the fridge. Use an airtight container. This method helps maintain taste and texture. Make sure to let the omelette cool down first. If you put hot food in the fridge, it can spoil faster. You can reheat your omelette in two ways: microwave or stovetop. If you choose the microwave, place it on a microwave-safe plate. Heat for about 30 seconds. Check if it's warm. If not, heat in 15-second bursts. For stovetop reheating, use a non-stick pan. Warm it over low heat. This method keeps the texture nice and fluffy. Cover the pan to trap heat and moisture. Yes, you can freeze a veggie omelette! First, let it cool down completely. Wrap it tightly in plastic wrap, then place it in a freezer bag. This keeps out freezer burn. To reheat, take it out of the freezer and let it thaw in the fridge overnight. You can then reheat it using the stovetop method for the best texture. Enjoy your loaded veggie omelette anytime! For the full recipe, click here. To make a loaded veggie omelette for one, you can adjust the ingredients. Use 2 large eggs and 2 tablespoons of milk. For veggies, use 1/4 cup bell peppers, 2 tablespoons red onion, 1/4 cup spinach, and 2 tablespoons mushrooms. This will give you a perfect portion. Cook it in a smaller skillet to ensure even cooking. The steps remain the same as in the full recipe. Yes, you can! If you prefer plant-based options, try using silken tofu or chickpea flour. Silken tofu can blend well to create a creamy texture. For chickpea flour, mix it with water to form a batter. Both options provide a nice flavor while keeping the dish vegan. The best cheese for omelettes is a matter of taste. Cheddar is a classic choice and melts beautifully. Feta offers a tangy flavor, while mozzarella gives a creamy texture. For a kick, try pepper jack. Each cheese adds its own unique flavor and pairs well with the veggies in your omelette. You've learned how to make a tasty veggie omelette. You know the key ingredients and steps. Remember, use fresh veggies and your favorite herbs for the best flavor. Adjust the recipe to fit your needs. Try different meats or cheeses for variety. Store leftovers properly for later enjoyment. With practice, you’ll master this dish and impress everyone. Enjoy your cooking journey!

Loaded Veggie Omelette Fresh and Flavorful Delight

Are you ready to elevate your breakfast game? A Loaded Veggie Omelette is your answer! Packed with fresh vegetables and

- 4 boneless, skinless chicken breasts - 1 cup fresh spinach, chopped - 1/2 cup feta cheese, crumbled - 1/4 cup cream cheese, softened - 2 cloves garlic, minced - 1/2 teaspoon dried oregano - 1/2 teaspoon black pepper - 1/4 teaspoon salt - 2 tablespoons olive oil - 1 tablespoon lemon juice - Toothpicks or kitchen twine Each ingredient in this recipe plays a key role. Chicken is a great source of protein, helping you feel full. Spinach brings iron and vitamins like A and C. Feta cheese adds flavor and calcium. Cream cheese gives richness and creaminess to the filling. Garlic offers health benefits and a tasty kick. Oregano and pepper enhance the flavors, while olive oil provides healthy fats. Lemon juice adds brightness and freshness to the dish. You can easily swap some ingredients. Use goat cheese instead of feta for a tangy twist. If you don’t have spinach, try kale or Swiss chard. For a lower-fat option, use Greek yogurt instead of cream cheese. Chicken thighs can replace chicken breasts for more flavor. If you prefer not to use toothpicks, you can tie the chicken with kitchen twine. These swaps keep the dish tasty while catering to your needs. You can find the Full Recipe for detailed cooking instructions. Start by gathering your ingredients. You will need chicken breasts, spinach, feta, and a few spices. Make sure to chop the spinach and mince the garlic. This will save time later. Prepare your oven by preheating it to 375°F (190°C). 1. Mix the Filling: In a bowl, combine chopped spinach, crumbled feta, cream cheese, minced garlic, oregano, pepper, and salt. Stir well until it is mixed. 2. Prepare the Chicken: Place your chicken breasts on a cutting board. Use a sharp knife to cut a pocket into each chicken breast. Be careful not to cut all the way through. 3. Stuff the Chicken: Take some of your filling and stuff it into the chicken pockets. Use toothpicks or kitchen twine to close the openings. 4. Sear the Chicken: Heat olive oil in a skillet over medium heat. Add the stuffed chicken breasts. Cook for about 3-4 minutes on each side until golden brown. 5. Bake the Chicken: Squeeze lemon juice over the chicken. Then, place the skillet in your preheated oven. Bake for 20-25 minutes or until the chicken reaches 165°F (74°C). 6. Finish Up: After baking, carefully remove the toothpicks or twine before serving. - Make sure to chop the spinach finely. This helps it mix well with the other ingredients. - Don't rush the searing step. Browning adds flavor. - Use a meat thermometer to check for doneness. This ensures your chicken stays juicy. - For a nice touch, serve your chicken on a bed of sautéed vegetables. This adds color and flavor to your plate. For the full recipe, check out the details above. Enjoy your cooking! To make the stuffing just right, use fresh spinach. Chop it finely for even mixing. Crumble the feta cheese well. Mix all the stuffing ingredients together until they blend smoothly. This way, each bite has a balanced flavor. Don’t overstuff the chicken. If you pack it too tight, the filling may spill out during cooking. Aim for about 1/4 of the mixture in each pocket. One big mistake is slicing the chicken too deep. You want to create a pocket, not cut it in half. Another mistake is not securing the openings. Use toothpicks or kitchen twine to keep the stuffing inside. If you skip this step, the filling will leak out. Also, avoid skipping the searing step. This adds flavor and helps seal in the juices. Searing is key to a tasty dish. Heat your olive oil in a large skillet on medium heat. When the oil shimmers, add the stuffed chicken. Sear each side for 3-4 minutes until golden brown. This step locks in moisture and creates a delightful crust. Once seared, drizzle lemon juice over the chicken for extra flavor. Then transfer the skillet to the oven for perfect cooking. Always check the internal temperature. It should reach 165°F (74°C) for safe eating. {{image_2}} You can add different flavors to your spinach feta stuffed chicken. Try mixing in sun-dried tomatoes for a burst of sweetness. You can also add chopped artichokes for a tangy twist. Want a spicy kick? Add some red pepper flakes to the filling. These small changes can make a big difference. If you want to switch proteins, turkey or pork can work well. Turkey breasts offer a lean option that pairs nicely with spinach and feta. Pork tenderloin is another tasty choice. Just remember to adjust cooking times, as these meats may cook differently than chicken. You can make a vegetarian version too! Replace chicken with large portobello mushrooms. They hold the filling perfectly and add a rich flavor. Another option is to use zucchini boats. Slice zucchini in half, scoop out the insides, and stuff them with the spinach and feta mix. Both options are tasty and healthy. For the full recipe, check out the Spinach Feta Stuffed Chicken section above. After enjoying your Spinach Feta Stuffed Chicken, let it cool down. Place the leftover chicken in an airtight container. This helps keep it fresh. Store it in the fridge for up to three days. Make sure to seal it well to prevent moisture loss. When you’re ready to eat your leftovers, preheat your oven to 350°F (175°C). Place the chicken in an oven-safe dish. Cover it with foil to keep it moist. Heat for about 15-20 minutes, or until it warms through. You can also use a microwave. Heat on medium for 2-3 minutes, checking often. If you want to save your stuffed chicken longer, freezing is a great option. Wrap each chicken breast tightly in plastic wrap. Then, place them in a freezer bag. Label the bag with the date. You can freeze the chicken for up to three months. To cook from frozen, thaw it in the fridge overnight before reheating. For a detailed guide, check out the Full Recipe. I love serving this chicken with roasted vegetables. Carrots, zucchini, and bell peppers create a colorful plate. You can also try garlic mashed potatoes for a creamy comfort. A light salad with lemon vinaigrette adds freshness. Quinoa or rice pairs well, too. These sides balance the rich filling and make a full meal. Yes! You can prep the chicken the night before. Just stuff the chicken breasts and store them in the fridge. Cover them tightly with plastic wrap or a container to keep them fresh. When ready to cook, take them out and let them sit at room temperature for 15 minutes. This helps them cook evenly. To check if chicken is cooked, use a meat thermometer. Insert it into the thickest part of the chicken. The temperature should reach 165°F (74°C). If you don’t have a thermometer, cut into the chicken. The juices should run clear, not pink. Cooked chicken should be firm, not rubbery. Enjoy your meal knowing it's perfectly done! This blog post outlined the key ingredients and their benefits for Spinach Feta Stuffed Chicken. It provided step-by-step cooking instructions and tips to avoid common mistakes. Variations offered new flavor twists and even vegetarian options. Lastly, I shared how to store leftovers and how to reheat them safely. Remember, cooking is fun and always a chance to learn. Keep experimenting, and you'll enjoy every bite. Happy cooking!

Spinach Feta Stuffed Chicken Tasty and Simple Recipe

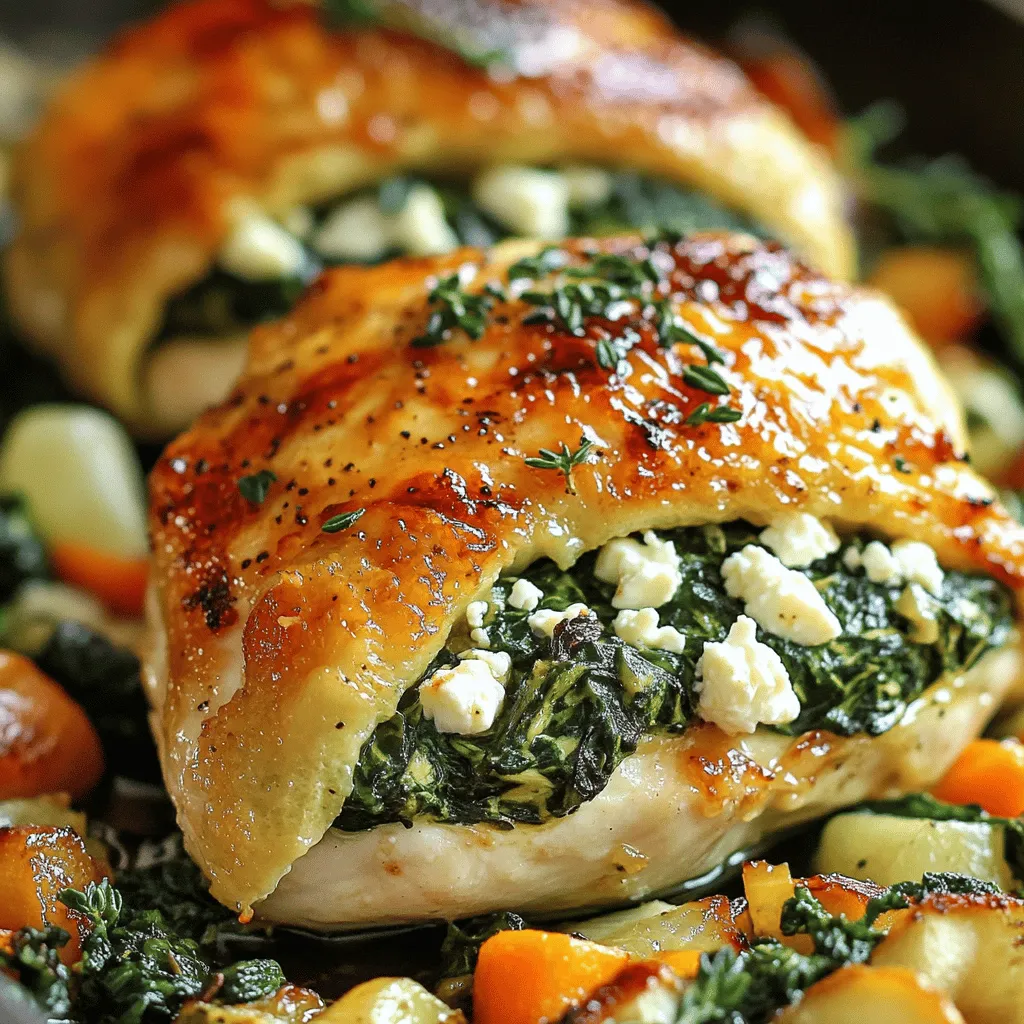
If you’re looking for a tasty dish that’s easy to make, you’re in the right place! My Spinach Feta Stuffed

- 1 large bag of tortilla chips - 2 cups shredded cheese (mix of cheddar and Monterey Jack) - 1 can (15 oz) black beans, rinsed and drained - 1 cup cherry tomatoes, halved - 1 jalapeño, sliced (optional) - 1 cup corn (canned or frozen) The heart of your nachos starts with the tortilla chips. They need to be sturdy to hold the toppings. Next, the cheese is key. I love a mix of cheddar and Monterey Jack for their great melt. Black beans add protein and texture. Cherry tomatoes bring freshness, while corn adds sweetness. If you like heat, jalapeños are a must. - 1 avocado, diced - ½ cup sour cream - ¼ cup fresh cilantro, chopped For a twist, consider adding avocado. It adds creaminess and flavor. Sour cream gives a nice cool contrast to the heat. Fresh cilantro brightens the dish and adds a pop of color. These toppings let you customize your nachos based on your taste. - 2 tablespoons lime juice - Salt and pepper to taste A bit of lime juice lifts the flavors. It adds brightness that works well with cheese and toppings. Don’t forget salt and pepper to enhance the taste. Adjust these to fit your preference. For the full recipe, check out the Cheesy Fiesta Sheet Pan Nachos. This recipe lets you create a fun and tasty snack that everyone will enjoy! 1. Preheat your oven to 375°F (190°C). This helps the nachos cook evenly. 2. Line a large baking sheet with parchment paper. This makes cleanup easy and quick. 1. Start by spreading the tortilla chips evenly across the baking sheet. Make sure they cover the surface well but don't stack them too high. 2. Next, distribute the toppings evenly. Add your drained black beans, corn, and halved cherry tomatoes. This ensures every bite is full of flavor. 3. Finally, sprinkle the shredded cheese generously over everything. Cheese makes everything better! 1. Bake the nachos in the preheated oven for about 10-15 minutes. You want the cheese to melt and get bubbly. 2. To check if they are ready, look for melted cheese and golden edges. If they look good, it’s time to take them out! For the full recipe, check out my Cheesy Fiesta Sheet Pan Nachos. Enjoy your tasty creation! To make sure your nachos stay crispy, layer them right. Start with a single layer of tortilla chips. If you stack them, they will become soggy. Top with your favorite ingredients, but keep it light. For the best cheese, I love a mix of cheddar and Monterey Jack. The cheddar gives sharpness, while the Monterey Jack melts beautifully. You can also try pepper jack for a spicy twist. Serve your nachos with great dips. Sour cream is a classic choice. Guacamole adds creaminess. Salsa gives a fresh kick. Pair your nachos with drinks like soda or light beer. A fruity mocktail also works well. These flavors balance the cheesy goodness. Prep toppings in advance to save time. You can dice the tomatoes, slice the jalapeños, and chop the cilantro a day before. Store them in the fridge. Using store-bought ingredients can save you work. Look for pre-shredded cheese and canned black beans. This way, you can focus on the fun part: eating! For the full recipe, check out the complete instructions above. {{image_2}} For those who crave meat, adding cooked chicken or beef takes nachos to a new level. Simply shred or chop cooked meat and sprinkle it over the chips. This adds a rich flavor and extra protein. If you want a vegetarian option, consider using black beans or lentils. These give the same hearty feel without meat. You can also try grilled vegetables like bell peppers or mushrooms for added texture and taste. You can create themed nachos for fun gatherings. For a Tex-Mex style, use ingredients like spicy chorizo, jalapeños, and guacamole. This adds a zesty kick that makes everyone smile. For Southwest flavors, think about adding ingredients like BBQ sauce, pulled pork, or corn salsa. These toppings give a unique twist that will impress your guests and keep them coming back for more. Explore South American influenced toppings for a fresh take. Try adding pico de gallo, queso fresco, or even plantains. Each bite bursts with flavor and transports you to a sunny beach. If you want to try something unique, consider Canadian or Asian inspired additions. For Canadian nachos, drizzle with maple syrup or add poutine-style gravy. For Asian flair, use teriyaki sauce, kimchi, or even sesame seeds. These toppings will surprise and delight your friends. For more ideas, check out the Full Recipe for Easy Sheet Pan Nachos. To keep your nachos fresh, store them in an airtight container. Place a paper towel in the container. This towel absorbs extra moisture and helps keep the chips crisp. You can keep nachos in the fridge for up to three days. If you want to keep them longer, you can freeze them. They will last in the freezer for about a month. Just know that freezing may change the texture of the chips. The best way to reheat nachos is in the oven. Preheat your oven to 350°F (175°C). Spread the nachos on a baking sheet. Bake them for about 10 minutes. This method warms them up without making them soggy. Avoid the microwave. It can make the chips chewy or limp, which is not what we want. If you have leftover nachos, you can use them in other dishes. Chop them up and add them to salads for a crunchy bite. You can also crush them and sprinkle them on soups for extra flavor. These ideas help you enjoy your nachos in new ways. To keep your nachos crisp, layer them wisely. Start with a single layer of tortilla chips. Avoid stacking them too high. Soggy chips often come from wet toppings. Choose toppings that are not too juicy. Rinse and drain black beans well. For tomatoes, use cherry or grape varieties, as they are less watery. If you want to add fresh ingredients like jalapeños or avocados, do this after baking. This helps keep the chips crunchy and delicious. Yes, you can prep some parts ahead. To save time, chop your toppings and store them in the fridge. You can layer your nachos with cheese and toppings, but avoid baking them until you are ready to serve. Cover the tray with foil or plastic wrap to keep everything fresh. When it's party time, just pop them in the oven for about 10-15 minutes. This ensures they come out hot and melty, just like the Full Recipe suggests. For the best flavor, use a mix of cheeses. Cheddar offers sharpness, while Monterey Jack adds creaminess. You can also try pepper jack for a spicy kick. If you want to be bold, consider adding crumbled queso fresco or even a sprinkle of feta. These options elevate the taste and make your nachos more exciting. Always shred your cheese fresh for better meltability. You can easily adjust the recipe for different diets. For gluten-free nachos, use certified gluten-free tortilla chips. If you're looking for vegan options, replace the cheese with a dairy-free blend. Nutritional yeast can also add a cheesy flavor. For sour cream, try using a vegan version made from cashews or soy. Avocados are naturally vegan and add healthy fats. These swaps keep the dish tasty and suitable for everyone! Easy Sheet Pan Nachos are fun and simple. You learned about the main ingredients, like tortilla chips and cheese. We also explored optional ingredients, cooking steps, and creative variations. Don't forget storage tips to enjoy nachos later. With these ideas, you can make a tasty dish for any occasion. I hope you feel inspired to create your own unique nachos today. Enjoy every bite!

Easy Sheet Pan Nachos Delectable Party Snack Recipe

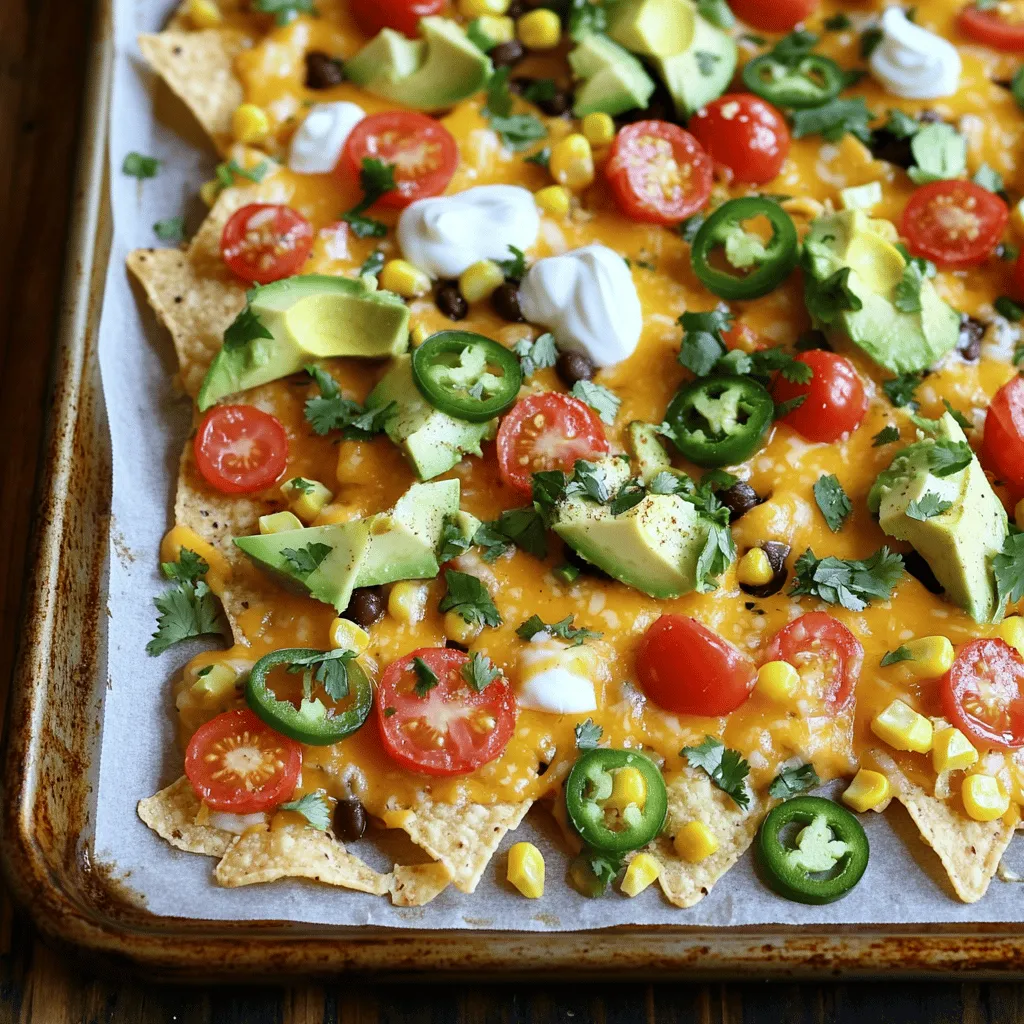
Get ready for the easiest party snack ever: Easy Sheet Pan Nachos! With crispy tortilla chips, gooey cheese, and your

- Shrimp requirements and preparation You will need 1 pound of large shrimp. Make sure they are peeled and deveined. This step saves time and makes cooking easier. Fresh shrimp works best, but you can also use frozen. If using frozen shrimp, thaw them before cooking. - Asparagus specifics Grab 1 bunch of asparagus. Trim the ends to remove any tough parts. Cut the asparagus into 2-inch pieces. This size helps them cook evenly and pair well with the shrimp. - Key spices and seasonings For flavor, you need: - 4 cloves of garlic, minced - 2 tablespoons of olive oil - 1 tablespoon of lemon juice - 1 teaspoon of paprika - Salt and pepper to taste - Fresh parsley, chopped for garnish - Lemon wedges for serving Using these spices will elevate your dish. Garlic adds a nice aroma, while paprika gives warmth. Lemon juice brightens the flavors and makes everything pop. You can find the full recipe [here](#) for more details on cooking. Start by heating the olive oil in your skillet over medium heat. I like to use a good amount of oil to help the garlic cook evenly. When the oil is hot, add the minced garlic. Sauté it for about 30 seconds. You want the garlic to be fragrant, but be careful not to burn it. Burnt garlic tastes bitter and can ruin your dish. Once the garlic is ready, raise the heat to medium-high and add the shrimp. The shrimp cook fast, so watch them closely. Season them with paprika, salt, and pepper as they cook. I usually cook them for about 2-3 minutes on each side. They should turn pink and opaque when done. Overcooking makes them tough, so timing is key here. After removing the shrimp, it’s time for the asparagus. Add the pieces directly into the skillet. Sauté them for about 4-5 minutes. You want them tender but still crisp. This adds a nice bite to the dish. After that, return the cooked shrimp to the skillet. Add in the lemon juice and toss everything together. Cook for another 1-2 minutes. This helps meld the flavors together nicely. For the full recipe, check out the details above! To make your one-pan garlic shrimp and asparagus shine, use spices and herbs. I love adding a pinch of red pepper flakes for heat. Fresh thyme or oregano can also boost flavor. For a bright touch, zest some lemon before juicing it. This zest adds a fresh, citrusy note that makes the dish pop. While I recommend skillet cooking for its speed, you can try other methods. You could use a grill for a smoky taste. If you prefer oven cooking, place the shrimp and asparagus on a baking sheet. Roast them at 400°F for about 10 minutes. Adjust the heat based on your cooking method. Lower heat for a longer cook time helps flavors meld well. Presentation can elevate your meal. Serve directly from the skillet for a homey feel. If you want to impress, plate the shrimp and asparagus on a large platter. Garnish with lemon wedges and fresh parsley. For sides, consider a light salad or fluffy rice. A crisp white wine pairs nicely with this dish. For a hearty option, serve with crusty bread to soak up the juices. You can find the full recipe [here]. {{image_2}} You can change the shrimp in this recipe. Scallops are a great option. They cook fast and taste sweet. Other shellfish, like crab or lobster, work well too. For a vegetarian dish, you can use tofu or chickpeas. Both options add protein and texture. Want to spice things up? Add red pepper flakes to the pan. A pinch gives a nice kick. You can also mix in different veggies. Try bell peppers, broccoli, or snap peas. Each vegetable adds its unique taste and color. If you need gluten-free options, this dish already fits. Just ensure your spices are gluten-free. For dairy-free needs, skip cheese or cream. Low-carb fans can enjoy this too. Reduce the asparagus or swap it for zucchini. These changes keep the meal light and healthy. For the full recipe, check out the detailed instructions to get started! To store your One-Pan Garlic Shrimp and Asparagus, use a good container. I recommend airtight glass or plastic containers. These help keep your meal fresh and tasty. Make sure to cool the dish first. Put it in the fridge within two hours of cooking. This keeps the shrimp safe and prevents bacteria growth. For reheating, I like to use a skillet. It helps keep the shrimp tender and the asparagus crisp. Heat the skillet on medium-low. Add a splash of water or olive oil to prevent sticking. Stir often to avoid overcooking the shrimp. You want them warm but not rubbery. This method keeps your meal just as good as when you first made it. If you want to freeze this dish, make sure it is cool first. Place it in a freezer-safe container. Leave some space at the top to allow for expansion. You can freeze it for up to three months. When ready to eat, thaw it in the fridge overnight for best results. This helps maintain the flavor and freshness. You can also reheat it straight from the freezer. Just add extra cooking time. Cooking this dish takes about 15 minutes in total. Here’s the breakdown: - Prep Time: 10 minutes - Cook Time: 5 minutes You’ll have a tasty meal ready in no time! Yes, you can use frozen shrimp! Here are my tips: - Thaw First: Always thaw shrimp in the fridge overnight. - Quick Thaw Option: For a fast method, place shrimp in cold water for 15-20 minutes. - Cooking Time: If frozen, add a minute to the cooking time until they turn pink. This way, you keep all the flavor! You can pair this dish with many sides. Here are my favorites: - Rice: White or brown rice soaks up the juices well. - Quinoa: A healthy grain with a nutty flavor. - Salad: A light green salad adds freshness. - Bread: Garlic bread is great for dipping. These options balance the meal nicely! Yes, you can prep this dish ahead. Here’s how: - Prep Ingredients: Chop asparagus and mince garlic in advance. - Cook Shrimp: You can cook shrimp a few hours before serving. - Store in Fridge: Keep everything in airtight containers until you’re ready. Just reheat and mix before serving! If asparagus isn’t your thing, try these veggies instead: - Broccoli: Florets cook quickly and add crunch. - Green Beans: They have a nice snap and bright color. - Zucchini: Sliced zucchini cooks fast and soaks up flavor well. Feel free to mix and match for a fun twist! In this post, we explored the steps to make One-Pan Garlic Shrimp and Asparagus. You learned about the key ingredients, cooking methods, and tips for flavor. We discussed variations to suit different tastes, along with storage and reheating advice. Cooking can be simple and enjoyable. Use these tips to create a tasty meal. Experiment with different flavors and ingredients. Remember, cooking is about finding what you love!

One-Pan Garlic Shrimp and Asparagus Flavor Boost

If you want a quick and tasty meal, you’ve found it! This One-Pan Garlic Shrimp and Asparagus recipe is easy

- Fresh Fruits for Kabobs: Strawberries, Pineapple, Green Grapes, Blueberries, Kiwi, Watermelon - Optional Flavor Enhancers: Honey, Lime Juice, Fresh Mint Leaves - Kitchen Tools Required: Wooden/Metal Skewers, Small Bowl Gathering the right ingredients makes all the difference. For the kabobs, I love using colorful fruits. The more colors, the better! For fresh fruits, you'll need: - 1 cup strawberries, hulled and halved - 1 cup pineapple chunks - 1 cup green grapes, halved - 1 cup blueberries - 1 cup kiwi, peeled and sliced - 1 cup seedless watermelon, cut into cubes These fruits not only taste great, but they also look beautiful together. You can add some optional flavor enhancers to make the kabobs even better. I often use: - 2 tablespoons honey - Juice of 1 lime - Fresh mint leaves for garnish (optional) These ingredients add a nice sweet and tangy touch. Lastly, you will need a few kitchen tools. Grab some: - Wooden or metal skewers - A small bowl for mixing the dressing With these ingredients and tools, you'll be ready to create a fun and tasty dessert. For the complete recipe, check out the Full Recipe section! Washing and Hulling First, wash all the fruits well under cold water. This step is important to remove any dirt or pesticides. Next, hull the strawberries by removing the green tops. Simply poke the tip of a knife into the berry, twist, and pull out the core. Cutting and Slicing Techniques Slice the kiwi into rounds. Each slice should be about half an inch thick. For watermelon, cut it into cubes. Make them about one inch in size. Halve the grapes to make them easier to skewer. This way, they stay stable on the kabob. Skewering Technique and Fruit Order Now, grab your skewers. Start with a strawberry on the skewer. Next, add a pineapple chunk. Then, place a half grape, a blueberry, a slice of kiwi, and finish with a watermelon cube. Keep this order for a colorful look. Repeat until the skewer is full, but leave space at the ends for handling. Tips on Filling the Skewers When you fill the skewers, make sure the fruits fit snugly. Avoid crowding them too closely; they should be able to move a little. This makes them look nice and prevents breaking. Use alternating colors to make each kabob pop. Drizzling Honey-Lime Dressing In a small bowl, mix honey and lime juice. Whisk until smooth. Once your kabobs are ready, drizzle this dressing over them. This adds a sweet and tangy flavor that makes the fruits shine. You can also brush it on gently using a pastry brush for an even coat. Garnishing with Mint For a finishing touch, add fresh mint leaves on top. This adds a burst of color and a fresh aroma. Place them around the kabobs or on top for a lovely presentation. Now, your rainbow fruit kabobs are ready to serve! For more tips and a complete guide, check the Full Recipe. To make tasty rainbow fruit kabobs, pick ripe fruits. Look for berries that are plump, sweet, and firm. Strawberries should be bright red with no white spots. Pineapples should smell sweet and feel slightly soft. Choose grapes that are green and crisp. For blueberries, select those that are deep blue and dry. Kiwi should be slightly soft to the touch but not mushy. Watermelon cubes should be juicy and have a vibrant pink color. Choose fruits that are in season. Seasonal fruits taste better and are often cheaper. In summer, look for berries and watermelon. In fall, apples and pears are great. Winter brings citrus fruits, like oranges and grapefruits. Spring is perfect for strawberries and kiwi. Use skewers that are long enough to hold all the fruit. A 10 to 12-inch skewer works well. Cut fruit into uniform sizes. This helps with balance. For example, cut strawberries in halves and watermelon into cubes. If you have larger pieces, try to match the size of grapes and blueberries. Arrange fruits in a colorful way. Start with a bright fruit, like a strawberry, and alternate colors. This makes the kabobs look fun and inviting. Keep the heavier fruits at the bottom. This will help them stay balanced on the skewer. For a beautiful display, use a large white plate. The colors will stand out against the white background. You can also place the kabobs in a mason jar for a fun twist. This works well for parties or picnics. Serve these kabobs at parties, barbecues, or family gatherings. They also make a great treat for kids. You can drizzle honey-lime dressing over them for extra flavor. Add fresh mint leaves on top for a pop of green. For more details, check the Full Recipe. {{image_2}} You can easily adapt rainbow fruit kabobs for various diets. If you want a vegan option, skip honey or use agave syrup. This makes the dish plant-based and still sweet. You can also make it gluten-free since all the fruits are naturally gluten-free. For different taste profiles, try swapping fruits. If you dislike grapes, use cherries instead. If you want a tropical vibe, mango is a great choice. You can mix any fruit you enjoy. This way, everyone can find a kabob they love. Adding yogurt or a chocolate drizzle can elevate your kabobs. A dollop of yogurt adds creaminess, while chocolate adds richness. Both options can make your kabobs even more fun. You can also experiment with spices. A sprinkle of cinnamon or chili powder can give a unique twist. This small addition can change the whole flavor. Don’t be afraid to try new things! Your creativity can lead to delicious surprises. For the full recipe, check out the section above to prepare your own rainbow fruit kabobs! To keep your leftover kabobs fresh, place them in an airtight container. This helps lock in moisture and flavor. I recommend refrigerating them right after serving. They stay tasty for up to two days in the fridge. If you don’t eat them quickly, the fruit may become mushy. You can prep these kabobs ahead of time for easy serving. Wash and cut the fruit a few hours before serving. Keep the pieces in a bowl with a little lime juice to prevent browning. If you want to assemble them later, store the fruit separately. Putting fruit on skewers too early can make them soggy. For the best taste, chill your kabobs in the fridge for about 10-15 minutes before serving. This makes them extra refreshing and delicious. You can find the full recipe in this article. When selecting fruits, look for bright colors and firm textures. Avoid any that show signs of bruising or wrinkles. Here are some factors to consider: - Color: Choose fruits with vibrant colors; they tend to be riper. - Firmness: Gently squeeze the fruit; it should feel firm but not hard. - Smell: Ripe fruits often have a sweet aroma. - Season: Buy fruits that are in season for the best flavor and price. Yes, you can prep these kabobs in advance. Here are some tips: - Assemble Early: You can make kabobs a few hours before serving. - Chill: Store them in the fridge to keep them fresh and cool. - Avoid Soggy Fruits: Drizzle the honey-lime dressing just before serving to prevent sogginess. You can easily swap fruits based on availability or preference. Here are some common alternatives: - Strawberries: Use raspberries or cherries instead. - Pineapple: Mango or peach can be great substitutes. - Kiwi: Try using banana or orange slices for a different taste. Absolutely! You can adapt this recipe to fit various diets. Here’s how: - Vegan: Use agave syrup instead of honey. - Low-Sugar: Skip the honey and use unsweetened yogurt for dipping. - Fruit Choices: Choose fruits that fit your diet, like berries for lower sugar. These kabobs are fun and flexible, so get creative! You can find the full recipe above to guide you. You can create fun and tasty fruit kabobs with simple steps. We covered fresh fruits, preparation, and assembly techniques. You also learned tips for selecting the best fruits and ensuring stability. Variations cater to different diets and tastes, while easy storage tips keep kabobs fresh. Embrace your creativity. Experiment with flavors and presentations. Enjoy making these delightful treats for any occasion!

Rainbow Fruit Kabobs Refreshing and Fun Dessert Idea

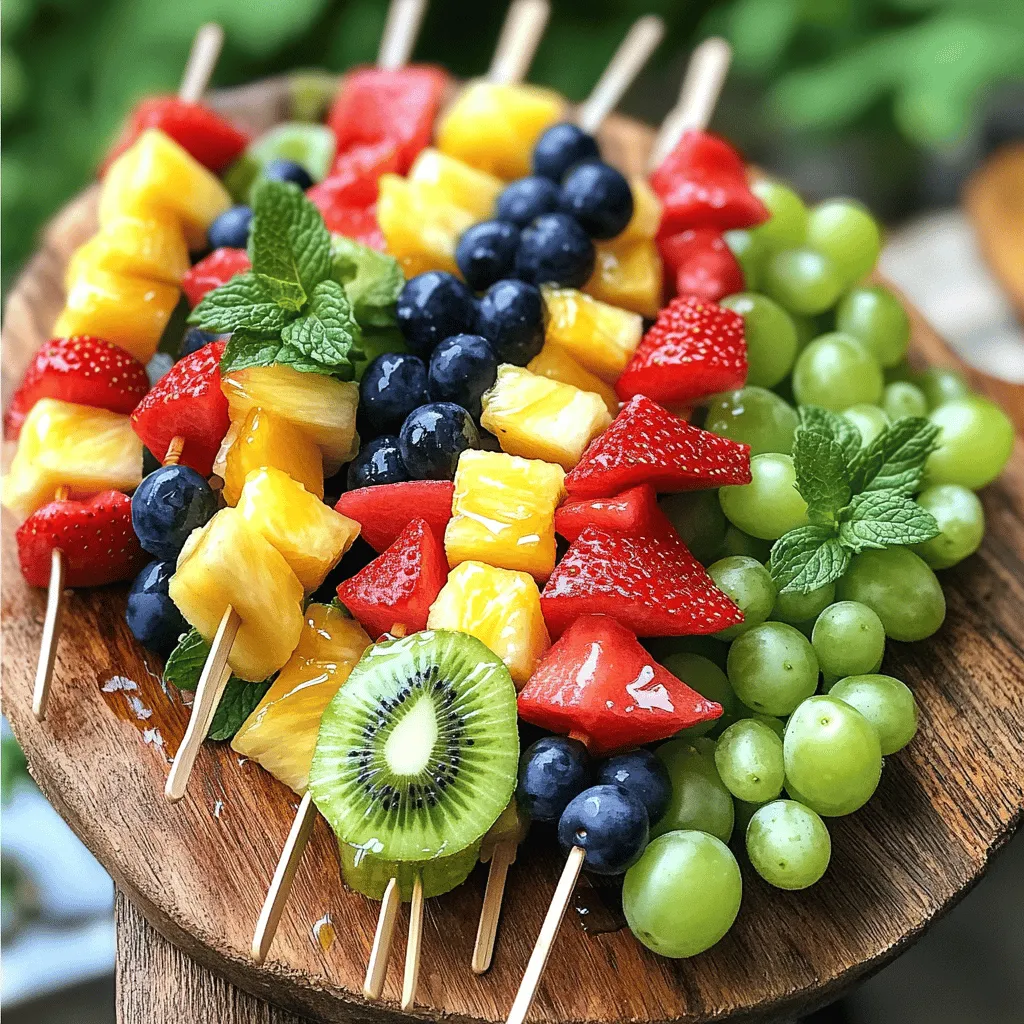
Looking for a fun, colorful dessert idea? Rainbow Fruit Kabobs are your answer! They’re perfect for parties, picnics, or just

For this tasty dish, you need a few key items: - 4 boneless, skinless chicken breasts - 1 cup of grated Parmesan cheese - 1 cup of breadcrumbs (Italian seasoned or panko) - 2 tablespoons of fresh parsley, chopped - 1 teaspoon of garlic powder - ½ teaspoon of onion powder - ½ teaspoon of paprika - Salt and pepper to taste - 2 large eggs, beaten - 3 tablespoons of olive oil These ingredients work together to create a crispy, juicy chicken that everyone will love. If you want to take your chicken up a notch, consider these extras: - 1 teaspoon of dried Italian herbs, like oregano or basil - A squeeze of fresh lemon juice for brightness - Red pepper flakes for some heat Adding these can give your chicken a unique twist. If you don’t have something on hand, here are some swaps: - Use shredded cheese instead of grated Parmesan for a different texture. - Try crushed cornflakes in place of breadcrumbs for extra crunch. - Swap olive oil with melted butter for a richer taste. These substitutions can help you customize the dish based on what you have at home! For the full recipe, check out the Baked Parmesan Crusted Chicken section above. First, gather all your ingredients. You will need four boneless, skinless chicken breasts. In a shallow bowl, mix one cup of grated Parmesan cheese with one cup of breadcrumbs. I like using Italian seasoned or panko for extra crunch. Add two tablespoons of fresh parsley, one teaspoon of garlic powder, half a teaspoon of onion powder, half a teaspoon of paprika, and salt and pepper to taste. Stir everything together until it's well mixed. In another bowl, beat two large eggs until they are frothy. This will help the coating stick well. Preheat your oven to 400°F (200°C). Lightly grease a baking sheet with cooking spray or olive oil. Take each chicken breast and dip it into the egg mixture first. Make sure it is fully coated. Next, dredge it in the Parmesan breadcrumb mix. Press firmly so the coating sticks well. Place the breaded chicken on the baking sheet. Drizzle three tablespoons of olive oil over the top of each piece. This step helps create a crispy crust. Bake the chicken in the preheated oven for 25 to 30 minutes. It's important to check that the chicken is cooked through. The internal temperature should reach 165°F (75°C). Once done, remove the chicken from the oven. Let it rest for five minutes before serving. This resting time keeps the juices inside, making the chicken juicy and tender. For the full recipe, check the earlier section. To get that crispy crust, you need to coat the chicken right. Start by using fresh breadcrumbs. They stick better and give a great crunch. Press the breadcrumbs onto the chicken firmly. This helps them stick during baking. Drizzling olive oil on top adds flavor and ensures crispiness. Bake at the right temperature—400°F is key for golden perfection. One mistake is not seasoning the chicken. Salt and pepper are essential. Another error is skipping the rest time. Letting the chicken rest for five minutes keeps it juicy. Don't overcrowd the baking sheet. Each piece needs space to get crispy. Lastly, avoid opening the oven too often. This lets heat escape and can lead to uneven cooking. Marinating adds depth to your chicken. Use simple ingredients like olive oil, lemon juice, and herbs. A quick 30-minute soak makes a big difference. You can also add garlic or mustard for extra zing. Marinating not only enhances flavor but also helps keep the chicken juicy. For a full experience, try the Full Recipe to see how all the flavors blend together! {{image_2}} To make a spicy version, add crushed red pepper flakes to the breadcrumb mix. Start with one teaspoon and adjust to your heat preference. The extra spice gives the chicken a nice kick. You can also use hot sauce in the egg wash for more heat. This variation is great for those who love bold flavors. Mix fresh herbs into the breadcrumb mixture for added flavor. Basil, oregano, or thyme work well. Use about one tablespoon of chopped herbs. These herbs make the chicken taste fresh and aromatic. You can even mix in some lemon zest for a bright twist. This herb-infused version is perfect for spring or summer meals. You can swap the Parmesan with other cheeses to change the flavor. Try using cheddar, mozzarella, or a mix of cheeses for a different taste. Each cheese brings its unique twist to the dish. For a tangy flavor, use feta cheese. Just remember to adjust the salt since some cheeses are saltier than Parmesan. This way, you keep the dish balanced and tasty. For the full recipe, check out the Baked Parmesan Crusted Chicken. To keep your leftover Baked Parmesan Crusted Chicken fresh, let it cool first. Place the chicken in an airtight container. Store it in the fridge for up to three days. You can also wrap each piece in plastic wrap for extra protection. If you want to keep it longer, freeze it for up to three months. When it’s time to eat your leftovers, take them out of the fridge. You can reheat the chicken in the oven for the best results. Set the oven to 350°F (175°C). Place the chicken on a baking sheet and cover it with foil. Heat for about 15-20 minutes, or until it’s warm throughout. This method helps keep the crust crispy. You can also use a microwave, but it may make the crust softer. Meal prep makes busy days easier. You can prep your chicken ahead of time. Bread the chicken breasts and store them in the fridge for up to a day. Just coat them with the breadcrumb mixture and keep them covered. When you’re ready to cook, just pop them in the oven. This saves time and helps you enjoy a warm, crispy meal. For extra flavor, add a marinade the night before you cook! Check out the Full Recipe for more details. You can serve this dish with many sides. Some great options include: - Roasted vegetables like broccoli, carrots, or bell peppers. - A fresh green salad with your favorite dressing. - Garlic mashed potatoes or creamy risotto for a filling meal. - Pasta with a light sauce, such as olive oil or marinara. These sides will complement the crispy chicken and make your meal well-rounded. Yes, you can prepare some parts ahead of time. You can coat the chicken earlier in the day. Just keep it in the fridge until you are ready to bake. If you want, you can also freeze the breaded chicken. Just make sure to thaw it before baking. This makes dinner quick and easy on busy nights. To keep the chicken juicy, follow these tips: - Use boneless, skinless chicken breasts. They cook evenly and stay moist. - Don’t overbake the chicken. Use a meat thermometer to check for 165°F (75°C). - Let the chicken rest for 5 minutes after baking. This helps the juices settle. By using these methods, your chicken will be both crispy on the outside and juicy on the inside. For the complete details, check the Full Recipe. Baked Parmesan crusted chicken is full of flavor and easy to make. We covered the essential and optional ingredients that boost taste. I shared simple steps for preparation and baking, plus tips for a great crust. You can also try exciting variations with spice or herbs. Store leftovers easily and reheat to enjoy later. Follow the advice here, and you’ll serve a tasty meal every time. Enjoy your cooking journey and share it with others!

Baked Parmesan Crusted Chicken Crispy and Juicy Dish

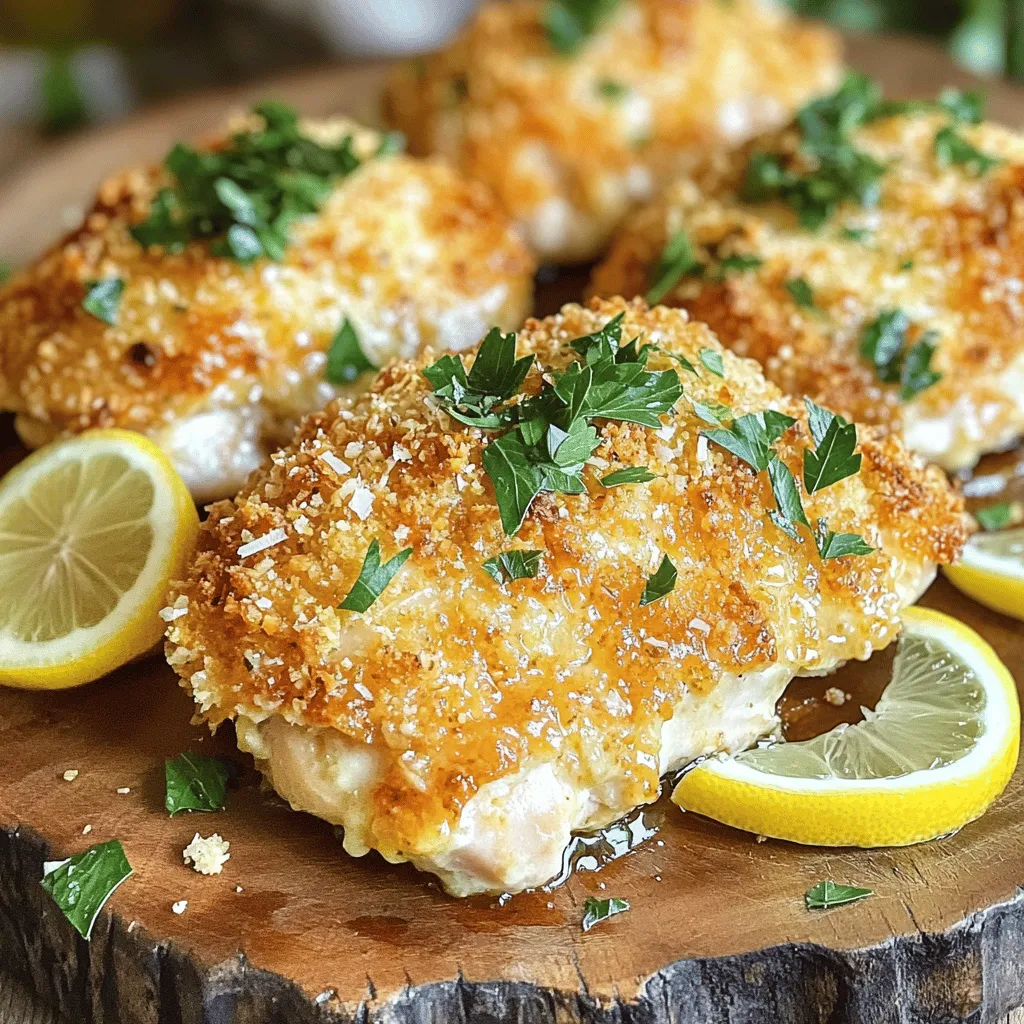
Craving a meal that’s both crispy and juicy? Look no further! My Baked Parmesan Crusted Chicken brings the best of

To make the best lemon ricotta pancakes, you need a few key items. Here’s what you’ll need: - 1 cup ricotta cheese - 1 cup all-purpose flour - 1 tablespoon baking powder - 1/4 teaspoon salt - 1/4 cup granulated sugar - Zest of 1 lemon - 1/2 cup milk - 2 large eggs - 2 tablespoons lemon juice - 1 teaspoon vanilla extract - Butter or cooking spray for frying These ingredients work together to create a fluffy and flavorful pancake. Ricotta cheese adds moisture and a light texture, while lemon juice and zest bring bright flavors. You can add a few extra touches to make these pancakes even better. Consider these optional ingredients: - Fresh berries (like blueberries or strawberries) - Chopped nuts (like walnuts or almonds) - A sprinkle of powdered sugar - Maple syrup for drizzling Each of these options adds a unique taste. Fresh berries add sweetness and color, while nuts give a crunchy contrast. The quality of your ingredients matters. Here are some tips to ensure your pancakes shine: - Ricotta Cheese: Use fresh, whole-milk ricotta for the best flavor and texture. - Lemon: Choose a firm lemon with bright color. Fresh zest gives the best taste. - Flour: Use all-purpose flour for a balanced texture. Avoid self-rising flour, as it can change the pancake's fluffiness. - Eggs: Fresh eggs improve the taste and structure. Using high-quality ingredients makes a big difference. They enhance the flavors and give you a better overall pancake. For the full recipe, check the detailed instructions. Start by gathering your wet ingredients. You will need ricotta cheese, milk, eggs, lemon juice, and vanilla extract. In a large bowl, add the ricotta cheese. Then, pour in the milk. Crack the eggs and add them to the bowl, followed by the lemon juice and vanilla extract. Use a whisk to mix them well until the mixture is smooth. This step is crucial because it helps create a creamy base for your pancakes. Next, let’s move on to the dry ingredients. In a separate bowl, combine all-purpose flour, baking powder, salt, sugar, and lemon zest. Make sure to measure each ingredient carefully. This mix gives your pancakes structure and flavor. Stir these dry ingredients together until they are well blended. It's important to do this separately to ensure even mixing when you combine the wet and dry ingredients later. Now, we get to the fun part: cooking the pancakes! Heat a non-stick skillet over medium heat. Lightly grease the skillet with butter or cooking spray. This keeps the pancakes from sticking. Pour about 1/4 cup of the batter onto the skillet for each pancake. Cook for 2-3 minutes, watching for bubbles to form on the surface. Once you see them, flip the pancakes. Cook for another 2-3 minutes until they turn golden brown. Remove them from the skillet and keep warm. Repeat this with the remaining batter. Serve your pancakes warm, topped with fresh berries and a drizzle of maple syrup for a delightful treat. For the full recipe, refer to the beginning of the article. To make your pancakes fluffy, focus on three key points. First, use fresh ingredients. Fresh ricotta and eggs add volume. Second, combine the wet and dry ingredients gently. Mix until just combined to keep the batter airy. Finally, let the batter rest for a few minutes. This helps develop the texture. Avoid overmixing the batter. It creates dense pancakes. If you see lumps, that’s okay! Also, do not skip the baking powder. It’s crucial for lift. Lastly, make sure your skillet is at the right heat. Too hot will burn the outside while the inside stays raw. Too cold will make them tough. Serve these pancakes warm for the best taste. Top them with fresh berries and maple syrup. You can also add a dollop of yogurt for creaminess. For a fun twist, drizzle honey or sprinkle nuts on top. Explore different flavors by pairing them with whipped cream or chocolate sauce. Enjoy your meal! {{image_2}} You can make these pancakes gluten-free. Use a gluten-free flour blend instead of all-purpose flour. This blend helps keep the texture light and fluffy. Look for a blend with xanthan gum; it helps bind the ingredients. Follow the same steps in the full recipe. You will enjoy the same great taste without gluten! You can easily change the flavor of these pancakes. To add blueberries, fold in about one cup of fresh or frozen berries into the batter. This will give each bite a sweet pop! You can also add a teaspoon of vanilla extract for a richer taste. Other options include orange zest or even chocolate chips. Mix and match flavors to suit your mood! Want to make these pancakes vegan? Swap the ricotta cheese for a plant-based alternative. Options like almond or tofu ricotta work great. Use almond milk or oat milk instead of regular milk. Replace eggs with flaxseed meal mixed with water. For each egg, mix one tablespoon of flaxseed meal with two and a half tablespoons of water. Let it sit for five minutes to thicken. These swaps keep the pancakes delicious and friendly for everyone. You can easily store leftover pancakes. Let them cool to room temperature first. Place them in a single layer on a plate. Cover with plastic wrap or foil. If you have many pancakes, stack them with parchment paper between each layer. This keeps them from sticking together. Store them in the fridge for up to three days. To reheat pancakes, use a skillet or microwave. For the skillet, heat on low. Add a little butter for flavor. Place the pancakes in the skillet for about one minute on each side. This method keeps them soft and warm. If using a microwave, place pancakes on a plate. Cover with a damp paper towel. Heat for 20-30 seconds. Check if they are warm enough. Freezing is a great way to save pancakes. First, let them cool completely. Then, place them in a single layer on a baking sheet. Freeze for about an hour, so they don’t stick together. After that, transfer the pancakes to a freezer-safe bag. Remove as much air as possible before sealing. They can stay in the freezer for up to two months. When you're ready to eat, just reheat them as described. Enjoy these fluffy treats anytime! For the full recipe, check out the [Full Recipe]. To make Lemon Ricotta Pancakes fluffy, I focus on mixing techniques. First, I whisk the wet ingredients well. This helps to incorporate air. Then, I mix the dry ingredients in a separate bowl. When I combine them, I stir gently. Overmixing can cause tough pancakes. Some lumps in the batter are fine. They help keep the pancakes light and airy. Yes, you can use different citrus fruits! Lime and orange work well too. Each fruit will bring a new flavor. For lime, use the same zest and juice amount. For orange, the taste will be sweeter. Feel free to experiment with your favorite citrus to find your perfect pancake flavor. I love serving Lemon Ricotta Pancakes warm. Fresh berries add color and taste. A drizzle of maple syrup enhances sweetness. You can also sprinkle powdered sugar on top for a pretty finish. For a twist, try a dollop of whipped cream. Each bite becomes a tasty treat! For the complete method, check out the Full Recipe. In this post, we covered the essential ingredients and steps for making lemon ricotta pancakes. We explored tips for fluffiness, common mistakes, and serving ideas. Variations like gluten-free and vegan options also help you adapt to your needs. Enjoying these pancakes can be a delightful experience. With the right ingredients and techniques, you can create a tasty dish everyone will love. Experiment and make it your own, and enjoy every bite!

Lemon Ricotta Pancakes Fluffy and Flavorful Delight

If you want to impress your family with a breakfast treat, try these Lemon Ricotta Pancakes. They’re fluffy, flavorful, and

- 2 cups seedless watermelon, cubed - 1/4 cup fresh lime juice (about 2 limes) - 1 tablespoon agave syrup (adjust to taste) - 1 jalapeño, sliced (seeds removed for less heat) - Sparkling water or club soda - Ice cubes The key to a great Spicy Watermelon Margarita Mocktail starts with fresh ingredients. I love using ripe seedless watermelon. It gives a sweet and juicy base. Fresh lime juice adds a bright, tangy flavor. Agave syrup is my go-to for sweetness. You can adjust the amount based on how sweet you like your drink. For a kick, I add sliced jalapeño. Make sure to remove the seeds if you prefer less heat. Finally, sparkling water or club soda adds a fizzy touch. It makes the drink light and refreshing. Ice cubes keep everything chilled and enjoyable on a hot day. - Lime wedges - Watermelon slices - Fresh mint leaves Garnishes elevate your drink. I often use lime wedges for a pop of color and extra zest. Watermelon slices add a fun and fruity touch. Fresh mint leaves give a nice aroma and freshness. These garnishes not only look great but also enhance the flavor. They make the mocktail feel special and inviting. Enjoy creating your Spicy Watermelon Margarita Mocktail with these simple yet vibrant ingredients. For a full recipe, refer to the section above. To start, you want to blend the watermelon and lime juice. I suggest using 2 cups of cubed seedless watermelon. Add 1/4 cup of fresh lime juice to the blender. Blend until the mix is smooth and vibrant. It should look like a bright pink smoothie. Next, strain the mixture through a fine sieve into a large pitcher. This step removes the pulp, giving you a smooth drink. Discard the pulp and keep the juice. Now it's time to add sweetness and spice. Add 1 tablespoon of agave syrup to the mixture. Adjust this amount based on your taste. Then, slice one jalapeño. If you want less heat, make sure to remove the seeds. Stir the jalapeño slices into the watermelon-lime juice mix. Let the jalapeño sit in the mixture for about 10 minutes. This time allows the spicy flavor to infuse into the juice. If you prefer a milder drink, you can remove the jalapeño slices sooner. Taste as you go to find your perfect heat level. When you’re ready to serve, fill glasses with ice cubes. Pour the strained watermelon mixture over the ice until each glass is about two-thirds full. This keeps the drink chilled and refreshing. Top each glass with sparkling water or club soda to fill it up. Give it a gentle stir to mix everything. Finally, garnish your mocktail with a lime wedge, a watermelon slice, and a sprig of fresh mint. This adds a nice touch and makes it look beautiful. For the full recipe, check out the instructions above. Enjoy your fresh and spicy watermelon margarita mocktail! To choose the perfect ripe watermelon, look for a few key signs. First, pick it up; it should feel heavy for its size. Next, check the skin for a yellow spot. This spot shows where it rested on the ground and ripened. A smooth surface usually means good quality. Avoid watermelons with dents or soft spots. Balancing sweetness and spiciness is crucial for this mocktail. You can add more agave syrup if it’s too spicy. Start with a little, then taste and adjust. For varied heat levels, try different peppers. Use a poblano for mild heat or a serrano for more kick. Each pepper brings a unique flavor that can enhance your drink. Presentation makes a big difference. Use fun glassware to impress your guests. You can try mason jars or colorful tumblers. Garnishing is key, too! Add a lime wedge or a watermelon slice on the rim. Fresh mint leaves not only look great but also add a refreshing scent. These small touches turn a simple drink into a stunning treat. For the full recipe, you can refer to the earlier section. {{image_2}} You can switch up the fruit in your spicy watermelon margarita mocktail. Try using fresh pineapple for a sweet twist. Pineapple adds a tropical flair that pairs well with the spice. You can also use cucumber for a cool, refreshing taste. Cucumber lightens the drink and balances the heat from the jalapeño. If you want a different sweet flavor, consider using honey or simple syrup. Honey brings a rich, floral note to your drink. It can add depth without masking the fruit. Simple syrup is easy to make and blends well in beverages. Just mix equal parts sugar and water until dissolved. Adjust the level of sweetness to fit your taste. Adding herbs to your mocktail can give it an exciting twist. Fresh basil or rosemary can enhance the flavor. Basil offers a sweet, peppery taste that complements the watermelon. Rosemary adds a piney, aromatic quality that works well with the lime. Muddle the herbs in the bottom of your glass before adding the drink for the best results. To store leftover watermelon, wrap it tightly in plastic wrap. This keeps it fresh for about 3 to 5 days. Place the wrapped watermelon in the fridge. Cut pieces should go in an airtight container. This method helps prevent the watermelon from drying out. If your watermelon starts to smell or look mushy, it's time to toss it out. For the prepared mocktail, store it in a pitcher with a lid. Keep it in the fridge for up to 24 hours. However, the longer it sits, the less fresh it tastes. If you plan to store it, don’t add the sparkling water yet. This keeps the drink fizzy and refreshing. Just before serving, pour the mocktail over ice and top it with sparkling water. You can prepare the drink ahead for parties. Blend the watermelon and lime juice a day before. Store it in the fridge until you're ready to serve. You can also slice the jalapeño ahead of time. Just remember to keep it in an airtight container. On the day of your gathering, mix everything together and enjoy! For the best flavor, infuse the jalapeño just before serving. This method gives a fresh taste. Check out the Full Recipe for more details. Yes, you can make this mocktail ahead of time. Mix the watermelon and lime juice in advance. Store it in the fridge for up to two hours. Add the jalapeño slices just before serving. This keeps the flavor fresh and spicy. If you want to store it longer, keep the jalapeños out. You can also prep your garnishes ahead. To adjust the sweetness, change the amount of agave syrup. Start with one tablespoon, then taste. If it’s not sweet enough, add more agave little by little. You can also use honey or simple syrup as a sweetener. If you want a less sweet drink, skip the syrup. This mocktail is flexible to suit your taste. You can get creative with garnishes! Try using fresh basil or rosemary for a twist. Slices of cucumber also add a refreshing touch. You can even use chili powder on the rim for extra spice. Lime zest adds color and flavor, too. Feel free to mix and match based on your mood! This blog post covered how to create a Spicy Watermelon Margarita Mocktail. We explored key ingredients like watermelon, lime juice, jalapeño, and agave syrup. I shared steps for making and garnishing your drink, plus tips for choosing the best watermelon and balancing flavors. Final thoughts: Feel free to experiment with variations and garnishes. Enjoy crafting and sharing this refreshing mocktail for any occasion!

Spicy Watermelon Margarita Mocktail Refreshing Drink

Are you ready to sip on something refreshingly bold? This Spicy Watermelon Margarita Mocktail combines the sweetness of ripe watermelon

To make these tasty vegan cinnamon roll bites, you need simple ingredients. Here’s what you will need: - 1 cup all-purpose flour - 1/4 cup coconut sugar - 1/2 tablespoon baking powder - 1/4 teaspoon salt - 1/2 cup almond milk (or any plant-based milk) - 2 tablespoons coconut oil, melted - 1 teaspoon vanilla extract - 3 tablespoons brown sugar (for filling) - 1 tablespoon ground cinnamon - 2 tablespoons chopped pecans or walnuts (optional) - 1 tablespoon maple syrup (for drizzling) These ingredients come together to create a soft, chewy texture and a rich flavor that you will love. You can customize your vegan cinnamon roll bites by adding fun extras. Here are some ideas: - Chopped nuts (like pecans or walnuts) for crunch - Dried fruit (like raisins or cranberries) for sweetness - A sprinkle of powdered sugar for a nice look - A drizzle of melted dark chocolate for extra indulgence Feel free to mix and match these options based on what you enjoy! If you have dietary needs, you can adjust the recipe easily. Here are some substitutes: - Use whole wheat flour instead of all-purpose flour for more fiber. - Swap coconut sugar for maple sugar if needed. - If you are nut-free, use oat milk instead of almond milk. - Replace the coconut oil with applesauce for a lower-fat option. These substitutions can help you enjoy the bites while meeting your needs. For the full recipe, check out the link! To start, gather all your ingredients. You will need: - 1 cup all-purpose flour - 1/4 cup coconut sugar - 1/2 tablespoon baking powder - 1/4 teaspoon salt - 1/2 cup almond milk (or any plant-based milk) - 2 tablespoons coconut oil, melted - 1 teaspoon vanilla extract - 3 tablespoons brown sugar (for filling) - 1 tablespoon ground cinnamon - 2 tablespoons chopped pecans or walnuts (optional) - 1 tablespoon maple syrup (for drizzling) First, preheat your oven to 350°F (175°C). Line a baking sheet with parchment paper for easy cleanup. In a mixing bowl, combine the flour, coconut sugar, baking powder, and salt. Mix it well to blend the dry ingredients. In another bowl, whisk the almond milk, melted coconut oil, and vanilla extract until smooth. Pour this mixture into the dry ingredients. Stir just until it forms a dough. Next, roll out your dough on a lightly floured surface. Aim for a rectangle about 1/4 inch thick. In a small bowl, combine the brown sugar, ground cinnamon, and chopped nuts if you choose to add them. Spread this mixture evenly over the rolled-out dough. Starting from one edge, carefully roll the dough into a log shape, like a classic cinnamon roll. Now, cut the rolled dough into bite-sized pieces, around 1-2 inches thick. Place these pieces on your prepared baking sheet. Bake for 15-20 minutes or until the edges turn golden brown. The smell will fill your kitchen with a sweet aroma! For a soft and fluffy texture, be careful not to overmix your dough. Mix just until everything comes together. If your dough feels too sticky, add a little more flour. If it’s too dry, a splash of almond milk can help. Remember, rolling the dough to the right thickness is key. Too thick and it won’t cook through; too thin and it may dry out. These small tips can make a big difference in the final taste of your vegan cinnamon roll bites. After baking, drizzle the warm bites with maple syrup for that extra touch of sweetness. Enjoy them fresh out of the oven for the best flavor! When making vegan cinnamon roll bites, avoid overmixing the dough. This can make your bites tough. Also, do not forget to preheat the oven. A hot oven helps the bites rise and bake evenly. Lastly, make sure to measure your ingredients correctly. Too much flour can lead to dry bites. To boost flavor, try adding a pinch of nutmeg along with cinnamon. This gives a warm spice note. You can also use different plant-based milks. Almond milk, oat milk, or soy milk can change the taste slightly. Adding a bit of vanilla extract enhances the overall flavor too. For a crunchy texture, mix in chopped pecans or walnuts. They add a delightful crunch that pairs well with the soft dough. Serve these bites warm for the best taste. Arrange them on a nice platter and sprinkle with powdered sugar. Drizzle with maple syrup just before serving for extra sweetness. You can also serve them with a side of dairy-free yogurt or ice cream. This makes for a fun and tasty dessert. For a special touch, add fresh fruit like strawberries or blueberries around the plate. You can find the full recipe in the earlier sections. {{image_2}} You can make gluten-free vegan cinnamon roll bites easily. Simply swap all-purpose flour with a gluten-free blend. Make sure your blend works for baking. This change keeps the flavor while making the bites safe for those with gluten issues. Want to switch things up? Try new fillings! Chocolate chips add richness, while fresh fruits like berries give a nice twist. Spread your favorite jam or nut butter for more flavor. Each filling creates a unique taste experience. Play around with these options to find your favorite! If you love mini treats, make smaller versions of these bites. Cut the rolled dough into smaller pieces, about one inch thick. This size is perfect for snacking or sharing. You can also create a variety pack, mixing different flavors in one batch. For the full recipe and step-by-step instructions, check out the [Full Recipe]. To keep your vegan cinnamon roll bites fresh, let them cool completely. Place them in an airtight container. Store them at room temperature for up to three days. If you want them to last longer, refrigerate them. They can stay fresh in the fridge for about a week. When you're ready to enjoy these bites again, reheating is easy. You can use a microwave for quick warming. Heat them for 10-15 seconds at a time until warm. If you want a crispy texture, use an oven. Preheat it to 350°F (175°C) and place the bites on a baking sheet. Warm them for about 5-7 minutes. This method keeps them nice and tasty. If you want to freeze your vegan cinnamon roll bites, place them in a single layer on a baking sheet. Freeze them for about an hour until solid. Then, transfer them to a freezer-safe bag. They can stay frozen for up to three months. When you’re ready to eat, take them out and thaw them in the fridge overnight. Reheat as described above. This way, you can enjoy a delicious treat anytime! For the full recipe, check out the details above. Yes, you can use different types of flour. Whole wheat flour adds more fiber and a nutty taste. Almond flour makes the bites gluten-free and adds a light texture. Just remember, each flour may change the texture slightly. You might need to adjust the liquid if you use a nut flour. You can find pre-made vegan cinnamon roll bites at many health food stores. Look in the frozen section or the bakery area. Some grocery chains also carry them. Online shops like Thrive Market or Amazon have options too. Always check the ingredients to ensure they are fully vegan. These vegan cinnamon roll bites stay fresh for about two days at room temperature. If you store them in an airtight container, they can last up to a week in the fridge. For longer storage, freeze them for up to three months. Just reheat them in the oven for a warm treat later. You learned about making tasty vegan cinnamon roll bites. We covered the key ingredients, useful tips, and different variations. You can try gluten-free versions or add various flavors. Remember to store them right and reheat properly for the best taste. Enjoy making these bites as a fun treat! I hope you feel ready to create your own delicious versions at home. Happy baking!

Vegan Cinnamon Roll Bites Irresistible Flavor Delight

If you love sweet treats but need a vegan twist, you’ve come to the right place. In this post, I’ll

Cooking Easy Chicken Enchilada Skillet is simple and fun. Here’s what you need: - 2 tablespoons olive oil - 1 pound boneless, skinless chicken breasts, cubed - 1 onion, diced - 2 cloves garlic, minced - 1 bell pepper (red or green), chopped - 1 can (15 oz) black beans, drained and rinsed - 1 can (10 oz) enchilada sauce - 1 cup corn (fresh, frozen, or canned) - 1 cup shredded cheese (cheddar or Mexican blend) - 1 teaspoon ground cumin - 1 teaspoon smoked paprika - Salt and pepper to taste - Fresh cilantro for garnish - Avocado slices for serving (optional) Each ingredient adds its own special touch. The chicken provides protein, while the beans and corn add texture. The spices bring warmth and flavor. Fresh cilantro and avocado slices finish the dish perfectly. For the full recipe and more tips, check out the [Full Recipe]. Enjoy cooking this easy and tasty meal! - Prep Time: 10 minutes - Total Time: 25 minutes - Servings: 4 Heating the Oil First, grab a large skillet and heat 2 tablespoons of olive oil over medium heat. This step is key as it helps cook the chicken evenly and adds flavor. Cooking the Chicken Next, add 1 pound of cubed chicken to the skillet. Season it with salt, pepper, 1 teaspoon of ground cumin, and 1 teaspoon of smoked paprika. Cook for about 5 to 7 minutes. The chicken should no longer be pink. Stir it occasionally to ensure it cooks well. Sautéing the Vegetables Now, add 1 diced onion, 2 minced garlic cloves, and 1 chopped bell pepper to the skillet. Sauté these for another 3 to 4 minutes. The goal is to soften the vegetables and make them fragrant. Mixing in Beans and Corn After the veggies are soft, stir in 1 can of drained black beans, 1 cup of corn, and 1 can of enchilada sauce. Mix everything together well. Let it simmer for about 5 minutes. This helps all the flavors blend nicely. Adding the Cheese Finally, sprinkle 1 cup of shredded cheese on top of the mixture. Cover the skillet and cook for an extra 2 to 3 minutes. The cheese should melt and become bubbly. For garnishing, you can add fresh cilantro on top. Slices of avocado also make a great side. Enjoy this tasty one-pan meal with your family! For the full recipe, check out the details above. - Ensuring Even Cooking: Cut the chicken into uniform cubes. This helps them cook evenly. Stir well during cooking to prevent any pieces from browning too much. A good stir every few minutes ensures that all sides get heat. - Adjusting Spice Levels: If you prefer less heat, use mild enchilada sauce. You can also reduce the amount of cumin and paprika. For more spice, add jalapeños or chili powder. Always taste as you go! - Prepping Ingredients in Advance: Chop onions, garlic, and bell peppers the night before. Store them in the fridge. This makes cooking faster and easier on busy weeknights. - Using Rotisserie Chicken: Save time by using store-bought rotisserie chicken. Just shred it and add it to the skillet. This cuts down on cooking time and still gives great flavor. - Using Fresh Herbs: Fresh cilantro adds a bright flavor. Chop it finely and mix it in just before serving. You can also use fresh parsley or green onions for a different taste. - Adding Extra Spices: Try adding a pinch of cayenne pepper for heat. A dash of oregano or chili flakes can also enhance the flavor. Experiment to find your favorite spice mix. For the full recipe, you can refer to the Easy Chicken Enchilada Skillet. Enjoy your cooking journey! {{image_2}} - Substituting Chicken with Tofu Swap chicken for firm tofu. Press it to remove moisture. Cut it into cubes. Sauté the tofu just like the chicken. This gives a great texture and flavor. - Adding More Vegetables You can add more veggies for a healthy boost. Try zucchini, spinach, or mushrooms. Just chop them up and add them when you sauté the onion and garlic. - Using Different Sauces Change the taste by using different sauces. Try salsa verde or mole sauce instead of enchilada sauce. Each sauce gives a unique twist to the dish. - Alternative Cheese Choices Switch up the cheese for a different flavor. Use pepper jack for spice or queso fresco for a milder taste. Mixing different cheeses can also create a tasty blend. - Oven-Baked Version To bake it, start by cooking the chicken and veggies in a skillet. Then, transfer them to a baking dish. Top with cheese and bake at 350°F for 20 minutes. This gives a nice golden top. - Slow Cooker Instructions For a slow cooker, add all the ingredients except cheese. Cook on low for 4-6 hours. Add cheese in the last 15 minutes. This method makes for a hands-free meal. For more details, check out the Full Recipe. To keep your Easy Chicken Enchilada Skillet fresh, store it in an airtight container. Place it in the fridge soon after it cools. This helps it stay tasty and safe to eat. Your leftovers will last for about 3 to 4 days. When you want to eat your leftovers, you can use a microwave or stovetop. The microwave is quick but may not keep the same texture. If you want the best taste, heat it on the stovetop. Just warm it gently over low heat while stirring. If you want to save your dish for later, freezing works well. First, let it cool completely. Then, place the skillet meal in a freezer-safe container. Make sure it's sealed tight to avoid freezer burn. To use it later, thaw it in the fridge overnight. Reheat it on the stovetop for the best taste and texture. For the full recipe, check back for all the details! Can I use frozen chicken? Yes, you can use frozen chicken. Just be sure to thaw it first. This allows for even cooking. If you cook it from frozen, it may take longer to cook through. Can I make this dish ahead of time? Absolutely! You can cook the enchilada skillet early in the day. Store it in the fridge. When ready to eat, just reheat it on the stove or in the microwave. How can I customize the spice level? You can add more spices for heat. Consider using chili powder or cayenne pepper. For less heat, reduce the amount of these spices or skip them altogether. Is this dish gluten-free? Yes, this dish can be gluten-free. Just make sure to use gluten-free enchilada sauce. Most of the other ingredients are naturally gluten-free. How many calories per serving? Each serving has about 400 calories. This can vary based on the amount of cheese and toppings you use. Check the exact numbers with your specific ingredients. What type of skillet is best? A large, heavy skillet works best. A cast-iron skillet is great for even heat. If you have a non-stick skillet, that works too. Do I need a lid for cooking? Yes, using a lid helps the cheese melt evenly. It also keeps the moisture in, making your dish nice and juicy. This blog post covered making an easy chicken enchilada skillet. We discussed all the key ingredients, step-by-step instructions, and helpful tips. You learned how to modify the dish for different tastes and dietary needs. Keep these ideas in mind for your next meal. With simple prep and cooking methods, you can create a tasty dish your family will love. Enjoy experimenting with flavors and perfecting your skillet!

Easy Chicken Enchilada Skillet Tasty One-Pan Meal

Looking for a quick and tasty dinner idea? My Easy Chicken Enchilada Skillet is your answer! This one-pan meal combines

Older posts
Newer posts
← Previous Page1 … Page6 Page7 Page8 … Page54 Next →

dsad

© 2025 Lisa Dishes • Built with GeneratePress

Our Policies

  • Copyright Policy
  • Cookie Policy
  • GDPR Policy
  • Privacy Policy
  • Disclaimer
  • Terms Of Use

More Information

  • Home
  • About
  • Contact
  • Appetizers
  • Dessert
  • Dinner
  • Drinks
©2025, Lisa Dishes About Back To Top