Skip to content
DisclaimerTerms Of UseGDPR PolicyCookie Policy

Lisa Dishes

  • Home
  • Drinks
  • Appetizers
  • Dinner
  • Dessert
  • About
  • Contact
  • Privacy Policy
DisclaimerTerms Of UseGDPR PolicyCookie Policy

lisa

- 1 large grapefruit, juiced - 2 sprigs of fresh rosemary - 2 tablespoons honey (or agave syrup for vegan option) - 1 cup sparkling water (chilled) - Ice cubes The key to a great Rosemary Grapefruit Spritzer is fresh, simple ingredients. The grapefruit gives a bright and tangy flavor. Fresh rosemary adds a lovely herbal note that makes the drink unique. Honey or agave syrup helps balance the tartness. Chilled sparkling water brings a refreshing fizz, making it perfect for hot days. Ice cubes keep your drink cool and enjoyable. - Grapefruit slices - Additional rosemary sprigs Garnishes play a big role in presentation. Slices of grapefruit add a pop of color. They also give a hint of what’s inside the drink. A sprig of rosemary on top not only looks nice but also adds aroma. The visual appeal makes your spritzer feel special. For the full recipe, you can explore the step-by-step instructions to create this delightful drink. To start, grab a small saucepan. Combine 1 cup of water, 2 tablespoons of honey, and 1 sprig of rosemary. Bring this mix to a gentle simmer over medium heat. Stir until the honey dissolves completely. This step brings out the rosemary's flavor. After simmering, remove the pan from heat. Let the rosemary steep for about 10 minutes. Strain the mixture to remove the leaves. Set the syrup aside to cool. Now it’s time to put it all together! In a large glass, combine the freshly squeezed juice from 1 large grapefruit and the cooled rosemary syrup. Stir well to mix the flavors. Next, add ice cubes halfway in the glass. Pour in 1 cup of chilled sparkling water. Gently stir again to combine everything. Once mixed, taste your spritzer. If you want it sweeter, add more honey or syrup to your liking. Finally, garnish your drink with grapefruit slices and a sprig of fresh rosemary. This adds a nice touch and makes it look beautiful. Enjoy your refreshing drink! Using fresh ingredients makes your rosemary grapefruit spritzer taste bright and lively. Fresh grapefruit juice gives a zesty kick. Fresh rosemary adds a fragrant touch. Avoid bottled juices; they lack the same flavor. Sweetness can vary based on taste. Start with two tablespoons of honey or agave syrup. After mixing, taste your spritzer. If it needs more sweetness, add a bit more honey. Adjust to find your perfect balance. Serve this drink right away for the best taste. If you chill your spritzer, it stays refreshing. Use clear glasses to show off the vibrant colors. A tall glass works well, but any glass you like will do. To make it fancy, garnish with grapefruit slices and rosemary sprigs. This not only looks great but also adds extra aroma. Enjoying this drink on a hot day makes it even better! For the full recipe, check out the details above. {{image_2}} You can make your Rosemary Grapefruit Spritzer even more exciting. Try adding other citrus juices. Orange or lemon juice can add a nice twist. Just use about a quarter cup of juice for balance. You can also use different herbs like mint or basil. Mint gives a fresh taste, while basil adds a warm flavor. Just muddle a few leaves in your glass before adding the other ingredients. If you want an adult beverage, consider adding gin or vodka. Both spirits mix well with grapefruit and rosemary. Start with one ounce of gin or vodka for each glass. This amount keeps the flavors bright and refreshing. Always taste your spritzer after mixing. You can adjust the spirit to suit your taste. Enjoy experimenting with these variations to find your favorite blend! If you have extra rosemary syrup, store it in the fridge. Use a clean glass jar. This keeps it fresh for your next drink. Homemade syrup stays good for about one week. After that, check for changes in smell or color. If it looks or smells off, throw it away. Want to impress guests? You can mix the grapefruit juice and syrup ahead of time. This way, you save time when friends arrive. Pour the mix into a clean pitcher. Seal it with a lid and place it in the fridge. It stays fresh for up to three days. When serving, add ice and sparkling water just before drinking. This keeps the fizz alive. For storage, a glass pitcher or jar works best. It helps maintain flavor and looks nice on the table. For the full recipe, check the main section. If you want a vegan option, use agave syrup. Maple syrup also works well. Both give a nice sweetness without losing flavor. You can also try stevia or coconut sugar for a different twist. Each sweetener has its own taste, so pick what you love! Yes, you can easily scale this recipe for parties. Just double or triple the amounts for the syrup and juice. Make sure to adjust the sparkling water too. Keep everything chilled and mix just before serving. This way, your spritzer stays bubbly and fresh. Absolutely! Just skip any alcohol and focus on the flavors in the drink. The rosemary and grapefruit shine through. You can add a splash of orange juice for extra sweetness. This makes a great family-friendly option everyone can enjoy. To chill sparkling water fast, use ice and water in a bowl. This method cools the bottles quickly. You can also place them in the freezer for about 15 minutes. Just be careful not to forget them, or they might freeze! This article covered how to make a delicious grapefruit spritzer with rosemary syrup. You learned about the key ingredients and easy steps to mix your drink. I shared tips for making it taste great and ideas for variations. Remember to use fresh ingredients for the best flavor. You can enjoy this spritzer at parties or as a refreshing drink at home. Making this recipe can be fun and simple, and you can impress your friends with your new skills. Enjoy your spritzer!

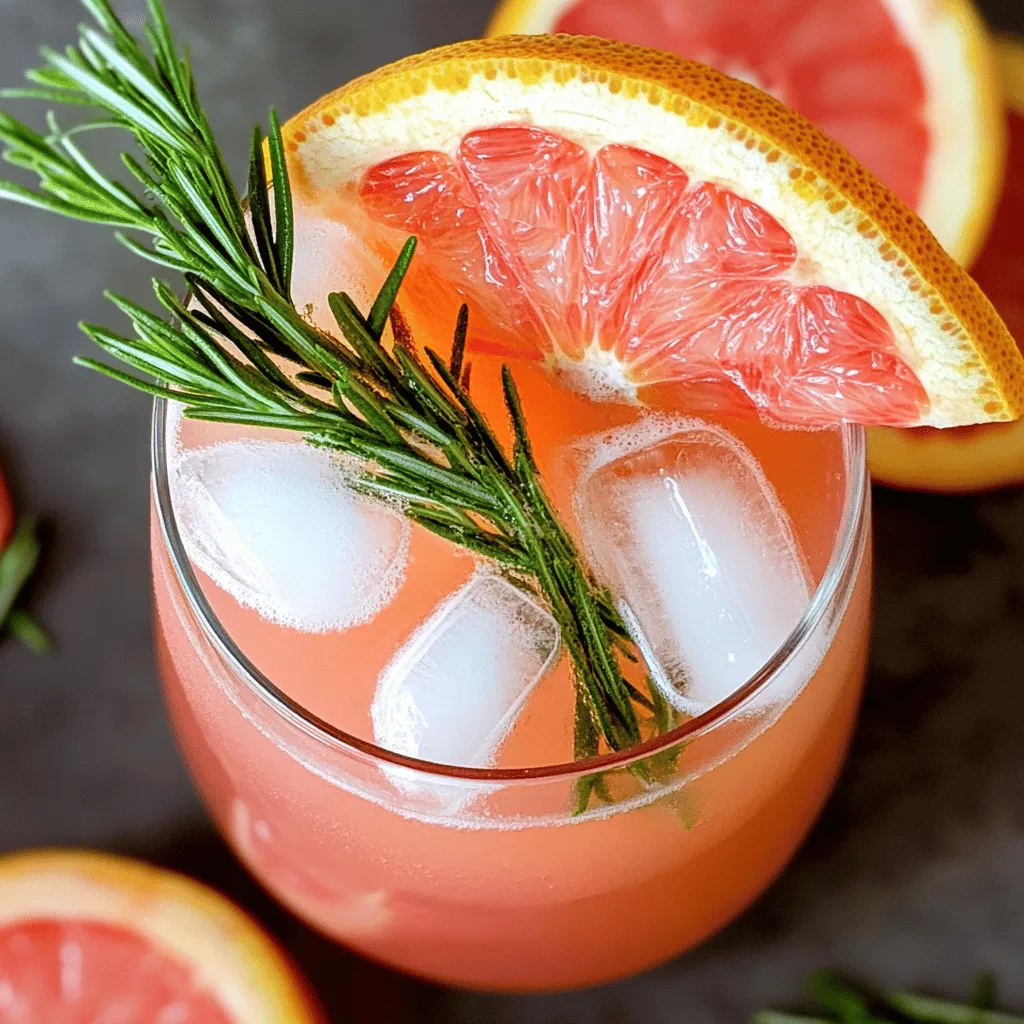
Rosemary Grapefruit Spritzer Refreshing Summer Drink

Looking for a refreshing drink to beat the summer heat? Look no further! The Rosemary Grapefruit Spritzer combines zesty grapefruit

- 1 cup unsweetened almond milk (or milk of choice) - 1 ripe banana - 1 scoop vanilla protein powder - 1 tablespoon chia seeds - 1 teaspoon ground cinnamon - 1 teaspoon ground ginger - 1/2 teaspoon ground cardamom - 1/4 teaspoon black pepper - 1 tablespoon maple syrup or honey (optional) - Ice cubes (as needed for desired thickness) Gather these ingredients before you start. The almond milk gives a creamy base. The banana adds natural sweetness and creaminess. Vanilla protein powder boosts nutrition. Chia seeds add fiber and omega-3s. The spices create that warm chai flavor. Maple syrup or honey can add more sweetness if you like. Ice cubes help make the smoothie thick and cold. - Calories per serving: Approximately 300 calories - Protein, fat, and carbohydrate breakdown: - Protein: 20g - Fat: 8g - Carbohydrates: 45g - Fiber content and health benefits: - Each serving has about 8g of fiber. - Fiber helps with digestion and keeps you full longer. This smoothie is a great choice for a quick breakfast or snack. It packs good nutrition and tastes amazing. Enjoy this treat while knowing it's good for your body! For the full recipe, check out the details above. - Step 1: Prepare the ingredients Start by gathering all your ingredients. You will need: - 1 cup unsweetened almond milk - 1 ripe banana - 1 scoop vanilla protein powder - 1 tablespoon chia seeds - 1 teaspoon ground cinnamon - 1 teaspoon ground ginger - 1/2 teaspoon ground cardamom - 1/4 teaspoon black pepper - 1 tablespoon maple syrup or honey (optional) - Ice cubes (as needed) - Step 2: Combine wet and dry ingredients in the blender In your blender, add the almond milk, banana, protein powder, and chia seeds. Next, sprinkle in the spices: cinnamon, ginger, cardamom, and black pepper. If you want a sweeter flavor, add maple syrup or honey. - Step 3: Blend until smooth and adjust consistency Blend all the ingredients on high speed until smooth. If the smoothie feels too thick, simply add more almond milk or ice cubes to reach your desired thickness. Taste it! If you want more sweetness or spice, adjust and blend again. Serve your smoothie in a tall glass for an eye-catching look. You can add a cinnamon stick for a warm touch. A slice of banana on the rim also makes it look nice. Enjoy your delicious Vanilla Chai Protein Smoothie! To get the right thickness for your smoothie, use ice cubes. Start with a few and add more if needed. If it’s too thick, pour in more almond milk. Blend on high speed for a creamy texture. Stop and scrape down the sides of the blender if needed. This helps mix everything well. You can adjust sweetness and spice to fit your taste. If you like it sweeter, add more maple syrup or honey. For spice, try more cinnamon or ginger, but start small. If you have allergies, replace the almond milk with oat or coconut milk. You can also swap the protein powder for a plant-based option if needed. Enjoy making this smoothie your own! {{image_2}} You can change the taste of your Vanilla Chai Protein Smoothie easily. Adding different fruits gives a new twist. Try mixing in berries or mango for a fruity flair. These fruits add sweetness and nutrition. They also blend well with the chai spices. You can also add more spices for depth. Nutmeg adds warmth, while vanilla extract boosts sweetness. Experimenting with spices can take your drink to the next level. Don’t be afraid to play around! Boosting nutrition is simple with this smoothie. Adding superfoods like spinach can enhance its health benefits. Spinach blends well and keeps the color nice and bright. It gives you vitamins and minerals without changing the taste. If you want more protein, consider Greek yogurt or nut butter. Greek yogurt makes the smoothie creamy and adds protein. Nut butter like almond or peanut provides healthy fats and a rich flavor. You can adjust these options based on your diet and taste preferences. For the full recipe, check out the details above! To keep your Vanilla Chai Protein Smoothie fresh, use an airtight container. A glass jar or a BPA-free plastic container works well. This helps keep the flavors intact. Store the smoothie in the fridge for up to 24 hours. Shake or stir it before drinking, as it may separate. If you want to save some for later, freezing is a great option. First, pour the smoothie into ice cube trays or small containers. This allows for easy thawing. Each portion should be about one cup or less. To thaw, just leave it in the fridge overnight or blend it frozen with a bit of almond milk. Enjoy your Vanilla Chai Protein Smoothie whenever you want! For the full recipe, check out the previous section. You can store your Vanilla Chai Protein Smoothie in the fridge for up to 24 hours. Make sure to keep it in a sealed container. If you want to store it longer, freezing is a great option. You can freeze it for up to a month. Just pour it into ice cube trays or freezer-safe bags. When you're ready to drink it, thaw in the fridge overnight or blend it straight from the freezer for a chilled treat. Yes, you can use many different liquids for your smoothie. Here are some great options: - Cow's milk - Soy milk - Oat milk - Coconut milk - Cashew milk Each option adds a unique flavor and texture. Choose one that fits your taste or dietary needs! While protein powder adds a boost of protein, it isn't a must. Here’s why you might want to use it: - It helps with muscle repair. - It keeps you full longer. - It adds a smooth texture. If you prefer not to use protein powder, consider these alternatives: - Greek yogurt for creaminess and protein. - Silken tofu for a plant-based option. - Nut butters for added flavor and healthy fats. These swaps will still make your smoothie tasty and nutritious. For the full recipe, check the earlier section! This blog post covered how to make a delicious Vanilla Chai Protein Smoothie. We discussed the key ingredients, step-by-step instructions, and tips for the perfect blend. You can customize flavors and nutrition to fit your needs. Store leftovers wisely to enjoy later. With its balance of protein and spices, this smoothie is great for a healthy boost. Give it a try and enjoy your tasty treat!

Vanilla Chai Protein Smoothie Quick and Tasty Recipe

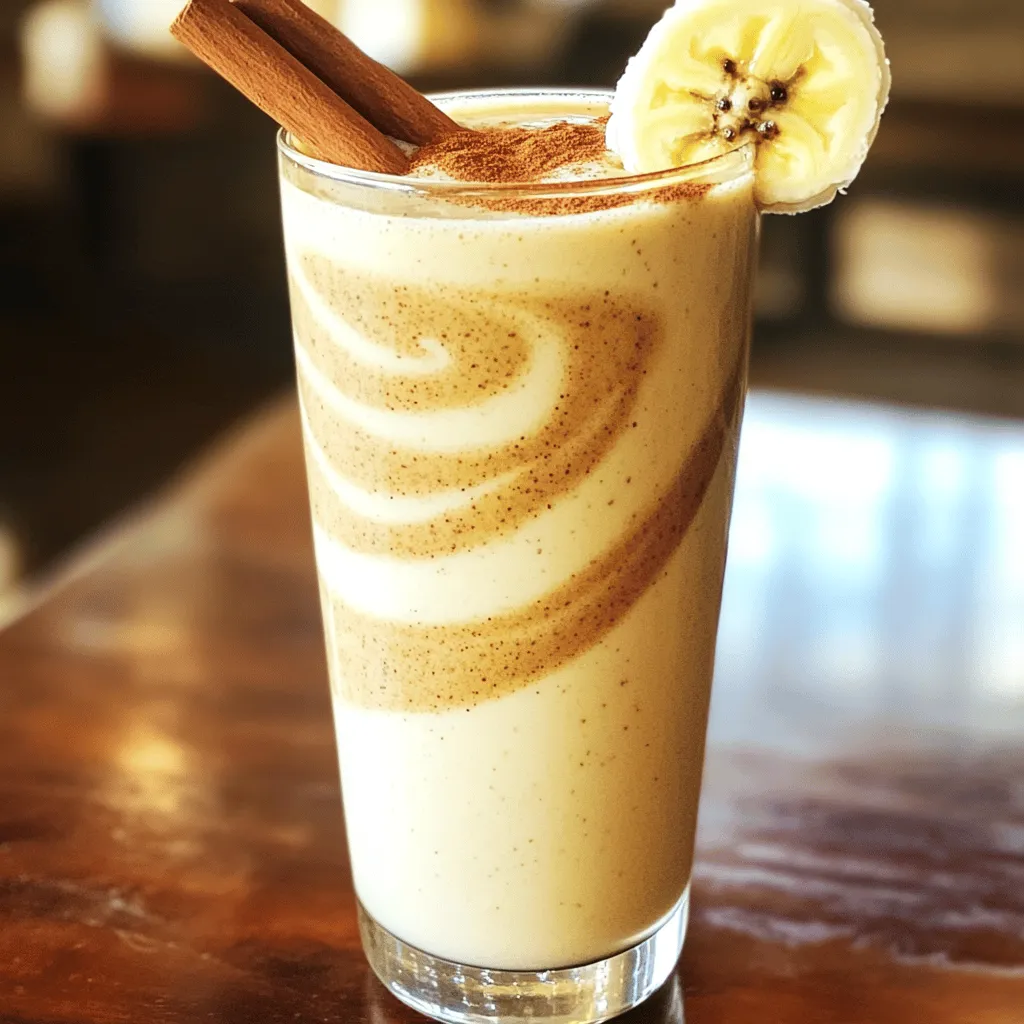
Are you looking for a quick, tasty treat that fuels your day? Look no further! This Vanilla Chai Protein Smoothie

To make a delicious birthday cake milkshake, gather these key items: - 2 cups vanilla ice cream - 1 cup milk (whole or 2%) - 1/4 cup birthday cake mix (dry) - 1/2 cup crumbled birthday cake (any flavor) - 2 tablespoons sprinkles (plus more for garnish) - Whipped cream (for topping) - Maraschino cherry (for garnish) These ingredients create a sweet and creamy treat. The vanilla ice cream adds richness, while the milk blends everything smoothly. The birthday cake mix and crumbled cake give that special flavor. Sprinkles add fun and color, making it festive. You can get creative with toppings. Here are some ideas: - Extra sprinkles on top - Chopped nuts for crunch - Chocolate syrup drizzle - Fresh fruit like strawberries or bananas These extras can change the taste and look. Use your favorites or what you have at home. If you don't have all the ingredients, don't worry! Here are some swaps you can try: - Use chocolate ice cream instead of vanilla for a twist. - Almond milk or oat milk works if you want a dairy-free option. - Any cake mix can replace the birthday cake mix. These changes can still give you a yummy birthday cake milkshake. Feel free to experiment and find what you like best. For the full recipe, check out the complete guide. To start, gather your ingredients. You will need: - 2 cups vanilla ice cream - 1 cup milk (whole or 2%) - 1/4 cup birthday cake mix (dry) - 1/2 cup crumbled birthday cake - 2 tablespoons sprinkles In a blender, add the ice cream, milk, birthday cake mix, and crumbled cake. Make sure to measure each ingredient carefully. This mix gives the shake its rich flavor. Blend the ingredients together until they are combined well. Blend the mixture on high speed. Stop the blender every so often to scrape down the sides. This helps to mix everything evenly. You want a smooth and creamy texture. If it seems too thick, add a bit more milk. Blend again until you're happy with the consistency. Once the base is ready, add the sprinkles. Pulse the blender a few times. This will mix in the sprinkles without blending them too much. Next, pour the milkshake into tall glasses. Top with whipped cream and add more sprinkles on top. Finish each glass with a maraschino cherry for a fun touch. Enjoy your birthday cake milkshake right away for the best taste! For the full recipe, check out the details above. To get a smooth and creamy milkshake, use high-quality vanilla ice cream. The ice cream should be slightly soft. Let it sit out for a few minutes before you scoop. Blend the ingredients for about 30 seconds. Stop to scrape the sides of the blender. This helps mix everything well. If your shake is too thick, add a bit more milk. If it’s too thin, add more ice cream. When serving your birthday cake milkshake, use tall glasses or mason jars. This adds a fun touch. Make sure to top it off with whipped cream. Add a generous sprinkle of colorful sprinkles on top. You can also place a maraschino cherry on the cream. For extra flair, stick a festive straw in each glass. This makes it look even more special! For added sweetness, try using flavored syrups. Vanilla, caramel, or even chocolate syrup can enhance the taste. Instead of birthday cake mix, you can use flavored mixes like chocolate or funfetti. If you want a less sweet shake, reduce the amount of cake mix or sprinkles. Always taste your shake before serving. Adjust the sweetness to your liking for the best birthday treat! Check out the Full Recipe for more details on making this fun treat! {{image_2}} You can mix things up with fun flavors! Try adding chocolate syrup for a chocolate birthday cake milkshake. This adds a rich taste. For a fruity twist, use strawberry syrup. Blend this with the ice cream for a fresh flavor. You can also add other favorite flavors like cookies and cream or mint. The options are endless! You don’t have to stick to vanilla cake. Use any cake you like! A chocolate cake gives a deep flavor. Lemon cake brings a nice zing. You can also use a red velvet cake for a fun color. Mix different milk types too. Almond milk or oat milk can add a new taste. Each change gives a unique twist! Want to make it healthier? Use low-fat ice cream or yogurt instead of regular ice cream. This keeps it creamy but cuts calories. You can also add fruits like bananas or berries. These add flavor and nutrients. Swap out regular milk for plant-based milk for a lighter option. This makes your treat both tasty and guilt-free! For the full recipe, check out the detailed instructions for making this delightful treat! If you have any leftover milkshake, store it in the fridge. Use an airtight container to keep it fresh. It’s best to drink it within a day for the best taste. If it separates, just give it a quick stir. You might have some leftover ingredients after making the milkshake. Save any extra cake scraps for another treat. You can mix them into yogurt for a quick snack. The leftover sprinkles can also jazz up cupcakes or cookies. You can freeze the milkshake for later. Pour it into ice cube trays, and freeze until solid. Later, you can blend the cubes with some milk for a quick treat. This way, you can enjoy a birthday cake milkshake anytime! For the full recipe, check out the guidelines above. To make your milkshake thicker, use less milk. You can also add more ice cream. Another tip is to chill your glass before pouring. This helps keep the shake cold and thick. You can also freeze the cake pieces before blending. This will add thickness and a nice texture. Yes, you can use any milk you like. Almond milk or oat milk works well for a dairy-free option. Each milk type adds a different taste. If you want a creamier milkshake, stick with whole milk. Try different types to find your favorite flavor. You can find great birthday cake milkshakes at local ice cream shops or diners. Some cafes and bakeries also serve fun milkshake options. Check online reviews or ask friends for their favorites. If you want a special treat, make one at home using the Full Recipe. A birthday cake milkshake lasts about one day in the fridge. It may separate, so stir it before drinking. If you want to keep it longer, consider freezing it. Just remember that the texture may change when you thaw it. This blog post explored how to make a delicious birthday cake milkshake. We looked at key ingredients, optional toppings, and smart substitutes that fit your taste. The step-by-step guide showed how to create the base, blend for the right texture, and add fun touches. I shared tips for great presentation and ways to vary the flavor. In the end, this milkshake is a fun and tasty treat for any celebration. Enjoy experimenting with different flavors and make it your own!

Delicious Birthday Cake Milkshake Fun Treat Recipe

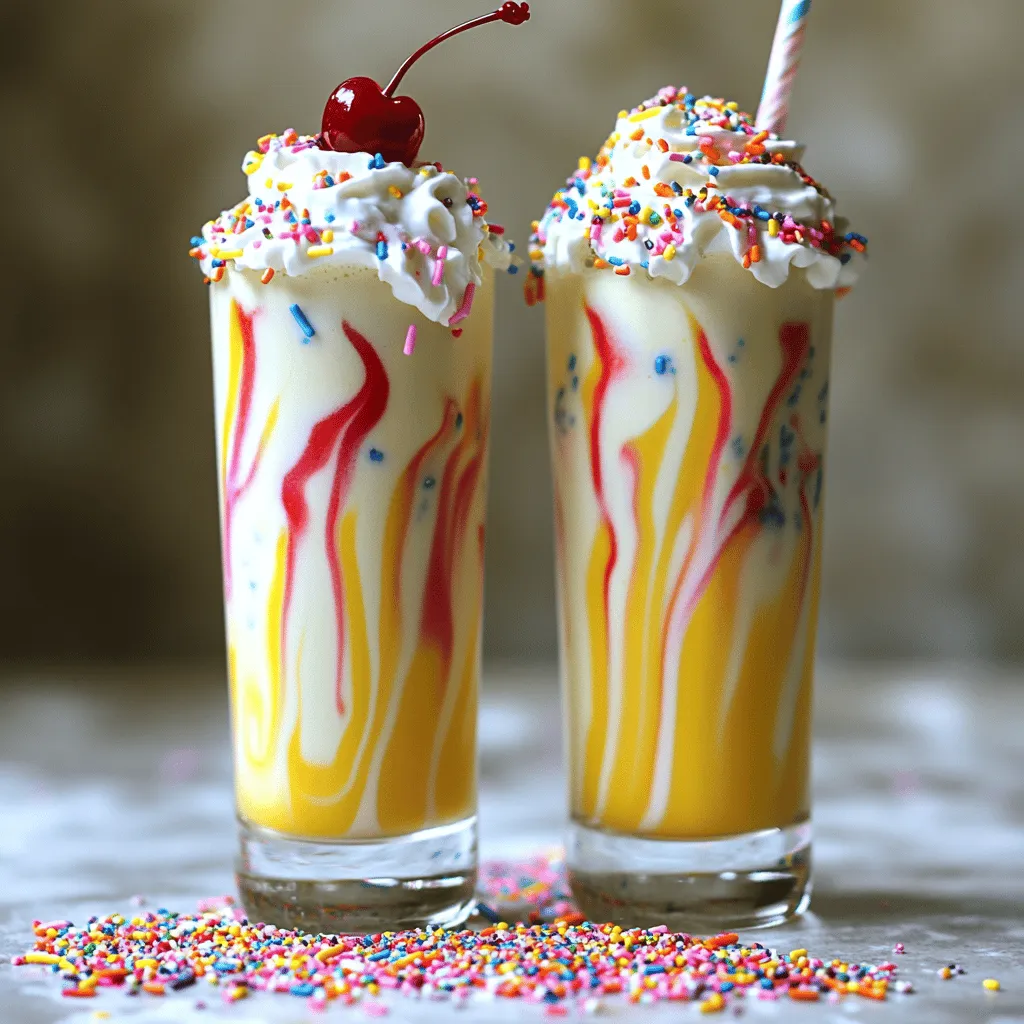
Get ready to indulge in a sweet treat with my Delicious Birthday Cake Milkshake Fun Treat Recipe! This milkshake blends

- 2 ripe bananas, sliced - 2 tablespoons almond butter - 1 cup almond milk (or any milk of your choice) - 1 tablespoon honey (or maple syrup for vegan option) - 1 tablespoon chia seeds - 1/2 teaspoon ground cinnamon - Ice cubes (optional) - A pinch of salt To make the Almond Butter Banana Smoothie, gather these simple ingredients. Ripe bananas give the smoothie its natural sweetness. Almond butter adds a creamy texture and rich flavor. Almond milk keeps it light and dairy-free. Honey or maple syrup sweetens the mix, while chia seeds boost nutrition. Ground cinnamon enhances the taste, and a pinch of salt balances the flavors. - Spinach for a green smoothie boost - Protein powder for extra nutrition - Vanilla extract for flavor enhancement You can customize your smoothie with optional add-ins. Spinach adds nutrients without changing the taste. Protein powder gives a healthy boost, perfect for post-workout. A drop of vanilla extract can enhance the flavor, making it even more delicious. - Blender - Measuring cups and spoons - Glasses for serving For this recipe, you need a blender to mix everything smoothly. Measuring cups and spoons help you get the right amounts. Lastly, glasses are essential for serving your tasty creation. You’ll find the full recipe at the end to guide you through this quick and easy process. - Combine all ingredients in the blender. - Add ice cubes if desired for a chilled smoothie. First, gather all your ingredients. You will need ripe bananas, almond butter, almond milk, honey or maple syrup, chia seeds, ground cinnamon, a pinch of salt, and ice cubes if you like it cold. I find that using ripe bananas adds natural sweetness and creaminess. - Blend on high speed until smooth and creamy. - Scrape down the sides as needed for even blending. Next, secure the lid on your blender. Blend on high speed for about 1-2 minutes. The goal is to achieve a smooth and creamy texture. Don’t forget to stop and scrape down the sides. This ensures that all ingredients blend evenly, giving you a rich flavor. - Taste and adjust sweetness with honey or maple syrup. - Blend again if additional ingredients are added. After blending, taste your smoothie. If it’s not sweet enough, add a bit more honey or maple syrup. Blend again for a few seconds if you add anything new. This step allows you to customize the flavor to your liking. Enjoy your creamy almond butter banana smoothie right away for the best taste! To get that smooth, creamy texture, blend your smoothie for a bit longer. This helps break down all the ingredients well. You can also use frozen bananas. They make the smoothie thicker and creamier, giving you that delightful mouthfeel. If you want it sweeter, add more honey or maple syrup. Just stir in a bit at a time until it’s right for you. You might also try natural sweeteners like dates. They add a unique flavor and are a great healthy option. To save time, prepare your ingredients in advance. Slice the bananas and measure the almond butter and milk. Then, when you're ready, just blend them up! You can store any blended smoothie in the fridge for up to 24 hours. But, I find it tastes best fresh. {{image_2}} You can switch up the taste of your smoothie easily. Here are some fun ideas: - Chocolate Almond Butter Banana Smoothie: Add 1 to 2 tablespoons of cocoa powder for a rich flavor. - Tropical Twist: Blend in a half cup of pineapple or mango for a fruity kick. Want to boost your smoothie’s nutrition? Try these simple changes: - Protein-Packed: Add a half cup of Greek yogurt to make it creamy and filling. - Low-Calorie Option: Substitute honey with a low-calorie sweetener like stevia. Do you have allergies or dietary needs? Here are safe swaps: - Nut Allergies: Swap almond butter for peanut butter or sunflower seed butter. - Dairy-Free Choice: Use oat milk instead of almond milk for a different taste. Experimenting with these variations can make your almond butter banana smoothie even more enjoyable! Check out the Full Recipe for more details. Store any leftover smoothie in an airtight container. This keeps it fresh and tasty. Try to drink it within 24 hours for the best flavor. When you take it out, give it a good shake before drinking. You can freeze smoothies in ice cube trays. This makes for easy portions later. When you're ready, blend the frozen cubes with fresh ingredients for a quick smoothie. It's like having a smoothie bar at home! Freshly blended smoothies taste best within the same day. If you store them longer, you may notice changes in taste and texture. The flavors can fade, and the smoothie might separate. Enjoy it fresh for the best experience. Yes, use maple syrup instead of honey for a vegan option. This simple swap keeps the sweetness intact while catering to your dietary needs. Increase the amount of banana or add more almond butter. Both options boost the creaminess and help create a satisfying texture. Yes, you can prepare ingredients ahead of time for quick assembly. Just keep the sliced bananas and almond butter in the fridge. Any milk alternative like oat, soy, or coconut milk works well. Each choice adds a unique flavor and keeps the smoothie dairy-free. Absolutely! Frozen bananas can enhance the creaminess of the smoothie. They also chill the drink, making it refreshing and delicious. For the full details, check out the Full Recipe. This blog covers making a tasty banana smoothie with simple ingredients. You learned about the base ingredients, optional add-ins, and the tools needed. I shared easy steps to blend it just right and how to adjust flavors. You can mix up the recipe with tasty variations to fit your diet. Storing tips help keep your smoothies fresh. Enjoy your smoothie journey, and feel free to get creative! Making a delicious smoothie can be both fun and healthy.

Almond Butter Banana Smoothie Creamy and Healthy Drink

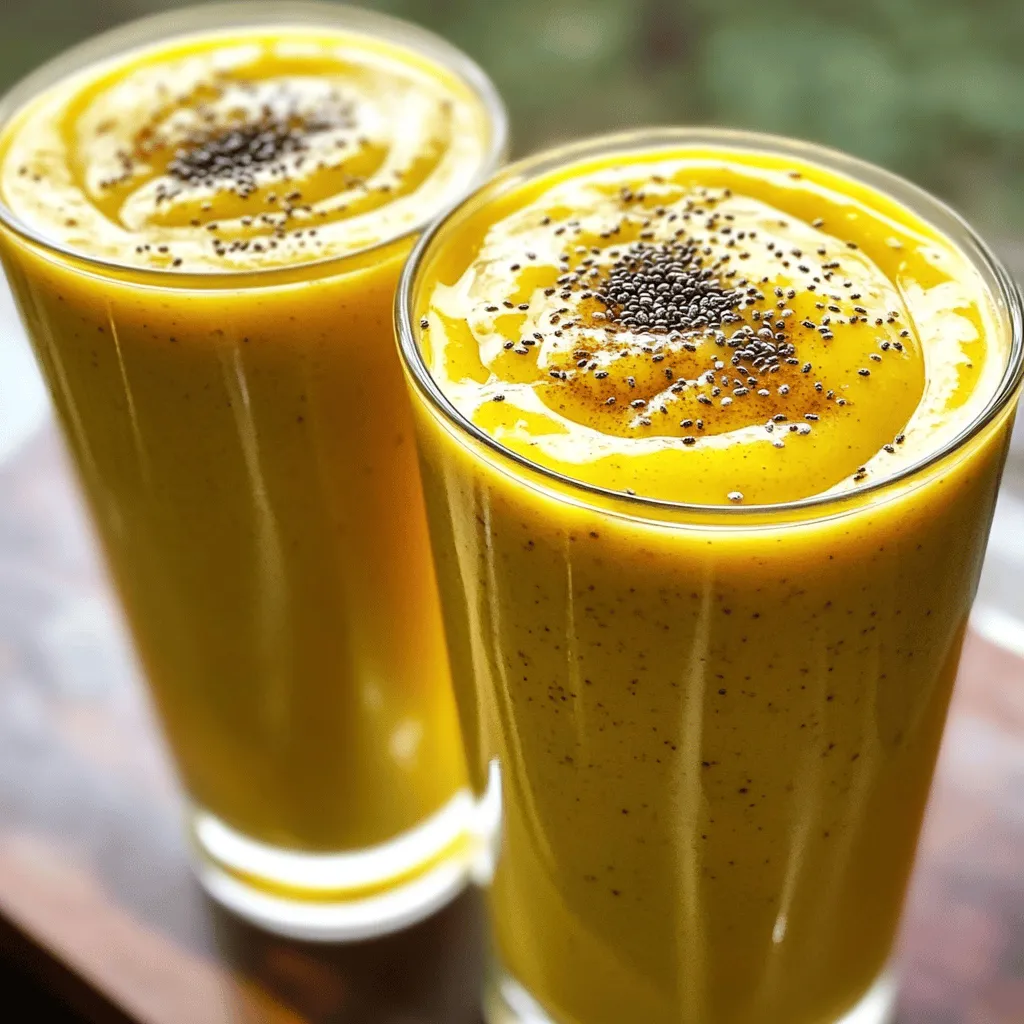
Looking for a delicious yet healthy drink? Try my Almond Butter Banana Smoothie! With just a few simple ingredients, you

To make a tasty Lavender Honey Iced Matcha, you need a few simple ingredients. Here’s what you will need: - 2 teaspoons matcha green tea powder - 1 tablespoon hot water - 1 tablespoon culinary-grade lavender buds - 2 tablespoons honey (to taste) - 1 cup milk (dairy or plant-based) - Ice cubes - Optional garnishes: lavender sprigs, edible flowers These ingredients create a unique drink that combines the earthy flavor of matcha with the sweet and floral notes of lavender. Each component plays a key role in making this drink refreshing and delightful. The matcha adds a boost of antioxidants, while the lavender gives a calming aroma. Honey sweetens the mix just right. You can choose any milk that fits your taste or dietary needs. The optional garnishes add a lovely touch and make your drink look beautiful. When picking lavender, make sure it is culinary grade. This ensures it is safe and tasty. If you want to try this recipe, check out the Full Recipe for step-by-step guidance. To start, simmer the lavender buds in water. Use a small saucepan and add 1 cup of water with 1 tablespoon of culinary-grade lavender buds. Bring it to a gentle simmer. Let it steep for about 5 minutes. This brings out the lovely floral flavor. Once done, strain the lavender buds from the water. Let the lavender-infused water cool completely. Next, prepare the matcha. In a small bowl, add 2 teaspoons of matcha green tea powder. Pour in 1 tablespoon of hot water. Use a whisk to mix it until smooth. Make sure there are no clumps left. This step is key for a creamy drink. Now it’s time to mix everything. In a large glass, combine the cooled lavender-infused water, honey, and the matcha mixture. Stir well until everything is blended. Then, fill the glass with ice cubes. Pour in 1 cup of milk, either dairy or plant-based. Give it a gentle stir to mix all the flavors. You can adjust the sweetness with more honey if needed. For a touch of elegance, garnish with a sprig of lavender and some edible flowers if you like. For a detailed view of all the steps, check the Full Recipe. To make the best Lavender Honey Iced Matcha, start with culinary-grade matcha. This type is perfect for drinks and desserts. Look for matcha with a vibrant green color. A bright hue shows high quality and freshness. Dull or yellowish shades often mean lower quality. You can customize the sweetness of your drink. Start with two tablespoons of honey, then taste. If you want it sweeter, add more honey. For a different flavor, try maple syrup or agave nectar. These can be great alternatives to honey. To avoid clumps in your matcha, whisk it well with hot water. Use a bamboo whisk if possible. If you don’t have one, a small regular whisk works too. For a creamy texture, mix in the milk slowly. This helps blend everything smoothly. Enjoy the rich taste without grit. {{image_2}} If you want a dairy-free drink, try almond, oat, or coconut milk. These options give a nice, creamy texture without dairy. Each milk adds its unique flavor. Almond milk is nutty, oat milk is sweet, and coconut milk has a tropical twist. Just swap the regular milk for any of these. You’ll enjoy a lovely Lavender Honey Iced Matcha without any dairy. To boost the taste, consider adding vanilla or mint. A splash of vanilla extract brings warmth and sweetness. Fresh mint leaves add a refreshing touch. You can also try flavored floral syrups. Lavender syrup gives a stronger floral taste that pairs well with matcha. Experiment with different syrups to find your favorite mix. These enhancements make your drink even more enjoyable. Change things up with seasonal flavors. For fall, try a lavender chai matcha. Add chai spices like cinnamon and ginger for warmth. It’s cozy and perfect for cooler weather. In summer, consider iced fruit variations. Adding fresh berries or citrus can brighten the drink. Strawberries or lemon slices can make it refreshing and fun. These twists keep your Lavender Honey Iced Matcha exciting all year round. To store leftover Lavender Honey Iced Matcha, keep it in a sealed container. Glass jars work well. Place the jar in the fridge. This drink is best enjoyed fresh, so try to drink it within one day. If you notice any changes in color or smell, it’s best to toss it. To keep matcha powder fresh, store it in an airtight container. Keep it in a cool, dark place. Avoid light and moisture, as they can ruin the flavor. For culinary lavender, store it in a sealed jar too. A cool, dark cupboard is perfect for preserving its scent and taste. Lavender Honey Iced Matcha stays good for about 24 hours in the fridge. After that, the flavor may change. The matcha can settle, which affects the creaminess. If you want to enjoy it later, just give it a gentle stir before serving. Always check for freshness before drinking. Matcha is a special green tea powder. I love it for its rich flavor and vibrant color. It has many health benefits. It is full of antioxidants. These help protect your cells from damage. Matcha can boost your energy and focus. It also helps you relax. Drinking matcha can support weight loss and improve heart health. Yes, you can make this Lavender Honey Iced Matcha vegan. Simply swap honey for maple syrup or agave nectar. Both options add sweetness without animal products. For the milk, use a plant-based option like almond, oat, or coconut milk. This way, you can enjoy the drink while keeping it vegan-friendly. You can find culinary lavender at specialty stores or online. Look for labels that say “culinary grade.” This ensures it’s safe to eat. Local farmers' markets often sell culinary lavender too. Some cafes serve Lavender Honey Iced Matcha. Check your local coffee shops or tea houses. They might offer unique variations and help you discover new flavors. To make Lavender Honey Iced Matcha, follow these steps: 1. Infuse lavender buds in water and strain. 2. Whisk matcha powder with hot water. 3. Mix lavender water, honey, and matcha. 4. Add ice and pour in milk. 5. Garnish with lavender sprigs and edible flowers. This quick summary gives you all you need to start making this refreshing drink at home. Enjoy the lovely blend of flavors! In this post, I shared how to make a delicious Lavender Honey Iced Matcha drink. We covered the key ingredients, step-by-step instructions, and helpful tips for perfecting your drink. You can also explore tasty variations and smart storage tips. Lavender and matcha offer a unique flavor that refreshes and energizes. Dive into this recipe, and enjoy making it for yourself or sharing it with others. Experiment with flavors and make it your own—you'll find joy in each sip!

Lavender Honey Iced Matcha Refreshing Summer Drink

Looking for a cool and unique drink to beat the summer heat? Try my Lavender Honey Iced Matcha. This refreshing

- 2 cups fresh cranberries - 1 cup orange juice (freshly squeezed) - Fresh mint leaves (for garnish) - 1/2 cup granulated sugar (adjust to taste) - 1 teaspoon grated orange zest - Ice cubes - 3 cups sparkling water or club soda When making the Cranberry Orange Refresher, you want the freshest ingredients. Start with bright, red cranberries. These little gems pack a punch of tartness and flavor. Freshly squeezed orange juice is key too. It gives this drink its zesty kick. You’ll also need some pantry staples. Granulated sugar helps balance the tartness of the cranberries. You can adjust the amount based on your taste. A bit of grated orange zest adds depth and a lovely aroma to the drink. Don't forget about the fizz! Sparkling water or club soda gives this refresher its bubbly personality. Finally, keep some ice cubes handy. They chill your drink and keep it refreshing. You can explore the full recipe for more details. Enjoy crafting this bright and simple refreshment! In a medium saucepan, you will combine 2 cups of fresh cranberries and 1/2 cup of granulated sugar. Add 1/4 cup of water to help the sugar dissolve. Cook this mixture over medium heat. You will need to stir it often. Keep cooking until the cranberries burst, which usually takes about 10-12 minutes. This step releases all the bright flavors. Once the cranberries have burst, take the pan off the heat. Let the mixture cool for a few minutes. Now, strain the mixture through a fine sieve. This will remove any solids. Press down gently to extract all the juice. You will have a vibrant cranberry syrup that shines with color. In a large pitcher, combine the cranberry syrup with 1 cup of freshly squeezed orange juice and 1 teaspoon of grated orange zest. Stir the mixture well to blend the flavors. Just before serving, gently stir in 3 cups of sparkling water or club soda. This will keep the drink bubbly and refreshing. When making your Cranberry Orange Refresher, you can adjust the sugar. Start with 1/2 cup, then taste. If it’s too tart, add more sugar a little at a time. You can also use honey or agave syrup as sweeteners. They add flavor too. Just remember, these options can change the taste a bit, so taste as you go. To show off the drink, use clear glasses. This lets the bright red color shine through. You can add a slice of orange on the rim for a nice touch. Fresh mint leaves also make a great garnish. They add color and a fresh smell. If you want, a twist of orange zest on top can make it pop even more. You can prepare the cranberry syrup ahead of time. Make it a day before and store it in the fridge. Just keep it in a sealed jar. When you’re ready to serve, mix the syrup with orange juice and sparkling water. This way, you can enjoy a fresh drink without any hassle. You can also store the mixed drink, but it’s best to drink it within a few hours. This keeps the fizz and taste just right. For the full recipe, check out the [Full Recipe]. {{image_2}} You can change the flavor of your Cranberry Orange Refresher by adding other fruits. Try using lemon or lime juice for a zesty kick. You can also mix in berries like strawberries or raspberries. These fruits pair well with cranberries and add a lovely color. If you want to switch from orange juice, consider using grapefruit juice. It gives a nice tartness that complements cranberries. If you prefer a still drink, you can make a non-sparkling version. Simply skip the sparkling water in the recipe. Instead, use cold water to mix the cranberry syrup and orange juice. For a creamy twist, try adding a splash of cream or coconut milk. This adds a rich flavor and smooth texture, making the drink extra special. Want to add some fun? You can make an alcoholic version! Adding vodka or rum gives your drink a kick. For vodka, use about 1 to 2 ounces per serving. If you like rum, try the same amount. Mix it well with the cranberry and orange juice. This twist is perfect for a party or a night out. Remember to enjoy responsibly! For more details, check out the Full Recipe for the Cranberry Orange Refresher. To store your cranberry syrup, pour it into a clean jar. Seal the jar tightly. Place it in the refrigerator. This way, it stays fresh and tasty. The syrup lasts about one week. You can use it in drinks or desserts. For the best flavor, use about two tablespoons of syrup per drink. When you mix the drink, store it in a pitcher. Keep it covered in the fridge. The drink is best enjoyed fresh. Try to drink it within two days. After that, the fizz will fade. If you want to save time, prepare the syrup ahead and mix the drink later. For the full recipe, check the detailed instructions earlier. Yes, you can use frozen cranberries. They work well in this drink. Just remember to thaw them first. Frozen cranberries may have more water than fresh ones. This can change the texture of the syrup. I suggest cooking them longer to get a good flavor. If you need a substitute for orange juice, try these options: - Lemon juice: It is tart and bright. - Grapefruit juice: This adds a unique flavor with a slight bitterness. - Pineapple juice: It gives a sweet and tropical twist. - Apple juice: It is sweet and milder in flavor. These substitutes can change the drink's taste, so choose based on what you enjoy. To reduce sweetness, try these tips: - Cut back on sugar: Start with half the amount and adjust. - Use less cranberry syrup: Add only what you need for flavor. - Choose a sugar alternative: Stevia or monk fruit can be good options. - Increase the citrus: Add more orange juice or a splash of lemon juice to balance the sweetness. These changes will keep the flavor strong while making it less sweet. For the full recipe, check the section above! This article covered how to make a refreshing Cranberry Orange drink. We discussed fresh ingredients, simple steps, and tips for the best results. You learned how to prepare the syrup, mix flavors, and even add your twist. You can adjust sweetness and explore fun variations. This drink is versatile and easy to make ahead. Enjoy crafting your own version and impressing friends with your delicious skills.

Cranberry Orange Refresher Bright and Simple Refreshment

Are you ready for a burst of flavor? My Cranberry Orange Refresher is bright, simple, and perfect for any occasion.

To make a delightful Brown Sugar Cinnamon Oat Latte, you need the following ingredients: - 1 cup oat milk - 1 shot espresso or 1/2 cup strong brewed coffee - 1 tablespoon brown sugar - 1/2 teaspoon ground cinnamon - 1/4 teaspoon vanilla extract - Pinch of salt - Whipped cream (optional, for topping) - Additional cinnamon for garnish These simple ingredients blend together to create a cozy, warm drink. When picking oat milk, look for a few key things: - Ingredients: Choose oat milk with few additives. The best oat milk has oats and water. - Flavor: Check for sweetened or unsweetened options. Unsweetened works well for this recipe. - Texture: For lattes, pick a creamier oat milk. Some brands froth better than others. Taste different brands to find one that you love! You can easily swap out ingredients if needed: - Oat Milk: You can use almond milk or soy milk instead. - Espresso: Strong brewed coffee is a great alternative if you don’t have espresso. - Brown Sugar: If you lack brown sugar, white sugar or maple syrup will work. - Ground Cinnamon: Nutmeg or pumpkin spice can be fun substitutes for a twist. Feel free to experiment! Each choice brings a new flavor to your drink. For the full recipe, check out the details above. To start, you need to make your espresso or strong coffee. If you have an espresso machine, brew one shot. This gives you a rich base for your latte. If you don't have one, no problem! Just brew 1/2 cup of strong coffee using your favorite method. Use a dark roast for a bolder flavor. Next, we heat the oat milk. Pour 1 cup of oat milk into a small saucepan. Turn the heat to medium. Stir the milk gently as it heats. Look for steam to rise but avoid boiling it. Remove the pan from heat once you see steam; this keeps the milk creamy and smooth. Now we mix everything together. In the warm oat milk, add 1 tablespoon of brown sugar, 1/2 teaspoon of ground cinnamon, and 1/4 teaspoon of vanilla extract. Sprinkle in a pinch of salt to enhance the flavors. Stir well until the sugar dissolves. If you want a frothy texture, use a milk frother or a blender on low speed. Finally, pour the hot espresso or coffee into your favorite mug. Then, gently pour the sweetened oat milk over the coffee. If you like, add a dollop of whipped cream on top and sprinkle more cinnamon for that cozy touch. Enjoy your Brown Sugar Cinnamon Oat Latte! For the full recipe, check the instructions above. To get that perfect froth, heat your oat milk gently. Keep it steaming but not boiling. Use a milk frother or a blender for a great texture. If using a blender, blend on low speed. This will make your latte light and airy. You can change the sweetness by adding more or less brown sugar. If you like it sweeter, add another half tablespoon. For spice, adjust the cinnamon to fit your taste. A little extra can enhance the flavor, but don’t overdo it. Presentation matters! Serve your latte in a nice mug. Top it with whipped cream for a treat. Dust some cinnamon on top for a great look. You can even add a cinnamon stick for an extra touch. This adds flavor and makes it look fancy. Enjoy your Brown Sugar Cinnamon Oat Latte! For more details, check the full recipe. {{image_2}} You can easily swap oat milk for other dairy-free options. Almond milk gives a nutty twist. Coconut milk adds a tropical flair. Soy milk offers a rich, creamy taste. Each choice brings a new flavor profile to your latte. Experiment to find your favorite. Want to jazz up your latte? Try adding chocolate or nutmeg. A tablespoon of cocoa powder gives a nice chocolatey taste. If you prefer spice, add a pinch of nutmeg. This small change can create a whole new drink. You can mix these flavors with the original recipe. On warm days, enjoy an iced version. Brew your espresso or coffee and let it cool. Fill a glass with ice cubes. Pour the cooled coffee over the ice. Then mix in the sweetened oat milk mixture. This gives you a refreshing drink that still tastes great. It’s perfect for summer afternoons! Now you have a few fun ways to enjoy your Brown Sugar Cinnamon Oat Latte. Check the Full Recipe for all the details you need. If you have leftover oat milk mixture, store it in an airtight container. This keeps it fresh. Place it in the fridge and use it within three days. Before using, shake or stir it well. This helps mix any settled ingredients back together. Brewed coffee can lose its taste quickly. To store it, keep it in a sealed container. This keeps it from getting stale. Store it in the fridge for up to three days. Avoid reheating coffee multiple times. This can make it taste bitter. To reheat your coffee, use a microwave or stovetop. Heat it slowly to avoid burning. Stir the coffee before drinking to mix in any settled flavors. If you want to enjoy your oat milk mixture again, gently warm it up. Do not boil it, as this can change the texture. A Brown Sugar Cinnamon Oat Latte is a warm drink made with oat milk, coffee, and sweet spices. It combines the rich flavors of brown sugar and cinnamon, creating a cozy treat. The oat milk gives it a creamy texture without dairy. This drink is perfect for a chilly morning or a cozy afternoon break. You can enjoy it hot or cold, but warm is my favorite way. Yes, you can make this latte without espresso. If you don’t have espresso, use strong brewed coffee instead. Just brew half a cup of coffee using your favorite method. The key is to make sure it’s strong enough to hold its flavor when mixed with oat milk. This way, your drink will still taste rich and satisfying. You can customize your Brown Sugar Cinnamon Oat Latte in many ways. Here are some fun ideas: - Sweetness: Adjust the brown sugar to suit your taste. Add more for a sweeter drink, or use less if you prefer a milder flavor. - Spices: Try adding nutmeg or ginger for a different spice profile. You can mix and match to find your favorite combination. - Froth: For a frothier latte, blend the oat milk mixture before pouring it over the coffee. - Toppings: Add whipped cream or a sprinkle of cocoa powder for an extra treat. Feel free to experiment and make this drink your own. Check out the Full Recipe for more details on making this delightful beverage! You learned how to make a Brown Sugar Cinnamon Oat Latte from scratch. We covered the ingredients, tips for choosing oat milk, and possible substitutes. You also discovered step-by-step brewing techniques, including making espresso and frothing oat milk. We discussed variations like the iced version and storage tips for leftovers. In the end, enjoy creating your latte any way you like. With practice, you’ll master this delicious drink. Happy brewing!

Brown Sugar Cinnamon Oat Latte Flavorful Delight

If you’re craving a cozy drink that warms the soul, look no further! My Brown Sugar Cinnamon Oat Latte brings

To make Cherry Berry Iced Tea, gather these ingredients: - 2 cups water - 2 tablespoons dried hibiscus flowers - 1 cup fresh or frozen cherries, pitted - 1 cup mixed berries (strawberries, blueberries, raspberries) - 1/4 cup honey or agave syrup (adjust to taste) - 1 tablespoon fresh lemon juice - Ice cubes - Fresh mint leaves for garnish These ingredients combine to create a refreshing drink perfect for summer. You can easily swap some ingredients based on what you have. Here are a few ideas: - Dried hibiscus flowers: Use chamomile flowers or green tea instead. - Cherries: If you can't find fresh cherries, use frozen ones or skip them. - Mixed berries: Feel free to use any berry you like, such as blackberries or raspberries. - Honey or agave syrup: Maple syrup works as a great alternative, too. - Lemon juice: Lime juice adds a fun twist to the flavor. These substitutions keep the drink tasty while making it easier to prepare. Cherry Berry Iced Tea is not only delicious, but it also offers some health benefits. Here’s a quick look at the nutritional aspects: - Calories: Around 80 per serving - Sugars: About 18 grams, mainly from honey and fruit - Vitamin C: Rich in vitamin C from the berries and lemon juice - Antioxidants: Hibiscus tea is known for its high antioxidant content This drink is a fun way to stay cool and healthy during hot days. For the full recipe, check the details above. Making Cherry Berry Iced Tea is fun and simple. First, gather all your ingredients. You will need dried hibiscus flowers, cherries, mixed berries, honey or agave syrup, lemon juice, and ice. This drink is perfect for hot days. You can serve it at gatherings or enjoy it alone. Start by boiling 2 cups of water in a medium saucepan. Once the water is boiling, take it off the heat. Add 2 tablespoons of dried hibiscus flowers to the water. Let it steep for about 10 minutes. This step is crucial for a rich flavor. When time is up, strain the tea into a large pitcher. Discard the hibiscus flowers. Now, you have a vibrant hibiscus tea base. Next, it's time to mix in the fruit. Add 1 cup of pitted cherries and 1 cup of mixed berries to the pitcher. The berries bring a burst of sweetness and color. While the tea is still warm, stir in 1/4 cup of honey or agave syrup. This helps it dissolve easily. Then, add 1 tablespoon of fresh lemon juice. This adds a nice zing to the drink. Allow the tea to cool to room temperature. Then, put it in the fridge for at least 2 hours. Serve over ice in tall glasses, and garnish with fresh mint leaves. Enjoy your refreshing Cherry Berry Iced Tea! For the complete recipe, check out the Full Recipe section. Finding the right sweetness is key. Start with 1/4 cup of honey or agave syrup. Taste it after mixing. You can always add more if you like it sweeter. Remember, some fruits are sweeter. Adjust the syrup based on your fruit choice. Want to add more depth? Try these fun ideas: - Add a few slices of fresh ginger. It gives a nice zing. - A splash of vanilla extract adds warmth to the tea. - For a tropical twist, mix in some pineapple juice. These extras can make your iced tea even more special. Experiment with flavors that you love. Serve your Cherry Berry Iced Tea in tall glasses. Fill them with ice cubes for a frosty look. Garnish each glass with fresh mint leaves. You can also add a few whole cherries or berries on top. This adds color and makes it look fancy. Enjoy sipping this refreshing drink on a hot day! {{image_2}} You can play with fruits in this Cherry Berry Iced Tea. Try using peaches or mangoes for a tropical taste. You can also add blackberries or even kiwi for a fun twist. Mixing fruits can change the flavor and make it exciting. Always wash your fruits well before using them. Want to make this tea a bit fancy? Add a splash of vodka or rum. A fruit-flavored vodka pairs nicely with the berries. You can also try sparkling wine for a bubbly treat. Just remember to serve it over ice. This makes a great drink for parties or summer nights. You can enjoy this tea both hot and cold. To make hot tea, just steep the hibiscus flowers in hot water. After steeping, cool it down and add your fruits. Hot tea is perfect for cooler days. Iced tea is refreshing on hot days. Each version brings out different flavors, so try them both! After making Cherry Berry Iced Tea, you may have some left. Store it in an airtight container. A glass jar works well. Keep it in the fridge. This way, it stays fresh for up to three days. If the tea gets too sweet, add more water or ice when serving. To keep your Cherry Berry Iced Tea fresh, avoid adding ice to the whole batch. Ice will melt and dilute the flavor quickly. Instead, serve iced tea over fresh ice in glasses. If you want to keep it chilled, use ice cubes made from tea. This keeps the taste strong and fresh. You can reuse leftover iced tea in fun ways. Pour it into a blender with some fruits. Blend it for a refreshing smoothie. You can also freeze it in ice cube trays. Use these cubes in other drinks or smoothies. This way, you can enjoy the flavor again without waste. For the complete recipe, check out the Full Recipe section! To make Cherry Berry Iced Tea, start by boiling water. Use 2 cups of water. Add 2 tablespoons of dried hibiscus flowers to the boiling water. Let it steep for about 10 minutes. After steeping, strain the tea into a pitcher. Discard the hibiscus flowers. Next, add 1 cup of fresh or frozen cherries and 1 cup of mixed berries. Stir in 1/4 cup of honey or agave syrup. Add 1 tablespoon of fresh lemon juice. Mix well. Let it cool at room temperature. Chill the tea in the fridge for at least 2 hours. Serve over ice and garnish with fresh mint leaves. This recipe will make four servings and is a true summer treat. Yes, you can make Cherry Berry Iced Tea ahead of time. This tea tastes better when it sits. You can prepare it the night before. Just store it in the fridge. It will stay fresh for about 3 days. Just remember to serve it over ice when you are ready. This way, you can enjoy it whenever you want. Hibiscus tea offers many health benefits. It is rich in antioxidants. These help fight free radicals in your body. Drinking hibiscus tea can lower blood pressure. It may help support heart health. This tea also aids digestion. It can help with weight management and keeping your skin healthy. Plus, it’s caffeine-free, making it a great choice any time of day. Enjoy your Cherry Berry Iced Tea for both taste and health! In this article, we explored how to make a refreshing Cherry Berry Hibiscus Tea. We covered ingredients, step-by-step instructions, and tips for the best flavor. You learned about variations, storage methods, and answered common questions about hibiscus tea. This drink is not just tasty; it has health benefits too. I hope you feel excited to try this recipe and enjoy every sip. Happy brewing!

Cherry Berry Iced Tea Refreshing Summer Delight

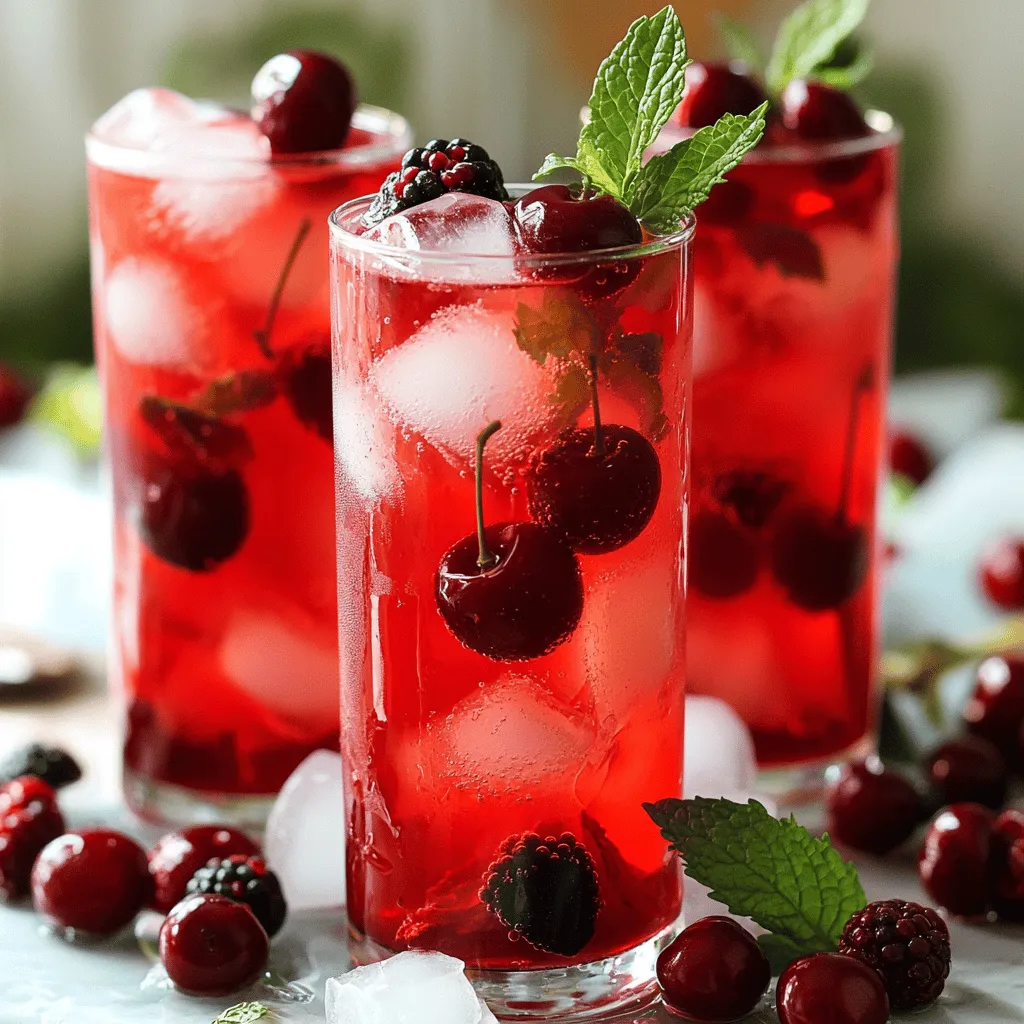
Looking for a cool drink to beat the summer heat? Cherry Berry Iced Tea is your answer! This refreshing blend

You will need the following items to make frosted lemonade: - 2 cups lemonade (freshly squeezed or store-bought) - 2 cups ice cubes - 1 cup whole milk or a dairy-free alternative - 1/2 cup granulated sugar (adjust to taste) - 1 teaspoon vanilla extract - Whipped cream (for topping) - Lemon slices and mint leaves (for garnish) To prepare your frosted lemonade, gather these tools: - A blender - Measuring cups and spoons - Tall glasses for serving - A straw (optional, but fun) Using fresh ingredients makes a big difference. Here’s how: - Choose fresh lemons if you make lemonade from scratch. Their bright flavor shines through. - Use good quality ice. Fresh ice cubes blend better and make a smoother drink. - If you prefer a creamier drink, opt for whole milk or a rich dairy-free option. - Adjust sugar based on your taste. Always start with less; you can add more later. - For the best garnish, use fresh mint leaves and thin lemon slices. They look pretty and add flavor. Try to make the most of quality ingredients! They enhance your frosted lemonade experience. For the full recipe, check the section above. To make frosted lemonade, start by gathering your ingredients. You need lemonade, ice, milk, sugar, and vanilla. Measure them out carefully. Then, add all the ingredients to your blender. The order matters; ice should go in last. Blend on high speed until smooth. It should look slushy and creamy. This usually takes about 30 to 45 seconds. If you see big ice chunks, blend longer. The perfect frosted lemonade is smooth, not watery. To get this right, use fresh ice cubes. Ensure your lemonade is cold, too. If it’s warm, it will melt the ice too fast. You can also freeze lemonade in ice cube trays. This way, you blend lemony ice cubes, keeping the flavor strong. If it turns out too thick, add a bit more milk. Blend again to mix it well. Taste your frosted lemonade before serving. If it’s not sweet enough, add more sugar. Blend again for a few seconds. If you want a zesty kick, add lemon juice. Just a little goes a long way. You can also try adding fresh herbs like mint for a fun twist. This is all about your taste. Make it how you love it! For the full recipe, check the earlier section. I love to serve frosted lemonade in tall glasses. The height makes it look fancy. Top each glass with whipped cream for a fun touch. Add a slice of lemon and some mint leaves for extra flair. You can also use colorful straws for a playful vibe. For a party, set up a frosted lemonade bar. Let guests choose their toppings and flavors. This makes it interactive and fun! Start with a good blender. A powerful blender crushes ice better and gives a smooth drink. Add the liquid ingredients first. This helps the blades move freely. Then, add ice and other solid ingredients. Blend on high until the mixture is slushy. If it's too thick, add a little more lemonade or milk. Always taste your drink before serving. Adjust the sweetness as needed. Avoid using too much ice. It can make your frosted lemonade too thick. If it happens, add more liquid to loosen it. Don't skip the vanilla extract. It adds a lovely flavor that balances the tartness. Also, remember to taste and adjust sweetness. Using too little sugar can leave your drink bland. Lastly, serve it right away. Froze lemonade tastes best when fresh and cold. This frosted lemonade recipe is simple and fun. You can find the full recipe above for perfect results every time! {{image_2}} You can easily make a dairy-free frosted lemonade. Just swap the whole milk for a dairy-free alternative. Try almond milk, coconut milk, or oat milk. These options work well and make it creamy. The taste remains fresh and tangy! If you want a sugar-free version, use a sugar substitute. Stevia or erythritol are great choices. You can also try monk fruit sweetener. These options can give you the sweetness without the calories. Just adjust to taste and blend again if needed. Want to spice things up? Add flavors like berries or fresh mint. Simply blend in a cup of strawberries, blueberries, or raspberries. For a minty twist, toss in a handful of fresh mint leaves. These additions bring new tastes to your frosted lemonade. They make it even more fun to drink! Try these variations to fit your diet and taste. Enjoy the creativity! For the full recipe, check out the Frosted Lemonade Bliss . You can store any leftover frosted lemonade in the fridge. Pour it into a sealed container. It stays fresh for up to two days. Stir well before serving again. The mixture may separate, so a good shake or stir helps. Freezing frosted lemonade is also an option. Pour the leftover drink into ice cube trays or freezer-safe bags. This way, you can enjoy a cool treat later. Just pop out a few cubes when you want a refreshing drink. Blend them with a bit of lemonade to bring it back to life. Frosted lemonade is best enjoyed cold, so reheating isn't a common need. If you want a warmer version, you can slowly heat it on low in a pot. Stir gently to avoid burning. However, I recommend serving it cold for the best taste. Frosted lemonade is a sweet and icy drink. It combines lemonade with ice and cream. This drink tastes like a slushy, refreshing treat. You can enjoy it on hot days or anytime you want a cool sip. The balance of tart lemonade and creamy milk makes it special. It’s a fun twist on classic lemonade. Yes, you can make this drink ahead of time. However, it’s best fresh. If you store it, the ice may melt. This will make it less frosty. For best results, blend the ingredients and serve right away. If you need to prepare it earlier, blend everything but the ice. Just add ice before serving. You can often find frosted lemonade at fast-food chains and cafes. Many places that sell lemonade offer their own version. Seasonal events, like fairs or summer festivals, may also have it. Look for shops that focus on slushy or frozen drinks, too. They might have unique twists on this classic drink. Popular toppings for frosted lemonade include whipped cream and lemon slices. You can also add fresh mint for a pop of color and flavor. Some people enjoy sprinkles for fun. You could try flavored syrups, like raspberry or strawberry, for extra taste. Get creative with toppings to make it your own! To make frosted lemonade without a blender, use a large bowl. Combine lemonade, ice, milk, and sugar in the bowl. Use a sturdy whisk to mix until smooth. Keep stirring until the ice breaks up. You can also crush ice in a bag with a rolling pin. Then fold the crushed ice into the lemonade mix. This will give you a frosty drink without a blender! This blog post covered everything you need for the perfect frosted lemonade. We discussed ingredients and equipment, along with tips for choosing the best items. The step-by-step instructions help you blend it just right. We explored serving suggestions and key blending tips, plus common mistakes to avoid. Try fun variations like dairy-free or sugar-free options. Remember to store leftovers properly for later enjoyment. Now, you're ready to impress your friends with this refreshing drink! Enjoy your frosted lemonade adventure!

Frosted Lemonade Refreshing and Easy Recipe Guide

Looking for a cool and tasty treat? You’ve come to the right place! In this guide, I’ll show you how

- 1 lb fresh or canned salmon, drained and flaked - 1/2 cup breadcrumbs (preferably panko for crispiness) - 1/4 cup green onions, finely chopped - 1/4 cup fresh dill, chopped - Zest and juice from 1 lemon - 2 eggs, lightly beaten - 1 tablespoon Dijon mustard - 1 clove garlic, minced - Salt and pepper to taste - Olive oil for frying When making Lemon Dill Salmon Cakes, you need fresh or canned salmon as the base. Salmon brings a rich flavor. I recommend using panko breadcrumbs. They create a crispy outside that you will love. For the best taste, add finely chopped green onions and fresh dill. These herbs brighten the flavor and bring freshness. Next, you will add lemon zest and juice. This step adds a bright zing that pairs well with salmon. Eggs and Dijon mustard act as binders. They help the cakes hold their shape. Finally, don’t forget the garlic. It adds a warm, savory note you won't want to miss. You will also need salt and pepper to taste. These simple seasonings enhance all the flavors. To cook the cakes, use olive oil. It adds flavor and helps achieve that golden crust. For the Full Recipe, you can find all the steps to bring these ingredients together into a delightful dish. Flaking the salmon Start by draining your salmon if it’s canned. Then, use a fork to flake it into small pieces. If you use fresh salmon, cook it first. Let it cool, then flake it just like the canned version. This step adds great texture to your cakes. Chopping herbs and vegetables Next, chop your green onions and fresh dill. Make sure they are finely chopped. This helps them mix well into the salmon. You’ll want to release all those fresh flavors in every bite. Combining salmon, breadcrumbs, and seasonings In a large bowl, combine the flaked salmon, breadcrumbs, green onions, dill, and minced garlic. Mix gently so you don’t break up the salmon too much. This keeps your cakes nice and chunky. Incorporating wet ingredients and forming patties Now, add the lemon juice, beaten eggs, and Dijon mustard. Season with salt and pepper to taste. Mix everything until well combined. Then, form the mixture into patties, about 3 inches wide. Place them on a plate, ready for cooking. Heating oil in the skillet Heat a generous amount of olive oil in a large skillet over medium heat. You want enough oil to cover the bottom of the skillet well. This helps achieve that crispy exterior you desire. Cooking times for crispy texture Once the oil is hot, add the salmon patties carefully. Cook for about 4-5 minutes on each side. You want them golden brown and crispy. Once done, remove the cakes and place them on a paper towel to drain excess oil. Enjoy them warm! For the full recipe, check out the detailed instructions above. Choosing the right breadcrumbs is key to good salmon cakes. I recommend using panko. Panko gives a light and crispy texture. Regular breadcrumbs can make the cakes dense. To avoid overworking the mixture, mix gently. Just combine the ingredients until they hold together. If you mash too much, the cakes lose their nice texture. A light touch makes all the difference. To elevate the taste, think about adding more seasonings. A pinch of cayenne pepper adds heat. Smoked paprika gives a nice depth. Lemon zest brightens every bite. You can use different herbs or spices as well. Fresh parsley works well with dill. If you like a twist, try cilantro or basil. They can change the flavor profile in fun ways. You can bake or fry your salmon cakes. Baking is a healthier option. Preheat your oven to 400°F and place the patties on a greased baking sheet. Bake for about 20 minutes, flipping halfway. If you prefer frying, use a good amount of olive oil. Heat the oil over medium heat. Fry each cake for about 4-5 minutes per side. This gives a crispy outside and tender inside. For outdoor grilling, use a grill basket or foil. This keeps the patties from falling apart. Preheat the grill to medium heat and cook for about 5-7 minutes per side. Enjoy that smoky flavor! For the full recipe, check out the complete guide above. {{image_2}} For those who need gluten-free options, you can swap regular breadcrumbs for gluten-free ones. You might try crushed rice crackers or ground almonds. Both work well and keep the salmon cakes crispy. If you want to skip the eggs, use 1/4 cup of unsweetened applesauce or mashed banana. This change keeps the cakes moist and helps them stick together. To spice things up, add different herbs or spices. Try parsley for a fresh twist or cayenne for some heat. You can also mix in minced cilantro for a fun flavor. Incorporating vegetables like spinach or bell peppers can add nutrition and taste. Chop them finely and mix them in. They make the cakes colorful and healthy. Pair your salmon cakes with a tasty sauce. A lemon dill yogurt sauce works great. Just mix Greek yogurt with lemon juice, dill, and salt. For sides, serve with a simple salad or roasted veggies. This adds crunch and makes the meal complete. If you have leftovers, try them in a sandwich or on a salad. They taste great cold or reheated. You can even crumble them on top of pasta for a unique dish. For the full recipe, check out the details above! To store cooked salmon cakes, place them in an airtight container. Make sure they cool down first. This keeps them fresh and safe to eat later. I recommend using glass or plastic containers with tight lids. You can stack the cakes in layers, but separate each layer with parchment paper to avoid sticking. If you want to freeze salmon cakes, wrap each one tightly in plastic wrap. Then, place them in a freezer bag. Remember to squeeze out as much air as possible. This helps prevent freezer burn. When you are ready to eat, thaw them in the fridge overnight. To reheat, bake them in the oven at 350°F for about 15 minutes. This keeps them crispy on the outside. Cooked salmon cakes last in the fridge for about three days. After that, their quality may drop. If you freeze them, they can last up to three months. Always check for signs of spoilage. If you see any mold or an off smell, it's best to throw them away. Freshness is key to enjoying these tasty treats. You can use crushed crackers or oats. Both options give a nice texture. Crushed crackers add a salty crunch. Oats offer a hearty feel. If you prefer, you can mix both for a unique taste. Just ensure the texture stays consistent for the best cakes. Yes, canned salmon works well. It saves time and is often less expensive. Canned salmon is already cooked, making it easy to use. The taste may differ slightly, but it still offers great flavor. Just drain and flake it before mixing with other ingredients. Look for a golden brown color on each side. The cakes should feel firm when you touch them. You can also cut one open to check the center. It should be opaque and hot throughout. Cooking them for about 4-5 minutes on each side helps ensure they are done. In this post, I covered how to make salmon cakes from fresh or canned salmon, using simple ingredients like panko breadcrumbs, herbs, and seasonings. I shared step-by-step instructions to prepare, mix, and cook these cakes for a crispy texture. We discussed tips for variations and storage, ensuring your cakes stay fresh. Remember, cooking is about trying new things. Don’t limit yourself to this recipe; feel free to adapt and explore flavors. Enjoy your salmon cakes, and happy cooking!

Lemon Dill Salmon Cakes Tasty and Crispy Treat

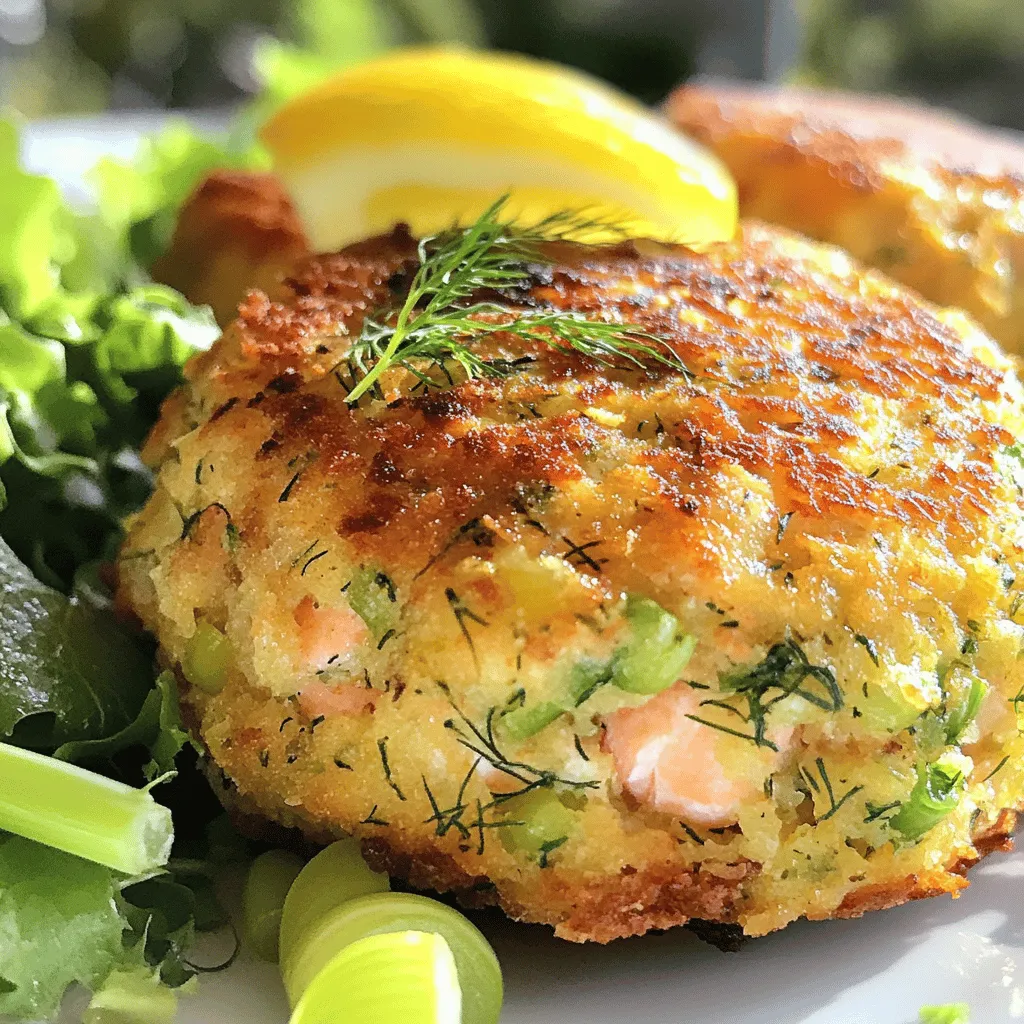
Looking for a quick, tasty dinner idea? Lemon Dill Salmon Cakes are the answer! Made with fresh or canned salmon,

Older posts
Newer posts
← Previous Page1 … Page9 Page10 Page11 … Page55 Next →

dsad

© 2025 Lisa Dishes • Built with GeneratePress

Our Policies

  • Copyright Policy
  • Cookie Policy
  • GDPR Policy
  • Privacy Policy
  • Disclaimer
  • Terms Of Use

More Information

  • Home
  • About
  • Contact
  • Appetizers
  • Dessert
  • Dinner
  • Drinks
©2025, Lisa Dishes About Back To Top