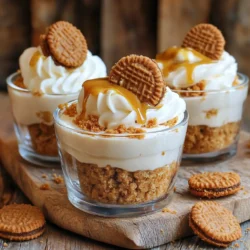
No-Bake Biscoff Cheesecake Cups
Indulge in the deliciousness of No-Bake Biscoff Cheesecake Cups with this easy recipe! Made with crushed Biscoff cookies and a creamy filling, these delightful treats are the perfect dessert for any occasion. Follow simple steps to create an irresistible sweet layer that everyone will love. Click through to explore these delightful recipes and treat yourself and your loved ones to a special dessert that's sure to impress!