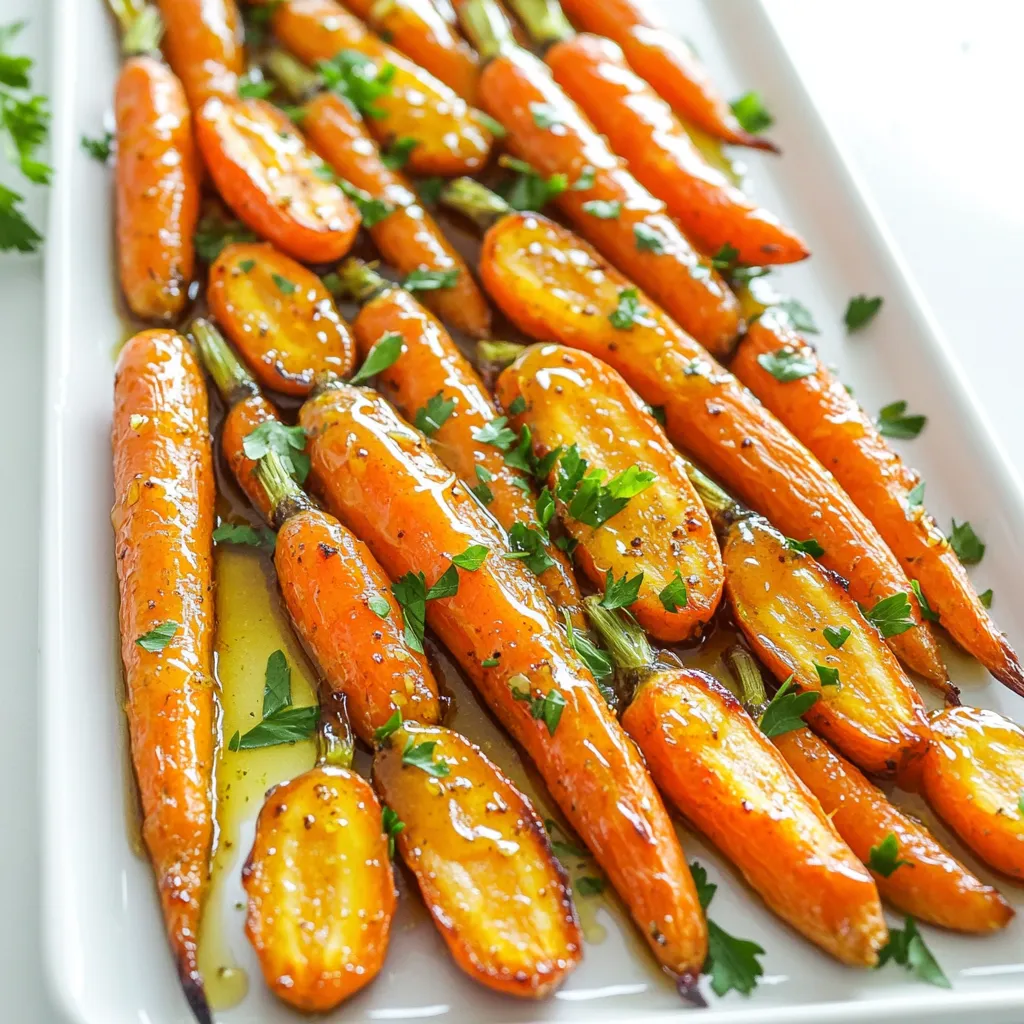
Roasted Honey Garlic Carrots Sheet-Pan Delight
Are you ready to elevate your vegetable game? This Roasted Honey Garlic Carrots Sheet-Pan Delight is the perfect mix of
Are you ready to elevate your vegetable game? This Roasted Honey Garlic Carrots Sheet-Pan Delight is the perfect mix of

Looking for a quick and tasty meal? These Teriyaki Chicken Lettuce Wraps take just 15 minutes to make! Imagine tender
Craving a sweet treat that’s both easy to make and bursting with flavor? Look no further! In this blog post,

Looking for a quick and tasty way to enjoy veggies? My Powerful Sheet-Pan Balsamic Roasted Veggie Medley gives you flavor

If you crave a quick and tasty meal, try these Air Fryer Garlic Butter Shrimp Tacos. With fresh shrimp, rich
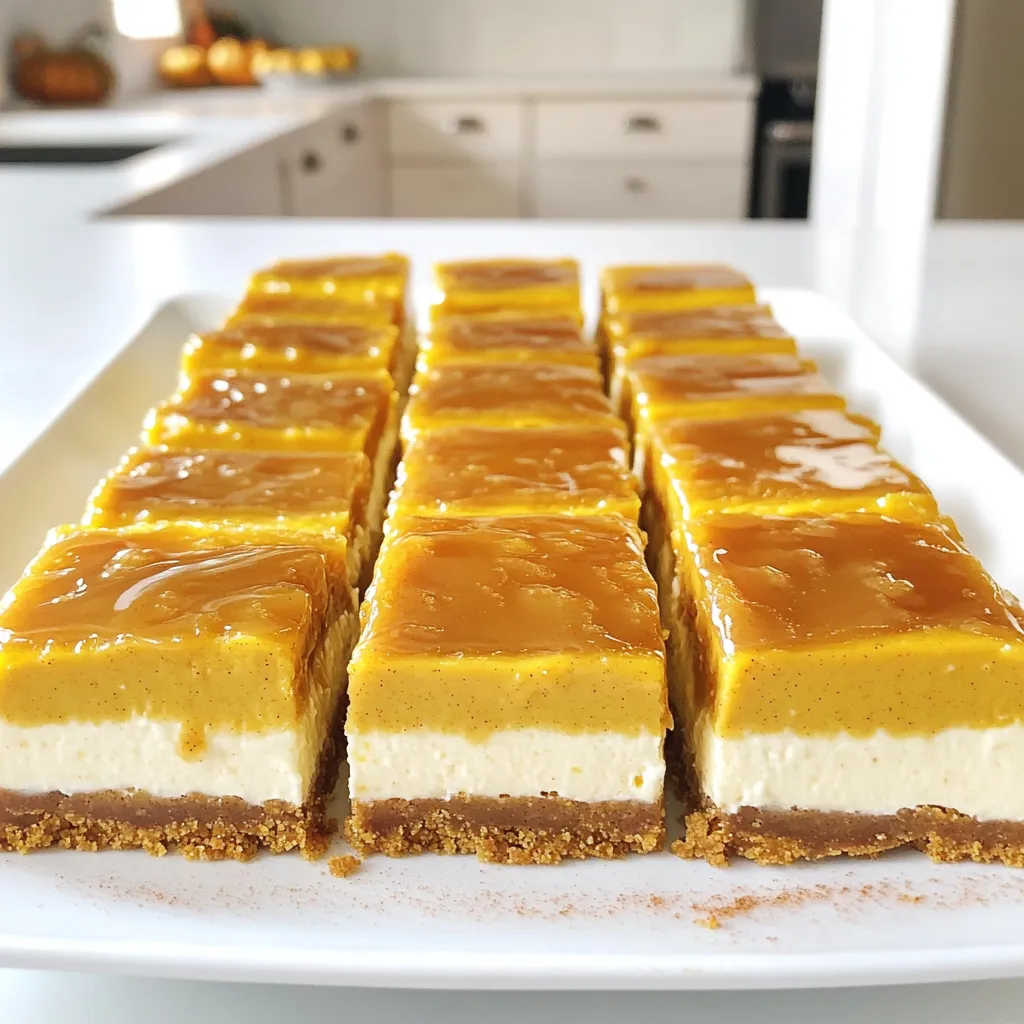
Get ready for a treat that combines two favorites: caramel and pumpkin! These Caramel Drizzle Pumpkin Cheesecake Bars are perfect

If you’re ready to spice up your breakfast or snack time, you’ve come to the right place! Savory Cheddar Jalapeño

Want to bring the taste of a bakery right into your home? Get ready to bake these scrumptious Apple Pie
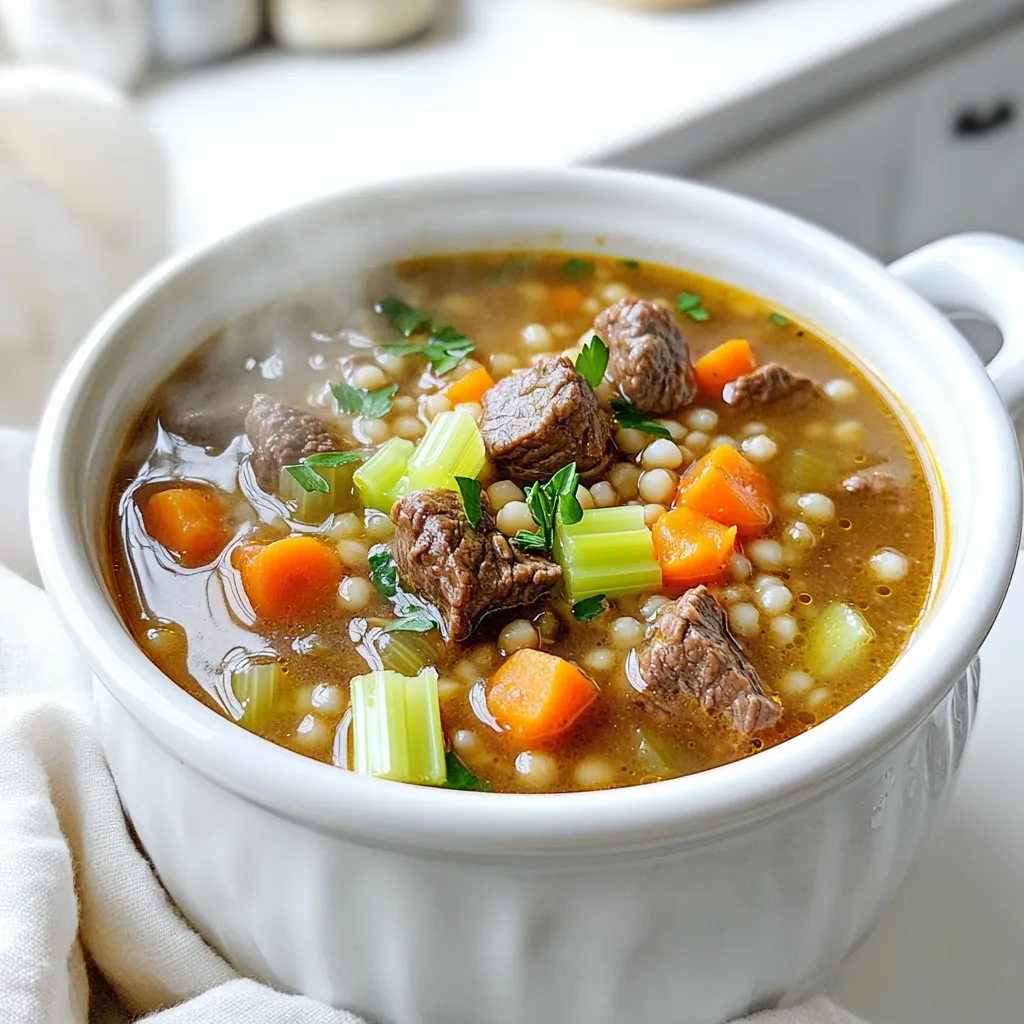
Looking for a warm, hearty meal that practically cooks itself? Discover the joy of Slow Cooker Rustic Beef and Barley
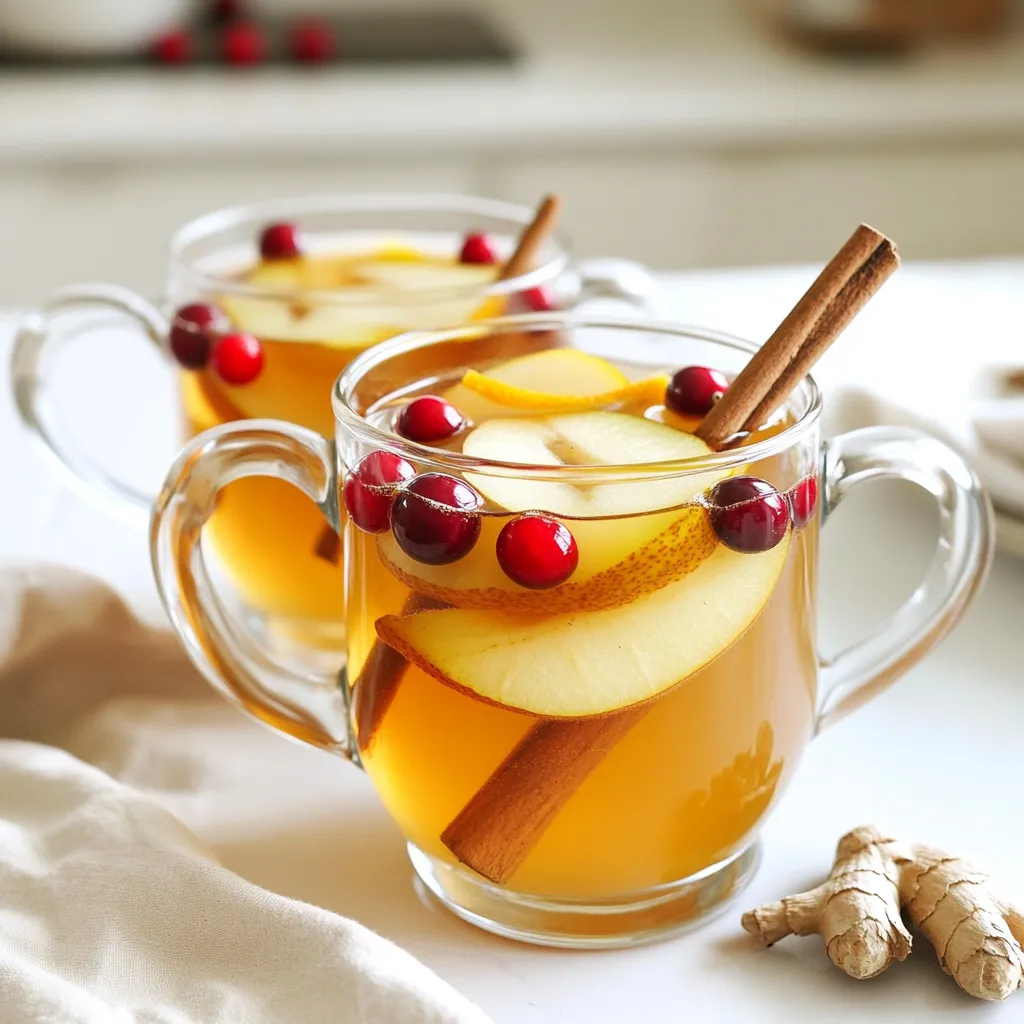
As the crisp air settles in, there’s nothing better than wrapping your hands around a warm mug of spiced pear
