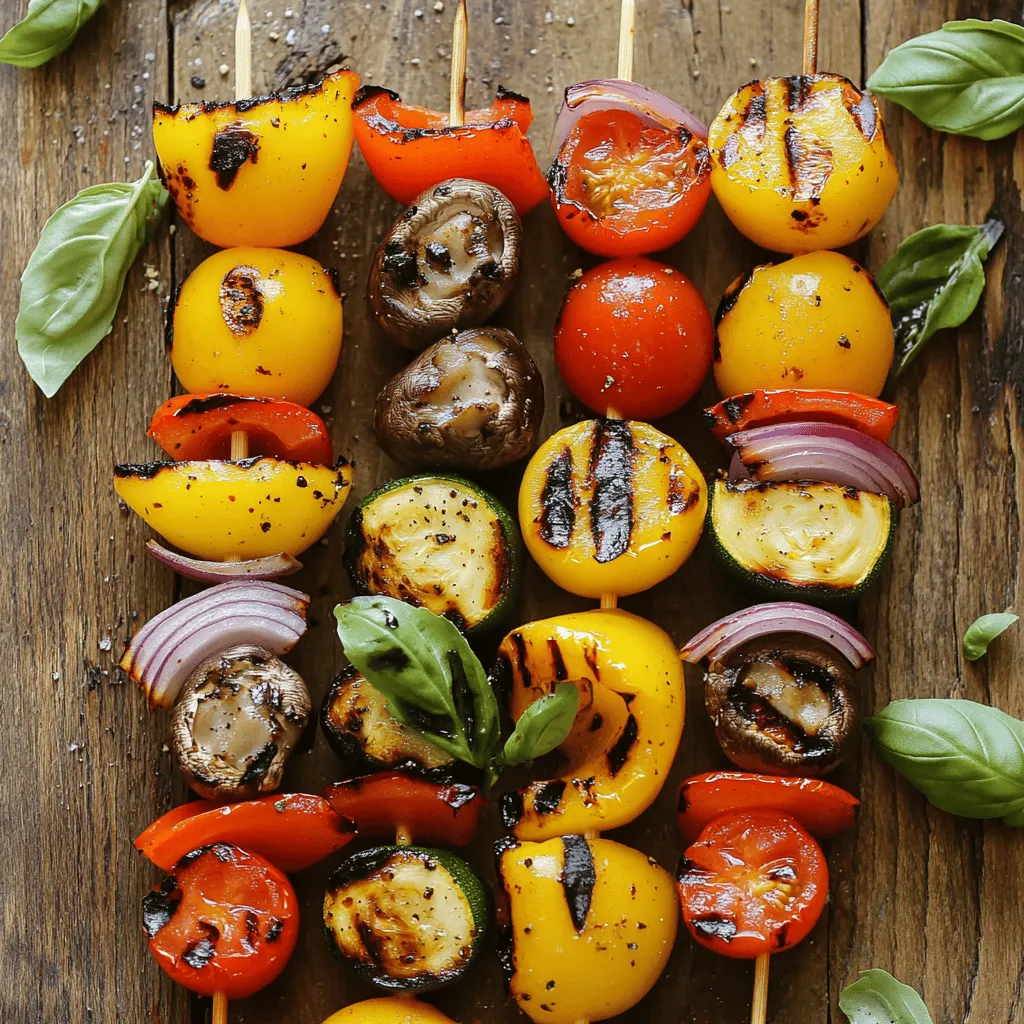
Grilled Veggie Skewers Flavorful and Easy Recipe
Are you ready to create a colorful dish that’s packed with flavor? Grilled veggie skewers are not only easy to
Are you ready to create a colorful dish that’s packed with flavor? Grilled veggie skewers are not only easy to
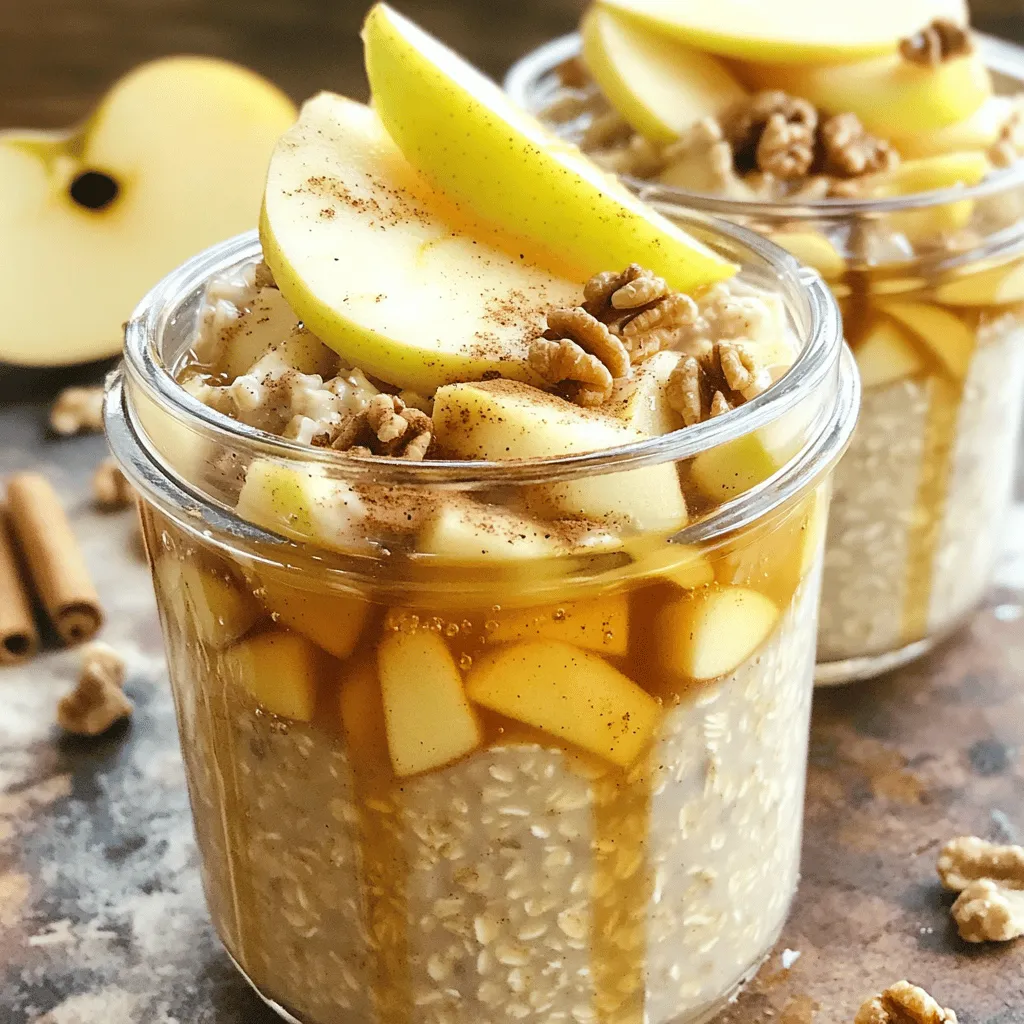
Looking for a quick and healthy breakfast? You’ve found it! Apple Cinnamon Overnight Oats are the perfect choice for busy

Looking for a sweet treat that’s easy to make and perfect for any occasion? Raspberry Almond Shortbread Bars are your
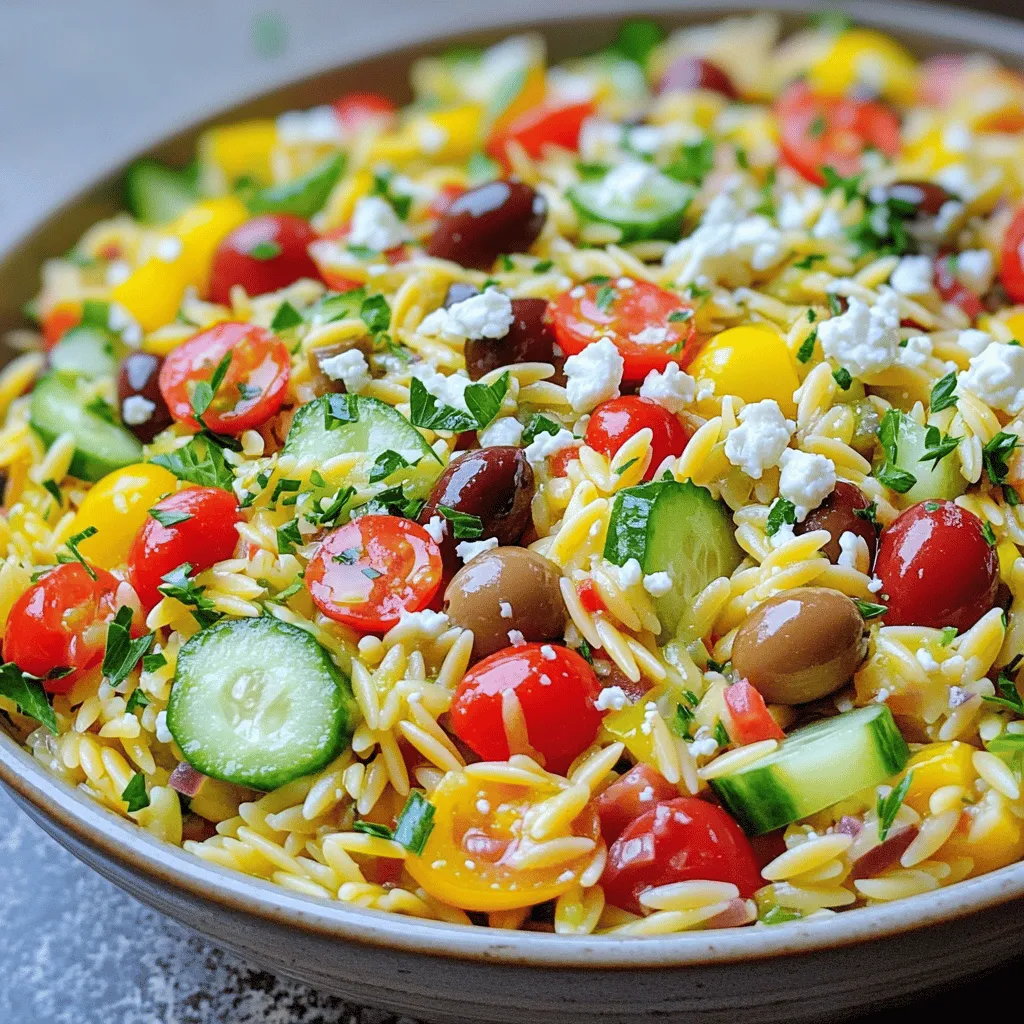
Looking for a fresh and tasty dish that’s quick to make? My Easy Greek Orzo Salad is just what you
![- Tofu and Marinade Ingredients - 1 block firm tofu, pressed and cubed - 2 tablespoons sriracha sauce - 1 tablespoon soy sauce - 1 tablespoon sesame oil - Vegetable Ingredients - 1 cup cooked quinoa - 1 cup broccoli florets - 1 red bell pepper, sliced - 1 carrot, julienned - Garnishing Ingredients - 2 green onions, sliced - 1 tablespoon sesame seeds - Salt and pepper to taste - Fresh cilantro, for garnish This list gives you everything you need to make tasty Spicy Sriracha Tofu Bowls. Each ingredient plays a key role in creating the perfect mix of flavors. The tofu absorbs the spicy marinade well, making every bite a delight. The fresh veggies add color and crunch, while garnishes bring it all together. You can find the full recipe above to guide you through the cooking process! Marinating the Tofu Start by mixing the sriracha, soy sauce, and sesame oil in a bowl. This mix gives the tofu its spicy kick. Cut your firm tofu into cubes. Toss the cubes gently in the marinade. Let it sit for at least 15 minutes. This allows the tofu to soak up the flavors. Prepping the Cooking Equipment You will need two skillets for this recipe. One skillet will be for the tofu, and another for the vegetables. Make sure both skillets are clean and ready for cooking. This step saves you time later on. Sautéing Techniques for Perfectly Cooked Vegetables Heat a splash of water or vegetable broth in a large skillet over medium heat. Add in the broccoli florets, sliced red bell pepper, and julienned carrot. Stir often and cook for about 5 to 7 minutes. You want the veggies to be tender but still crisp. Season them with salt and pepper to taste. This keeps the vegetables flavorful and bright. Achieving the Right Crispiness In the second skillet, heat a non-stick pan over medium-high heat. Add the marinated tofu cubes to the pan. Cook for about 8 to 10 minutes. Make sure to turn the cubes until they are golden brown and crispy on all sides. Perfectly cooked tofu adds a great texture to your bowl. Tips for Cooking in Batches If your skillet is small, cook the tofu in batches. This helps avoid overcrowding the pan. Overcrowding can lead to steaming instead of frying. Cook until each batch is crispy before moving on to the next. Layering Techniques for Flavor To make your bowls, start with a base of cooked quinoa. Quinoa adds protein and fiber. Next, layer on your sautéed vegetables and crispy tofu. This creates a colorful display. Finally, sprinkle sesame seeds, sliced green onions, and fresh cilantro on top. This adds extra flavor and makes the dish look great. Enjoy your Spicy Sriracha Tofu Bowls! For a full recipe, check out the complete instructions. Tofu comes in different types. Firm and extra-firm are the most common. Firm tofu has a softer texture. It absorbs flavors well but can break apart easily. Extra-firm tofu has less water and holds its shape better. For our Spicy Sriracha Tofu Bowls, I suggest using firm tofu. It mixes well with the marinade and gives a nice texture when cooked. Adjusting the Sriracha heat is simple. If you want less spice, mix in some honey or maple syrup. This adds sweetness and balances the heat. You can also try other sauces. For example, teriyaki sauce or hoisin sauce can give a sweet twist. Experiment to find what you love most! The right pan can make a big difference. A non-stick pan works best for cooking tofu. It helps achieve that golden brown color without sticking. If you want to get it extra crispy, use a cast-iron skillet. It retains heat well and gives a nice sear to the tofu. {{image_2}} If you're seeking protein alternatives, tempeh and seitan are great choices. Tempeh has a nutty flavor and a firm texture. It absorbs marinades well, making it a tasty option. You can slice or cube tempeh just like tofu. Seitan, made from wheat gluten, offers a chewy texture that mimics meat. It also soaks up flavors nicely. Try using either protein in the same marinade as the tofu. You can easily swap in seasonal vegetables for variety. Think about using zucchini, snap peas, or asparagus. Each brings its own taste and texture. In the fall, try butternut squash or Brussels sprouts. In summer, go for bell peppers or corn. Using a mix of colors makes your dish more appealing. Fresh veggies add flavor and nutrition. Pair your spicy sriracha tofu bowls with other dishes for a full meal. They go well with a simple side salad. You can also serve them with steamed rice or a grain like farro. For a refreshing touch, add a dollop of yogurt or a squeeze of lime juice. These options balance the heat and enhance the flavors. For the complete recipe, be sure to check the [Full Recipe]. Store your leftovers in an airtight container. This keeps the tofu fresh and tasty. Place the container in the fridge. Eat them within three days for the best flavor. If you have cooked quinoa, store it separately. This helps keep the texture nice. To reheat, use a skillet over medium heat. Add a little cooking oil to help keep the tofu crispy. Stir-fry the tofu for about five minutes. Check that it’s hot all the way through. You can also use an oven. Preheat to 350°F (175°C) and bake for 10-15 minutes. This method helps maintain crispiness without drying it out. To freeze tofu, start with firm tofu. Drain and press it well to remove excess moisture. Cut it into cubes, then spread them on a baking sheet. Freeze for about two hours until firm. Transfer the cubes to a freezer bag. For vegetables, blanch them first. This means boiling them for a short time, then cooling them quickly. This step helps keep their color and texture. Store the blanched veggies in freezer bags as well. Enjoy your Spicy Sriracha Tofu Bowls anytime with these storage tips! For the full recipe, check out the earlier section. Can I make this recipe vegan? Yes, this recipe is already vegan. It uses tofu, quinoa, and veggies. These ingredients are all plant-based. How can I make it less spicy? To cut down the heat, use less sriracha. You can also mix in some coconut milk. This will add creaminess and balance the spice. Can this dish be made ahead of time? Absolutely! You can prep the tofu and vegetables in advance. Just store them in the fridge. When you're ready to eat, cook and assemble the bowls. What can I serve with Spicy Sriracha Tofu Bowls? These bowls pair well with a side salad or soup. You can also serve them with steamed rice for extra carbs. Check out the Full Recipe for more serving ideas! In this blog post, we covered how to make tasty Sriracha tofu bowls. I shared the key ingredients, step-by-step cooking instructions, and useful tips. You learned about tofu choices, cooking methods, and how to assemble flavorful bowls. For your final meal, customize the recipe with veggies and sauces you love. Enjoy your cooking journey and have fun trying different toppings! Simple meals can be exciting when you mix and match.](https://lisadishes.com/wp-content/uploads/2025/07/b693df76-3185-43f6-8808-c514dc1afdf8.webp)
If you crave a bold and savory meal, look no further than Spicy Sriracha Tofu Bowls. This quick dish combines
![- 300g spaghetti or fettuccine - 3 tablespoons olive oil - 4 cloves garlic, minced - 1 cup heavy cream - 1 lemon (zest and juice) - 1/2 cup grated Parmesan cheese - Salt and pepper to taste - Fresh parsley, chopped (for garnish) - Red pepper flakes (optional, for a kick) - Additional herbs (such as basil or thyme) In this dish, you will find simple yet tasty ingredients. The pasta is the base. Spaghetti or fettuccine works best. I love using olive oil for its rich flavor. Garlic brings a nice aroma and taste. Heavy cream adds that creamy touch we all crave. Next, the lemon zest and juice give the dish a bright flavor. Parmesan cheese adds a salty richness. Don't forget salt and pepper to boost the taste. Fresh parsley makes a lovely garnish. You can change it up with red pepper flakes for heat. Other herbs like basil or thyme can add more flavor. This mix of ingredients makes a perfect weeknight meal. If you want the full recipe, it's just one click away! - Bring a large pot of salted water to a boil. - Cook pasta according to package instructions until al dente. Cooking pasta is simple. Start by boiling water. The salt adds flavor to the pasta. Once the water bubbles, add the pasta. Stir it gently to prevent sticking. Check the package for timing. Al dente means the pasta is firm but not hard. When it's done, reserve one cup of the water. This water will help with the sauce later. - Heat olive oil in a skillet over medium heat. - Sauté minced garlic until fragrant. - Add heavy cream and let simmer. Next, you’ll make the sauce. Heat olive oil in a large skillet. Use medium heat so the oil doesn't smoke. Add minced garlic and sauté for one to two minutes. The garlic should smell good, but don’t let it brown. Then, pour in the heavy cream. Stir it well and let it simmer for two to three minutes. This helps the flavors blend. - Incorporate lemon zest and juice into the sauce. - Stir in grated Parmesan cheese for creaminess. - Adjust sauce thickness with reserved pasta water. Now, it’s time to mix everything. Add lemon zest and juice to the sauce. This gives the dish a bright flavor. Next, stir in the grated Parmesan cheese. This makes the sauce rich and creamy. If the sauce feels too thick, add a splash of reserved pasta water. It helps to reach the perfect consistency. Finally, add the cooked pasta to the skillet. Toss it well in the sauce so every piece is coated. Season with salt and pepper to taste. For a kick, sprinkle in red pepper flakes if you like. You can find all these steps in detail in the Full Recipe. Enjoy your cooking! To prevent garlic from burning, always cook it on medium heat. Garlic cooks fast, so stay alert! Saute it until just fragrant, about 1-2 minutes. If it turns brown, it will taste bitter. For the right sauce thickness, start with heavy cream. Let it simmer on low heat for a few minutes. If it gets too thick, add a bit of the reserved pasta water. This helps create a smooth and creamy sauce. For an appealing dish, use shallow bowls. This allows the pasta to shine! Drizzle some olive oil on top and sprinkle fresh parsley and Parmesan cheese. It makes the dish look fancy. Pair this pasta with a simple salad or garlic bread. A light salad with lemon vinaigrette works well. You can also serve it with grilled vegetables for extra flavor. Use a large pot for boiling pasta. A deep skillet is perfect for making the sauce. A wooden spoon helps mix everything well. For pasta, spaghetti or fettuccine works best. Choose your favorite or whatever you have on hand. The key is to cook it to al dente for the best texture. For the [Full Recipe], refer to the steps above for a delicious meal. Happy cooking! {{image_2}} You can easily swap pasta types. Try whole wheat or gluten-free pasta. Both work well in this dish. They add different tastes and textures. For a dairy-free option, use coconut cream or cashew cream. These will mimic the rich creaminess of heavy cream. Nutritional yeast can replace Parmesan cheese for a cheesy flavor. Want to add some protein? Cooked chicken or shrimp makes a great addition. Just toss them in with the pasta for a hearty meal. You can also mix in seasonal veggies. Spinach or cherry tomatoes brighten the dish. They add color and nutrition, making your meal more vibrant. Love spice? Adjust the heat by using different peppers. Jalapeños add a fresh kick, while crushed red pepper gives warmth. Herbs can change the flavor too. Basil or thyme adds depth to the creamy sauce. Feel free to experiment and find your favorite mix! For more guidance, check the Full Recipe for ideas and tips. To store leftover creamy lemon garlic pasta, wait for it to cool. Place it in an airtight container. Glass or plastic containers work well. Make sure to seal the lid tightly. This helps keep the pasta fresh and tasty. To reheat your pasta, you can use two methods. The stovetop method is best for keeping the creaminess. Add a splash of water or cream to the skillet. Heat it on low and stir gently. For the microwave, place the pasta in a bowl. Cover it with a damp paper towel. Heat in short bursts, stirring in between. This way, the pasta warms evenly without drying out. Creamy lemon garlic pasta lasts in the fridge for about three days. Keep an eye on it. Check for signs of spoilage, like an off smell or mold. If you see any changes, it's best to throw it out. Enjoy your leftovers while they are still fresh! What can I substitute for heavy cream in Creamy Lemon Garlic Pasta? You can use whole milk mixed with a bit of butter. This will give you a creamier texture. Another option is coconut milk for a dairy-free choice. It adds a nice flavor too. Can I make this dish vegan? Yes, you can make it vegan! Use coconut cream or cashew cream instead of heavy cream. Replace Parmesan with nutritional yeast or vegan cheese. This keeps the dish creamy and tasty. Should I rinse pasta after cooking? No, do not rinse your pasta. Rinsing removes the starch that helps the sauce stick. Just drain it and add it to your sauce right away. How do I know when spaghetti is al dente? Spaghetti is al dente when it's firm but not hard. You should bite into it and feel a slight chew. The package usually gives a cooking time, but taste testing is the best way. How can I make it spicier? Add red pepper flakes to the sauce. You can also use fresh chili peppers or a dash of hot sauce. Adjust to your taste for the perfect kick! Can I freeze Creamy Lemon Garlic Pasta? Yes, you can freeze it! Just cool it down first. Store it in airtight containers. Reheat it on the stove, adding a bit of water to bring back creaminess. Creamy Lemon Garlic Pasta is a bright and tasty dish. The lemon adds a nice zing, while garlic gives it depth. The creamy sauce makes every bite rich and smooth. This dish is quick and easy, perfect for busy weeknights. You can use spaghetti or fettuccine, but both work well. The heavy cream melts with the cheese to create a beautiful sauce. Fresh parsley adds a pop of color and flavor. For those who like heat, red pepper flakes can spice things up. For in-depth instructions and more tips, check the [Full Recipe](#). Enjoy making this dish, and I promise you will love the flavor! In this blog post, we explored how to make a delicious Creamy Lemon Garlic Pasta. You learned about key ingredients, cooking steps, and tips for the perfect sauce. We also covered variations, storage, and FAQs to enhance your dish. Whether you're a new cook or a seasoned chef, this recipe is a must-try. With fresh flavors and simple steps, you’ll please any crowd. Enjoy experimenting and make this dish your own!](https://lisadishes.com/wp-content/uploads/2025/07/c870e048-82ac-406b-8751-eebdc4694928.webp)
Busy weeknights call for quick and tasty meals, and Creamy Lemon Garlic Pasta fits the bill! With just a few
![Here’s what you need to make Chocolate Covered Strawberry Pops. Gather these items before you start: - 1 pound fresh strawberries - 8 ounces dark chocolate - 1 tablespoon coconut oil (optional) - Sprinkles or crushed nuts - Wooden popsicle sticks These ingredients are simple but key to a great treat. Fresh strawberries give a sweet and juicy bite. Dark chocolate adds a rich flavor, while coconut oil helps to make it smooth. You can use sprinkles or nuts to add fun and crunch. The popsicle sticks are essential for holding the strawberries. Make sure to wash and dry the strawberries well. This step is important for the chocolate to stick. Each ingredient plays a role in making these pops a delightful treat. For the full recipe, refer to the section above. Start with fresh strawberries. Wash them well and dry them gently. This step is key. If the strawberries are wet, the chocolate won't stick. Next, take a wooden popsicle stick. Insert it into the stem end of each strawberry. Push it in halfway. This will make it easy to dip. Now, it’s time to melt your chocolate. Use a microwave-safe bowl for this. Add the chocolate and coconut oil if you want a smoother mix. Heat it in the microwave. Start with 30 seconds. Afterward, take it out and stir well. Repeat this until it is fully melted and smooth. Grab a strawberry by the stick. Dip it into the melted chocolate. Swirl it gently to coat it well. Let the extra chocolate drip back into the bowl. While the chocolate is still wet, roll the strawberry in sprinkles or crushed nuts. This adds fun and flavor. Place the dipped strawberries upright. You can use a glass or a parchment-lined tray. Let them sit for a few minutes to harden. Or, put them in the fridge for about 15 minutes to speed up the process. For the full recipe, check out the details above. Enjoy your tasty Chocolate Covered Strawberry Pops! When picking strawberries, I always choose organic if I can. Organic strawberries taste better and have fewer chemicals. Look for bright red berries. They should smell sweet and feel firm. Size matters too. Medium to large strawberries work best for pops. They hold chocolate well and provide a great bite. To get a smooth chocolate finish, melt chocolate slowly. I use a microwave, heating in short bursts. Stir often to avoid burning. If your chocolate clumps, add a bit of coconut oil. This helps the chocolate stay smooth and shiny. Dip each strawberry quickly to avoid a messy coating. Let excess chocolate drip back into the bowl. If you plan for a party, you can prep the strawberries ahead. Store washed berries in the fridge for a day. Keep them dry to avoid spoilage. You can also melt chocolate a few hours before. Just reheat it gently if it cools down too much. This way, you can enjoy stress-free fun on the big day. For the full recipe, check out the [Full Recipe]. {{image_2}} You can use different types of chocolate for your pops. Dark chocolate offers a rich, bold taste. Milk chocolate gives a sweet and creamy flavor. White chocolate is sweet and pairs well with fruit. You can also try flavored chocolates. For example, mint or orange chocolate adds a fun twist. Toppings can change the look and taste of your pops. Chopped nuts add crunch and flavor. Shredded coconut gives a tropical feel. You can use cookie crumbs for a fun texture. Seasonal sprinkles, like stars or hearts, make them festive. Choose toppings that match the season or the occasion. While strawberries are the star, other fruits work great too. Bananas can be cut into chunks and dipped. Pineapple gives a tart and juicy option. You can also try other berries like blueberries or raspberries. Each fruit offers its own unique flavor and texture. Feel free to mix and match for fun! Check out the full recipe for detailed steps. To keep your Chocolate Covered Strawberry Pops fresh, you should store them in the fridge. The cool temperature helps maintain the chocolate's firmness and keeps strawberries juicy. Place each pop in an airtight container. This will keep them safe from moisture and odors. If you stack them, put parchment paper between layers to avoid sticking. These delightful treats stay fresh for about 3 to 5 days when stored properly. After that, they may lose flavor and texture. Look for signs of spoilage like dull chocolate or mushy strawberries. If you see these signs, it's best to toss them out. Enjoy your Chocolate Covered Strawberry Pops while they are at their best! Yes, you can use many types of chocolate for dipping. Dark chocolate, milk chocolate, and white chocolate all work well. Each type gives a different taste. I love dark chocolate for its rich flavor, but choose what you like best. You can even try flavored chocolates, like mint or orange. The key is to melt it properly for a smooth dip. If your chocolate is too thick, do not worry! You can fix it easily. Add a little coconut oil or vegetable oil to the chocolate. Start with just a teaspoon, and stir it in. This will help thin the chocolate for a nice, smooth coating. Heat it in the microwave again for a few seconds if needed. Stir until it is just right for dipping. Yes, you can make chocolate covered strawberry pops vegan! Use dairy-free chocolate instead of regular chocolate. There are many great brands that offer this option. For the popsicle sticks, make sure they are vegan-friendly. The rest of the recipe is already vegan since strawberries and sprinkles are plant-based. Enjoy your tasty treat without any animal products! For more details on making these pops, check out the Full Recipe. This blog post covered how to create delicious chocolate-covered strawberries. We started with the right ingredients and moved through each step, from preparing the strawberries to storing your treats. I shared tips for choosing the best fruit and perfecting your chocolate coating. Plus, I discussed fun variations and answered common questions. Now you can impress friends with this easy, tasty treat. Enjoy creating your own fun versions, and share your tasty results!](https://lisadishes.com/wp-content/uploads/2025/07/635e810b-8278-4500-a7b5-a9a2fa3711a8.webp)
Are you ready for a sweet treat? Chocolate Covered Strawberry Pops are delicious and fun to make. I’ll guide you
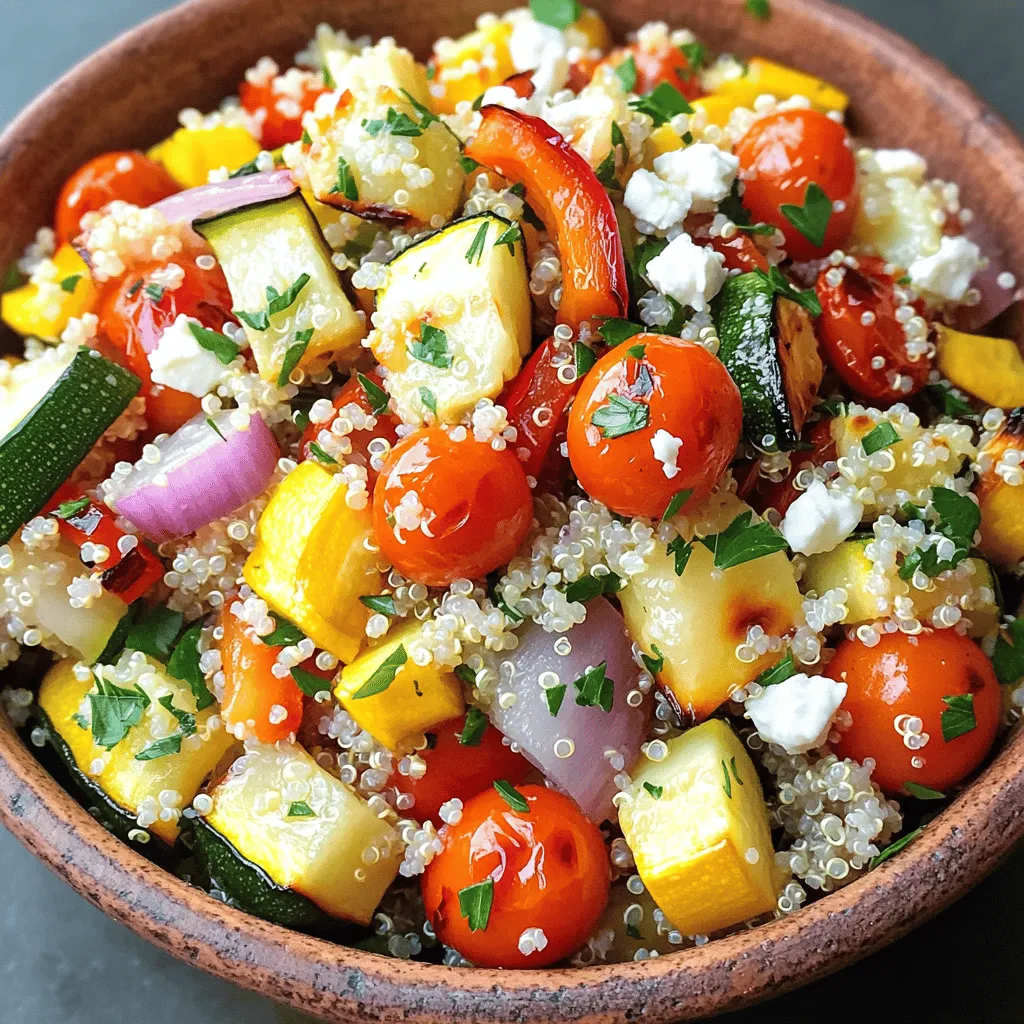
Are you looking for a dish that is both tasty and healthy? My Roasted Vegetable Quinoa Salad is just what
![To make Fresh Strawberry Yogurt Bark, you will need these ingredients: - 2 cups Greek yogurt (plain or vanilla) - 2 tablespoons honey or maple syrup - 1 teaspoon vanilla extract - 1 cup fresh strawberries, hulled and sliced - 1/4 cup granola or nuts (optional, for crunch) - A pinch of salt Greek yogurt is the star of this treat. It gives a creamy base packed with protein. You can choose plain or vanilla yogurt depending on your taste. Honey or maple syrup adds natural sweetness. I love maple syrup for a unique flavor. Vanilla extract makes the bark even more tasty. Fresh strawberries bring a burst of flavor and color. I suggest using ripe strawberries for the best taste. Granola or nuts add a fun crunch if you want. A pinch of salt balances all the flavors. This simple list makes Fresh Strawberry Yogurt Bark easy to prepare. For the complete cooking steps, check the Full Recipe. Start by lining a baking sheet with parchment paper. This paper helps with easy removal. Make sure the paper extends over the edges. This will give you extra grip when you take the yogurt bark out. In a mixing bowl, combine Greek yogurt, honey, and vanilla extract. You can also add a pinch of salt for flavor. Stir the mix until it is smooth and creamy. This will make your yogurt bark rich and tasty. Now, pour the yogurt mixture onto the lined baking sheet. Use a spatula to spread it evenly. Aim for about a 1/4-inch thick layer. Next, arrange the sliced strawberries on top. Press them gently into the yogurt. If you want some crunch, sprinkle granola or nuts over the top. Place the baking sheet in the freezer. Let it freeze for at least three hours. This time allows the yogurt to become firm. Check that it is completely solid before you remove it from the tray. When it’s ready, use the parchment paper to lift it out easily. To get the best texture for your yogurt bark, use Greek yogurt. It is thick and creamy. Mixing it well with honey or maple syrup and vanilla helps too. This step makes it smooth and tasty. When spreading the yogurt on the baking sheet, keep it about 1/4-inch thick. This thickness helps it freeze evenly. For topping, arrange strawberries in a fun pattern. Press them slightly into the yogurt. This keeps them from falling off when you cut it later. If you like, sprinkle granola or nuts on top for some crunch. It adds flavor and texture. Serving your yogurt bark can be just as fun. Slice it into squares or rectangles. Use a sharp knife to get clean edges. You can also break it into pieces for a more rustic look. For a pretty display, arrange the pieces on a big platter. Garnish with extra strawberries or a drizzle of honey. It makes the bark look more inviting. If you're short on time, make slices while it’s still frozen. This way, it won't get too soft. Enjoy this treat right away or store it for later! {{image_2}} You can change the fruits used in yogurt bark. Try berries like blueberries or raspberries. You can also use sliced bananas for a sweet twist. Each fruit adds its own taste, making the treat fun and fresh. Switching yogurt flavors can also change the game. Use strawberry yogurt for a stronger berry taste. Or, try coconut yogurt for a tropical vibe. Each choice gives you a new way to enjoy yogurt bark. Adding crunch is simple and fun. Choose different nuts like almonds or walnuts for texture. You can even use seeds like chia or sunflower seeds. Each nut or seed offers a unique flavor and crunch. Incorporating chocolate chips is a great way to make it sweeter. Dark chocolate chips add richness, while white chocolate chips give a creamy touch. Mixing in some chocolate makes your yogurt bark feel like a treat! For the full recipe, check out the [Full Recipe]. To keep your yogurt bark fresh, store it in an airtight container. You can freeze it for up to two months. This helps keep the flavors intact. When freezing, ensure the bark is fully set. If not, it may become mushy. You can also wrap individual pieces in plastic wrap. This makes it easy to grab a snack later. If you have leftovers, place them back in the airtight container. Make sure to separate layers with parchment paper. This prevents them from sticking together. If you need to re-freeze any pieces, ensure they stay cold. Re-freezing does not change the taste much, but it may alter the texture slightly. Enjoy your delicious treat any time! You can store Fresh Strawberry Yogurt Bark for up to two weeks. Keep it in an airtight container. This helps maintain its freshness and prevents freezer burn. When you want a treat, just grab a piece from the freezer. Yes, you can make it ahead of time. Prepare it and freeze for at least three hours. This allows the yogurt bark to set completely. I suggest making it a day or two before you need it. This way, you have a quick snack ready to go. Greek yogurt works best for yogurt bark. It has a thick texture and rich taste. You can also use regular yogurt if you prefer. Plain yogurt keeps the flavor neutral. Vanilla adds a sweet touch. Yes, this recipe is great for kids! It is healthy and fun to eat. Greek yogurt gives protein, while strawberries add vitamins. You can even let kids help make it. They will love arranging the fruit on top. Fresh Strawberry Yogurt Bark is an easy treat. You learned about the simple ingredients and how to make it. We covered tips for perfect texture and fun variations. This recipe is great for anyone, especially kids. Store it well to keep it fresh and enjoy it later. Now you can make a delicious snack with ease. Experiment with flavors and toppings to find your favorite mix. Enjoy this tasty, healthy treat and share it with friends!](https://lisadishes.com/wp-content/uploads/2025/07/61281185-a4f6-403c-b02b-a8b71fece136.webp)
Looking for a quick and tasty treat? Fresh Strawberry Yogurt Bark is your answer! This easy recipe combines creamy Greek
![To make Baked Garlic Lemon Tilapia, you need these main ingredients: - 4 tilapia fillets - 4 cloves garlic, minced - 2 tablespoons olive oil - 2 tablespoons fresh lemon juice - 1 teaspoon lemon zest - Salt and pepper to taste - 1 teaspoon dried oregano - Fresh parsley for garnish - Lemon slices for serving These ingredients bring bright flavors to the dish. The garlic adds depth, while the lemon gives it a fresh kick. Tilapia is a mild fish that pairs well with these strong flavors. You can add a few optional ingredients to enhance the dish: - Red pepper flakes for heat - A splash of white wine for richness - Capers for a briny touch - Cherry tomatoes for added sweetness These additions can make the dish even more fun and exciting. Feel free to mix and match these options based on your taste. Each serving of Baked Garlic Lemon Tilapia has: - Calories: about 180 - Protein: 26g - Fat: 8g - Carbohydrates: 2g - Fiber: 0g This meal is light yet filling. It’s a great source of protein and healthy fats. Enjoy this dish as part of a balanced diet. For the full recipe, check the [Full Recipe] link. First, preheat your oven to 400°F (200°C). This heat will cook the fish evenly. While your oven heats, prepare your baking dish. You can line it with parchment paper. If you don't have that, lightly grease it with cooking spray. This step helps prevent sticking and makes cleanup easier. Next, grab a small bowl. In it, mix together the olive oil, lemon juice, and lemon zest. Add the minced garlic, dried oregano, salt, and pepper. Use a whisk to combine all the ingredients well. This mixture is key to adding flavor to your fish. The aroma alone will make your mouth water! Now, take your tilapia fillets and place them in the baking dish. Brush both sides of the fillets with your garlic lemon mixture. If you want extra zing, squeeze more lemon juice over the top. Bake the tilapia in your preheated oven for 12 to 15 minutes. The fish is done when it flakes easily with a fork. Once baked, let it rest for a couple of minutes. Finally, garnish with fresh parsley and serve with lemon slices. For the full recipe, check out the details shared earlier. To get perfectly flaky tilapia, cook it at the right temperature. The oven should be set to 400°F (200°C). This heat cooks the fish evenly without drying it out. Check your tilapia after 12 minutes. It should flake easily with a fork. If it does, it’s done! Seasoning is key with tilapia. Use fresh garlic for the best flavor. Combine garlic with lemon juice, lemon zest, olive oil, salt, and pepper. Brush this mix on both sides of the fish. This adds flavor and moisture. Don’t skip the oregano; it gives a nice herbal touch. Baked garlic lemon tilapia pairs well with many sides. Try serving it with a fresh salad or steamed veggies. Rice or quinoa also make excellent choices. If you want something light, serve with lemon slices and parsley. This keeps the dish fresh and bright. For more ideas, check the Full Recipe. {{image_2}} You can easily swap tilapia for other fish. Try using cod, haddock, or even salmon. Each fish has a unique taste and texture. Cod is flaky and mild, while salmon offers a rich flavor. Just adjust the cooking time based on the thickness of the fish. For thicker fillets, bake a little longer. Always watch for that flaky texture to know when it's done. Feel free to get creative with herbs and spices. You can add dill or thyme for a fresh twist. A pinch of red pepper flakes can give it a spicy kick. If you love smokiness, try smoked paprika. Mixing these flavors can enhance your dish. Just remember, start with a little, then taste as you go. This way, you can find your perfect balance. If you need gluten-free options, this recipe is already perfect. All the ingredients are naturally gluten-free. For low-carb choices, keep it simple. Serve the tilapia with veggies like zucchini or asparagus instead of rice. You can also add a fresh salad for crunch. These options keep your meal light and full of flavor, making dinner both healthy and tasty. After enjoying your baked garlic lemon tilapia, let the leftovers cool. Place the fillets in an airtight container. This keeps the fish fresh and tasty. You can store them in the fridge for up to three days. Make sure to cover them well to avoid any strong fridge odors. When you are ready to eat the leftovers, you have a few options. The oven works best for reheating. Preheat it to 350°F (175°C). Place the tilapia on a baking sheet and cover it with foil. Heat for about 10 minutes. This keeps the fish moist. You can also use the microwave, but be careful not to overcook it. Heat in short bursts of 30 seconds, checking often. If you want to save some tilapia for later, freezing is a great option. Wrap the cooled fillets tightly in plastic wrap. Then place them in a freezer-safe bag. Remove as much air as you can. You can freeze tilapia for up to two months. When you're ready to cook it, thaw it overnight in the fridge. This helps keep the texture nice. For best results, bake it from fresh rather than refreezing it after thawing. Yes, you can use frozen tilapia. Just make sure to thaw it first. Place the frozen fillets in the fridge overnight. If you're in a hurry, you can also run them under cold water. Using thawed tilapia helps the flavors absorb better. Baked Garlic Lemon Tilapia lasts for about 3 days in the fridge. Store it in an airtight container. It’s best to eat it fresh, but you can enjoy it later too. Just reheat it gently to keep it moist. Great sides for Baked Garlic Lemon Tilapia include: - Steamed broccoli - Roasted asparagus - Rice or quinoa - A fresh garden salad These sides complement the light flavor of the fish and add nutrition. The best way to check if the fish is done is to use a fork. Gently flake the fish at the thickest part. If it flakes easily and looks opaque, it’s ready. The internal temperature should reach 145°F (63°C) for safety. This article outlined how to make Baked Garlic Lemon Tilapia. We covered the key ingredients, steps for preparation, and tips for perfecting your dish. Remember, flaky fish and bold flavors make all the difference. You can also try different fish or flavors for variety. Storing leftovers properly keeps your meal fresh and tasty. I hope these insights inspire you to cook confidently and enjoy this healthy dish. Explore, experiment, and make this recipe your own!](https://lisadishes.com/wp-content/uploads/2025/07/640a7138-8387-47d4-8e6f-0adbcbff6689.webp)
Are you ready to impress your family with a dinner everyone will love? Baked Garlic Lemon Tilapia is simple and
