Skip to content
DisclaimerTerms Of UseGDPR PolicyCookie Policy

Lisa Dishes

  • Home
  • Drinks
  • Appetizers
  • Dinner
  • Dessert
  • About
  • Contact
  • Privacy Policy
DisclaimerTerms Of UseGDPR PolicyCookie Policy

NO-ING-IMG

- 6 cups Rice Krispies cereal - 4 cups mini marshmallows - 3 tablespoons butter - 1 teaspoon vanilla extract - Food coloring (red, blue, yellow, green) - 1/4 cup rainbow sprinkles (optional) - Calories per serving: About 150 calories - Key nutrients: - Sugar: 10g - Fat: 3g - Carbohydrates: 28g Rice Krispie Treats are not just fun to make; they are also delicious! Each bite gives you a mix of sweetness and crunch. The ingredients are simple and easy to find. Rice Krispies cereal gives the treats their signature snap. Mini marshmallows melt perfectly into a gooey mixture. Butter adds richness, while vanilla extract boosts the flavor. Adding food coloring makes the treats extra special. You can create bright, fun layers. Rainbow sprinkles give a playful finish. This colorful twist makes them great for parties or just for fun! Now, let’s take a look at the calories and nutrients. Each serving has about 150 calories. They contain 10 grams of sugar, which adds sweetness. The treats have 3 grams of fat and 28 grams of carbs. These treats not only taste good but also look great. With the right ingredients, you can make a delightful treat that everyone loves. For the full recipe, check out the detailed instructions I shared earlier! First, get a 9x13 inch baking dish. You can grease it lightly with butter. Alternatively, you can line it with parchment paper. This helps the treats come out easily later. Next, take a large saucepan. Set the heat to low. Add 3 tablespoons of butter to the pan. Once it melts, throw in 4 cups of mini marshmallows. Stir this mix continuously until it melts completely. It should be smooth and gooey. Now, remove the pan from heat. Stir in 1 teaspoon of vanilla extract for flavor. Then, divide the melted marshmallow into four bowls. Add a few drops of food coloring to each bowl. Use red, blue, yellow, and green. Mix well so the colors blend into the marshmallow. In a big bowl, add 6 cups of Rice Krispies cereal. Choose one colored marshmallow mixture. Pour it over the cereal. Stir until every piece is coated with the gooey mix. Press the colored cereal into the prepared dish. Use a spatula or your hands to compact it well. Repeat with the other colored mixtures, layering them on top of each other. After all colors are packed, let it cool for about 30 minutes at room temperature. Once cooled, slice the treats into squares or rectangles. You can sprinkle rainbow sprinkles on top for extra fun. Serve these colorful treats and enjoy the smiles they bring! To get the best Rice Krispie Treats, focus on texture. You want them chewy but also crispy. Start by melting the butter and marshmallows slowly. Heat them on low. Stir often to avoid burning. Once melted, mix in the Rice Krispies quickly. Don’t over-mix, or they can become hard. Press the mixture gently into the pan. This keeps them light and airy. Sticky treats can be a hassle. To avoid this, grease your hands or spatula with butter. This helps when you press the mixture into the pan. If your hands stick, the treats get messy. A little grease goes a long way. You can also use parchment paper. It makes lifting the treats out easy. Keeping your treats fresh is key. Store them in an airtight container. This keeps them soft and chewy. If left out, they can harden fast. For best results, eat them within a week. If you want to save some, freeze them. Wrap each piece in plastic wrap. Then place them in a freezer bag. They can last for up to three months. Enjoy your treats whenever you want! {{image_2}} If you love chocolate, this is for you. You can easily change the classic Rice Krispie Treats. Just add cocoa powder or chocolate chips. To do this, melt 3 cups of mini marshmallows with 3 tablespoons of butter. Then, mix in ½ cup of cocoa powder. Stir until smooth. Now, add the Rice Krispies and mix well. You can also fold in chocolate chips for extra chocolatey goodness. Rice Krispie Treats are great for any season. For Halloween, you can make spooky treats by adding black and orange food coloring. Shape them into ghosts or pumpkins. For Christmas, add red and green colors with festive sprinkles. You can even shape them into stars or trees. These treats make great gifts or party snacks during the holidays. Want to mix things up? Try adding peanut butter to your treats. Just add 1 cup of smooth peanut butter when melting the marshmallows. This adds a rich flavor and creaminess. You can also add chopped nuts or dried fruits for a crunch. Almonds, walnuts, or cranberries work well. These add texture and taste, making your treats unique. For the full recipe, check out the original details above. Enjoy experimenting with these fun variations! To keep your Rice Krispie Treats fresh, store them in an airtight container. This keeps air out and moisture in. Place a piece of parchment paper between layers if you stack them. Avoid direct sunlight or heat, as this can make them hard. If you have extras, they can stay in a cool, dry place. Rice Krispie Treats last about 2 to 3 days at room temperature. If you keep them in the fridge, they can last up to a week. However, the texture may change. They can become dry if stored too long, so enjoy them fresh! You can freeze Rice Krispie Treats for later. First, let them cool completely. Then, wrap them tightly in plastic wrap. Place the wrapped treats in a freezer bag. They can last up to 3 months frozen. To eat, thaw them in the fridge overnight. Enjoy the treat as if it were fresh! For the complete recipe, check out the Full Recipe. You can use similar cereals like Corn Pops or puffed rice. Cheerios also work well. These cereals provide a nice crunch. They may change the flavor a bit but keep the fun. Yes, you can use regular marshmallows. They will melt just fine. The texture may be a bit chewier. Mini marshmallows mix in easier and coat better. It takes about 30 minutes for the treats to cool. Make sure to let them sit at room temperature. If you rush this, they may not hold their shape. Yes, toppings are a great idea! You can add chocolate chips or nuts. Try sprinkles or even shredded coconut for fun. Adding toppings makes your treats even more colorful. To reduce stickiness, use greased hands when mixing. A spatula coated with butter helps too. You can also dust your hands with powdered sugar. This keeps the mixture from sticking. We covered how to make fun Rice Krispie Treats using simple ingredients. You learned to melt marshmallows and color them for a vibrant twist. I shared tips for storage and variations to enjoy. Remember, the right technique gives you that perfect chewy texture. With these steps, you can impress friends and family. So, grab your ingredients and start creating your colorful treats today! Enjoy your sweet dessert adventure!

Rice Krispie Treats Delightful and Easy Recipe

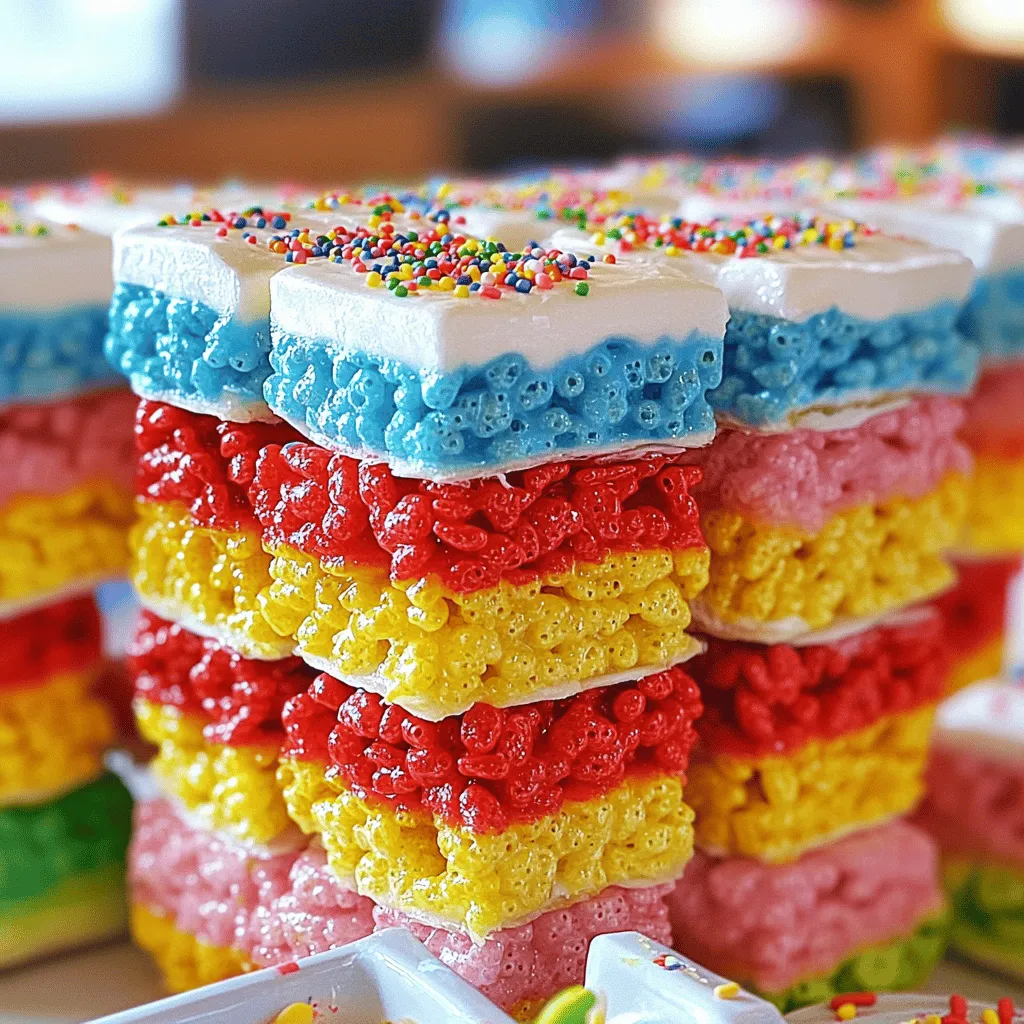
Are you ready to create a sweet treat that everyone loves? Rice Krispie Treats are fun, easy, and perfect for

For these No Bake S’mores Bars, you need just a few simple ingredients. Here is the list: - 1 ½ cups graham cracker crumbs - ½ cup unsweetened cocoa powder - ½ cup granulated sugar - ½ cup unsalted butter, melted - 2 cups miniature marshmallows - 1 cup milk chocolate chips - 1 teaspoon vanilla extract - ½ cup semi-sweet chocolate chips (for drizzle) These ingredients come together to create a treat that is both rich and nostalgic. The graham crackers give a nice base, while the cocoa powder adds a deep chocolate flavor. The butter makes everything stick together and adds richness. The miniature marshmallows provide that classic s'mores taste and texture. Don’t forget the milk chocolate chips; they melt perfectly and blend with the marshmallows. The vanilla extract enhances the flavors, making each bite taste amazing. Finally, the drizzle of semi-sweet chocolate on top adds a finishing touch that looks great and tastes even better. Be sure to gather everything before starting. This helps keep the process smooth and fun. For the full recipe, check out the details on how to put these ingredients together for an irresistible dessert! To start, grab a large mixing bowl. Add the graham cracker crumbs, cocoa powder, and sugar. Mix well until combined. Next, pour in the melted butter and vanilla extract. Stir until all the dry mix feels moist and crumbly. Now, line an 8x8 inch square baking pan with parchment paper. Leave some paper hanging over the edges for easy lifting later. Firmly press the graham cracker mix into the bottom of the pan. Make sure it's even. Place it in the fridge for about 15 minutes to set. In a microwave-safe bowl, combine the milk chocolate chips and 1 cup of miniature marshmallows. Microwave this mix in 20-second bursts, stirring in between. Do this until it melts and becomes smooth, which should take about 1 minute total. Take the crust out of the fridge. Spread the melted chocolate mixture evenly over the crust. Next, top it with the remaining miniature marshmallows. Press them gently into the chocolate for a good seal. In a new bowl, melt the semi-sweet chocolate chips in the microwave as before. Once melted, use a spoon or piping bag to drizzle it over the marshmallows. This adds a nice touch. Put the pan back in the fridge. Chill it for at least 2 hours or until it fully sets. Once set, use the parchment paper to lift the bars out of the pan. Cut them into squares and enjoy! For the full recipe, refer to our detailed guide. To make these bars just right, ensure all your ingredients mix well. Start by blending the graham cracker crumbs, cocoa powder, and sugar thoroughly. This mix forms the base, so every bite should taste great. When you press the mixture into the pan, use a firm press. This helps the base hold together better when you cut the bars later. To boost the taste, add a pinch of salt. This small touch balances the sweet flavors and makes everything pop. For extra fun, consider mixing in some nuts or a spoonful of peanut butter. These additions can give your bars a new texture and flavor twist that you will love. For serving, use a rustic wooden platter. It adds a nice touch and looks great. When you're ready to serve, sprinkle extra graham cracker crumbs on top. This not only looks nice but also gives a nod to classic s’mores. You can even add whole marshmallows or chocolate squares for decoration. This makes your bars not only tasty but also beautiful to present. {{image_2}} You can switch up the chocolate in your s’mores bars. Use dark chocolate chips for a richer flavor. This will give your bars a deep, intense taste. If you prefer something lighter, try white chocolate. It will add a sweet and creamy touch to your treat. If you want to change the sweetness, there are good options. Substitute granulated sugar with coconut sugar or honey. Both add unique flavors. You can also explore sugar-free chocolate options. This makes your bars a bit healthier while still being sweet. Get creative with add-ins and modifications. Incorporate crushed candies or toffee bits for extra crunch. This adds a fun twist. You can also replace regular marshmallows with chocolate-covered marshmallows. This will boost the chocolate flavor in your bars. For the full recipe, check the above section. Store your No Bake S’mores Bars in an airtight container in the fridge. They can last for up to 1 week. This keeps them fresh and tasty. When you’re ready to enjoy them, just grab a bar and savor that sweet flavor. If you want to save some for later, freeze the bars wrapped in plastic wrap. This helps keep them from getting freezer burn. When you’re ready to enjoy them, thaw the bars in the refrigerator before serving. This way, they taste just as good as when you made them. Yes, they can be made 1-2 days in advance. This makes them perfect for parties or gatherings. Just store them in the fridge. The flavors will blend nicely, and they will still taste fresh. Yes, use gluten-free graham cracker crumbs. Many brands offer these. Just check the label. This way, everyone can enjoy these tasty bars. Increase the amount of graham cracker crumbs or chill longer. A firmer base helps hold the bars together. If they are too soft, they may fall apart when you cut them. Use a sharp knife and cut while chilled for clean edges. This keeps the layers neat and pretty. A warm knife can make cutting harder, so keep it cold. You can create delicious No Bake S’mores Bars with simple steps. First, mix the graham crackers, cocoa, and sugar. Then chill the mixture and melt the chocolate. Layer it all and chill again for the best results. These bars are easy to make and fun to share. Play around with flavors and add-ins to make them your own. Enjoy your tasty treat!

No Bake S’mores Bars Irresistible Sweet Treat

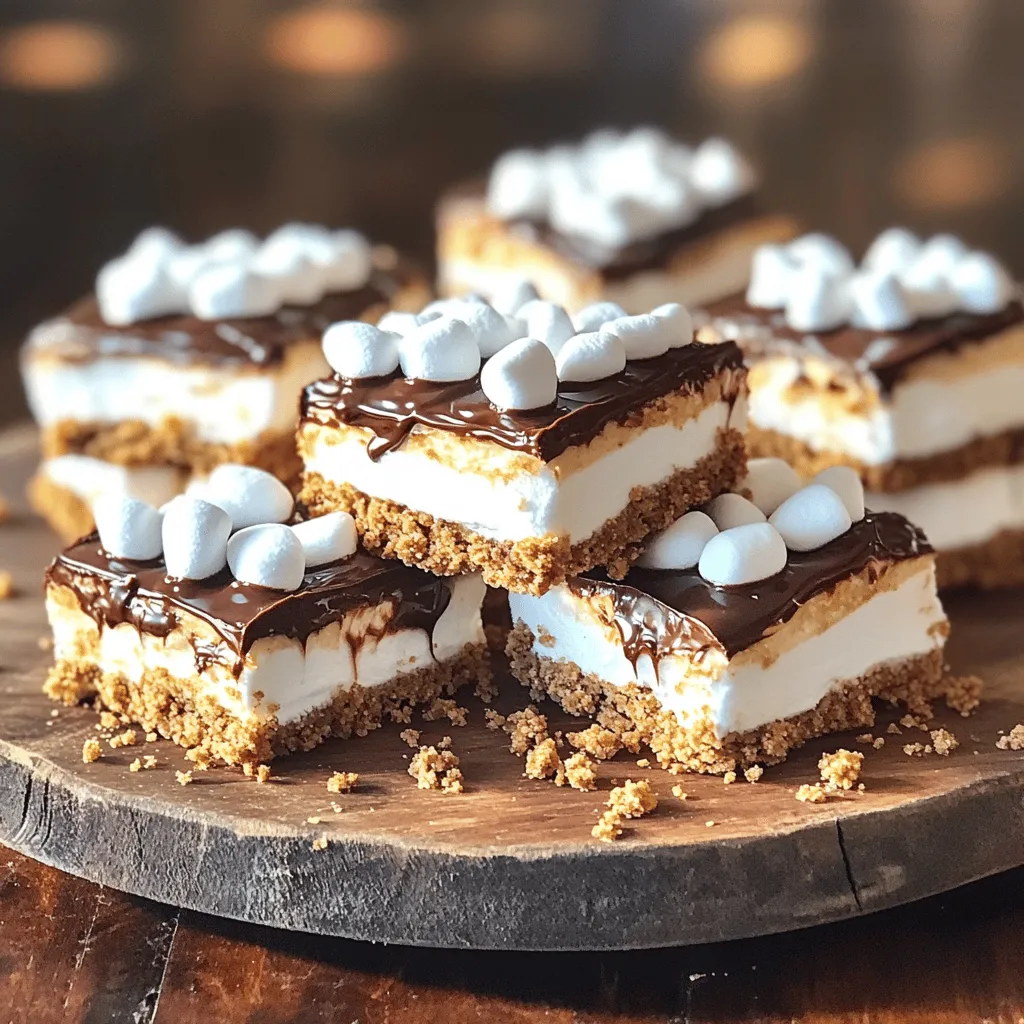
If you crave a sweet treat that’s easy to make and hard to resist, you’ll love these No Bake S’mores

To make Cosmic Brownie Copycat, gather these simple ingredients: - 1 cup unsalted butter, melted - 1 1/4 cups granulated sugar - 1 teaspoon vanilla extract - 3 large eggs - 1 cup all-purpose flour - 1/2 cup unsweetened cocoa powder - 1/2 teaspoon baking powder - 1/4 teaspoon salt - 1/2 cup semi-sweet chocolate chips - 1/2 cup rainbow sprinkles - 1/3 cup chopped nuts (optional) - Extra chocolate chips and sprinkles for topping If you need to make substitutions, try using dairy-free butter for a vegan option. You can also swap all-purpose flour with a gluten-free mix if needed. When baking, precise measurements matter. Use dry measuring cups for flour and cocoa powder. For sticky items like sugar or butter, pack them lightly in the cup, then level with a knife. Also, it is key to use room temperature eggs. They mix better with other ingredients and help create a smooth batter. If your eggs are cold, place them in warm water for a few minutes. This small step makes a big difference in your brownies’ texture! First, preheat your oven to 350°F (175°C). This step is key for even baking. While the oven heats, prepare your pan. Grease a 9x13-inch pan with butter or use parchment paper. Parchment makes it easy to lift the brownies out later. Next, let’s mix the wet ingredients. In a large bowl, combine melted butter and granulated sugar. Whisk them together until they blend well. This step is important for a creamy texture. Then, add eggs one by one, mixing well after each. Include one teaspoon of vanilla extract for extra flavor. Now, it’s time for the dry ingredients. In a separate bowl, sift together all-purpose flour, cocoa powder, baking powder, and salt. Sifting helps keep the batter smooth. Gradually add the dry mix to the wet mix. Stir gently until just combined. Be careful not to overmix, or the brownies can become tough. Pour the batter into the prepared pan. Spread it evenly with a spatula. This helps them bake evenly. Before you bake, sprinkle extra chocolate chips and rainbow sprinkles on top. Bake for 25-30 minutes. To check if they are done, insert a toothpick in the center. It should come out with moist crumbs, not wet batter. Once baked, let them cool for at least 15 minutes before cutting. For the complete recipe, refer to the Full Recipe section. To get that perfect fudgy brownie, avoid overmixing. Stir the batter until just combined. This keeps your brownies soft and chewy. Also, use a 9x13-inch baking pan for best results. This size gives even baking and a nice texture. You can add fun flavors like espresso or peppermint extract. Just a little goes a long way. For extra fun, try mix-ins like nuts, toffee bits, or even peanut butter chips. Each mix-in adds a new twist to your Cosmic Brownie. To get the best texture, cool the brownies in the pan for 15 minutes. Then, move them to a wire rack to cool completely. This helps keep them moist. When cutting, use a sharp knife for clean squares. Wipe the knife between cuts for neat edges. Enjoy your delicious Cosmic Brownies! {{image_2}} You can add nuts to your Cosmic Brownies for more flavor. Walnuts, pecans, or almonds work well. Each nut brings a unique taste. Walnuts add a rich, earthy note. Pecans give a buttery flavor, while almonds offer a nice crunch. Chop the nuts into small pieces. Mix them into the batter before baking. This will give your brownies an extra layer of texture. To make gluten-free Cosmic Brownies, swap the all-purpose flour for a gluten-free blend. Look for blends that include rice flour and tapioca flour. These help keep the texture nice and chewy. You may need to add a bit more liquid. Start with 1-2 tablespoons of extra melted butter or milk. This will help keep the brownies moist and delicious. You can make vegan Cosmic Brownies by replacing eggs and butter. Use flax eggs or applesauce to substitute eggs. For butter, try coconut oil or vegan butter. Both options work great and keep the flavor rich. If you choose applesauce, use 1/4 cup for each egg. This keeps the brownies soft and tasty. Enjoy every bite without the animal products! For the full recipe, check out the details above. To keep your Cosmic Brownies fresh, use air-tight containers. This helps lock in moisture and flavor. Store them at room temperature for up to five days. If you want them to last longer, refrigerate them. Just remember to wrap them well to avoid drying out. Freezing Cosmic Brownies is easy and a great way to save leftovers. First, let them cool completely. Then, cut them into squares. Wrap each square in plastic wrap. Place the wrapped brownies in a freezer bag. They can stay frozen for up to three months. To thaw, take out the desired number of brownies. Leave them at room temperature for about an hour. You can also microwave them for a few seconds if you’re in a hurry. Enjoy your treats as if they were fresh out of the oven! You can use several items instead of eggs. Here are some good options: - Flaxseed meal: Mix 1 tablespoon of flaxseed meal with 2.5 tablespoons of water. Let it sit for 5 minutes. - Applesauce: Use 1/4 cup of unsweetened applesauce for each egg. It adds moisture. - Mashed banana: Use 1/4 cup of mashed banana for one egg. This gives a hint of sweetness. - Yogurt: Use 1/4 cup of plain yogurt for each egg. It keeps the brownies rich. These substitutes can change the texture and taste. Flaxseed gives a nutty flavor while applesauce adds sweetness. You may want to try different options to find what you like best. Yes, you can! Making brownies ahead is easy. Just follow these tips: - Bake and cool: Make the brownies as normal. Let them cool completely in the pan. - Wrap well: Wrap the cooled brownies tightly in plastic wrap. This keeps them fresh. - Store in the fridge: You can keep them in the fridge for up to a week. - Freeze for longer: For longer storage, freeze them. Cut the brownies into squares and place them in an airtight container. They will last for about three months in the freezer. When you’re ready to enjoy, let them thaw in the fridge overnight. Cosmic Brownies can last a while if stored right. Here’s what you need to know: - At room temperature: They stay fresh for about 3-4 days. Keep them in an airtight container. - In the fridge: If you place them in the fridge, they can last up to a week. - In the freezer: They last for about three months in the freezer. Just remember to wrap them well. Check for any signs of spoilage before eating. If they smell off or have mold, it’s best to toss them. Enjoy your sweet treat! For the full recipe, check out the Cosmic Brownie Copycat Recipe. In this post, we covered the key ingredients for Cosmic Brownies, from mixing to baking. I shared tips on measuring, enhancing flavors, and achieving that perfect texture. We also explored variations, storage methods, and frequently asked questions. Remember, small changes can lead to great results. Enjoy experimenting with your own Cosmic Brownie recipe, and share with others. Happy baking!

Cosmic Brownie Copycat Recipe Simple and Delicious Treat

If you’ve ever craved the nostalgia of Cosmic Brownies, you’re in for a treat! This Cosmic Brownie Copycat recipe captures

- 1 cup unsalted butter (2 sticks) - 2 cups granulated sugar - 4 large eggs - 1 teaspoon vanilla extract - 1 cup all-purpose flour - 1 cup unsweetened cocoa powder - 1/2 teaspoon salt - 1 cup pretzel pieces (plus extra for topping) - 1 cup chocolate chips - 1 cup caramel sauce To make these caramel pretzel brownies, gather all these ingredients. The unsalted butter gives a rich base. Granulated sugar adds sweetness, while eggs provide moisture and structure. Vanilla extract enhances flavor, and flour and cocoa powder create a fudgy texture. Salt balances sweetness, while pretzel pieces add a crunchy twist. Chocolate chips bring extra chocolatey goodness, and caramel sauce ties it all together. When you combine these flavors, you create a delicious treat. You can find the full recipe above. Mixing these ingredients right will lead to a sweet delight that everyone will love. 1. First, preheat your oven to 350°F (175°C). Grease a 9x13 inch baking pan or line it with parchment paper. This helps with easy removal later. 2. Next, melt 1 cup of unsalted butter in a medium saucepan over low heat. Once melted, remove it from the heat. Stir in 2 cups of granulated sugar until well mixed. 3. Now, add 4 large eggs, one at a time. Mix well after each addition. Stir in 1 teaspoon of vanilla extract until fully blended. 1. In a separate bowl, sift together 1 cup of all-purpose flour, 1 cup of unsweetened cocoa powder, and 1/2 teaspoon of salt. 2. Gradually combine the dry mixture into the wet mixture. Stir until just combined. Do not overmix; this helps keep your brownies soft. 1. Fold in 1 cup of pretzel pieces and 1 cup of chocolate chips into the brownie batter. This adds a nice crunch and flavor. 2. Pour half of the brownie batter into the prepared baking pan. Smooth it into an even layer. 3. Drizzle half of the 1 cup of caramel sauce over the brownie layer. Pour the remaining batter on top and gently spread it out. 4. Add the leftover caramel sauce on top of the second brownie layer. Sprinkle extra pretzel pieces for a crunchy topping. 5. Bake in the preheated oven for about 30-35 minutes. Check if a toothpick inserted in the center comes out with a few moist crumbs. 6. After baking, remove from the oven and let cool in the pan on a wire rack. Once cooled, slice into squares and enjoy these caramel pretzel brownies. For the complete recipe, check the Full Recipe. To make your caramel pretzel brownies a hit, focus on consistency. The batter should be thick but pourable. If it feels too dry, add a tiny splash of water or milk. This helps keep your brownies moist. To avoid overbaking, set a timer for 30 minutes. Check with a toothpick. If it comes out with a few moist crumbs, your brownies are done. Overbaking makes them dry and crumbly. Using parchment paper makes removal easy. Just line your pan before pouring in the batter. Once cooled, lift the brownies out using the edges of the paper. For a fudge-like center, don't mix the batter too much. Fold in the pretzels and chocolate chips gently. This keeps air in the batter, giving you that rich, gooey texture. {{image_2}} You can make your Caramel Pretzel Brownies even better with fun flavors. Adding nuts like walnuts or pecans gives a crunchy texture. It also adds a rich taste that pairs well with the sweet caramel. You can also try different types of chocolate chips. Use dark chocolate for a richer flavor, or mix in white chocolate for a fun twist. These simple changes can make the brownies even more exciting and tasty. If you want to make these brownies fit special diets, it’s easy! For gluten-free options, swap all-purpose flour with almond flour or coconut flour. This keeps the texture nice while making it gluten-free. If you need a vegan version, replace eggs with a flaxseed mixture. Mix one tablespoon of ground flaxseed with three tablespoons of water for each egg. Use a plant-based butter and dairy-free chocolate chips, too. These tweaks let everyone enjoy these delicious treats! To keep your caramel pretzel brownies fresh, place them in an airtight container. This will help prevent them from drying out. If you want extra protection, wrap the brownies in plastic wrap before placing them in the container. You can store them at room temperature for up to four days. If you need them to last longer, refrigerate them. They will stay fresh for up to a week in the fridge. To freeze brownies, first let them cool completely. After cooling, cut them into squares. Wrap each square in plastic wrap, then place them in a freezer-safe bag. You can freeze them for up to three months. When you're ready to enjoy your brownies, take them out of the freezer. Allow them to thaw in the fridge overnight. For best results, let them sit at room temperature for a bit before serving. This will help restore their delicious texture! Can I use dark chocolate instead of cocoa powder? Yes, you can use dark chocolate. Just melt it first and use it in place of cocoa powder. Use about 4 ounces of dark chocolate for every cup of cocoa powder. This swap will make your brownies rich and fudgy. How do I fix dry brownies? If your brownies come out dry, there are a few fixes. Add a bit of melted butter or some milk to the mixture. You can also serve them with ice cream or whipped cream to add moisture. Next time, check the baking time closely. Removing them when a toothpick has a few moist crumbs will help! What can I substitute for caramel sauce? You can use dulce de leche or make a quick homemade caramel. To make your own, cook sugar and butter together until they melt and turn golden. You can also use chocolate sauce for a different flavor. How do I know when brownies are done? Check your brownies with a toothpick. Insert it in the center. If it comes out with a few moist crumbs, they are done. For a fudgier texture, take them out sooner! The edges should look set while the center may still be soft. Enjoy the Full Recipe for perfect results. This blog post detailed how to make delicious brownies with pretzels and caramel. We covered key ingredients, easy steps, and tips for success. You can try different flavors or dietary options to suit your needs. Store your brownies properly to keep them fresh, or freeze them for later. Remember, baking is about creativity and enjoyment. Get into your kitchen and start making these treats. You'll love sharing them with friends and family!

Caramel Pretzel Brownies Irresistible Sweet Delight

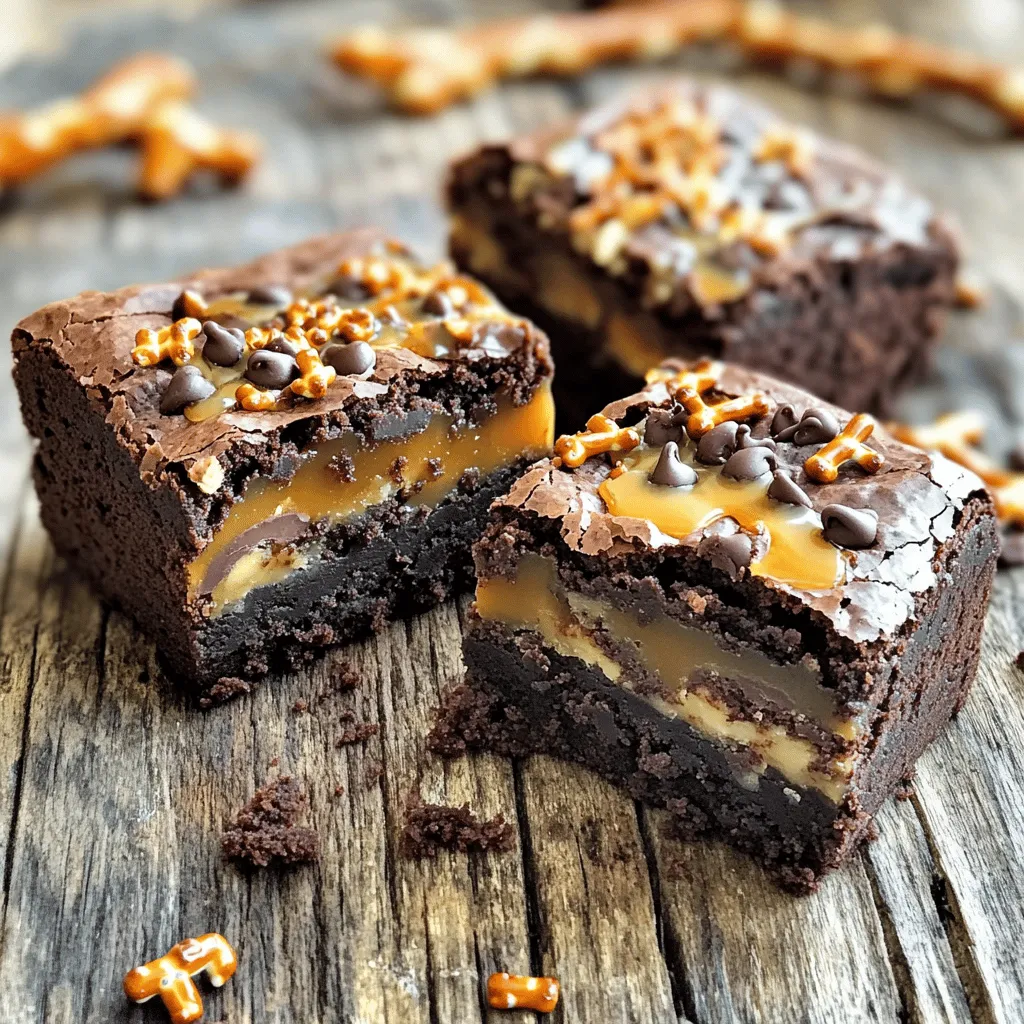
If you crave a dessert that balances sweet and salty, these Caramel Pretzel Brownies are your answer. I’ll show you

To make a fudgy brownie mug cake, you need simple ingredients. Each item plays a key role in creating your delicious treat. Here’s what you’ll need: - 4 tablespoons all-purpose flour - 4 tablespoons granulated sugar - 2 tablespoons unsweetened cocoa powder - 1/8 teaspoon baking powder - 3 tablespoons vegetable oil - 3 tablespoons water - 1/4 teaspoon vanilla extract - A pinch of salt - Optional: chocolate chips, nuts, or a scoop of ice cream for topping Each ingredient works together to create that rich, fudgy texture. The all-purpose flour gives structure. Granulated sugar adds sweetness, while unsweetened cocoa powder brings that deep chocolate flavor. Baking powder helps the cake rise just right. Vegetable oil makes the cake moist. Water mixes everything together smoothly. Vanilla extract adds warmth and flavor. A pinch of salt balances the sweetness. Feel free to customize your mug cake! Add chocolate chips or chopped nuts for extra taste. You can even top it with ice cream. This simple list makes it easy to whip up a tasty treat anytime. For the full recipe, check out the details above. First, grab a microwave-safe mug. It should hold about 12 oz. In the mug, mix these dry items: - 4 tablespoons all-purpose flour - 4 tablespoons granulated sugar - 2 tablespoons unsweetened cocoa powder - 1/8 teaspoon baking powder - A pinch of salt Stir these ingredients well. Make sure there are no lumps. This step sets the stage for a great texture. Next, add the wet ingredients. Pour in: - 3 tablespoons vegetable oil - 3 tablespoons water - 1/4 teaspoon vanilla extract Mix everything together until smooth. Scrape the bottom and sides of the mug. You want a nice batter with no dry spots. If you like, fold in a tablespoon of chocolate chips or nuts for extra flavor. Now, it's time to cook! Microwave the mug cake for about 40-60 seconds on high. Start with 40 seconds. Check the cake’s height and texture. If it’s not set, add 10 seconds more. You want it fudgy but not gooey. Let the mug cake cool for a minute before digging in. It’s a warm, chocolaty treat. For extra fun, top it with ice cream or more chocolate chips. Enjoy your quick and easy treat! To get the best fudgy brownie mug cake, you want a soft, moist center. Mix the dry ingredients well to avoid lumps. When you add the wet ingredients, stir until smooth. Don't overmix; just combine until you see no dry flour. This will help keep the cake light and fluffy. Want to make your mug cake even better? Try adding some chocolate chips or nuts to the batter. These give a nice texture and extra flavor. You can also add a pinch of espresso powder for a coffee kick. If you like more sweetness, fold in a tablespoon of peanut butter or Nutella, too. Microwaves can vary, so watch your cake closely. Start with 40 seconds, then check if it’s done. If it looks wet, microwave in 10-second bursts. You want it to rise but still be soft and fudgy. Let it cool for a minute before diving in. This makes it easier to eat and the flavors meld together beautifully. For the full recipe, just refer back to the main section. {{image_2}} You can change the taste of your mug cake easily. Try adding mint extract for a fresh twist. Just a drop can make a big difference. Peanut butter is another great option. Mix in a spoonful for rich, nutty goodness. If you love coffee, espresso powder is perfect. It adds depth to the chocolate flavor. Want a gluten-free version? Swap all-purpose flour with almond flour or a gluten-free blend. These options work well in this recipe. Just keep the same measurements. Your mug cake will still be rich and fudgy, and you won't miss the wheat. To make this mug cake vegan, use a plant-based oil like coconut oil. Replace the water with almond or soy milk for extra creaminess. For the egg-free version, no need to worry. The recipe holds up well without eggs. Enjoy a delicious vegan treat in just minutes. For the full recipe, check out the [Full Recipe]. To store leftover brownie mug cake, let it cool first. Once cool, cover it tightly with plastic wrap or transfer it to an airtight container. This keeps the cake moist and fresh. Store it in the fridge for up to two days. However, I recommend enjoying it fresh for the best taste. When you want to enjoy your leftover mug cake, simply reheat it in the microwave. Place the mug in the microwave for about 10 to 15 seconds. Check to see if it’s warm enough. If it needs more time, heat in 5-second intervals. This keeps the cake soft and fudgy. If you want to make the mug cake in advance, prepare the dry ingredients first. Mix the flour, sugar, cocoa, baking powder, and salt. Store this mix in a sealed bag or jar. When you are ready, add the wet ingredients. This method saves time and makes it easy to whip up a treat. Just remember, it's best to cook it right away for the best texture. For the detailed recipe, check out the Full Recipe section. You know your mug cake is done when it has risen and feels firm. Use a toothpick to check the center. If it comes out clean, it's ready. If the cake is still wet, microwave it in 10-second bursts. Remember, you want it fudgy, not dry. Yes, you can use different flours, but results may vary. Almond flour works well for a nutty taste. Coconut flour absorbs more moisture, so reduce the amount. Whole wheat flour adds fiber but may change the texture slightly. Experiment to find your favorite! You can use melted butter, coconut oil, or applesauce instead of vegetable oil. Each choice adds its own flavor and texture. Butter adds richness, while applesauce keeps it moist and cuts calories. Choose what you have on hand for a tasty treat. This mug cake is a treat, not a health food. It has sugar and oil, but you can make it healthier. Use less sugar or a sugar substitute. Swap in applesauce for the oil. Add nuts for protein or dark chocolate for antioxidants. Balance is key! To make more servings, multiply the ingredients by the number of mugs you need. Keep the cooking time similar, but check each one for doneness. Make sure you have enough microwave space for all the mugs. Enjoy sharing this quick and easy treat with friends! For more detailed steps, check out the Full Recipe. This blog post covered how to make a simple, tasty mug cake in your microwave. We discussed the basic ingredients like flour, sugar, and cocoa powder. I shared steps to mix wet and dry ingredients for the best texture. You learned tips for flavors, variations, and even storage. Mug cakes are easy and fun to customize. Make it your own! Enjoy your quick, sweet treat and experiment with different flavors.

Fudgy Brownie Mug Cake Quick and Easy Treat

Craving something sweet but short on time? You’re in luck! This Fudgy Brownie Mug Cake is quick and simple, perfect

To make the easiest chocolate mug cake, you need a few key items. These ingredients are simple and easy to find. Here’s what you need: - 4 tablespoons all-purpose flour - 4 tablespoons granulated sugar - 2 tablespoons cocoa powder - 1/8 teaspoon baking powder - 3 tablespoons milk (you can use almond or oat milk) - 2 tablespoons vegetable oil - 1/4 teaspoon vanilla extract These basics create a rich and fluffy cake. Mix them well for the best result! Want to make your mug cake even better? Here are some tasty add-ins you might like: - 2 tablespoons chocolate chips - Chopped nuts (like walnuts or pecans) These extras add fun flavors and textures. Feel free to experiment with what you have! If you don’t have an ingredient, no worries! Here are some easy swaps you can try: - Instead of all-purpose flour, use gluten-free flour. - Swap vegetable oil for melted butter or coconut oil. - Use any milk you like—dairy or non-dairy. These substitutions help you customize your cake. Just remember, the taste might change slightly with swaps, but it will still be delicious! For the full recipe, check the details above. Start with a microwave-safe mug. I like using one that holds about 12 ounces. This size helps the cake rise well. Make sure the mug is clean and dry. This step is important for a good bake. In your mug, add these dry ingredients: - 4 tablespoons all-purpose flour - 4 tablespoons granulated sugar - 2 tablespoons cocoa powder - 1/8 teaspoon baking powder Stir these well. You want to break up any clumps. This makes sure your cake has a smooth texture. Now, it’s time for the wet ingredients. Add: - 3 tablespoons milk (you can use almond or oat milk) - 2 tablespoons vegetable oil - 1/4 teaspoon vanilla extract Mix these into the dry ingredients. Keep stirring until you have a smooth batter. There should be no dry spots left. If you want, add 2 tablespoons of chocolate chips or nuts for extra flavor. Put the mug in the microwave. Cook on high for about 1 minute and 30 seconds. Watch closely! The cake should rise and look firm. If it’s not done, microwave in 10-second bursts until ready. Be sure to let it cool for a minute. It will be hot! Enjoy your treat. For the full recipe, check out the details above. To get a soft and fluffy cake, follow these tips. Use a large mug, around 12 oz. This gives the cake space to rise. Mix the dry ingredients well before adding wet ones. This helps blend flavors. When adding wet ingredients, stir until smooth. Avoid lumps for a better texture. Microwave it for 1 minute and 30 seconds. Check if it’s done; it should look set but not dry. Overmixing can lead to a tough cake. Mix just until combined. Using too small a mug can cause overflow. Make sure to use the right size. If you microwave it too long, the cake will be hard. Start with less time and add more if needed. Also, don’t skip the vanilla extract. This adds depth to the flavor. Want to make your mug cake special? Add chocolate chips or nuts for extra crunch. You can also use flavored milk, like almond or oat, for a twist. A dash of espresso powder can deepen the chocolate taste. Try adding a pinch of sea salt on top. It makes the sweetness pop. For a fun touch, top with whipped cream or ice cream after cooking. You can find the full recipe above for easy reference. {{image_2}} You can easily change up the flavor of your mug cake. Instead of chocolate, try vanilla. Just swap the cocoa powder for an extra tablespoon of flour. You can also add a teaspoon of almond extract for a nutty taste. For a fruity twist, mix in some peanut butter or Nutella. The possibilities are endless! If you want to make a vegan mug cake, use almond or oat milk instead of regular milk. You can also replace vegetable oil with melted coconut oil. For gluten-free options, use almond flour or gluten-free flour blends. These swaps keep the cake tasty while meeting your dietary needs. Top your mug cake with whipped cream or a scoop of ice cream. Fresh berries or sliced bananas add a great touch too. Drizzle some chocolate or caramel sauce over the top for extra sweetness. You can even sprinkle some nuts or shredded coconut for a crunchy bite. Feel free to get creative and make it your own! For the full recipe, check out the Easiest Chocolate Mug Cake. If you have leftover mug cake, let it cool first. Cover the mug with plastic wrap or a lid. Store it in the fridge for up to two days. This keeps it fresh and tasty. You can also move it to a small container if you prefer. When you want to eat your leftover mug cake, heat it in the microwave. Place it in for about 10 to 15 seconds. Check if it's warm enough. If not, heat it for a few more seconds. Be careful not to overheat, or it might dry out. You can freeze your mug cake for longer storage. First, let it cool completely. Wrap it tightly in plastic wrap. Then, place it in a freezer bag. It can last up to three months in the freezer. When you want to enjoy it, thaw it in the fridge overnight, then reheat as needed. For the full recipe, refer to the earlier section. It takes about 1 minute and 30 seconds to cook a mug cake in the microwave. You may need to adjust this time based on your microwave's power. If the cake is not fully cooked, microwave it in 10-second bursts. This way, you can avoid overcooking it. Remember, the cake will continue to cook a bit after you take it out. Yes, you can make a chocolate mug cake without a microwave! You can use an oven instead. Preheat your oven to 350°F (175°C). Place your mug in the oven for about 15 to 20 minutes. Keep an eye on it to check for doneness. The cake should rise and look set when done. Just be sure to use an oven-safe mug. If your mug cake overflows, it likely cooked too long or the mug was too small. To prevent overflow, use a larger mug, about 12 oz in size. If it does overflow, carefully clean the microwave while it's still warm. You can also reduce the amount of batter to avoid this. Enjoy the mess, and remember, it still tastes great! For the full recipe, check out the Easiest Chocolate Mug Cake! You can make a tasty mug cake easily. We covered essential and optional ingredients, and substitutions for them. I shared step-by-step instructions for mixing and cooking. We explored tips for texture, common mistakes, and flavor boosts. I also discussed fun variations, storage tips, and answered common questions. Now, you have everything needed to create your own mug cake masterpiece. Enjoy experimenting and savor each bite!

Easiest Chocolate Mug Cake Quick and Simple Recipe

Craving a sweet treat but short on time? I’ve got just the thing for you—my Easiest Chocolate Mug Cake! This

For these oatmeal cups, you need simple and wholesome items. Here’s a list: - 2 cups rolled oats - 1/2 cup brown sugar, packed - 1 teaspoon baking powder - 1/2 teaspoon salt - 1 teaspoon cinnamon - 2 cups milk (dairy or non-dairy) - 1/4 cup maple syrup - 1/4 cup unsweetened applesauce - 1 teaspoon vanilla extract These ingredients come together to create a warm and tasty breakfast. I love how the brown sugar and maple syrup blend into the oats. You can make these oatmeal cups even better with toppings. Here are some ideas: - Chopped nuts - Dried fruits - Fresh fruits - Chocolate chips Toppings let you personalize each cup. I often add chopped nuts for crunch or dark chocolate chips for a sweet touch. If you have dietary needs or preferences, some swaps can work well. Here are a few: - Use honey or agave syrup instead of maple syrup. - Swap the brown sugar for coconut sugar for a lower glycemic index. - Almond milk or oat milk can replace dairy milk. These changes keep your oatmeal cups just as tasty. You can still enjoy all the flavors with these simple swaps. For the complete recipe, check the Full Recipe section. First, set your oven to 350°F (175°C). This warm heat helps the oatmeal cups bake evenly. Next, grab a muffin tin. Use silicone or paper liners to make it easy to remove the cups later. Lining the tin keeps your cups from sticking. In a large bowl, place 2 cups of rolled oats. Add 1/2 cup of brown sugar, 1 teaspoon of baking powder, 1/2 teaspoon of salt, and 1 teaspoon of cinnamon. These flavors mix well together. Stir the dry ingredients until they are evenly combined. This step is crucial for a tasty bite. In another bowl, whisk together 2 cups of milk, 1/4 cup of maple syrup, 1/4 cup of unsweetened applesauce, and 1 teaspoon of vanilla extract. Make sure this mixture is smooth. The wet ingredients give your oatmeal cups moisture and sweetness. Pour this mixture into the dry ingredients and stir until well combined. Now, scoop the oatmeal mixture into the prepared muffin tin. Fill each cup about three-quarters full. If you like, add toppings like nuts or chocolate chips on top. Bake the cups in your preheated oven for 25-30 minutes. They should look golden brown and feel firm when touched. After baking, let the oatmeal cups cool in the tin for about 10 minutes. This helps them set. Then, transfer them to a wire rack to cool completely. For a fun twist, drizzle some extra maple syrup over the cups before serving. You can also pair them with fresh fruit for a complete meal. Enjoy these delightful bites! To get the best results, fill each cup the same. This helps them cook evenly. If you have a silicone muffin tin, use it. It makes removing the cups easy. Rotate the tin halfway through baking for uniform heat. This ensures all cups turn golden brown. You can control how sweet your oatmeal cups are. If you like them sweeter, add more brown sugar or maple syrup. If you want less sweetness, cut back on the sugar. You can also use ripe bananas or applesauce for natural sweetness. Taste the mixture before baking to get it just right. After baking, let the oatmeal cups cool completely. Store them in an airtight container. They last up to five days in the fridge. For longer storage, freeze them in a single layer on a baking sheet. Once frozen, transfer them to a freezer-safe bag. They can stay fresh for up to three months. Reheat in the microwave for a quick breakfast. Enjoy your tasty Maple Brown Sugar Oatmeal Cups! {{image_2}} You can change the flavor of your oatmeal cups easily. Try adding a mashed banana for a fruity twist. You might also use pumpkin puree for a fall taste. For chocolate lovers, mix in cocoa powder or mini chocolate chips. You could even add a spoonful of peanut butter for a creamy texture. Each option brings a new taste to your breakfast. Making these oatmeal cups fit your diet is simple. If you're vegan, just swap the milk for almond or oat milk. Use a plant-based sweetener instead of brown sugar. For gluten-free options, use certified gluten-free oats. These swaps let anyone enjoy your delicious oatmeal cups, regardless of diet. Toppings make your oatmeal cups even more fun. Sprinkle some chopped nuts for crunch and protein. Dried fruits like cranberries or raisins add sweetness. You can also use fresh fruits, like berries or sliced bananas, to brighten the dish. Drizzle a bit of honey or extra maple syrup for extra flavor. These toppings not only taste great but also make your breakfast look beautiful. For the full recipe, check out the recipe above and enjoy creating your own tasty variations! After baking, let your Maple Brown Sugar Oatmeal Cups cool down. Once cool, place them in an airtight container. They stay fresh in the fridge for up to five days. If you want to keep them longer, consider freezing them. To freeze, wrap each oatmeal cup in plastic wrap. Then, place them in a freezer-safe bag or container. They will last for up to three months in the freezer. When you’re ready to enjoy, just thaw them in the fridge overnight. To reheat, simply take an oatmeal cup out of the fridge or freezer. For fridge cups, microwave for 30-60 seconds. For frozen cups, heat them for about 1-2 minutes. You want them warm all the way through. Enjoy your delightful breakfast treat any time! To make oatmeal cups gluten-free, use certified gluten-free oats. Regular oats may contain gluten. Check the label to be sure. You can also swap regular baking powder with a gluten-free version. Yes, you can use instant oats. However, the texture will change. Instant oats may make the cups softer. Rolled oats give a better structure, so I recommend using them for the best results. Oatmeal cups can last up to five days in the fridge. Store them in an airtight container to keep them fresh. They may lose some texture over time but will still taste great! Serve oatmeal cups warm, drizzled with extra maple syrup. Add fresh fruit or a sprinkle of nuts for crunch. They make a great grab-and-go breakfast or snack! For the complete recipe, check out the Full Recipe section. It provides all the steps and tips you need to create these tasty oatmeal cups. These maple brown sugar oatmeal cups are easy to make and delicious. You can customize them with your favorite toppings or make swaps for dietary needs. Remember to store extras properly for later. This recipe is not only tasty but also fun to create. Try different flavors to keep things interesting. Enjoy making these oatmeal cups and share them with friends and family. You're sure to love the results!

Maple Brown Sugar Oatmeal Cups Easy Breakfast Delight

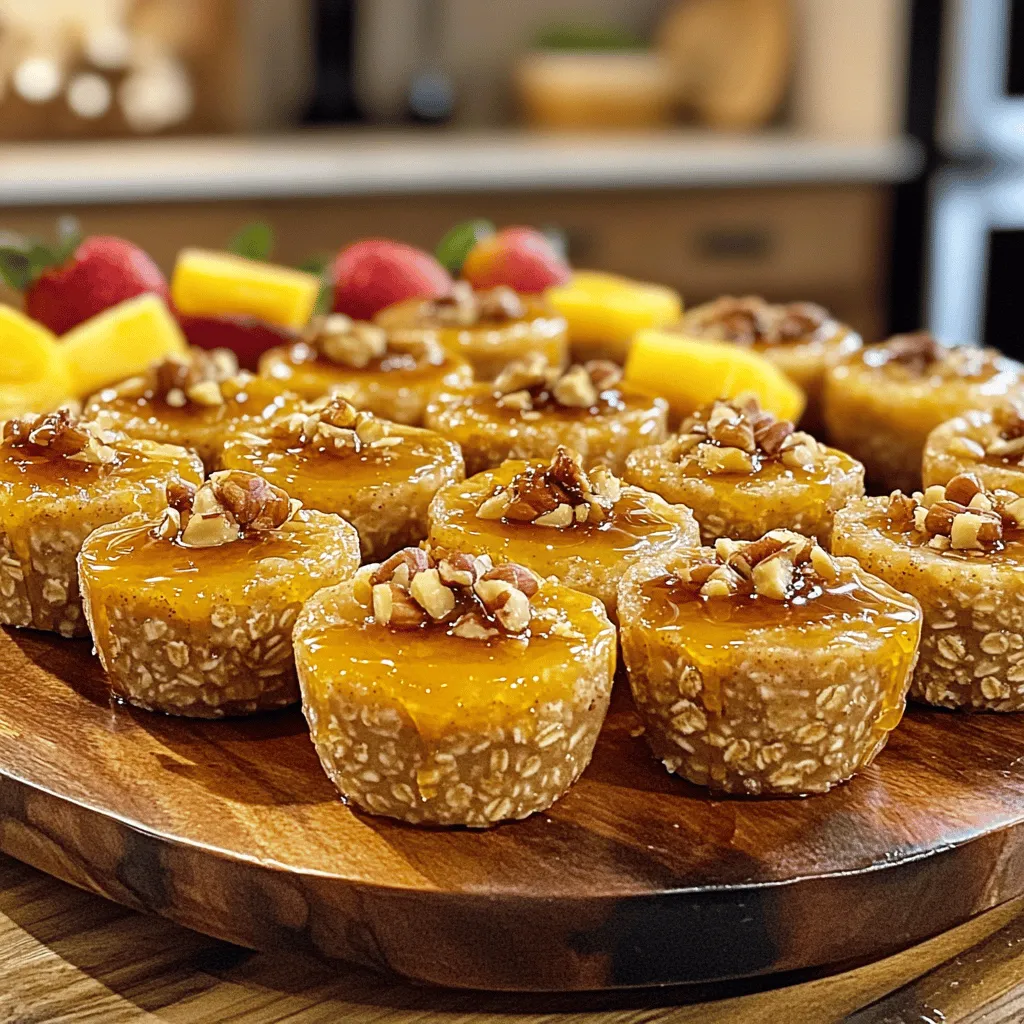
Start your morning with a warm hug from my Maple Brown Sugar Oatmeal Cups! These easy and tasty cups are

- Fresh or frozen blueberries - Banana - Rolled oats - Greek yogurt - Almond milk (or milk of choice) The main stars of this smoothie are the blueberries. They add sweetness and a vibrant color. You can use fresh or frozen blueberries. Both work well and taste great. Bananas make the smoothie creamy and add natural sweetness. Rolled oats give it a nice texture and keep you full. Greek yogurt adds protein and makes it thick. Almond milk is a perfect base, but you can use any milk you like. - Honey or maple syrup - Vanilla extract - Cinnamon - Pinch of salt You can make the smoothie sweeter with honey or maple syrup. I often add vanilla extract for a warm flavor. A bit of cinnamon gives it that cozy muffin taste. A pinch of salt can balance the sweetness, making the flavors pop. Feel free to mix and match these options based on what you love. For the complete recipe, check out the [Full Recipe]. First, gather your ingredients. You will need blueberries, banana, oats, Greek yogurt, and almond milk. Place these main ingredients in your blender. If you want a sweeter taste, add honey or maple syrup. This is your chance to make it just right for your taste buds! Next, blend all the ingredients on high speed until smooth and creamy. You should not see any chunks. If the smoothie feels too thick, add a bit more almond milk. Blend again until you reach the perfect consistency. Taste it! If it needs more sweetness, add more honey or maple syrup and blend briefly to mix. Now it's time to serve! Pour the smoothie into a tall glass or a bowl. For a fun touch, you can top it with extra blueberries, a sprinkle of oats, and a dash of cinnamon. This makes it look great and adds some texture. You can find the full recipe to guide you through this easy process! Blueberries are superstars in the health world. They are low in calories but high in vitamins. They help keep your heart healthy and boost your brain power. Plus, they contain antioxidants that fight off bad stuff in your body. Greek yogurt is creamy and packed with protein. It helps keep you full and supports gut health. Rolled oats add fiber, which aids digestion and keeps blood sugar steady. Together, these ingredients create a smoothie that nourishes your body and tastes great. To get the perfect texture, you might need to adjust the thickness. If your smoothie is too thick, simply add more almond milk. Blend again until smooth. For sweetness, taste your smoothie first. If it needs a boost, add honey or maple syrup in small amounts. Blend again until mixed evenly. Use a high-speed blender for the best results. It breaks down the ingredients well, creating a creamy texture. If you have a setting for smoothies, use it. It will save you time and effort. A beautiful smoothie is all about presentation. Serve your blueberry muffin smoothie in a clear glass. This way, everyone can see its vibrant color. It’s like art in a glass! To make it even more appealing, garnish with extra blueberries and a sprinkle of oats on top. You can also add a dash of cinnamon for flair. This not only looks good but adds to the flavor too. For serving, tall glasses work best, allowing for a lovely view of your delicious creation. {{image_2}} To make a vegan Blueberry Muffin Smoothie, you can use plant-based substitutes for dairy. Swap Greek yogurt for coconut or almond yogurt. These options keep your smoothie creamy and delicious. For milk, almond milk works well, but you can try oat or soy milk too. When it comes to sweeteners, you can skip honey. Instead, use agave syrup or maple syrup. This change keeps it vegan while adding sweetness. Adding protein to your smoothie can make it more filling. A scoop of your favorite protein powder blends in easily. It adds nutrition without changing the taste much. You can also incorporate nut butters like almond or peanut butter. A tablespoon gives a creamy texture and adds healthy fats. This makes your smoothie a great post-workout drink. Want to mix things up? Try adding different fruits. Strawberries, raspberries, or even peaches can give a fun twist. Each fruit brings its own flavor and health benefits. You can also play with spices beyond cinnamon. Nutmeg or ginger can add warmth and depth. Experimenting with these flavors keeps your smoothie exciting and fresh! For the full recipe, check out the Blueberry Muffin Smoothie 🫐🥤 section above. To keep your blueberry muffin smoothie fresh, store it in the fridge. Use an airtight container. Glass jars work well for this. Smoothies can separate over time, so shake well before drinking. If you have leftovers, consume them within 24 hours for the best taste. You can freeze smoothie ingredients for later use. Portion your blueberries, banana, and oats into bags. This way, you can blend them anytime. To use frozen smoothies, thaw in the fridge overnight. You can also blend them directly from the freezer. Just add a little extra milk for a smoother texture. Fresh smoothies last about a day in the fridge. If you freeze them, they can last up to three months. Look for changes in color or texture as signs of spoilage. If it smells sour or has an off taste, it's best to throw it away. Enjoy your blueberry muffin smoothie fresh or frozen for a tasty treat! A Blueberry Muffin Smoothie tastes just like a fresh blueberry muffin. It has a sweet, fruity flavor with a hint of spice. The key ingredients include: - 1 cup fresh or frozen blueberries - 1 banana, sliced - 1/2 cup rolled oats - 1/2 cup Greek yogurt - 1 cup almond milk (or milk of choice) - 1 tablespoon honey or maple syrup (optional for sweetness) - 1 teaspoon vanilla extract - 1/2 teaspoon cinnamon - A pinch of salt These ingredients blend together to create a creamy, delicious drink. The oats add a nice texture, while the yogurt gives it a rich taste. The blueberries provide antioxidants and natural sweetness. You can find the full recipe at the end of this article. Yes, you can make this smoothie ahead of time. Store it in the fridge for up to 24 hours. Use an airtight container to keep it fresh. If you want to save it longer, pour it into ice cube trays and freeze it. This way, you can enjoy it later by blending the frozen cubes with a splash of almond milk. Just remember, the texture may change slightly after storage. Both fresh and frozen blueberries work well in this smoothie. Fresh blueberries taste bright and juicy. They add a lovely flavor to the drink. On the other hand, frozen blueberries are convenient and often more affordable. They give the smoothie a nice chill and creamy texture. When using frozen blueberries, you won’t need to add ice, which keeps the flavor strong. This blog post covered how to make a delicious blueberry muffin smoothie. I shared key ingredients like fresh blueberries, rolled oats, and Greek yogurt. You learned step-by-step instructions and tips for blending. Each ingredient adds unique health benefits. We explored variations for different diets and preferences. Remember to store leftovers properly for freshness. Smoothies can be a fun and nutritious choice. Enjoy experimenting with flavors to find your favorite combination. Healthy habits can start with just one tasty smoothie!

Blueberry Muffin Smoothie Flavorful and Healthy Drink

Looking for a tasty treat that’s also good for you? The Blueberry Muffin Smoothie is your answer! This creamy drink

- 2 ripe mangoes, peeled and diced - 1 dragonfruit (pitaya), peeled and diced - 1 cup freshly squeezed lemon juice (about 4-5 lemons) - 4 cups cold water - ½ cup honey or agave syrup (adjust to taste) - Ice cubes - Fresh mint leaves and lemon slices for garnish To make Mango Dragonfruit Lemonade, you start with fresh fruit. Ripe mangoes and dragonfruit give this drink a bright, vibrant flavor. Look for mangoes that feel slightly soft when you press them. The dragonfruit should be bright pink or yellow, with firm skin. Next, we need liquids. Freshly squeezed lemon juice adds a tart punch. Use about four to five lemons for one cup of juice. Cold water helps blend everything smoothly, keeping it refreshing. For sweetness, honey or agave syrup works well. I suggest starting with half a cup and adjusting based on your taste. The drink should be sweet but not too sugary. Don't forget the ice! It makes the drink chill and refreshing. Fresh mint leaves and lemon slices add a nice touch when serving. They make the drink look pretty and add extra flavor. This simple combination of ingredients creates a delightful summer drink. For the full recipe, check below! - Step 1: Blend the mangoes and dragonfruit Start by peeling and dicing the mangoes and dragonfruit. Put them in a blender. Blend on high until smooth. This step creates a vibrant base for the drink. - Step 2: Strain the mixture Take the blended fruit and pour it through a fine sieve into a large pitcher. This removes any pulp. You want a smooth texture for your lemonade. - Step 3: Combine with lemon juice and water Add one cup of freshly squeezed lemon juice to the pitcher. Then pour in four cups of cold water. This combination balances the sweetness of the fruit with the tartness of the lemon. - Step 4: Sweeten and mix Add half a cup of honey or agave syrup to the pitcher. Stir well until it dissolves completely. Adjust the sweetness based on your taste. - Step 5: Chill before serving Place the pitcher in the refrigerator. Let it chill for at least 30 minutes. This allows the flavors to blend beautifully. - Step 6: Serve over ice with garnish Fill glasses with ice cubes and pour the lemonade over the top. Garnish with fresh mint leaves and lemon slices. This adds a nice touch and makes it look pretty. For a detailed view of all ingredients and steps, check the Full Recipe. To make the best Mango Dragonfruit Lemonade, start with ripe mangoes. Look for mangoes that give slightly when you press them. Their skin should be a mix of green and yellow. This means they are sweet and ready to eat. For dragonfruit, choose ones that are bright in color and firm. If the skin has a few blemishes, it’s fine. The flesh inside should be white or pink with tiny black seeds. When picking lemons, go for ones that are heavy for their size. The best lemons have a bright yellow color and smooth skin. This means they have lots of juice. If you can, roll the lemon on a counter. This helps release more juice when you squeeze it. Not everyone likes the same level of sweetness. You can use honey or agave syrup, but there are other options too. Maple syrup or coconut sugar works well too. If you want to keep it sugar-free, try using stevia or monk fruit. To find the perfect balance, start with half a cup of sweetener. After mixing, taste it. If it needs more sweetness, add a little more. Just remember, you can always add more, but you can't take it away. You can make your lemonade even better by adding other fruits or herbs. Try adding strawberries or raspberries for a berry twist. Fresh basil or mint can also add a unique flavor. If you want to change the tartness, add more lemon juice for a tangy taste. If it’s too tart, add a bit more sweetener. Play around with these flavors to make a drink you love. {{image_2}} You can make Mango Dragonfruit Lemonade even better with fruit add-ins. Berries like strawberries and blueberries work well. They add color and flavor. Citrus fruits like oranges and limes also brighten the drink. You might try adding a few slices of peach in summer. They bring a sweet twist. Feel free to mix and match your favorite fruits. Want to turn this drink into a cocktail? It’s easy! You can add rum or vodka for a fun twist. Just mix one cup of your chosen spirit with the lemonade. If you like bubbly drinks, try adding prosecco. It gives a nice fizz to the beverage. Enjoy it on a warm day with friends! For a vegan version, use agave syrup instead of honey. It keeps the drink sweet and plant-based. You can also try stevia or monk fruit for a sugar-free option. If you want creaminess without dairy, blend in some coconut cream. It adds a tropical feel and enhances the flavor. This way, everyone can enjoy this refreshing drink. For the complete recipe, check out the [Full Recipe]. To keep Mango Dragonfruit Lemonade fresh, store it in the fridge. Use a glass pitcher with a lid. This helps keep the drink cool and tasty. If you don't have a lid, cover the pitcher with plastic wrap. Avoid metal containers, as they can alter the taste. In the fridge, your Mango Dragonfruit Lemonade lasts about 3 to 5 days. Look for signs of spoilage, like an off smell or strange color. If it tastes sour, it’s best to throw it out. You can freeze Mango Dragonfruit Lemonade! Pour it into an ice cube tray or freezer-safe container. Leave some space at the top, as it will expand when frozen. When you're ready to enjoy, thaw it in the fridge or use the microwave. Stir well before serving. Mango Dragonfruit Lemonade is a bright, refreshing drink. It combines sweet mangoes and exotic dragonfruit. The drink gets its tangy kick from fresh lemon juice. This mix creates a vibrant pink color and fruity flavor. It’s perfect for hot summer days and gatherings with friends. Yes, you can make this drink ahead of time. Prepare the lemonade and store it in the fridge. It tastes even better after chilling for a bit. Just give it a stir before serving. You can also freeze it in ice cube trays. This way, you have cold lemonade ready when you need it. You can find Mango Dragonfruit Lemonade at many stores. Some popular brands offer ready-to-drink options. Look for it in the juice or beverage aisle. You may also find it at cafes or juice bars. If you prefer homemade, check my Full Recipe for a simple guide. Mango Dragonfruit Lemonade is not just tasty; it's healthy too! Mangoes are rich in vitamins A and C. Dragonfruit has antioxidants that boost your immune system. Lemons provide vitamin C, which helps with hydration. The honey adds natural sweetness without refined sugar. This drink is a great way to cool off and get nutrients. If fresh fruit is not available, don’t worry! You can use frozen mangoes and dragonfruit. Just blend them while frozen for a slushy texture. You can also use bottled juices as a substitute. Look for pure juices without added sugar. This way, you still get the great taste of Mango Dragonfruit Lemonade. This blog post covered how to make Mango Dragonfruit Lemonade. We explored key ingredients, from ripe mangoes to fresh lemon juice. I shared step-by-step instructions for preparation, sweetening, and chilling the drink. You learned tips for selecting the best fruit and adjusting sweetness. We also discussed fun variations and storage tips. Mango Dragonfruit Lemonade is refreshing and easy to make. Enjoy it as a treat or share it with friends. Let your creativity shine by trying different fruits or serving styles!

Mango Dragonfruit Lemonade Refreshing Summer Drink

Looking for a cool, tasty drink to beat the summer heat? Look no further! Mango Dragonfruit Lemonade is here to

To make a tasty Dragon Fruit Refresher, you need a few simple items. Here’s the list: - 1 cup dragon fruit, peeled and diced (white or pink flesh) - 1 cup coconut water - 1/2 cup fresh lime juice (about 4-5 limes) - 1 tablespoon agave syrup or honey (adjust to taste) - 1/2 cup soda water (or sparkling water for a fizzy boost) - Fresh mint leaves for garnish - Ice cubes You can make your refresher even more fun! Here are some optional garnishes and add-ins: - Slices of lime for a zesty touch - Additional dragon fruit pieces for color - Edible flowers to brighten the drink Selecting the best ingredients makes a big difference. Here are some tips: - Dragon Fruit: Look for bright skin. It should feel firm but not hard. - Coconut Water: Choose fresh coconut water, not from concentrate, for the best taste. - Limes: Pick limes that are heavy for their size. Juicy limes are the best. - Mint: Fresh mint should smell strong. Look for vibrant green leaves with no browning. Now you have everything you need to create a refreshing drink that’s sure to impress! For the complete steps, check out the Full Recipe. Start by gathering all your ingredients. You will need 1 cup of diced dragon fruit, 1 cup of coconut water, and 1/2 cup of fresh lime juice. For sweetness, add 1 tablespoon of agave syrup or honey. This mix tastes best when you blend it well. In a blender, combine the diced dragon fruit, coconut water, lime juice, and agave syrup. Blend on high until smooth. This step is key to getting a creamy base. The bright color of the dragon fruit will make your drink look appealing right away. Next, take a fine mesh sieve and place it over a large pitcher. Pour the blended mixture through the sieve. This helps remove any pulp and gives you a smooth drink. Use a spoon to push the mixture through if needed. This step ensures that your refresher is light and easy to sip. Now it's time for the fizzy part! Add 1/2 cup of soda water to your pitcher. Stir gently to mix everything together. Taste your refresher and add more agave syrup if you want it sweeter. To serve, fill glasses with ice cubes. Pour the dragon fruit mixture over the ice. Garnish with fresh mint leaves. You can also add slices of lime or extra dragon fruit for a fun touch. Enjoy your refreshing drink! For the complete steps, check the Full Recipe. To make the best Dragon Fruit Refresher, balance is key. You want sweet and tart in every sip. Start with fresh dragon fruit. It adds a mild sweetness. Next, use lime juice for a zing. The coconut water gives it a smooth base. Adjust the sweetness with agave syrup or honey. Taste your mix before serving. If it's too sweet, add more lime. If it's too tart, add more sweetener. This way, you can make it just right for you. The look of your Dragon Fruit Refresher matters. First, choose clear glasses to show off the colors. Fill each glass with ice cubes. Pour the refresher over the ice. Garnish each drink with fresh mint leaves. They add a pop of green. You can also add slices of lime or extra dragon fruit on the rim. This makes your drink look fancy. A stunning presentation makes it more fun to drink! Avoid these common pitfalls to make the best refresher. First, don’t skip the straining step. This keeps your drink smooth. Second, don’t add too much soda water. It can water down the flavor. Start with half a cup and adjust as needed. Third, don’t forget to taste your mix. Adjust the sweetness before serving. Lastly, don’t rush the garnish. A little care in adding mint and lime can make a big difference. Follow these tips, and you’ll impress everyone with your drink! {{image_2}} You can easily switch up the dragon fruit refresher with tropical fruits. Pineapple, mango, and passion fruit add a fun twist. For a pineapple refresher, use fresh pineapple chunks. Blend them with the dragon fruit for a sweet and tangy taste. Mango adds creaminess, while passion fruit gives a zesty kick. Sweeteners can change your drink's taste. You can use honey, agave syrup, or maple syrup. If you want a healthier option, try stevia or monk fruit sweetener. Each will give you a different flavor. Start with a little and add more to fit your taste. This makes your refresher just right for you! Want some energy? Try adding tea to your refresher. Green tea or black tea works well. Brew your tea and let it cool before mixing. You can blend it with the coconut water for a refreshing drink. This gives you a caffeine boost while keeping the drink light and tasty. To store leftover Dragon Fruit Refresher, pour it into an airtight container. This keeps it fresh and prevents spills. Store it in the fridge for up to three days. If you want to enjoy it later, give it a good stir before serving. This will mix any settled ingredients. You can freeze the dragon fruit for later use. Cut it into chunks and place them in a freezer-safe bag. Remove as much air as possible before sealing. This helps keep the fruit fresh. Coconut water can also freeze well. Pour it into ice cube trays. Once frozen, store the cubes in a bag. This way, you can add them to future drinks. To maintain the freshness of your refresher, always use fresh ingredients. Store lime juice in the fridge and use it within a week. Keep mint leaves in a glass of water for a few days. Cover them with a plastic bag to keep them fresh longer. For the best taste, serve your drink chilled and enjoy it right after mixing. Follow these steps, and your Dragon Fruit Refresher will stay delicious! For the full recipe, check out the detailed instructions. Yes, you can use frozen dragon fruit. It works well in this recipe. The frozen fruit will make your drink colder and thicker. Just allow it to thaw a bit before blending. This helps it mix well with the other ingredients. The refresher lasts about three days in the fridge. Store it in an airtight container for best results. Over time, the flavors may change slightly. Give it a good stir before serving again. If you want to substitute coconut water, try using flavored water. You could also use regular water with a splash of lime juice. This keeps the drink refreshing and light. Another option is to use fruit juice, like pineapple juice, for a sweeter taste. You can make a great Dragon Fruit Refresher at home. Start with fresh ingredients and add your favorite garnishes. Remember to blend well and strain for a smooth drink. Pay attention to flavor balance for the best taste. If you want to change it up, try tropical fruits or tea. Store any leftovers properly to keep them fresh. This drink is fun and easy to make, and it tastes amazing. Enjoy your homemade refresher and impress others with your skills!

Dragon Fruit Refresher Copycat Easy and Delicious Recipe

Do you crave the vibrant taste of a Dragon Fruit Refresher but want to make it at home? You’re in

Older posts
Newer posts
← Previous Page1 … Page49 Page50 Page51 … Page84 Next →

dsad

© 2026 Lisa Dishes • Built with GeneratePress

Our Policies

  • Copyright Policy
  • Cookie Policy
  • GDPR Policy
  • Privacy Policy
  • Disclaimer
  • Terms Of Use

More Information

  • Home
  • About
  • Contact
  • Appetizers
  • Dessert
  • Dinner
  • Drinks
©2026, Lisa Dishes About Back To Top