Skip to content
DisclaimerTerms Of UseGDPR PolicyCookie Policy

Lisa Dishes

  • Home
  • Drinks
  • Appetizers
  • Dinner
  • Dessert
  • About
  • Contact
  • Privacy Policy
DisclaimerTerms Of UseGDPR PolicyCookie Policy

NO-ING-IMG

To make banana oat pancakes, you need simple and healthy ingredients. Here is the list: - 1 cup rolled oats - 1 ripe banana, mashed - 1 cup milk (dairy or non-dairy) - 1 large egg - 1 tablespoon baking powder - 1 teaspoon vanilla extract - ½ teaspoon cinnamon - ¼ teaspoon salt - 2 tablespoons maple syrup (optional) - Coconut oil or butter for cooking These ingredients work well together. The oats give a nice texture, while the banana adds sweetness. You can use any milk you like. The baking powder helps the pancakes rise. Adding a little cinnamon makes them smell amazing. You can adjust the sweetness with maple syrup if you want. With the full recipe, you can easily whip up a tasty breakfast. 1. Make oat flour using a blender. Start by adding 1 cup of rolled oats to your blender. Blend until the oats look like fine flour. This is your oat flour. 2. Combine dry ingredients in a mixing bowl. In a large bowl, mix the oat flour, 1 tablespoon of baking powder, ½ teaspoon of cinnamon, and ¼ teaspoon of salt. Stir well to combine. 3. Mix wet ingredients separately and then combine. In another bowl, mash 1 ripe banana. Add 1 cup of milk, 1 large egg, 1 teaspoon of vanilla extract, and 2 tablespoons of maple syrup if you like it sweet. Mix until smooth. 4. Let the batter sit to thicken. Pour the wet mix into the dry ingredients. Stir gently until just mixed. Let the batter sit for about 5 minutes. This helps it thicken. 5. Cook pancakes on a skillet and flip at the right time. Heat a non-stick skillet over medium heat. Add a small amount of coconut oil or butter. Pour ¼ cup of batter for each pancake. Cook for 2-3 minutes until bubbles form. Flip and cook for another 2-3 minutes until golden. Now, you have delicious banana oat pancakes ready to enjoy! For the full recipe and measurements, refer to the earlier section. To get the best pancake texture, use ripe bananas. They add moisture and natural sweetness. Blend the oats into a fine flour. This helps the pancakes rise and stay fluffy. Letting the batter rest is key. It thickens the mix and gives the oats time to absorb moisture. Resting for five minutes makes a big difference. Cooking time matters, too. If your pancakes are thick, cook them a bit longer. Watch for bubbles on the surface; that’s your cue to flip. Aim for a golden brown color on both sides. Toppings can make your pancakes pop! I love adding fresh fruits like sliced strawberries or blueberries. Nuts, like walnuts or almonds, give a nice crunch. For special occasions, stack pancakes high. Drizzle with maple syrup and sprinkle with cinnamon. You can also add a dollop of yogurt on the side. This makes for a fun breakfast that looks great on the table. {{image_2}} If you want to make Banana Oat Pancakes gluten-free, you can use gluten-free rolled oats. These oats are just as tasty and will keep your pancakes fluffy. Make sure to check the label to ensure they are certified gluten-free. For a vegan version, you can swap the milk and egg. Use almond milk or oat milk instead of regular milk. For the egg, try using a flax egg. Just mix one tablespoon of ground flaxseed with three tablespoons of water. Let it sit for five minutes to thicken, and it works great in the batter. To make your pancakes even more exciting, consider adding chocolate chips or chopped nuts to the batter. Chocolate chips add a sweet touch, while nuts provide a nice crunch. Both mix well with the banana flavor. You can also spice things up by adding nutmeg or pumpkin spice. These spices add warmth and depth to the pancakes. Just sprinkle a little into the batter for a cozy twist. These variations let you customize your pancakes to fit your taste. For the full recipe, check out the main article! After enjoying your Banana Oat Pancakes, you might have some left. To keep them fresh, place them in an airtight container. Refrigerate them for up to three days. When you want to eat them again, reheat them in the microwave. Heat each pancake for about 20 to 30 seconds. You can also use a toaster or skillet. Just warm them until they are hot all the way through. Freezing pancakes is a great way to save time. Start by letting the pancakes cool completely. Then, stack them with parchment paper between each pancake. This prevents them from sticking together. Place the stack in a freezer-safe bag or container. Be sure to remove any air to keep them fresh. You can freeze them for up to two months. When you're ready to eat, take them out and reheat. You can use the microwave or toaster. For best results, heat them until they are warm and soft. Enjoy your pancakes any time! For the full recipe, check the earlier section. How to make Banana Oat Pancakes gluten-free? To make these pancakes gluten-free, use certified gluten-free oats. Blend them into flour as usual. This keeps the texture while avoiding gluten. Can I substitute the egg in the recipe? Yes, you can use a flax egg or a chia egg. Mix 1 tablespoon of ground flaxseed or chia seeds with 2.5 tablespoons of water. Let it sit until it thickens. What’s the best way to reheat pancakes? To reheat pancakes, use a microwave or skillet. In the microwave, heat them for about 20 to 30 seconds. In a skillet, warm them over low heat for a few minutes. How to enhance the flavor of my pancakes? You can add vanilla extract, cinnamon, or nutmeg to the batter. Chopped nuts or chocolate chips also work well. Fresh fruit can add a nice touch too. Health benefits of oats and bananas. Oats are great for heart health. They are high in fiber, which helps digestion. Bananas provide potassium and vitamins. Together, they make a filling and nutritious meal. Caloric content and serving information for Banana Oat Pancakes. One serving (about 2 pancakes) contains around 200 calories. This can vary based on the ingredients you use. The pancakes are low in added sugars and high in nutrients. For the full recipe, check back at the beginning. This blog post outlined how to make delicious Banana Oat Pancakes. We covered the key ingredients, step-by-step cooking instructions, and tips for perfect pancakes. You learned about dietary variations and how to store leftovers. In final thoughts, these pancakes are easy to make and great for everyone. Enjoy customizing them with your favorite toppings and flavors! Kids and adults alike will love this healthy, tasty treat. Happy cooking!

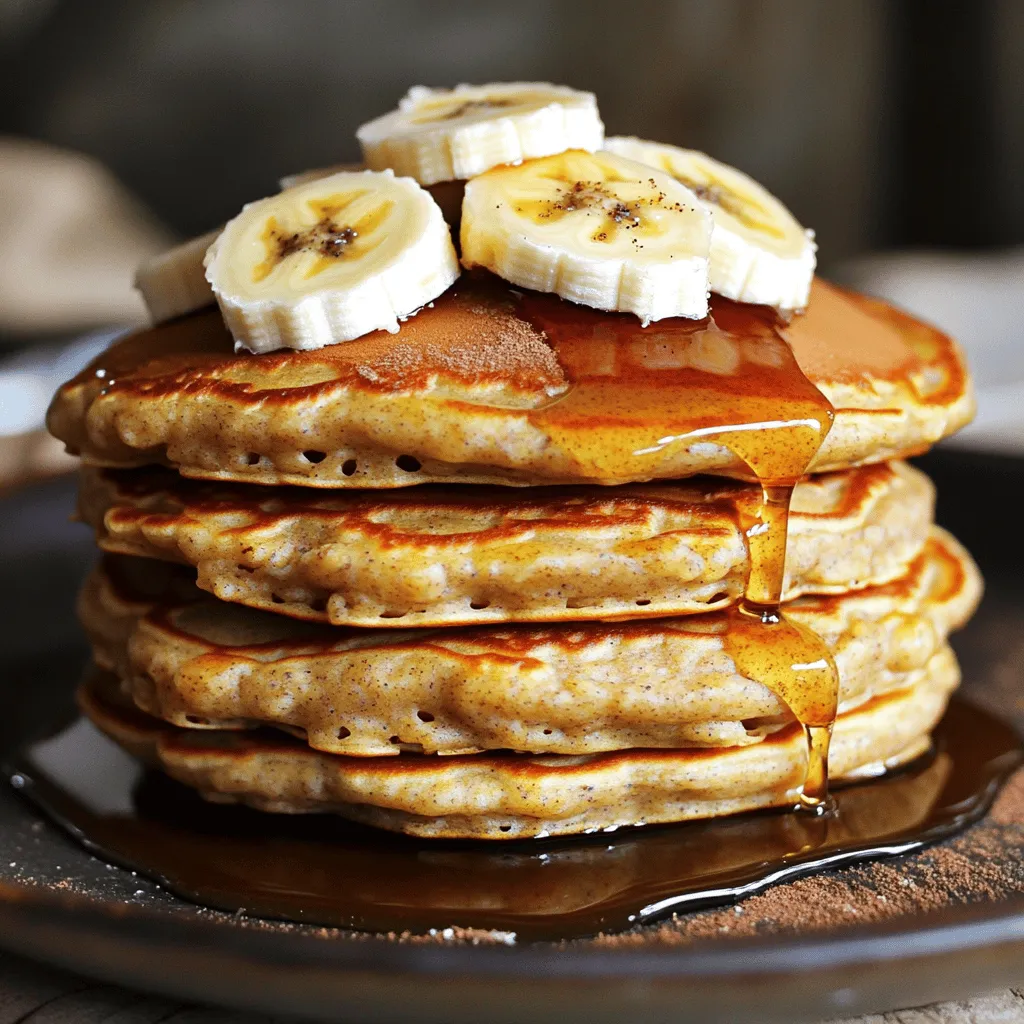
Banana Oat Pancakes Healthy and Tasty Breakfast Option

Looking for a quick and tasty breakfast? Try my Banana Oat Pancakes! They’re easy to make and packed with healthy

- 1 medium head of cauliflower, chopped into florets - 2 cups vegetable broth - 1 tablespoon olive oil - 3 cloves garlic, minced - 1 cup unsweetened almond milk (or any plant-based milk) - 1/4 cup nutritional yeast - 1 teaspoon onion powder - 1 teaspoon garlic powder - Salt and pepper to taste - Fresh parsley, chopped (for garnish) - Pasta of choice (fettuccine or penne recommended) - Chili flakes for heat - Extra nutritional yeast for garnishing This creamy cauliflower Alfredo recipe is packed with flavor and nutrients. Cauliflower is the star here. It gives the sauce a rich and smooth texture. The vegetable broth adds depth while garlic brings a warm aroma. Nutritional yeast gives a cheesy taste, making it perfect for a comfort dish. I love using unsweetened almond milk for creaminess. You can use other plant-based milk too. Olive oil adds a hint of richness. Salt and pepper balance the flavors. Fresh parsley makes it look nice and bright. Consider adding chili flakes if you like heat. A sprinkle of extra nutritional yeast on top is a fun touch. These ingredients help you create a dish that is not only tasty but also healthy. You can find the complete recipe in the Full Recipe section. 1. Boil salted water: Start by bringing a large pot of salted water to a boil. This is the water for your pasta. 2. Cook pasta: Add your pasta to the boiling water. Cook it according to the package instructions until it is al dente. Once done, drain the pasta and set it aside. 3. Prepare cauliflower: Chop the head of cauliflower into small florets. In a separate pot, add the cauliflower and cover it with vegetable broth. Bring this mixture to a boil. Then, lower the heat and let it simmer for about 10-12 minutes until the cauliflower is soft. 1. Transfer cauliflower: After cooking, use a slotted spoon to take the cauliflower out of the broth. Make sure to keep the broth for later. 2. Add ingredients to blender: Place the cooked cauliflower in a blender. Add olive oil, minced garlic, almond milk, nutritional yeast, onion powder, garlic powder, and a pinch of salt and pepper. 3. Blend until smooth: Blend the mixture until it is creamy and smooth. If the sauce is too thick, add a little reserved broth to reach your desired consistency. 1. Warm the sauce: In a large skillet, pour in the creamy cauliflower mixture. Warm it gently over medium heat, stirring occasionally. 2. Toss pasta with sauce: Add the cooked pasta to the skillet. Toss everything together until the pasta is well-coated in the creamy sauce. 3. Serve: You can now serve this dish hot. It looks great with a sprinkle of fresh parsley on top. For detailed ingredients and measurements, check the Full Recipe. To adjust the sauce consistency, you can add a bit of the reserved vegetable broth. Start with a small amount. Blend the mixture again until you reach your desired creaminess. If it’s too thick, just keep adding broth until it feels right. Nutritional yeast is vital for flavor. It adds a cheesy, nutty taste to the sauce. This ingredient makes your creamy cauliflower Alfredo rich and satisfying. You can find it in most grocery stores or online. For extra flavor, try adding herbs or spices. Fresh basil or thyme can brighten the dish. A pinch of nutmeg gives warmth, while black pepper adds a kick. Experiment with what you like best! Pair your creamy cauliflower Alfredo with a side salad or roasted veggies. This adds freshness and balances the meal well. You can also serve it with garlic bread for a cozy touch. When serving, use large bowls for a warm and inviting look. Drizzle a bit of olive oil on top for shine. It makes the dish look fancy without much effort. Garnishing with fresh parsley adds a pop of color. You can also sprinkle extra nutritional yeast on top for a cheesy finish. A dash of chili flakes can give it a nice zing and appeal. For the full recipe, check out the earlier sections. {{image_2}} You can add cooked chicken or tofu to your creamy cauliflower Alfredo. This step will make your meal heartier. For chicken, use grilled or shredded pieces. If you prefer tofu, try firm or extra-firm tofu. Just cube it and toss it in at the end. For vegan options, consider chickpeas or lentils. They add protein and texture. You could also use a plant-based meat substitute. These options boost nutrition while keeping the dish light and tasty. To change the flavor, try making a garlic Parmesan version. Just add grated vegan Parmesan cheese or nutritional yeast. This adds a rich, cheesy taste. You can also use fresh herbs like basil or thyme for a burst of freshness. If you like spice, sprinkle in some red pepper flakes. This adds heat and makes the dish exciting. You can also experiment with smoked paprika for a smoky flavor. If you need gluten-free options, choose gluten-free pasta. Many brands offer great alternatives made from rice or legumes. They still taste great with the creamy sauce. For nut-free diets, replace almond milk with oat milk or any other nut-free milk. Always check labels to ensure the products are safe for your needs. This way, everyone can enjoy this dish without worry. For the full recipe, check out the details above. To store leftovers, let the creamy cauliflower Alfredo cool first. Then, transfer it into an airtight container. This helps keep the flavors fresh. I recommend using glass containers for better storage. Glass is non-reactive, so it won’t change the taste of your food. Label the container with the date to track freshness. You can freeze the cauliflower Alfredo too! Start by letting the sauce cool completely. Then, pour it into freezer-safe bags or containers. Squeeze out as much air as you can before sealing. This helps prevent freezer burn. To thaw, move the frozen sauce to the fridge overnight. For quick thawing, place the container in a bowl of warm water. When ready, heat it gently on the stove. To reheat, I find the stovetop works best. It keeps the sauce creamy and smooth. Just warm it over low heat, stirring often. If using a microwave, do so in short bursts. Stir in between to ensure even heating. Either way, avoid high heat to keep the sauce from separating. Enjoy your delicious creamy cauliflower Alfredo again! For the full recipe, refer back to the main section. Creamy cauliflower Alfredo can last about 3 to 5 days in the fridge. Store it in an airtight container. Make sure it cools down before sealing. This helps keep it fresh and tasty. Yes, you can easily make this dish vegan! The recipe already uses plant-based milk and nutritional yeast. Just ensure your pasta is also vegan-friendly. This way, you get great taste without animal products. To thicken your sauce, try these tips: - Add more nutritional yeast for extra creaminess. - Blend in a small amount of cooked potato. - Use a cornstarch slurry; mix cornstarch with water and heat it in the sauce. These options help you achieve the desired thickness. Yes, you can swap cauliflower for other veggies. Consider using broccoli or butternut squash for a different twist. Both add flavor and nutrients, but keep in mind that taste and texture will change. This blog post covered how to make creamy cauliflower Alfredo. You learned the key ingredients, including cauliflower, almond milk, and nutritional yeast. The step-by-step guide showed how to prepare, blend, and combine the sauce with pasta. I shared tips for achieving creaminess and enhancing flavors, along with variations to suit different diets. Remember, leftovers store well in the fridge and can be frozen for later use. With this recipe, you can enjoy a healthy twist on a classic dish. Happy cooking!

Creamy Cauliflower Alfredo Rich and Flavorful Dish

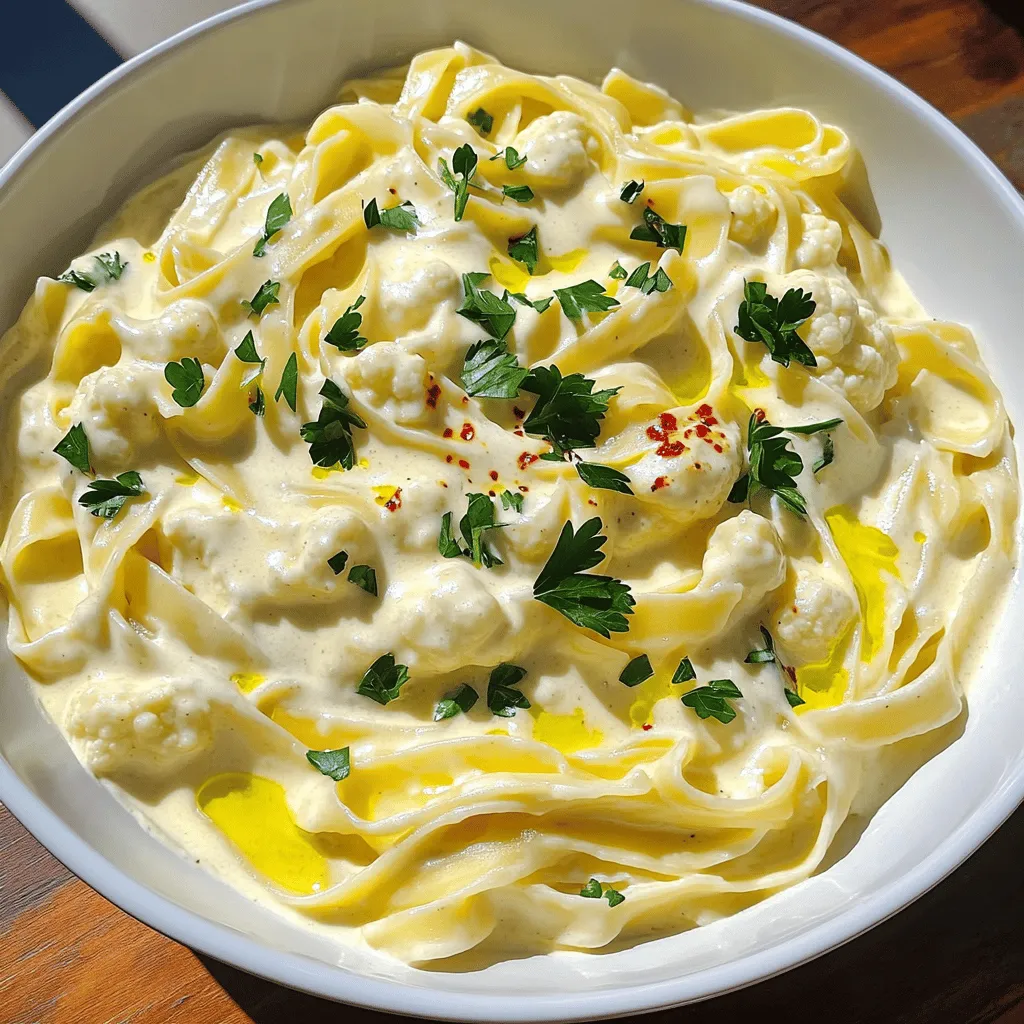
Looking for a delicious vegetarian dish that’s rich and creamy? Try my Creamy Cauliflower Alfredo! This recipe uses simple ingredients

- 2 cups cooked chicken, shredded or diced - 1/2 cup dried cranberries - 1/2 cup pecans, chopped - 1/2 cup celery, finely chopped - 1/4 cup red onion, finely chopped - 1/2 cup Greek yogurt - 2 tablespoons mayonnaise - 1 tablespoon honey - 1 tablespoon Dijon mustard - Salt and pepper to taste - Fresh parsley, chopped (for garnish) To make a great cranberry pecan chicken salad, start with these simple ingredients. You can use leftover chicken or rotisserie chicken to save time. The dried cranberries add a sweet touch, while the pecans give a nice crunch. Celery and red onion bring freshness and a bit of bite. For the dressing, I mix Greek yogurt and mayonnaise together. This combo makes it creamy without being too heavy. Honey and Dijon mustard add flavor and a hint of sweetness. Season with salt and pepper to make it pop. - Mixing bowls - Whisk - Measuring cups and spoons Having the right tools helps make cooking easier. A large mixing bowl is perfect for combining everything. A whisk is great for making the dressing smooth. Measuring cups and spoons ensure you get the right amounts of each ingredient. - Calories per serving: Approximately 300 - Macronutrient breakdown: - Protein: 25g - Carbohydrates: 15g - Fats: 18g This salad is not just tasty; it's also good for you. Each serving has a nice balance of protein, carbs, and fats. It’s a filling meal that can keep you energized throughout the day. Check the full recipe for more details on how to make this delicious dish. - In a large mixing bowl, combine 2 cups of cooked chicken, 1/2 cup dried cranberries, 1/2 cup chopped pecans, 1/2 cup finely chopped celery, and 1/4 cup finely chopped red onion. - In a separate bowl, whisk together 1/2 cup Greek yogurt, 2 tablespoons mayonnaise, 1 tablespoon honey, 1 tablespoon Dijon mustard, and salt and pepper to taste until smooth. - Pour the dressing over the chicken mixture and gently fold everything together until well combined. You can serve this salad in many delicious ways. It works great on a bed of mixed greens. You can also make a tasty sandwich or scoop it onto a buttery croissant. Each option brings a unique twist to your meal. Chilling the salad is key to enhancing the flavors. I recommend covering the bowl and placing it in the fridge for at least 30 minutes. This step allows all the great tastes to mix and meld. The longer it chills, the better it gets! For the full recipe, check out the detailed steps. To get the best flavor in your cranberry pecan chicken salad, fresh ingredients are key. Use juicy chicken, sweet cranberries, and crunchy pecans. Toasting the pecans enhances their flavor. Just heat them in a pan for a few minutes. For shredding chicken easily, try using two forks. Hold the chicken with one fork and shred with the other. You can also use a stand mixer with the paddle attachment to shred cooked chicken quickly. Just be careful not to overdo it! One common mistake is not properly chilling the salad. Chilling helps the flavors blend and makes the salad taste even better. Aim for at least 30 minutes in the fridge before serving. Another mistake is overdressing the salad. Too much dressing can make it soggy. Start with a little dressing and add more as needed. You can always add more, but you can’t take it out! To make your salad even better, consider adding some apple slices or grapes. Their sweetness pairs well with the chicken and cranberries. You can also sprinkle in some feta cheese for a tangy kick. These additions create a balance of flavors and textures that make every bite exciting! {{image_2}} You can easily make this salad vegetarian. Simply swap the chicken for chickpeas or tofu. Chickpeas add protein and a nice texture. Tofu gives a soft bite, perfect for this dish. Use firm tofu for the best results. Just drain and press it to remove extra water. Then, chop it into cubes. To make this salad gluten-free, choose gluten-free mayonnaise. There are great brands available that taste just as good. You can also use gluten-free bread for a sandwich. Look for bread made from rice or almond flour. These options help keep your meal safe and tasty. If you want to change the flavor, try a citrus dressing. Lemon or orange juice can brighten the salad. You can also use different nuts, like walnuts or almonds. Each nut adds its own unique taste. Experiment and find your favorite mix! For the full recipe, check out the Cranberry Pecan Chicken Salad. Enjoy creating your own variations! Cranberry pecan chicken salad keeps well in the fridge. Store it in an airtight container. It lasts about three to four days. After that, the flavors may fade. Always check for freshness before eating. I don't recommend freezing this salad. The texture changes when thawed. The chicken can become dry, and the veggies may get mushy. If you have extra, consider using it as a filling for a sandwich instead. For easy lunches, you can prep this salad in advance. Chop the chicken and veggies on a Sunday. Mix them but wait to add the dressing until you're ready to eat. This keeps everything fresh. You can also portion it into containers for grab-and-go meals. Enjoy this salad on its own or with some greens for a nice balance. Check out the Full Recipe for more details. To make Cranberry Pecan Chicken Salad, follow these simple steps: 1. In a large bowl, mix 2 cups of cooked chicken, 1/2 cup of dried cranberries, 1/2 cup of chopped pecans, 1/2 cup of finely chopped celery, and 1/4 cup of finely chopped red onion. 2. In another bowl, whisk together 1/2 cup of Greek yogurt, 2 tablespoons of mayonnaise, 1 tablespoon of honey, 1 tablespoon of Dijon mustard, and salt and pepper to taste. 3. Pour the dressing over the chicken mix. Gently fold everything together. 4. Taste your salad and add more salt or pepper if needed. 5. Cover the bowl and chill it in the fridge for 30 minutes. This helps the flavors mix well. 6. Serve on greens, in a sandwich, or on a croissant. Garnish with fresh parsley. For the full recipe, check out the detailed instructions above. Yes, you can use leftover chicken! It works great in this salad. Just shred or dice the chicken into small pieces. Using leftover chicken saves time and reduces waste. You can also use rotisserie chicken for an easy option. Just make sure it’s cooked and safe to eat. Cranberry Pecan Chicken Salad pairs well with many sides. Here are some tasty options: - Mixed greens or a fresh garden salad - Whole grain crackers or pita chips - A cup of vegetable soup - Sweet potato fries for a warm side - A fruit salad to add freshness These sides will enhance your meal and make it more satisfying. This blog post covered a delicious and easy recipe for Cranberry Pecan Chicken Salad. You learned about the key ingredients, helpful tools, and step-by-step prep. I shared tips to perfect your dish and common mistakes to avoid. You can even customize it for your taste or dietary needs. In conclusion, this salad is versatile and quick to make. Enjoy it as a meal or a side. With a little prep, you can create a tasty dish again and again!

Cranberry Pecan Chicken Salad Flavorful and Fresh Meal

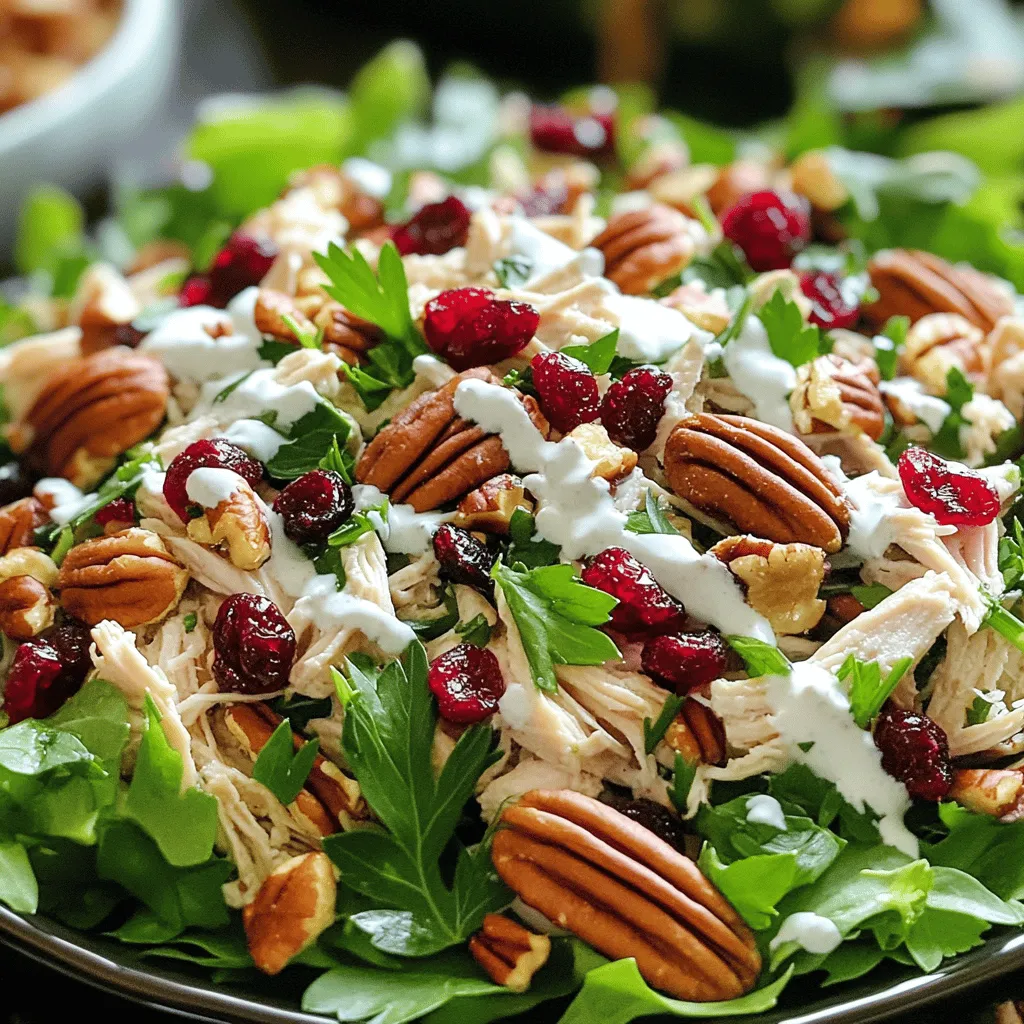
Cranberry Pecan Chicken Salad is a tasty way to enjoy a fresh meal that is both healthy and satisfying. This

To make Garlic Butter Shrimp Scampi, gather these main items: - 1 pound large shrimp, peeled and deveined - 4 tablespoons unsalted butter - 3 tablespoons olive oil - 6 cloves garlic, minced - 8 ounces linguine or spaghetti These ingredients create a rich and tasty dish. The shrimp gives protein, while the pasta adds heartiness. You need a few key seasonings to add flavor: - 1 teaspoon red pepper flakes (adjust to spice preference) - Juice of 1 lemon - Zest of 1 lemon - 1/2 cup fresh parsley, finely chopped - Salt and pepper to taste These seasonings brighten the dish. Lemon juice adds tang, while red pepper flakes give a kick. For those who want to mix things up, consider these add-ins: - Grated Parmesan cheese (for serving) - Cherry tomatoes for freshness - Spinach for added greens These add-ins can elevate your dish even more. They make it colorful and exciting, so feel free to get creative! For the complete recipe, check out the Full Recipe section. To start, boil a large pot of water. Make sure to add salt to the water. This helps flavor the pasta. Once boiling, add 8 ounces of linguine or spaghetti. Cook it according to the package directions until it is al dente. This usually takes about 8-10 minutes. Remember to save 1 cup of pasta water before draining. This water helps adjust the sauce later if needed. While the pasta cooks, heat a large skillet over medium heat. Add 3 tablespoons of olive oil and 2 tablespoons of butter. Once hot, add 6 minced garlic cloves and 1 teaspoon of red pepper flakes. Sauté them for 1-2 minutes. Keep an eye on the garlic; it should smell nice but not burn. Next, add the shrimp in a single layer. Season them with salt and pepper. Cook for about 2-3 minutes on one side until they turn pink. Flip them and cook for another 1-2 minutes until fully done. Lower the heat and add the remaining 2 tablespoons of butter, along with the juice and zest of 1 lemon. Stir well to melt the butter and blend the flavors. If the sauce feels too thick, add some reserved pasta water until it looks just right. Now, add the drained pasta to the skillet. Toss it with the shrimp and sauce until everything is well mixed. If it needs more flavor, adjust the seasoning with salt, pepper, or lemon juice. Finally, stir in 1/2 cup of chopped fresh parsley. Serve your Garlic Butter Shrimp Scampi right away and top with grated Parmesan cheese. Enjoy this tasty dish! For more details, refer to the Full Recipe. To cook shrimp just right, watch the time. Shrimp cook fast. They usually need 2-3 minutes on each side. Look for the pink color and a firm texture. Overcooking makes shrimp tough. Always cook shrimp in a single layer for even heat. If they stick together, they won’t cook well. Use fresh herbs to brighten your dish. I love adding parsley and basil. They bring a fresh taste. Try adding a pinch of thyme or oregano for more depth. Red pepper flakes add a nice kick, but adjust to your heat preference. Lemon juice and zest also boost flavor. They make the dish bright and zesty. Avoid cooking shrimp straight from the freezer. Thaw them first for even cooking. Overcooking leads to rubbery shrimp, so keep an eye on them. Don’t skip the lemon juice; it adds balance. When cooking the garlic, don’t let it burn. Burnt garlic tastes bitter and ruins your dish. Finally, remember to reserve some pasta water. It helps adjust the sauce's thickness and keeps everything creamy. For the full recipe and all the details, check out the [Full Recipe]. {{image_2}} You can switch shrimp for scallops or chicken. Scallops bring a sweet taste. They cook fast and add a nice touch. Just sear them in the same garlic butter. Chicken provides a heartier meal. Cut it into small pieces for even cooking. Cook it until golden brown. Both options give you a new way to enjoy this dish. If you want a veggie twist, use vegetables instead of shrimp. Zucchini, bell peppers, or asparagus work well. Sauté them just like you would the shrimp. They soak up the garlic butter flavor. This makes a light yet tasty meal. For added protein, toss in chickpeas or lentils. You can still enjoy that creamy garlic sauce! While linguine is classic, you can try other pasta types. Spaghetti, fettuccine, or even zucchini noodles are great options. Each pasta has a unique texture. They all mix well with the garlic butter sauce. You can even use gluten-free pasta if needed. Experiment and find what suits your taste best! For the complete recipe, check out the Full Recipe section. To keep your garlic butter shrimp scampi fresh, let it cool down first. Place it in an airtight container. This step helps maintain its flavor and texture. Store it in the fridge for up to three days. If you use the Full Recipe, make sure to keep the shrimp and pasta separate for best results. Reheating is easy. You can use the microwave or the stove. If using a microwave, cover the dish and heat it in short bursts. Stir between intervals to ensure even heating. On the stove, gently warm it over low heat. Add a splash of water or broth to keep it moist. This method helps prevent the shrimp from becoming tough. Freezing garlic butter shrimp scampi is not ideal but possible. If you need to freeze it, do so without the pasta. Place the shrimp in an airtight freezer bag. Remove as much air as possible. It can last up to three months. When ready to eat, thaw it in the fridge overnight, then reheat as mentioned above. You can serve Garlic Butter Shrimp Scampi with various sides. Some great options include: - Garlic bread: This adds a nice crunch. - Steamed vegetables: Broccoli or asparagus work well. - Salad: A fresh, green salad balances the meal. - Rice or quinoa: These grains soak up the sauce nicely. Each option complements the shrimp's rich flavors perfectly. Yes, you can use frozen shrimp for this recipe. Just remember to thaw them first. Place the shrimp in cold water for about 15-20 minutes. Once thawed, pat them dry to remove excess moisture. This helps them cook evenly. Frozen shrimp can be just as tasty as fresh. Make sure to check the label for quality. Making garlic butter sauce is simple and quick. Here’s how: 1. Melt butter: Start with unsalted butter in a pan over medium heat. 2. Add garlic: Stir in minced garlic and cook for about 1-2 minutes. Be careful not to burn it. 3. Flavor it: Add lemon juice, zest, and seasonings like salt and pepper. This sauce is perfect for many dishes, not just shrimp scampi. It adds a burst of flavor! For the full recipe, check the Garlic Butter Shrimp Scampi section. Garlic butter shrimp scampi is a simple, tasty dish. We covered key ingredients, essential seasonings, and fun add-ins. I shared easy steps for cooking pasta, sautéing shrimp, and serving your dish. You also learned tips for perfect shrimp and common mistakes to avoid. We explored variations like scallops or veggie options, plus how to store leftovers. Now, you have the knowledge to create this meal with confidence and creativity. Enjoy experimenting with flavors and making it your own!

Garlic Butter Shrimp Scampi Tasty and Quick Recipe

If you’re craving a quick and tasty dinner, look no further than this Garlic Butter Shrimp Scampi. With its rich

- 1 cup unsalted butter, melted - 2 cups granulated sugar - 4 large eggs - 1 teaspoon vanilla extract - 1 cup all-purpose flour - 1 cup unsweetened cocoa powder - 1/2 teaspoon baking powder - 1/4 teaspoon salt - 1 cup mint chocolate chips - 1/2 teaspoon peppermint extract The ingredients for these brownies create a rich, fudgy treat. The melted butter adds moisture and flavor. Granulated sugar brings sweetness and helps the brownies rise. Eggs are the binding force, making the brownies hold together well. Vanilla extract adds a warm note that complements the chocolate. Flour and cocoa powder form the base of the batter. Baking powder helps the brownies puff up just right. Salt balances the sweetness and enhances all the flavors. Mint chocolate chips give a fun twist, while peppermint extract intensifies the mint flavor. - For a dairy-free version, use coconut oil or vegan butter as a butter alternative. - Swap granulated sugar for coconut sugar or maple syrup for a healthier option. - For gluten-free brownies, replace all-purpose flour with almond or oat flour. These substitutions allow you to cater to various dietary needs without sacrificing taste. Each alternative brings its unique flair, making the brownies your own. Feel free to mix and match to suit your preferences. Check out the Full Recipe for detailed instructions on how to use these ingredients effectively. First, preheat your oven to 350°F (175°C). This step is key for even baking. While it heats, grease a 9x13 inch baking pan with non-stick spray. You can also line it with parchment paper for easy removal later. This makes cleanup a breeze! In a large bowl, pour in the melted butter and sugar. Use a whisk to mix them together until smooth. You want everything to combine well. Next, add the eggs one at a time. Make sure to beat well after each addition. Finally, stir in one teaspoon of vanilla extract for that lovely flavor. In another bowl, whisk together the dry ingredients. This includes the flour, cocoa powder, baking powder, and salt. Mix these until they are well combined. Now, gently add this dry mixture to the wet ingredients. Be careful not to overmix. You want the batter just combined. After that, fold in the mint chocolate chips and peppermint extract. This will give your brownies that amazing minty flavor. Pour your brownie batter into the prepared pan. Spread it out evenly. Now, bake the brownies in your preheated oven for 25 to 30 minutes. To check if they are done, insert a toothpick into the center. It should come out with a few moist crumbs, not wet batter. Once done, take them out and let cool for about 15 to 20 minutes in the pan. Then, transfer to a wire rack to cool completely before cutting into squares. For the full recipe, check the earlier section. To make the best chocolate mint brownies, mixing well is key. Start with the wet ingredients. Combine the melted butter and sugar until smooth. Then, add eggs one at a time, mixing well after each. When you stir in the dry ingredients, do it gently. Overmixing can make your brownies tough. You want a fudgy texture. The goal is to mix just until you no longer see dry flour. This way, you keep them soft and rich. After baking, let the brownies cool in the pan for about 15-20 minutes. Then, move them to a wire rack. This helps them cool evenly. If you cut them too soon, they may crumble. Wait until they are room temperature before slicing. A sharp knife helps you get clean cuts. For neat squares, wipe the knife between cuts. Presentation makes a big difference. Serve the brownies on a nice platter. Add fresh mint leaves on top for color. A dusting of powdered sugar gives a pretty touch. You can also drizzle melted chocolate for extra flair. This makes your brownies look as good as they taste. Enjoy your creation! For the full recipe, check the earlier section. {{image_2}} You can make chocolate mint brownies even more fun by adding extras. Try mixing in chopped nuts like walnuts or pecans for a nice crunch. You can also fold in your favorite candies, like crushed peppermint candies or even chocolate bars. If you want a richer taste, use dark chocolate chips instead of mint chocolate chips. This twist gives brownies a deep flavor and adds a lovely texture. If you want a lighter treat, you can lower the sugar or swap ingredients. Try using applesauce instead of half the butter for a moist brownie with fewer calories. You can also use a sugar substitute like stevia or coconut sugar to cut down on sweetness. For a gluten-free option, replace all-purpose flour with almond flour. Your brownies will still taste great while being a bit healthier. Make your brownies fit any celebration by changing up the recipe. For Halloween, mix in orange and black sprinkles. You can use festive cookie cutters to shape your brownies into fun forms. In winter, add a touch of eggnog flavor by using nutmeg and cinnamon in the batter. These small changes bring a seasonal spirit to your delightful brownies. For the full recipe, check out the earlier section. To keep your chocolate mint brownies fresh, you have two main options. For short-term storage, you can keep them at room temperature. Just place them in an airtight container. This method works best if you plan to eat them within three days. If you want your brownies to last longer, store them in the fridge. This will keep them fresh for up to a week. Make sure they are in an airtight container to avoid drying out. Freezing your brownies is a great way to save them for later. Start by cutting them into squares. Wrap each piece in plastic wrap. Then, place them in a freezer-safe bag. This helps prevent freezer burn. When you want to enjoy them again, simply take out the brownies and let them thaw in the fridge overnight. You can also leave them on the counter for a few hours. This way, they will regain their soft texture. Freshly made chocolate mint brownies can last for about a week when stored properly. However, if you freeze them, they can last for up to three months. Just remember to check for any signs of freezer burn or off flavors before you enjoy them. Proper storage is key to keeping these treats irresistible and decadent! You can use regular chocolate chips if you don't have mint chocolate chips. Dark chocolate chips add a rich taste. You can also chop up mint candies or chocolate bars with mint flavor. For a more natural option, use finely chopped fresh mint leaves. Keep in mind that this will give you a different texture. Yes! You can replace eggs with applesauce or mashed bananas. Each egg can be replaced with 1/4 cup of applesauce. This makes the brownies moist. You can also use flaxseed meal mixed with water, about 1 tablespoon of flaxseed meal and 2.5 tablespoons of water for each egg. This works well and adds a nutty flavor. To boost mint flavor, add extra peppermint extract. A few drops can make a big difference. You can also mix in additional mint chocolate chips. If you want a fresh taste, try adding chopped mint leaves. Be careful not to add too much extract; a little goes a long way. Yes! You can use gluten-free flour blends instead of all-purpose flour. Look for a blend that contains xanthan gum for the best results. Almond flour is another great option, but it may change the texture. Make sure your chocolate chips are gluten-free as well. Check for signs beyond the toothpick test. The edges should look set and slightly pulled away from the pan. The top should be shiny and firm. When you press down gently, it should spring back. If you see cracks on top, that is a good sign too. You learned how to make delicious chocolate mint brownies today. We covered the right ingredients, step-by-step instructions, and key tips. You can even explore variations and storage methods to keep them fresh. Don't forget the substitution options if needed. With this guide, you’re ready to bake your own batch of amazing brownies. Enjoy sharing them with friends and family. Baking can be fun and rewarding. Let your creativity shine!

Chocolate Mint Brownies Irresistible and Decadent Treat

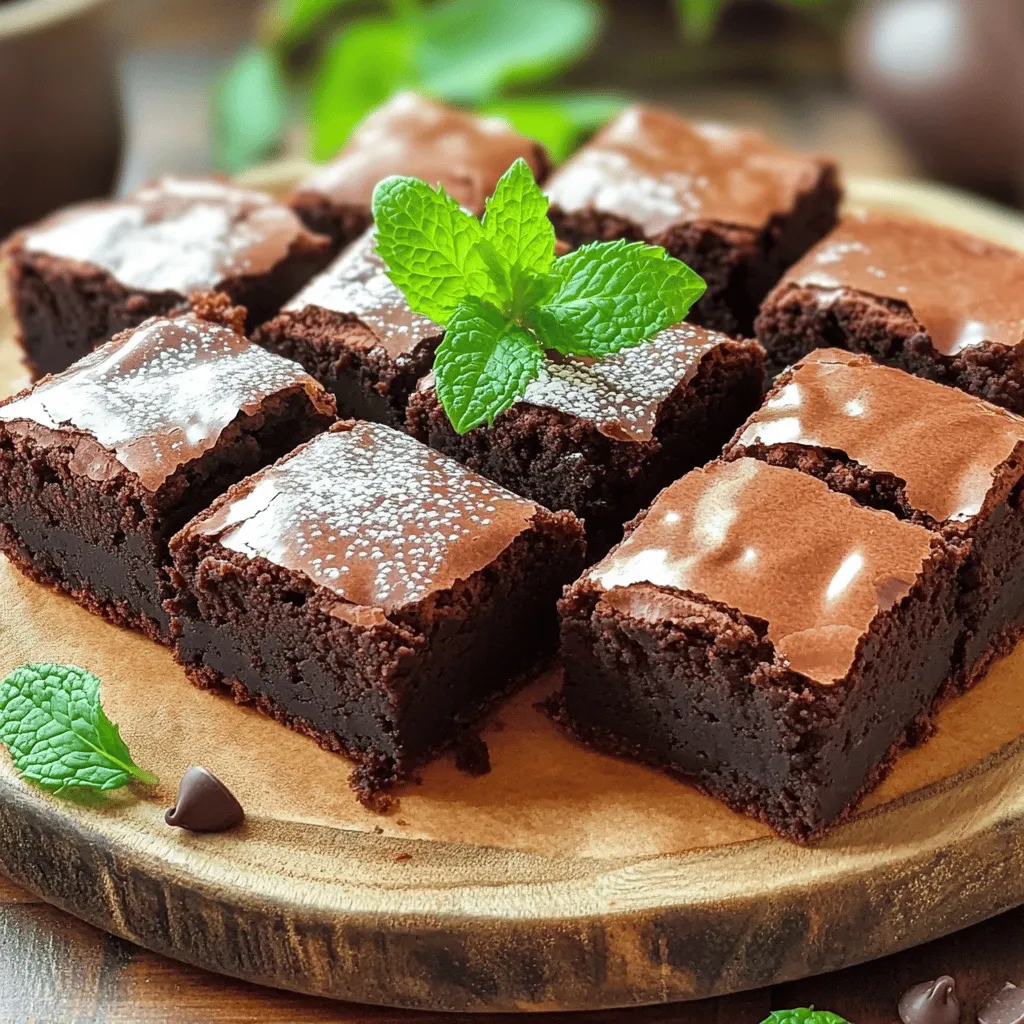
Get ready for a treat that will make your taste buds dance! These chocolate mint brownies are the perfect blend

Cooking Lemon Herb Quinoa is easy. You need fresh and simple ingredients. Here’s what you will need: - Quinoa and Broth - 1 cup quinoa, rinsed - 2 cups vegetable broth - Aromatics: Onion and Garlic - 1 small red onion, finely chopped - 2 cloves garlic, minced - Fresh Produce: Lemon, Tomatoes, and Herbs - 1 lemon (zested and juiced) - 1 cup cherry tomatoes, halved - 1/2 cup fresh parsley, chopped - 1/4 cup fresh mint, chopped - Seasoning Essentials - 1 tablespoon olive oil - Salt and pepper to taste Each ingredient adds brightness to the dish. The vegetable broth gives flavor. The lemon adds a zesty touch. Fresh herbs make it fragrant. Cherry tomatoes add sweetness. This mix makes the dish healthy and tasty. You can find the full recipe above for more details. Cooking the Quinoa To cook the quinoa, start with a medium saucepan. Bring 2 cups of vegetable broth to a boil over medium-high heat. Once boiling, add 1 cup of rinsed quinoa. Lower the heat to low, cover, and simmer for about 15 minutes. You will know it’s ready when the liquid is absorbed and the quinoa is fluffy. Steaming and Resting After cooking, remove the saucepan from heat. Let it sit covered for 5 minutes. This helps the quinoa steam and become even more tender. Fluff it gently with a fork before adding it to the dish. Sautéing the Onion and Garlic In a skillet, heat 1 tablespoon of olive oil over medium heat. Add 1 small chopped red onion and cook until it turns translucent, about 5 minutes. Stir in 2 minced garlic cloves and cook for 1-2 minutes until fragrant. This mix adds a nice depth to your dish. Adding Cherry Tomatoes Next, add 1 cup of halved cherry tomatoes to the skillet. Cook them for about 3-4 minutes until they soften a little. These tomatoes bring a burst of flavor and color to the dish. Mixing Quinoa with Vegetables Once the tomatoes are ready, fluff the cooked quinoa again. Add it to the skillet with the onion, garlic, and tomatoes. Stir everything together so the flavors blend well. Adding Lemon Juice and Herbs Next, pour the lemon juice from 1 lemon and add the lemon zest. Toss in 1/2 cup of chopped parsley and 1/4 cup of chopped mint. Mix everything until well combined. Season it with salt and pepper to taste. This step brightens the dish and makes it truly refreshing. For the complete cooking details, check out the Full Recipe. Rinsing Before Cooking Always rinse quinoa before cooking. This step removes bitter saponins from the outer layer. Just place quinoa in a fine mesh strainer. Rinse under cold water for a minute. You’ll notice a cleaner flavor after cooking. Ensuring Proper Water Ratio For great texture, use a 2:1 water-to-quinoa ratio. This means two cups of water for each cup of quinoa. Using vegetable broth instead of water boosts flavor. Let it boil, then reduce the heat and cover. This helps the quinoa cook evenly and makes it fluffy. Using Fresh Herbs vs. Dried Fresh herbs bring a bright taste to your dish. I love using parsley and mint in Lemon Herb Quinoa. If fresh herbs are not available, dried herbs work too, but use less. Dried herbs are more potent, so adjust to taste. Adjusting Lemon Juice to Taste The lemon juice adds zest and brightness. Start with the juice of half a lemon. Taste it, and if you want more tang, add more juice. This way, you control the sourness. Ideal Pairings for Lemon Herb Quinoa Lemon Herb Quinoa pairs well with grilled chicken, fish, or roasted veggies. It’s a great side dish or a light main course. You can also add chickpeas for extra protein. This makes it filling and healthy! Presentation Tips Serve Lemon Herb Quinoa in a large bowl or individual plates. Garnish with lemon slices and a sprinkle of fresh herbs. This adds color and makes the dish look appealing. Your guests will love it! For the full recipe, follow the steps provided earlier. {{image_2}} Adding protein can make your Lemon Herb Quinoa even better. You can use chickpeas or lentils. These plant-based options boost fiber and keep you full. They blend well with the lemon and herbs. You can also add grilled chicken or shrimp. These meats bring a savory taste. The flavors of lemon and herbs work nicely together. Feel free to experiment with your favorite proteins. You can change the flavor profile by using different herbs. Try basil, cilantro, or dill to mix things up. Each herb adds its own unique taste. This keeps the dish exciting and fresh. Replacing lemon with lime is another great option. Lime gives a zesty twist. The bright flavor pairs well with the quinoa. You can adjust the acidity to your liking. For gluten-free options, use quinoa as your base. Quinoa is naturally gluten-free and safe for those with sensitivities. It makes this dish a great choice for everyone. If you want vegan alternatives, keep the recipe as is. It is already plant-based. You can swap out any animal products while keeping it healthy. This dish is versatile and meets various dietary needs. I recommend checking the Full Recipe for more details on preparation. To keep your Lemon Herb Quinoa fresh, store it in the fridge. Place it in a container with a lid. This helps prevent drying out. Quinoa can last for about 3 to 5 days in the fridge. Use glass or plastic containers for storage. Glass containers are great for keeping flavors in. Make sure the container is airtight for best results. When reheating, fluff the quinoa to keep it light. You can use a microwave or stovetop. Add a splash of water before heating. This helps create steam. Fluff gently with a fork after reheating. The microwave is quick and easy. Heat for about 1 to 2 minutes. The stovetop takes longer but offers better texture. Heat on low for about 5 minutes, stirring occasionally. To freeze quinoa, let it cool first. Place it in a freezer-safe bag. Remove as much air as possible before sealing. Label the bag with the date. Quinoa can last up to 3 months in the freezer. Thaw in the fridge overnight for best results. You can also reheat directly from frozen. Use the stovetop method with a little water for best fluffiness. For the Full Recipe, visit the recipe section above! The cooking ratio for quinoa is 1 cup of quinoa to 2 cups of liquid. This liquid can be broth or water. The ratio helps the quinoa cook evenly and absorb the flavors, making it tasty. Cooked quinoa lasts about 5 days in the fridge. Store it in an airtight container. This keeps it fresh and safe to eat later. If you notice any off smells, it’s best to toss it out. Yes, you can use water instead of broth. However, using broth adds more flavor. If you want a milder taste, water is a good choice. Add a pinch of salt to enhance the flavor. Quinoa is a healthy choice. It is high in protein and fiber. It is also gluten-free, making it a great option for many diets. Quinoa contains many vitamins and minerals, which are good for your body. To make quinoa fluffier, rinse it well before cooking. This removes any bitter coating. Use the correct water-to-quinoa ratio. After cooking, let it sit for a few minutes. Fluff it gently with a fork before serving. Lemon Herb Quinoa is a bright and tasty dish. This recipe blends fresh flavors with wholesome ingredients. You will enjoy how easy it is to make this dish. First, you start by rinsing 1 cup of quinoa. This step helps remove any bitterness. Next, bring 2 cups of vegetable broth to a boil. Once it bubbles, add the quinoa. Lower the heat and cover the pot. Let it simmer for about 15 minutes. The quinoa will absorb the broth and become fluffy. While the quinoa cooks, heat 1 tablespoon of olive oil in a skillet. Add 1 small red onion, chopped finely. Sauté it until it turns soft and translucent. Then, add 2 cloves of minced garlic. Cook until you smell the garlic aroma. Now, it’s time to add color! Toss in 1 cup of halved cherry tomatoes. Stir them for about 3 to 4 minutes. They should soften but not turn mushy. Once the quinoa is ready, fluff it with a fork. Combine it with the sautéed veggies in the skillet. Squeeze the juice of 1 lemon and add its zest. Mix in 1/2 cup of chopped parsley and 1/4 cup of chopped mint. These herbs bring a fresh taste to the dish. Lastly, season with salt and pepper. Taste it and adjust as needed. Serve the Lemon Herb Quinoa warm. You can garnish it with lemon slices and extra herbs for a lovely look. This dish is perfect for a healthy meal or a side. Enjoy this easy yet flavorful recipe! This blog post explored how to make delicious Lemon Herb Quinoa. We discussed key ingredients like quinoa, broth, and fresh produce. I provided step-by-step instructions for cooking quinoa and making a tasty vegetable mix. You learned tips for perfecting texture and flavor. We also covered variations to add protein or change flavors, plus how to store leftovers. With these steps, you can create a dish that's healthy and exciting. Enjoy trying new ideas and making this recipe your own!

Lemon Herb Quinoa Flavorful and Healthy Dish

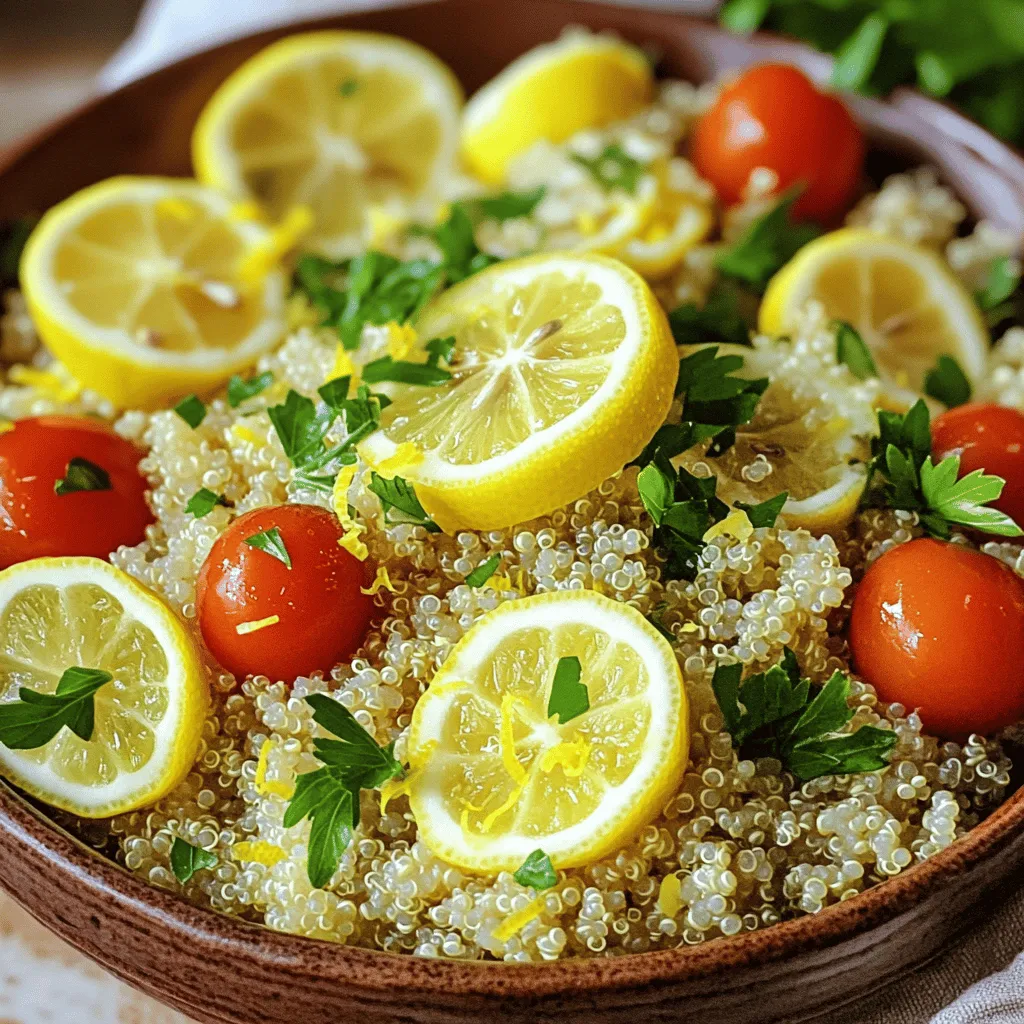
Are you ready to elevate your meals with a burst of flavor? Lemon Herb Quinoa is not just a healthy

To make the best brown butter blondies, you need a few simple ingredients. Each one plays a key role in giving these treats their rich flavor and lovely texture. Here’s what you’ll need: - 1 cup (2 sticks) unsalted butter - 1 cup light brown sugar - 1/2 cup granulated sugar - 2 large eggs - 1 tablespoon vanilla extract - 2 cups all-purpose flour - 1 teaspoon baking powder - 1/2 teaspoon baking soda - 1/4 teaspoon salt - 1 cup white chocolate chips - 1/2 cup chopped nuts (such as pecans or walnuts - optional) The unsalted butter is important because it lets you control the salt in the recipe. Brown sugar adds a lovely sweetness and moisture. The eggs help to bind everything together. Vanilla extract gives a nice warm flavor that complements the brown butter. You’ll want to mix the all-purpose flour with baking powder and baking soda. These leavening agents help the blondies rise and get that perfect texture. Salt balances the sweetness, while white chocolate chips create those delightful pockets of creaminess. If you love some crunch, add nuts for extra texture. With these ingredients, you’re ready to create a dessert that is full of flavor and sure to impress. For the complete process and tips, check the Full Recipe. First, we need to melt the butter. Place it in a medium saucepan over medium heat. Stir the butter often as it melts. After a few minutes, it will start to foam. Keep stirring until it turns a lovely golden brown. This process takes about 5 to 7 minutes. You will notice a nutty aroma fill your kitchen. This scent adds a lot of flavor to your blondies. Now, take your brown sugar and granulated sugar. In a large bowl, combine these sugars with the brown butter. Use a whisk to mix them well. Make sure they blend into a smooth mixture. Next, add the eggs one at a time. Stir well after each egg. This step helps create a nice, fluffy batter. Finally, add the vanilla extract for an extra touch of flavor. In another bowl, whisk together the flour, baking powder, baking soda, and salt. This step is important for the blondies to rise. Once mixed, gradually add the dry ingredients to the wet mixture. Stir gently until just combined. Be careful not to overmix. Overmixing can make the blondies tough instead of soft and chewy. Pour the thick batter into your prepared baking pan. Spread it evenly with a spatula. This ensures that the blondies bake evenly. Place the pan in a preheated oven at 350°F (175°C). Bake for 20 to 25 minutes. Keep an eye on them. The edges should look golden, and a toothpick should come out with a few moist crumbs. Once done, let them cool for about 10 minutes in the pan. Then, transfer the blondies to a wire rack to cool completely. For the full recipe, check the earlier section. To get that perfect texture in your blondies, mix the batter gently. Overmixing can make them tough. Aim for a smooth blend without lumps, but stop mixing once you combine the wet and dry ingredients. Keep an eye on your oven temperature too. Too hot can burn the edges before the center cooks. A temperature of 350°F (175°C) works best. Using fresh ingredients is key. Fresh eggs and butter enhance flavor and texture. Check the dates on your baking powder and baking soda. Old leavening agents can lead to bland, dense blondies. Trust me, fresh ingredients make a big difference. To enhance the flavor, try serving your blondies warm. Dust them with powdered sugar for a sweet touch. You can also add a scoop of vanilla ice cream on the side. The warm blondies and cold ice cream create a fun contrast. For toppings, consider drizzling caramel or chocolate sauce. Chopped nuts or sprinkles add a nice crunch. You can even serve them with fresh fruit for a pop of color. Each of these ideas makes the dish even more enjoyable. {{image_2}} You can easily switch up the flavors in your blondies. One fun way is to add different types of chips. Dark chocolate chips give a rich taste. Butterscotch chips add a sweet twist. You can even mix and match these options for a unique treat. Another great idea is to infuse your blondies with spices. Cinnamon adds warmth and depth. Nutmeg brings a cozy, festive vibe. Just a pinch of these spices can elevate your blondies to a new level of flavor. If you need gluten-free options, you can substitute all-purpose flour with a gluten-free blend. Many brands work well, so you can still enjoy these treats. Just make sure to check the blend for best results. For vegan substitutions, replace the eggs with flax eggs. To make flax eggs, mix one tablespoon of ground flaxseed with two and a half tablespoons of water. Let it sit for a few minutes until it thickens. You can also swap butter with vegan butter or coconut oil. These adjustments let you enjoy brown butter blondies no matter your dietary needs. You can find the Full Recipe for all these delicious variations and more! To keep your brown butter blondies fresh, store them in an airtight container. This helps lock in moisture and flavor. Place parchment paper between layers if stacking them. This prevents sticking and keeps each piece intact. Keep the container at room temperature for up to five days. For longer storage, refrigerate them for up to a week. You can freeze blondies to enjoy later. First, let them cool completely. Then, cut them into squares. Wrap each square in plastic wrap. Place the wrapped squares in a freezer-safe bag or container. They can last up to three months in the freezer. When you're ready to eat, take out the blondies. Let them thaw in the fridge overnight for best texture. You can also warm them in the microwave for a few seconds. Enjoy the sweet, nutty flavor of your blondies any time! What makes blondies different from brownies? Blondies use brown sugar and no cocoa powder. This gives them a rich, caramel flavor. Brownies have chocolate and taste different due to cocoa. Can I use salted butter instead of unsalted? Yes, you can use salted butter. Just skip any added salt in the recipe. The flavor will change slightly but still be good. How do I know when my blondies are done baking? Check the edges for a golden brown color. Insert a toothpick in the center. If it comes out with a few moist crumbs, they're done. How long do blondies last at room temperature? Blondies last about 3 to 5 days at room temperature. Store them in an airtight container to keep them fresh. Can I make brown butter in advance? Yes, you can make brown butter ahead of time. Just let it cool and store it in the fridge. Reheat it gently before using it in the recipe. For the full recipe, check out the Brown Butter Bliss Blondies. In this blog post, we explored how to make delicious brown butter blondies. We covered the key ingredients, how to prepare and mix them, and baking tips for perfect blondies. You learned about flavor variations and storage methods to keep them fresh. Remember, using fresh ingredients and not overmixing are crucial for the best results. Now, it's time to enjoy your tasty blondies with fun toppings or pairings. Happy baking!

Brown Butter Blondies Delightfully Decadent Treat

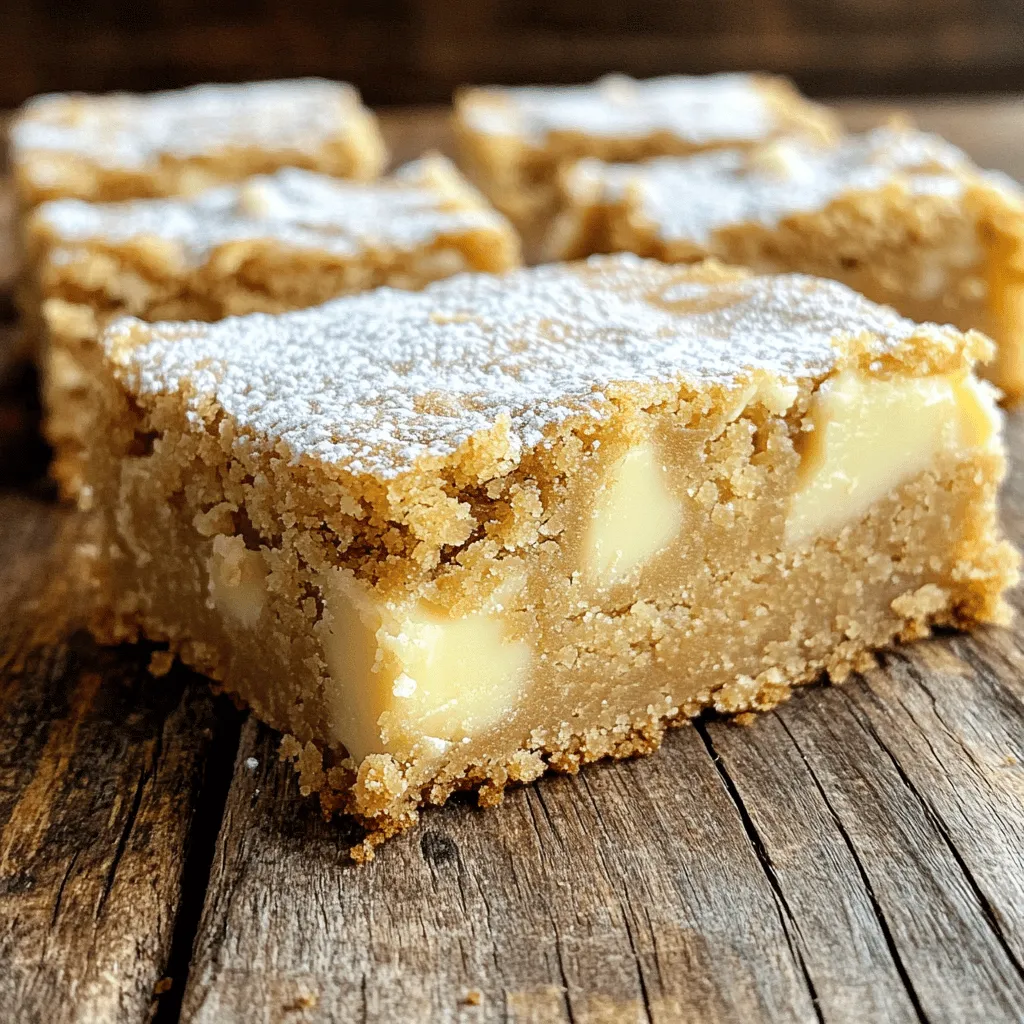
Are you ready to take your dessert game to the next level? Brown butter blondies are a delightfully decadent treat

For my delicious cinnamon roll blondies, I love using simple, high-quality ingredients. Here’s what you need: - Main ingredients for the blondies: - 1 cup unsalted butter, melted - 1 cup brown sugar, packed - 1/2 cup granulated sugar - 2 large eggs - 2 teaspoons vanilla extract - 2 cups all-purpose flour - 1 teaspoon baking powder - 1/2 teaspoon baking soda - 1/2 teaspoon salt - 2 teaspoons ground cinnamon - 1/2 cup chopped pecans (optional) - Ingredients for the cinnamon glaze: - 1 cup powdered sugar - 2 tablespoons milk - 1/2 teaspoon vanilla extract - 1/2 teaspoon ground cinnamon - Optional add-ins and substitutions: - You can swap the pecans for walnuts or leave them out entirely. - For a nut-free version, simply skip the nuts. - If you want a richer flavor, try using dark brown sugar instead of light. I find that using fresh spices really makes a difference in flavor. Always have a good quality vanilla extract on hand too. It adds a nice depth to the blondies. For the full recipe, check out the details above. 1. Preheat your oven to 350°F (175°C). This step is key for even baking. 2. Prepare a 9x13-inch baking pan. Grease it and line with parchment paper. Leave some overhang to lift out later. 3. In a large bowl, mix melted butter, brown sugar, and granulated sugar. Whisk until smooth. 4. Add two eggs, one at a time. Mix well after each. Then, stir in vanilla extract. 5. In another bowl, whisk flour, baking powder, baking soda, salt, and ground cinnamon. This mix gives the blondies their flavor and rise. 1. Gradually add the dry mix to the wet mix. Stir just until combined. If you want a crunch, fold in chopped pecans. 2. Pour the batter into your prepared pan. Spread it evenly. 3. For the cinnamon swirl, mix 1 tablespoon of cinnamon with 3 tablespoons of brown sugar. Sprinkle this mix over the batter. 4. Use a knife or skewer to create swirls. Drag it gently through the batter. 5. Bake for 25 to 30 minutes. Check doneness by inserting a toothpick. It should come out clean. 1. While the blondies bake, prepare the cinnamon glaze. Whisk together powdered sugar, milk, vanilla extract, and ground cinnamon until smooth. 2. After baking, let the blondies cool in the pan for at least 10 minutes. Use the parchment paper to lift them out. 3. Drizzle the cinnamon glaze over the cooled blondies. Let it set for a few minutes. 4. Cut the blondies into squares and serve. Enjoy the sweet, cinnamon goodness! For the full recipe, refer to the earlier section. To get the best texture in your blondies, follow these tips: - Use room temperature ingredients. This helps the batter mix evenly. - Don’t overmix the batter. Mix just until combined. This keeps blondies soft. - Check doneness with a toothpick. Insert it into the center; it should come out clean. Common mistakes to avoid include: - Skipping the parchment paper. It makes it easy to lift out the blondies. - Not measuring flour properly. Too much flour can make them dry. - Opening the oven door too soon. This can cause the blondies to sink. Cinnamon roll blondies pair wonderfully with: - A scoop of vanilla ice cream. - Fresh fruit like berries or bananas. - A cup of coffee or tea for a cozy treat. The best ways to enjoy them are: - Serve warm with a drizzle of cinnamon glaze. - Pack them for lunch or snacks. - Share with friends at gatherings for a sweet surprise. {{image_2}} You can change the flavor of your cinnamon roll blondies in fun ways. Swap the chopped pecans for walnuts or almonds. Both nuts add a nice crunch. You can also mix in dried fruits like cranberries or raisins for sweetness. If you love chocolate, add chocolate chips to the batter. They melt and create pockets of gooey goodness. For a caramel twist, drizzle caramel sauce over the blondies before baking. This adds a rich flavor that pairs well with the cinnamon. You can even sprinkle sea salt on top for a sweet and salty treat. If you need gluten-free blondies, use a gluten-free flour blend. Look for one that has xanthan gum to help with texture. You can also try almond flour for a nutty flavor. For a vegan version, replace the eggs with flax eggs. Mix 1 tablespoon of ground flaxseed with 2.5 tablespoons of water for each egg. Use a non-dairy milk like almond or oat milk instead of regular milk in the glaze. These simple swaps keep the flavor while meeting dietary needs. For the full recipe, check out the section above to guide your baking experience. To keep your cinnamon roll blondies fresh, use an airtight container. This helps maintain moisture and flavor. Store them at room temperature for up to four days. If you want to keep them longer, freezing is a great option. Wrap each blondie tightly in plastic wrap. Then place them in a freezer-safe bag. They can last up to three months in the freezer. Just remember to label the bag with the date. When it’s time to enjoy your blondies again, reheating is easy. Preheat your oven to 350°F (175°C). Place the blondies on a baking sheet and cover them with foil. Heat for about 10 minutes. This keeps them warm and soft. If you prefer using a microwave, heat one blondie for 10-15 seconds. This method is quick but can dry them out. To avoid dryness, add a small cup of water in the microwave. This helps maintain moisture during reheating. Enjoy your delicious treat! To make cinnamon roll blondies from scratch, gather your ingredients first. You will need butter, sugars, eggs, flour, baking powder, baking soda, salt, cinnamon, and optional pecans. Mix the melted butter with the sugars. Add the eggs and vanilla. In a separate bowl, combine the dry ingredients. Mix them together, pour the batter into a pan, and add the cinnamon swirl. Bake at 350°F for 25-30 minutes, then cool and glaze. You can add chopped nuts like pecans or walnuts for crunch. For a richer taste, try adding chocolate chips or butterscotch chips. You can also mix in a pinch of nutmeg or cardamom for extra warmth. Experimenting with different extracts, like almond, can bring a new twist. Yes, you can use different sugars. For a deeper flavor, try using dark brown sugar. You can also use coconut sugar for a healthier option. Keep in mind that each sugar will change the taste slightly, so choose what you enjoy most. Cinnamon roll blondies can be stored for up to one week. Keep them in an airtight container at room temperature. If you want to keep them longer, you can freeze them for up to three months. Just make sure they are well-wrapped to prevent freezer burn. Yes, you can substitute the eggs in this recipe. Use 1/4 cup of applesauce for each egg. You can also use flaxseed meal mixed with water. Combine 1 tablespoon of flaxseed meal with 2.5 tablespoons of water. Let it sit for five minutes until it thickens. This will work well to bind your blondies. We covered how to make delicious cinnamon roll blondies from scratch. You learned about key ingredients, baking steps, and tips for perfect results. I shared fun variations and storage tips, ensuring your treats stay fresh. Remember, you can customize these blondies to fit your taste. Enjoy exploring flavors and sharing them with friends. Baking should be fun, so dive in and create!

Cinnamon Roll Blondies Irresistible Sweet Treat

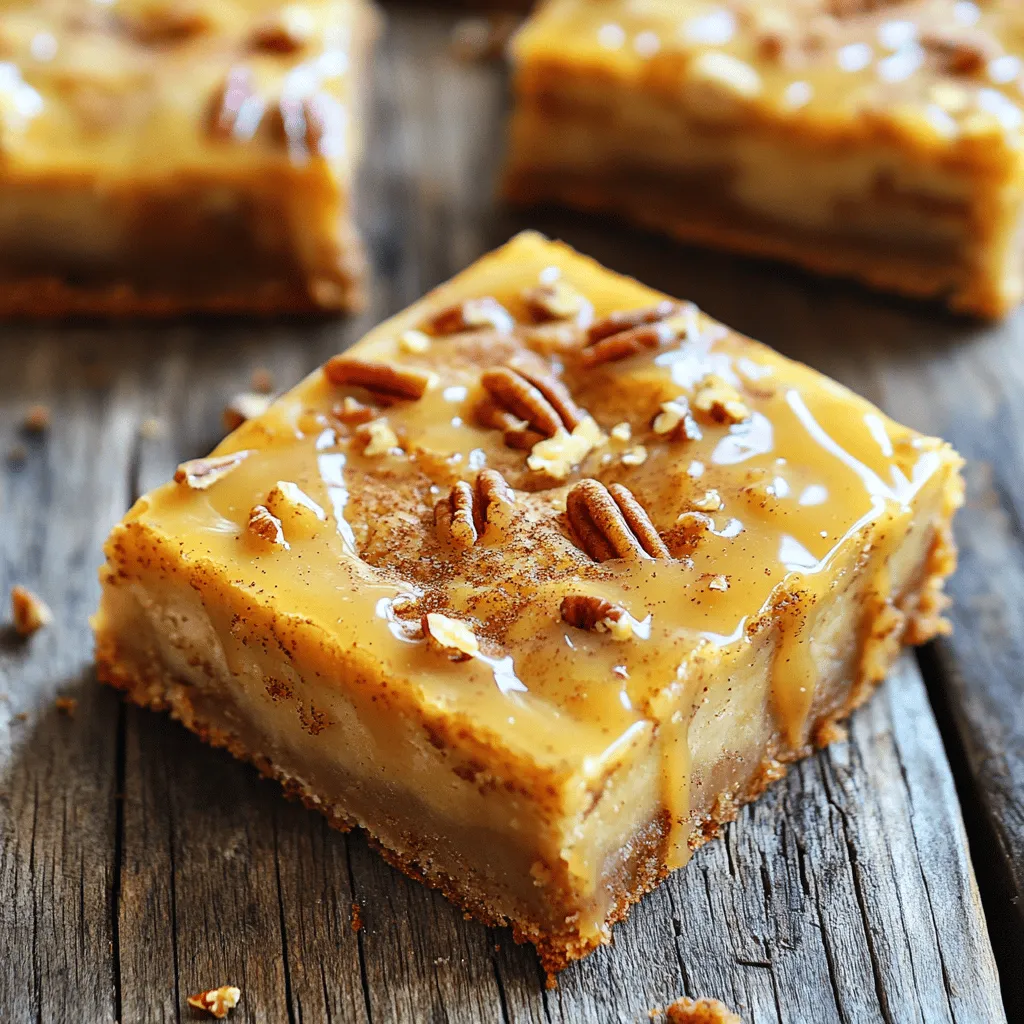
If you love cinnamon rolls and blondies, you’re in for a treat! Cinnamon Roll Blondies combine the best of both

- 5 cups Rice Krispie cereal - 1/2 cup unsalted butter - 1 package (10 oz) mini marshmallows - 1 teaspoon vanilla extract - 1/2 cup birthday cake-flavored sprinkles - 1/4 cup white chocolate chips (optional) - Extra sprinkles for topping You need simple ingredients for these treats. Rice Krispie cereal gives the base a crispy texture. Unsalted butter adds a rich flavor. Mini marshmallows melt to create a gooey mix. Vanilla extract enhances the taste, making it even better. Birthday cake-flavored sprinkles provide that fun party vibe. If you want extra sweetness, white chocolate chips are a tasty option. Finally, top with more sprinkles for a colorful finish. This recipe is fun and brings joy to any birthday celebration. For the complete recipe, check out the Full Recipe link. First, you need to get your baking dish ready. You can either grease it or line it with parchment paper. Greasing is quick and easy. Just spray the dish with non-stick spray. This helps the treats come out smoothly. Lining with parchment paper is a great option too. It makes removal even easier. Just place the paper in the dish, leaving some overhang. This way, you can lift the treats out when they cool. Next, let’s melt the butter and marshmallows. Use a large saucepan and set the heat to low. Low heat is key here. It helps prevent burning. Add the butter first and let it melt fully. After the butter is melted, add the mini marshmallows. Stir them in well. Keep stirring until they melt completely and blend with the butter. This should create a smooth mixture. Now, it’s time to mix everything together. Remove the saucepan from the heat. Stir in the vanilla extract. This adds a nice flavor to the treats. Then, gradually add the Rice Krispie cereal. Mix it in slowly. You want all the cereal to be well coated. Once combined, fold in the birthday cake-flavored sprinkles. If you like, add some white chocolate chips too. Stir gently to keep the sprinkles intact. Now, pour the mixture into the prepared baking dish. Use a greased spatula or a piece of wax paper to press it down. Make sure it's even and firm. This helps the treats hold their shape. While the mixture is still warm, sprinkle extra birthday-themed sprinkles on top. This makes them look festive and fun. Finally, let the treats cool for about 30 minutes before cutting them into squares. Enjoy your tasty creation! You can find the Full Recipe for Birthday Cake Rice Krispie Treats above. To avoid sticky treats, follow these tips: - Use fresh marshmallows. Old marshmallows can be hard and dry. - Grease your hands. Lightly butter your hands while pressing the mixture. - Don’t overmix. Mix just until combined to keep treats light and airy. Get creative with fun toppings: - Themed sprinkles. Pick sprinkles that match the birthday theme for joy. - Birthday candles. Place a candle in each treat for added fun and a festive touch. Make your treats shine when serving: - Colorful platter. Arrange the treats on a bright dish for eye-catching appeal. - Extra sprinkles on top. Add a sprinkle shower right before serving. - Personalized treats. Cut each treat into fun shapes using cookie cutters for variety. For a complete guide to making these tasty treats, check out the Full Recipe. {{image_2}} You can easily change the flavor of your birthday cake Rice Krispie treats. Adding different flavored sprinkles can give a fun twist. For example, try chocolate or strawberry sprinkles. You can also mix in other goodies like mini chocolate chips or nuts. These add texture and taste. Experimenting with flavors lets you create a treat everyone will love. If you have dietary needs, you can still enjoy these treats. For gluten-free options, use gluten-free Rice Krispie cereal. This small change makes a big difference. For vegan substitutions, swap the butter with coconut oil or vegan butter. Use vegan marshmallows instead of regular ones. These changes keep your treats tasty and inclusive for all diets. For the full recipe, check out the detailed instructions above. To keep your Birthday Cake Rice Krispie Treats fresh, store them in an airtight container. This helps keep them soft and chewy. Line the container with parchment paper before placing the treats inside. This prevents sticking and makes for easy removal. Always ensure the container is sealed tightly to block air and moisture. When stored properly, these treats last about 5 to 7 days. You may notice they start to harden after a few days. To avoid this, store them in a cool area, away from sunlight and heat sources. If you want them to last longer, consider freezing them. To freeze your treats, first cut them into squares. Wrap each piece in plastic wrap. Then place the wrapped treats in a freezer-safe bag or container. This prevents freezer burn. When you're ready to enjoy them, remove the treats from the freezer. Let them thaw in the fridge or at room temperature for about 30 minutes. Enjoy your sweet treat as if it was just made! To keep your Rice Krispie Treats soft, follow these tips: - Use fresh marshmallows. Old marshmallows can harden over time. - Don’t overcook the mixture. Melt the marshmallows just until smooth. - Press the mixture gently into the pan. Pressing too hard can make them dense. - Store them in an airtight container. This helps maintain moisture. These steps help ensure your treats stay soft and chewy for days. Yes, you can! To prep ahead: - Make the treats up to two days in advance. - Store them in an airtight container at room temperature. - You can also wrap them tightly in plastic wrap for extra freshness. This way, you can enjoy your treats without stress on the big day. If you need a marshmallow substitute, try these options: - Use marshmallow fluff instead. It works well in a pinch. - Try using a vegan marshmallow alternative if desired. - You can also melt white chocolate and mix it with the cereal. These options keep the texture similar and still taste great in your treats. For the complete guide, check the Full Recipe. You now know how to make Birthday Cake Rice Krispie Treats. Start with simple ingredients like Rice Krispie cereal and marshmallows. Follow the step-by-step instructions for great results. Use tips for perfect texture and fun decorations. Don't forget about tasty variations and storing your treats well. Creating these treats is fun, easy, and brings joy to celebrations. Enjoy making and sharing them with family and friends. Happy snacking!

Birthday Cake Rice Krispie Treats Fun and Easy Recipe

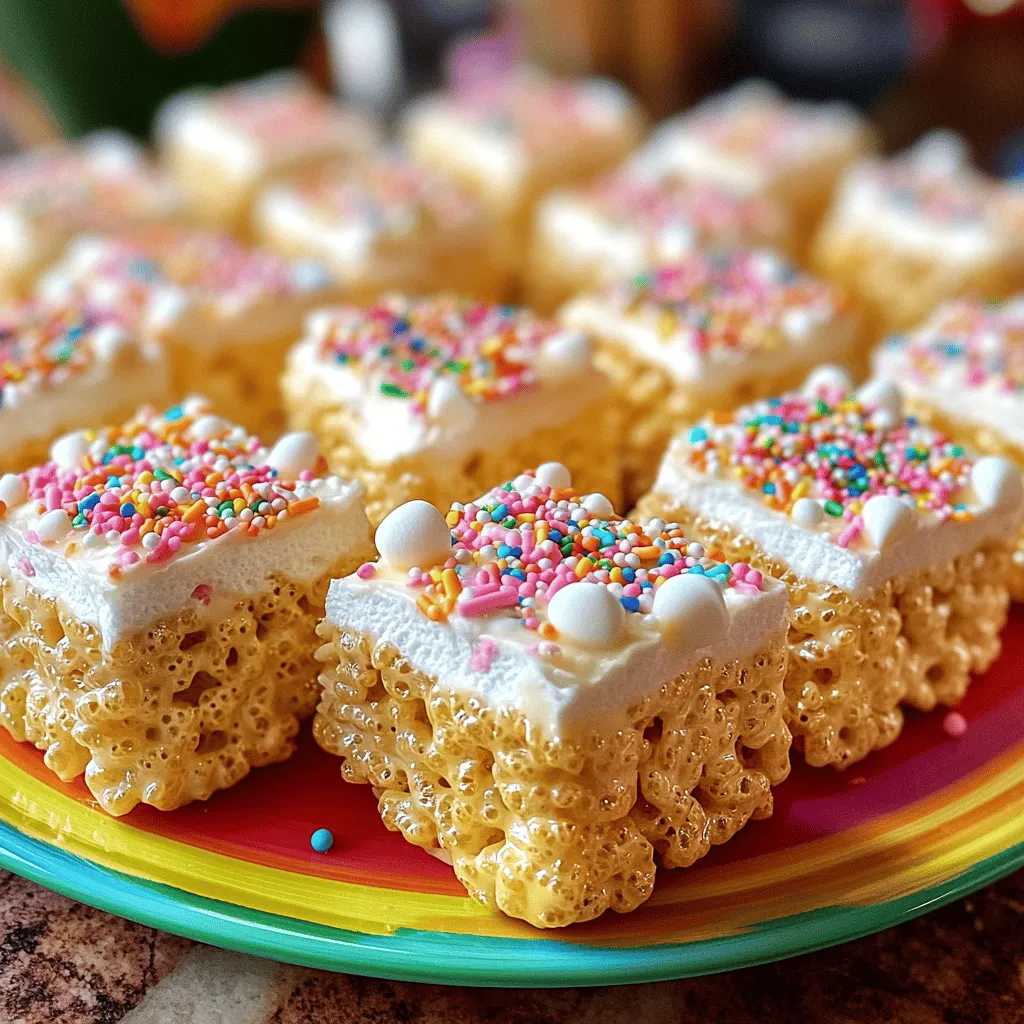
Looking for a fun and easy way to celebrate a birthday? Birthday Cake Rice Krispie Treats are the perfect treat!

- 6 cups Rice Krispies cereal - 1 cup mini marshmallows - 1 cup peanut butter (smooth or crunchy) - 1 cup unsalted butter (2 sticks) - 1 cup granulated sugar - 1/2 cup brown sugar, packed - 1 teaspoon vanilla extract - 1 teaspoon sea salt (plus extra for garnish) You might want to change some ingredients. Here are a few ideas: - For a vegan option, use coconut oil in place of butter. Swap regular marshmallows for vegan ones. - If you need gluten-free treats, look for gluten-free Rice Krispies. They taste just as good! - You can use sunflower seed butter or soy nut butter instead of peanut butter for nut-free treats. These swaps keep the fun and flavor intact while meeting dietary needs. Enjoy the process of making your treats! To start, gather a large saucepan and place it on medium heat. First, melt one cup of unsalted butter. Once the butter is melted, add one cup of granulated sugar and half a cup of packed brown sugar. Stir this mixture continuously until it starts to boil lightly. This step is key for a smooth caramel. Next, reduce the heat to low. Carefully mix in one cup of mini marshmallows and one cup of peanut butter. Stir until the mix is fully melted and smooth. This should take about 2-3 minutes. The marshmallows and peanut butter give the caramel its rich, gooey texture. Now, it’s time to fold in the Rice Krispies. You will need six cups of Rice Krispies cereal for this step. Gently add the cereal to the caramel mixture. Make sure to fold it in carefully. This helps to coat each piece evenly without crushing them. An even coating ensures that every bite is packed with flavor. Before pouring the mixture, grease a 9x13 inch baking dish. You can use cooking spray or some butter to prevent sticking. Pour the Rice Krispie mixture into the dish. Spread it evenly using a spatula or your greased hands. Press down firmly to compact the mixture well. After pressing, allow the treats to cool at room temperature for at least 30 minutes. Once set, cut them into squares or rectangles. For a special touch, sprinkle a small pinch of sea salt over the top before serving. This enhances the salted caramel flavor and makes them even more delicious. To avoid overly sticky treats, use a non-stick saucepan. Melt the butter slowly on low heat. Stir in the sugars until they dissolve completely. Once you add the marshmallows and peanut butter, make sure to stir gently. This keeps the mixture smooth and creamy. After mixing in the Rice Krispies, press the mixture into your baking dish firmly. Use your hands or a spatula to compact the mixture without crushing the cereal. This helps create a nice, chewy texture that holds together well. For extra flavor, try adding toppings. You can drizzle melted chocolate on top. Or, sprinkle crushed nuts for a crunchy bite. A dash of cinnamon or a swirl of peanut butter can add a unique twist. Using different types of salt can enhance the taste. Flaky sea salt offers a nice crunch. Try smoked salt for a deeper flavor. Each type brings its own unique taste to your treats. Choosing the right saucepan makes a big difference. A heavy-bottomed saucepan prevents burning. It ensures even heating for melting butter and sugar. Use a sturdy spatula for mixing. A silicone spatula works best for scraping the sides of the pan. Measuring cups are important for accuracy. They help you get the right amount of each ingredient. For more tips, check out the Full Recipe. It offers detailed steps and suggestions for perfecting your Salted Caramel Rice Krispie Treats. {{image_2}} You can easily change the flavor of your salted caramel rice Krispie treats. Adding chocolate chips gives them a rich twist. I love using semi-sweet chips for balance. You can also mix in nuts for crunch. Walnuts or pecans work well. Another fun idea is to add spices. A dash of cinnamon gives warmth. Nutmeg adds a cozy holiday feel. Just a pinch can transform the taste. Not everyone can enjoy the same treats. For a low-sugar option, use a sugar substitute. This way, you can still enjoy the sweetness without the extra sugar. If you have allergies, try nut-free options. Use sunflower seed butter instead of peanut butter. You can also find dairy-free marshmallows. These swaps make your treats safe and delicious for everyone. Seasonal flavors can make your treats even more special. For fall, add a bit of pumpkin spice. In summer, try mixing in dried fruit for a fruity twist. You can also make holiday-themed treats. For Halloween, add orange and black sprinkles. At Christmas, use festive colors like red and green. These ideas make your treats fun for any occasion. For the complete recipe, check out the Full Recipe above. Enjoy your baking! To keep your salted caramel rice Krispie treats fresh, use airtight containers. Glass or plastic containers work well. Make sure the treats are cool before sealing the container. This prevents moisture build-up, which can make them soggy. Keep the treats at room temperature. They can stay fresh for up to three days. If you want them to last longer, avoid cutting them into squares until you're ready to eat. This helps keep their shape and texture. To stop the treats from becoming stale, try these tips: - Place a slice of bread in the container. - The bread adds moisture and keeps the treats soft. - Avoid using wax paper between layers, as it can stick. You can freeze salted caramel rice Krispie treats for a longer storage option. First, let them cool completely. Then, wrap each treat in plastic wrap. After wrapping, place them in a freezer-safe bag or container. When freezing, the treats can last for up to three months. To thaw, move them to the fridge overnight. If you're in a hurry, you can let them sit at room temperature for about 30 minutes. When ready to enjoy, do not refreeze them after thawing. This keeps the texture nice and chewy. For the full recipe, refer back to the main sections outlined above. Salted Caramel Rice Krispie Treats last about 2-3 days at room temperature. Keep them in an airtight container. If you store them in the fridge, they can last up to a week. Just remember, the treats might get a bit firmer when cold. Yes, you can make these treats a day or two ahead. This is great for parties or events. Just store them in an airtight container. They will still taste amazing when you serve them. If the mixture is sticky, you can try these tips. First, let the mixture cool a bit before mixing in the Rice Krispies. This can help reduce stickiness. Second, use a greased spatula or your hands to avoid sticking. If it’s still too sticky, add a bit more Rice Krispies. This will help balance the texture. For the full list of ingredients and steps, check out the Full Recipe. This will guide you through making these delicious treats step by step. You’ve learned how to make delicious Salted Caramel Rice Krispie Treats. We covered ingredients, easy steps, and tips for the right texture. You can customize these treats for diet needs or special occasions. Remember to store them well for lasting freshness. I hope you feel ready to create your own tasty snacks. Enjoy your cooking!

Salted Caramel Rice Krispie Treats Irresistible Delight

Craving something sweet and salty? Get ready to make Salted Caramel Rice Krispie Treats! This twist on a classic will

Older posts
Newer posts
← Previous Page1 … Page48 Page49 Page50 … Page84 Next →

dsad

© 2026 Lisa Dishes • Built with GeneratePress

Our Policies

  • Copyright Policy
  • Cookie Policy
  • GDPR Policy
  • Privacy Policy
  • Disclaimer
  • Terms Of Use

More Information

  • Home
  • About
  • Contact
  • Appetizers
  • Dessert
  • Dinner
  • Drinks
©2026, Lisa Dishes About Back To Top