Skip to content
DisclaimerTerms Of UseGDPR PolicyCookie Policy

Lisa Dishes

  • Home
  • Drinks
  • Appetizers
  • Dinner
  • Dessert
  • About
  • Contact
  • Privacy Policy
DisclaimerTerms Of UseGDPR PolicyCookie Policy

NO-ING-IMG

- 2 large cucumbers, diced - 1 cup cherry tomatoes, halved - 1 red bell pepper, diced - 1/2 red onion, finely chopped - 1 cup feta cheese, crumbled - 1/4 cup Kalamata olives, pitted and sliced - 3 tablespoons fresh dill, chopped - 3 tablespoons extra virgin olive oil - 2 tablespoons red wine vinegar - 1 teaspoon dried oregano - Salt and pepper to taste You can add more taste with these options: - Avocado for creaminess - Chickpeas for protein - Radishes for a crunchier bite - Lemon juice for a zesty kick Fresh ingredients make a big difference. Here’s how to pick the best: - Look for firm cucumbers with smooth skin. - Choose tomatoes that are bright and fragrant. - Select bell peppers that feel heavy and have shiny skin. - Pick red onions that are firm and have no soft spots. - Choose feta cheese that is creamy but not too crumbly. - For olives, check for good color and no wrinkling. {{ingredient_image_1}} Start by dicing two large cucumbers. I prefer to use English cucumbers for their crispness. Next, halve one cup of cherry tomatoes. Their sweetness brings a nice balance to the salad. Then, dice one red bell pepper and finely chop half a red onion. Each adds texture and taste. Combine all these fresh veggies in a large mixing bowl. Make sure to mix them up well. This way, every bite has a little bit of everything. In a small bowl, whisk together three tablespoons of extra virgin olive oil and two tablespoons of red wine vinegar. This mix adds depth and tanginess. Then, add one teaspoon of dried oregano, along with salt and pepper to taste. Whisk until it’s well combined. The dressing should feel light yet full of flavor. This will coat your salad beautifully. Now, it’s time to bring everything together. Pour the dressing over the veggie mix. Add one cup of crumbled feta cheese and a quarter cup of sliced Kalamata olives. These ingredients provide a rich, salty flavor that pairs perfectly with the fresh vegetables. Sprinkle three tablespoons of fresh dill on top. Dill adds a bright note that makes the salad sing. Gently toss all the ingredients until they are coated in the dressing. Let the salad sit for about ten minutes. This allows the flavors to blend nicely. Serve it in a large, shallow bowl. Garnish with extra dill sprigs and a few olives for a lovely touch. Enjoy your fresh and vibrant cucumber dill Greek salad! Cutting your vegetables right makes a big difference. For cucumbers, slice them into bite-sized pieces. This way, they soak up the dressing well. Cherry tomatoes should be halved. This helps release their sweet juice. The red bell pepper should be diced small. This adds crunch and color. Finally, chop the red onion finely. This gives a nice sharp taste without overpowering the salad. You can change ingredients to match your taste. If you love spice, add jalapeños or diced chili peppers. Want it sweeter? Use yellow or orange bell peppers. If you don't like olives, try capers. You can switch feta cheese for goat cheese if you prefer a creamier texture. Fresh herbs work too. Try basil if you want a different flavor. Tossing your salad well is key. Start by adding the dressing to the bowl first. This helps the veggies get coated evenly. Use your hands or salad tongs to mix gently. Be careful not to squish the tomatoes or feta. Let it sit for about 10 minutes. This allows flavors to mix better. Always taste before serving. Adjust salt and pepper if needed. Pro Tips Fresh Ingredients: Always use the freshest cucumbers and tomatoes you can find for the best flavor and crunch. Chill Before Serving: For an extra refreshing salad, chill the salad in the refrigerator for 30 minutes before serving. Customizable Add-ins: Feel free to add other ingredients like avocado or chickpeas for extra texture and nutrition. Flavor Infusion: Allow the salad to sit for at least 10 minutes after dressing to let the flavors meld together beautifully. {{image_2}} Chickpeas add great texture and protein to your salad. They make it more filling. Use one can of drained chickpeas. Toss them in with the other ingredients for a hearty twist. It turns a light dish into a meal. Plus, they bring a nutty taste that pairs well with the fresh veggies. In summer, add fresh herbs like basil or mint. They give a bright flavor. You can also swap in ripe peaches or watermelon for sweetness. In fall, consider adding roasted butternut squash. It adds warmth and a sweet touch. You can even include apple slices for crunch and sweetness. Each season brings new flavors to enjoy! For a vegan version, skip the feta cheese. Try crumbled tofu or a nut-based feta. You can also use avocado to add creaminess. Nutritional yeast gives a cheesy flavor while keeping it plant-based. These swaps keep your salad tasty and satisfying, while still fresh and light. To keep your cucumber dill Greek salad fresh, place it in an airtight container. Make sure to seal the lid tightly. This helps to keep the flavors in and the salad crisp. If you have extra dressing, store it separately. This way, your salad stays crunchy and not soggy. When stored in the fridge, your salad lasts about 3 days. After that, the veggies may start to lose their crunch. Always check for off smells or changes in texture before eating. If it seems off, it's best to toss it out. I don’t recommend freezing this salad. Freezing can change the texture of cucumbers and tomatoes. They can become mushy when thawed, losing their fresh taste. If you want to prep ahead of time, consider freezing the dressing. You can mix it up fresh later for a quick meal. The best type of cucumber for a salad is the English cucumber. It has thin skin and fewer seeds, making it crisp and tasty. Another good choice is the Persian cucumber. It is smaller and has a sweet flavor. Both types work great in a Cucumber Dill Greek Salad. Yes, you can prepare this salad ahead of time. Make it a few hours before serving. This gives the flavors time to mix. Just keep it in the fridge until you are ready to serve. If you prepare it too early, the cucumbers can get watery. To prevent this, add the dressing right before serving. You can add many ingredients for extra nutrition. Here are some ideas: - Chickpeas for protein - Avocado for healthy fats - Spinach for more vitamins - Carrots for crunch and color - Bell peppers for added sweetness Feel free to mix and match! These additions can make your salad even more delicious and healthy. In this blog post, we explored various fresh ingredients to elevate your salad. We discussed how to prepare vegetables, make flavorful dressings, and the best ways to combine everything. You learned tips for cutting and tossing, along with exciting variations, like adding chickpeas or seasonal ingredients. Proper storage keeps your salad fresh longer. Remember, a great salad starts with fresh produce and personal touch. Enjoy the process and make it your own!

Cucumber Dill Greek Salad Refreshing and Simple Dish

Looking for a light and tasty side dish? You’ve found it in this Cucumber Dill Greek Salad! Fresh cucumbers, zesty

For this tasty dish, gather these items: - 1 lb Brussels sprouts, halved - 6 tablespoons unsalted butter, melted - 4 cloves garlic, minced - 2 tablespoons honey - 1 teaspoon balsamic vinegar - Salt and pepper to taste - 1/4 teaspoon red pepper flakes (optional) - 1/4 cup grated Parmesan cheese - Fresh parsley, chopped for garnish Using the right measurements is key. If you want to change the recipe: - Try 4 tablespoons of olive oil instead of butter for a lighter version. - Use maple syrup in place of honey for a vegan twist. - If you run out of balsamic vinegar, apple cider vinegar works well too. You can add some fun flavors to your Brussels sprouts. Here are some ideas: - Cooked bacon bits or pancetta for a savory touch. - Lemon zest for a bright and fresh taste. - Toasted nuts, like almonds or walnuts, for crunch. - A sprinkle of feta cheese for a creamy addition. These options let you customize the dish to your taste. Happy cooking! {{ingredient_image_1}} Start by preheating your oven to 400°F (200°C). This step is key for getting crispy sprouts. A hot oven helps caramelize the Brussels sprouts perfectly. Take 1 pound of Brussels sprouts and wash them well. Trim the ends and cut each sprout in half. This helps them cook evenly. Place the halved sprouts in a large bowl. In a separate bowl, melt 6 tablespoons of unsalted butter. Add 4 cloves of minced garlic, 2 tablespoons of honey, and 1 teaspoon of balsamic vinegar. Mix in salt, pepper, and red pepper flakes if you like some heat. Whisk until everything combines well. Pour the garlic butter mixture over the halved Brussels sprouts. Toss them until they are well coated. Spread the sprouts in a single layer on a baking sheet lined with parchment paper. Roast them in the oven for 20 to 25 minutes. Stir them halfway through cooking. Look for golden brown and crispy edges. Once done, take the sprouts out of the oven. Immediately sprinkle 1/4 cup of grated Parmesan cheese on top. The heat will melt the cheese a bit. Transfer the sprouts to a serving dish. Garnish with fresh chopped parsley for a nice pop of color. Enjoy your tasty dish warm! To get crispy Brussels sprouts, you must follow a few steps. First, make sure your oven is hot. Set it to 400°F (200°C) and let it preheat. Next, spread the halved Brussels sprouts in a single layer on your baking sheet. This helps them roast evenly. If they are too close together, they will steam and become soft. Stir them halfway through cooking to ensure even browning. Cutting Brussels sprouts properly helps them cook well. Start with fresh sprouts. Trim the stem end and remove any yellow leaves. Then, cut them in half. This allows the garlic butter to soak in. Halving also helps them cook faster. If you want, you can quarter them for even smaller pieces. Just make sure they are of similar size for even cooking. To boost the flavor of your Brussels sprouts, try a few tricks. The garlic butter mixture adds depth. You can also add honey and balsamic vinegar for a sweet touch. If you like heat, sprinkle in red pepper flakes. Don't forget to finish with Parmesan cheese. It melts beautifully and adds a savory bite. Lastly, a sprinkle of fresh parsley brightens up the dish. Pro Tips Choose Fresh Brussels Sprouts: Look for bright green sprouts that are firm and tightly packed. Avoid any that are yellowing or have blemishes for the best flavor. Adjust the Garlic: For a milder garlic flavor, roast the garlic with the Brussels sprouts. For a stronger taste, add raw minced garlic just before serving. Experiment with Seasonings: Feel free to add herbs like thyme or rosemary, or spices like smoked paprika for a different flavor profile that complements the Brussels sprouts. Serve Immediately: These Brussels sprouts are best enjoyed fresh out of the oven when they are crispy and hot. Reheating can cause them to lose their texture. {{image_2}} You can mix it up by adding different cheeses. Try using goat cheese or feta. These cheeses add a tangy flavor that pairs nicely with the sprouts. I like to sprinkle the cheese on right after roasting. This way, it melts just a bit and sticks to the sprouts. You can also add a bit of blue cheese for a bolder taste. Each cheese gives a unique twist to the dish. Brussels sprouts are great, but you can add other veggies too! Carrots, sweet potatoes, or cauliflower work well. Just chop them to the same size as the Brussels sprouts. This helps everything cook evenly. Toss them in the garlic butter mix just like you do with the sprouts. The flavors blend nicely, and you get a colorful side dish. It's a fun way to use what you have in your fridge. If you love heat, add more red pepper flakes. Start with half a teaspoon and adjust to your taste. This gives the dish a nice kick! You can also mix in some chopped fresh chili peppers for extra spice. I enjoy this version when I want something bold. Just remember to balance the heat with the sweet honey in the recipe. It makes every bite exciting! To keep your Garlic Butter Roasted Brussels Sprouts fresh, place leftovers in an airtight container. It is best to store them in the fridge. They will last for about 3 to 5 days. Make sure the sprouts cool down before you seal the container. This helps prevent moisture buildup. When you are ready to enjoy the leftovers, preheat your oven to 350°F (175°C). Spread the Brussels sprouts on a baking sheet. Bake for about 10 to 15 minutes until they are heated through. This method keeps them crispy. You can also microwave them for about 1 to 2 minutes, but they may lose some crispiness. If you want to freeze the Brussels sprouts, ensure they are completely cool. Place them in a freezer-safe bag. They can last in the freezer for up to 2 months. When you want to use them, take the sprouts out and let them thaw in the fridge overnight. For best results, reheat in the oven for a fresh taste. Yes, you can use frozen Brussels sprouts. They are convenient and save time. Just keep in mind, they may become softer than fresh ones. To use them, thaw the sprouts first. Then, follow the same steps in the recipe. This will help them roast better and get nice and crispy. To make this recipe vegan, swap out the butter. Use plant-based butter instead. This will give you that rich flavor without using dairy. You can also leave out the Parmesan cheese or replace it with a vegan cheese. This keeps the dish tasty and plant-friendly! Garlic Butter Roasted Brussels Sprouts pair well with many dishes. You can serve them alongside roasted chicken or fish. They also go great with pasta or a grain dish like quinoa. For a full meal, add a fresh salad or some crusty bread. Enjoy the mix of flavors! Garlic butter roasted Brussels sprouts are simple yet delicious. This blog covered everything, from ingredients to cooking tips. You learned how to prepare, roast, and serve these sprouts. Remember to experiment with different flavors and add-ins to make them your own. Store leftovers properly for future meals. Enjoy the taste of this dish while having fun cooking it! Your kitchen can become a place of tasty adventures. Happy cooking!

Garlic Butter Roasted Brussels Sprouts Flavorful Delight

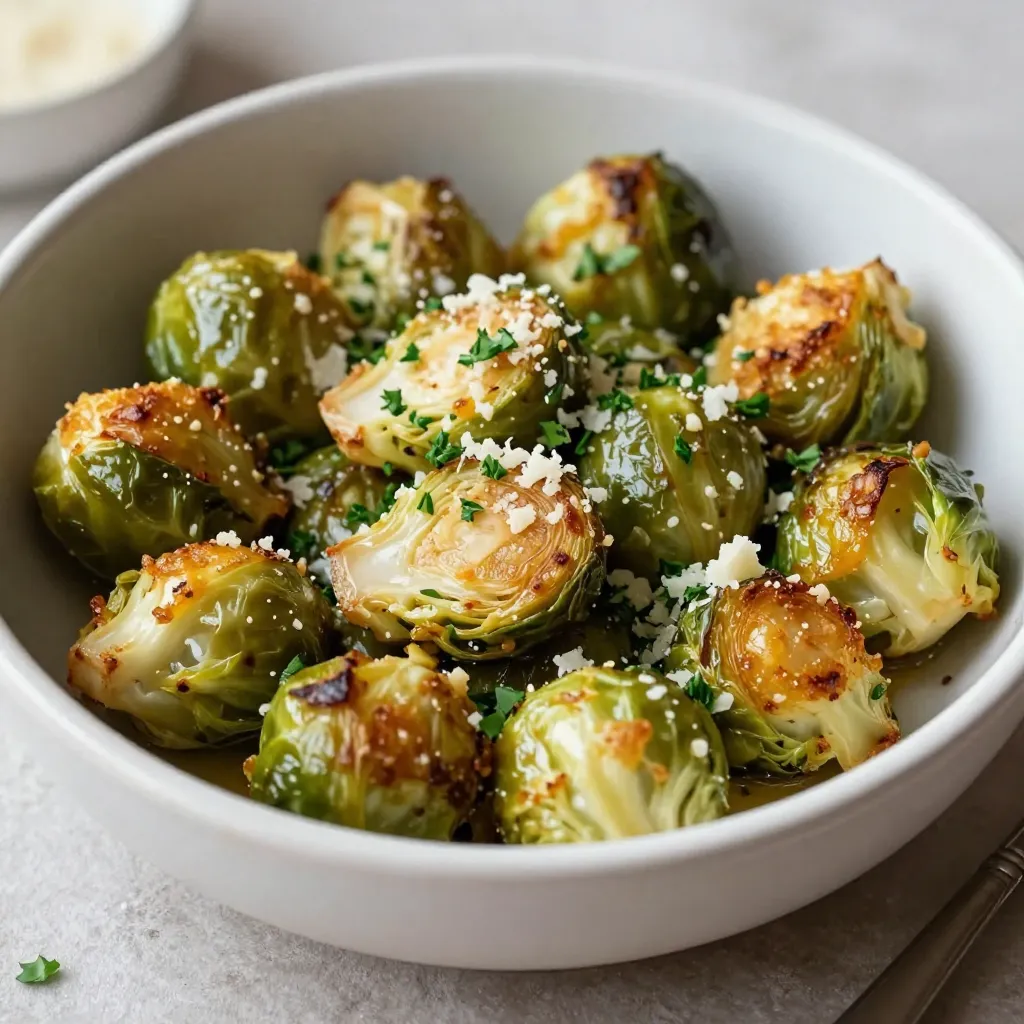
If you want a tasty side dish that will impress everyone, look no further. Garlic butter roasted Brussels sprouts are

Here’s what you need for your savory chicken Alfredo stuffed shells: - 12 jumbo pasta shells - 2 cups cooked chicken, diced - 1 cup ricotta cheese - 1 cup mozzarella cheese, shredded - 1/2 cup Parmesan cheese, grated - 1 cup Alfredo sauce (store-bought or homemade) - 1 teaspoon garlic powder - 1 teaspoon Italian seasoning - Salt and pepper to taste - Fresh parsley for garnish Each ingredient plays a role in making these shells rich and creamy. The jumbo pasta shells are perfect for holding the filling. Cooked chicken gives a nice protein boost. Ricotta, mozzarella, and Parmesan create a creamy texture and great flavor. The Alfredo sauce ties everything together with its rich, buttery taste. Garlic powder and Italian seasoning add depth, while salt and pepper bring balance. Finally, fresh parsley adds a pop of color and freshness on top. Enjoy gathering your ingredients! {{ingredient_image_1}} First, you need to preheat your oven to 375°F (190°C). This step is key to getting a nice, bubbly top on your dish. Next, boil 12 jumbo pasta shells according to the package instructions until they are just al dente. This means they should still have a little bite to them. Once they are done, drain the shells and set them aside. Make sure they don’t stick together. In a large mixing bowl, combine 2 cups of cooked, diced chicken, 1 cup of ricotta cheese, and half of the mozzarella cheese. You will also need 1/2 cup of grated Parmesan cheese. Add 1 teaspoon of garlic powder, 1 teaspoon of Italian seasoning, and season with salt and pepper to taste. Mix all these ingredients until they are well blended. This filling is creamy, cheesy, and full of flavor. Start by spreading a thin layer of Alfredo sauce on the bottom of your baking dish. This helps keep the shells from sticking. Now, carefully stuff each cooked shell with your chicken and cheese mixture. Place them in the baking dish in a single layer. Once all the shells are stuffed, pour the remaining Alfredo sauce over the top. Finally, sprinkle the rest of the mozzarella cheese evenly over the sauce. Cover the dish with aluminum foil, making sure it is sealed tight. Bake for 25 minutes. After that, remove the foil and bake for another 10 to 15 minutes. This will let the cheese get bubbly and slightly golden. When done, take the dish out of the oven and let it cool for a few minutes. Garnish with freshly chopped parsley before serving. Enjoy your savory chicken Alfredo stuffed shells! - Achieving perfect al dente shells: Cook the jumbo pasta shells for one to two minutes less than the package says. This keeps them firm. Drain and rinse them with cold water to stop cooking. - Ensuring even filling distribution: Use a small spoon to fill each shell. Make sure to pack the filling in well. This helps every bite taste great. - Garnishing choices: Use fresh parsley for color and taste. You can also sprinkle some extra Parmesan for a nice touch. - Serving accompaniments, like garlic bread: Pair the stuffed shells with warm garlic bread. This adds a nice crunch and flavor to the meal. - Overcooked shells solutions: If your shells are too soft, try not to cook them as long next time. You can also let them cool before filling. This helps them hold shape. - Fixing runny filling: If your filling is too runny, add more ricotta cheese or some breadcrumbs. This can help thicken it up. Pro Tips Don’t Overcook the Pasta: Boil the shells until they are just al dente, as they will continue to cook in the oven and become mushy if overcooked. Customize Your Filling: Feel free to add vegetables like spinach or mushrooms to the chicken and cheese mixture for added flavor and nutrition. Make Ahead: These stuffed shells can be assembled ahead of time and stored in the fridge, making them a great option for meal prep. Use Fresh Herbs: Garnishing with fresh parsley or basil not only adds a pop of color but also enhances the flavor profile of the dish. {{image_2}} You can swap cheese to match your taste. Try using feta or goat cheese for a tangy twist. If you want a lighter filling, cottage cheese works well too. For the chicken, use rotisserie chicken for a quick option. Turkey also makes a good choice if you prefer a leaner meat. To make this dish lower in calories, use low-fat cheese and a light Alfredo sauce. You can also add Greek yogurt for creaminess without the extra fat. If you're gluten-free, look for gluten-free pasta shells. They work just as well and taste great. Adding veggies boosts flavor and nutrition. Spinach adds a nice color and taste. Mushrooms give a hearty texture. You can also spice things up with red pepper flakes or Italian herbs. Adjust the heat based on your preference to make it just right for you. To store leftover stuffed shells, let them cool first. Place them in a container with a lid. Make sure the lid fits tightly to keep them fresh. You can use glass or plastic containers. These keep the shells safe and tasty for up to three days in the fridge. To prep for freezing, first, let the stuffed shells cool. Arrange them in a single layer on a baking sheet. Cover them with foil and freeze for about two hours. Once frozen, transfer them to a freezer-safe bag. This helps save space and keeps them fresh for up to three months. To thaw, move them to the fridge overnight for the best quality. For reheating, you can use an oven or a microwave. If you choose the oven, preheat it to 350°F (175°C). Place the stuffed shells in a baking dish and cover with foil. This keeps them moist. Heat for about 20 minutes. For the microwave, place a few shells on a plate and cover them with a damp paper towel. Heat for about two minutes, checking them often. This helps retain their texture. Enjoy your meal warm and delicious! Can I use store-bought Alfredo sauce? Yes, you can use store-bought Alfredo sauce. It saves time and still tastes great. Just pour it over the shells before baking. I often keep a jar handy for quick meals. How long can I store leftovers? You can store leftovers in the fridge for up to three days. Make sure to cover them tightly. This helps keep them fresh and safe to eat later. Can I prepare these shells ahead of time? Absolutely! You can prepare the shells a day in advance. Just stuff them, cover, and store in the fridge. Bake them when you are ready to eat. This makes dinner planning easier! What sides go well with chicken Alfredo stuffed shells? I love serving garlic bread with these shells. A simple side salad is also great. You can add roasted veggies for extra flavor and color. These sides balance the rich taste of the dish. You now have a complete guide to making delicious Chicken Alfredo Stuffed Shells. We covered the ingredients and walked through every step, from cooking to baking. I shared tips to ensure perfect shells and provided ideas for variations and storage. Use this dish to impress family and friends. Don't hesitate to try different flavors or health options. Enjoy your meal and make it a memorable feast!

Savory Chicken Alfredo Stuffed Shells Dinner Recipe

Are you ready to make a dinner that wows? These savory Chicken Alfredo Stuffed Shells are sure to impress your

- 1 medium head of cauliflower, cut into florets - 1 cup all-purpose flour - 2 tablespoons olive oil The main ingredient here is cauliflower. It provides a great base for this dish. The all-purpose flour helps create a light, crispy coat. Olive oil adds flavor and aids in achieving that golden crisp. - 1 teaspoon garlic powder - 1 teaspoon onion powder - 1/2 teaspoon smoked paprika - 1/2 teaspoon salt - 1/4 teaspoon black pepper These seasonings bring the dish to life. Garlic powder adds depth. Onion powder gives a sweet note. Smoked paprika adds a hint of smokiness, while salt and pepper enhance all the flavors. - 1/4 cup orange juice - Zest of 1 orange - 1 tablespoon soy sauce - 1 tablespoon maple syrup - 1/2 teaspoon red pepper flakes The orange sauce really makes this dish special. Fresh orange juice gives a bright taste. Orange zest boosts that citrus flavor. Soy sauce adds umami, while maple syrup balances the tartness. Red pepper flakes give a nice kick. This sauce coats the crispy cauliflower perfectly. For the complete recipe, check the Full Recipe section. Preheating the oven Set your oven to 425°F (220°C). This high heat helps the cauliflower get crispy. Line a baking sheet with parchment paper. This makes cleanup easy. Preparing the batter In a large bowl, mix these dry ingredients: - 1 cup all-purpose flour - 1 teaspoon garlic powder - 1 teaspoon onion powder - 1/2 teaspoon smoked paprika - 1/2 teaspoon salt - 1/4 teaspoon black pepper Slowly add 1 cup of water and whisk until smooth. The batter should be thick but pourable. Coating cauliflower florets Take your medium head of cauliflower, cut it into florets, and add them to the batter. Toss gently until each piece is covered. Baking process Spread the coated florets on your baking sheet. Make sure they’re spaced out. Drizzle 2 tablespoons of olive oil over the cauliflower. Bake for 25–30 minutes. Flip them halfway through. They should turn golden brown and crispy. Simmering the sauce While the cauliflower bakes, make the orange glaze. In a small saucepan, combine: - 1/4 cup orange juice - Zest of 1 orange - 1 tablespoon soy sauce - 1 tablespoon maple syrup - 1/2 teaspoon red pepper flakes Bring this to a simmer over medium heat. Cook for 4–5 minutes. It should thicken a bit. Caramelizing the cauliflower Once the cauliflower is crispy, take it out of the oven. Toss it in the orange glaze until well coated. Return it to the oven for 5 more minutes. This caramelizes the glaze and adds a nice shine. Enjoy your crispy baked orange cauliflower! For the full recipe, check out the previous section. To get that perfect crispy texture, spacing is key. When you lay the cauliflower on the baking sheet, make sure not to crowd them. If they touch, they will steam instead of bake. Each piece needs room to get crispy. I flip the florets halfway through baking. This helps them brown evenly on all sides. You can adjust heat with red pepper flakes. If you like it spicy, add more flakes. For a fresh touch, try adding herbs like parsley or cilantro. They brighten the dish and add a nice green color. Mixing in herbs can make your cauliflower sing with flavor. Garnishing is important for a beautiful dish. I like to sprinkle chopped green onions and toasted sesame seeds on top. This adds color and texture. When serving, a side of rice or quinoa makes a great match. It balances the flavors and makes the meal feel complete. For the full recipe, check out the details above. Enjoy creating this tasty dish! {{image_2}} To make this dish vegan, you can easily swap some ingredients. Instead of using all-purpose flour, try chickpea flour. It gives a nice flavor and helps the batter stick. For the liquid, you can use vegetable broth instead of water. This change adds depth and taste to your cauliflower. You can play with different citrus juices to change the taste. Try lemon or lime juice for a tangy twist. You could even use grapefruit juice for a unique flavor. Adding spices can also change things up. Consider using curry powder or cumin for a warm, savory kick. These spices mix well with the orange and create a tasty blend. Crispy baked orange cauliflower pairs well with many side dishes. Serve it with rice or quinoa for a filling meal. You could also add a simple salad for freshness. If you want to make it a main course, add protein. Some grilled tofu or chickpeas would work great. For an extra touch, drizzle some extra orange glaze on top before serving. Check out the Full Recipe for more ideas! To store your leftover crispy baked orange cauliflower, place it in an airtight container. Seal it well to keep moisture out. The dish stays fresh in the fridge for up to three days. When you want to enjoy it again, just remember to reheat it properly for the best taste. Freezing is another option for longer storage. First, let the cauliflower cool completely. Then, place it in a single layer on a baking sheet. Freeze until firm, about an hour. After that, transfer the pieces to a freezer-safe bag. This way, you can enjoy it for up to three months. When ready to eat, thaw it overnight in the fridge before reheating. To keep your crispy baked orange cauliflower crunchy, use the oven. Preheat it to 375°F (190°C). Place the cauliflower on a baking sheet and bake for about 10 minutes. This will help restore that delightful crispiness. You can also use an air fryer for a quick reheat. Just set it to 350°F (175°C) and heat for about 5 minutes. Enjoy this flavorful dish anytime! For the full recipe, check out the link above. You can pair this dish with many sides. Here are some great options: - Steamed rice: White or brown rice balances the flavors well. - Quinoa: A healthy grain that adds protein and fiber. - Roasted vegetables: Carrots or bell peppers bring more color and taste. - Salad: A fresh salad with a light dressing complements the dish nicely. - Noodles: Serve it over noodles for a heartier meal. These sides enhance the flavor and make your meal complete. Yes, you can easily make this dish gluten-free. Here are some substitutions to consider: - Flour: Use gluten-free all-purpose flour or almond flour instead of regular flour. - Soy sauce: Opt for gluten-free soy sauce or tamari. - Cornstarch: This can be a great thickener in your batter. These changes keep the dish tasty while catering to gluten-free diets. Leftover crispy cauliflower can stay fresh for about 3 to 4 days in the fridge. Here are some tips for storage: - Airtight container: Store it to keep moisture out. - Refrigerate promptly: Don’t leave it out at room temperature too long. For the best taste, enjoy it within a few days. This recipe for crispy baked orange cauliflower is easy and fun. We went over the key ingredients and how to make the dish. Knowing tips for crispiness and flavor makes it even better. You can also switch things up with variations that suit your taste. Store your leftovers the right way to enjoy them later. With this dish, you can impress family and friends. Simple steps lead to great results. Enjoy your cooking adventure!

Crispy Baked Orange Cauliflower Flavorful and Easy Dish

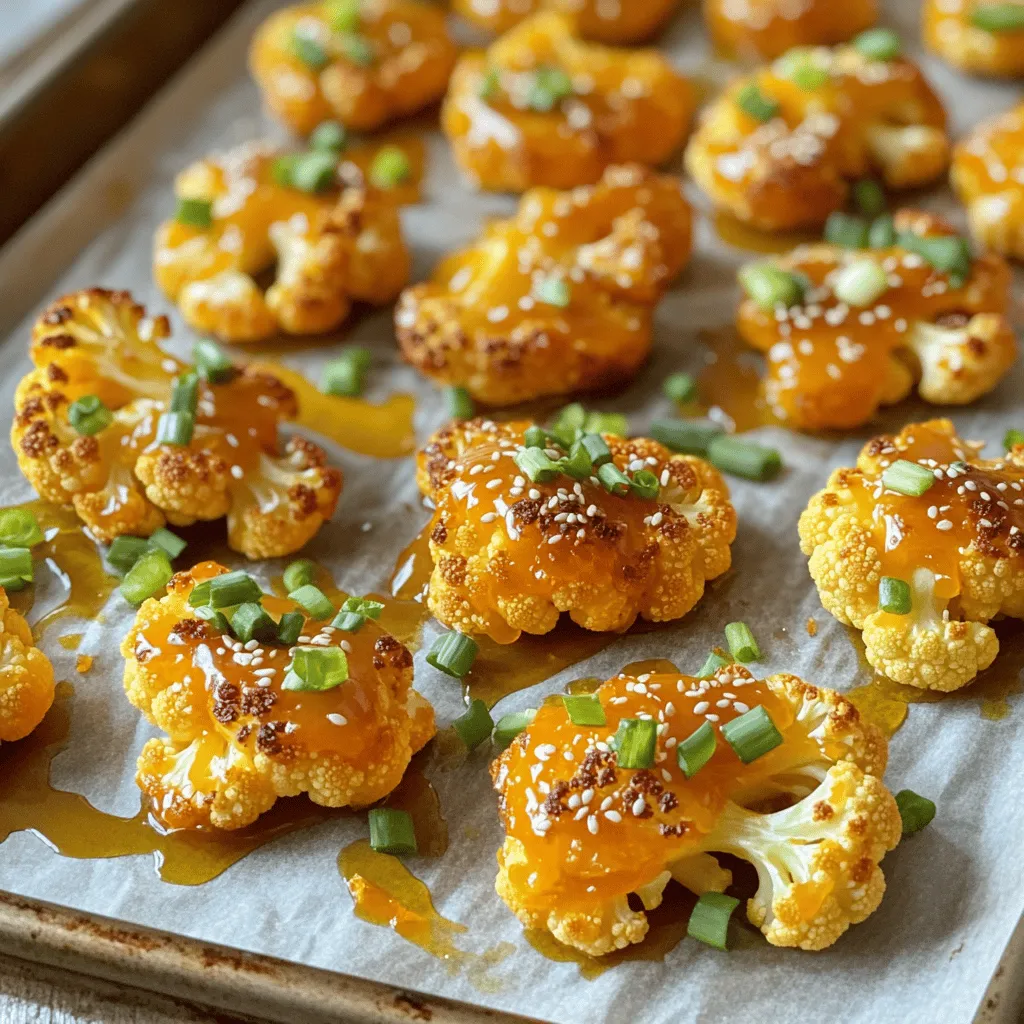
Get ready to enjoy a burst of flavor with my Crispy Baked Orange Cauliflower. This dish is not only straightforward

- Coconut milk: You can use canned or carton coconut milk. Canned coconut milk is richer and creamier. It adds a thick, smooth texture. Carton coconut milk is lighter and may have added water. Choose based on your taste and diet. - Fresh vs. store-bought mango puree: Fresh mangoes bring bright flavor and sweetness. They add a nice texture. Store-bought mango puree is easy and quick. It saves time if you're in a rush. - Importance of chia seeds: Chia seeds are the heart of this pudding. They soak up the liquid and turn soft. They give the pudding its unique texture. Plus, they are packed with fiber and nutrients. - Maple syrup or honey: Both sweeteners work well. Maple syrup adds a warm, rich flavor. Honey gives a floral sweetness. Choose what you like best! - Vanilla extract: A small amount enhances the overall flavor. It adds warmth and depth to the pudding. Vanilla is a simple way to elevate your dish. - Garnishes: Fresh mango slices make the dish pop. Toasted coconut flakes add crunch and a tropical touch. These toppings make your pudding look and taste amazing! For the complete list of ingredients and steps, check the Full Recipe. First, gather your ingredients. In a mixing bowl, combine the coconut milk, mango puree, maple syrup, vanilla extract, and a pinch of salt. Whisk everything together until it’s smooth. Whisking is key here. It makes sure all the flavors mix well and creates a creamy texture. Now, gradually add the chia seeds to your mixture. Stir continuously as you pour in the seeds. This helps prevent clumping. If clumps form, it won’t look nice in your pudding. Once the seeds are evenly mixed, cover the bowl with plastic wrap. You can also use individual serving glasses if you prefer. Chill the mixture in the fridge for at least four hours or overnight. This waiting time is important. The chia seeds need time to absorb the liquid and thicken the pudding. When you’re ready to serve, give the pudding a good stir. This helps mix any settled ingredients. Top it with fresh mango slices and a sprinkle of toasted coconut flakes. These garnishes not only look great but add flavor and texture too. For the full recipe, check the details provided earlier. Enjoy your tasty treat! To make the best mango coconut chia pudding, soaking time is key. I recommend soaking the mixture for at least four hours. This allows the chia seeds to absorb the liquid fully. If you want a thicker pudding, let it sit longer. For a creamier texture, check it after four hours. You can always stir in more coconut milk if it gets too thick. Many people make mistakes when making chia pudding. One big mistake is over or under-whisking the mixture. Whisk until smooth, but don’t whisk too hard. This can break the chia seeds. Another common issue is not letting the pudding sit long enough to thicken. If you don’t wait, your pudding will be runny and will not set properly. So, be patient and let it chill! {{image_2}} You can make this chia pudding even more fun! Try adding different fruit purees. You might like strawberry, raspberry, or even passion fruit. Each puree brings a unique taste and color. You can mix and match your favorite fruits for a tasty twist. Spice it up! Adding a pinch of cinnamon or nutmeg can change the flavor. These spices add warmth and depth. They work well with the mango and coconut flavors. Experiment to find your perfect blend! This recipe is great for many diets. It is vegan since it uses coconut milk and maple syrup. You can also make it gluten-free with ease. Just check all your ingredients to be sure. If you want a high-protein option, consider adding a scoop of protein powder. You can also mix in some Greek yogurt. Both options boost the nutritional value. They keep you feeling full longer. Enjoy customizing this dish to fit your needs! For the full recipe, check out the detailed instructions above. To keep your Mango Coconut Chia Pudding fresh, store any leftovers in an airtight container. This will prevent the pudding from absorbing unwanted smells from your fridge. The pudding stays good for up to five days. If you notice any changes in smell or texture, it’s best to toss it out. You can freeze Mango Coconut Chia Pudding, but it may change in texture once thawed. To freeze, place the pudding in a freezer-safe container. Leave some space at the top, as it will expand when frozen. You can freeze it for up to three months. When you’re ready to enjoy it, move the container to the fridge to thaw overnight. After it thaws, give it a stir to mix any separated liquids. Serve chilled. You can top it with fresh mango slices or toasted coconut flakes to freshen it up. For the full recipe, check out the instructions above. Chia seeds need time to absorb liquid and thicken. I suggest soaking them for at least four hours. For best results, soak them overnight. This way, they become soft and create a nice texture. You will enjoy a creamy pudding that holds its shape. Yes, you can use other milk substitutes. Almond milk and oat milk are great options. They provide different flavors and can change the pudding’s texture. Just keep in mind that using unsweetened versions can help control sweetness. Each type of milk will give a unique taste to your Mango Coconut Chia Pudding. Absolutely! This pudding is both tasty and nutritious. Chia seeds are packed with fiber, protein, and omega-3 fatty acids. Coconut milk adds healthy fats, while mango gives vitamins A and C. Together, they create a fun and healthy dessert. It’s a sweet treat you can feel good about enjoying. For the complete recipe, check out the Full Recipe. We've explored the key ingredients for the Mango Coconut Chia Pudding. You learned about coconut milk, fresh mango puree, and the vital role of chia seeds. I shared step-by-step instructions and tips for making the perfect pudding. With variations to suit your taste and storage info for leftovers, you now have the tools for a delicious treat. In conclusion, this pudding is not just tasty; it’s also healthy and versatile. Enjoy experimenting and make it your own!

Tasty Mango Coconut Chia Pudding Easy Delight Recipe

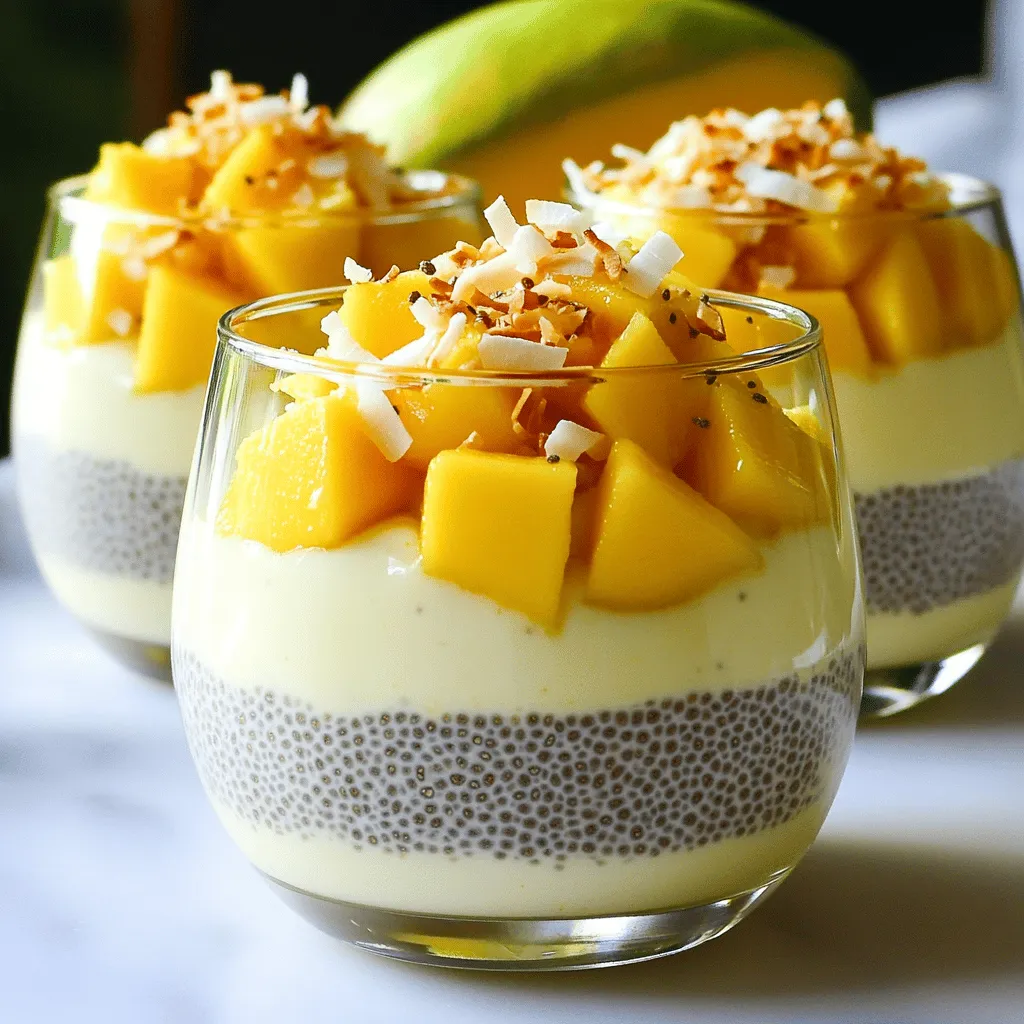
Get ready to enjoy a tropical treat with my Tasty Mango Coconut Chia Pudding! This easy delight recipe is perfect

- 1 lb boneless, skinless chicken thighs - 2 tablespoons chipotle sauce (or 1-2 chipotle peppers in adobo sauce, minced) - 1 tablespoon smoked paprika - 1 teaspoon garlic powder - 1 teaspoon cumin - 1 teaspoon salt - 1 tablespoon olive oil - 1 medium onion, thinly sliced - 1 bell pepper (any color), sliced - 8 small corn or flour tortillas The main star here is the chicken thighs. They stay juicy and tender, making them perfect for tacos. You’ll want that delicious chipotle sauce or the peppers in adobo for heat and flavor. The spices, like smoked paprika and cumin, give the chicken that smoky taste. - 1 avocado, sliced - Fresh cilantro, for garnish - Lime wedges, for serving Toppings can make or break your tacos. Creamy avocado adds great texture. Fresh cilantro gives a punch of flavor, and lime wedges bring a zesty kick. You can’t skip these toppings! - Corn tortillas vs. flour tortillas - How to choose the best tortilla When choosing tortillas, corn or flour both work great. Corn tortillas are more traditional and have a nice flavor. Flour tortillas are softer and easier to fill. Pick the one you like best! For the best tortilla, look for fresh options. If they are warm and soft, they will hold all your tasty fillings well. Make sure they are pliable for easy folding! For the full recipe, check out the detailed instructions above. To make the chicken flavorful, we need a good marinade. Start by mixing the chipotle sauce, smoked paprika, garlic powder, cumin, and salt in a large bowl. This blend gives the chicken its smoky taste. Coat the chicken thighs well in the marinade. Cover the bowl and chill it in the fridge. I recommend marinating for at least 30 minutes. If you have time, two hours adds even more flavor. To get the best texture, heat olive oil in a skillet over medium-high heat. Once the oil is hot, add the marinated chicken thighs. Cook them for about 6-7 minutes on each side. You want the outside to be slightly crispy and the inside fully cooked. After cooking, let the chicken rest for 5 minutes. This helps keep it juicy. Now, let’s sauté the veggies! In the same skillet, add the sliced onion and bell pepper. Cook them for about 4-5 minutes until they soften. You want them to be slightly charred for extra flavor. This step really adds depth to your tacos. The sweet taste of the veggies balances the smoky chicken. Marinating is key for great taste. It allows the chicken to soak up all those bold flavors. I suggest marinating the chicken for at least 30 minutes. If time allows, try for 2 hours. This brings out the smoky notes of the chipotle sauce. Selecting the right spices matters too. I use smoked paprika, garlic powder, and cumin. These spices add depth and warmth. They balance the heat from the chipotle. Feel free to adjust spice levels to suit your taste. For cooking chicken, medium-high heat works best. This setting allows the chicken to brown nicely. It will cook through without drying out. Keep an eye on the time. Each side should take about 6-7 minutes. To get that crispy exterior, don’t overcrowd the pan. Cook in batches if needed. Letting the chicken rest for 5 minutes after cooking helps too. This keeps it juicy and tender. Consider serving these tacos with sides like rice or black beans. Dips like guacamole or salsa are also great. They enhance the flavors and make the meal more fun. Customizing taco toppings is easy. You can add sliced jalapeños for heat or shredded cheese for creaminess. Fresh lime juice brightens the dish and adds zest. Explore your options and make these tacos your own. For the full recipe, check out the Smoky Chipotle Chicken Tacos section. {{image_2}} You can cook smoky chipotle chicken tacos in a few ways. Grilling the chicken gives it a nice char and smoky flavor. Just heat your grill to medium-high. Cook the marinated chicken for about 6-7 minutes on each side. The result is juicy and tender chicken. Pan-frying is also quick and easy. Heat olive oil in a skillet over medium-high heat. This method keeps the chicken crispy on the outside. The cooking time remains the same. If you prefer a slow cooker, it’s simple too. Mix the chicken with the marinade and place it in the slow cooker. Cook it on low for 6-8 hours. This method makes the chicken very tender and full of flavor. You can swap chicken for other proteins. Tofu works well for a vegetarian option. Press it to remove excess water, then marinate just like chicken. Cook it until golden for a great texture. Beef is another choice. Use flank steak or ground beef. Adjust the cooking time for ground beef. Cook until browned, then mix in veggies and spices. You can even use shrimp for a seafood twist. Just marinate and cook for a few minutes until pink. Get creative with flavors! Try adding different spices like chili powder or oregano. You can also mix in sauces such as barbecue or salsa for a unique taste. Add different vegetables to your tacos too. Try corn, zucchini, or mushrooms for added texture and taste. Grilled or roasted vegetables can add great flavor too. With these variations, you can make smoky chipotle chicken tacos your own. Check out the full recipe for more details! To keep your smoky chipotle chicken tacos fresh, store each ingredient separately. This helps maintain their flavors and textures. Use airtight containers to keep everything safe. Store the chicken and veggies in one container. Place tortillas in a separate bag or container. Use a container with a lid for the avocado. This prevents browning. When you want to heat your chicken and veggies, use the microwave or a skillet. If using the microwave, heat them in short bursts. Check every 30 seconds so they do not overcook. For a skillet, add a little oil to prevent sticking. Heat on medium until warmed through. This keeps the chicken juicy and the veggies crisp. Yes, you can freeze these tacos! It’s best to freeze the chicken and veggies separately. Make sure they are completely cool before freezing. Use freezer-safe bags or containers to avoid freezer burn. When ready to eat, thaw them overnight in the fridge. Reheat as mentioned above. Enjoy your tasty tacos later without losing flavor. For the full recipe, visit the recipe section. You can enjoy these tacos with many tasty sides. Here are some great options: - Mexican rice: This dish pairs well with the smoky chicken. - Refried beans: A classic side that adds creaminess. - Corn salad: Fresh corn with lime and cilantro brightens the meal. - Chips and salsa: Crunchy chips with zesty salsa are fun. - Margaritas or agua fresca: Refreshing drinks that match the flavors. These sides enhance your meal and bring color to your plate. Yes, you can prepare these tacos in advance for easy meals. Here’s how: - Marinate the chicken: You can marinate it the night before. This adds flavor and saves time. - Cook the chicken and veggies: You can cook them ahead and store them in the fridge. - Assemble before serving: Warm the tortillas and stack them up right before eating. This method is great for busy days or gatherings. The spice level depends on how much chipotle sauce you use. Here’s how to adjust it: - Mild: Use less chipotle sauce or opt for sweet peppers. - Medium: Stick to the recipe for balanced heat. - Spicy: Add extra chipotle sauce or diced peppers. Experiment to find your perfect heat level and enjoy customizing your dish! You've learned how to make smoky chipotle chicken tacos that shine. We covered key ingredients like chicken thighs and chipotle sauce. You know how to marinate and cook chicken for the best texture. Plus, we explored tortilla choices and tasty toppings. Don't forget about the many ways to change up this dish. Keep your leftovers fresh and tasty. With these tips, you can enjoy these tacos any day. Dive into the rich flavors, and make it your own!

Smoky Chipotle Chicken Tacos Flavorful and Easy Meal

Craving a quick and tasty meal? These Smoky Chipotle Chicken Tacos are your answer! With juicy chicken, bold flavors, and

- 12 large portobello mushrooms, stems removed - 1 cup fresh spinach, chopped - 1 cup canned artichoke hearts, drained and chopped - 1/2 cup cream cheese, softened - 1/2 cup grated Parmesan cheese - 1/2 cup mozzarella cheese, shredded - 1 clove garlic, minced - 2 tablespoons olive oil - Salt and pepper to taste The main ingredients in this dish create a rich and creamy filling. Portobello mushrooms are perfect for stuffing. They hold the filling well and add a nice, earthy flavor. Spinach and artichoke hearts provide freshness and a burst of flavor. Cream cheese adds creaminess, while Parmesan and mozzarella bring a nice cheesy texture. - 1/4 teaspoon red pepper flakes - Fresh parsley for garnish - Alternative cheese options Optional ingredients give you flexibility. Red pepper flakes add a touch of heat. Fresh parsley brightens the dish and looks great on the plate. You can also use different cheeses if you want to change up the flavor. For example, goat cheese or feta can add a unique twist. Check out the Full Recipe for all the details on how to make these delicious stuffed mushrooms. 1. Preheat your oven to 375°F (190°C). 2. Clean the portobello mushrooms with a damp cloth. 3. Place them stem-side up on a baking sheet lined with parchment paper. 4. Drizzle olive oil on the mushrooms and set them aside. 1. In a medium bowl, mix together the chopped spinach and artichoke hearts. 2. Add cream cheese, Parmesan cheese, half of the mozzarella cheese, and minced garlic. 3. Stir until all ingredients combine well. 4. Season the mixture with salt and pepper to taste. 1. Spoon the filling generously into each portobello mushroom cap. 2. Pack the filling slightly for a good fit. 3. Top each stuffed mushroom with the remaining mozzarella cheese. 4. Bake in the preheated oven for 20-25 minutes. 5. The mushrooms should be tender and the cheese bubbly and golden. 6. Remove from the oven and let cool for a couple of minutes. 7. Garnish with freshly chopped parsley before serving. For the full recipe, check the details above. Enjoy your savory Spinach Artichoke Stuffed Mushrooms! To get a creamy filling, use softened cream cheese. This makes mixing easy. Blend it with spinach and artichokes well. Mix until smooth and creamy. You can add more cream cheese if needed. For tender mushrooms, make sure to choose large portobello mushrooms. Clean them gently and remove the stems. Drizzle with olive oil before baking. This keeps them moist and helps them cook evenly. Bake until they are soft and the cheese is golden. These stuffed mushrooms pair well with a fresh salad or crusty bread. A light vinaigrette salad complements the dish well. For a fun twist, serve them with a spicy dipping sauce. To make it pretty, garnish with fresh parsley. You can also sprinkle extra cheese on top for a cheesy touch. Enjoy them warm for the best flavor. For more exciting ideas, check the Full Recipe for variations and extra tips. {{image_2}} You can change the recipe to fit your tastes. If you want a vegetarian option, swap cream cheese for tofu. This gives a nice creamy texture. You can also add extra veggies, like bell peppers or zucchini, to the filling. If you crave some meat, try adding crispy bacon. The bacon adds a savory crunch. Want to spice things up? Add jalapeños to the filling. This gives your mushrooms a kick. For a fresh twist, use different herbs. Fresh basil or oregano can enhance the flavors. You can also sprinkle in some Italian seasoning. Each change adds a new layer of taste to your dish. Experiment with these swaps and profiles. Each option creates a unique, delicious version of spinach artichoke stuffed mushrooms. Find your favorite and enjoy! For the full recipe, check out the details above. To keep your stuffed mushrooms fresh, first let them cool. Place them in a container with a lid. Store the container in the fridge. They will stay good for about three days. If you want to keep them longer, you can freeze them. Wrap each stuffed mushroom tightly in plastic wrap. Then, place them in a freezer bag. They can last up to three months in the freezer. When reheating stuffed mushrooms, the oven is your best friend. Preheat your oven to 350°F (175°C). Place the mushrooms on a baking sheet. Bake for about 10-15 minutes. This helps keep them crispy. If you want to use the microwave, do so with care. Place the mushrooms on a microwave-safe plate. Heat in short bursts of 30 seconds. Check often to avoid sogginess. Enjoy your tasty Spinach Artichoke Stuffed Mushrooms again! For the complete recipe, check out the Full Recipe. How long do Spinach Artichoke Stuffed Mushrooms last? These stuffed mushrooms stay fresh for up to three days in the fridge. Store them in an airtight container. Can I make these ahead of time? Yes, you can prepare the stuffing and fill the mushrooms a day in advance. Keep them covered in the fridge. Just bake them when ready to serve. What’s the best cheese to use? I recommend using a mix of cream cheese, Parmesan, and mozzarella. This blend gives a great taste and texture. Can I use different types of mushrooms? Absolutely! You can use button mushrooms or shiitake mushrooms. Just make sure they are large enough to hold the filling. How do I know when the stuffing is cooked? The mushrooms should be tender, and the cheese must be bubbly and golden. You can check the texture by piercing a mushroom with a fork. If it’s soft, it’s done! For the full recipe, check the details above. In this blog post, we explored making Spinach Artichoke Stuffed Mushrooms. You learned about key ingredients like portobello mushrooms, cream cheese, and seasonings. I provided step-by-step instructions for prep, filling, and baking. You discovered tips for a creamy texture and fun variations. Finally, we discussed storage and reheating methods. Enjoy this dish at your next gathering or cozy night in. It’s sure to impress both family and friends. Happy cooking!

Spinach Artichoke Stuffed Mushrooms Flavorful Delight

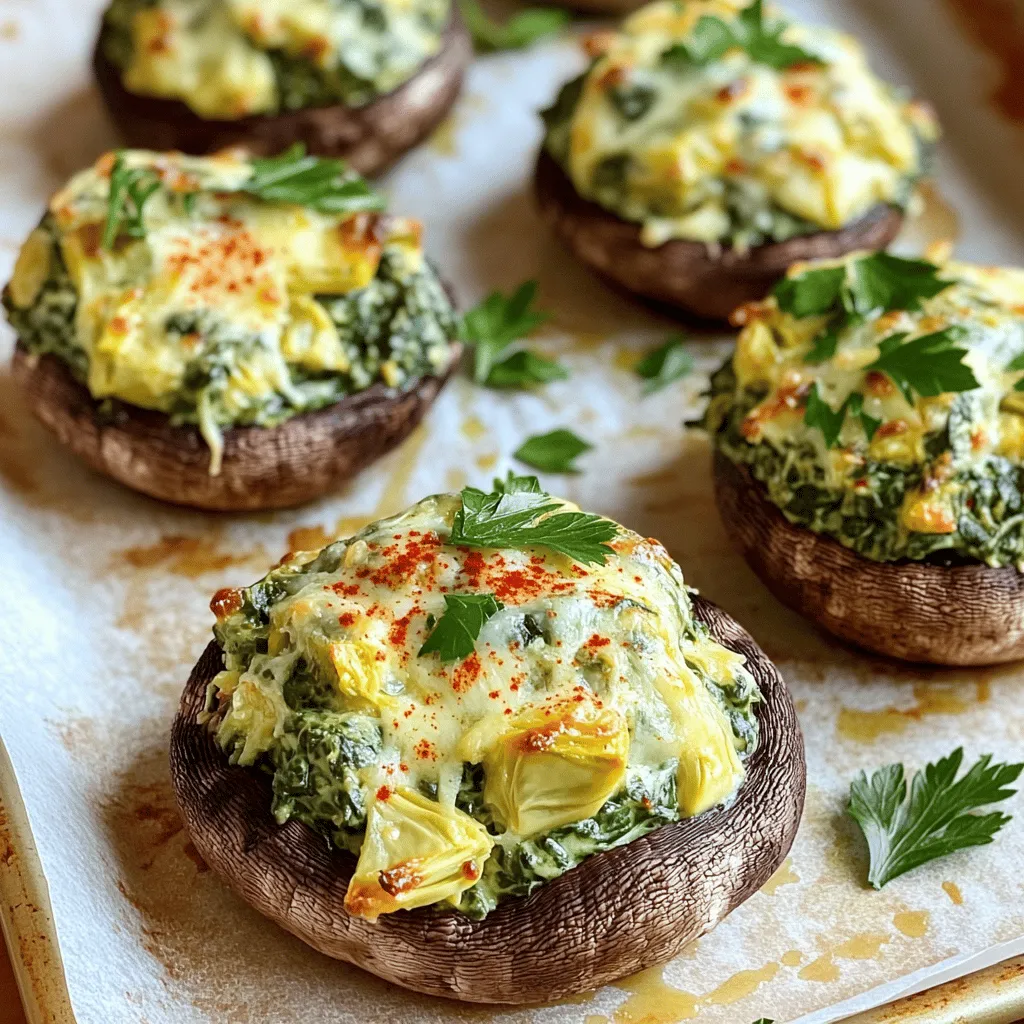
If you’re craving a savory treat that bursts with flavor, look no further! Spinach Artichoke Stuffed Mushrooms offer a perfect

To make your Peanut Butter Chocolate Chip Energy Balls, gather these ingredients: - 1 cup rolled oats - 1/2 cup creamy peanut butter - 1/4 cup honey or maple syrup - 1/2 cup chocolate chips (dark or milk, as preferred) - 1/4 cup ground flaxseed - 1/2 teaspoon vanilla extract - A pinch of salt Each ingredient plays a special role in this recipe. - Rolled oats give the balls a chewy texture. They also add fiber to keep you full. - Creamy peanut butter binds the mixture together and adds healthy fats. - Honey or maple syrup offers sweetness and helps with texture. - Chocolate chips bring rich flavor and a treat-like quality. - Ground flaxseed adds nutrients and a subtle nutty taste. - Vanilla extract enhances the overall flavor. - Salt balances sweetness and brings out the other flavors. You can customize your energy balls with these add-ins: - Chopped nuts for added crunch. - Dried fruit like raisins or cranberries for more sweetness. - Coconut flakes for a tropical twist. - Protein powder to boost protein content. Feel free to swap peanut butter with almond butter or sunflower seed butter for a nut-free option. You can also use agave syrup instead of honey. First, gather all your ingredients. You need rolled oats, creamy peanut butter, honey, chocolate chips, ground flaxseed, vanilla extract, and a pinch of salt. This recipe is quick and easy, taking only ten minutes to prep. In a large bowl, mix rolled oats, ground flaxseed, and salt. Stir them well. Next, add the creamy peanut butter and honey. Use a spatula to blend until the mixture comes together. Then, stir in the vanilla extract. Fold in the chocolate chips gently. This step ensures they are spread evenly. Now, use your hands to form small balls, roughly 1 inch wide. Place them on a baking sheet lined with parchment paper. This helps prevent sticking. Once formed, refrigerate the energy balls for at least 30 minutes. This chill time helps them set properly. After 30 minutes, your energy balls are ready to enjoy! You can serve them as a snack or a quick breakfast. For a fun twist, roll them in crushed nuts or coconut flakes before refrigerating. Pair these energy balls with fresh fruit for a tasty and nutritious treat. For the full recipe, check out the details above. To mix your energy balls well, start with dry ingredients. Combine rolled oats, ground flaxseed, and salt in a bowl. Stir until mixed evenly. Then, add the creamy peanut butter and honey. Use a spatula for a good mix. This helps to blend the flavors. Make sure everything is combined before adding chocolate chips. If your mixture feels too sticky, add more oats. They help absorb moisture. You can also chill the mixture for a short time. This makes it easier to handle. If you find it still sticks, lightly oil your hands. This will help you roll the balls without mess. Serve your energy balls cold for a refreshing treat. Pair them with fresh fruit like apples or bananas. You can also enjoy them with yogurt for a tasty snack. For a fun twist, roll the balls in crushed nuts or coconut flakes. This adds flavor and makes them look great! {{image_2}} You can easily change the flavor of your energy balls. Try adding spices like cinnamon or nutmeg. These spices add warmth and depth. You can also mix in some cocoa powder for a richer chocolate taste. If you love fruit, consider adding dried cranberries or raisins. They provide a sweet and chewy contrast to the chocolate. Making these energy balls vegan is simple. Just swap honey for maple syrup. This keeps them sweet and plant-based. For a gluten-free option, use certified gluten-free oats. This way, everyone can enjoy them without worry. You can also skip the chocolate chips or use dairy-free versions to suit your needs. Feel free to experiment with different nut butters. Almond butter or cashew butter work well, too. They each bring their own unique flavor. For sweeteners, you can use agave nectar or brown rice syrup instead of honey. This flexibility makes these energy balls fun to personalize. Add your favorite nuts or seeds for extra crunch and nutrition. You can find the full recipe for these energy balls [here](#). To keep your Peanut Butter Chocolate Chip Energy Balls fresh, store them in an airtight container. This helps lock in moisture and flavor. Place a piece of parchment paper between layers if you stack them. This prevents them from sticking together. Always refrigerate these energy balls right after making them. The cool temperature helps them maintain their shape and texture. You can freeze these energy balls for a longer shelf life. First, place them on a baking sheet. Make sure they are not touching. Freeze them for about an hour. Once they are solid, transfer them to a freezer-safe bag or container. Be sure to label it with the date. They will keep well in the freezer for up to three months. When you're ready to eat, just thaw them in the fridge overnight. When stored in the fridge, these energy balls last about one week. Keep an eye on them for any signs of spoilage. If they start to smell off or look dry, it’s best to toss them. For frozen energy balls, quality remains excellent for about three months. Over time, the taste may change slightly, but they will still be safe to eat. Enjoy your energy balls while they are fresh for the best taste! Peanut Butter Chocolate Chip Energy Balls stay fresh for about one week. Store them in an airtight container in your fridge. This keeps them firm and tasty. You can also freeze them for longer storage. They will last up to three months in the freezer. Just let them thaw before enjoying. Yes, you can make these without honey or maple syrup. Use mashed bananas or agave syrup as sweet alternatives. These options provide moisture and sweetness. Adjust the amount based on your taste. You may need to change the texture slightly, but they will still be delicious. Yes, these energy balls are healthy! They pack protein from peanut butter and fiber from oats. The chocolate chips add a bit of sweetness and fun. Ground flaxseed boosts omega-3 fatty acids. Enjoy them as a quick snack or post-workout treat. They provide energy without refined sugars. If you're allergic to peanuts or want a change, try almond butter or sunflower seed butter. Both options work well in this recipe. Each nut butter gives a unique flavor and texture. Just make sure the substitute is smooth and creamy for best results. This recipe is already a no-bake snack! Just mix the ingredients, form the balls, and chill them. No oven is needed at all. After chilling, they are ready to eat. They make a great grab-and-go option for busy days. For a fun twist, try rolling them in coconut or crushed nuts before chilling. This blog post covered how to make delicious Peanut Butter Chocolate Chip Energy Balls. We explored key ingredients and their options. I shared step-by-step instructions for easy preparation. Tips helped you mix well and avoid stickiness. We also discussed fun variations and storage methods for freshness. These energy balls are simple to make and great for snacks. You can customize them for your taste and needs. Enjoy creating your own tasty treats!

Peanut Butter Chocolate Chip Energy Balls Easy Recipe

Looking for a quick snack that packs a punch? These Peanut Butter Chocolate Chip Energy Balls are just what you

For a tasty Tomato Basil Bruschetta, gather these items: - 1 French baguette, sliced into 1/2 inch pieces - 4 ripe tomatoes, diced - 2 cloves garlic, minced - 1/4 cup fresh basil leaves, finely chopped - 3 tablespoons balsamic vinegar - 3 tablespoons extra virgin olive oil - Salt and pepper to taste - Optional: 1/4 cup crumbled feta cheese for a tangy twist You can easily swap some ingredients if needed. Use any fresh bread instead of a French baguette. If fresh tomatoes are not available, canned tomatoes work too. For a twist, try red onion instead of garlic. You can skip the feta for a dairy-free option. If you want a sweeter taste, use honey instead of balsamic vinegar. These swaps keep your bruschetta flavorful and fun! Selecting ripe tomatoes is key for great bruschetta. Look for tomatoes that feel heavy for their size. The skin should be shiny and smooth. A ripe tomato will have a deep color, like red or yellow. Give it a gentle squeeze; it should feel slightly soft but not mushy. The smell should be sweet and earthy. If you find these signs, you have the perfect tomatoes for your dish! First, preheat your oven to 400°F (200°C). Take your French baguette and slice it into 1/2 inch pieces. Arrange the slices on a baking sheet. Brush each slice lightly with extra virgin olive oil. This helps them crisp up nicely. Bake the slices for about 5-7 minutes. You want them to turn golden brown and crispy. While the bread bakes, let's make the tomato topping. In a mixing bowl, combine the diced tomatoes, minced garlic, and chopped basil. Add balsamic vinegar, olive oil, salt, and pepper to taste. Mix everything well. Let it marinate for about 10 minutes. This step brings out the flavors and makes it even more delicious. Once your baguette slices are toasted, take them out of the oven. Let them cool slightly. Spoon the tomato mixture generously onto each slice. If you like, sprinkle crumbled feta cheese on top for extra taste. Serve immediately. Enjoy the crispness of the bread and the freshness of the topping. For the complete recipe, check the Full Recipe. To boost the taste of your Tomato Basil Bruschetta, use fresh ingredients. Ripe tomatoes give the best flavor. Choose tomatoes with bright color and firm texture. Adding a splash of lemon juice brightens the dish. Fresh basil should be fragrant and vibrant. You can also mix in a pinch of red pepper flakes for a kick. A drizzle of good quality balsamic vinegar adds a sweet tang. Avoid using stale bread for bruschetta. Fresh baguette gives the best crunch. Don't skip toasting the bread; it keeps the topping from making it soggy. Mixing the tomato topping too early can lead to mushy tomatoes. Let the mixture sit for about ten minutes before serving. Lastly, don’t overload each piece. One or two tablespoons of topping per slice is perfect. Bruschetta is a great crowd-pleaser. Serve it as an appetizer at parties or gatherings. Arrange the bruschetta on a large platter. You can add a small bowl of extra balsamic on the side for dipping. Pair it with a light white wine, like Sauvignon Blanc. If you want a fun twist, offer a few variations. Guests will love trying different toppings. For the full recipe, check out the details above! {{image_2}} Bruschetta offers a great chance to get creative. You can mix and match toppings. Some of my favorite unique options include: - Roasted red peppers - Sliced olives - Creamy goat cheese - Fresh arugula - Grilled zucchini These toppings add depth and flavor. Each one brings a new twist to the classic. Try adding a drizzle of pesto for an herbal lift. Using seasonal ingredients makes bruschetta even better. In the summer, fresh tomatoes shine. As fall arrives, switch to roasted butternut squash. Here are some ideas: - Spring: Use asparagus and lemon zest. - Summer: Stick with juicy tomatoes and fresh basil. - Fall: Try pumpkin puree with sage. - Winter: Use hearty greens like kale or spinach. These swaps keep your bruschetta fresh and exciting. You can easily adapt bruschetta for different diets. For a vegan version, skip the feta cheese. Use avocado or hummus as a tasty spread. For gluten-free options, try these: - Gluten-free baguette or bread - Cucumber slices as a base - Sweet potato rounds, baked until crisp These choices ensure everyone can enjoy bruschetta. Check out the Full Recipe for more ideas! To keep your bruschetta fresh, store it correctly. Place the leftover topping in an airtight container. This helps keep the flavors from drying out. Store it in the fridge for up to two days. Keep the toasted baguette slices separate. They lose their crunch when stored with the topping. Reheating bruschetta can be tricky. You want to keep the bread crispy. To do this, preheat your oven to 350°F (175°C). Place the toasted baguette slices on a baking sheet. Heat them for about 5 minutes or until warm. Avoid microwaving, as it makes the bread chewy. You can freeze bruschetta, but it's best for the topping only. Prepare the tomato mixture, then place it in a freezer-safe bag. Squeeze out the air to prevent freezer burn. It can stay frozen for up to three months. When ready to use, thaw it in the fridge overnight. Toast fresh baguette slices when serving for the best taste. You can find the Full Recipe for more details. For bruschetta, I love using a French baguette. Its crusty outside gives a nice crunch. You can also use ciabatta or Italian bread. Just make sure the bread can hold the toppings well. Thin slices work best for that perfect bite. You can prep the tomato topping ahead of time. Just mix the diced tomatoes, garlic, basil, and dressing. Store it in the fridge for up to two hours. However, I recommend toasting the bread just before serving. This keeps it crispy and fresh. Bruschetta is best eaten fresh. If you have leftovers, store the topping and bread separately. The tomato mix can last about two days in the fridge. However, the bread will lose its crunch. So, eat it as soon as you can for the best taste! Bruschetta is simple to make, using fresh ingredients and clear steps. We covered the best ingredients, tips for ripe tomatoes, and how to prep your baguette. Enhancing flavors and avoiding common mistakes can elevate your dish. Don't forget to explore variations and storage tips for leftovers. Ready to impress at your next gathering? Have fun with different toppings and enjoy every bite!

Tomato Basil Bruschetta Fresh and Flavorful Recipe

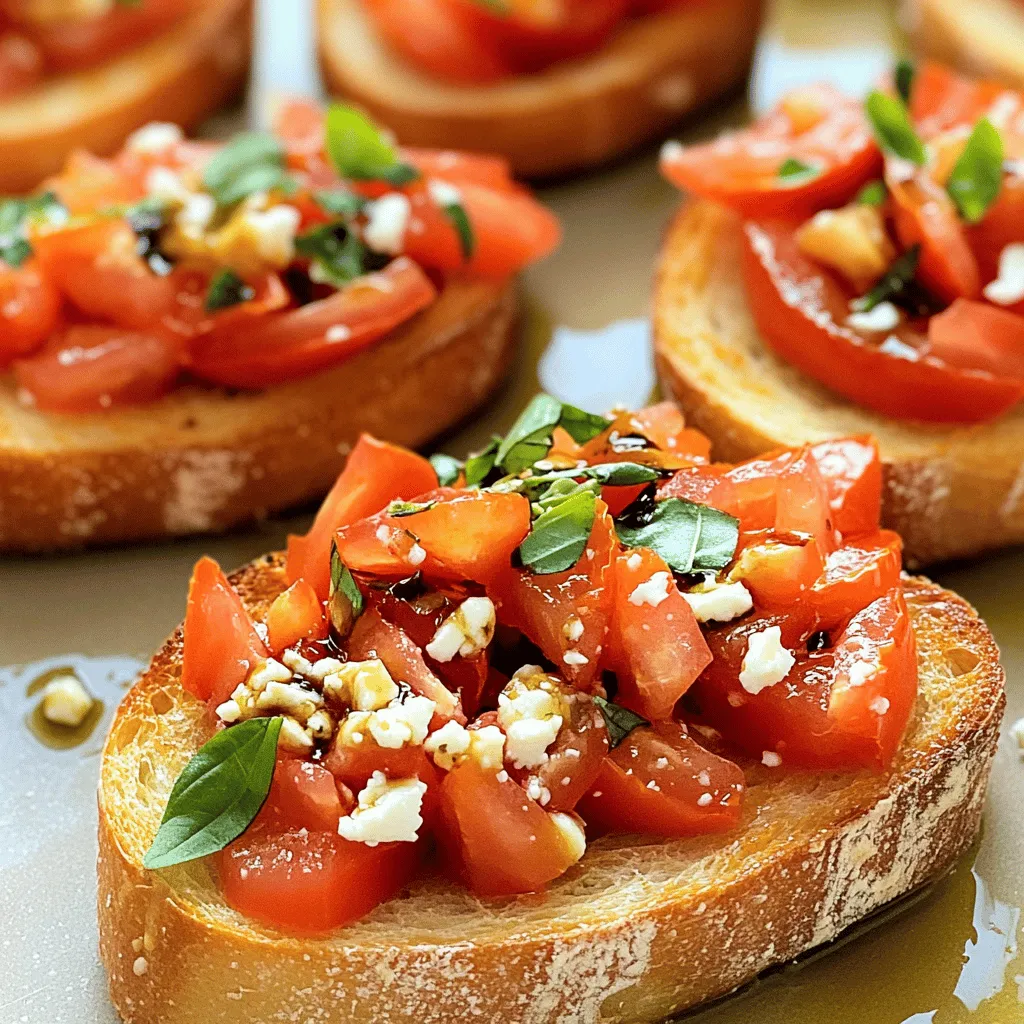
If you crave a quick and tasty appetizer, Tomato Basil Bruschetta is the answer! This recipe bursts with fresh flavors

To make Buffalo Ranch Chicken Tenders, we need fresh and simple ingredients. Here’s what you will need: - 1 lb chicken tenders - 1 cup buttermilk - 1 cup all-purpose flour - 1 cup breadcrumbs (preferably panko for extra crunch) - 1 teaspoon garlic powder - 1 teaspoon onion powder - 1 teaspoon paprika - 1 teaspoon salt - 1 teaspoon black pepper - 1 cup buffalo sauce (store-bought or homemade) - 1/4 cup ranch seasoning mix - Cooking oil for frying Each ingredient plays a key role in building flavor and texture. The chicken tends to soak up the buttermilk, which makes it juicy. The flour and breadcrumbs create a crunchy outer layer. The spices add depth and zing to each bite. I like to use panko breadcrumbs because they give the tenders an extra crunch. You can buy buffalo sauce or make your own. The ranch seasoning mix adds a creamy twist that balances the heat from the buffalo sauce. Keep these ingredients handy as they are vital for this crispy and flavorful dish. For the full recipe, refer to the instructions below. To start, combine 1 cup of buttermilk with 1/4 cup of ranch seasoning mix in a bowl. This mixture adds flavor and keeps the chicken juicy. Next, add 1 pound of chicken tenders to the bowl. Make sure they are well coated. Cover the bowl and place it in the fridge for at least 1 hour. For the best taste, marinate overnight. Now, set up your breading station. In one shallow dish, mix 1 cup of all-purpose flour with 1 teaspoon each of garlic powder, onion powder, paprika, salt, and black pepper. This blend gives the chicken a nice flavor. In another dish, combine 1 cup of breadcrumbs with the remaining ranch seasoning mix. Using panko breadcrumbs will give you that extra crunch! After marinating, take the chicken tenders from the fridge. Let the excess buttermilk drip off. First, dredge each tender in the seasoned flour. Then, dip it back into the buttermilk. Finally, coat it in the breadcrumb mixture. Press firmly so the crumbs stick well. In a large skillet, heat about 1/2 inch of cooking oil over medium-high heat. The oil should be hot, around 350°F. Carefully add a few chicken tenders at a time. Avoid overcrowding the pan. Fry each tender for about 4-5 minutes on each side, or until they turn golden brown. Once done, drain them on paper towels to absorb excess oil. In a large bowl, combine the hot fried chicken tenders with 1 cup of buffalo sauce. Gently toss them to ensure every piece is coated in that spicy goodness. Arrange the buffalo ranch chicken tenders on a platter. For a fun touch, drizzle extra ranch dressing on top. Serve with celery sticks and some buffalo sauce on the side for dipping. This will make for a colorful and tasty presentation! For a complete guide, check out the Full Recipe. To make your chicken tenders extra crunchy, focus on the breading. It needs to coat evenly. This helps every bite have that satisfying crunch. I suggest using panko breadcrumbs instead of regular ones. Panko gives a light and airy texture that makes the tenders even more delicious. The temperature of your cooking oil matters a lot. If it's too cold, the chicken will soak up oil and become greasy. If it's too hot, the outside will burn before the inside cooks. To test if your oil is ready, drop a small piece of bread into it. If it sizzles and browns in about 60 seconds, your oil is just right. Aim for 350°F for the best results. Buffalo ranch chicken tenders taste great with celery sticks and ranch dressing. The coolness of the ranch balances the spicy buffalo sauce. You can also serve them with other dips like blue cheese or a spicy mayo. For sides, consider crispy fries or a fresh salad to complete your meal. {{image_2}} Want more heat? Add extra hot sauce to the buffalo sauce. You can adjust the spice level to your liking. Mix in a tablespoon or two of hot sauce before tossing the cooked chicken. This gives the tenders a bold, fiery kick. If you're feeling adventurous, try different hot sauces. Each brand has its own flavor profile, so experiment! For a healthier option, you can bake the chicken tenders. Preheat your oven to 400°F. After coating the chicken, place them on a baking sheet lined with parchment paper. Lightly spray the tenders with cooking oil. Bake for 20-25 minutes or until they are golden brown and cooked through. Flip them halfway for even cooking. This method keeps the tenders crispy without frying. If you need a gluten-free dish, substitute the all-purpose flour and breadcrumbs. Use almond flour or gluten-free flour as a one-to-one swap. For breadcrumbs, look for gluten-free panko or crush gluten-free crackers. These swaps will keep your tenders crispy and delicious without gluten. Enjoy the same great taste with these simple changes. For the full recipe, check the section above. To store chicken tenders properly, let them cool first. Place them in an airtight container. Make sure to separate layers with parchment paper. This helps keep them fresh. Store the container in the fridge. The tenders will last for 3 to 4 days. For best taste, eat them sooner rather than later. For the best texture, reheat chicken tenders in the oven. Preheat your oven to 375°F. Place tenders on a baking sheet. Heat for about 10 to 15 minutes. Check if they are warm throughout. You can also use an air fryer. This method keeps them crispy. Just heat at 350°F for about 5 to 7 minutes. To freeze chicken tenders, first, let them cool completely. Wrap each tender in plastic wrap. Then, place wrapped tenders in a freezer bag. Squeeze out as much air as possible. This prevents freezer burn. You can freeze them for up to 3 months. When ready to eat, thaw in the fridge overnight before reheating. Enjoy the great taste of buffalo ranch chicken tenders anytime! For the complete cooking process, check the Full Recipe. Yes, you can use frozen chicken tenders. Just remember to thaw them first. Thawing helps the chicken cook evenly. You can use the same steps as with fresh chicken. However, cook time may vary slightly. Check that the tenders reach an internal temperature of 165°F for safety. If you don’t have buttermilk, don’t worry! You can easily make a substitute. Mix 1 cup of milk with 1 tablespoon of vinegar or lemon juice. Let it sit for about 5 minutes until it thickens. This will mimic the tangy flavor of buttermilk. You can also use plain yogurt or sour cream thinned with a bit of water. To make the dish milder, reduce the buffalo sauce. You can also mix in a little extra ranch dressing. This cuts the heat while keeping great flavor. For even less spice, consider using a mild hot sauce or skipping it altogether. Your kids will enjoy a tasty meal without the kick! You’ve learned how to make delicious buffalo ranch chicken tenders. We discussed the key ingredients, step-by-step instructions, and helpful tips. With these guidelines, you can achieve crispy, flavorful tenders that everyone will love. Remember, you can customize this recipe to suit your tastes. Whether you prefer spicy or want a healthier option, there’s a way to make it work. Enjoy cooking and sharing your tasty creations with friends and family!

Buffalo Ranch Chicken Tenders Crispy and Flavorful Dish

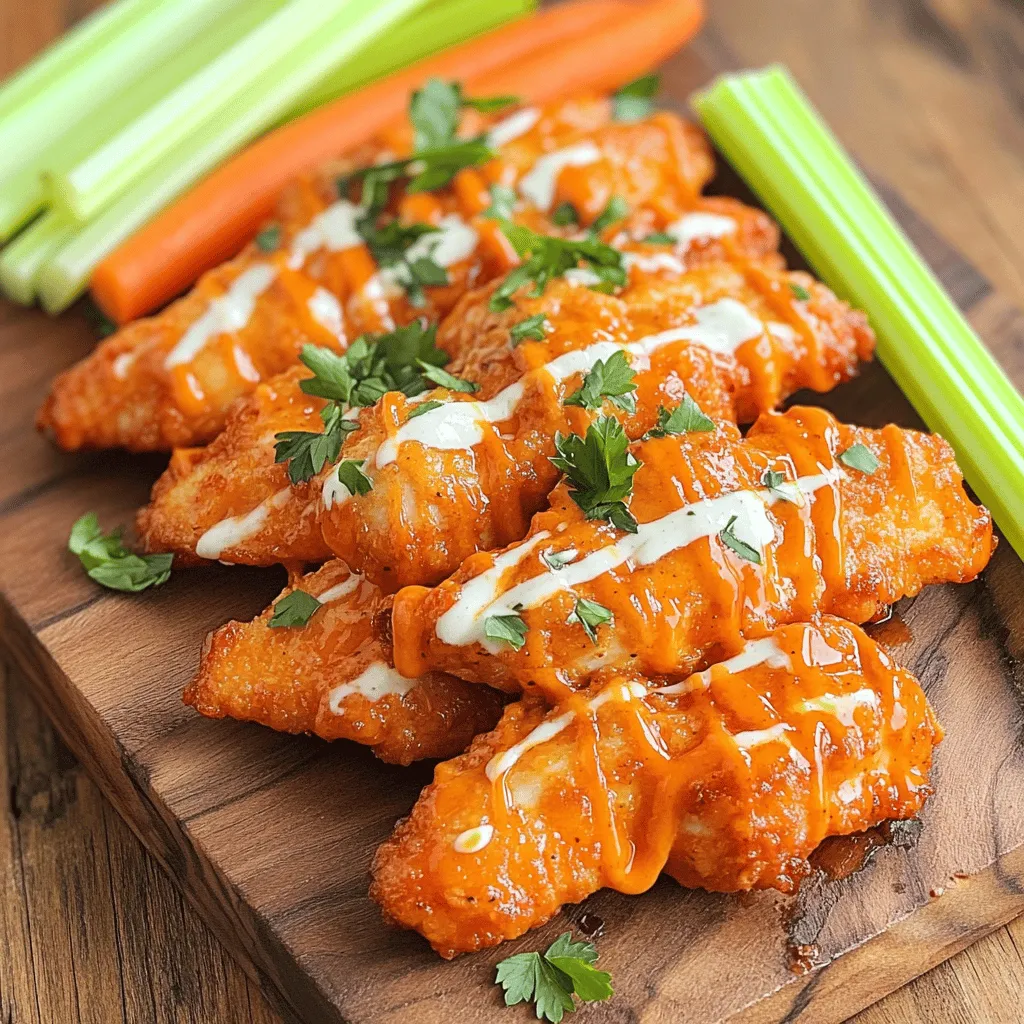
Are you ready for a tasty twist on chicken tenders? My Buffalo Ranch Chicken Tenders are crispy, flavorful, and easy

Older posts
Newer posts
← Previous Page1 … Page44 Page45 Page46 … Page84 Next →

dsad

© 2026 Lisa Dishes • Built with GeneratePress

Our Policies

  • Copyright Policy
  • Cookie Policy
  • GDPR Policy
  • Privacy Policy
  • Disclaimer
  • Terms Of Use

More Information

  • Home
  • About
  • Contact
  • Appetizers
  • Dessert
  • Dinner
  • Drinks
©2026, Lisa Dishes About Back To Top