Skip to content
DisclaimerTerms Of UseGDPR PolicyCookie Policy

Lisa Dishes

  • Home
  • Drinks
  • Appetizers
  • Dinner
  • Dessert
  • About
  • Contact
  • Privacy Policy
DisclaimerTerms Of UseGDPR PolicyCookie Policy

NO-ING-IMG

- Fresh or frozen ravioli (any filling) - Unsalted butter - Minced garlic - Fresh thyme or dried thyme - Red pepper flakes (optional) - Salt and pepper - Grated Parmesan cheese - Fresh parsley To make Minute Garlic Butter Ravioli, gather your ingredients first. This dish shines with simple, fresh items. Start with ravioli. You can use fresh or frozen, and any filling works well. I often choose cheese or spinach ravioli for a rich taste. Next, grab unsalted butter. This adds creaminess and depth to your sauce. Now, for flavor, you need minced garlic. Fresh garlic gives a strong, tasty kick. Thyme adds an earthy tone. Use fresh thyme if you have it. Dried thyme works too, just use less. If you like some heat, add red pepper flakes. This is optional but fun for spice lovers. For seasoning, keep salt and pepper handy. These will help balance the dish. Don't forget the finishing touches! Grated Parmesan cheese makes everything better. Finally, fresh parsley brightens your plate. It adds color and freshness. With these ingredients, you’ll create a dish that's quick and full of flavor. To start, you need to prepare boiling salted water. Fill a large pot with water and bring it to a boil. Add a good amount of salt once it bubbles. This salt helps flavor the ravioli. Next, cook the ravioli based on what you choose. If you use fresh ravioli, it takes about 2-3 minutes to cook. For frozen ravioli, it takes around 4-5 minutes. Keep an eye on them. They float to the top when they are ready. While the ravioli cooks, let’s make the garlic butter sauce. Melt 4 tablespoons of unsalted butter in a large skillet over medium heat. When the butter is melted, add 4 cloves of minced garlic. Sauté the garlic for about 1-2 minutes. Watch closely so it doesn't burn. You want it to smell great! After that, stir in 1 teaspoon of fresh thyme and, if you like spice, add 1 teaspoon of red pepper flakes. Cook this mix for another 30 seconds. This step makes the sauce even more flavorful. Now, it’s time to bring it all together. Use a slotted spoon to transfer the ravioli from the boiling water to the skillet with the garlic butter. Gently toss the ravioli in the sauce to coat them well. Season with salt and pepper to taste. Once you do this, your dish is almost ready! Finally, remove the skillet from heat. Transfer the ravioli to serving plates. Top with grated Parmesan cheese and chopped fresh parsley for a lovely finish. Enjoy! Choosing the right type of ravioli Pick fresh or frozen ravioli. Fresh ravioli cooks fast, usually in 2-3 minutes. Frozen ravioli takes a bit more time, around 4-5 minutes. Choose a filling you love, like cheese or meat. Checking for doneness Look for soft and plump ravioli. They should float to the top when cooked. You can taste one to be sure. If it’s tender, it’s ready! Alternative herbs and spices You can mix things up! Try basil or oregano instead of thyme. For a kick, add more red pepper flakes. These swaps add fresh notes to your dish. Adding extra ingredients for flavor Consider adding vegetables like spinach or cherry tomatoes. They add color and taste. You can also toss in some cooked shrimp or chicken for protein. These extras make the meal even better. Pairing with side dishes or salads Serve your ravioli with a light salad. A simple green salad with olive oil and lemon works great. You can also serve garlic bread on the side for extra flavor. Presentation ideas Make it look fancy! Place the ravioli in a swirl on the plate. Top with grated Parmesan and fresh parsley for a pop of color. A drizzle of olive oil adds shine. Your dish will impress anyone! {{image_2}} You can choose different types of ravioli to fit your taste. For meat-filled options, consider: - Ground beef ravioli - Chicken and mushroom ravioli - Sausage ravioli These options add rich flavors to your dish. If you prefer a vegetarian twist, try: - Spinach and ricotta ravioli - Butternut squash ravioli - Wild mushroom ravioli These fillings bring a fresh and tasty touch. You can mix and match based on what you like. The garlic butter sauce works well, but you can switch it up. A creamy garlic butter sauce is an easy variation. Just add heavy cream to the garlic butter. This makes the dish richer and more decadent. You can also try adding pesto or marinara sauce. Pesto gives a vibrant, herby flavor. Marinara adds a classic tomato taste. Both options can change the dish's profile while keeping it simple. For those with dietary needs, there are great alternatives. You can find gluten-free ravioli at many stores. These options let everyone enjoy this dish. If you want vegan substitutes, use plant-based ravioli. Replace the butter with olive oil or vegan butter. Skip the cheese or use a vegan cheese option. These swaps help you enjoy the flavors without dairy or gluten. To keep your leftover ravioli fresh, store it in a sealed container. You can use glass or plastic. Make sure to add a bit of the garlic butter sauce to keep it moist. This helps the ravioli not stick together. Store it in the fridge for up to three days. If you want to use the microwave, place the ravioli in a bowl. Add a splash of water or sauce to keep it from drying out. Cover it loosely with a lid or microwave-safe wrap. Heat for one minute, then stir and heat for another minute if needed. For the skillet method, melt a little butter in a pan over low heat. Add the leftover ravioli and a splash of water or broth. Cover the pan and heat for about five minutes, stirring gently. This method keeps the ravioli creamy and flavorful. To freeze cooked ravioli, lay them flat on a baking sheet. Freeze them for about two hours until solid. Then, transfer to a freezer bag. For uncooked ravioli, place them on a baking sheet in the freezer. Once they are firm, store them in a bag too. When you’re ready to use frozen ravioli, cook them straight from the freezer. Do not thaw them first. Boil them for about five extra minutes compared to fresh ones. This way, you’ll have a quick meal ready in no time! It takes about 15 minutes to make this dish. Here’s the breakdown: - Prep Time: 5 minutes - Cook Time: 10 minutes - Fresh ravioli cooks in 2-3 minutes. - Frozen ravioli takes around 4-5 minutes. You can easily whip this up for a quick meal. You can use any type of ravioli for this dish. Here are some tasty options: - Cheese ravioli - Spinach and ricotta - Mushroom or truffle - Meat-filled ravioli like beef or chicken Choose your favorite filling to match your mood. Yes, you can prepare this dish ahead of time. Here are some tips: - Cook the ravioli but do not mix with the sauce. - Store cooked ravioli in an airtight container. - Reheat the ravioli in hot water or a skillet later. - Make the garlic butter sauce when ready to serve for the best flavor. This way, you save time and still enjoy a fresh dish. You now have a clear guide to making delicious garlic butter ravioli. We covered the ingredients, step-by-step cooking methods, and expert tips. You can enhance the flavors with different herbs and fillings, and I shared storage and reheating advice. With these tools, you can create a fantastic meal anytime. Enjoy experimenting with variations to find your perfect dish. Happy cooking!

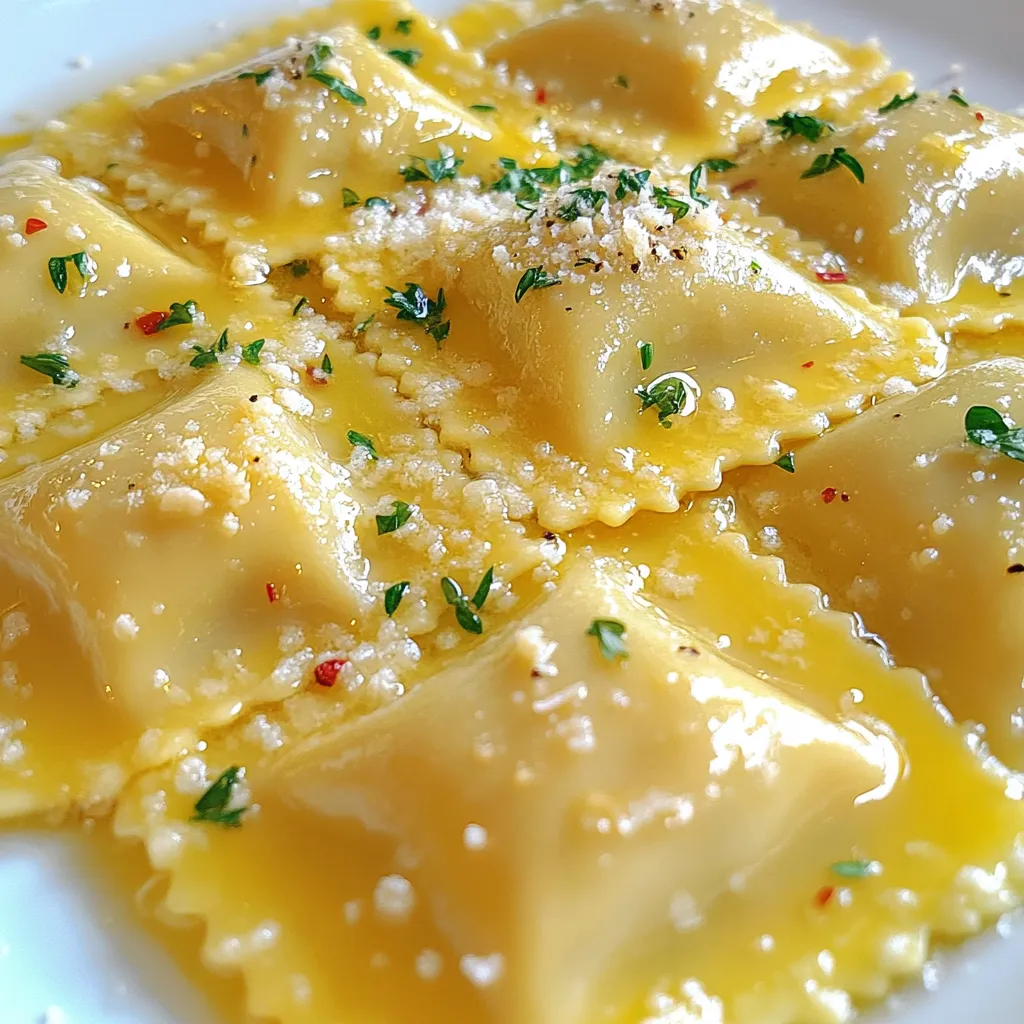
Minute Garlic Butter Ravioli Simple and Flavorful Dish

Are you craving a quick, tasty meal that impresses? Look no further than Minute Garlic Butter Ravioli! This simple and

- 1 lb boneless, skinless chicken breasts, cut into bite-sized pieces - 1 cup breadcrumbs (preferably whole wheat for extra flavor) - 1/2 cup all-purpose flour - 2 large eggs - 1 teaspoon garlic powder - 1 teaspoon onion powder - 1/2 cup buffalo sauce (adjust for heat preference) - Salt and pepper to taste - Cooking spray - Air fryer - Shallow dishes for breading - Mixing bowl First, season the chicken pieces. In a bowl, mix 1 teaspoon of garlic powder, 1 teaspoon of onion powder, salt, and pepper. Add the bite-sized chicken pieces. Stir well to coat each piece evenly. This step adds flavor to every bite. Next, create a breading station. You need three shallow dishes. Put 1/2 cup of all-purpose flour in the first dish. In the second dish, beat 2 large eggs until smooth. Finally, place 1 cup of breadcrumbs in the third dish. Whole wheat breadcrumbs add extra flavor and crunch. Now, it’s time for the breading process. Start with the flour coating. Take a piece of chicken and dip it into the flour. Shake off any extra flour. This helps the egg stick better. Next, dip the floured chicken into the beaten eggs. Let the excess egg drip off. This step keeps the breading from getting soggy. Finally, apply the breadcrumbs. Place the chicken into the breadcrumbs and press gently. This ensures the crumbs stick well. Repeat this for all chicken pieces. Before cooking, preheat your air fryer. Set it to 400°F (200°C) and let it warm for about 5 minutes. Preheating helps the chicken cook evenly. Now, arrange the chicken in the basket. Spray the air fryer basket with cooking spray to prevent sticking. Place the breaded pieces in a single layer. Avoid overcrowding the basket. You may need to work in batches for the best results. Cook the chicken bites for 10-12 minutes. Flip them halfway through the cooking time. This helps them brown nicely. Check for an internal temperature of 165°F (74°C) to ensure they are fully cooked. Enjoy the crispy, spicy flavor of these buffalo chicken bites! To ensure even cooking, cut your chicken into uniform pieces. Aim for bite-sized chunks. This helps them cook at the same rate. Season all sides well with garlic powder, onion powder, salt, and pepper. The seasoning enhances flavor throughout each bite. For extra crunch, adjust your breading. Use whole wheat breadcrumbs for more texture. You can also double dip the chicken. After the first breading, dip it back in the egg and coat with breadcrumbs again. This gives a thicker, crunchier layer. Managing portion sizes is key. Do not crowd your air fryer basket. If you pile in too many chicken bites, they won’t cook evenly. Cook in batches if needed. This allows hot air to circulate around each piece. Preventing overcrowding keeps your bites crispy. Each batch should fit comfortably in the basket. Aim for a single layer. This makes sure each piece gets golden brown and tender. The best sauces for serving include ranch or blue cheese dressing. These creamy dips cool the heat of the buffalo sauce. You can also try a yogurt-based dip for a lighter option. For vegetable accompaniments, serve carrot and celery sticks. They add a nice crunch and freshness. These veggies balance the spicy flavor of the chicken bites. Enjoy your meal with these tasty sides! {{image_2}} You can easily change the heat of your buffalo chicken bites. If you want a milder flavor, use a mild buffalo sauce. For those who love spice, stick with a hotter version. You can also mix in different spices like paprika or cayenne pepper to boost the heat. Just remember, a little goes a long way! Adjusting the sauce not only changes the heat but also enhances the taste. If you need a gluten-free option, use crushed cornflakes instead of breadcrumbs. Cornflakes give a nice crunch and work well. You can also try panko breadcrumbs for a lighter texture. They add great crispiness too. Experimenting with different breadings can keep your chicken bites fresh and exciting. Mixing in cheese can take your chicken bites to the next level. Cheddar or mozzarella can melt beautifully inside. Adding herbs like parsley or oregano to the batter can also brighten the flavor. These little tweaks make each bite more delicious. Don't be afraid to get creative with your flavors! To keep your Air Fryer Buffalo Chicken Bites fresh, use airtight containers. These containers lock in moisture and flavor. They last up to three days in the fridge. After that, the bites may dry out or lose flavor. To maintain crispiness, use an oven for reheating. Preheat it to 350°F (175°C) and bake for about 10 minutes. This method helps the bites stay crunchy. If you use a microwave, they may become soft. For best results, stick to the oven. You can freeze both uncooked and cooked bites. For uncooked bites, freeze them on a baking sheet. Once frozen, transfer them to a bag. They can last up to three months. To freeze cooked bites, let them cool first. Then, store them in airtight bags. For thawing, place them in the fridge overnight for the best quality. This helps maintain taste and texture. Enjoy your tasty bites anytime! Yes, you can use frozen chicken. However, cooking frozen chicken needs some special care. First, make sure the chicken pieces are small enough to cook through. You may need to add extra cooking time, about 5-10 minutes. Always check if they are cooked well. The key is to ensure they reach an internal temperature of 165°F (74°C). This way, you keep them safe and tasty. Most air fryers work well for buffalo chicken bites. I recommend models with a basket style. Brands like Ninja, Philips, and Cosori are great choices. Look for features such as adjustable temperature settings and a timer. These features help you get perfect results each time you cook. Absolutely! While buffalo sauce is a classic, you can try other sauces. BBQ sauce offers a sweet twist. Ranch dressing gives a creamy flavor. For a tangy kick, try teriyaki or sriracha. Feel free to mix and match to find your favorite taste! To check if the chicken is fully cooked, use a meat thermometer. Insert it into the thickest piece of chicken. It should read 165°F (74°C). This temperature ensures the chicken is safe to eat. If you don't have a thermometer, cut into a piece. The meat should be white and juices should run clear. You now know how to make tasty air fryer buffalo chicken bites. We discussed the main ingredients, like chicken and breadcrumbs, and the spices that add flavor. I shared step-by-step instructions from prep to cooking. Plus, you learned tips for getting that perfect crunch. Don’t forget about the variations and storage tips to keep your bites fresh. With all this knowledge, you can enjoy these bites any time. Dive in and start cooking!

Air Fryer Buffalo Chicken Bites Savory and Easy Recipe

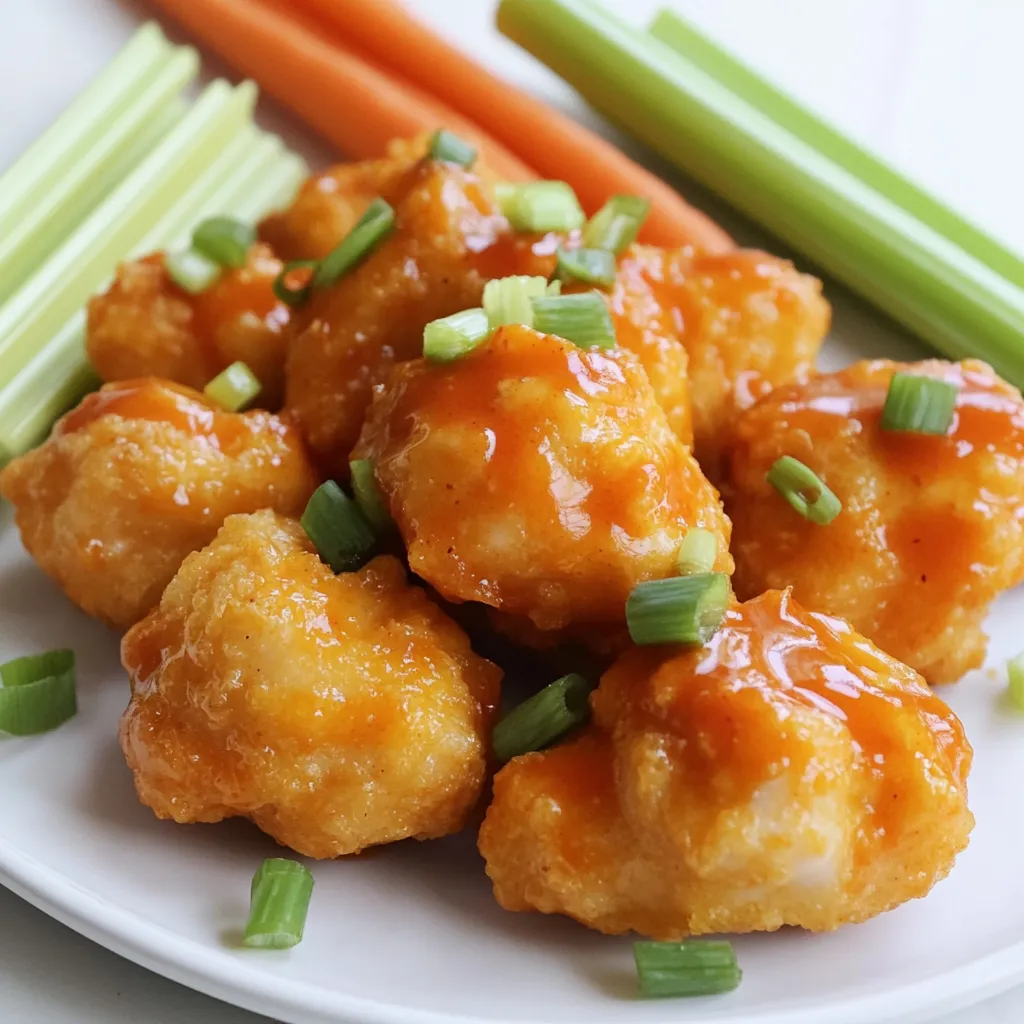
Looking for a snack that’s both savory and simple? My Air Fryer Buffalo Chicken Bites tick all the right boxes!

- 1 cup apple butter - 1 cup brown sugar, packed - 1/2 cup unsalted butter, melted - 1/4 cup granulated sugar - 2 large eggs - 1 teaspoon vanilla extract - 2 cups all-purpose flour - 1 teaspoon baking powder - 1/2 teaspoon baking soda - 1/4 teaspoon salt - 1 teaspoon ground cinnamon - Optional ingredients: 1/2 cup chopped walnuts, 1/2 cup white chocolate chips To make apple butter blondies, gather the ingredients first. Apple butter is the star here. It brings rich flavor and moisture. The brown sugar adds sweetness and depth. Unsalted butter makes the batter creamy. Granulated sugar gives a nice lift to the blondies. Two eggs add structure. Vanilla extract enhances the taste. All-purpose flour forms the base. Baking powder and baking soda help the blondies rise. Salt balances the sweetness, while ground cinnamon adds warmth. Feel free to personalize your blondies. You can fold in chopped walnuts for crunch. Or mix in white chocolate chips for extra sweetness. These ingredients make your blondies even more delightful. 1. Preheat your oven to 350°F (175°C). This helps the blondies bake evenly. 2. Grease a 9x13 inch baking pan. You can also line it with parchment paper. This makes it easy to remove the blondies later. 1. In a large bowl, whisk the melted butter, brown sugar, and granulated sugar together. Mix until smooth. 2. Add the apple butter, eggs, and vanilla extract. Stir until well combined. 3. In another bowl, sift together the flour, baking powder, baking soda, salt, and ground cinnamon. 4. Gradually add the dry mix to the wet mix. Stir just until combined. Do not overmix! 5. If you want extra crunch, fold in chopped walnuts and white chocolate chips. 1. Pour the batter into the prepared baking pan. Spread it evenly across the pan. 2. Bake in the preheated oven for 25-30 minutes. To check doneness, insert a toothpick into the center. It should come out clean. 3. Once baked, let the blondies cool in the pan for about 10 minutes. Then, transfer them to a wire rack to cool completely before cutting into squares. To make the best apple butter blondies, avoid overmixing the batter. When you mix too much, it can make them tough. Stir just until you see no dry flour. This way, they'll stay soft and chewy. Baking time is key for perfect blondies. Check them at 25 minutes. Insert a toothpick in the center. If it comes out clean, they are ready. If it has wet batter, give them a few more minutes. Serving your blondies nicely makes them even more enjoyable. Try placing them on a rustic wooden board. You can also use a decorative plate. Dust them with powdered sugar for a lovely touch. For extra flair, drizzle caramel sauce over the top. It adds sweetness and looks great. You can also serve them with a scoop of vanilla ice cream for a fun treat. Sometimes, blondies can have issues. If they turn out too dry, you might have baked them too long. Keep an eye on them as they bake. If they are too gooey in the center, they need more time in the oven. Just check again in a few minutes. If you added walnuts, ensure they are chopped small for even texture. Finally, if they stick to the pan, make sure to grease it well or line it with parchment. This helps with easy removal and keeps them intact. {{image_2}} You can change the flavor of your apple butter blondies. Try using different nut butters. Almond or cashew butter adds a unique taste. It also gives a nice twist to the recipe. You can also add spices for a new flavor profile. Nutmeg or ginger adds warmth and depth. A pinch of cardamom will surprise your taste buds. Experiment to find your favorite mix! If you need gluten-free blondies, use gluten-free flour. Almond flour or oat flour works well. These flours keep the blondies soft and tasty. For vegan blondies, replace the eggs with applesauce. You can also use flaxseed meal mixed with water. It acts like an egg and binds the batter well. Use a plant-based butter to replace regular butter for a full vegan treat. You can easily swap out white chocolate chips. Dark chocolate or butterscotch chips add a richer flavor. If you want something nutty, try using different nuts. Pecans or hazelnuts work great instead of walnuts. This way, you can tailor each batch to your taste. Adjust the ingredients to make each blondie special! To keep your apple butter blondies fresh, store them in an airtight container. This helps maintain moisture and flavor. You can leave them at room temperature for up to three days. If you want to keep them longer, place them in the fridge. They will stay good for about a week. You can freeze your blondies for future treats. First, let them cool completely. Then, cut them into squares. Wrap each square in plastic wrap. Place the wrapped squares in a freezer bag. They will last for up to three months in the freezer. When you're ready to enjoy them, take out a square. Let it thaw at room temperature for about an hour. If you want them warm, pop them in the microwave for 10-15 seconds. Enjoy your tasty treat! What is the difference between blondies and brownies? Blondies and brownies share a similar base but differ in flavor and color. Brownies use cocoa powder, which gives them a dark chocolate taste. Blondies skip the cocoa and use brown sugar and vanilla, offering a rich, sweet flavor. They are often lighter in color, resembling a cookie bar more than a brownie. Can I make this recipe without eggs? Yes, you can make this recipe without eggs! To replace each egg, use 1/4 cup of unsweetened applesauce or a mashed banana. These swaps keep the blondies moist and help bind the ingredients together. How can I tell when my blondies are done? Check for doneness by inserting a toothpick into the center. If it comes out clean or with a few moist crumbs, your blondies are ready. They should be set around the edges but slightly soft in the center. Can I use homemade apple butter? Absolutely! Using homemade apple butter adds a personal touch and unique flavor. Just ensure it's smooth and not too watery, as this can affect the batter's texture. How do I adjust baking time for a smaller pan? If you use a smaller pan, your blondies may bake faster. Start checking for doneness 5-10 minutes earlier. Always use the toothpick test to ensure they are baked just right. You learned all about making delicious blondies. We covered key ingredients like apple butter and sugar, plus steps to mix and bake. We discussed tips to perfect your blondies and presented fun variations for any diet. Remember, the right storage keeps them fresh. Now, it’s time for you to create your own tasty treats! Enjoy the process and share with others.

Apple Butter Blondies Delightfully Simple Treat

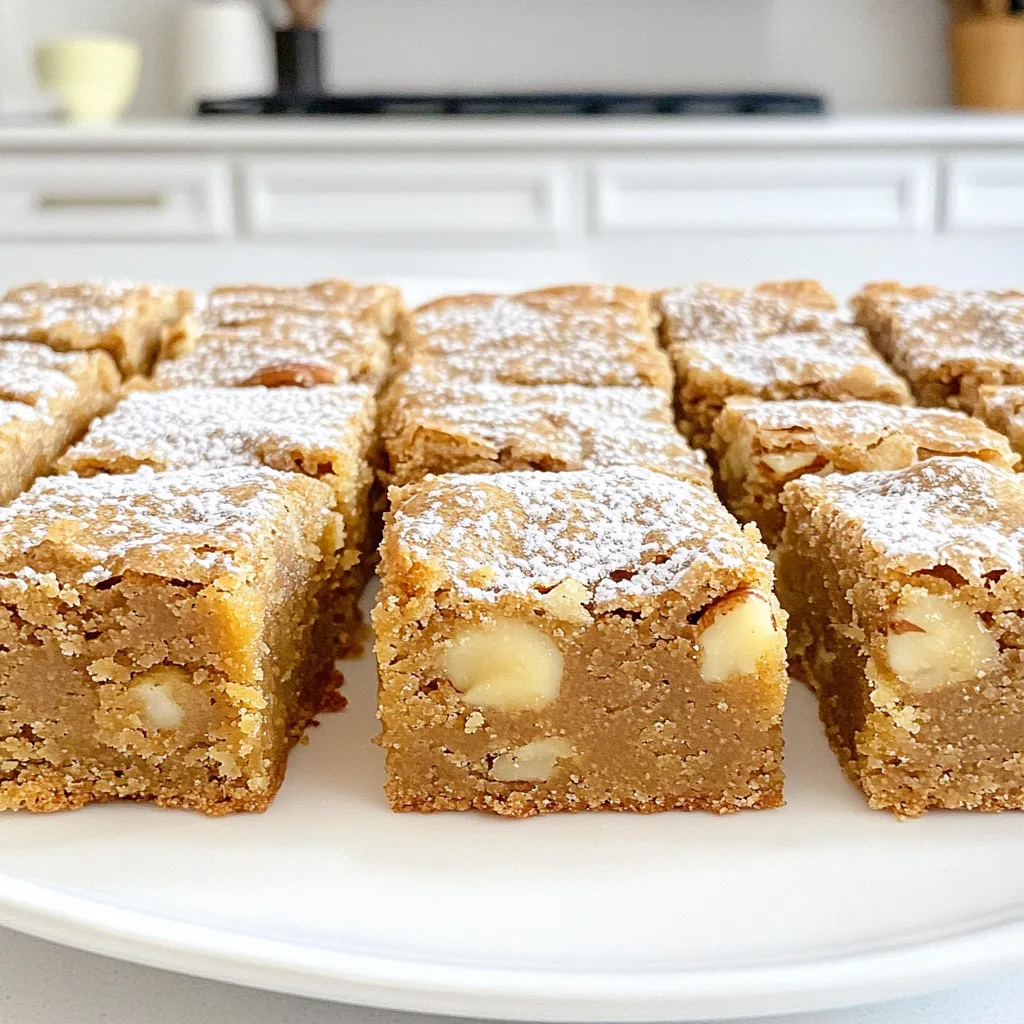
Craving a sweet, easy treat? Try my Apple Butter Blondies! These delicious bars combine rich apple butter with basic baking

- 2 lbs beef chuck, cut into 1-inch cubes - 4 medium potatoes, diced - 3 carrots, sliced - 1 large onion, chopped - 4 cloves garlic, minced - 1 bay leaf Beef chuck is a great choice for stews. It becomes tender and flavorful after cooking for hours. Cut it into 1-inch cubes for even cooking. The potatoes add a hearty touch. Dice them into small chunks. Carrots bring sweetness, and the onion adds depth. Minced garlic boosts the flavor. Lastly, don't forget the bay leaf; it adds a subtle aroma. - 3 cups beef broth (low-sodium) - 2 tablespoons tomato paste - 2 tablespoons Worcestershire sauce - 1 teaspoon dried thyme - 1 teaspoon dried rosemary - Salt and pepper to taste - 2 tablespoons olive oil The beef broth serves as the stew's base. Choose low-sodium to control salt levels. Tomato paste adds richness; it deepens the color and flavor. Worcestershire sauce gives a nice umami kick. Dried thyme and rosemary bring earthy notes. Season with salt and pepper to balance the flavors. Olive oil helps to sear the beef and enhance the taste. - Fresh parsley, chopped (for garnish) Fresh parsley brightens up the dish. It adds a pop of color and a fresh taste. Sprinkle it on top just before serving. It makes the stew look inviting and adds a touch of freshness. - Searing the Beef First, heat olive oil in a large skillet over medium-high heat. Once hot, add the beef cubes. Sear them until they are browned on all sides. This takes about 4 to 5 minutes. The browning adds deep flavor to the stew. - Transferring to the Slow Cooker After searing, transfer the beef into your slow cooker. Be careful not to lose any juices. These juices help create a rich taste in the stew. - Sautéing Onions and Garlic In the same skillet, add chopped onions and minced garlic. Sauté them until the onions turn translucent, about 3 minutes. This step builds more flavor for the stew. - Adding Vegetables to Slow Cooker Next, add diced potatoes, sliced carrots, and the sautéed onion and garlic to the slow cooker. These vegetables will soak up the flavors as they cook. - Mixing Broth and Sauces In a bowl, mix together the beef broth, tomato paste, and Worcestershire sauce. Stir until well combined. This mixture will give your stew a hearty base. - Gentle Stirring Before Cooking Pour this mixture over the ingredients in the slow cooker. Then, stir everything gently. Make sure all the ingredients are submerged in the broth to cook evenly. - Low vs. High Cooking Duration Cover your slow cooker. You can cook on low for 8 hours or on high for 4 hours. Choose based on your schedule. Low cooking gives better flavor, while high cooking is quicker. - Checking for Doneness When the time is up, check the beef. It should be tender and easy to shred with a fork. If it’s not tender, let it cook a bit longer. Enjoy your delicious rustic beef stew! Alternative Seasonings You can change the flavor by using different herbs. Try adding basil or oregano. These herbs bring a fresh taste to your beef stew. If you like spice, a pinch of red pepper flakes works well too. You can also use a splash of red wine for richness. Tips for Searing Meat Searing your beef adds color and flavor. Heat your skillet well before adding the olive oil. Make sure to brown all sides of the meat. This process takes about 4-5 minutes. Don’t crowd the pan; work in batches if needed. This step makes your stew more tasty. How to Ensure Tender Vegetables For soft veggies, cut them into even pieces. This way, they cook at the same rate. Add root vegetables like carrots and potatoes early. They need more time to soften. Stir gently during cooking to keep them intact. Adjusting Liquid Levels If your stew is too thick, add more broth. Start with half a cup. Mix well and check the texture. If it’s too watery, let it cook longer with the lid off. This helps to reduce the liquid. Pairing with Bread or Salad Serve your stew with crusty bread. It’s perfect for soaking up the broth. A fresh salad on the side adds lightness. Consider a simple green salad with a squeeze of lemon. Suggested Side Dishes Roasted vegetables or creamy mashed potatoes go great with stew. They add extra flavor and comfort. You can also serve it with a side of rice for a filling meal. {{image_2}} You can switch up the meat in this stew. If you want a change, use pork or chicken instead of beef. Both options work well with the same spices and broth. Just remember to adjust cooking times. Chicken cooks faster than beef. For veggies, you can add or swap in peas or mushrooms. These add great flavor and texture. You can even use sweet potatoes for a sweeter touch. Don't be afraid to mix and match what you have in your pantry. If you prefer not to use a slow cooker, you can make this stew on the stove. Start by browning the meat in a large pot. Then, add the veggies and broth. Let it simmer for about 1.5 to 2 hours. Stir often to keep it from sticking, and check for doneness. Another quick option is using an Instant Pot. After browning the meat, add all the ingredients, and seal the lid. Cook on high pressure for about 35 minutes. Let the steam release naturally for best results. For those looking to make it gluten-free, use gluten-free broth and check sauces for gluten content. Most beef broth is gluten-free, but always double-check the label. If you're watching sodium, use low-sodium broth and skip added salt. This will still give you a tasty stew without too much salt. You can also try fresh herbs for flavor instead of salt. - Cooling and Packaging: After serving, let the stew cool. This step helps keep it safe. Once cool, transfer it to storage containers. Use shallow containers for faster cooling. - Best Containers for Storage: Choose airtight containers to keep the stew fresh. Glass or plastic containers work well. Label them with the date for easy tracking. - Microwave vs. Stovetop: You can reheat the stew in the microwave or on the stovetop. For the microwave, use a microwave-safe bowl. Stir halfway through to heat evenly. On the stovetop, warm it gently over medium heat. - Avoiding Overcooking the Beef: When reheating, keep an eye on the beef. Heat just until warm to prevent it from becoming tough. Stir gently to avoid breaking apart the meat. - How to Freeze Stew Properly: To freeze, let the stew cool completely. Then, pour it into freezer-safe bags. Remove as much air as possible before sealing. This helps prevent freezer burn. - Thawing and Reheating Frozen Stew: To thaw, place the bag in the fridge overnight. For quicker thawing, submerge the bag in cold water. Reheat using the stovetop or microwave, stirring frequently to keep it moist. Cooking this stew can take either 8 hours on low or 4 hours on high. I recommend using the low setting for best flavors. This slow method allows the beef to get tender and soak up all the tasty spices. Yes, you can add many other vegetables. Common choices include peas, green beans, or even corn. You can also swap potatoes for sweet potatoes. Feel free to use what you like or have on hand! If your stew is too thin, there are a few easy ways to thicken it. You can mix a tablespoon of cornstarch with water and stir it in. Another way is to mash a few potato pieces and mix them back in. Both methods work well! It is not safe to leave stew on the warm setting overnight. Always turn off the slow cooker after cooking. If you want to cook overnight, use the low setting and make sure to eat it soon after. This blog post covered all you need to make a great Slow Cooker Rustic Beef Stew. We discussed key ingredients like beef chuck, vegetables, and seasonings. I shared step-by-step instructions, tips for flavor and texture, and even variations to suit your taste. Remember, a little experimentation can lead to your best stew yet. Follow these guidelines for a comforting dish you can enjoy any day of the week. Enjoy your cooking, and may your stew come out perfect every time!

Slow Cooker Rustic Beef Stew Flavorful Comfort Dish

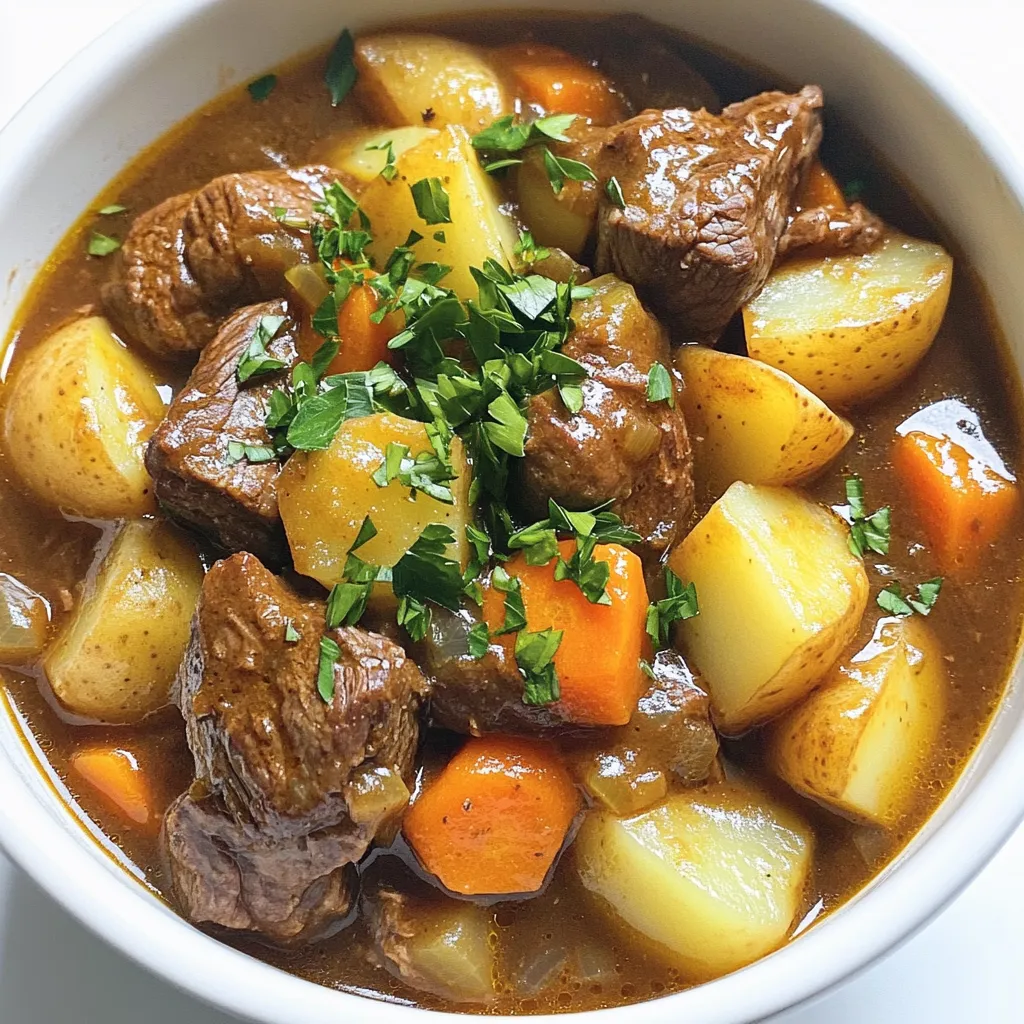
Looking for a warm, cozy meal that feels like a hug in a bowl? My Slow Cooker Rustic Beef Stew

- 1 cup unsalted butter - 2 cups granulated sugar - 4 large eggs - 1 teaspoon vanilla extract - 1 cup all-purpose flour - 1/2 cup unsweetened cocoa powder - 1/4 teaspoon salt - 1/4 teaspoon baking powder - 16 oz cream cheese, softened - 1 cup canned pumpkin puree - 3/4 cup granulated sugar - 2 large eggs - 1 teaspoon vanilla extract - 1 teaspoon ground cinnamon - 1/2 teaspoon ground nutmeg - Powdered sugar - Whipped cream - Ground cinnamon To make these delicious Pumpkin Cheesecake Brownie Bars, you need two main layers: the brownie and the pumpkin cheesecake. For the brownie layer, you will melt butter, mix in sugar, and then add eggs and vanilla. You will also combine flour, cocoa powder, salt, and baking powder. This mix gives the bars a rich, chocolatey base. Next, the pumpkin cheesecake layer is a creamy blend of softened cream cheese, pumpkin puree, and spices. The spices, like cinnamon and nutmeg, bring warmth to each bite. For garnishes, a dusting of powdered sugar or a dollop of whipped cream adds a nice touch. You can even sprinkle a little extra cinnamon on top for that perfect fall vibe. Enjoy! First, set your oven to 350°F (175°C). While it heats, grab a 9x13-inch baking pan. Coat it with non-stick spray or line it with parchment paper. This makes it easy to lift out the bars later. In a medium saucepan, melt 1 cup of unsalted butter over low heat. When it’s melted, take it off the heat. Stir in 2 cups of granulated sugar until well mixed. Let it cool a bit before adding 4 large eggs and 1 teaspoon of vanilla extract. Mix until smooth. In another bowl, whisk together 1 cup of all-purpose flour, 1/2 cup of unsweetened cocoa powder, 1/4 teaspoon of salt, and 1/4 teaspoon of baking powder. Gradually add this dry mix to your butter-sugar mixture. Stir until just combined and spread it evenly in the prepared pan. Next, take a large mixing bowl. Beat 16 oz of softened cream cheese until it’s smooth. Then, add 1 cup of canned pumpkin puree, 3/4 cup of granulated sugar, and 2 large eggs. Mix in 1 teaspoon of vanilla extract, 1 teaspoon of ground cinnamon, and 1/2 teaspoon of ground nutmeg. Blend until creamy and well combined. Pour the pumpkin cheesecake mixture over the brownie layer in the pan. Use a spatula to spread it evenly. To create a marbled effect, take a knife or skewer. Gently swirl it through the top of the cheesecake layer and the brownie mix. Place the baking pan in your preheated oven. Bake for 40-45 minutes. Check if the cheesecake layer is set. A toothpick inserted in the center should come out clean. Once baked, take the pan out of the oven. Let it cool for at least 30 minutes in the pan. After that, refrigerate for at least 2 hours to set completely. When chilled, slice into bars for serving. To create a perfect swirl, use a knife or skewer. Gently drag it through the cheesecake layer. Start from the edges and move toward the center. This method mixes the brownie and cheesecake just right. Be careful not to over-swirl. You want a nice marbled look, not a blended mess. One common mistake is overmixing the brownie batter. Mix just until blended. Too much mixing can make the brownies tough. Also, make sure your cream cheese is soft. Cold cream cheese won’t mix well. It will leave lumps in your cheesecake layer. Lastly, check your oven temperature. An oven that is too hot can burn the edges. For serving, let the bars chill well. Cold bars hold their shape better. Use a sharp knife to slice them for clean cuts. Dust the top with powdered sugar for a pretty touch. You can also add a dollop of whipped cream. Sprinkle a bit of cinnamon on top for extra flavor. Serve on a lovely plate to impress your guests. {{image_2}} You can make your pumpkin cheesecake brownie bars even tastier. Adding chocolate chips or nuts gives extra flavor and crunch. I love using semi-sweet chocolate chips; they blend well with the pumpkin and cream cheese. Just mix in about 1 cup of chocolate chips when you prepare the brownie layer. If you prefer nuts, walnuts or pecans work great. Chop them up and fold in about 1 cup before spreading the brownie mix in the pan. This small change can make a big difference! If you need a gluten-free treat, you can easily adjust the recipe. Substitute the all-purpose flour with a gluten-free flour blend. Make sure to choose a blend that includes xanthan gum, as this helps the bars hold together. The rest of the recipe stays the same. You won’t lose flavor or texture, but you'll enjoy a gluten-free version that everyone can savor! Pumpkin is not the only star of the fall season. You can switch flavors based on what you like. For a spiced apple version, replace the pumpkin puree with apple butter and add a bit of apple pie spice. If you want a peppermint twist for winter, add crushed candy canes to the cheesecake layer. Mixing the flavors can make these bars fit any season. Just have fun and get creative! To store leftover Pumpkin Cheesecake Brownie Bars, place them in an airtight container. Keep them in the fridge for up to a week. This helps keep them fresh and tasty. If you cut the bars, use parchment paper between layers. This prevents them from sticking together. You can freeze these bars for longer storage. First, let them cool completely. Then, wrap each bar tightly in plastic wrap. Place wrapped bars in a freezer-safe bag or container. They can last up to three months in the freezer. When you want to enjoy them, thaw them in the fridge overnight. If you like your bars warm, reheating is easy. Place the bar on a plate and microwave it for about 10-15 seconds. You can also warm them in an oven at 350°F (175°C) for 5-10 minutes. This will bring back that fresh-baked taste. Enjoy! Yes, you can use fresh pumpkin. First, cook the pumpkin until soft. Then, puree it until smooth. Make sure to drain any extra water. This helps keep the bars from getting too wet. Fresh pumpkin gives a nice flavor and shine. Just remember, one cup of fresh pumpkin is about the same as one cup of canned. You can make these bars a day or two in advance. Bake them as the recipe says. Once they cool, cover them tightly with plastic wrap. Store them in the fridge. When you are ready, slice them into bars. They taste even better after chilling. Yes, you can use Greek yogurt or mascarpone cheese. These options will change the texture a bit. Greek yogurt will make it lighter, while mascarpone will keep it creamy. Choose based on your taste and what you have on hand. You can create delicious pumpkin cheesecake brownies by using the right layers and techniques. We covered the key ingredients, step-by-step instructions, useful tips, and variations. You can even store and serve them with ease. Remember, practice makes perfect. Enjoy trying different flavors and sharing these tasty treats. With these tips, you can impress anyone and make kitchen time fun! Enjoy baking your scrumptious bars!

Pumpkin Cheesecake Brownie Bars Irresistible Treat

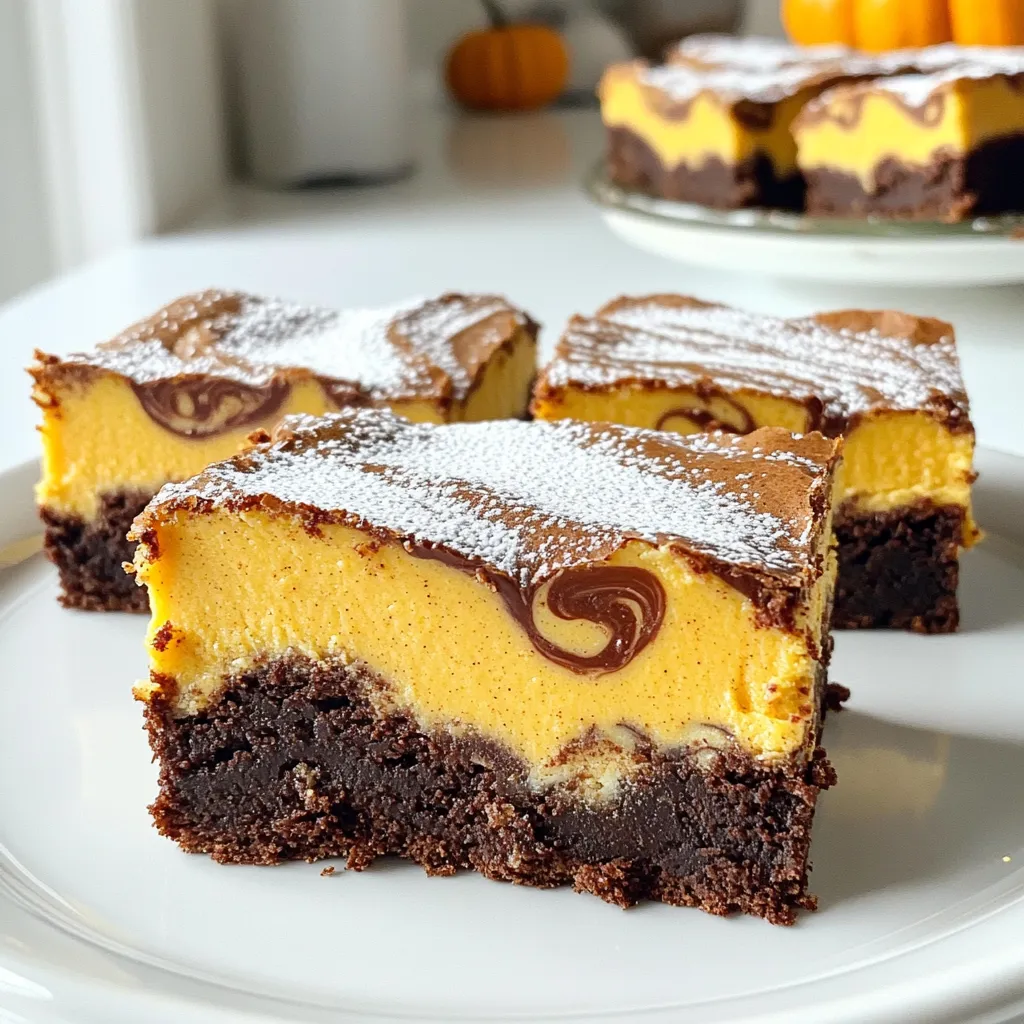
Ready to impress your family and friends with a dessert that combines two favorites? Dive into the world of Pumpkin

To make crispy zucchini chips in the air fryer, you need the right ingredients. Here’s what you will need: - 2 medium zucchinis, thinly sliced - 1 cup almond flour - 1/2 cup grated Parmesan cheese (or nutritional yeast for a vegan option) - 1 teaspoon garlic powder - 1 teaspoon onion powder - 1 teaspoon smoked paprika - 1/2 teaspoon salt - 1/4 teaspoon black pepper - 2 tablespoons olive oil Each ingredient plays a role in making your chips tasty and crispy. The zucchinis give the base flavor, while the almond flour and Parmesan add crunch. The seasonings, like garlic and paprika, pack a punch. Olive oil helps everything stick and crisp up nicely. You can switch out the Parmesan for nutritional yeast if you want a vegan version. This keeps the flavor strong without using dairy. Make sure to slice the zucchini thinly for the best crunch. Too thick, and they won't crisp up well. Preheating the Air Fryer Start by preheating your air fryer to 360°F (180°C). This helps the chips cook evenly and become crisp. Mixing the Coating In a bowl, mix these ingredients: - 1 cup almond flour - 1/2 cup grated Parmesan cheese (or nutritional yeast) - 1 teaspoon garlic powder - 1 teaspoon onion powder - 1 teaspoon smoked paprika - 1/2 teaspoon salt - 1/4 teaspoon black pepper Stir well until everything is combined. This mix adds great flavor and crunch. Preparing the Zucchini Take 2 medium zucchinis and slice them thinly. Use paper towels to pat the slices dry. This step is key. Removing moisture helps the chips crisp up in the air fryer. Coating the Zucchini Put the zucchini slices in a large bowl. Drizzle with 2 tablespoons of olive oil. Toss until all slices are coated. Then, dip each slice into the flour mixture. Make sure both sides are coated well. Shake off any extra coating. Arranging in Air Fryer Place the coated zucchini slices in the air fryer basket. Arrange them in a single layer without overlapping. If you have many slices, you may need to cook in batches. Cooking Time and Temperature Air fry the zucchini chips for about 12-15 minutes. Flip them halfway through cooking. Look for a golden color and crispy texture. Cooling and Serving Once done, take the chips out of the air fryer. Let them cool for a few minutes before serving. This waiting time lets them become even crispier. Suggested Dips Serve the zucchini chips with marinara sauce or a creamy avocado dip. These dips add extra flavor and make the snack even more enjoyable. To make crispy zucchini chips, you need to remove moisture. Start by slicing the zucchinis thin. Use a paper towel to pat them dry. This step is key to achieving that crunch. After drying, coat them in olive oil. Cooking time adjustments can also help. Air fry at 360°F (180°C). Cook for 12 to 15 minutes. Flip the chips halfway through for even cooking. Watch them closely to avoid burning. You can boost the flavor of your zucchini chips. Try adding more spices like cayenne for heat. Lemon zest can add a fresh twist too. Don’t shy away from experimenting with flavors. For cheese variations, Parmesan works great, but you can go vegan. Nutritional yeast will give a cheesy taste without dairy. Feel free to mix and match your favorite seasonings. It’s all about making it your own! {{image_2}} Vegan Options If you want a vegan snack, just swap the Parmesan cheese for nutritional yeast. This gives your chips a cheesy flavor without using any dairy. You can also add more spices to enhance the taste. Try adding a pinch of cayenne for a kick! Gluten-Free Substitutes Almond flour is a great option for those avoiding gluten. It gives the chips a nice crunch. If you can't find almond flour, try using coconut flour. Just remember, coconut flour absorbs moisture, so use less than almond flour. These swaps make your snack healthy and tasty. Sweet vs. Savory Versions Zucchini chips can be sweet or savory. For sweet chips, add a sprinkle of cinnamon and a bit of brown sugar to the coating mix. This gives a unique twist that kids will love. Savory versions, like the classic recipe, keep the garlic and paprika for that perfect crunch. Spicy Zucchini Chips If you enjoy heat, make spicy zucchini chips! Add more cayenne or a dash of hot sauce to the olive oil before tossing. You can also mix in chili powder to the coating. This will give your chips a bold flavor that will spice up your snack time. To keep your zucchini chips fresh, store them in an airtight container. This will help seal in the crunch. Place the container in a cool, dry spot away from sunlight. Your chips will stay good for about 3 to 4 days this way. If you want to keep them longer, consider freezing them. Just know that freezing may change their texture. When it's time to enjoy your leftover chips, you have two main choices: oven or air fryer. The air fryer is the best option for keeping them crispy. Preheat it to 350°F (175°C) and warm the chips for about 5 minutes. If you use the oven, set it to 350°F (175°C) too. Spread the chips on a baking sheet and heat for around 10 minutes, flipping them halfway. To keep your chips crispy, avoid using the microwave. The steam will make them soggy. If you follow these steps, your zucchini chips will taste fresh and crunchy, just like the first time! To make zucchini chips, start by preheating your air fryer to 360°F (180°C). Slice two medium zucchinis thinly. In a bowl, mix almond flour, grated Parmesan cheese, garlic powder, onion powder, smoked paprika, salt, and black pepper. Pat the zucchini slices dry to remove moisture. Toss them in olive oil, then coat with the flour mixture. Arrange the slices in a single layer in the air fryer. Cook for 12-15 minutes, flipping them halfway through. Enjoy your crispy chips! If your zucchini chips turn out soggy, ensure the slices are very thin. Soggy chips often happen when there’s too much moisture. Pat the slices dry with paper towels before cooking. You can also increase the cooking time slightly. This helps remove excess moisture and makes the chips crispier. Yes, you can use different seasonings to match your taste. Try adding cayenne pepper for spice or Italian herbs for a fresh flavor. Nutritional yeast can replace Parmesan for a vegan option. Experiment to find your favorite blend! Almond flour helps create a crispy coating but is not necessary. You can use regular flour, breadcrumbs, or even crushed cornflakes. Just ensure the coating adheres well to the zucchini slices for the best results. Zucchini chips are best enjoyed fresh. They last about 2-3 days in an airtight container. To keep them crispy, store in a cool, dry place away from moisture. For longer storage, consider freezing the uncooked coated zucchini slices. This blog post covered making crispy zucchini chips in an air fryer. We discussed essential ingredients, step-by-step instructions, and tips to enhance flavor. I shared how to store leftover chips and offered answers to common questions. For perfect zucchini chips, embrace your creativity. Try different seasonings, or mix flavors. Remember, home cooking is fun and rewarding. Enjoy every bite of your crispy snack!

Zucchini Chips Air Fryer Crispy and Delicious Snack

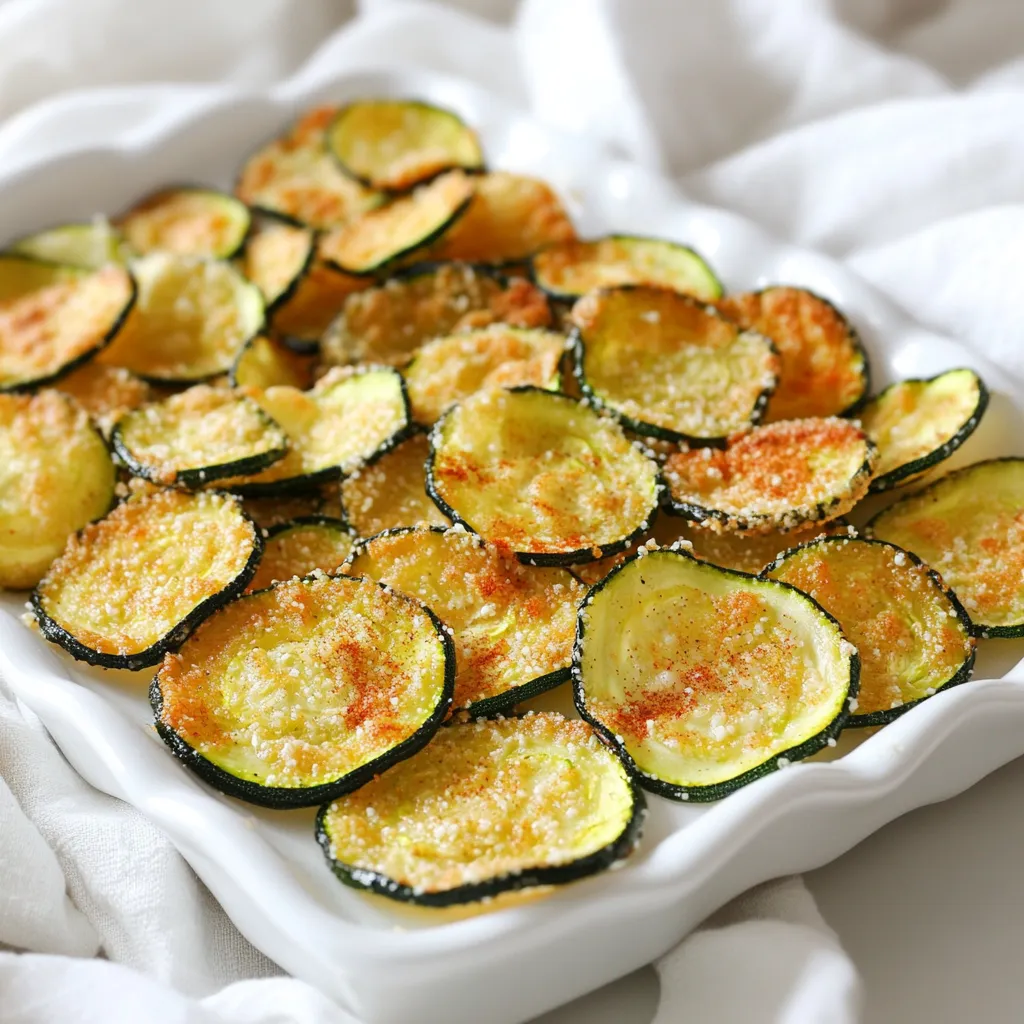
If you’re looking for a snack that’s both crispy and delicious, zucchini chips in the air fryer are the way

- 1 loaf of crusty bread (like ciabatta or sourdough) - 1 cup shredded mozzarella cheese - 1/2 cup grated Parmesan cheese - 1/4 cup unsalted butter, melted - 3 cloves garlic, minced I love choosing the right bread for this dish. Ciabatta and sourdough both have a great crust. They hold up well when you pull them apart. Cheese is a star in this recipe. I use mozzarella for its stretchy quality. Parmesan adds a nice, sharp flavor. Together, they create a creamy, cheesy filling. Butter and garlic are the magic duo. The melted butter makes everything rich. Minced garlic gives a punch of flavor. Together, they elevate the bread to new heights. - 2 tablespoons fresh parsley, chopped - 1 teaspoon Italian seasoning - Salt and pepper to taste Fresh parsley brings a burst of color and freshness. It balances the richness of the cheese and butter. Italian seasoning adds depth to the flavor. It includes herbs like oregano and basil. These flavors remind me of a cozy Italian kitchen. Salt and pepper are key to bringing all the flavors together. Just a pinch of salt and a dash of pepper make a big difference. Adjust to your taste for the perfect bite. First, you need to preheat your oven to 375°F (190°C). This step is key for getting your bread nice and toasty. Next, grab a cutting board. Carefully slice your crusty bread into cube-like pieces. Make sure not to cut all the way through. You want the loaf to stay intact. This will help it pull apart easily later. Now it's time to make the garlic butter. In a small bowl, mix melted butter, minced garlic, chopped parsley, Italian seasoning, salt, and pepper. Stir it well until it’s all combined. Use a spoon or a brush to drizzle this mixture all over the bread. Be sure to let some seep into the cracks for extra flavor. Next, let's add the cheesy goodness. Take your shredded mozzarella and grated Parmesan cheese. Stuff this cheese into the gaps of the sliced bread. Spread it out evenly so every piece gets some cheese. This makes each pull apart extra tasty. Now, wrap the entire loaf in aluminum foil. Place it on a baking sheet to catch any drips. Bake it in the oven for 15 minutes. After that, carefully remove the foil. Bake for another 10 to 15 minutes. This will help the cheese melt and turn golden brown on top. When it’s done, let it cool a bit before pulling apart pieces to serve. Enjoy your cheesy garlic pull apart bread! - Best breads to use for ideal texture: I love using crusty bread like ciabatta or sourdough. These breads give a great crunch on the outside and a soft inside. Their texture holds up well to the cheese and garlic flavors. - Ensuring even cheese melting throughout: To make sure the cheese melts evenly, stuff it deep into each slice. Use both mozzarella and Parmesan for the best flavor. This combination gives you that gooey, cheesy goodness. - Oven temperature tips for optimal results: Preheat your oven to 375°F (190°C). This temperature helps the bread get golden and the cheese melt perfectly. - Checking doneness without drying out the bread: Bake the bread covered for the first 15 minutes. This keeps it moist. After that, uncover it for 10-15 more minutes. Keep an eye on it. You want a nice golden brown color without drying it out. - Best serving accompaniments: Serve your pull apart bread with a small bowl of marinara sauce or garlic butter for dipping. This adds a nice touch and enhances the flavors. - Creative serving ideas and garnishing: Place the bread on a rustic wooden board. You can sprinkle extra parsley on top for color. This makes the dish look fresh and inviting. {{image_2}} You can mix up the cheese in your pull apart bread. Try using feta for a tangy kick. Cheddar adds a sharp flavor that many love. If you want a creamy melt, use Gruyère. For a dairy-free option, vegan cheese works well too. Look for brands made from nuts or soy. They melt nicely and keep your bread tasty. Spice up your bread with extra herbs. Red pepper flakes add some heat. Oregano brings a nice Mediterranean touch. You can also add fun fillings. Stuff the bread with fresh spinach for a healthy twist. Sun-dried tomatoes give a rich, savory flavor. Mix and match to find your favorite combo. If you need gluten-free options, many brands offer great bread choices. Look for gluten-free ciabatta or sourdough. These can still give you that crusty texture. You can also change the shape of your bread. Use small buns or dinner rolls. These shapes make for easy sharing at parties. Experiment and have fun with it! To keep your cheesy garlic pull apart bread fresh, cool it properly. After baking, let it sit at room temperature for about 30 minutes. This helps the steam escape and prevents sogginess. Once it cools, wrap the bread tightly. Use aluminum foil or plastic wrap to keep it safe from air. For longer storage, place the wrapped bread in an airtight container. This keeps it fresh for about 2-3 days on the counter. If you want to store it longer, freeze it. Wrap it well in foil and then place it in a freezer bag. It can last for up to 3 months in the freezer. When it’s time to enjoy leftovers, reheating is key. The best method is to use the oven. Preheat your oven to 350°F (175°C). Unwrap the bread and place it on a baking sheet. Cover it loosely with foil to prevent it from getting too hard. Heat for about 10-15 minutes. This revives the crust and cheese texture. If you’re in a hurry, you can use the microwave. Place a slice on a microwave-safe plate. Cover it with a damp paper towel. Heat for about 20-30 seconds. This method keeps it soft but may not crisp the bread. Always check the bread to avoid overheating. Can I make the dough from scratch? Yes, you can make your dough. Use flour, yeast, water, and salt. Mix and knead well. Let it rise until fluffy. How to keep the bread warm for serving? Wrap the bread in a clean kitchen towel. Place it in a bread basket. This keeps it warm and soft. What can I serve with cheesy garlic pull apart bread? Serve it with marinara sauce or garlic butter for dipping. A side salad goes well too. What to do if the bread is too hard after baking? If your bread is hard, cover it with a damp towel. Let it sit for a few minutes. This helps soften the crust. Tips for preventing cheese from oozing out during baking Stuff the cheese into the bread tightly. Use less cheese if necessary. This helps prevent it from melting out. Can I use margarine instead of butter? Yes, margarine works in this recipe. It will change the flavor slightly but still tastes good. What can I use as a garlic substitute? Try garlic powder or garlic salt. Use about 1/4 teaspoon for each clove. Adjust to your taste. Cheesy garlic pull apart bread is simple to make. You learned about key ingredients, like crusty bread and various cheeses. We covered how to prepare the bread and mix the garlic butter. Then, stuffing and baking created a delicious meal. Remember to use the right herbs and spices to enhance the flavor. Try different cheeses or bread for unique twists. Proper storage and reheating keep leftovers tasty. Enjoy experimenting with these techniques and tips. Your kitchen adventures will be rewarding!

Cheesy Garlic Pull Apart Bread Savory Delightful Treat

Are you ready to impress your friends at your next gathering? Cheesy Garlic Pull Apart Bread is the ultimate savory

To make delicious pumpkin spice granola clusters, you need: - 2 cups rolled oats - 1 cup pumpkin seeds - 1 cup almond flour - 1/2 cup honey or maple syrup - 1/2 cup coconut oil, melted - 1 teaspoon vanilla extract - 1 tablespoon pumpkin spice blend (cinnamon, nutmeg, ginger, cloves) - 1/2 teaspoon salt These ingredients create a blend of flavors and textures. The oats give a chewy base, while pumpkin seeds add a nice crunch. Almond flour gives it a slight nutty taste. Honey or maple syrup adds sweetness and binds everything together. Coconut oil helps everything bake nicely. You can also add some fun extras to make your granola unique: - 1/2 cup dried cranberries or raisins (optional) - Chopped nuts (like almonds or walnuts) - Chocolate chips for a sweet twist These add-ins can enhance flavor and give more texture to your clusters. Dried fruit adds a hint of tartness, while nuts can provide extra crunch. If you love chocolate, a few chips can make it feel like a treat! If you need alternatives, there are options! Instead of honey, use agave syrup for a vegan choice. Almond flour can be swapped with oat flour if you prefer. For nut-free options, use seeds like sunflower seeds instead of nuts. Always check for allergies when adding new ingredients. These substitutions keep the recipe tasty while accommodating your needs. Start by preheating your oven to 325°F (160°C). This heat is key for a crunchy texture. While the oven warms up, take a baking sheet and line it with parchment paper. This makes cleanup easy and helps the granola not stick. In a large bowl, add the following dry ingredients: - 2 cups rolled oats - 1 cup pumpkin seeds - 1 cup almond flour - 1 tablespoon pumpkin spice blend - 1/2 teaspoon salt Mix these well. It’s important to combine them so that every bite has great flavor. In another bowl, whisk together: - 1/2 cup honey or maple syrup - 1/2 cup melted coconut oil - 1 teaspoon vanilla extract Whisk until smooth. This mixture brings sweetness and moisture to the granola. After mixing, pour the wet ingredients over the dry ones. Stir until everything is coated. Let this sit for about 5 minutes. This helps it thicken. Next, transfer the mixture to the prepared baking sheet. Press it down firmly. This ensures even baking and helps form clusters. Bake for 20-25 minutes. Keep an eye on it to avoid burning. When it turns golden brown, it’s done. Let it cool on the baking sheet. As it cools, the clusters will stick together. Once cool, break it into pieces and enjoy! To get that crunchy bite, press the granola mixture firmly onto the baking sheet. This helps it stick together. Bake until golden brown, about 20 to 25 minutes. Keep an eye on it to avoid burning. Let it cool completely on the sheet. This cooling time helps form those tasty clusters we love. Store your granola clusters in an airtight container. This keeps them fresh for up to two weeks. If you live in a humid area, use a vacuum-sealed bag. This prevents moisture from ruining your crunchy snack. Avoid storing in the fridge, as it can make them soft. Serve your granola clusters in a clear jar for a stunning look. You can also sprinkle them over yogurt for a delicious breakfast. Add a drizzle of honey for extra sweetness. For a fun snack, mix in some dark chocolate chips or nuts. {{image_2}} To make this granola gluten-free, use certified gluten-free oats. Regular oats may contain gluten. Check labels to be sure. The other ingredients, like pumpkin seeds and almond flour, are naturally gluten-free. This way, everyone can enjoy this tasty snack! Feel free to play with the spice blend! Try adding cardamom for a unique kick. You can swap pumpkin spice for chai spice for an exciting change. Mixing in a bit of cocoa powder can give you a chocolatey twist. Experiment with your favorites to find what you love best! Adding nuts or seeds boosts the nutrition and crunch. Almonds, walnuts, or sunflower seeds work great. They not only add flavor but also healthy fats and protein. Mix in about 1 cup of your chosen nuts or seeds in the dry ingredients. This makes your clusters even more satisfying and rich in nutrients. To keep your pumpkin spice granola clusters fresh, store them in an airtight container. I recommend using glass jars or plastic bins with tight seals. This prevents air and moisture from getting in. Make sure the granola is completely cool before sealing. Warm granola can trap steam and lead to sogginess. When stored properly, your granola clusters can last up to two weeks at room temperature. If you want to keep them longer, consider freezing them. The taste and texture remain great for up to three months in the freezer. Just remember to label your containers with the date. To freeze your granola, first, let the clusters cool completely. Then, place them in a freezer-safe bag or container. Press out as much air as possible before sealing. This helps prevent freezer burn. When you're ready to eat, simply thaw them in the fridge or at room temperature. Enjoy your crunchy treat anytime! You can use maple syrup instead of honey. Maple syrup adds a nice sweetness, just like honey. It keeps the clusters sticky and holds them together. This swap works well if you want a vegan option. Yes, you can make these clusters ahead of time. They store well in an airtight container. Make a big batch and enjoy them for up to two weeks. Just remember to let them cool completely before storing. To make these clusters vegan, use maple syrup instead of honey. Make sure your coconut oil is plant-based, which it usually is. This way, you keep the clusters tasty and vegan-friendly. You can add yogurt or milk for a great topping. Fresh fruit like bananas or berries pairs well too. You can also sprinkle some extra pumpkin spice on top for extra flavor. Yes, you can adjust the sweetness. If you like it less sweet, use less honey or maple syrup. You can also add more if you prefer them sweeter. Just keep in mind that the sweetness helps bind the clusters together. In this post, we explored making pumpkin spice granola clusters. We covered essential ingredients, step-by-step instructions, and helpful tips. You learned about variations, storage tips, and answers to common questions. With these guidelines, you can create tasty, crunchy clusters. Remember to get creative with flavors and ingredients. Enjoy making your own granola treat!

Pumpkin Spice Granola Clusters Savory and Crunchy Snack

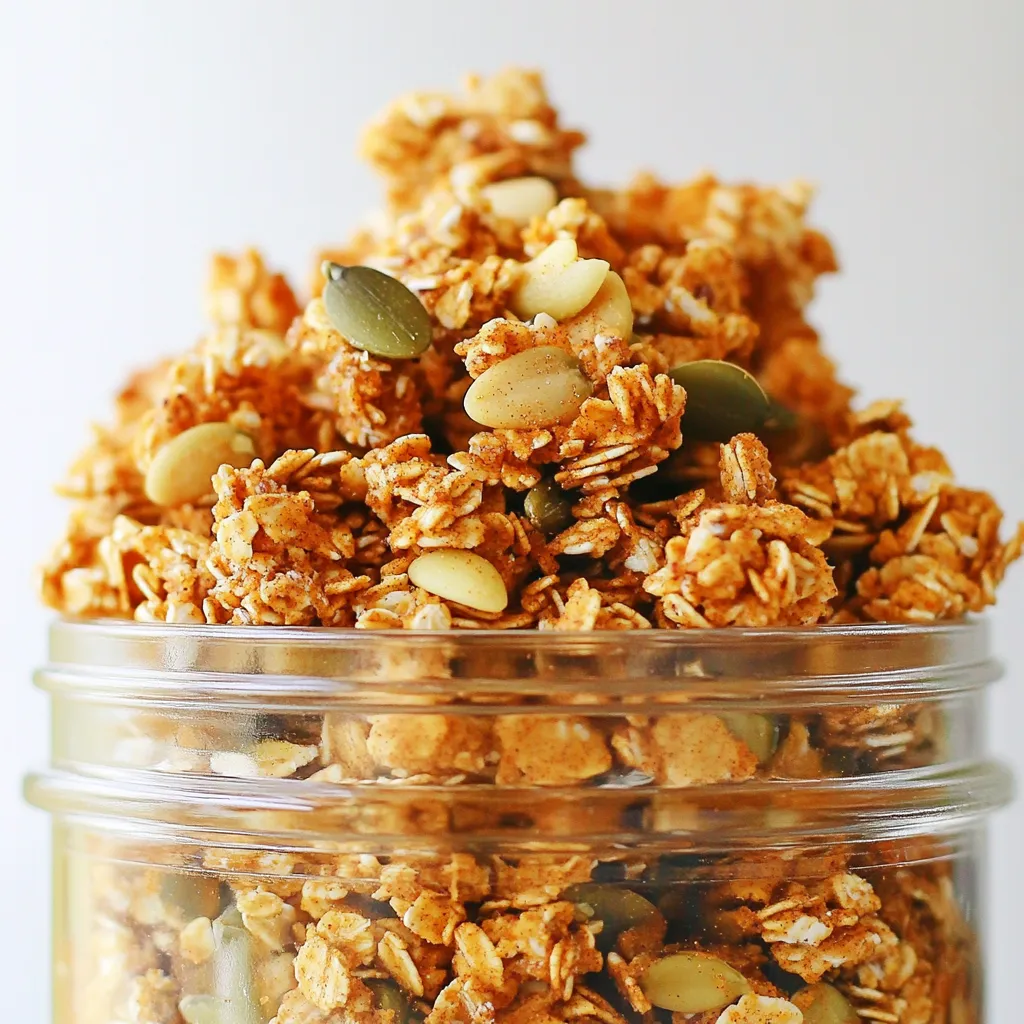
Are you ready to enjoy a tasty snack that captures the essence of fall? These Pumpkin Spice Granola Clusters are

- 2 lbs flank steak, thinly sliced - 1/4 cup soy sauce - 1/4 cup brown sugar - 1/2 cup beef broth - 2 teaspoons minced ginger - 4 cloves garlic, minced - 1 large onion, sliced - 1 bell pepper, sliced (red or green) - 1/4 teaspoon black pepper - 1 tablespoon cornstarch - 2 tablespoons water - 3 green onions, chopped - Sesame seeds This recipe uses simple yet flavorful ingredients. The flank steak is key. It cooks well and becomes tender. The soy sauce adds savory depth. Brown sugar brings a touch of sweetness. The beef broth gives the dish body. Minced ginger and garlic add warmth and aroma. Onions and bell peppers add color and crunch. I love using fresh ingredients for the best taste. You can swap in fresh ginger if you prefer. Just remember, fresh ginger has a stronger flavor. Adjust the amount based on your taste. For the garnish, the green onions add freshness. The sesame seeds give a nice crunch. Together, they make the dish pop. You can also experiment with other toppings if you like. To get started, you need to make the sauce. In a small bowl, combine: - 1/4 cup soy sauce - 1/4 cup brown sugar - 1/2 cup beef broth - 2 teaspoons minced ginger - 4 cloves garlic, minced - 1/4 teaspoon black pepper Stir all the ingredients together until they blend well. This sauce is the heart of your Mongolian beef. It brings out the flavors and makes the dish shine. Now, it's time to layer your ingredients in the slow cooker. First, take 2 lbs of flank steak, thinly sliced. Place it in the slow cooker and coat it with the sauce you just made. Make sure every piece of beef is covered. Next, add the sliced veggies on top: - 1 large onion, sliced - 1 bell pepper, sliced (you can use red or green) This adds color and crunch to your dish. Cover the slow cooker and set it to cook. You have two options: - Cook on low for 4-5 hours - Cook on high for 2-3 hours Choose whichever works best for you. The meat should be tender when done. In the last 30 minutes of cooking, thicken the sauce. Mix together: - 1 tablespoon cornstarch - 2 tablespoons water Stir this mixture into the slow cooker. This step will give your sauce a nice, rich texture. Once everything is ready, serve your Mongolian beef hot. Enjoy! - Choose the right cut of beef: I recommend flank steak. It is tender and flavorful. Slice it thinly against the grain for the best texture. - Marinade options for extra flavor: You can add more depth by marinating the beef. Mix soy sauce, ginger, and garlic. Let it sit for 30 minutes before cooking. - Differences between low and high settings: Low settings cook the meat slowly over 4-5 hours. High settings cook faster, taking 2-3 hours. Both make the beef tender, but low gives better flavor. - How to adjust for slower cookers: If your slow cooker runs hot, check the meat sooner. You may need to use the lower setting to avoid overcooking. - Accompaniments that complement Mongolian beef: Serve with steamed broccoli or snap peas. These add color and crunch. - Best rice or noodle options: I love serving this dish over jasmine rice or egg noodles. Both soak up the sauce well and balance the flavors. {{image_2}} You can always switch up cuts of beef for this recipe. Flank steak works great, but you can use sirloin or chuck roast too. Each cut offers a different taste and texture. For a veggie boost, add carrots or snow peas. They add color and crunch, making the dish more fun and tasty. Want to spice it up? Add red pepper flakes to give your Mongolian beef some heat. If you prefer sweet, try adding pineapple or hoisin sauce. These options create a new twist while keeping the core flavors intact. Experimenting with spices can turn a simple dish into something special. How you serve this dish can change the experience. You can use lettuce wraps for a fresh, crunchy bite. Or, serve it over rice for a hearty meal. If you want a Western spin, consider making tacos or burritos using the beef. Each style brings a unique flair to your table! To store leftover Mongolian beef, let it cool first. Place it in an airtight container. This will keep it fresh and safe. I like using glass or plastic containers with tight lids. They help prevent spills and keep smells in check. For freezing, place the beef in freezer-safe bags. Squeeze out as much air as you can. This helps avoid freezer burn. Label the bags with the date. When you're ready to eat, thaw it in the fridge overnight. Reheat it in a pan or microwave until hot. Mongolian beef lasts about 3 to 4 days in the fridge. If you freeze it, it can last up to 3 months. Check for signs of spoilage, like off smells or changes in color. If it smells weird or looks slimy, it's best to toss it out. Yes, you can use chicken or pork instead of beef. The cooking times may change. Chicken cooks faster, so check for doneness at around 2 hours on high. Pork may need a bit longer, similar to beef. Choose cuts that are tender and flavorful for best results. To make a smaller portion, cut the ingredients in half. Use 1 lb of flank steak and reduce the sauce ingredients accordingly. This will keep the taste strong while serving about three people. You can also freeze leftovers for later. The best way to reheat Mongolian beef is on the stove. Use a pan over medium heat. Stir often until heated through. You can also microwave it in short bursts, stirring in between. Add a splash of beef broth to keep it moist. Yes, you can use fresh ginger. Just peel and grate it finely. Use about 1 tablespoon of fresh ginger instead of 2 teaspoons of minced. Fresh ginger will give a brighter flavor to the dish. Yes, you can make a vegetarian version. Use tofu or seitan as the main protein. Replace the beef broth with vegetable broth. All other ingredients can stay the same. This way, you still get that tasty Mongolian flavor without meat. Mongolian beef is a tasty dish you can easily make at home. We covered the main ingredients, sauce preparation, and slow-cooking tips. You learned about perfecting the recipe and helpful variations. Remember, you can add your favorite veggies or swap proteins for fun twists. With the right storage and reheating methods, you can enjoy this meal anytime. I hope you feel ready to cook and customize your own delicious Mongolian beef!

Mongolian Beef Slow Cooker Easy and Flavorful Meal

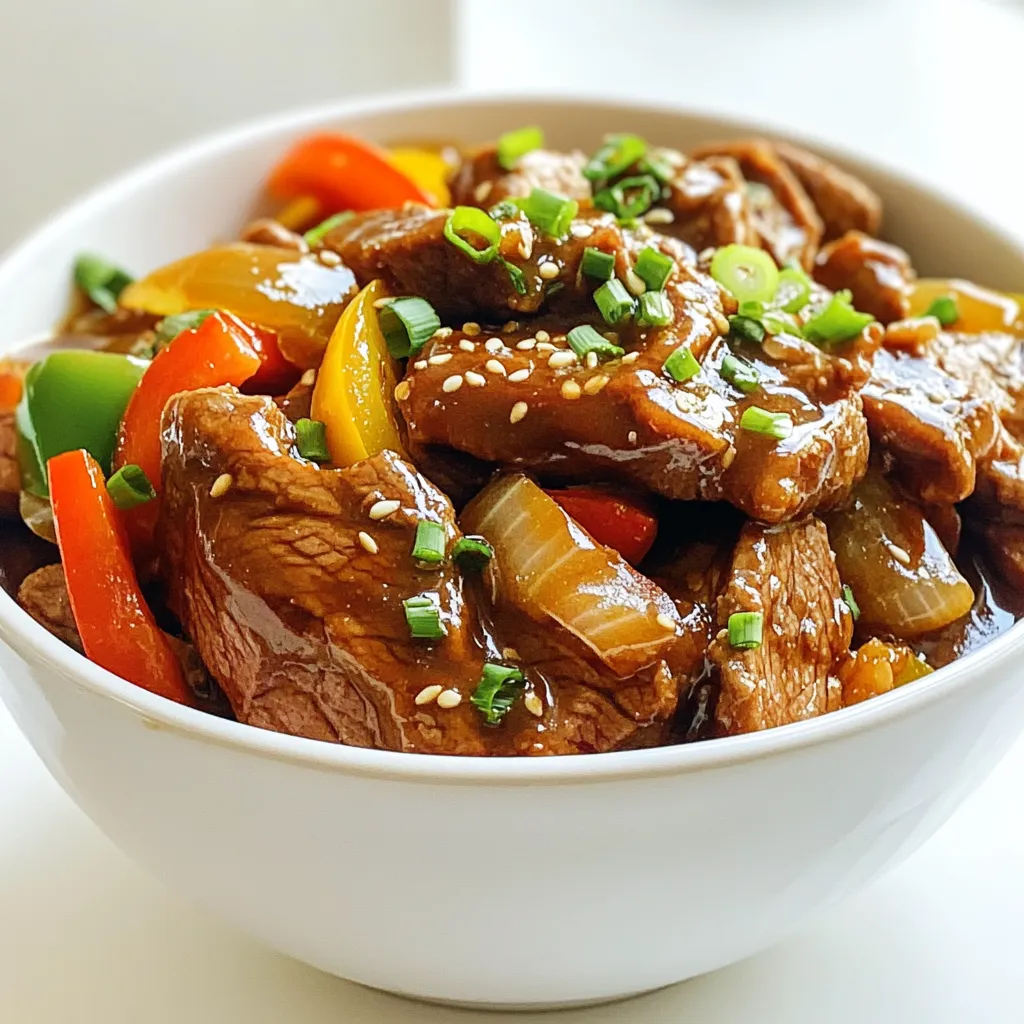
Are you craving a delicious meal that’s easy to make? Look no further than Mongolian Beef in a slow cooker.

- 2 cans (15 oz each) white beans (cannellini or navy), drained and rinsed - 1 tablespoon olive oil - 1 medium onion, diced - 3 cloves garlic, minced - 2 medium carrots, diced - 2 stalks celery, diced - 4 cups vegetable broth I love using white beans in this soup. They add a creamy texture and a rich flavor. Cannellini or navy beans work well. Make sure to rinse and drain them for the best taste. The base of the soup starts with olive oil, onion, garlic, carrots, and celery. These veggies give a tasty foundation. - 1 cup coconut milk (for creaminess) - 2 cups fresh spinach, chopped - 1 teaspoon dried thyme - 1 teaspoon dried oregano - 1/2 teaspoon red pepper flakes (optional, for heat) - Juice of 1 lemon - Fresh basil leaves for garnish For creaminess, I use coconut milk. It makes the soup smooth and rich. Fresh spinach adds color and nutrition. The herbs, like thyme and oregano, bring a warm flavor. Red pepper flakes can add heat if you enjoy spice. A splash of lemon juice brightens everything up. I love finishing the soup with fresh basil for a pop of flavor. - Salt and pepper to taste Seasoning is key to a great soup. Always taste and adjust with salt and pepper. This step helps to enhance the natural flavors of the beans and veggies. A little seasoning goes a long way in making your creamy Tuscan white bean soup truly shine. To start, heat one tablespoon of olive oil in a large pot over medium heat. Once hot, add the diced onion, carrots, and celery. Sauté these for about 5 to 7 minutes. You want them to soften but not brown. Next, stir in three minced garlic cloves, one teaspoon of dried thyme, one teaspoon of dried oregano, and half a teaspoon of red pepper flakes if you like some heat. Cook this for an extra minute or two until you smell the lovely aromas. Now, it’s time to add in the main ingredients. Pour in two cans of drained white beans and four cups of vegetable broth. Bring this mixture to a gentle boil. After boiling, lower the heat and let it simmer for about 15 minutes. This will help the flavors meld together. To make the soup creamy, use an immersion blender. Blend part of the soup while leaving some beans whole for texture. If you don’t have an immersion blender, transfer half of the soup to a regular blender. Blend it until smooth, then return it to the pot. After blending, stir in one cup of coconut milk and two cups of chopped fresh spinach. Let the soup simmer for another 5 minutes. This will wilt the spinach and blend all the flavors. Finally, season with salt, pepper, and the juice of one lemon to taste. If the soup seems too thick, add more broth or water until it reaches your desired consistency. Serve your soup hot, garnished with fresh basil leaves for a nice finish. To get the best texture, use an immersion blender. It lets you blend right in the pot. If you don’t have one, pour half the soup into a regular blender. Blend until smooth, then mix it back in. This gives a nice creamy feel. Remember to leave some beans whole for a hearty bite. You can swap herbs and spices to fit your taste. Try fresh basil or parsley for a bright touch. If you like heat, add more red pepper flakes. A little goes a long way. Taste the soup after adding, then adjust as needed. This helps you find your perfect flavor. Serve the soup with crusty bread or a light salad. Both pair well and balance the meal. For leftovers, store the soup in an airtight container. It keeps well in the fridge for about three days. You can also freeze it for up to three months. Just thaw and reheat when ready to enjoy. {{image_2}} You can mix things up by using other beans. Great options include kidney beans or pinto beans. If you want a veggie boost, try adding chopped kale or Swiss chard. You can also use vegetable broth made from scratch for more flavor. For a dairy-free option, instead of coconut milk, try almond milk. It will keep the soup creamy and rich. Want to add more depth? You can toss in diced zucchini or potatoes for extra texture. Both add heartiness and flavor. If you like protein, add cooked chicken or sausage. They will make the soup more filling and delicious. To give your soup a Mediterranean flair, add olives or feta cheese. These will bring a salty, tangy taste that pairs well with the beans. For a unique Indian twist, sprinkle in some curry spices. This will change the flavor profile and excite your taste buds. To store your soup in the fridge, let it cool first. Then, pour it into a container. Use an airtight container to keep it fresh. Glass or plastic containers work well. Make sure to cover it tightly to avoid spills. For long-term storage, you can freeze the soup. It’s best to use freezer-safe containers. You can also use zip-top bags. Leave some space in the bag for the soup to expand. When ready to eat, thaw the soup overnight in the fridge. You can reheat it on the stove or in the microwave. Stir well to ensure it heats evenly. This soup lasts about 4-5 days in the fridge. In the freezer, it can last up to 3 months. Check for signs of spoilage before eating. If the soup smells off or has mold, it’s best to throw it away. Always trust your senses when it comes to food safety. Yes, this soup is vegan. It uses only plant-based ingredients. The white beans provide protein. Olive oil adds healthy fat. Coconut milk gives it a creamy texture without dairy. Fresh spinach and herbs add flavor and nutrients. You can enjoy this dish while keeping your diet plant-based. Yes, you can use dried beans. Start by soaking them overnight. Drain and rinse the beans before cooking. Use about 1 cup of dried beans for this recipe. Cook them in water until tender, about 1 to 1.5 hours. Once cooked, add them to the soup as you would canned beans. This soup is naturally gluten-free. All the ingredients listed do not contain gluten. Just be sure to check your vegetable broth for any gluten. Most broth brands are safe, but it's good to confirm. You can enjoy this soup without worry if you follow these tips. This soup pairs well with several sides. A fresh salad adds crunch and brightness. Crusty bread is perfect for dipping. You might also try serving it with garlic bread or a side of roasted vegetables. Each option enhances the meal and makes it more filling. This blog post covered how to make a creamy Tuscan white bean soup. We discussed key ingredients like white beans, coconut milk, and herbs. You learned step-by-step instructions for sautéing, blending, and adjusting flavors. With tips for perfecting creaminess, enhancing flavors, and various serving options, you can make this soup your own. Remember, it’s flexible. Whether you adjust spices or add proteins, you have room to explore. Enjoy your cooking journey and make this dish your favorite!

Creamy Tuscan White Bean Soup Simple and Tasty Dish

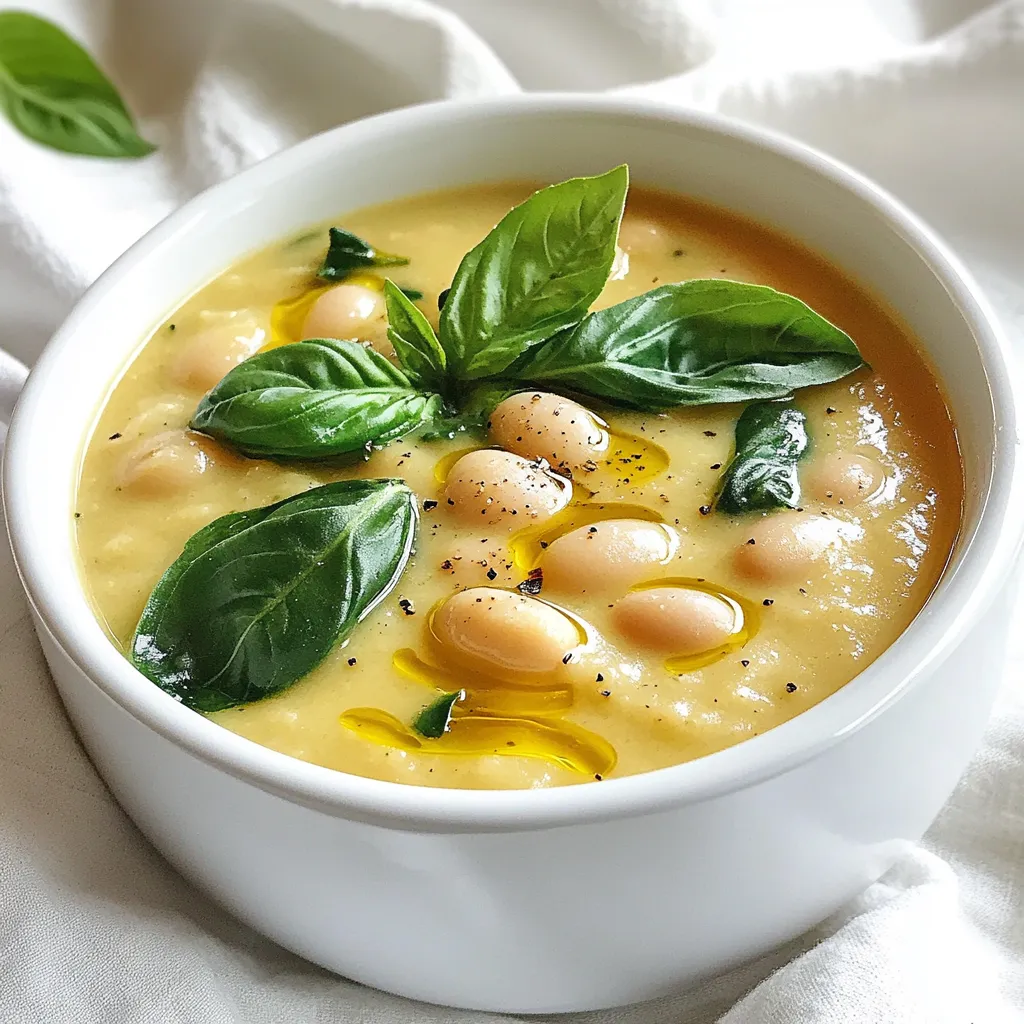
Looking to warm up your dinner routine? This Creamy Tuscan White Bean Soup is not only comforting but also easy

Older posts
Newer posts
← Previous Page1 … Page3 Page4 Page5 … Page84 Next →

dsad

© 2026 Lisa Dishes • Built with GeneratePress

Our Policies

  • Copyright Policy
  • Cookie Policy
  • GDPR Policy
  • Privacy Policy
  • Disclaimer
  • Terms Of Use

More Information

  • Home
  • About
  • Contact
  • Appetizers
  • Dessert
  • Dinner
  • Drinks
©2026, Lisa Dishes About Back To Top