Skip to content
DisclaimerTerms Of UseGDPR PolicyCookie Policy

Lisa Dishes

  • Home
  • Drinks
  • Appetizers
  • Dinner
  • Dessert
  • About
  • Contact
  • Privacy Policy
DisclaimerTerms Of UseGDPR PolicyCookie Policy

NO-ING-IMG

To make honey mustard chicken thighs, you need these main items: - 4 bone-in, skin-on chicken thighs - 1/4 cup Dijon mustard - 1/4 cup honey - 2 tablespoons olive oil - 2 cloves garlic, minced - 1 teaspoon dried thyme - 1 teaspoon smoked paprika - Salt and pepper to taste - Fresh parsley, chopped for garnish Using fresh ingredients can make a big difference in flavor. I recommend: - Fresh garlic instead of jarred - Fresh thyme instead of dried - Fresh parsley for garnish You can swap some ingredients if needed. Here are a few ideas: - Use yellow mustard if you don't have Dijon - Maple syrup can replace honey for a different taste - Chicken breast works as an alternative to thighs - Use any fresh herbs you like, such as rosemary or basil Start by gathering your ingredients. You will need: - 4 bone-in, skin-on chicken thighs - 1/4 cup Dijon mustard - 1/4 cup honey - 2 tablespoons olive oil - 2 cloves garlic, minced - 1 teaspoon dried thyme - 1 teaspoon smoked paprika - Salt and pepper to taste - Fresh parsley, chopped for garnish Preheat your oven to 400°F (200°C). In a medium bowl, whisk together the Dijon mustard, honey, olive oil, minced garlic, dried thyme, smoked paprika, salt, and pepper. Mix until it is smooth and well combined. Next, place the chicken thighs in a large baking dish. Make sure they are skin side up. Pour the honey mustard mixture over the chicken. Make sure to coat each thigh well. For deeper flavor, let the chicken marinate for 15 to 30 minutes. This step is optional but highly recommended. Once your chicken has marinated, it's time to bake. Place the baking dish in the preheated oven. Bake the chicken for 35 to 40 minutes. You want the skin to turn crispy and the chicken to reach an internal temperature of 165°F (75°C). To make the skin even crispier, switch your oven to broil for an extra 3 to 5 minutes. Keep a close eye on it. The broiler can burn food quickly if you are not careful. To get that perfect crispy skin, here are some tips: - Make sure your chicken skin is dry before cooking. Pat it with paper towels if needed. - Do not cover the chicken while it bakes. This allows moisture to escape and keeps the skin crispy. - Use the broiler at the end for extra crunch, but watch it closely to prevent burning. Following these steps will lead to delicious Honey Mustard Chicken Thighs that are both flavorful and easy to make. Enjoy your meal! Marinating the chicken adds great taste. I suggest letting it sit for 15 to 30 minutes. The honey and Dijon mustard mix seeps into the meat. This makes it juicy and full of flavor. You can even marinate overnight for a stronger taste. But if you're short on time, a quick marinade still works. You can pair honey mustard chicken thighs with many sides. Here are a few ideas: - Roasted vegetables like carrots, potatoes, or Brussels sprouts - A fresh garden salad with a light dressing - Creamy mashed potatoes for a comforting touch - Steamed rice or quinoa for a healthy option These sides balance the sweet and tangy flavors of the chicken. To make the best honey mustard chicken, steer clear of common mistakes. Do not skip the marinating step, even if you’re in a hurry. It makes a huge difference. Also, avoid cooking the chicken at too high a temperature; it can burn the outside. Always check the internal temperature. You want it to reach 165°F (75°C). Lastly, let the chicken rest before serving. This keeps it juicy and tender. {{image_2}} You can change the flavor by using different marinades. Try a soy sauce mix for a savory twist. Mix 1/4 cup soy sauce, 1 tablespoon honey, and minced ginger. It gives a sweet and salty taste. You can also use a spicy marinade. Combine 1/4 cup honey mustard with hot sauce for a kick. This adds heat and flavor to your chicken thighs. Baking is great, but you can try grilling too. Grilling adds a smoky flavor. Cook the thighs on medium heat for about 20-25 minutes. Flip them halfway through for even cooking. You can also use a slow cooker. Cook on low for 4-6 hours. This makes the chicken very tender and juicy. Serve these chicken thighs with rice or mashed potatoes. They soak up the honey mustard sauce well. A fresh salad on the side is nice too. It adds crunch and brightness to your meal. You can also serve it with roasted veggies. They add color and nutrients to the plate. For a fun twist, serve in wraps with lettuce and tomatoes. To store leftover honey mustard chicken thighs, let them cool down first. Place the chicken in an airtight container. You can keep it in the fridge for up to four days. Make sure to keep the skin on for better taste. If you want, you can also cover the chicken tightly with plastic wrap. If you want to freeze the chicken, wrap each thigh in foil or plastic wrap. Then, place them in a freezer-safe bag. You can freeze them for up to three months. When you're ready to eat, just thaw them in the fridge overnight before reheating. To reheat the chicken, preheat your oven to 350°F (175°C). Place the chicken on a baking sheet. Heat it for about 15-20 minutes or until warm. You can also use the microwave, but it may not keep the skin crispy. If you want that crispy texture back, try broiling for a few minutes after microwaving. The best temperature to cook chicken thighs is 400°F (200°C). At this temperature, the chicken cooks evenly. It also allows the skin to crisp up nicely. This method keeps the meat juicy and flavorful. Always use a meat thermometer to check the internal temperature. You want it to reach 165°F (75°C) for safe eating. Yes, you can use boneless chicken thighs. They will cook faster than bone-in thighs. Be sure to adjust the cooking time down to about 25-30 minutes. The honey mustard sauce will still coat the chicken well. Just ensure they reach the same internal temperature of 165°F (75°C). To ensure the chicken is cooked through, use a meat thermometer. Check the thickest part of the thigh. It should read 165°F (75°C). If you don’t have a thermometer, cut into the meat. The juices should run clear, and the meat should not be pink. Let the chicken rest for five minutes before serving. This helps keep it juicy and tender. This blog post covered all the key points for cooking chicken thighs. We explored required and fresh ingredients, along with possible substitutions. The step-by-step guide clarified preparation, baking, and tips for crispy skin. Our tips and tricks enhanced flavors and avoided common errors. Variations offered new ideas for marinades and cooking methods. Lastly, we shared storage tips for leftovers. Cooking chicken thighs can be simple and fun. With practice, you will impress your family and friends. Enjoy experimenting in the kitchen!

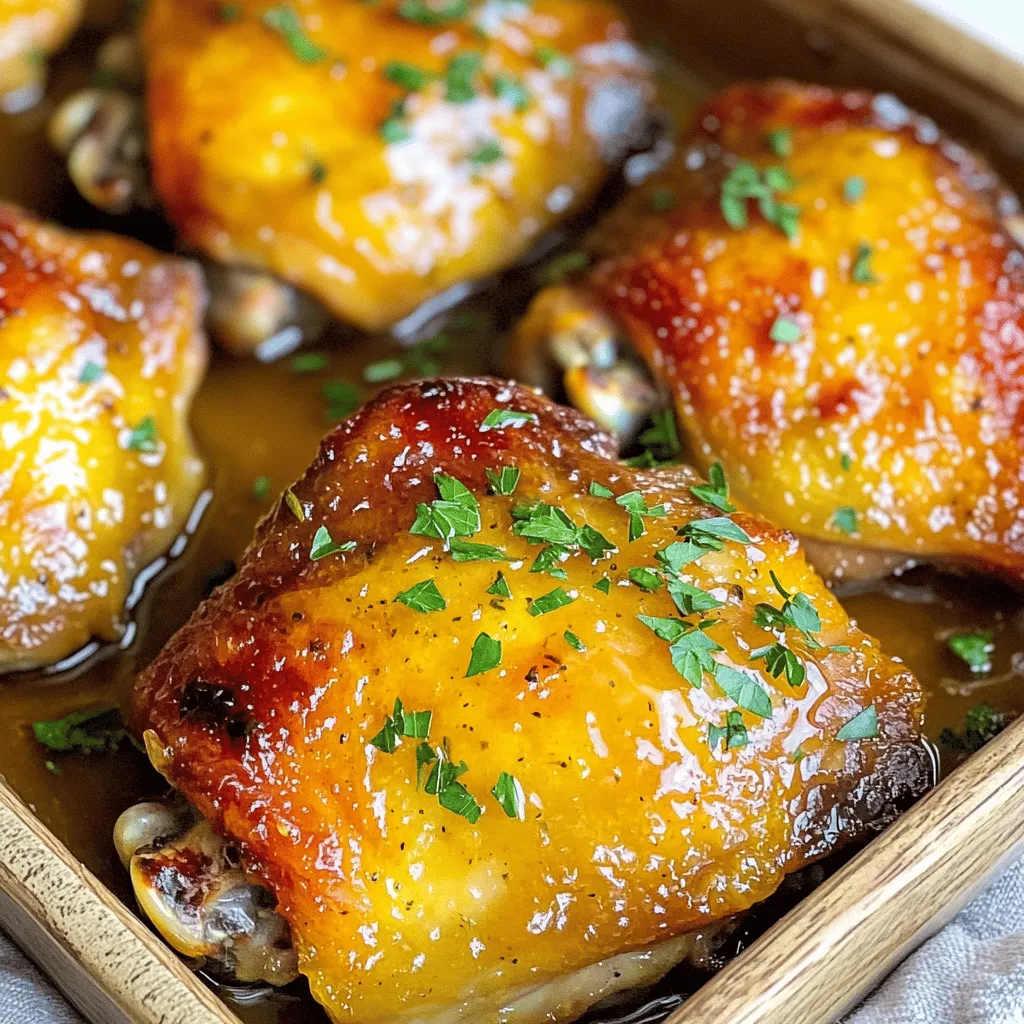
Honey Mustard Chicken Thighs Flavorful and Easy Dish

Looking to spice up your dinner routine? Honey Mustard Chicken Thighs are flavorful and easy to make! This dish combines

- 2 large zucchinis - 1 ripe avocado - 1 cup fresh basil leaves - 1 clove garlic, minced - 2 tablespoons lemon juice - 2 tablespoons nutritional yeast (optional, for a cheesy flavor) - 1/4 cup extra-virgin olive oil - Salt and pepper to taste - Cherry tomatoes, halved (for garnish) - Pine nuts (for garnish) To make Avocado Pesto Zucchini Noodles, you need fresh and simple ingredients. Start with zucchinis, which you will spiralize into noodles. Choose ripe avocados for a creamy texture. Fresh basil leaves add bright flavor. One clove of minced garlic will give a nice kick to the pesto. Lemon juice keeps the avocado fresh and adds a zesty note. Nutritional yeast is optional but adds a cheesy flavor. Extra-virgin olive oil brings everything together for a smooth consistency. Lastly, salt and pepper enhance the taste. For garnishes, halved cherry tomatoes add color and sweetness. Pine nuts add a delightful crunch. With these ingredients ready, you can create a fresh, tasty dish that impresses anyone at your table. - Spiralizing or Slicing Techniques To start, take your zucchinis and spiralize them. A spiralizer makes long, noodle-like strands. If you don't have one, use a mandoline or a vegetable peeler. Both tools can create thin strips of zucchini. - Salting to Remove Moisture Place the spiralized zucchini in a bowl. Sprinkle a pinch of salt over them. This step helps draw out excess moisture. Let the zucchini sit for about 10 to 15 minutes. You’ll notice some water pooling at the bottom of the bowl. - Combining Ingredients in a Food Processor While the zucchini is resting, it’s time to make the avocado pesto. In your food processor, add one ripe avocado, fresh basil leaves, minced garlic, and lemon juice. Also, add a pinch of salt and pepper. - Adjusting Consistency and Flavor Turn on the food processor and slowly drizzle in extra-virgin olive oil. Keep blending until the mixture is smooth and creamy. If you want a cheesier flavor, add two tablespoons of nutritional yeast. Taste and adjust the seasoning as you like. - Mixing Pesto with Zucchini Noodles After 15 minutes, check your zucchini. Squeeze out any excess moisture and place the noodles in a clean bowl. Add the avocado pesto to the noodles. Gently toss everything together until well coated. - Garnishing Tips For a pretty finish, garnish your dish with halved cherry tomatoes and a sprinkle of pine nuts. This adds a nice crunch and color. Serve immediately to enjoy the fresh flavors! Adding Spices or Herbs You can boost your avocado pesto with spices or herbs. Try adding a pinch of red pepper flakes for heat. Fresh parsley gives a nice twist too. Don't be shy to mix flavors. Experiment until you find your favorite blend. Choosing the Right Avocado A ripe avocado is key for smooth pesto. Look for avocados that yield slightly when pressed. They should be dark green and smooth. Avoid hard ones, as they won't blend well. A perfect avocado makes your dish creamy and rich. How to Properly Spiralize Zucchini Use a spiralizer for perfect zucchini noodles. First, trim the ends of each zucchini. Secure it in the spiralizer and twist. If you don't have one, a vegetable peeler can work too. Just peel long, thin strips. Preventing Excess Moisture Zucchini can be watery. To reduce moisture, sprinkle salt on the noodles. Set them aside for 10-15 minutes. This helps draw out the water. Afterward, gently squeeze them to remove any extra liquid. Serving Ideas Serve the avocado pesto zucchini noodles fresh. A large bowl works best. You can also plate individual servings for a nice touch. This dish looks great and tastes even better! Garnish Variations For garnishes, halved cherry tomatoes add color and sweetness. Pine nuts give a nice crunch. You can also sprinkle fresh basil on top. This enhances the dish visually and adds extra flavor. {{image_2}} Vegan and Gluten-Free Options This dish is naturally vegan and gluten-free. You use fresh veggies and ripe avocado. Nutritional yeast gives a cheesy taste without dairy. You can enjoy this meal worry-free, no matter your diet. Low-Carb Alternatives If you're cutting carbs, zucchini noodles are a perfect choice. They are low in carbs and high in fiber. You can even add cauliflower rice for more texture. This keeps the dish light and healthy. Substituting Herbs or Nuts Feel free to swap basil with other herbs. Try spinach, arugula, or parsley for a new twist. You can also change the nuts. Use walnuts or almonds instead of pine nuts. Each swap offers a unique flavor. Adding Proteins Want to make it heartier? Add some protein! Grilled chicken or shrimp pairs well here. For a vegan option, toss in chickpeas or lentils. These additions make your meal more filling. Using Seasonal Vegetables During summer, use fresh cherry tomatoes. In fall, add roasted butternut squash. Seasonal veggies boost flavor and nutrients. This keeps the dish fresh and exciting all year. Adjusting for Different Types of Pesto You can use various pesto types. Try sun-dried tomato pesto for a rich taste. Or go with a spicy arugula pesto for a kick. Each version changes the dish, making it your own. To keep your Avocado Pesto Zucchini Noodles fresh, store them in an airtight container. This helps maintain their flavor and texture. Place the container in the fridge right after you finish eating. - Best Practices for Refrigeration: Make sure the noodles are cool before sealing the container. This prevents extra moisture from forming. If you have leftovers after one day, check for freshness before eating. - Freezing Avocado Pesto: You can freeze the avocado pesto if you have extra. Pour it into ice cube trays. Once frozen, move the cubes to a freezer bag. This way, you can thaw only what you need later. Knowing how long your dish lasts helps avoid waste. - How Long It Lasts in the Fridge: The zucchini noodles can last for about 2 days in the fridge. The pesto stays fresh for about 4 days. - Signs of Spoilage: Look for any off smells or changes in color. If the pesto looks brown, it’s time to toss it. The zucchini noodles should remain bright and firm. If they feel mushy, it's best to discard them. You can easily make zucchini noodles without a spiralizer. Use a mandoline slicer or a vegetable peeler instead. Slice the zucchini into thin strips. Aim for long, noodle-like pieces. This method works well if you do not have a spiralizer. Yes, you can make the avocado pesto in advance. Store it in an airtight container. To keep it fresh, add a layer of olive oil on top. This helps prevent browning. You can refrigerate it for up to three days. You can serve many things with Avocado Pesto Zucchini Noodles. Here are some great ideas: - Grilled chicken or shrimp for protein. - A side of garlic bread for crunch. - A fresh salad for extra greens. - Roasted vegetables for added flavor. Avocado Pesto Zucchini Noodles are healthy and low in carbs. Zucchini is low in calories and high in water. Avocado provides healthy fats and fiber. This dish is also rich in vitamins A and C. This dish is vegan and gluten-free. It fits many dietary needs. If you want more protein, add nuts or seeds. Adjust the recipe to fit your diet. Enjoy the fresh flavors without worry! We covered how to make delicious avocado pesto zucchini noodles. You learned about key ingredients like zucchinis and ripe avocados. I shared step-by-step instructions for making the dish and tips for flavor and storage. Now, you can create this healthy meal with ease. Enjoy the process, and don’t be afraid to try new twists. Happy cooking!

Avocado Pesto Zucchini Noodles Fresh and Simple Dish

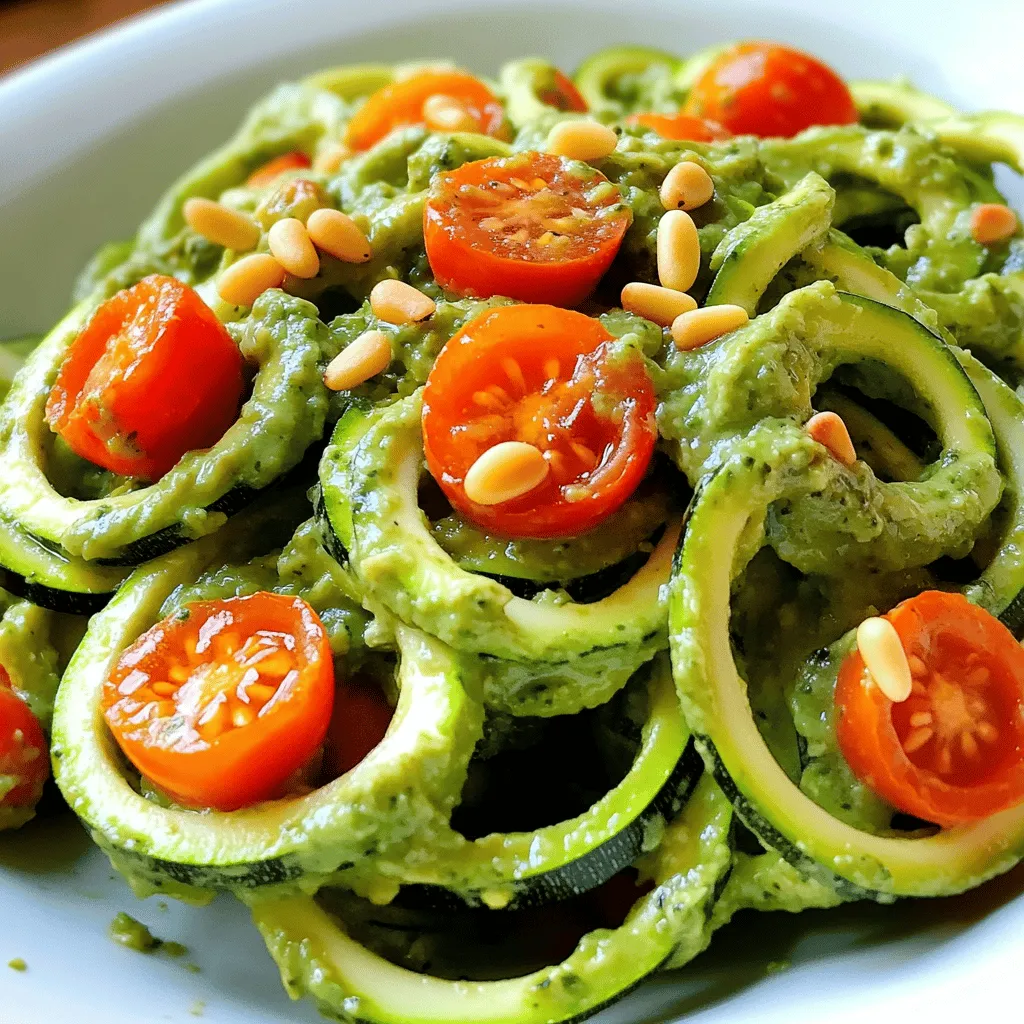
Looking for a quick, fresh meal? Try my Avocado Pesto Zucchini Noodles! This dish is packed with flavor, vibrant colors,

- 1 lb (450g) beef sirloin, thinly sliced - 2 tablespoons vegetable oil - 1 bell pepper (red or yellow), sliced - 1 cup broccoli florets - 1 cup snap peas - 2 cloves garlic, minced - 1 tablespoon fresh ginger, minced - 1/3 cup soy sauce - 1/4 cup honey - 2 tablespoons rice vinegar - 1 tablespoon cornstarch mixed with 2 tablespoons water (slurry) - 2 green onions, sliced (for garnish) - Sesame seeds (for garnish) You can switch out beef for other proteins. Chicken, tofu, or shrimp work well. Fresh veggies give the best taste, but frozen ones are fine too. If you need a gluten-free option, use gluten-free soy sauce for the same flavor. To start, heat a large skillet over medium-high heat. Add 1 tablespoon of vegetable oil. When the oil is hot, add the thinly sliced beef sirloin. I season the beef lightly with salt and pepper. Stir-fry the beef for about 3 to 4 minutes. You want it browned, but not overcooked. Once done, remove the beef from the skillet and set it aside. Seasoning adds flavor, so don’t skip this step! In the same skillet, add the remaining tablespoon of oil. Then, add 2 cloves of minced garlic and 1 tablespoon of minced ginger. Stir for about 30 seconds until they smell great. Next, add the sliced bell pepper, 1 cup of broccoli florets, and 1 cup of snap peas. Stir-fry these veggies for about 3 to 4 minutes. You want them tender but still crisp. This order helps cook the vegetables evenly. While the veggies cook, prepare the teriyaki sauce. In a small bowl, combine 1/3 cup of soy sauce, 1/4 cup of honey, and 2 tablespoons of rice vinegar. Whisk until everything is well mixed. Once the vegetables are ready, return the beef to the skillet. Pour the teriyaki sauce over the beef and veggies, stirring to coat everything. Now, make the sauce thick. Add 1 tablespoon of cornstarch mixed with 2 tablespoons of water. Stir continuously for about 1 to 2 minutes. This will help your sauce thicken up nicely. After that, you are ready to serve! - Using high heat for stir-frying: High heat is key. It helps cook the beef fast, keeping it tender. Heat your skillet until it’s hot. This way, the beef sears and caramelizes well. A hot skillet gives your dish that nice, smoky flavor. - Importance of not overcrowding the skillet: Avoid overcrowding your skillet. If you add too much beef or veggies, they will steam instead of fry. This makes them soggy. Cook in batches if needed. Give each piece room to brown nicely. This simple step makes a big difference! - Marinating beef for extra flavor: For extra flavor, marinate the beef. Use soy sauce, honey, and a splash of vinegar. Let it sit for at least 30 minutes. This step adds depth and richness to each bite. You can also add garlic or ginger to the marinade. - Alternative sauces for variation: Mix it up with different sauces! Instead of teriyaki, try hoisin or oyster sauce. You can also use a mix of soy sauce and lime juice for a tangy twist. Each sauce brings its own unique taste to your stir-fry. Be creative and find your favorite! {{image_2}} You can easily adjust this recipe to fit your diet. For a vegetarian or vegan version, swap the beef for tofu or tempeh. Both options soak up flavors well. Simply cut the tofu into cubes, and stir-fry it until golden. For a low-carb alternative, consider using cauliflower rice instead of regular rice. This adds a tasty crunch while keeping carbs lower. You can also load up on the veggies for more fiber and volume. Want to make your stir fry even better? You can add nuts like cashews or peanuts for crunch. Just toss them in during the last few minutes of cooking. You can also mix in other vegetables. Try carrots, mushrooms, or zucchini for added color and taste. For more flavor, experiment with different sauces or spices. A splash of sriracha can add heat, while a dash of sesame oil gives a nutty aroma. Each addition can make your dish unique and fun! To keep your Sweet Teriyaki Beef Stir Fry fresh, use airtight containers. Glass or plastic containers work well. Make sure to let the dish cool before sealing it. Store leftovers in the fridge for up to three days. If you want to keep them longer, freeze the stir fry. It can last for up to three months in the freezer. Just remember to label the containers with the date. When you’re ready to enjoy your leftovers, the best way to reheat is on the stove. Heat a non-stick skillet over medium heat. Add a splash of water or broth to keep it moist. Stir gently to warm everything evenly. If you prefer the microwave, use a microwave-safe dish. Cover it with a lid or wrap to prevent splatters. Heat in short bursts, stirring between each. To avoid sogginess, don’t add too much liquid. Enjoy your tasty meal again! What can I use instead of beef in this recipe? You can use chicken, shrimp, or tofu. Each option gives a new taste. Chicken is lean and works well. Shrimp cooks fast and adds a nice texture. Tofu is great for a plant-based meal. Just keep the cooking times in mind. Can I make this dish ahead of time? Yes, you can prep the beef and veggies in advance. Store them in the fridge. It’s best to cook the stir fry fresh. This keeps the veggies crisp and the beef tender. If you must make it ahead, reheat gently. How do I make the sauce thicker or thinner? To thicken the sauce, add more cornstarch slurry. Mix one tablespoon of cornstarch with two tablespoons of water. Stir this into the sauce while it cooks. For a thinner sauce, add more soy sauce or water. Adjust it to your liking. What side dishes pair best with Sweet Teriyaki Beef Stir Fry? Steamed jasmine rice or quinoa work great. They soak up the sauce well. You can also serve it with a fresh salad or steamed veggies. For a fun touch, use chopsticks to eat! In this article, we explored the ingredients needed for a tasty Sweet Teriyaki Beef Stir Fry. You learned about required items like beef sirloin, colorful veggies, and flavor boosters. We also discussed cooking steps and helpful tips for the best results. Final thoughts: Cooking is fun and you can adjust this dish to fit anyone’s taste. Whether you like beef, chicken, or tofu, this stir fry is sure to please everyone!

Sweet Teriyaki Beef Stir Fry Quick and Flavorful Dish

Are you ready to whip up a delicious meal that’s quick and bursting with flavor? In this blog post, I’ll

Here’s what you will need to make Pistachio Rosewater Shortbread: - 1 cup unsalted butter, softened - ½ cup powdered sugar - 2 cups all-purpose flour - ½ cup ground pistachios - 1 teaspoon vanilla extract - 1 tablespoon rosewater - ¼ teaspoon salt - Extra ground pistachios for garnish Each ingredient plays a role in creating that melt-in-your-mouth texture. The unsalted butter gives a rich base, while powdered sugar adds sweetness. All-purpose flour helps bind everything together, and ground pistachios enhance flavor and crunch. Vanilla extract adds warmth, and rosewater provides a lovely floral note. The salt balances the sweetness and brings out the flavors. Finally, you can sprinkle extra ground pistachios on top for an appealing finish. 1. Preheat your oven to 350°F (175°C) and line a baking sheet with parchment paper. 2. In a large bowl, cream together the softened butter and powdered sugar. Mix until it is light and fluffy. This step creates a nice base for your cookies. 1. Slowly add the all-purpose flour and ground pistachios into the butter mixture. Mix gently until just combined. 2. Then, add the vanilla extract, rosewater, and salt. Stir until a soft dough forms. This dough will have a fragrant and nutty aroma. 3. Transfer the dough to a floured surface. Shape it into a log about 2 inches in diameter. Wrap the log in plastic wrap and refrigerate for about 30 minutes to firm up. Chilling helps the cookies keep their shape while baking. 1. Once chilled, slice the log into ½-inch thick rounds. Place them on the prepared baking sheet. 2. Sprinkle a little extra ground pistachios on top of each cookie for a nice touch. 3. Bake in the preheated oven for 12-15 minutes or until the edges are lightly golden. Watch them closely, as oven times can vary. These steps will guide you to create delightful Pistachio Rosewater Shortbread cookies. Enjoy the process! - Use chilled butter for a flaky texture. Cold butter helps create a light, airy shortbread. If your butter is warm, the dough can become greasy and dense. - Don’t over-mix the dough. Mix just until combined. Over-mixing can lead to tough cookies. You want the dough to be soft and easy to handle. - Adjust sugar based on personal sweetness preference. Some like their cookies sweeter, while others prefer a hint of salt. Start with the recipe and tweak as needed. - Experiment with rosewater for intensity of flavor. Rosewater can vary in strength. Start with one tablespoon and add more if you want a stronger taste. A little can go a long way! {{image_2}} You can make these shortbread even better with simple tweaks. Try adding a touch of lemon zest for a bright, citrusy kick. This twist brings a refreshing flavor that pairs well with the rosewater. Another option is to mix in chopped dried rose petals. This will enhance the floral notes and make the cookies look lovely. The petals add a pop of color and extra aroma. If you need a gluten-free option, swap the all-purpose flour for gluten-free flour. This change keeps the texture nice while making it suitable for everyone. For a dairy-free treat, use coconut oil instead of butter. It adds a subtle coconut flavor and keeps the cookies rich and tasty. Both options let more people enjoy your delicious Pistachio Rosewater Shortbread. To keep your Pistachio Rosewater Shortbread fresh, store the cookies in an airtight container at room temperature. This helps maintain their crisp texture and delicious flavor. If you want them to last longer, refrigerate the cookies. This can extend their freshness for a week or more. You can freeze unbaked dough for future baking. Simply shape the dough into a log, wrap it in plastic, and place it in the freezer. When you're ready to bake, thaw the dough in the refrigerator overnight. Then, slice and bake as usual. This way, you can enjoy freshly baked cookies anytime! Typically, they last up to two weeks when stored properly. To keep them fresh, place the cookies in an airtight container. Store them at room temperature away from direct sunlight. This way, you can enjoy their rich flavor and buttery texture for days. Yes, almonds or walnuts can be used as substitutes for pistachios. If you pick almonds, chop them finely for a similar crunch. Walnuts add a nice earthy flavor. Both options work well in this shortbread. Feel free to try your favorite nuts and see what you like best. While it adds a unique flavor, you can experiment with other extracts or omit it altogether. If you don’t have rosewater, try vanilla or almond extract instead. Both will give your cookies a nice taste. You can even skip the extract and focus on the nuts. The cookies will still be delicious! These Pistachio Rosewater Shortbread cookies are easy and fun to make. You start with simple ingredients like butter, flour, and pistachios. Follow the steps to shape and bake, and you’ll have a delicious treat. Remember to adjust for your taste and try different flavors or nuts. Store them properly to keep them fresh. Enjoy baking, and share these delightful cookies with friends and family. You’ll love how they taste and look!

Pistachio Rosewater Shortbread Delightful and Simple

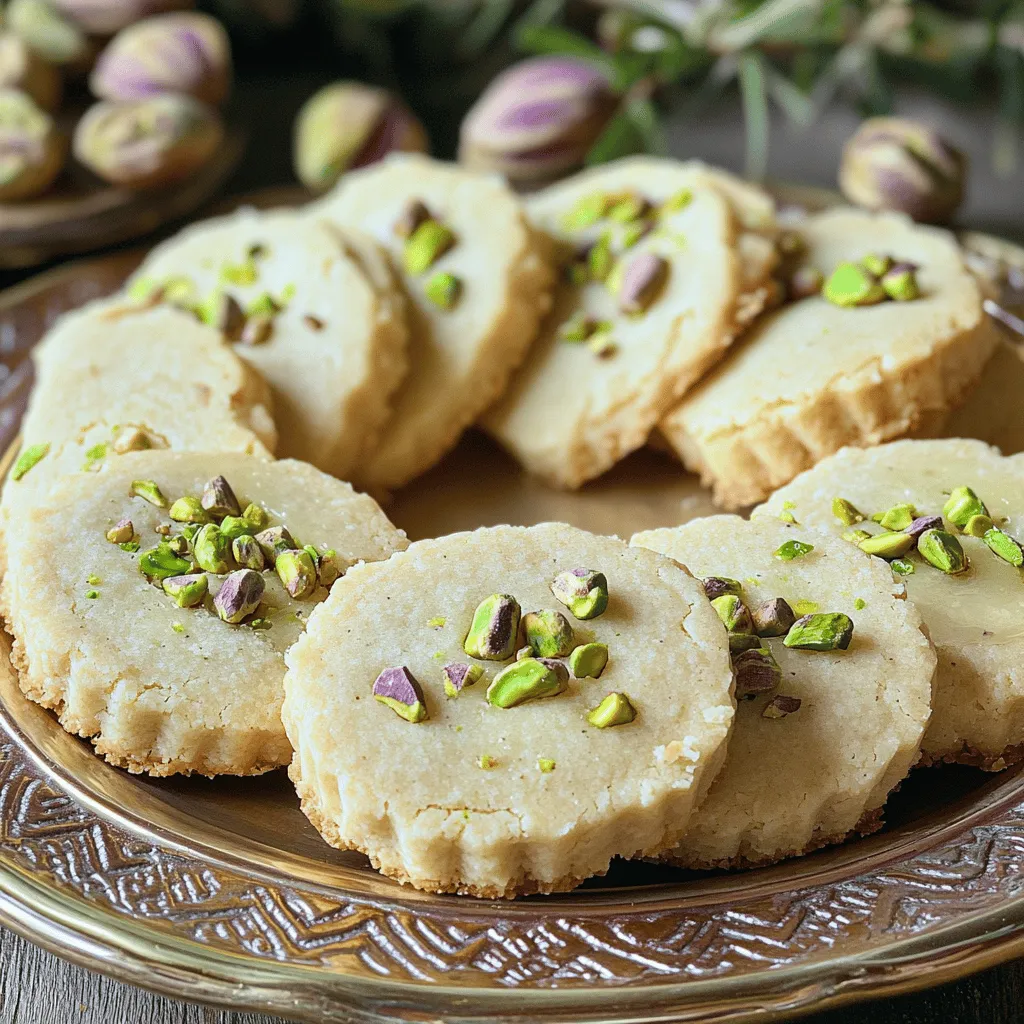
If you’re ready to treat yourself and impress friends, these Pistachio Rosewater Shortbread cookies are a must-try. Simple to make

- 1 large head of cauliflower, cut into florets - 6 cloves of garlic, unpeeled - 3 tablespoons olive oil - 1/2 cup cream cheese, softened - 1/2 cup unsweetened almond milk (or regular milk) - Salt and pepper to taste - 1/4 teaspoon nutmeg (optional) - Fresh chives, chopped (for garnish) To make creamy roasted garlic mashed cauliflower, gather these fresh ingredients. Start with a large head of cauliflower. This veggie is the star of the dish. Use six cloves of garlic for a rich flavor. The garlic will roast and turn sweet as it cooks. You will need three tablespoons of olive oil. This adds healthy fat and helps with roasting. Next, grab half a cup of cream cheese. It gives the mash a smooth and creamy texture. Almond milk, or regular milk, is also needed. Use half a cup to adjust the creaminess. Season with salt and pepper to taste. You can also add nutmeg for a warm flavor. Finally, chop some fresh chives to garnish. They add a nice pop of color and taste. Each ingredient plays a role in making this dish rich and delicious. Enjoy the process of creating this tasty side! 1. Preheating the oven: Start by preheating your oven to 400°F (200°C). This step helps cook the cauliflower and garlic evenly. 2. Preparing the cauliflower and garlic: Cut one large head of cauliflower into florets. Place these florets on a large baking sheet. For garlic, take six cloves and leave them unpeeled. This keeps the garlic sweet during roasting. 3. Seasoning tips: Drizzle three tablespoons of olive oil over the cauliflower and garlic. Sprinkle salt and pepper to taste. Toss everything together to coat evenly. This adds flavor and helps with roasting. - Timing and temperature details: Roast the cauliflower and garlic in the oven for 25-30 minutes. Check if the cauliflower is fork-tender and the garlic is soft. This means they are ready to come out of the oven. 1. Mixing roasted garlic and cauliflower: Once out of the oven, let them cool for a few minutes. Squeeze the roasted garlic from the skins into a mixing bowl. Add the cauliflower florets to that bowl. 2. Using an immersion blender vs. potato masher: Add half a cup of softened cream cheese and half a cup of unsweetened almond milk to the bowl. You can use either an immersion blender or a potato masher to mix this. Puree until smooth and creamy. If it’s too thick, add more almond milk to reach your desired consistency. Taste and adjust salt and pepper if needed. To boost the taste, add fresh herbs like thyme or rosemary. You can also sprinkle in spices such as paprika or garlic powder. A squeeze of lemon juice can brighten the dish too. Experiment to find your perfect blend! If your mashed cauliflower is too thick, stir in more almond milk. Start with a tablespoon at a time. For a thicker mash, use less almond milk. Adjust until you reach the creamy texture you love. For a smooth finish, I recommend using an immersion blender. It blends quickly and easily right in the bowl. A good potato masher works well too if you prefer a chunkier texture. Both tools help you achieve a delightful dish! {{image_2}} You can easily make this dish dairy-free. Instead of cream cheese, try using cashew cream. Blend soaked cashews with a bit of water to create a smooth mix. For milk, unsweetened almond milk works well. You can also use oat milk or coconut milk. These swaps keep the dish creamy and delicious without dairy. Want to change the flavor? Add fresh herbs or spices! Try mixing in thyme or rosemary for a fragrant touch. For a spicy kick, add red pepper flakes or smoked paprika. You can also stir in some fresh lemon juice for brightness. Each of these options brings a new twist to your creamy dish. Busy days call for make-ahead meals. You can roast the cauliflower and garlic the night before. Just store them in the fridge. When you're ready to serve, blend and heat them up. You can also store the finished mash in the fridge for up to three days. This makes mealtime easy and stress-free! To store your creamy roasted garlic mashed cauliflower, let it cool first. Transfer it into an airtight container. This keeps moisture in and prevents drying. You can also use plastic wrap over a bowl. Make sure it touches the surface to reduce air exposure. When reheating, use a microwave or a stovetop. If using a microwave, heat on medium power. Stir every minute to keep it even. If you use a stovetop, add a splash of almond milk. Stir gently to maintain a creamy texture. Avoid high heat to prevent sticking. In the fridge, your mashed cauliflower lasts about 3 to 5 days. If you want to keep it longer, freeze it. It can last for up to 3 months in the freezer. Just remember to label your container for easy tracking. Yes, you can freeze mashed cauliflower. First, let it cool completely. Then, scoop it into an airtight container. You can also use freezer bags. Press out as much air as possible. Label the bag with the date before putting it in the freezer. When you're ready to eat it, thaw it in the fridge overnight. Reheat it gently on the stove or in the microwave. If it seems dry, add a splash of almond milk for creaminess. Mashed cauliflower is lower in carbs and calories than mashed potatoes. A cup of mashed cauliflower has about 140 calories, while mashed potatoes have around 210 calories. Cauliflower also has more fiber and vitamins. It’s rich in Vitamin C and K. This makes it a great choice if you want to eat healthier. Plus, it is easier on the digestive system. If you want to cut calories, mashed cauliflower is an excellent option. To make vegan mashed cauliflower, swap out the cream cheese and milk. Use vegan cream cheese or cashew cream in place of cream cheese. For milk, you can use any plant-based milk. Almond milk, coconut milk, or soy milk works well. Just ensure that the plant-based options are unsweetened. This keeps the taste savory. Follow the same steps in the recipe for a creamy, vegan delight. Enjoy the same rich flavors without the dairy! In this article, we explored how to make delicious mashed cauliflower. We covered key ingredients like cauliflower, garlic, and cream cheese. You learned clear steps for prep and roasting. I also shared tips for flavor and consistency, plus variations for everyone. Remember, you can store leftovers easily and reheat them well. Mashed cauliflower is a tasty, healthier option. It can fit any meal and satisfy your cravings. Now, it’s time for you to try it! Enjoy cooking!

Creamy Roasted Garlic Mashed Cauliflower Delight

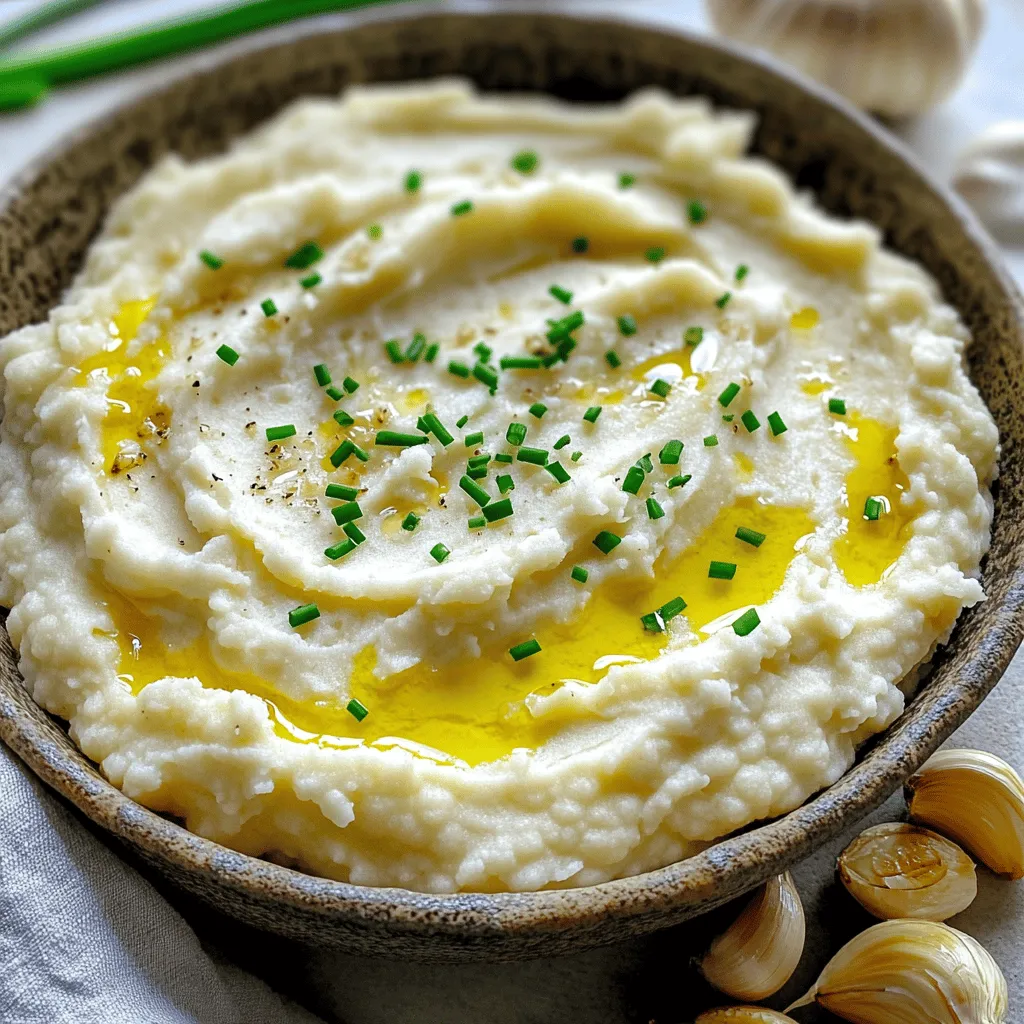
Are you ready to transform your vegetable game with a creamy twist? In this post, I’ll share my favorite recipe

To make chocolate raspberry lava cakes, you need some simple but tasty ingredients. Here’s what you will need: - 1 cup semi-sweet chocolate chips - ½ cup unsalted butter - 2 large eggs - 2 large egg yolks - ½ cup granulated sugar - 1 teaspoon vanilla extract - ¼ cup all-purpose flour - ¼ teaspoon salt - ½ cup fresh raspberries - Powdered sugar for dusting - Fresh mint leaves for garnish (optional) Each ingredient plays a key role in creating a rich and gooey dessert. The semi-sweet chocolate chips give the cakes their deep chocolate flavor. Unsalted butter adds a creamy texture and richness. Eggs and egg yolks help bind the mixture and create a soft center. Granulated sugar adds sweetness, while vanilla extract enhances the chocolate taste. All-purpose flour gives structure, and a pinch of salt balances the flavors. Fresh raspberries provide a burst of tartness, making each bite a delight. Finally, the powdered sugar dusting adds a touch of elegance, and fresh mint leaves can bring a fresh look to your dessert. Each element combines to create an indulgent treat you’ll love to share. {{ingredient_image_1}} First, preheat your oven to 425°F (220°C). This step is key to a successful bake. While the oven heats, grease four 6-ounce ramekins with butter. Then, dust them with cocoa powder. Tap out any extra cocoa powder. This prevents sticking and adds flavor to your cakes. Next, you need to melt the chocolate and butter. Place 1 cup of semi-sweet chocolate chips and ½ cup of unsalted butter in a heatproof bowl. You can do this in the microwave or over a double boiler. Stir until smooth. Once melted, let the mixture cool slightly. Cooling is important, as hot chocolate can cook the eggs later. In a separate bowl, whisk together 2 large eggs, 2 large egg yolks, ½ cup of granulated sugar, and 1 teaspoon of vanilla extract. Mix until combined and slightly frothy. Now, gently fold in the cooled chocolate mixture until well combined. Next, sift in ¼ cup of all-purpose flour and ¼ teaspoon of salt. Fold gently until just mixed. Be careful not to over-mix, as this can make the cakes tough. Now it’s time to assemble. Divide the batter evenly among the prepared ramekins. Press 2-3 fresh raspberries into the center of each ramekin, pushing them slightly into the batter. Place the ramekins on a baking sheet and bake for 12-14 minutes. You want the edges firm but the center soft. Timing is crucial for that perfect lava consistency. When done, let them sit for a minute. Run a knife around the edges, then invert onto plates. Enjoy your warm, gooey treats! - Baking Time Adjustments: Bake your lava cakes for 12 to 14 minutes. If your oven runs hot, check at 12 minutes. If you want a softer center, try 11 minutes. Each oven is unique. - How to Know When the Cakes Are Done: Look for firm edges and soft centers. The sides should look set, while the middle jiggles slightly. This means you have the perfect gooey center. - Presentation Tips for Serving: Serve the lava cakes warm on a nice plate. Dust them with powdered sugar for a sweet touch. Add a sprig of fresh mint for color. - Recommended Accompaniments: A scoop of vanilla ice cream pairs well. Fresh raspberries or strawberries add a nice pop of flavor. You can also drizzle some chocolate sauce on the plate. - Overmixing the Batter: Mix gently when adding flour. Overmixing can make the cakes tough. The batter should be just combined. - Underbaking or Overbaking: Keep an eye on the time. Underbaked cakes won't ooze; overbaked ones will be dry. Follow the timing tips for the best result. Pro Tips Use Quality Chocolate: The flavor of your lava cakes heavily relies on the chocolate you use. Opt for high-quality semi-sweet chocolate chips for the best results. Don’t Overbake: The key to a gooey center is to keep an eye on the baking time. Remove the cakes when the edges are firm, but the center is still slightly jiggly. Cool Slightly Before Serving: Letting the cakes sit for a minute after baking allows them to set slightly, making it easier to invert them without breaking. Enhance with Ice Cream: A scoop of vanilla ice cream not only complements the rich chocolate but also contrasts beautifully with the warm lava cake. {{image_2}} You can change the taste of chocolate raspberry lava cakes by using white chocolate instead of semi-sweet chocolate. This gives a sweet and creamy twist. Simply replace the chocolate chips with an equal amount of white chocolate chips. You can also add different berries for new flavors. Try strawberries or blueberries for a fruity touch. Just mash the berries slightly before adding them to the batter. This step lets their flavor mix well with the chocolate. If you need gluten-free options, use almond flour or coconut flour instead of all-purpose flour. Both options work well in this recipe. They keep the cake moist and rich. For vegan lava cakes, replace eggs with flaxseed meal or applesauce. For each egg, use 1 tablespoon of ground flaxseed mixed with 2.5 tablespoons of water. Let it sit for a few minutes to thicken. Applesauce also works; use 1/4 cup for each egg. Mason jar lava cakes are a fun way to serve these treats. Just layer the batter and raspberries in small jars. Bake them in the jars for a cute presentation. Mini lava cakes are perfect for parties. Use smaller ramekins or muffin tins to create bite-sized desserts. These mini cakes are easy to share and look great on any table. To keep your chocolate raspberry lava cakes fresh, store them in the fridge. Place them in an airtight container. This helps keep them moist. They will stay good for up to two days. Do not cover them with plastic wrap, as this can make them soggy. To reheat your lava cakes, use the oven for the best results. Preheat the oven to 350°F (175°C). Place the cakes on a baking sheet. Heat them for about 10 minutes. This warms the cakes while keeping that gooey center. Avoid using the microwave; it can cook the center too much. Yes, you can freeze lava cakes! First, cool them completely. Wrap each cake tightly in plastic wrap. Then, place them in a freezer bag. They can last for up to three months. When ready to eat, let them thaw in the fridge overnight. Then, reheat as mentioned above. This keeps the soft center nice and warm. To reheat lava cakes, you can use the microwave or the oven. The oven gives the best texture. Preheat it to 350°F (175°C). Place the cakes on a baking sheet and heat for about 5-7 minutes. Check if the center is warm and soft. If using a microwave, heat each cake for about 15-20 seconds. This keeps the lava flow intact. Avoid overheating, as it can cook the center too much. Yes, you can make the batter ahead of time. Mix your ingredients and store the batter in the fridge for up to 24 hours. Just remember to bring it back to room temperature before baking. This method saves you time when you want to serve a warm dessert. It keeps the flavors fresh and delicious. A perfectly cooked lava cake has firm edges with a soft, gooey center. Bake for 12-14 minutes, then check for doneness. If the edges are set but the center jiggles slightly, it's done. If it looks solid all through, it may be overcooked. Timing is key for that lovely molten center. Chocolate lava cakes pair well with vanilla ice cream or whipped cream. The cold creaminess balances the warm, rich cake. You can also serve fresh raspberries or strawberries on the side. A drizzle of raspberry sauce adds a nice touch. Mint leaves as a garnish give a pop of color and flavor. This blog post showed you how to create a delicious chocolate lava cake. You learned about key ingredients, easy steps, and tips for success. Remember, timing is vital for that perfect gooey center. Don't forget to try fun variations, and if you have extras, store or freeze them properly. With these insights, you can impress friends and family with your baking skills. Enjoy making this treat, and let your creativity shine. Happy baking!

Chocolate Raspberry Lava Cakes Indulgent Dessert Delight

If you crave a dessert that oozes decadence from the first bite, you’re in the right place! Chocolate Raspberry Lava

To make chocolate dipped coconut macaroons, gather these ingredients: - 3 cups shredded unsweetened coconut - 1 cup sweetened condensed milk - 1 teaspoon vanilla extract - 1/4 teaspoon salt - 2 large egg whites - 1/4 cup granulated sugar - 8 ounces dark chocolate, chopped - 1 tablespoon coconut oil When making these macaroons, quality matters. Choose fresh, unsweetened coconut for the best flavor. Look for sweetened condensed milk in a can with a clear label. Check that it’s creamy and not too thick. For chocolate, select high-quality dark chocolate with at least 60% cocoa. This gives your macaroons a rich taste. Lastly, always use fresh eggs for light and fluffy texture. If you have allergies or preferences, there are easy swaps. Use coconut cream instead of sweetened condensed milk for a dairy-free version. You can replace shredded coconut with almond flour for a nutty twist. If you need a vegan option, replace egg whites with aquafaba, the liquid from canned chickpeas. For a different flavor, try using white chocolate instead of dark chocolate. First, preheat your oven to 325°F (163°C). Grab a large bowl. Next, add 3 cups of shredded unsweetened coconut. Pour in 1 cup of sweetened condensed milk. Add 1 teaspoon of vanilla extract and 1/4 teaspoon of salt. Mix everything well until combined. You want a sticky texture that holds together. In a clean bowl, take 2 large egg whites. Use a hand mixer to beat them until soft peaks form. This takes about 2-3 minutes. Gradually add 1/4 cup of granulated sugar while mixing. Keep beating until stiff peaks form. This step is key for fluffy macaroons. Now, gently fold the egg whites into the coconut mixture. Be careful not to deflate your egg whites too much. Using a cookie scoop or your hands, shape small mounds. Place them on a lined baking sheet, spacing them about 1 inch apart. Bake for 20-25 minutes, until the tops are golden brown. After baking, let them cool on the sheet for 10 minutes before moving them to a wire rack to cool completely. To keep your macaroons from flattening, use fresh egg whites. Old egg whites tend to lose their volume. Make sure to beat the egg whites until stiff peaks form. This adds air and helps them rise. Also, avoid overmixing the coconut and egg white mixture. Gentle folding keeps the air in the batter. For dipping, I recommend using dark chocolate. It adds rich flavor and pairs well with coconut. Choose a chocolate with at least 60% cocoa solids for a nice balance of sweetness and bitterness. You can also use semi-sweet chocolate if you prefer a sweeter taste. Adding coconut oil to the chocolate helps it melt smoothly and gives a nice shine. When serving your macaroons, a decorative plate makes a great first impression. You can also use a cute gift box for special occasions. For a fun touch, drizzle extra melted chocolate over the tops. This adds flair and makes them even more tempting. Pair your macaroons with a cup of coffee or tea for a delightful snack. {{image_2}} You can play with flavors to make these macaroons your own. Try adding a splash of almond extract for a rich nutty taste. If you prefer a zesty twist, add lime zest. Each flavor adds a new layer of fun to your treat. Mix it into the coconut mixture before you bake. These macaroons are naturally gluten-free. The main ingredient, shredded coconut, is safe for those avoiding gluten. Just make sure all your other ingredients, like the chocolate and sweetened condensed milk, are also gluten-free. This dessert is perfect for gatherings where you need to cater to various diets. You can choose the size of your macaroons based on your mood. If you want bite-sized treats, use a small cookie scoop. For larger servings, go for a big scoop. Just remember to adjust the baking time. Smaller macaroons will bake faster, while larger ones may need a few extra minutes in the oven. Enjoy experimenting with sizes! To keep your chocolate dipped coconut macaroons fresh, store them in an airtight container. Use parchment paper between layers to avoid sticking. Keep them at room temperature if you eat them within a week. If you want to store them longer, the fridge is a good option. Just make sure the container is sealed well. You can freeze macaroons to enjoy later. Place them in a single layer on a baking sheet. Put the sheet in the freezer for about an hour. Once they are frozen, transfer them to a freezer bag. Remove as much air as you can. They can last up to three months in the freezer. To serve, thaw them in the fridge overnight. Homemade macaroons will stay fresh for about a week at room temperature. In the fridge, they can last up to two weeks. If frozen, they can last up to three months. Always check for any signs of spoilage before eating. Proper storage helps maintain their taste and texture. Enjoy your tasty treats! Yes, you can make macaroon dough ahead of time. Prepare the mixture as stated in the recipe. Seal it tightly in an airtight container. Store it in the fridge for up to 24 hours. When ready, just scoop and bake as usual. This saves time on busy days. A macaroon and a macaron are not the same. Macaroons are made with coconut, egg whites, and sugar. They are chewy and often dipped in chocolate. Macarons are delicate cookies made with almond flour, egg whites, and sugar. They have a smooth shell and sandwiched filling. Understanding this helps you appreciate both treats. Yes, you can use sweetened coconut. However, it will make your macaroons sweeter. If you like sweet treats, this is a fun option. Just adjust the amount of sweetened condensed milk slightly. This way, you keep the balance right and enjoy the flavor. We covered the key steps and tips to make perfect macaroons. We discussed choosing the right ingredients, preparing the coconut mixture, and beating egg whites. You now have tricks to avoid flat macaroons and ideas for dips and presentations. Whether you try flavor variations or explore storage options, enjoy making these treats. With practice, your macaroons can impress anyone. Happy baking!

Chocolate Dipped Coconut Macaroons Delightful Treat

If you love coconut and chocolate, you’re in for a treat! My Chocolate Dipped Coconut Macaroons are a simple yet

- 4 bone-in, skin-on chicken thighs - 4 cloves garlic, minced - 2 tablespoons fresh rosemary, chopped - 1 tablespoon olive oil - 1 teaspoon lemon zest - Salt and pepper to taste - 1 cup chicken broth - 1 lemon, sliced - 1 cup baby potatoes, halved - Fresh rosemary sprigs for garnish The main ingredients for this dish are simple yet flavorful. The chicken thighs are the star of the show. Their skin holds in moisture and flavor. Garlic adds a punch that blends well with chicken. Fresh rosemary gives a lovely aroma and taste. You can really taste the herbs in each bite. The other ingredients help boost the flavor. Olive oil keeps the chicken moist and helps the skin crisp. Lemon zest adds a bright note that cuts through the richness. Salt and pepper are a must for seasoning. Chicken broth keeps the meat juicy while it cooks. You can add optional ingredients for more texture. Sliced lemon gives a fresh taste and looks great. Baby potatoes soak up the broth’s flavor and make a nice side. A sprig of fresh rosemary brightens up the plate before serving. These ingredients come together to create a savory delight that you will love. - Preheat the oven to 425°F (220°C). - Pat the chicken thighs dry with paper towels. This step is key. It helps the skin get crispy. - In a small bowl, combine: - 4 cloves garlic, minced - 2 tablespoons fresh rosemary, chopped - 1 tablespoon olive oil - 1 teaspoon lemon zest - Salt and pepper to taste - Mix these ingredients well. This creates a flavorful paste. - Rub the garlic-rosemary mixture all over the chicken thighs. Make sure to get under the skin. This boosts flavor. - In a large oven-safe skillet, arrange the chicken thighs skin-side up. - Add lemon slices around the chicken. If you like, scatter halved baby potatoes on top. - Pour 1 cup of chicken broth into the skillet. This keeps the chicken moist. - Roast the chicken in the oven for 35-40 minutes. Look for a golden brown color. - The chicken must reach an internal temperature of 165°F (75°C). - Once done, remove the skillet from the oven. Let the chicken rest for 5 minutes before serving. This helps the juices settle. To get crispy skin, dry the chicken thighs well. Moisture can make the skin soggy. Use paper towels to pat them dry before seasoning. Cooking at the right temperature is key. Set your oven to 425°F (220°C). This high heat helps the skin crisp up nicely. For better flavor, marinate the chicken thighs for at least 30 minutes. This allows the garlic and rosemary to soak in. You can also add other herbs, like thyme or oregano, for extra taste. Experiment with spices like paprika or crushed red pepper for a kick. Pair your rosemary garlic roasted chicken thighs with sides like roasted vegetables or a fresh salad. Creamy mashed potatoes work well too. For a beautiful presentation, garnish with fresh rosemary sprigs and lemon slices. This adds color and a hint of freshness to the dish. {{image_2}} You can change the herbs in this dish for new flavors. Thyme and oregano work well. They both add a nice touch to the chicken. Just swap in the same amount as the rosemary. This keeps the balance of flavors strong. If you want to switch things up, try grilling the chicken. Grilling gives it a smoky flavor. Just be sure to use a grill-safe pan or foil to catch the drippings. Another great option is a slow cooker. Just season the chicken as before and place it in the slow cooker. Add the broth and lemon slices. Cook on low for about 6 hours. This method makes the chicken very tender and juicy. You can also use chicken breasts instead of thighs. Breasts cook faster, so check them sooner. They should reach the same internal temperature of 165°F. Feel free to change up the veggies too. Instead of baby potatoes, you can use carrots or green beans. You can also swap chicken broth for vegetable broth for a lighter taste. This makes the dish flexible and fun to make! To keep your rosemary garlic roasted chicken thighs fresh, store them in the fridge. Place the chicken in an airtight container. This helps seal in moisture and flavor. You can also wrap the chicken tightly in plastic wrap or foil. Make sure to eat the leftovers within three to four days for the best taste. The best storage containers are glass or BPA-free plastic. They help prevent any unwanted smells in your fridge. If you have a lot of leftovers, consider using smaller containers. This way, you can grab a single serving easily. For reheating, the oven is the best method. Preheat your oven to 350°F (175°C). Place the chicken on a baking sheet and cover it with foil. Heat for about 15 to 20 minutes. This keeps the chicken juicy and warm. If you’re in a hurry, use the microwave. Place the chicken on a microwave-safe plate. Cover it with a damp paper towel. Heat for 1 to 2 minutes, checking to make sure it does not dry out. To freeze leftovers, let the chicken cool completely first. Then, wrap each piece tightly in plastic wrap. Place them in a freezer-safe bag or container. This method helps prevent freezer burn. You can freeze the chicken for up to three months. When you're ready to eat, thaw the chicken in the fridge overnight. For a quicker method, you can use the microwave’s defrost setting. Once thawed, reheat it in the oven or microwave as mentioned above. Enjoy your delicious meal even after freezing! Cook chicken thighs until they reach an internal temperature of 165°F (75°C). This usually takes about 35 to 40 minutes in a preheated oven at 425°F (220°C). It is important to use a meat thermometer to check. This way, you ensure they are safe to eat. The skin should be golden brown and crispy. Yes, you can use boneless chicken thighs. They cook faster, around 25 to 30 minutes. However, the flavors may differ. Bone-in thighs tend to be juicier and more flavorful due to the bone. Boneless thighs are convenient and great for quick meals. Pair the chicken with a variety of sides. Here are some ideas: - Roasted vegetables, like carrots and Brussels sprouts - Creamy mashed potatoes - A light salad with mixed greens and vinaigrette - Garlic bread for a tasty touch These sides complement the chicken's savory flavors well. Yes, you can prepare this dish in advance. Season the chicken and refrigerate for up to 24 hours. When ready, just roast it as usual. You can also cook it ahead and reheat it. To keep it fresh, store in an airtight container in the fridge. Enjoy your meal without the last-minute rush! Roasting chicken thighs with garlic and rosemary is easy and delicious. You learned about key ingredients and steps to prepare this dish. I shared tips for getting crispy skin and enhancing flavor. You can even try variations and make it your own. Store leftovers correctly and reheat with care. Enjoy this simple meal with your favorite sides. Cooking can be fun, so dive in and let these flavors shine!

Rosemary Garlic Roasted Chicken Thighs Savory Delight

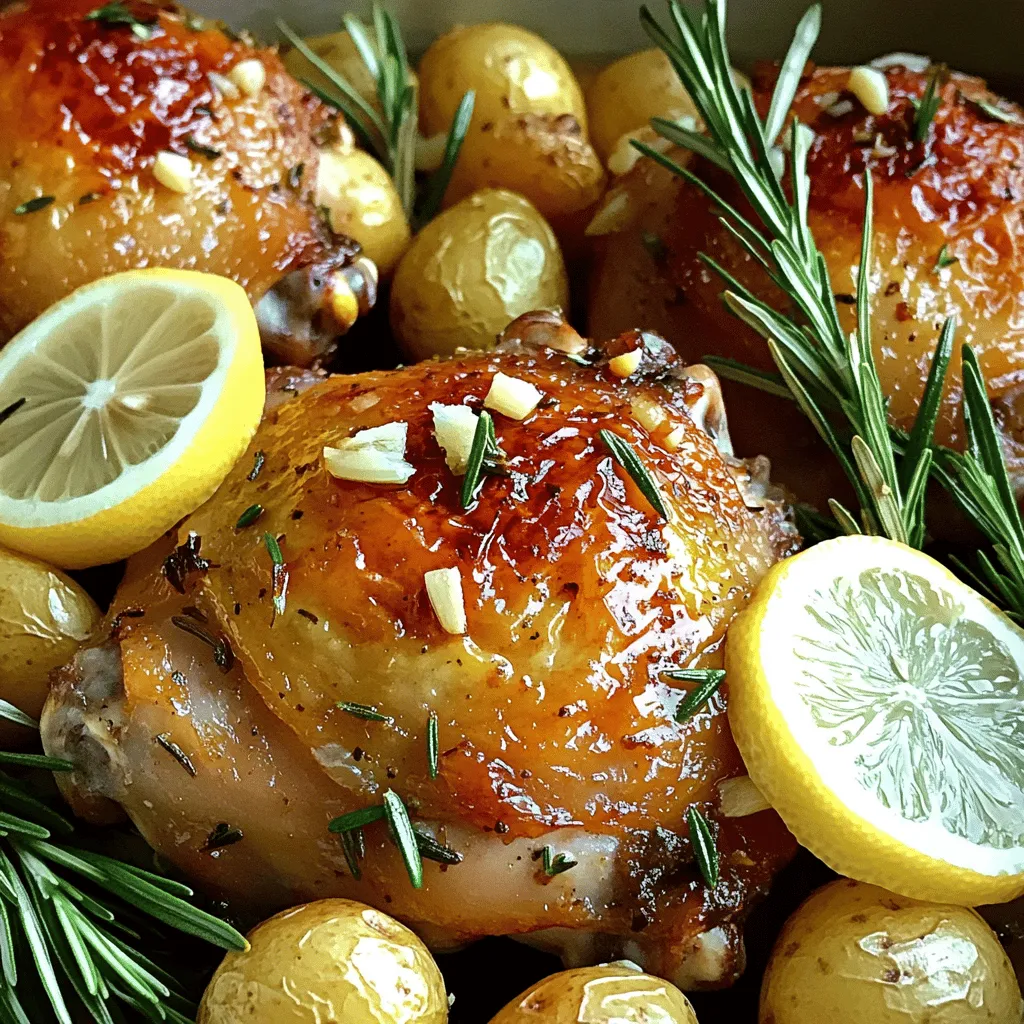
If you love juicy, flavorful chicken, you’ll adore these Rosemary Garlic Roasted Chicken Thighs. With just a few fresh ingredients,

- 1 cup rolled oats - 1/2 cup creamy peanut butter - 1/4 cup honey or maple syrup - 1/2 cup chocolate chips (dark or semi-sweet) - 1/4 cup chopped nuts (almonds or walnuts) - 1/2 teaspoon vanilla extract - Pinch of salt Each bar has about 150 calories. You get around 4 grams of protein per serving. The fat content is about 7 grams. Using creamy peanut butter is key. It blends well and gives a smooth texture. You can choose dark or semi-sweet chocolate chips. Dark chips add a rich flavor, while semi-sweet chips offer a balanced taste. Both options work great in the energy bars. To start, take a medium bowl and add 1 cup of rolled oats and 1/4 cup of chopped nuts. I like to use almonds or walnuts for crunch. Mix them together well. This step helps blend the flavors and gives a nice texture. Next, grab a microwave-safe bowl. Add 1/2 cup of creamy peanut butter and 1/4 cup of honey or maple syrup. Microwave for about 30 seconds. This will warm the mix so it stirs easily. After heating, stir well to combine. Then, add 1/2 teaspoon of vanilla extract and a pinch of salt. Mix until everything is smooth. Now, pour the peanut butter mixture over the oats and nuts. Stir until they are well mixed. At this point, add 1/2 cup of chocolate chips. I love using dark or semi-sweet chips for a richer taste. Mix until the chocolate is evenly spread. Take an 8x8 inch baking dish and line it with parchment paper. Leave some overhang. This makes it easy to lift the bars out later. Now, press the mixture firmly into the dish. Spread it out evenly. Refrigerate for at least 1-2 hours. This will help it firm up nicely. Once set, lift the bars out using the parchment paper. Cut them into squares or rectangles. I suggest cutting them into 12 pieces. This size is great for snacks. For a nice touch, place the bars on a colorful plate. Enjoy your tasty, homemade energy bars! How to fix a dry mixture If your mixture feels dry, add a bit more honey or maple syrup. This will help bind the ingredients better. You can also mix in a splash of water or milk. Just be careful not to make it too runny. Ensuring the bars hold together To make sure your bars hold together, press the mixture firmly into the baking dish. Use a flat surface, like a spatula, to really pack it down. Chilling the bars will also help them firm up, making them easier to cut. Best ways to store energy bars Wrap each bar in plastic wrap or foil. This keeps them fresh and makes them easy to grab on the go. You can also store them in an airtight container. Shelf life in the refrigerator and freezer In the fridge, these bars last about a week. If you want them to last longer, place them in the freezer. They can stay good for up to three months when frozen. Adding spices or extracts To boost flavor, consider adding a pinch of cinnamon or nutmeg. A splash of almond extract can also add a nice twist. These small additions can make a big difference. Substituting ingredients for different flavors You can switch out the chocolate chips for dried fruit, like cranberries or raisins. If you want a nutty flavor, try adding coconut flakes or sunflower seeds. {{image_2}} If you want a nut-free version, use sun butter or soy nut butter. Both work well in place of peanut butter. They give a similar texture and taste. You can also try tahini, made from sesame seeds. This will change the flavor but still taste great! Mix in dried fruits like cranberries, raisins, or apricots for a sweet twist. Seeds, such as chia or flaxseed, add crunch and nutrition. You can also add shredded coconut for a tropical flair. Just remember to keep the total mix-ins under a cup to maintain the bar's texture. To cut down on sugar, use less honey or syrup. Try only 2 tablespoons instead of 1/4 cup. You can also use sugar substitutes like stevia or monk fruit. These options let you enjoy your bars without the extra sugar. Just make sure to adjust the liquid ingredients slightly to keep the right texture. When you want peanut butter chocolate chip energy bars without making them, some brands stand out. My favorites include: - RXBAR: These bars are simple and use whole food ingredients. They have a rich peanut butter taste. - Larabar: Known for their wholesome ingredients, these bars are chewy and sweet. - KIND: They offer nut-filled bars with a crunchy texture and a hint of chocolate. Each brand has its unique flavor and texture. Always check for high-quality ingredients. You can find these energy bars in many places. - Local Grocery Stores: Most stores have a healthy snack aisle. Look there for popular brands. - Online: Websites like Amazon, Thrive Market, or brand-specific sites often have variety packs. This lets you try different flavors. Buying online can save time. It also allows you to read reviews before your purchase. Let’s look at some popular choices: - RXBAR: These bars have 12 grams of protein. They are chewy and fill you up fast. Many love the chocolate and peanut butter combo. - Larabar: These bars are gluten-free and made from few ingredients. They taste great and have a fruity sweetness. - KIND: These bars are crunchy with a nice balance of nuts and chocolate. They have around 5 grams of protein and can be a great snack. Each bar has different tastes and nutrients. Read reviews to find the best one for you. Yes, you can use natural peanut butter. Creamy peanut butter is smooth and easy to mix. Natural peanut butter has oil that separates on top. This means you must stir it before use. Both types work well in this recipe. If you use natural peanut butter, the bars might be a bit crumbly. Just add a little more honey or syrup to help bind them. These bars can last up to one week in the fridge. Store them in an airtight container. Keep them away from heat and light. If you want them to last longer, freeze them. Wrap each bar in plastic wrap and place them in a freezer bag. They can stay fresh in the freezer for about three months. Absolutely! You can change the nuts or add seeds. Try using sunflower seeds or pumpkin seeds. You can also swap chocolate chips for dried fruit. Some like to add coconut flakes for a tropical twist. Just make sure to keep the main ratios the same for the best results. Yes, these bars can be gluten-free if you use certified gluten-free oats. Regular oats can have traces of gluten from processing. Always check the packaging to be sure. This way, everyone can enjoy a tasty snack without worry. These peanut butter chocolate chip energy bars are easy to make and tasty. You learned about the key ingredients, how to mix them, and tips to make them perfect. Remember to store your bars well to keep them fresh. Feel free to change the recipe to match your taste. With these ideas, you can enjoy a smart snack any time!

Peanut Butter Chocolate Chip Energy Bars Simple Recipe

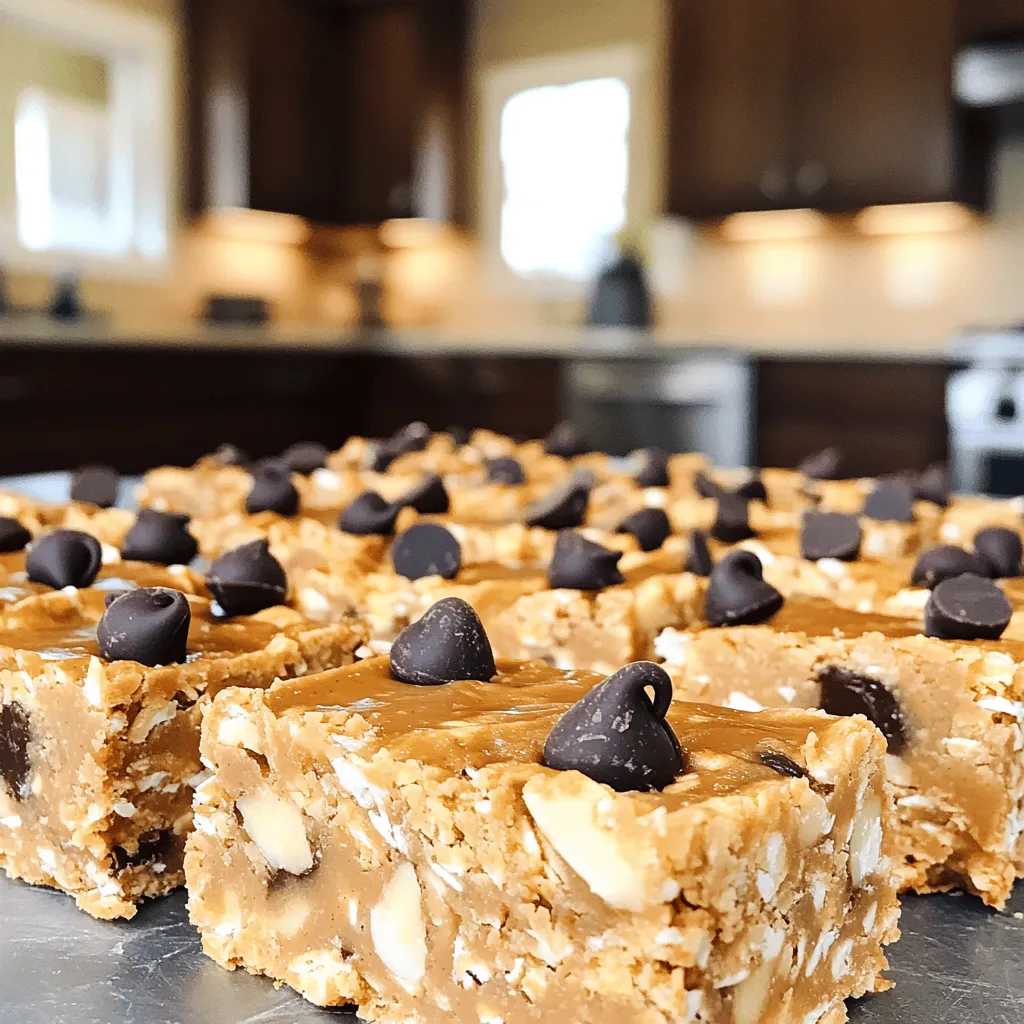
Are you looking for a quick snack that’s both tasty and healthy? You’ve found it! My Peanut Butter Chocolate Chip

- 4 boneless, skinless chicken breasts - 2 tablespoons olive oil - 2 jalapeños, finely chopped - Zest of 1 lime - 1/4 cup fresh lime juice - 3 cloves garlic, minced - 1 teaspoon ground cumin - 1 teaspoon honey (optional) - Salt and pepper to taste - Fresh cilantro, for garnish For this tasty dish, you need just a handful of ingredients. Start with chicken breasts. They are the main part of the meal. Make sure they are boneless and skinless to keep it simple. Then grab some olive oil. It helps the flavors stick and adds a nice touch. Jalapeños give this chicken its kick. I like to chop them finely. If you want less heat, remove the seeds. Lime zest and juice add a fresh twist. The zest gives great aroma and brightens the dish. Don't forget garlic! It adds depth and flavor. Ground cumin brings warmth and earthiness. If you like a hint of sweetness, add honey. Salt and pepper balance everything. Finally, fresh cilantro adds color and freshness when you serve it. Gather these ingredients, and you’re ready to create a summer delight that’s sure to impress! First, take a large bowl. Combine 2 tablespoons of olive oil with spices. Add the zest of one lime and 1/4 cup of fresh lime juice. Next, stir in 2 finely chopped jalapeños and 3 minced garlic cloves. If you want a hint of sweetness, mix in 1 teaspoon of honey. Add salt and pepper to taste. Mix well to create a flavorful marinade. Now, take 4 boneless, skinless chicken breasts. Coat each piece in the marinade, ensuring they are well covered. Cover the bowl with plastic wrap. Place it in the fridge for at least 30 minutes. For deeper flavor, marinate for up to 2 hours. Preheat your grill to medium-high heat. Oil the grates to prevent sticking. Remove the chicken from the marinade and let excess drip off. Discard any leftover marinade. Place the chicken on the grill. Cook for 6-7 minutes on one side. Flip and continue grilling for another 6-7 minutes. The chicken should reach an internal temperature of 165°F (75°C). Once cooked, remove the chicken from the grill. Let it rest for about 5 minutes. This helps keep the chicken juicy. While resting, chop fresh cilantro for garnish. Slice the grilled chicken and sprinkle the chopped cilantro on top before serving. Marination is key for great taste. I suggest marinating the chicken for at least 30 minutes. For deeper flavor, go for 2 hours. The longer it sits, the better it absorbs the marinade. You can adjust the spice level by using jalapeños with or without seeds. For less heat, remove the seeds. If you want more kick, keep them in. Preheat your grill to medium-high heat. This helps to get nice grill marks. Oil the grates well to stop sticking. Cook the chicken for about 6-7 minutes on one side. Flip and grill for another 6-7 minutes. Always check for doneness. The chicken should reach 165°F (75°C) inside. Use a meat thermometer for the best results. Plate your chicken on a large dish. Garnish with lime wedges and fresh cilantro. This adds color and flavor. You can serve it with grilled veggies or a fresh salad. Both make great sides that complete the meal. Enjoy the bright flavors of summer! {{image_2}} You can change the flavor of the chicken by using different herbs or spices. Try adding fresh basil or oregano for a new twist. You can also use garlic powder or paprika for extra depth. For citrus, lime is great, but lemon and orange work well too. Each option gives a unique taste, so feel free to experiment. If you don’t have a grill, you can still enjoy this recipe. Oven baking works well; preheat it to 400°F (200°C) and cook the chicken on a baking sheet. You can also use a stovetop skillet. Heat some oil in the pan and cook the chicken for about 6-7 minutes per side. A grill pan gives nice marks and flavor, too. To make your chicken even better, think about adding sweet or smoky elements. A bit of brown sugar or smoked paprika can change the taste. You can also grill fruits like peaches or pineapples alongside the chicken. Veggies such as bell peppers and onions add color and flavor. These ideas make your meal more exciting and delicious. To keep your jalapeño lime grilled chicken fresh, wrap it well. Use plastic wrap or a tight container. Store it in the fridge for up to four days. This way, it stays juicy and flavorful. Remember, the sooner you eat it, the better the taste! For reheating, the oven works best. Preheat it to 350°F (175°C). Place the chicken in a baking dish, cover it with foil, and heat for about 15-20 minutes. This method helps keep it moist. You can also use a microwave, but it may dry out the chicken. If you choose the microwave, heat it in short bursts. Add a splash of water to keep it juicy. If you want to save some for later, freezing is a great option. Wrap each piece tightly in plastic wrap, then in foil. Place them in a freezer-safe bag. This helps prevent freezer burn. You can freeze grilled chicken for up to three months. For thawing, move it to the fridge for a night. This slow thaw keeps the texture intact. Once thawed, follow the reheating tips to enjoy your dish again. The chicken is fully cooked when it reaches an internal temperature of 165°F (75°C). This ensures it is safe to eat. Use a meat thermometer to check the thickest part of the chicken. If you don’t have one, cut into the chicken. The juices should run clear, and the meat should not be pink inside. Cooking time may vary depending on your grill and chicken thickness. Yes, you can make this recipe ahead of time. Marinating the chicken is key to great flavor. I suggest marinating the chicken for at least 30 minutes. For even more flavor, let it sit in the marinade for up to 2 hours. After marinating, store the chicken in the fridge until you’re ready to grill. This makes the dish perfect for meal prep! Many side dishes go well with jalapeño lime grilled chicken. Here are a few tasty options: - Grilled vegetables like zucchini, bell peppers, and corn - A fresh, crisp salad with lime vinaigrette - Cilantro lime rice for a zesty touch - Black beans for protein and fiber - Corn on the cob for a sweet crunch These sides will complement the chicken’s spicy and tangy flavors perfectly! In this blog post, I shared how to make delicious jalapeño lime grilled chicken. You learned about the essential ingredients and the step-by-step instructions for marinating and grilling. I included tips for flavor, grilling, and even variations to keep meals fresh and exciting. Don't forget about storing and reheating your leftovers properly. Enjoy trying different sides and enhancing the meal as you like. With these simple steps, you can impress anyone at your next cookout!

Jalapeño Lime Grilled Chicken Flavorful Summer Delight

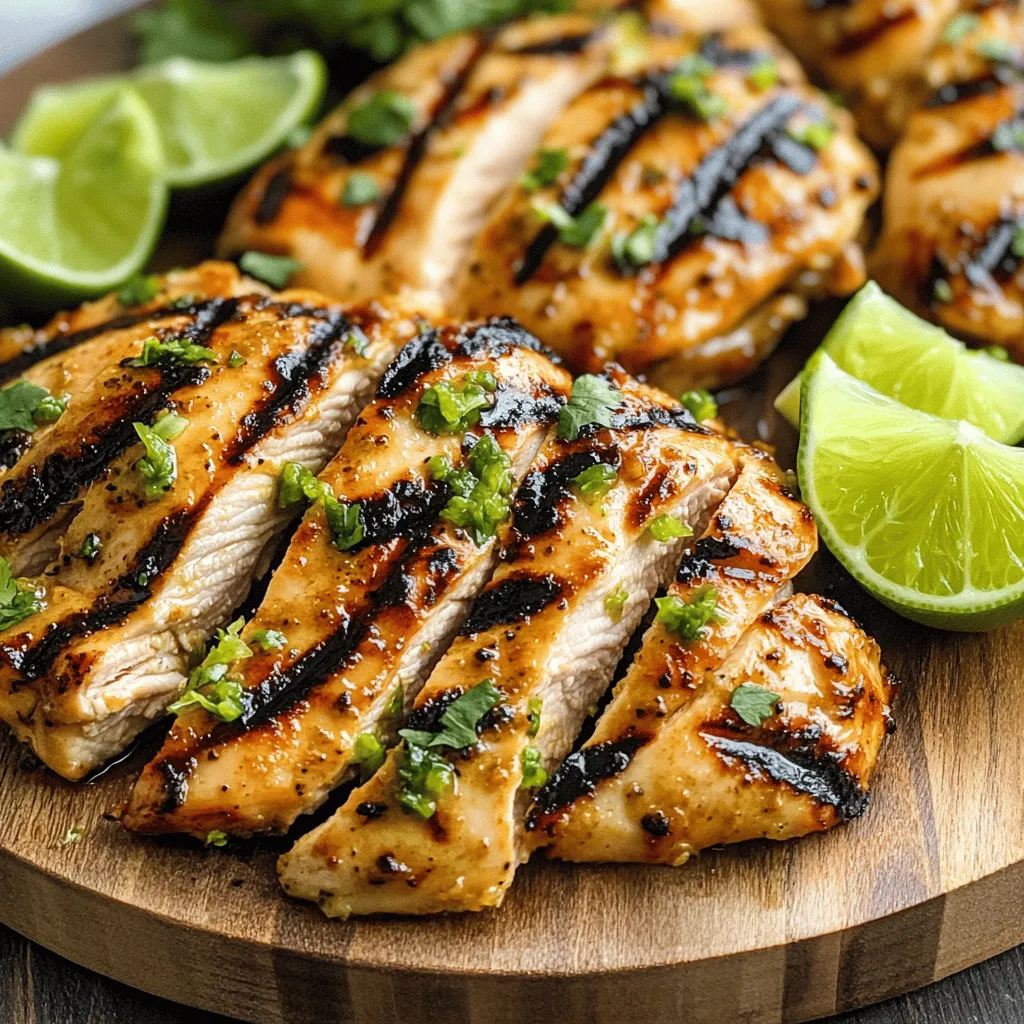
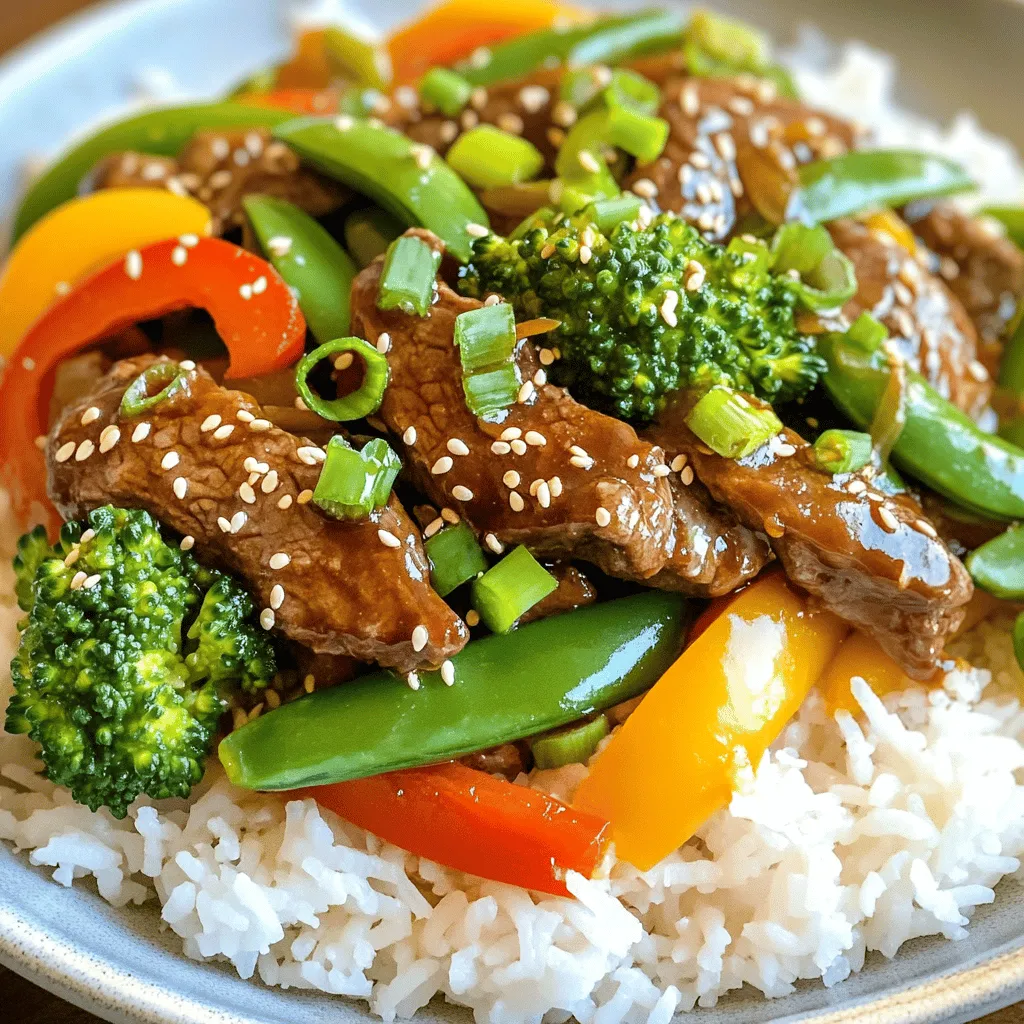
Get ready to fire up your grill! My Jalapeño Lime Grilled Chicken is a flavorful summer delight that’ll impress your

Older posts
Newer posts
← Previous Page1 … Page37 Page38 Page39 … Page84 Next →

dsad

© 2026 Lisa Dishes • Built with GeneratePress

Our Policies

  • Copyright Policy
  • Cookie Policy
  • GDPR Policy
  • Privacy Policy
  • Disclaimer
  • Terms Of Use

More Information

  • Home
  • About
  • Contact
  • Appetizers
  • Dessert
  • Dinner
  • Drinks
©2026, Lisa Dishes About Back To Top