Skip to content
DisclaimerTerms Of UseGDPR PolicyCookie Policy

Lisa Dishes

  • Home
  • Drinks
  • Appetizers
  • Dinner
  • Dessert
  • About
  • Contact
  • Privacy Policy
DisclaimerTerms Of UseGDPR PolicyCookie Policy

NO-ING-IMG

- 1 can (15 oz) chickpeas, drained and rinsed - 2 medium roasted red peppers (jarred or home-roasted) - 1/4 cup tahini - 2 tablespoons olive oil - 2 tablespoons fresh lemon juice - 1 clove garlic, minced - 1 teaspoon ground cumin - Salt and pepper, to taste - Water, as needed Chickpeas are a great source of protein and fiber. They help keep you full. Tahini adds healthy fats and protein, which are good for your heart. Olive oil offers healthy fat and can reduce inflammation. Fresh lemon juice gives a boost of vitamin C, which supports your immune system. Garlic has many health benefits, including boosting your heart health. Ground cumin adds flavor and may aid digestion. When picking chickpeas, look for cans with no added salt or preservatives. If you roast your own peppers, choose ripe, bright red ones for the best taste. For tahini, select a brand that uses pure sesame seeds, without additives. Fresh lemon juice is best, so pick lemons that feel heavy for their size. For garlic, choose firm cloves with no soft spots. When buying olive oil, look for extra virgin for the best flavor and health benefits. To start, decide if you want to use jarred or fresh peppers. If you choose fresh, preheat your oven to 450°F (230°C). Cut the red bell peppers in half. Place them skin-side up on a baking sheet. Roast them for 25-30 minutes. The skin should look charred. After roasting, let them cool for a few minutes. Once cool, peel off the charred skin. If you use jarred peppers, just drain them well. Next, grab your food processor. Add the drained chickpeas, roasted red peppers, tahini, olive oil, fresh lemon juice, minced garlic, and ground cumin. This mix creates great flavor. Blend everything together until it’s smooth. Sometimes, you may need to stop and scrape down the sides. This helps everything blend evenly. Now, it’s time to get the right texture. Gradually add water, one tablespoon at a time. Keep blending until the hummus is creamy and spreadable. You want it smooth and not too thick. After that, taste it. Add salt and pepper as needed, then blend for a few more seconds to mix. Finally, transfer your hummus to a serving bowl. Drizzle a little olive oil on top for a nice finish. When making roasted red pepper hummus, avoid these common errors: - Skip the rinse: Always rinse canned chickpeas. This removes excess sodium. - Over-adding water: Add water slowly. Too much makes the hummus thin. - Using unroasted peppers: Roasted peppers add depth. Raw peppers lack flavor. To elevate your hummus, try these tips: - Add spices: Try smoked paprika or cayenne for a kick. - Fresh herbs: Blend in fresh basil or cilantro for a bright taste. - Zest it up: Lemon zest adds zing. It brightens the overall flavor. Serve your hummus in style: - Garnish: Drizzle olive oil and sprinkle paprika on top. - Serve with variety: Pair with warm pita, crunchy veggies, or crispy crackers. - Colorful platter: Arrange different dippers for a vibrant display. Add olives or cherry tomatoes for extra color. {{image_2}} You can spice up your roasted red pepper hummus easily. Just add jalapeños or cayenne pepper. Start with a small amount. Blend it in with the other ingredients. Taste and adjust based on your heat level. This gives your dip a nice kick. It’s great for those who love heat. For a Mediterranean touch, mix in some olives and feta cheese. Chop about 1/2 cup of olives. Add them to your food processor along with the other ingredients. Crumble in 1/4 cup of feta. This adds saltiness and depth. Serve it with pita or veggies for a delightful snack. Fresh herbs can brighten your hummus. Try adding parsley, basil, or cilantro. Use about 1/4 cup of chopped herbs. Blend them in with the other ingredients for a fresh taste. This variation is perfect for summer gatherings. It brings a vibrant flavor and color to the dish. To keep your roasted red pepper hummus fresh, store it in a tight container. Place it in the fridge right after you finish eating. This dip will stay tasty for about four to five days. Make sure the lid is on tight to keep it from drying out. You can also drizzle a little olive oil on top before sealing to keep it moist. If you have extra hummus, you can freeze it! Use an airtight container or a freezer bag. Leave some space at the top for expansion. When you want to eat it, let it thaw in the fridge overnight. Stir it well before serving, as it may separate a bit. You can freeze the hummus for up to three months. Leftover hummus can be great in many ways. Spread it on sandwiches or wraps for a tasty twist. You can also use it as a base for salad dressings. Mix it with yogurt for a creamy dip or serve it with grilled meats. The options are endless, so get creative! Regular hummus is smooth and creamy. It mainly uses chickpeas, tahini, and lemon juice. Roasted red pepper hummus adds a sweet and smoky flavor. The roasted peppers give it a vibrant color. This makes it unique and tasty. You can enjoy both, but they each have their own charm. Homemade roasted red pepper hummus can last about 4 to 5 days. Store it in an airtight container in the fridge. Make sure to cover it well to keep it fresh. If you see any change in color or smell, it's best to toss it. Enjoy it while it’s at its best! Yes, you can use dried chickpeas. Soak them overnight and cook them until tender. This may take longer than using canned. Canned chickpeas save time and are ready to use. Both options can make great hummus, but cooked dried chickpeas have a richer taste. Lots of tasty options pair well with hummus! Here are some of my favorites: - Warm pita bread - Crunchy vegetable sticks like carrots and celery - Sliced cucumbers - Bell pepper strips - Crackers or tortilla chips These dippers add flavor and crunch to your hummus experience. This blog post covers everything you need for roasted red pepper hummus. We talked about key ingredients and their health benefits. I shared tips for choosing quality items and ways to prepare and blend them well. You can avoid common mistakes and enhance flavors for the best taste. Different variations and storage tips help keep your hummus fresh. Remember, making this dish is easy and fun. Enjoy your hummus with friends and family!

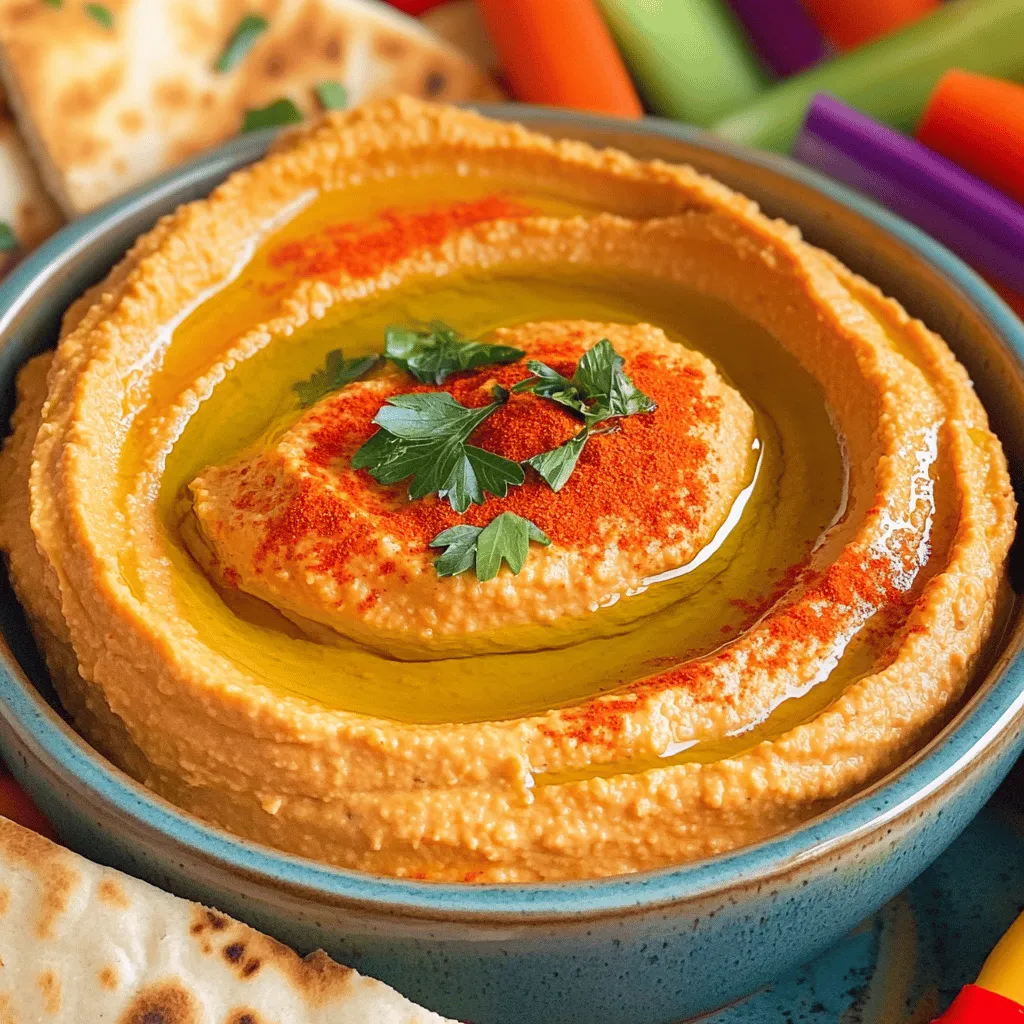
Roasted Red Pepper Hummus Flavorful and Simple Dip

Are you ready to elevate your snack game? Roasted Red Pepper Hummus is a flavorful dip that’s both simple to

To make Almond Joy Energy Balls, gather these simple ingredients: - 1 cup rolled oats - 1/2 cup almond butter - 1/3 cup honey or maple syrup - 1/2 cup shredded unsweetened coconut - 1/4 cup dark chocolate chips - 1/4 cup chopped almonds - 1 teaspoon vanilla extract - 1/4 teaspoon salt These ingredients work together to create a tasty and healthy snack. You can easily adapt this recipe for different diets: - For a nut-free version, use sunflower seed butter instead of almond butter. - Substitute maple syrup for honey if you want a vegan option. - If you're gluten-free, make sure to use certified gluten-free oats. - You can replace dark chocolate chips with dairy-free chocolate for a vegan treat. These swaps help everyone enjoy this snack. Each Almond Joy Energy Ball has about: - Calories: 100 - Protein: 3g - Carbohydrates: 12g - Fat: 5g These little balls pack a punch of energy. They are perfect for snacks or a quick boost throughout the day. They combine healthy fats and natural sugars, making them a great choice for any time. First, gather your dry ingredients. You need: - 1 cup rolled oats - 1/2 cup shredded unsweetened coconut - 1/4 cup chopped almonds - 1/4 cup dark chocolate chips In a large mixing bowl, add the rolled oats, shredded coconut, chopped almonds, and dark chocolate chips. Mix everything well. Make sure to break up any clumps. This step is key for even flavor in each bite. Next, focus on the wet ingredients. You will need: - 1/2 cup almond butter - 1/3 cup honey or maple syrup - 1 teaspoon vanilla extract - 1/4 teaspoon salt In a separate bowl, add the almond butter, honey or maple syrup, vanilla extract, and salt. Stir until smooth. This mixture should be creamy and well combined. You can use a whisk or a spatula to make it easier. Now it's time to combine the two mixtures. Pour the wet mixture into the dry ingredients. Use your hands to mix everything together. The mixture should feel sticky but not too wet. If it feels too dry, add a bit more almond butter or honey. If it’s too sticky, sprinkle in more oats or coconut. Once you get the right texture, form small balls about 1 inch in diameter. Place each ball on a baking sheet lined with parchment paper. After forming all the balls, chill them in the fridge for at least 30 minutes. This helps them set and makes them easier to eat. Enjoy your tasty snack! To get the right texture, start with the right mix of dry and wet ingredients. The rolled oats and shredded coconut add a nice chew. Use almond butter for creaminess. If the mix feels too dry, add a touch more almond butter or honey. If it’s sticky, throw in a little more oats or coconut. You want a sticky but manageable mix. Roll it into balls easily. Store your energy balls in an airtight container. Keep them in the fridge for up to a week. For longer storage, freeze them. Line a baking sheet with parchment paper and place the balls on it. Freeze until solid, then transfer them to a freezer bag. They can last up to three months in the freezer. Just grab one when you need a snack! You can boost the flavor with fun add-ins. Try adding a scoop of protein powder for extra energy. Chia seeds or flaxseeds also add nutrition. Want a little crunch? Toss in some chopped nuts or seeds. You can also swap dark chocolate chips for milk chocolate or white chocolate. Experiment and find your favorite mix! {{image_2}} You can switch almond butter for other nut butters. Peanut butter adds a classic taste. Cashew butter gives a creamy twist. Sunflower seed butter works for nut-free diets. These options change the flavor while keeping the energy boost. Spices and extracts add fun flavors. Try adding cinnamon for warmth. A dash of cocoa powder enhances the chocolate taste. You can even use peppermint extract for a fresh touch. Each new flavor makes your energy balls exciting and unique. Want to boost nutrition? Add chia seeds or flaxseeds for healthy fats. They also add fiber and protein. Just a couple of tablespoons will do. These superfoods make your snack even better while keeping it tasty. To keep your Almond Joy Energy Balls fresh, store them in the fridge. Use an airtight container. This helps prevent them from drying out. I recommend enjoying them within one week. The cool temperature keeps the flavors intact. It also helps maintain their chewy texture. You can freeze these energy balls for longer storage. Place them in a freezer-safe bag. Separate layers with parchment paper to avoid sticking. They last up to three months in the freezer. When you're ready to eat them, just thaw them in the fridge overnight. This way, they stay tasty and ready to enjoy. To keep your energy balls fresh, avoid moisture. Always use clean hands or utensils when handling them. If you notice any excess moisture, dab it with a paper towel. This helps keep them from getting soggy. Keeping them sealed tight will keep their taste and texture perfect for your snacking needs. Yes, you can make Almond Joy Energy Balls vegan. Simply replace honey with maple syrup. Use almond butter that has no added ingredients. This swap keeps the energy balls sweet and tasty. Almond Joy Energy Balls last about a week in the fridge. Store them in an airtight container. If you want them to last longer, you can freeze them. They will stay fresh for up to three months in the freezer. Yes, you can replace honey with other sweeteners. Maple syrup works great as a substitute. You may also use agave syrup for a similar sweet taste. Just remember to adjust the amount to keep the right texture. In this blog post, we explored how to make delicious energy balls. We covered the right ingredients, substitutions for diets, and their nutrition. I shared steps to prepare dry and wet ingredients, mix them, and form the balls. We discussed tips for texture, storage, and flavor. Variations with nut butters and superfoods added fun. Proper storage keeps these snacks fresh and tasty. Try these energy balls for a quick, healthy treat. Enjoy your time in the kitchen!

Almond Joy Energy Balls Delightful Snack Option

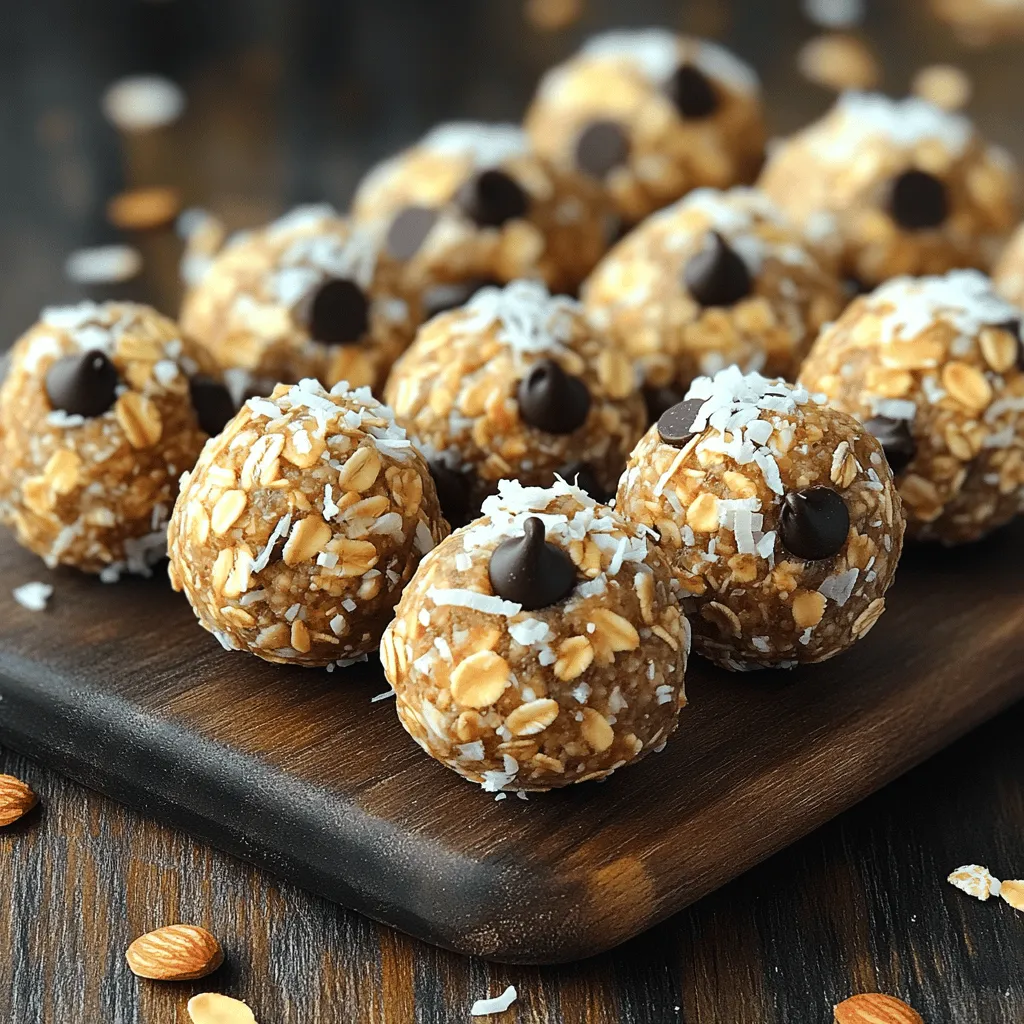
Looking for a delicious and healthy snack? Almond Joy Energy Balls are perfect for you! Packed with flavor and energy,

- 2 medium sweet potatoes, peeled and diced - 1 can (15 oz) black beans, rinsed and drained - 1 can (14 oz) diced tomatoes (with juices) - 1 medium onion, chopped - 2 cloves garlic, minced - 1 bell pepper (any color), chopped - 2 tablespoons olive oil - 2 tablespoons chili powder - 1 teaspoon cumin - 1 teaspoon smoked paprika - ½ teaspoon cayenne pepper (adjust to taste) - 2 cups vegetable broth - Salt and pepper to taste - Fresh cilantro for garnish - Avocado slices for serving (optional) I love using sweet potatoes in this chili. They add a touch of sweetness that balances the spices perfectly. Black beans make the dish hearty and filling. Diced tomatoes bring acidity to the mix, brightening up the flavors. Chop the onion and garlic finely. They will add depth to your chili. I like to use any color bell pepper for a pop of color. The olive oil helps cook the veggies and adds richness. For spices, chili powder and cumin are essential. They provide warmth and a bit of heat. Smoked paprika adds a nice smoky flavor. Adjust the cayenne pepper based on your spice level. If you want it mild, use less. Vegetable broth is the base for your chili. It adds moisture and flavor. Finally, finish with salt and pepper to taste. Fresh cilantro and avocado slices make the perfect garnish. They add freshness and creaminess. Enjoy this tasty combination in every bite! - Heating the Olive Oil Start by heating 2 tablespoons of olive oil in a large pot over medium heat. This step is vital. It helps to create a base for the flavors. - Sautéing Vegetables Add 1 chopped onion and 1 chopped bell pepper to the pot. Cook these for about 5 minutes, or until they soften. Stir occasionally to prevent sticking. After that, mix in 2 minced garlic cloves and cook for 1 to 2 more minutes. You want the garlic fragrant, but not burnt. - Adding Spices and Sweet Potatoes Next, toss in 2 diced sweet potatoes. Sprinkle in 2 tablespoons of chili powder, 1 teaspoon of cumin, 1 teaspoon of smoked paprika, and ½ teaspoon of cayenne pepper. Stir well to coat the sweet potatoes with all the spices. This step adds depth to the dish. - Incorporating Vegetable Broth and Simmering Pour in 2 cups of vegetable broth. Bring the mixture to a boil. Once boiling, reduce the heat and let it simmer. Cook for about 15 minutes or until the sweet potatoes are tender. Stir occasionally to keep everything mixed well. - Adding Black Beans and Diced Tomatoes After 15 minutes, add 1 can of rinsed black beans and 1 can of diced tomatoes (with their juices) to the pot. Stir everything together. Allow this to simmer for another 10 minutes. This lets the flavors meld together for a rich taste. - Adjusting Seasoning to Taste Taste your chili and season it with salt and pepper. If you like more heat, feel free to add extra cayenne pepper. Adjusting the seasoning is key to making it your own. - Serving Suggestions and Garnishing Serve the chili hot. Garnish each bowl with fresh cilantro and avocado slices if you wish. This adds a nice touch of freshness and creaminess. Enjoy your savory sweet potato black bean chili! Adjusting Spice Levels To make your chili just right, adjust the spices. I recommend starting with ½ teaspoon of cayenne pepper. Taste your chili as it cooks. If you want more heat, add a bit more cayenne. You can also try adding hot sauce for an extra kick. Ensuring Sweet Potatoes are Tender Sweet potatoes should be soft but not mushy. When you add them to the pot, cover it and check them after 15 minutes. If they are not tender, let them simmer for a few more minutes. This will help them cook through without losing their shape. Slow Cooker vs. Stovetop Method You can make this chili on the stovetop or in a slow cooker. For the stovetop, follow the recipe step-by-step. If using a slow cooker, sauté the onions and peppers first. Then add all ingredients to the slow cooker. Cook on low for 6-8 hours or high for 3-4 hours. Adding Additional Vegetables or Proteins Feel free to add more veggies like corn or zucchini. You can also stir in some cooked quinoa or lentils for extra protein. This keeps your chili hearty and filling. Best Accompaniments for Chili Chili pairs well with many sides. I love serving it with cornbread or a light salad. You can also top it with cheese or sour cream for creaminess. Pairing with Bread or Rice Serve your chili with crusty bread for dipping. Rice is another great option, soaking up all that flavor. You can use white rice, brown rice, or even quinoa. Each brings its own taste and texture. {{image_2}} Using Different Beans You don’t have to stick with black beans. You can use kidney beans, pinto beans, or chickpeas instead. Each type brings a different taste and texture. Try to mix and match to find your favorite. Swapping Sweet Potatoes for Other Vegetables If you want a twist, swap sweet potatoes for zucchini or butternut squash. These options will change the flavor and texture. Just chop them into small pieces and add them during cooking. Incorporating Fresh Herbs Fresh herbs can make a big difference. Try adding cilantro, parsley, or even basil. Chop them up and stir them in right before serving. This adds a burst of flavor. Adding Heat with Chili Peppers Want more spice? Add fresh chili peppers like jalapeños or serranos. Dice them up and add them when you sauté the onions. Adjust the amount to suit your taste. Vegan and Gluten-Free Options This chili is already vegan and gluten-free. All ingredients are plant-based and contain no gluten. You can enjoy this dish without any worries. Low-Carb Modifications If you’re watching carbs, skip the sweet potatoes. Instead, add more black beans or use cauliflower. This keeps the chili low in carbs while still being filling and tasty. To keep your sweet potato black bean chili fresh, store it in an airtight container. This helps prevent odors from mixing in your fridge. Let the chili cool before sealing it. In the fridge, your chili lasts about 3 to 5 days. Make sure to label the container with the date. This way, you won't forget how long it has been there. You can freeze this chili for longer storage. First, let it cool completely. Then, pour it into freezer-safe bags or containers. Remove as much air as possible to avoid freezer burn. Your chili can stay fresh in the freezer for up to 3 months. When you’re ready to eat, just take it out and thaw it in the fridge overnight. When reheating your chili, the stove is the best method. Pour the chili into a pot and heat it on medium. Stir often to keep it from sticking. You can also use the microwave. Place your chili in a microwave-safe bowl and cover it. Heat for 1-2 minutes, stirring halfway through. To keep the flavors strong, avoid overheating. Taste and adjust the seasoning if needed. Enjoy that warm, rich flavor! Can I make this chili in advance? Yes, you can make this chili ahead of time. It tastes even better the next day as the flavors mix. Store it in the fridge in a sealed container for up to four days. Is this recipe kid-friendly? Absolutely! Kids usually love the sweet flavor of sweet potatoes and the beans add a nice texture. You can adjust the spices to make it milder for younger taste buds. How can I adjust the recipe for meal prepping? To meal prep, simply double the recipe. Portion it into containers for easy grab-and-go meals. This chili freezes well, so you can keep some for later. Caloric Content per Serving Each serving of this chili has about 300 calories. It fills you up with healthy nutrients without weighing you down. Health Benefits of Ingredients - Sweet potatoes provide vitamins and fiber. - Black beans are rich in protein and iron. - Tomatoes add antioxidants. - Spices like cumin and chili powder boost metabolism. What to do if the chili is too thick? If the chili is too thick, add a little vegetable broth or water. Stir well and heat it for a few minutes. This will help loosen it up. How to make it spicier or milder? For more heat, add extra cayenne or chili powder. Taste as you go to find the perfect spice level for you. If it's too spicy, add a bit of sugar or more sweet potatoes to balance it out. This chili uses great ingredients like sweet potatoes and black beans for a tasty dish. You learned how to cook it step by step. Plus, you now have tips to make it even better and ideas for fun variations. Remember, you can store leftovers or freeze this chili for later. With all these details, you can create a meal that everyone will love. Enjoy making and sharing this delicious chili!

Savory Sweet Potato Black Bean Chili Recipe Delight

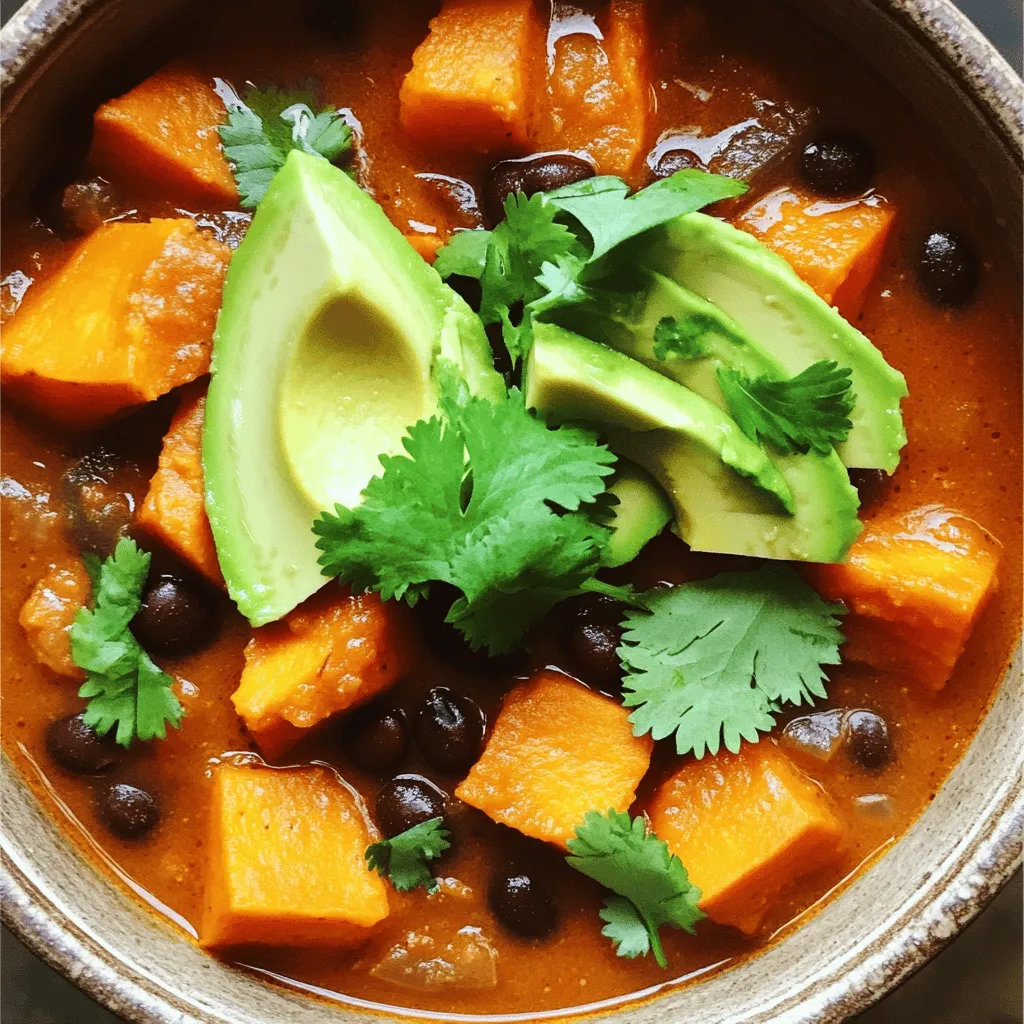
Are you ready to warm your soul with a bowl of Sweet Potato Black Bean Chili? This savory delight combines

To make Creamy Mushroom Spinach Orzo, gather these simple ingredients: - 1 cup orzo pasta - 2 cups vegetable broth - 1 tablespoon olive oil - 1 small onion, finely chopped - 3 cloves garlic, minced - 8 ounces mushrooms, sliced (cremini or button) - 4 cups fresh spinach - 1 cup heavy cream - ½ cup grated Parmesan cheese - Salt and pepper to taste - ¼ teaspoon nutmeg - Fresh parsley, chopped (for garnish) You can swap some ingredients if needed. For a lighter dish, use low-fat milk instead of heavy cream. If you want a dairy-free option, try coconut cream. You can also use gluten-free pasta for those with gluten issues. For mushrooms, any type works. Try shiitake or portobello for a richer flavor. If you don’t have Parmesan, nutritional yeast gives a nice cheesy flavor too. Using good quality ingredients makes a difference. For pasta, look for Barilla or De Cecco brands. They cook well and taste great. For broth, Swanson or Pacific Foods offer rich flavors. Use California Olive Ranch extra virgin olive oil for its fresh taste. For cheese, Grana Padano is a wonderful substitute for Parmesan. These brands will help your dish shine. To start, grab a medium saucepan. Pour in 2 cups of vegetable broth. Heat it until it simmers gently. Add 1 cup of orzo pasta. Cook it based on the package instructions until it is al dente. This usually takes about 8 to 10 minutes. Once done, drain the orzo and set it aside. This step is key for a tasty base. Next, take a large skillet and heat 1 tablespoon of olive oil over medium heat. Add 1 small onion, finely chopped. Sauté for about 3 to 4 minutes until it turns translucent. Now, stir in 3 cloves of minced garlic and 8 ounces of sliced mushrooms. Cook this mixture for another 5 to 7 minutes. You want the mushrooms to be tender and nicely browned. Then, toss in 4 cups of fresh spinach. Cook until the spinach wilts; this takes about 2 minutes. This mix brings great flavor and texture. Now it's time to make it creamy. Lower the heat and pour in 1 cup of heavy cream. Stir well to combine everything. Then, add the cooked orzo to the skillet. Toss it all together to coat the orzo well. Next, mix in ½ cup of grated Parmesan cheese, salt, pepper, and ¼ teaspoon of nutmeg. Stir until it all blends into a creamy delight. Cook for another minute on low heat. This step elevates the dish to a whole new level of yum! Finally, remove from the heat. Garnish with fresh parsley before serving. Enjoy your delicious meal! To make your orzo super creamy, use heavy cream. It adds richness and flavor. You can mix in some grated Parmesan cheese for extra creaminess. Add it slowly and stir well. This helps it melt and blend. Don’t forget a pinch of nutmeg! It adds warmth and depth to the dish. A medium saucepan works best for cooking orzo. Make sure it’s big enough to hold the broth and orzo. Use a large skillet for sautéing the veggies. A wooden spoon is great for mixing. It won’t scratch your pan and helps keep the orzo from sticking. An instant-read thermometer can help check if everything is cooked through. Creamy mushroom spinach orzo pairs well with grilled chicken or shrimp. Their flavors balance the creaminess. A simple green salad with lemon vinaigrette adds freshness. You can also serve some crusty bread on the side. This helps soak up the creamy sauce. Consider a light white wine, like Sauvignon Blanc, to drink with your meal. {{image_2}} You can easily make this dish vegetarian or vegan. To do this, switch the heavy cream for coconut milk or cashew cream. This change keeps the dish creamy and adds a nice flavor. You can also use nutritional yeast instead of Parmesan cheese. It gives a cheesy taste without dairy. For added protein, consider adding chickpeas or lentils. These ingredients keep the dish filling and nutritious. If you want extra protein, adding chicken or shrimp works well. Cook the protein first before adding it to the dish. For chicken, use diced breast and cook it in the skillet until golden. For shrimp, add them after the mushrooms and cook until pink. This addition makes the meal more satisfying. You can also use cooked sausage for a savory touch. Enhance the flavor with herbs and spices. Fresh herbs like basil or thyme add a bright taste. Add them at the end for the best flavor. You can also sprinkle some red pepper flakes for a spicy kick. A squeeze of lemon juice brightens the dish, making it fresh and zesty. Feel free to experiment and find your favorite mix! To store leftover Creamy Mushroom Spinach Orzo, let it cool first. Place it in an airtight container. Make sure to cover it well to keep it fresh. You can store it in the fridge for up to three days. Reheating is easy. You can use the microwave or the stove. For the microwave, heat it in short bursts. Stir in between to heat evenly. On the stove, add a splash of broth or cream. Heat it over low until warm. This will keep it creamy and tasty. You can freeze this dish for later. Use a freezer-safe container and portion it out. Make sure it cools down completely before you freeze it. It will stay good for about two months. When ready to eat, thaw it in the fridge overnight. Reheat it gently to enjoy again. Yes, you can use other pasta shapes like penne or fusilli. Just remember to adjust the cooking time. Short pasta works well in creamy dishes like this one. You want it to soak up all the flavors. Creamy Mushroom Spinach Orzo lasts about 3 to 5 days in the fridge. Store it in an airtight container. To keep it fresh, make sure it cools down before sealing. You can make this dish ahead of time. Just cook the orzo and veggies as usual. Store them separately from the cream sauce. When ready to eat, heat it all together. This helps keep the dish creamy and delicious. We explored how to make creamy mushroom spinach orzo from start to finish. I shared key ingredients, substitutions, and recommended brands for flavor. You learned how to cook the orzo, sauté veggies, and combine all for a creamy dish. I offered tips for texture, tools, and meal pairings. Plus, I provided variations for different diets and storage methods. This dish is easy, tasty, and flexible. Enjoy making it your own!

Creamy Mushroom Spinach Orzo Tasty Quick Dinner

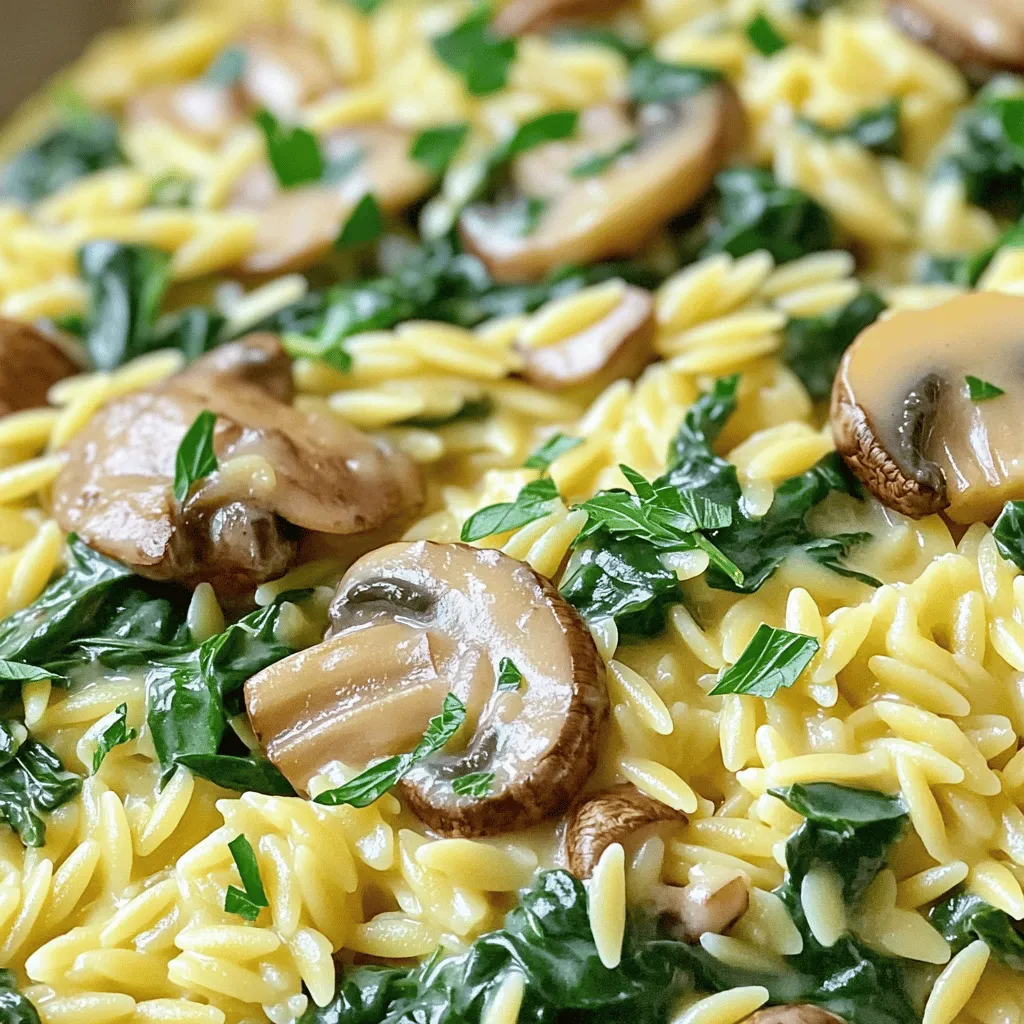
Looking for a quick and tasty dinner that’s creamy and satisfying? You’re in the right place! This Creamy Mushroom Spinach

- 1 lb salmon fillet, skinless and boneless, cut into bite-sized cubes - ¼ cup teriyaki sauce (homemade or store-bought) - 1 tablespoon honey - 1 tablespoon sesame oil - 2 green onions, sliced (for garnish) - 1 tablespoon sesame seeds (for garnish) - Salt and pepper to taste - If you lack teriyaki sauce, soy sauce works well. Add some sugar for sweetness. - For honey, you can use maple syrup or agave nectar. They add nice flavor too. - Some great teriyaki sauces are Kikkoman and Soy Vay. Both give great taste. - For sesame oil, try Kadoya or Spectrum. They offer high-quality options. To start, you will prepare the marinade. In a medium bowl, mix ¼ cup of teriyaki sauce, 1 tablespoon of honey, and 1 tablespoon of sesame oil. Stir well until the honey blends into the sauce fully. This mix adds a great taste to the salmon. Next, add 1 pound of skinless, boneless salmon, cut into bite-sized cubes. Toss the salmon in the marinade until every piece is coated. Let the salmon marinate for 15 to 20 minutes. This waiting time is key for a rich flavor that will shine when cooked. Now, it’s time to get your air fryer ready. Preheat your air fryer to 400°F (200°C). Allow it to warm up for about 5 minutes. A hot air fryer helps the salmon cook evenly and crisps up nicely. When placing the salmon in the basket, make sure to arrange the cubes in a single layer. This spacing is crucial. If the salmon pieces touch, they won't cook evenly. Give them room to breathe and cook perfectly. For cooking, set the timer for 8 to 10 minutes. Flip the salmon bites halfway through. This helps them cook evenly and get that lovely crisp on the outside. To check for doneness, look for the salmon to turn opaque and flaky. You want it to be cooked through but not dry. If you have a food thermometer, the internal temperature should read 145°F (63°C). This ensures a safe and tasty meal. To avoid overcooking salmon, keep an eye on the time. Salmon cooks quickly in the air fryer. I recommend checking it at the 8-minute mark. The fish should flake easily with a fork. If it feels tough, it’s likely overcooked. Achieving the right texture is key. Air frying gives the salmon a nice crisp outside. To do this, space the salmon cubes well in the basket. This helps hot air circulate around them. Flip them halfway to ensure even cooking and a golden finish. Want to boost the flavor? Try adding garlic powder or ginger to the marinade. They add depth to the teriyaki taste. You can also mix in a splash of lime juice for a tangy kick. If you want to make homemade teriyaki sauce, it’s easy! Combine ¼ cup soy sauce, 2 tablespoons brown sugar, and a tablespoon of mirin. Heat it gently until the sugar dissolves. This gives you a fresh and rich flavor for your salmon bites. What sides go best with teriyaki salmon bites? Steamed rice or quinoa pairs nicely. They soak up the sauce well. You could also serve it with a simple green salad for a fresh crunch. For creative serving ideas, try using lettuce wraps. Place a salmon bite in a lettuce leaf, add some veggies, and drizzle with extra sauce. It makes for a fun and tasty meal! {{image_2}} You can switch out salmon for chicken to make chicken teriyaki bites. Use the same marinade. Cut your chicken into bite-sized pieces and follow the same cooking steps. For a vegetarian choice, try tofu teriyaki bites. Use firm tofu for the best texture. Press the tofu to remove excess water. Cut it into cubes and marinate just like the salmon. Cook them using the same air fryer method. Want to change up the taste? Add citrus flavors like lime or orange juice to the marinade. This gives the dish a bright twist. You can also try adding ginger or garlic for an extra kick. Another fun option is to use Asian-inspired marinades. Look for sauces like hoisin or sweet chili. Mixing these with the teriyaki sauce can add depth to your dish. If you need gluten-free options, use gluten-free teriyaki sauce. Many brands offer this now, so check your local store. Make sure to read labels to avoid hidden gluten. When cooking for a gluten-free diet, you can also use tamari instead of soy sauce. Tamari is often gluten-free and has a similar taste. This way, everyone can enjoy your teriyaki bites! To keep your teriyaki salmon bites fresh, store them in an airtight container. This helps keep moisture in and air out. Place them in the fridge right after cooking. They will stay good for up to three days. If you want them to last longer, consider freezing. Yes, you can freeze teriyaki salmon bites! Make sure they are completely cool before freezing. Use a freezer-safe bag or container. Remove as much air as you can to prevent freezer burn. To reheat, let them thaw in the fridge overnight. This keeps the texture nice and tender. The best way to reheat salmon bites is in the air fryer. Set it to 350°F (175°C) and cook for about 5 minutes. This way, you keep the bites crispy. You can also use a skillet over medium heat. Just a few minutes on each side will warm them up. Avoid the microwave, as it can dry out the salmon. You can tell salmon bites are done when they change color. The flesh will turn from bright pink to a light opaque color. It should flake easily with a fork. The internal temperature should reach 145°F (63°C). If you have a food thermometer, this is the best way to check. Yes, you can use frozen salmon. First, thaw it completely. The best way to thaw is in the fridge overnight. If you're short on time, you can also use cold water. Just place the sealed salmon in a bowl of cold water for about an hour. Make sure to pat it dry before you cut it. This helps the marinade stick better. If you don’t have an air fryer, you can bake the salmon bites. Preheat your oven to 400°F (200°C). Place the salmon on a baking sheet lined with parchment paper. Bake for about 12-15 minutes, or until cooked through. You can also pan-sear the bites on medium heat in a skillet. Cook for about 3-4 minutes on each side for a nice crust. You now have all the tools to make tasty teriyaki salmon bites. We covered the key ingredients, marinating tips, and cooking steps. You learned how to avoid overcooking and enhance flavors with spices. We even explored variations with different proteins and storage tips. With these insights, you can enjoy this dish today or impress your friends at dinner. Dive into the joys of cooking and have fun experimenting in the kitchen!

Air Fryer Teriyaki Salmon Bites Simple Flavor Boost

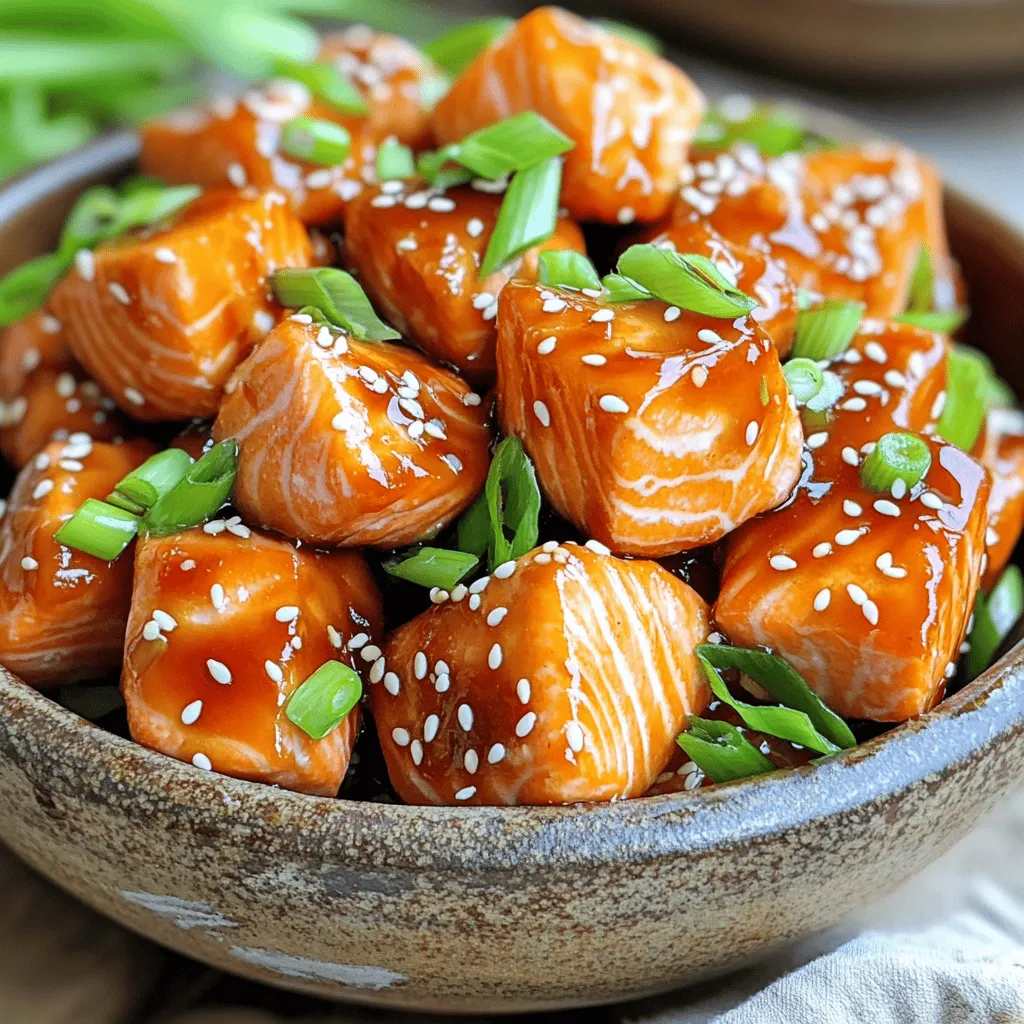
Looking to elevate your dinner game? I have the perfect solution: Air Fryer Teriyaki Salmon Bites. These tasty bites are

To make a tasty cinnamon roll mug cake, you need these simple items: - 4 tablespoons all-purpose flour - 2 tablespoons brown sugar - 1/4 teaspoon baking powder - 1/4 teaspoon ground cinnamon - 1/8 teaspoon salt - 3 tablespoons milk - 1 tablespoon vegetable oil - 1/2 teaspoon vanilla extract Each ingredient plays a key role. The flour gives the cake its structure. Brown sugar adds sweetness and a hint of caramel flavor. Baking powder helps the cake rise, making it fluffy. Ground cinnamon brings that warm, cozy taste we all love. The milk and vegetable oil keep the cake moist, while vanilla adds a nice aroma. For the cream cheese frosting, you will need: - 1 tablespoon cream cheese - 1 teaspoon powdered sugar - 1/4 teaspoon milk This frosting is easy to whip up. Cream cheese provides a rich, tangy flavor. Powdered sugar adds sweetness and helps it thicken. A splash of milk makes the frosting smooth and spreadable. You can add some fun toppings to your cake. Consider these options: - Chopped pecans - Chopped walnuts These nuts add a nice crunch and extra flavor. You can also serve the cake plain for a simpler treat. Enjoy your mug cake just the way you like it! To make the batter, grab a microwave-safe mug. In the mug, whisk together: - 4 tablespoons all-purpose flour - 2 tablespoons brown sugar - 1/4 teaspoon baking powder - 1/4 teaspoon ground cinnamon - 1/8 teaspoon salt Mix these dry ingredients well to avoid lumps. Next, add: - 3 tablespoons milk - 1 tablespoon vegetable oil - 1/2 teaspoon vanilla extract Stir until the mixture is smooth. It should look like a thick batter. Now, it’s time to cook the batter. Place the mug in the microwave. Heat for about 1 minute and 30 seconds. Keep an eye on it as it cooks. If you have a stronger microwave, check after 1 minute. The cake should rise and be set in the center. If it's not done, heat in 10-second bursts until ready. While the cake cools, let’s make the frosting. In a small bowl, mix: - 1 tablespoon cream cheese - 1 teaspoon powdered sugar - 1/4 teaspoon milk Beat these together until smooth and creamy. Once the mug cake has cooled a bit, spread the frosting on top. For added crunch, sprinkle with chopped pecans or walnuts if you like. Enjoy your warm cinnamon roll mug cake! Microwave cooking is quick but tricky. Start with 1 minute and 30 seconds. If the cake isn't fully cooked, add 10 to 15 seconds. Remember, every microwave cooks a bit differently. Check for doneness by inserting a toothpick. If it comes out clean, you’re good to go! You can swap some ingredients to meet your needs. Use almond milk or oat milk instead of regular milk. If you lack brown sugar, regular sugar works. Want a sweeter cake? Add a bit more sugar. For a gluten-free option, try a gluten-free flour blend. Just keep the same measurements! Serve your cinnamon roll mug cake warm for the best taste. Top it with cream cheese frosting for a rich flavor. You can also add nuts for crunch. Chopped pecans or walnuts work great. Want something special? Drizzle with maple syrup or caramel sauce for extra sweetness! {{image_2}} You can change up your cinnamon roll mug cake in fun ways. Try adding chocolate chips for a sweet twist. You can also mix in orange zest for a bright flavor. If you love nuts, chopped almonds can give a nice crunch. You can even add a dash of nutmeg for warmth. Each of these options adds a new taste to your cake! To make your mug cake even more exciting, consider some add-ins. Chopped pecans or walnuts can add a nice bite. Dried fruit, like raisins or cranberries, can add sweetness and chewiness. If you like a creamy texture, try adding a spoonful of yogurt. These little changes can boost flavor and make your cake unique. The cream cheese frosting is tasty, but you can switch it up. Try using a simple glaze made from powdered sugar and milk. Mix them until smooth and drizzle it over the cake. You can also use whipped cream for a light topping. If you want something fruity, a berry jam can be a fun choice. Each frosting option changes the whole vibe of your cake! To store leftover cinnamon roll mug cake, let it cool down first. Then, place it in an airtight container. This keeps the cake fresh and moist. You can also cover the mug tightly with plastic wrap. Store the cake in the fridge if you plan to eat it later. It will stay fresh for a few days. When you are ready to enjoy the leftover cake, take it out of the fridge. If you stored it in a container, transfer it back to a microwave-safe mug. Heat it in the microwave for about 15 to 30 seconds. Check if it’s warm enough. You want it to be soft and fluffy again. If it needs more time, heat in short bursts. The cinnamon roll mug cake tastes best when fresh. However, it can last up to three days in the fridge. If you notice any strange smells or changes in texture, it’s best to toss it. Remember, homemade treats have a shorter shelf life than store-bought ones. Always trust your senses! You can swap the milk with any plant-based milk. Use almond, soy, or oat milk. Replace the cream cheese with vegan cream cheese or a mix of coconut yogurt and powdered sugar. This change keeps the frosting tasty and creamy without any dairy. The rest of the recipe stays the same. Just mix and microwave as you usually would! Yes, you can use gluten-free flour! Look for a blend that includes xanthan gum. This helps mimic the texture of regular flour. Just replace the all-purpose flour with the gluten-free option, and follow the same steps. Your mug cake will still rise and taste delicious. If you lack cream cheese, try using plain yogurt or a simple glaze. Mix powdered sugar with a bit of milk to create a sweet drizzle. You can also stir in nut butter for a rich flavor. These options will add sweetness and keep your mug cake delightful! You learned how to make a tasty cinnamon roll mug cake. We covered the key ingredients, easy steps, and helpful tips. Plus, you explored fun variations and storage ideas. Don’t be afraid to experiment with flavors or toppings. The mug cake is quick and delicious, perfect for any time. Enjoy your sweet treat!

Cinnamon Roll Mug Cake Quick and Easy Delight

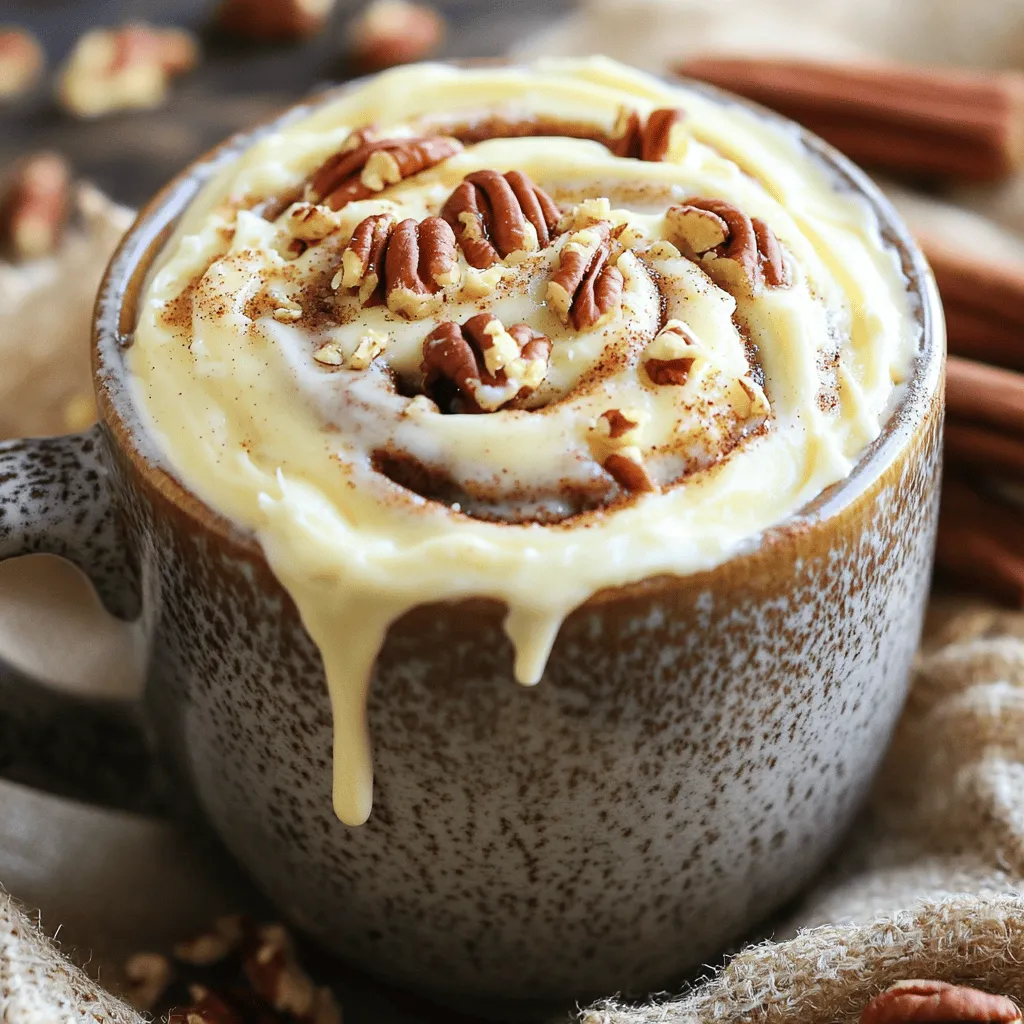
Craving a warm, sweet treat but short on time? You’re in luck! My Cinnamon Roll Mug Cake is the perfect

To make chili lime grilled corn, you need fresh and simple ingredients. This dish will burst with flavor and is easy to prepare. Here’s what you will need: - Fresh Corn (4 ears, husked) - Olive Oil (3 tablespoons) - Spices: - Chili Powder (1 teaspoon, adjust to taste) - Smoked Paprika (1/2 teaspoon) - Cayenne Pepper (1/4 teaspoon, optional for extra heat) - Lime (Juice of 2 limes and zest of 1 lime) - Cheese (1/4 cup crumbled queso fresco or feta) - Fresh Herbs (chopped cilantro for garnish) - Seasoning (sea salt and freshly ground black pepper to taste) Each ingredient plays a key role in creating a dish that is both zesty and satisfying. Fresh corn is the star here, offering sweetness and crunch. The olive oil helps the spices stick and brings richness. The chili powder and smoked paprika add warmth and depth. Lime juice and zest brighten the flavors. Cheese adds creaminess, while cilantro brings a fresh finish. Lastly, salt and pepper enhance all the tastes. Feel free to play with these ingredients based on what you like best. Enjoy the process of making this fun summer side dish! - Preheat the Grill Start by heating your grill to medium-high. This helps to get nice grill marks. - Make the Chili Lime Marinade In a bowl, mix together: - 3 tablespoons olive oil - 1 teaspoon chili powder - 1/2 teaspoon smoked paprika - 1/4 teaspoon cayenne pepper (if you like heat) - Juice of 2 limes - Zest of 1 lime Whisk them well to blend flavors. - Coat the Corn with Marinade Take 4 husked ears of corn. Brush them with the chili lime marinade. Make sure to cover all sides for full flavor. - Season the Corn After coating, sprinkle sea salt and black pepper on the corn for extra taste. - Cooking Time and Temperature Place the corn on the grill. Cook for 10 to 15 minutes. Turn the corn every few minutes. Look for grill marks to know it’s cooking well. - Checking for Doneness The corn is ready when it feels tender. You can poke it with a fork to check. - Adding Cheese and Garnish Once off the grill, sprinkle crumbled queso fresco or feta cheese on top. Add fresh chopped cilantro for a bright finish. - Serving with Extra Marinade Drizzle any leftover marinade over the corn. It adds more flavor and keeps it juicy. To avoid corn sticking to the grill, oil both the grill and the corn. Use a paper towel to wipe oil on the grill. This simple step helps keep your corn intact. For perfect grill marks, preheat your grill to medium-high. Place corn diagonally on the grill. Turn it every few minutes for great lines. Balancing heat and flavor is key. Start with one teaspoon of chili powder. Then, adjust based on your taste. If you like spice, add cayenne pepper. For cheese, try crumbled feta if you can't find queso fresco. Both will add creaminess and flavor. When selecting fresh corn, look for bright green husks. They should feel firm and moist. The kernels should be plump and tightly packed. Different corn varieties can change the flavor. Sweet corn offers a nice contrast to the chili and lime. This makes your dish more delicious and exciting. {{image_2}} You can make your chili lime grilled corn even spicier. Start by adding more cayenne pepper to the marinade. A little goes a long way. You can also try using different chili types. For instance, chipotle powder gives a smoky kick. If you love heat, consider using fresh jalapeños. Simply chop them finely and mix them in with the marinade. While cilantro is a classic choice, you can switch it up with other herbs. Fresh parsley or basil can add their own unique touch. For a bold flavor, try adding minced garlic or onion to the marinade. This gives a nice depth to the corn. You can roast garlic beforehand for a sweeter taste. If you want a vegan version, simply skip the cheese. You can replace queso fresco with avocado slices for creaminess. This keeps it hearty and fresh. For gluten-free needs, this recipe is already safe. The ingredients do not contain gluten, so you can enjoy it worry-free. How do you store grilled corn? First, let the corn cool down. Wrap each ear in plastic wrap or foil. Place the wrapped corn in an airtight container. This keeps it fresh and tasty. You can also store it in a resealable plastic bag. Just make sure to squeeze out the air before sealing. What are the best containers for storage? Glass containers work well. They are sturdy and won’t absorb smells. You can use plastic containers too. Just ensure they are airtight to keep the corn moist. What are the best methods for reheating grilled corn? The oven is a great choice. Preheat it to 350°F (175°C). Place the corn on a baking sheet. Cover it with foil to prevent drying out. Heat for about 10 minutes, or until warm. You can also reheat corn in the microwave. Place it in a microwave-safe dish. Add a splash of water and cover it. Heat for about 1-2 minutes. Check the corn and stir if needed. What are flavor retention tips? To keep the flavor, add a bit of lime juice when reheating. This helps maintain the chili lime taste. You can also drizzle some olive oil before serving. Enjoy the fresh flavors again! Grill the corn for about 10-15 minutes. Turn it often to get even cooking. Look for nice grill marks and a tender bite. The corn should pop with flavor when you bite into it. This grilling time helps bring out its natural sweetness. I recommend using fresh corn for the best taste and texture. Frozen corn may not have the same crunch and flavor. If you only have frozen corn, thaw it first. Then grill it briefly to warm it up. This will help mimic the grilled taste. You can get creative with toppings! Try adding: - Crumbled feta or goat cheese - Sliced jalapeños for heat - Avocado slices for creaminess - A sprinkle of chili flakes for extra spice - Fresh herbs like parsley or basil for a twist These options add layers of flavor. Yes, chili lime grilled corn is great for meal prep! It holds up well in the fridge. Store it in an airtight container for up to three days. Reheat it on the grill or in the microwave. The flavors will still shine, making it perfect for quick meals. You now have all the tools to make delicious chili lime grilled corn. We covered key ingredients and easy steps to prepare it. Grilling tips help you avoid mishaps. Plus, we explored tasty variations and storage ideas. Experiment with flavors to find your favorite twist. This dish is perfect for gatherings or a fun side. Don’t forget to try out different herbs and spice levels. With this guide, you can enjoy fresh corn at its best, every time. Happy grilling!

Chili Lime Grilled Corn Tasty Summer Side Dish

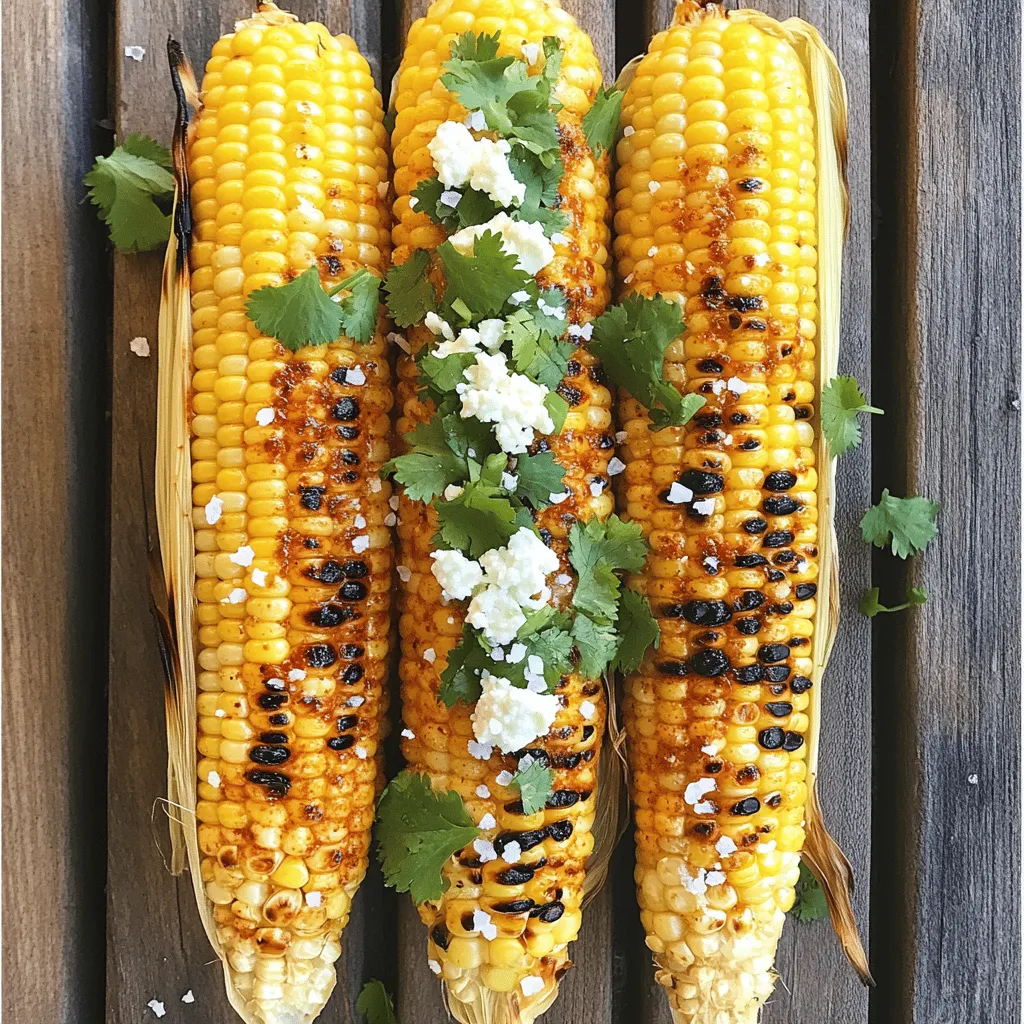
Looking for a zesty summer treat? Chili Lime Grilled Corn is your answer! This easy recipe combines sweet corn, spicy

For this dish, you need a medium head of cauliflower. Cut it into small florets. This will give your mac and cheese a nice texture. You also need 8 ounces of elbow macaroni. If you want, use gluten-free pasta instead. The pasta adds a classic touch to this recipe, making it feel comforting. Cheese is key for creaminess. Use 2 cups of shredded sharp cheddar cheese. It adds a strong flavor. Then, mix in 1 cup of shredded mozzarella cheese. This cheese melts well and gives that gooey texture. For a dairy alternative, use 1 cup of unsweetened almond milk. You can swap it for any milk you prefer. This keeps the dish creamy without adding too many calories. Seasonings bring out the best flavors. Use 3 tablespoons of butter to start your sauce. Mix in 3 tablespoons of all-purpose flour to thicken it. Add 1 teaspoon each of garlic powder and onion powder for flavor. Don’t forget about salt and pepper to taste. For a smoky hint, use 1/2 teaspoon of smoked paprika. Top your dish with 1/4 cup of panko breadcrumbs for crunch. Finally, sprinkle some chopped fresh parsley on top for color and freshness. To start, gather your ingredients. You will need a medium head of cauliflower and 8 ounces of elbow macaroni. First, cut the cauliflower into small florets. Next, boil a large pot of salted water. Once it boils, add the macaroni. Cook it according to the package instructions until it is al dente. Add the cauliflower florets to the pot in the last 3-4 minutes of cooking. This step helps soften the cauliflower while keeping it firm. Drain both the pasta and cauliflower and set them aside for later. Now, let’s make the cheese sauce. In a large saucepan, melt 3 tablespoons of butter over medium heat. Once the butter melts, stir in 3 tablespoons of all-purpose flour, 1 teaspoon of garlic powder, and 1 teaspoon of onion powder. This mix creates a roux. Cook this for 1-2 minutes while stirring. Gradually whisk in 1 cup of almond milk. Keep stirring until the sauce thickens, which takes about 5 minutes. Once thickened, remove it from heat. Stir in 1.5 cups of sharp cheddar cheese and all the mozzarella cheese. Mix until the cheese melts and the sauce is creamy. It’s time to combine everything. In a large bowl, mix the drained macaroni and cauliflower with the cheese sauce. Stir well to coat everything evenly. Season this mix with salt, pepper, and 1/2 teaspoon of smoked paprika for a hint of smokiness. Next, transfer the mixture to a greased 9x13-inch baking dish. Sprinkle the remaining cheddar cheese on top, then add 1/4 cup of panko breadcrumbs for a crispy topping. Bake in your preheated oven at 350°F for 20-25 minutes. The top should be golden and bubbly when done. Once out of the oven, let it cool slightly. Finish by garnishing with chopped parsley before serving. To get that creamy texture, start with a good roux. Melt the butter in a pan over medium heat. Mix in the flour until it forms a paste. Then, whisk in the almond milk slowly. Keep stirring until it thickens. It should take about five minutes. This step is key for a smooth sauce. Stir in the cheese while the sauce is warm. This helps it melt nicely. Use garlic powder and onion powder to boost flavor. These spices give a nice taste without hiding the cauliflower. A touch of smoked paprika adds warmth. Just a little salt and pepper can enhance all the flavors. Mix well and taste. Make sure it’s just right for you. You want the cheese to shine through, but not overpower the dish. For a great crispy top, use panko breadcrumbs. They are lighter and crispier than regular bread crumbs. Once you layer them on top, add a bit more cheese. This helps everything stick and browns nicely. Bake the dish until the top is golden brown. This takes about 20 to 25 minutes. Let it cool a bit before serving. This ensures the topping stays crunchy. {{image_2}} To make this dish low-carb, swap the pasta for cauliflower rice. This change keeps the comfort but lowers the carbs. You can also use a keto-friendly flour instead of all-purpose flour. If you need gluten-free options, use gluten-free pasta. Many brands offer great taste and texture. For the roux, you can easily swap all-purpose flour with almond flour or coconut flour. Both work well and keep this dish creamy. You can boost the nutrition by adding other veggies. Spinach, broccoli, or peas mix well. If you want protein, consider adding cooked chicken or turkey. Both will give your dish a hearty twist. Just stir them in before baking for extra flavor and texture. After you prepare your creamy cauliflower mac and cheese, let it cool. Place it in an airtight container. This dish stays fresh in the fridge for about 3 to 5 days. When you want to eat it again, just check for any odd smells or changes in texture. You can freeze cauliflower mac and cheese for later. First, let it cool completely. Then, scoop it into a freezer-safe container. You can also use freezer bags for easier storage. This meal can last up to 3 months in the freezer. When you're ready to eat, just thaw it in the fridge overnight. To reheat, you have a few options. For the oven, preheat it to 350°F (175°C). Place the mac and cheese in a baking dish. Cover it with foil to keep it moist and bake for about 20 minutes. If you prefer the microwave, scoop a portion into a microwave-safe bowl. Heat it in 1-minute intervals, stirring in between, until it's warm. Enjoy your creamy comfort food anytime! Yes, you can use other cheeses. Try gouda or fontina for a different flavor. Cheese like cream cheese can add extra creaminess. Just keep in mind that each cheese has its own taste. Mixing cheeses can create a unique dish. To make this dish vegan, swap dairy cheese for plant-based cheese. Use coconut or cashew milk instead of almond milk. Replace butter with vegan butter or olive oil. You can also use gluten-free flour if needed. This way, you keep the creamy texture without any animal products. You can add many vegetables to this dish. Broccoli, spinach, or peas work well. You might also try adding roasted bell peppers for sweetness. Carrots can give a nice crunch. Just make sure to adjust cooking time for firmer veggies. The goal is to enhance flavors while keeping the comfort of mac and cheese. This article covered how to make delicious cauliflower mac and cheese. We explored the key ingredients like pasta, cheeses, and spices. I provided step-by-step instructions for prepping, sauce-making, and baking. You also learned valuable tips for great texture and taste. Variations included keto options, gluten-free swaps, and veggie add-ins. Finally, we discussed proper storage and reheating. Embrace your creativity with this dish. Enjoy exploring different flavors and toppings!

Cauliflower Mac and Cheese Creamy Comfort Food Recipe

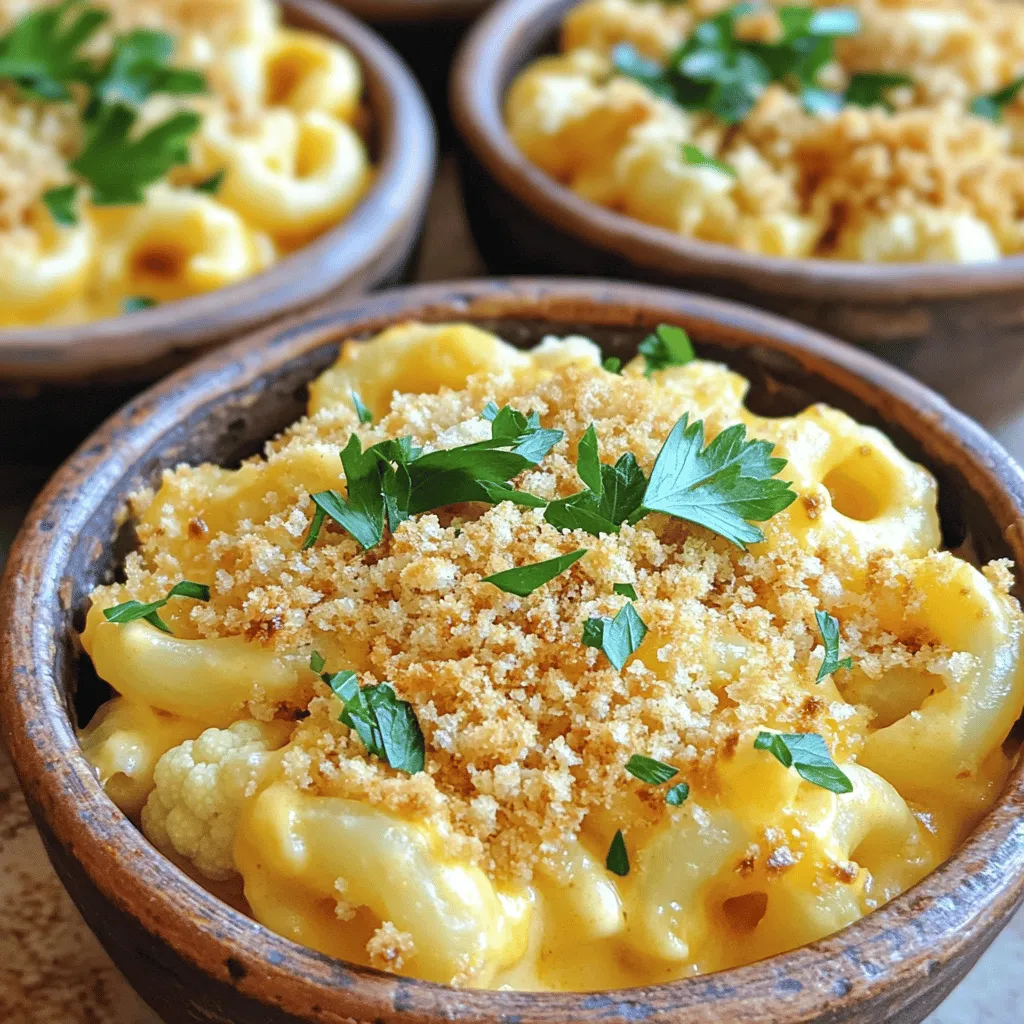
Are you ready to enjoy a creamy, delicious spin on a classic comfort food? My Cauliflower Mac and Cheese recipe

- 3 ripe bananas, mashed - 1 cup shredded coconut (unsweetened) - 1/2 cup granulated sugar - 1/2 cup brown sugar, packed - 1/2 cup unsalted butter, melted - 2 large eggs - 1 teaspoon vanilla extract - 1 teaspoon baking soda - 1/2 teaspoon baking powder - 1/4 teaspoon salt - 1 1/2 cups all-purpose flour - 1/2 cup chopped walnuts or pecans (optional) You can make this recipe fit special diets. Here are some swaps: - Use coconut oil instead of butter for a dairy-free option. - Substitute eggs with flaxseed meal mixed with water or applesauce for a vegan version. - Choose gluten-free flour to make the bread gluten-free. Ripe bananas are key to this recipe. They add natural sweetness. The riper they are, the better. Look for bananas with brown spots. They’ll mash easily and mix well. This gives your bread a moist texture. Plus, ripe bananas have more flavor. They make your coconut banana bread truly delicious. Start by preheating your oven to 350°F (175°C). This step is crucial for even baking. Next, grab a 9x5-inch loaf pan and grease it well. You can use butter or cooking spray. This helps the bread come out easily once it’s baked. In a large bowl, mash three ripe bananas. Use a fork to get them smooth. Then, pour in 1/2 cup of melted butter. Mix them together until they blend well. Now, add 1/2 cup of granulated sugar, 1/2 cup of brown sugar, and two large eggs. Don’t forget the teaspoon of vanilla extract! Stir everything until it looks smooth and uniform. In another bowl, whisk together 1 1/2 cups of all-purpose flour, 1 cup of shredded coconut, 1 teaspoon of baking soda, 1/2 teaspoon of baking powder, and 1/4 teaspoon of salt. Make sure there are no lumps. This mix gives your bread its structure and flavor. Now, it’s time to combine the wet and dry ingredients. Gradually add the dry mix to the wet mix. Stir gently until just combined. Be careful not to overmix; this can make the bread tough. If you want, fold in 1/2 cup of chopped walnuts or pecans for some crunch. Pour the batter into your prepared loaf pan. Smooth the top with a spatula. Place it in the oven and bake for 60-70 minutes. To check if it’s done, insert a toothpick into the center. If it comes out clean, your bread is ready. Once baked, let it cool in the pan for 10 minutes. Then, transfer it to a wire rack to cool completely. Enjoy your delicious coconut banana bread! To make your banana bread moist, use very ripe bananas. Look for bananas with brown spots. These bananas are sweeter and softer. Mash them well before mixing. Adding melted butter helps too. Do not overmix the batter; mix just until combined. This keeps the bread fluffy. One common mistake is using cold eggs. Always use room temperature eggs for better mixing. Also, avoid skipping the baking soda and baking powder. These help the bread rise. Overbaking is another pitfall. Check your bread at 60 minutes. If a toothpick comes out clean, it's done. Use a 9x5-inch loaf pan for the best results. A good quality pan helps the bread cook evenly. Have measuring cups and spoons ready for accuracy. A large mixing bowl is a must for combining ingredients. A whisk is helpful for mixing dry ingredients smoothly. Lastly, a wire rack is great for cooling the bread evenly. {{image_2}} You can make a vegan version of coconut banana bread easily. Replace the eggs with flax eggs. To make one flax egg, mix one tablespoon of ground flaxseed with three tablespoons of water. Let it sit for five minutes before using. Swap out the butter for coconut oil or applesauce. Use the same amount as the butter in the original recipe. This keeps the bread moist and adds a nice flavor. To make gluten-free coconut banana bread, use a gluten-free flour blend. Look for one that has xanthan gum for better texture. You can also use almond flour or oat flour as a base. The baking time may change slightly, so check the bread with a toothpick. You want it to come out clean, just like with regular flour. Adding extra flavors can make your coconut banana bread even better. Try folding in chocolate chips for a sweet twist. Dark chocolate pairs well with the banana and coconut. You can also add spices like cinnamon or nutmeg for warmth. Just a teaspoon of either can change the taste. For a crunchy texture, add chopped nuts like walnuts or pecans. They add great flavor and a bit of crunch. Explore these options to make your coconut banana bread unique! To keep your coconut banana bread fresh, wrap it tightly in plastic wrap. You can also place it in an airtight container. Store it at room temperature for up to three days. If you live in a humid area, the fridge is better. It can last up to a week in the fridge. Freezing is a great option for long-term storage. First, let the bread cool completely. Then, wrap it in plastic wrap and foil. Place it in a freezer bag. This way, it stays fresh for about three months. When you're ready to eat, just thaw it in the fridge overnight. To reheat your banana bread, slice it first. You can use a toaster or an oven for the best results. Heat slices in a toaster for about 3-5 minutes. If using an oven, set it to 350°F (175°C) and warm for 10-15 minutes. This will keep it moist and tasty. Enjoy it warm with a bit of butter or cream! Yes, you can use frozen bananas. Just thaw them before mashing. Frozen bananas often taste sweeter. They also add moisture to the bread. Check the bread after 60 minutes. Insert a toothpick into the center. If it comes out clean, the bread is done. If it has batter on it, bake for a few more minutes. Let it cool before slicing. You can use applesauce or flaxseed meal. For one egg, use 1/4 cup of applesauce. For flaxseed, mix 1 tablespoon of ground flaxseed with 2.5 tablespoons of water. Let it sit for a few minutes until it thickens. The bread lasts about 3 to 4 days at room temperature. Store it in an airtight container to keep it fresh. You can also refrigerate it for a week. Yes, you can use sweetened coconut. This will make the bread sweeter. Adjust the sugar in the recipe to balance the flavors. We covered how to make delicious coconut banana bread. You learned about the key ingredients, such as ripe bananas and alternatives for special diets. I shared step-by-step instructions and tips to avoid mistakes. Plus, variations help you customize the flavor to your liking. Store and reheat it properly to keep it fresh. With these insights, you can create a tasty treat and enjoy every bite. Happy baking!

Coconut Banana Bread Tasty and Easy Recipe

Are you ready to bake something delicious? This Coconut Banana Bread recipe is tasty and super easy to make. Whether

To make Strawberry Lemon Cheesecake Bars, gather these fresh ingredients. Each one plays a key role in creating a tasty treat. - 1 ½ cups graham cracker crumbs - ½ cup unsalted butter, melted - 2 tablespoons sugar - 2 (8-ounce) packages cream cheese, softened - 1 cup granulated sugar - 3 large eggs - 1 teaspoon vanilla extract - 1 tablespoon lemon zest - ½ cup fresh lemon juice - 1 cup fresh strawberries, pureed - 2 tablespoons powdered sugar (for topping) These ingredients combine to form a delightful mix of flavors. The graham cracker crumbs and butter create a buttery crust that is both rich and crunchy. The cream cheese and sugar form a creamy filling that balances the tartness of lemons and strawberries. Fresh lemon juice and zest add bright flavor. Pureed strawberries give a sweet twist to each bite. The powdered sugar dusting adds a nice touch for presentation. Each ingredient plays its part in making these bars a hit at any gathering. Preheating the Oven and Preparing the Pan First, preheat your oven to 350°F (175°C). This step warms the oven for even baking. Next, take a 9x9 inch baking pan. Grease it well or line it with parchment paper. This helps you remove the bars easily later. Mixing Ingredients for the Crust In a medium bowl, combine 1 ½ cups of graham cracker crumbs, ½ cup of melted unsalted butter, and 2 tablespoons of sugar. Mix these ingredients well until the mixture looks like wet sand. This forms the base of your cheesecake bars. Baking the Crust Now, press the graham cracker mixture evenly into the bottom of your prepared pan. Make sure it is compact. Bake this in the oven for 10 minutes. Once baked, remove it and let it cool slightly while you prepare the filling. Beating the Cream Cheese and Sugar In a large mixing bowl, take 2 packages of softened cream cheese and add 1 cup of granulated sugar. Beat these together until the mixture is smooth and creamy. This step is key for a rich filling. Adding the Eggs and Flavorings Add the eggs one at a time, mixing well after each addition. Then, add 1 teaspoon of vanilla extract, 1 tablespoon of lemon zest, and ½ cup of fresh lemon juice. Mix until everything is combined. This adds flavor and a nice tang to your cheesecake. Layering the Cheesecake Mixture and Strawberry Puree Pour about half of the cheesecake mixture over your cooled graham cracker crust. Next, spoon 1 cup of fresh strawberry puree over this layer. The puree adds sweetness and color. Creating the Marbled Effect Use a knife or toothpick to gently swirl the strawberry puree into the cheesecake layer. This creates a beautiful marbled effect. Take care not to mix too much; you want to see both layers. Baking the Cheesecake Bars Pour the remaining cheesecake mixture on top and smooth it out with a spatula. Bake in the oven for 30-35 minutes. The edges should set while the center has a slight jiggle when done. Once baked, remove the bars and let them cool to room temperature. Refrigerate for at least 4 hours or overnight for best results. Softened cream cheese is key for a smooth filling. Cold cream cheese makes lumps. Leave it out for an hour before mixing. This helps it blend easily with sugar. Checking for doneness is simple. Bake until the edges set and the center jiggles slightly. It will firm up as it cools. Overbaking makes the texture dry. Dusting with powdered sugar adds a nice touch. It makes the bars look fancy. Use a small sieve for even coverage. This step is quick but makes a big difference. Serve the bars on a colorful plate for fun. Add fresh strawberry slices and mint leaves. This makes each bite refreshing. Your guests will love the bright colors and flavors! {{image_2}} You can change the fruit to make this dessert your own. Try using different fruit purees. For example, raspberry or blueberry add a fun twist. These fruits mix well with the creamy filling. They also bring a nice color to the bars. Just swap the strawberry puree for your choice. The taste will be just as good! If you want a vegan option, there are great substitutes. Use vegan cream cheese instead of regular cream cheese. You can replace eggs with flaxseed meal or unsweetened applesauce. You can also use maple syrup for sugar. These swaps keep the taste rich while making it plant-based. The crust is an important part of these bars. You can try a nut-based crust for a new flavor. Use crushed almonds or pecans instead of graham crackers. Mix them with melted coconut oil for a tasty twist. This option is perfect for nut lovers. If you need a gluten-free alternative, use gluten-free graham crackers. They work just like regular ones. You can also use almond flour mixed with coconut oil. This keeps the texture nice and crumbly while being safe for those with gluten issues. To keep your cheesecake bars fresh, you should store them in the fridge. Place them in an airtight container. This helps avoid drying out. They will stay good for up to five days. You can also cover them tightly with plastic wrap. If you want to store them longer, consider freezing. Cut the bars into squares before freezing for easy serving later. Wrap each square in plastic wrap, then place them in a freezer-safe bag. They can last up to three months in the freezer. When you want to enjoy these bars again, avoid using the microwave. This can change the texture. Instead, let them sit at room temperature for about 30 minutes before serving. This helps the flavors return. Enjoy your bars cold or at room temperature for the best taste. Yes, you can use frozen strawberries. Just thaw them first and drain any excess liquid. This keeps the cheesecake bars from being too watery. The taste will still be great! However, fresh strawberries do provide a brighter flavor and better texture. These bars last about five days in the fridge. Make sure to cover them well. This keeps them fresh and tasty. If you want to enjoy them longer, you might consider freezing them. Absolutely! Making them a day in advance is a great idea. It gives the flavors more time to blend. Just refrigerate them overnight after baking. This way, you can serve them cold and ready to enjoy the next day. You learned about making Strawberry Lemon Cheesecake Bars. We covered the key ingredients, like graham crackers, cream cheese, and fresh strawberries. You now have step-by-step instructions for the crust and filling. I shared tips to perfect your dessert and make it look great. You can even try fun variations and know how to store leftovers. Enjoy creating these tasty bars, and share them with your friends!

Strawberry Lemon Cheesecake Bars Simple and Tasty Treat

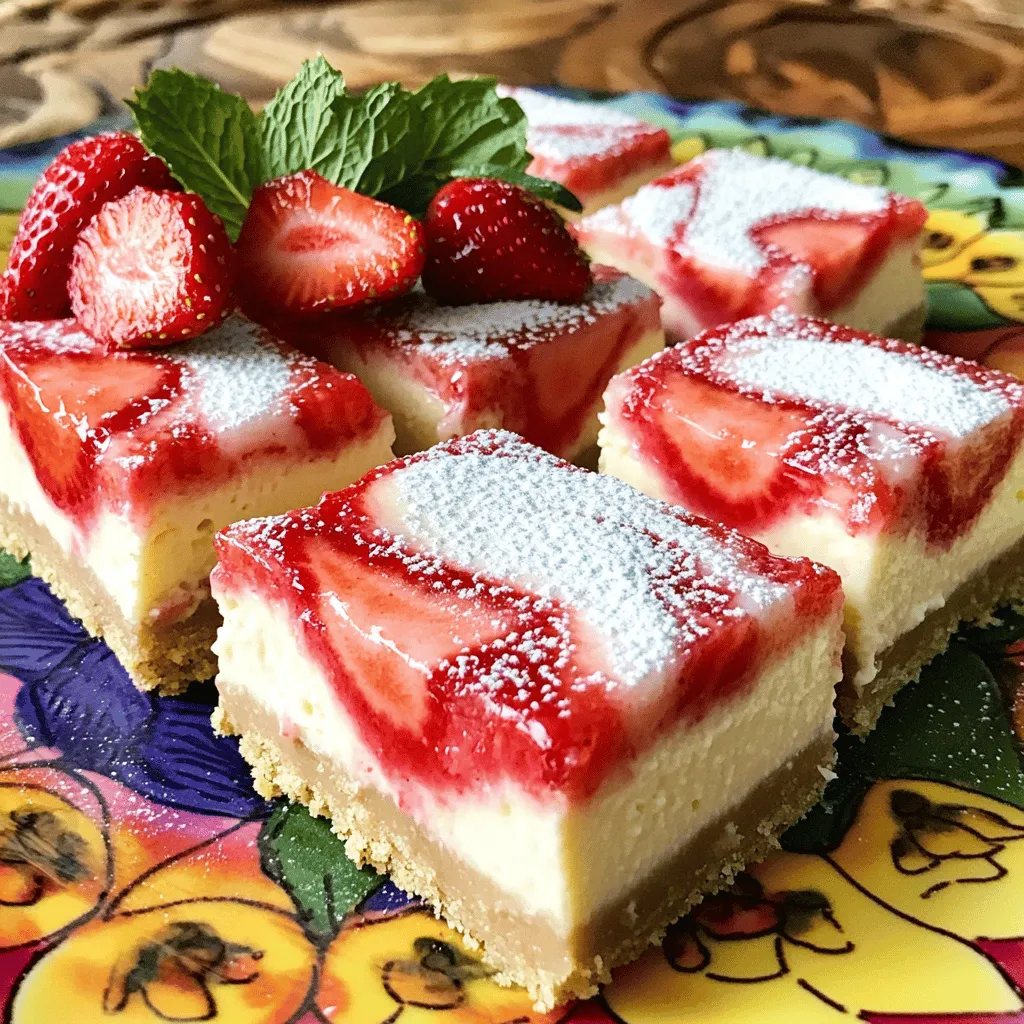
Are you looking for a delicious treat that’s simple to make? Try my Strawberry Lemon Cheesecake Bars! With their creamy

Older posts
Newer posts
← Previous Page1 … Page33 Page34 Page35 … Page84 Next →

dsad

© 2026 Lisa Dishes • Built with GeneratePress

Our Policies

  • Copyright Policy
  • Cookie Policy
  • GDPR Policy
  • Privacy Policy
  • Disclaimer
  • Terms Of Use

More Information

  • Home
  • About
  • Contact
  • Appetizers
  • Dessert
  • Dinner
  • Drinks
©2026, Lisa Dishes About Back To Top