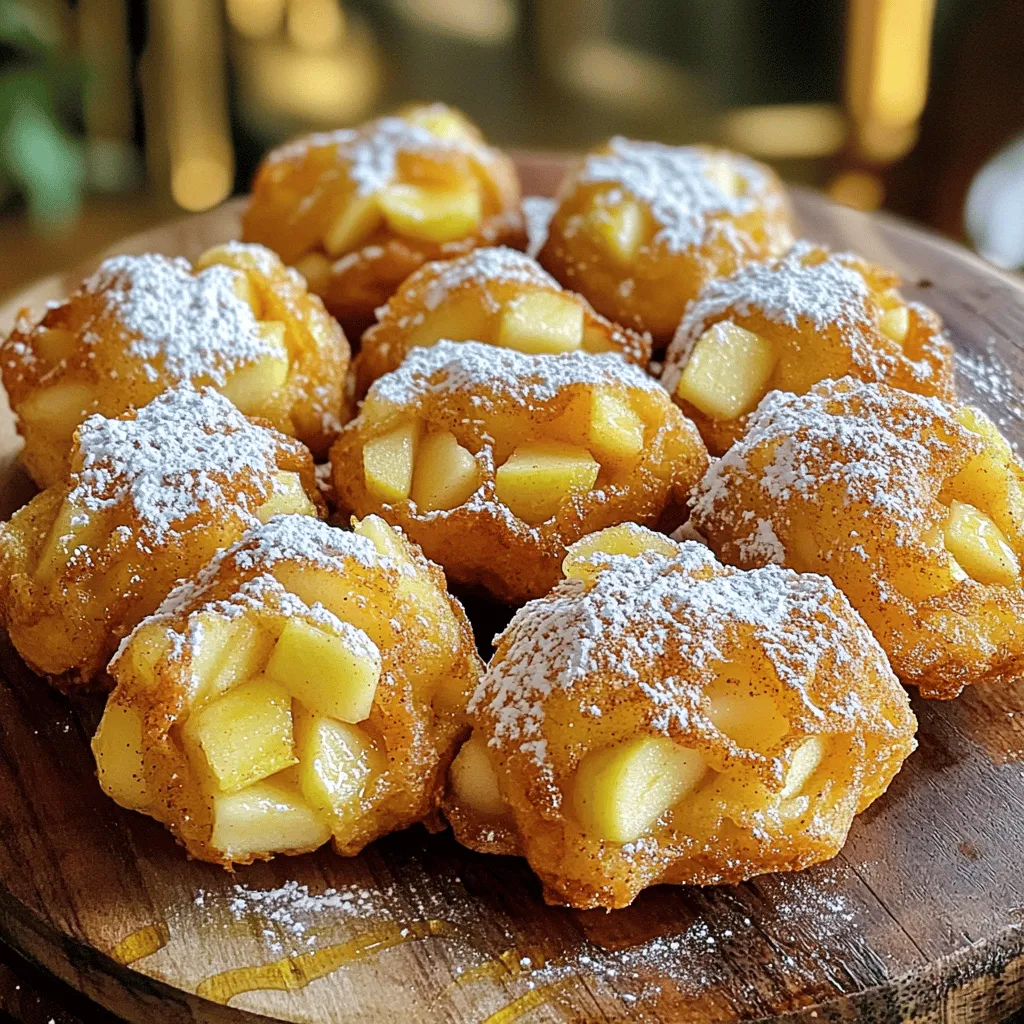
Apple Cinnamon Fritters Bakery Delightful Recipe
Are you ready to dive into a world of warm, sweet goodness? This Apple Cinnamon Fritters Bakery Delightful Recipe will
Are you ready to dive into a world of warm, sweet goodness? This Apple Cinnamon Fritters Bakery Delightful Recipe will
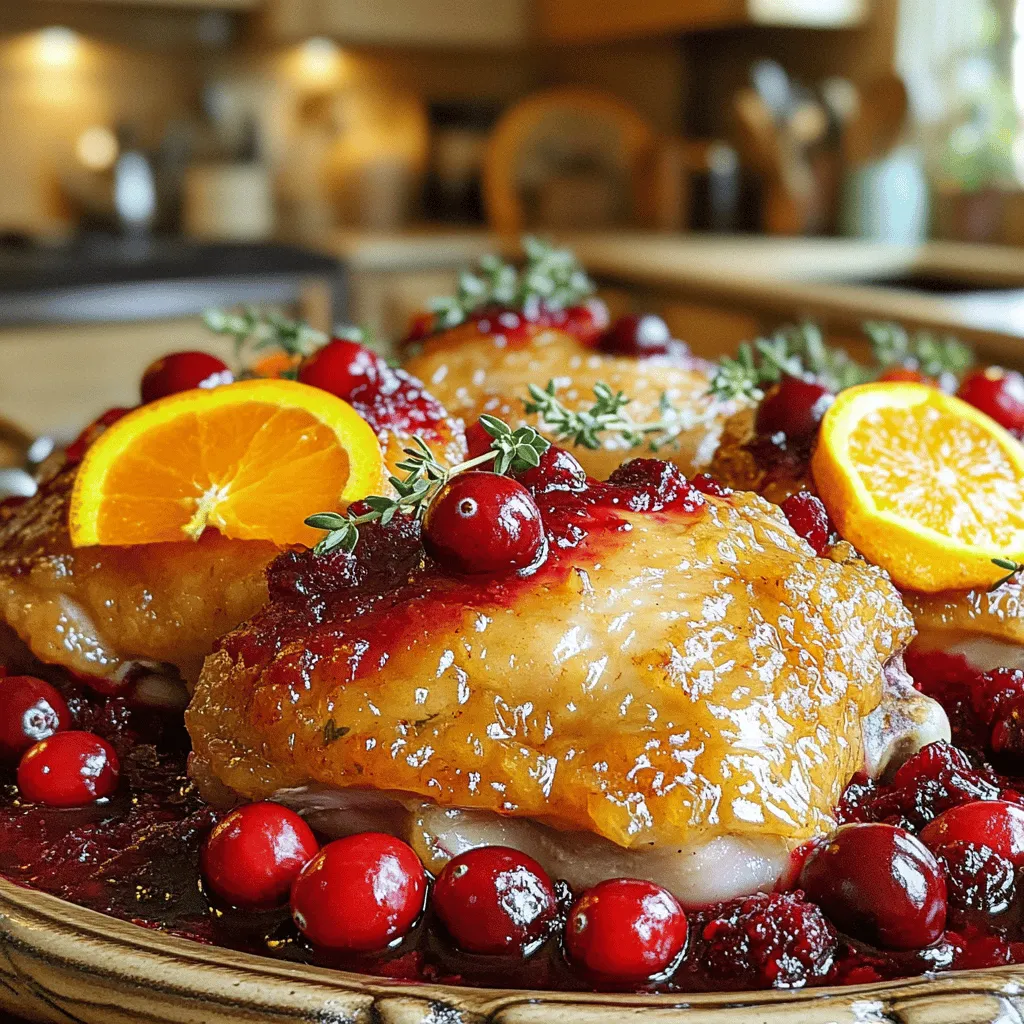
Are you ready for a meal that bursts with flavor and joy? My Slow Cooker Cranberry Orange Chicken Roast is
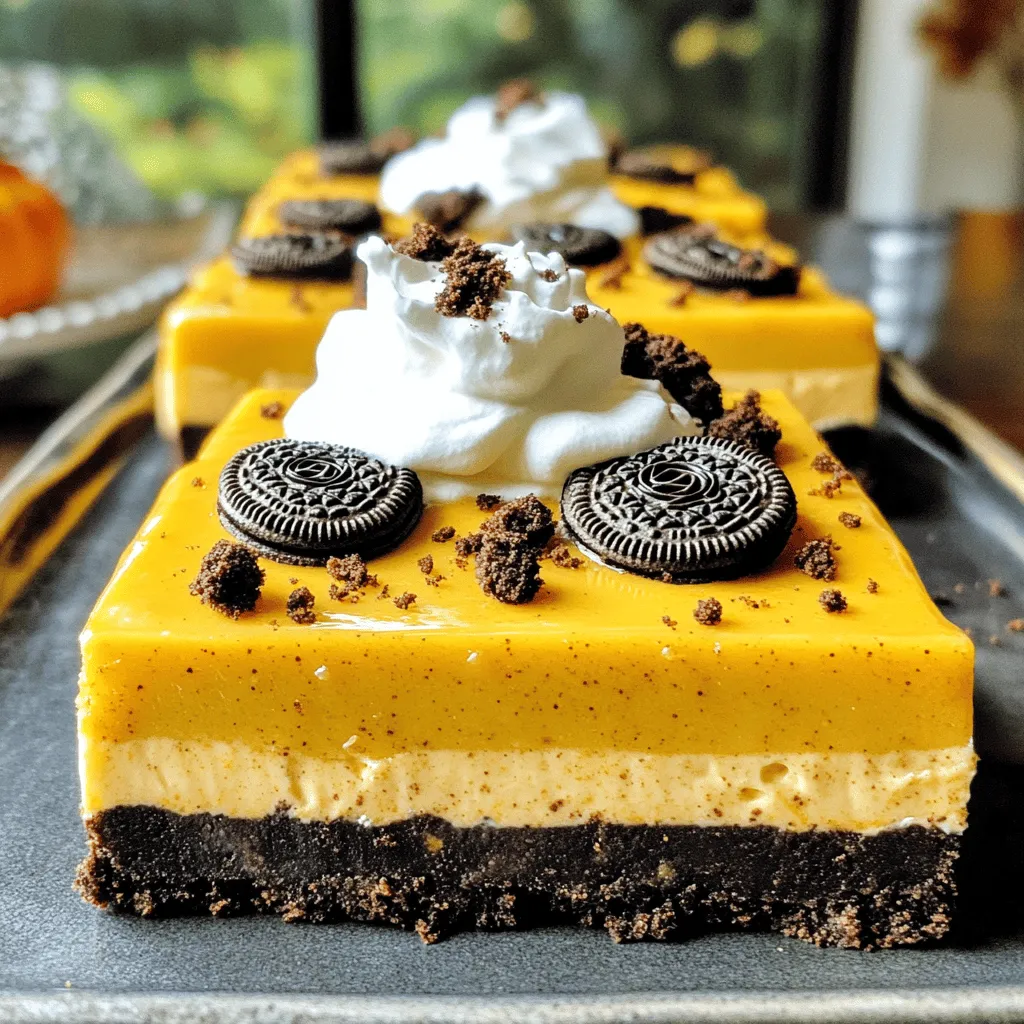
Craving a sweet treat but short on time? Look no further! These No-Bake Oreo Pumpkin Cheesecake Bars are an easy
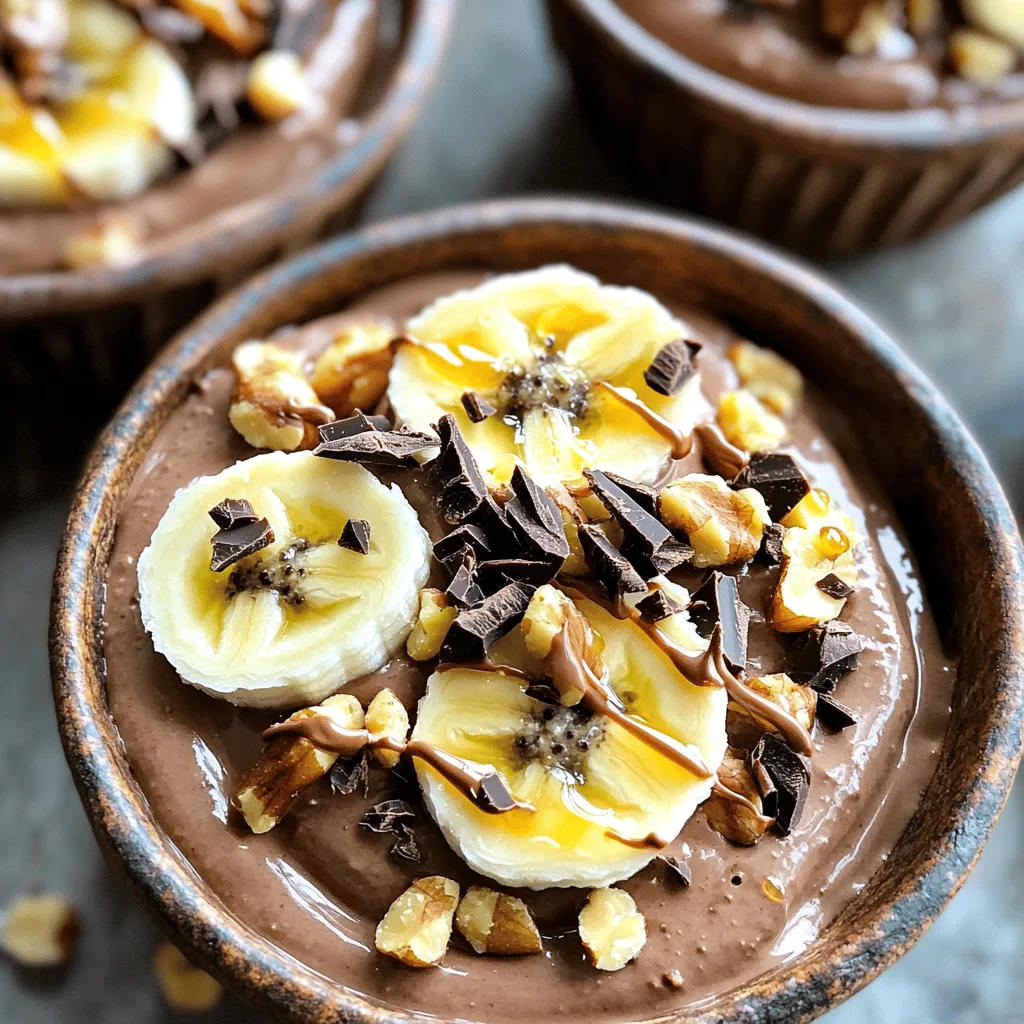
Looking for a tasty snack packed with protein? You’ll love these High-Protein Chocolate Peanut Butter Cottage Cheese Cups! They mix
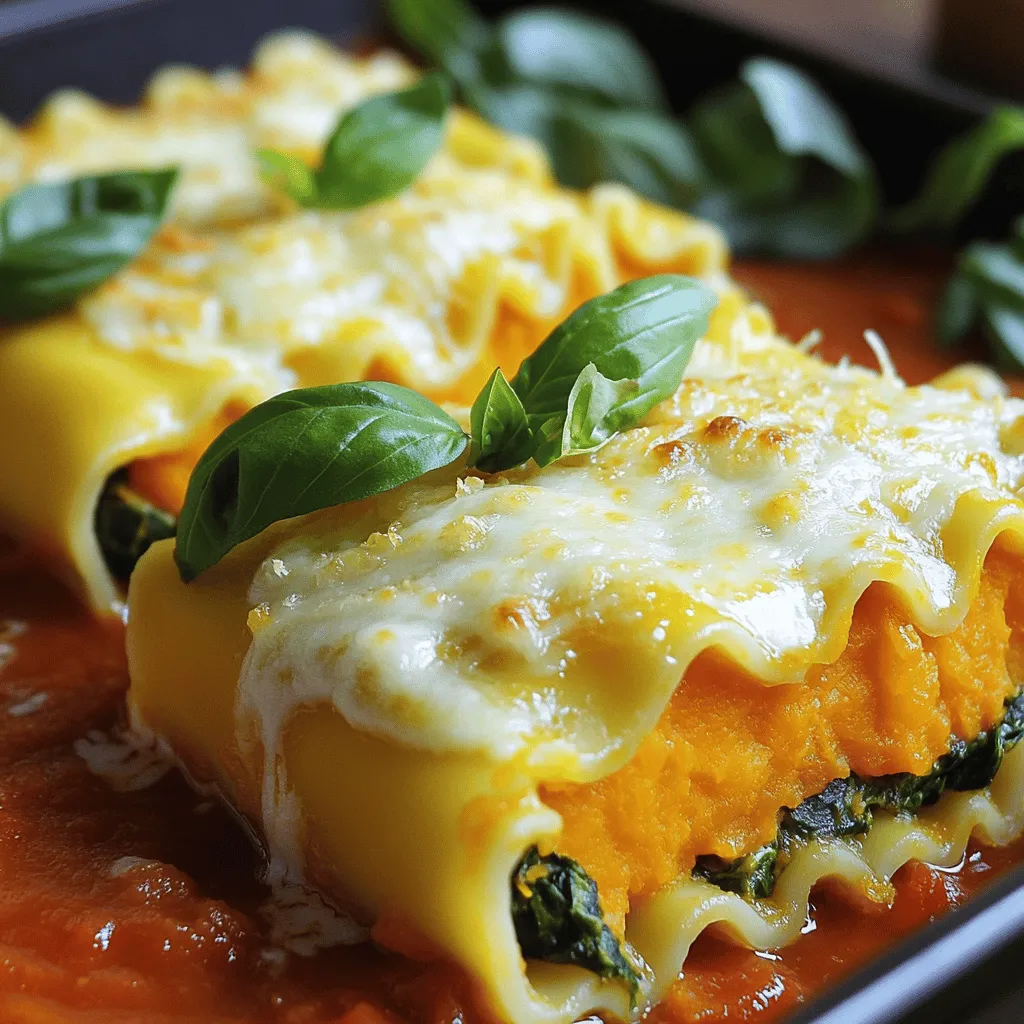
If you’re craving a warm and hearty meal, look no further! Butternut Squash and Spinach Lasagna Rolls are rich, cheesy,

Looking for a comforting meal that’s easy to make? You’ll love my Slow Cooker Creamy Sun-Dried Tomato Chicken Delight! With
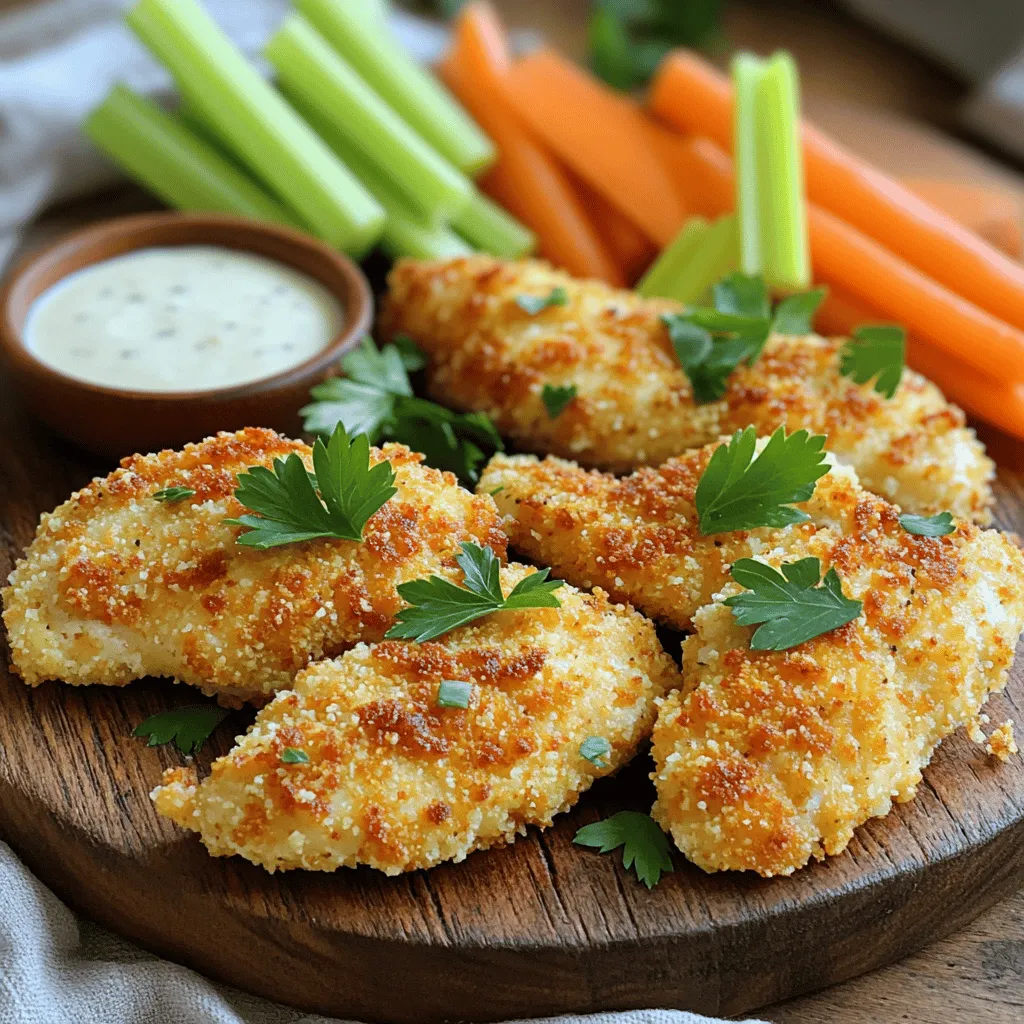
Looking for a quick and tasty meal? You’ve found it! My Air Fryer Crispy Ranch Chicken Tenders are sure to
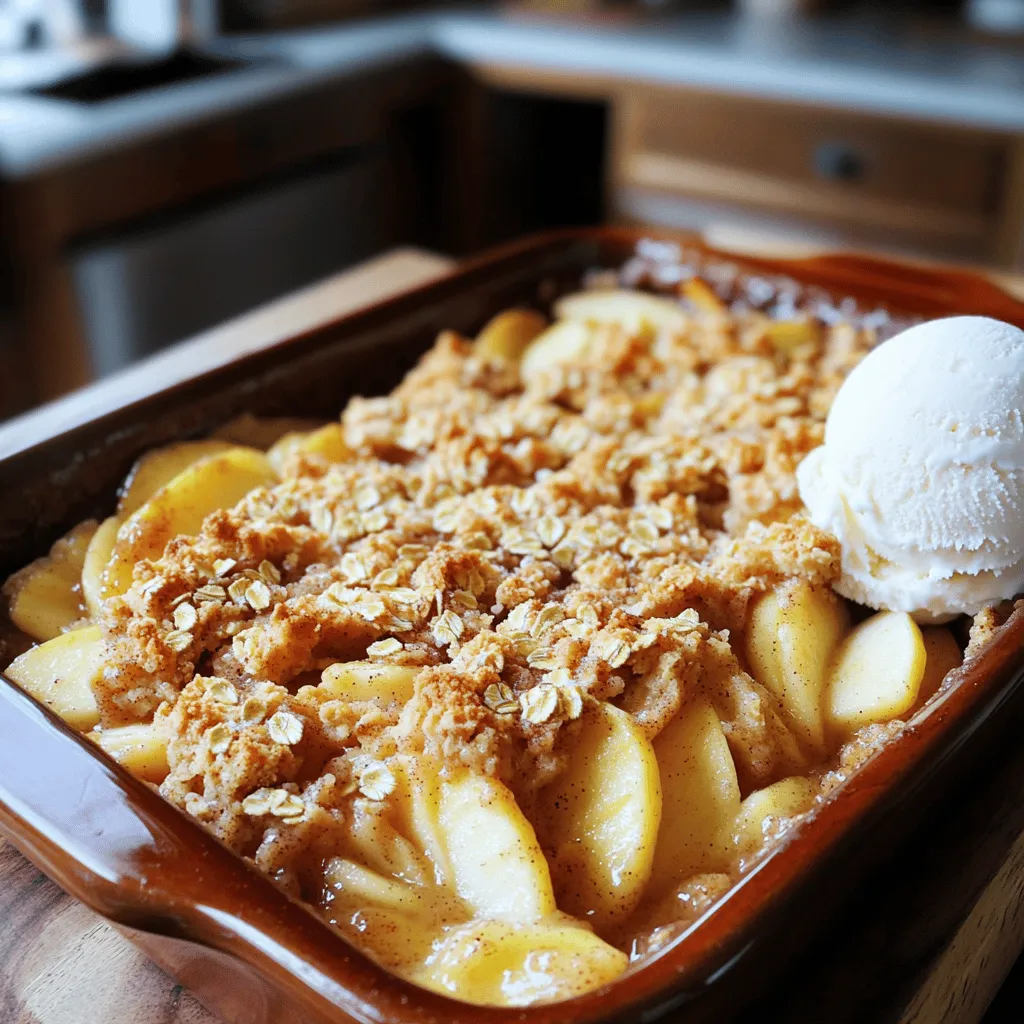
Imagine cozying up in your kitchen, filling the air with the warm scents of cinnamon and baked apples. My Warm

Get ready to indulge in fall flavors with my Pumpkin Spice Cheesecake Brownie Swirl Bars! These bars combine rich chocolate
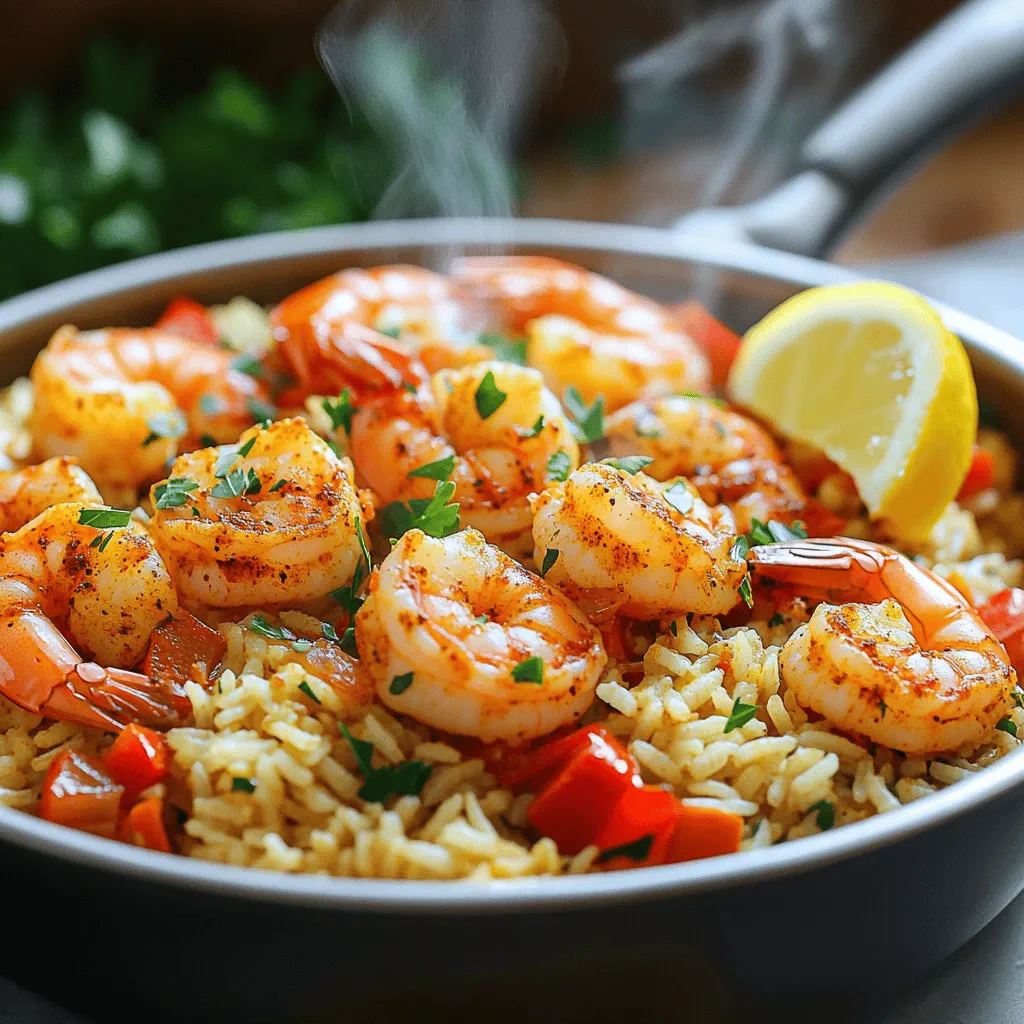
Discover a meal that packs a punch in flavor and ease! This One-Pot Spicy Cajun Shrimp and Rice combines bold
