Skip to content
DisclaimerTerms Of UseGDPR PolicyCookie Policy

Lisa Dishes

  • Home
  • Drinks
  • Appetizers
  • Dinner
  • Dessert
  • About
  • Contact
  • Privacy Policy
DisclaimerTerms Of UseGDPR PolicyCookie Policy

NO-ING-IMG

To make these tasty garlic chicken wings, you need a few key items: - 2 lbs chicken wings - 4 cloves garlic, minced - 2 tablespoons olive oil - 1 tablespoon soy sauce - 1 teaspoon onion powder - 1 teaspoon smoked paprika - 1 teaspoon black pepper - 1 teaspoon salt - 1 tablespoon fresh parsley, chopped (for garnish) These ingredients make a flavorful marinade that brings out the best in the chicken wings. You can add your own twist to the recipe. Here are some ideas: - 1 teaspoon cayenne pepper for heat - 1 tablespoon honey for a sweet touch - Fresh herbs, like thyme or rosemary, for added flavor Try these options to spice things up or make it sweeter. You can customize the wings to fit your taste. To cook the wings perfectly, gather these tools: - A large mixing bowl - An air fryer - A measuring spoon - A sharp knife for mincing garlic - A cutting board Having these tools ready will help you prepare the wings easily. They make the cooking process smooth and fun. Start by gathering your ingredients. You need garlic, olive oil, soy sauce, onion powder, smoked paprika, black pepper, and salt. In a large bowl, add the minced garlic, olive oil, soy sauce, onion powder, smoked paprika, black pepper, and salt. Mix them well to form a smooth marinade. This mix will coat the chicken wings and add great flavor. Now it’s time to add the chicken wings. Place the wings in the bowl with the marinade. Make sure each wing is well coated. This step is crucial. Cover the bowl and put it in the fridge. Let the wings marinate for at least 30 minutes. This allows the flavors to seep in, making them extra tasty. Preheat your air fryer to 380°F (193°C) for about 5 minutes. This step helps to crisp the wings. After preheating, take your marinated wings and place them in the air fryer basket. Arrange them in a single layer. You might need to cook in batches if your air fryer is small. Cook the wings for 25-30 minutes, shaking the basket halfway through. This ensures even cooking. You want them to be golden brown and crispy. After cooking, let the wings rest for a few minutes. Garnish them with chopped fresh parsley before serving. Enjoy your flavorful treat! To get crispy wings, use a good marinade. The olive oil helps a lot. Make sure to coat each wing well. This will help create that golden crunchy texture we all love. Shaking the basket halfway through cooking is key. It ensures that every side gets that nice crisp. Every air fryer is a bit different. Some cook faster than others. If your wings look golden before the time is up, take them out. If they need more time, add a few minutes. Always check on them to avoid overcooking. This way, you’ll get juicy wings every time. These wings go well with many sides. Try serving them with celery sticks and ranch dressing. You can also serve them with a cool salad. For drinks, try a cold beer or lemonade. The wings are tasty on their own but pair well with dips too! {{image_2}} You can easily change up the taste of your garlic chicken wings. If you like spicy, add some hot sauce or red pepper flakes to the marinade. For a sweet twist, mix in honey or maple syrup. You can even try adding citrus zest for a fresh flavor. Experiment with different spices to find what you enjoy most. If you follow a gluten-free diet, simply swap out soy sauce for tamari or coconut aminos. Both taste great and keep the wings flavorful. For a Paleo option, use a natural sweetener like honey and skip the soy sauce. Always check labels to ensure your ingredients fit your diet. If you don’t have an air fryer, you can still enjoy these wings. To bake them, preheat your oven to 400°F (200°C). Place the wings on a baking sheet lined with parchment paper. Bake for 40-45 minutes, flipping halfway through for even cooking. For deep-frying, heat oil in a pot to 350°F (175°C) and fry the wings for about 10-12 minutes. Both methods yield crispy, tasty wings! Store any leftover chicken wings in an airtight container. Place them in the fridge. They stay fresh for about 3 to 4 days. Make sure they cool down before sealing them. This helps keep the skin crispy. To reheat your wings, use the air fryer again. Set it to 350°F (175°C). Cook for about 5 to 8 minutes. This keeps them crispy and hot. You can also use an oven. Bake them at 350°F (175°C) for 10 to 15 minutes. Flip them halfway for even heating. You can freeze the wings too! Place the cooled wings in a freezer-safe bag. Remove as much air as you can. They last up to 3 months in the freezer. When ready to eat, thaw them in the fridge overnight. Reheat them in the air fryer for the best taste. Cook chicken wings in the air fryer for 25 to 30 minutes. Start by preheating the air fryer to 380°F (193°C). Place the wings in a single layer. Shake the basket halfway through cooking. This helps them cook evenly and get crispy. Yes, you can use frozen chicken wings. However, they will need a longer cooking time. Cook them for about 30 to 35 minutes. Shake the basket halfway to ensure even cooking. Make sure the wings reach an internal temperature of 165°F (74°C). Garlic chicken wings pair well with many sauces. Here are a few favorites: - Ranch dressing - Blue cheese dressing - Honey mustard - Spicy buffalo sauce - Barbecue sauce These sauces add extra flavor and make your meal even more fun! You learned about making air fryer garlic chicken wings from scratch. First, gather essential ingredients and tools. Then, follow the steps to marinate, cook, and serve. Use tips for crispiness and adjust for your air fryer. Explore flavor variations and cooking methods too. In summary, these wings bring joy to any meal. Enjoy them fresh or store leftovers for later. With these tips, every bite will be tasty.

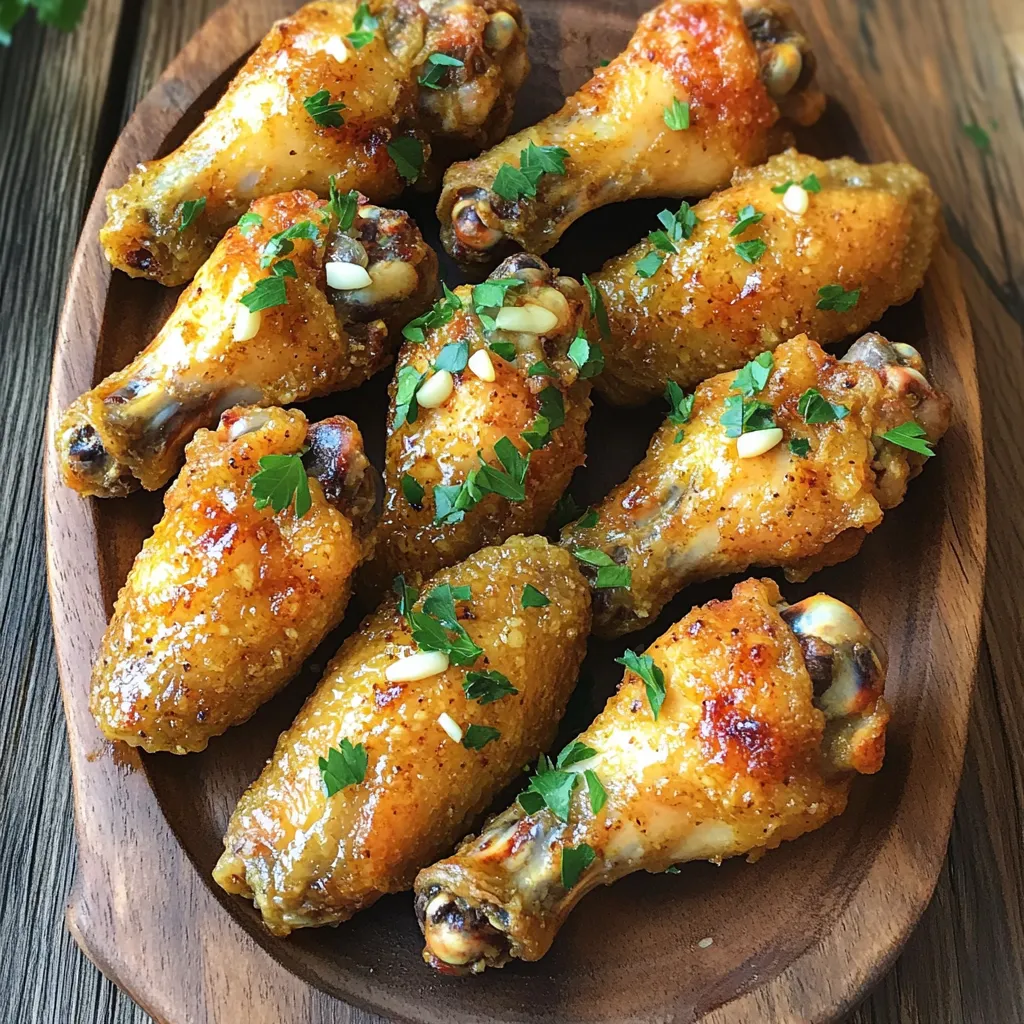
Air Fryer Garlic Chicken Wings Juicy and Flavorful Treat

Craving juicy and flavorful chicken wings? You’re in the right place! My Air Fryer Garlic Chicken Wings are packed with

To make the No Bake Chocolate Peanut Butter Cheesecake, you need several key ingredients. Here’s what you will need: - 1 cup digestive biscuits or graham cracker crumbs - 1/2 cup unsalted butter, melted - 1 cup cream cheese, softened - 1 cup smooth peanut butter - 1/2 cup powdered sugar - 1 teaspoon vanilla extract - 1 cup heavy whipping cream - 1/2 cup semi-sweet chocolate chips (for melting) - 1/4 cup chocolate chips (for garnish) Each ingredient plays a vital role in creating this delight. The digestive biscuits or graham crackers form the crust. The melted butter binds them well. Cream cheese and peanut butter create a rich and creamy filling. Powdered sugar adds sweetness, while vanilla enhances flavor. Heavy whipping cream gives the cheesecake its light texture. Semi-sweet chocolate makes it extra indulgent and delicious. Finally, the extra chocolate chips serve as a fun garnish. Gather these ingredients before you start. This will make your baking process smooth and enjoyable. Each step is simple, and having everything ready helps you focus on the fun part: creating a delicious dessert! To start, you need to mix the biscuit crumbs with the melted butter. In a medium bowl, combine 1 cup of digestive biscuit crumbs and 1/2 cup of unsalted butter. Stir until all the crumbs get coated. This mixture will be your crust. Next, you’ll form the crust. Press the crumb mixture firmly into the bottom of a 9-inch springform pan. Use the back of a spoon to pack it tightly. Once it looks even, place the pan in the fridge. This helps set the crust while you prepare the filling. Now, let's make the cheesecake filling. In a large mixing bowl, combine 1 cup of softened cream cheese, 1 cup of smooth peanut butter, 1/2 cup of powdered sugar, and 1 teaspoon of vanilla extract. Beat these together until smooth and creamy. Next, you will whip the heavy cream. In a separate bowl, whip 1 cup of heavy whipping cream until stiff peaks form. Gently fold this whipped cream into the peanut butter mixture. Be careful not to deflate the whipped cream. For the final assembly, start by melting the chocolate. In a small bowl, microwave 1/2 cup of semi-sweet chocolate chips in 20-second intervals. Stir until the chocolate is melted and smooth. Let it cool slightly. Now, fold the melted chocolate into the cheesecake mixture. Make sure it’s evenly mixed. Pour the cheesecake filling over the chilled crust. Spread it evenly with a spatula. Finally, cover the cheesecake with plastic wrap and refrigerate for at least 4 hours. For the best results, chill it overnight. Enjoy your delicious creation! - Ensuring cream cheese is softened: Start with cream cheese at room temperature. This helps it blend smoothly. Cold cream cheese makes it hard to mix. Let it sit out for about 30 minutes before use. - Properly whipping the heavy cream: Whip the cream until it forms stiff peaks. This adds fluffiness to your cheesecake. Be gentle when folding it into the mixture. This keeps the air in, making the cheesecake light. - Serving ideas and garnish options: Slice the cheesecake into wedges for serving. Place them on individual plates for a nice touch. - Chocolate drizzle and crushed peanuts: Drizzle melted chocolate on top before serving. Sprinkle crushed peanuts for added crunch and beauty. This makes the cheesecake look extra special. - Overmixing the cheesecake filling: Mix just until smooth. Overmixing can lead to a runny texture. This can ruin the perfect cheesecake. - Not chilling adequately: Chill the cheesecake for at least four hours. For best results, chill overnight. This helps the flavors meld and the texture set perfectly. {{image_2}} You can switch up the nut butter in this cheesecake. Try almond or cashew butter for a new taste. Each nut butter brings its own flavor. You can also swap the chocolate. Use dark chocolate for a richer taste or white chocolate for a sweeter treat. Each choice offers a fun twist on the classic recipe. If you need a gluten-free crust, use gluten-free biscuits. They work just as well and taste great. For a dairy-free version, use dairy-free cream cheese and coconut cream instead of heavy cream. This keeps the cheesecake creamy without dairy. These swaps make the cheesecake friendly for various diets. Serve this cheesecake with fresh fruits like strawberries or raspberries. They add a nice tartness to balance the rich flavors. You can also drizzle chocolate sauce or caramel sauce on top. For a fun twist, make mini cheesecake bites. Use a muffin tin for small servings that are perfect for parties. To keep your cheesecake fresh, store leftovers in the fridge. Place it in an airtight container. If you have a slice or two left, use plastic wrap to cover it well. You can also freeze the cheesecake for longer storage. Cut it into slices, wrap each slice in plastic wrap, and place them in a freezer-safe bag. This way, you can enjoy it later! In the fridge, your cheesecake lasts about five days. After that, the taste and texture may change. Look for signs of spoilage, like a sour smell or a change in color. If you see any mold, it’s best to toss it out. When you’re ready to serve, take the cheesecake out of the fridge. Let it sit for about 15 minutes at room temperature. This helps bring back the creamy texture. If you froze it, move it to the fridge overnight to thaw. Once thawed, you can add a drizzle of melted chocolate or whipped cream for extra flair! Yes, you can make this cheesecake ahead of time. I often prepare it the day before serving. The recommended chilling time is at least 4 hours. For the best texture, chill it overnight. This allows the flavors to meld and the cheesecake to set well. Yes, you can substitute ingredients if needed. For a dairy-free version, use plant-based cream cheese and nut butters. You can also use coconut cream instead of heavy whipping cream. For a gluten-free option, swap the digestive biscuits with gluten-free graham crackers. You can tell the cheesecake is set when it feels firm to the touch. It should not jiggle in the center. The texture will be smooth and creamy, not runny. If it holds its shape when cut, it's ready to serve. You have a few options for chocolate types. You can use dark chocolate for a richer taste. Milk chocolate gives a sweeter flavor. If you want something different, try white chocolate or even carob chips for a unique twist. This blog post detailed how to make a delicious cheesecake. We covered the needed ingredients, step-by-step instructions, and helpful tips. You learned about variations for different tastes and dietary needs. We also discussed the best ways to store your cheesecake. In the end, enjoy creating your own tasty dessert, tailored to your preferences. With practice, you’ll master this recipe and impress your friends and family. Happy baking!

No Bake Chocolate Peanut Butter Cheesecake Delight

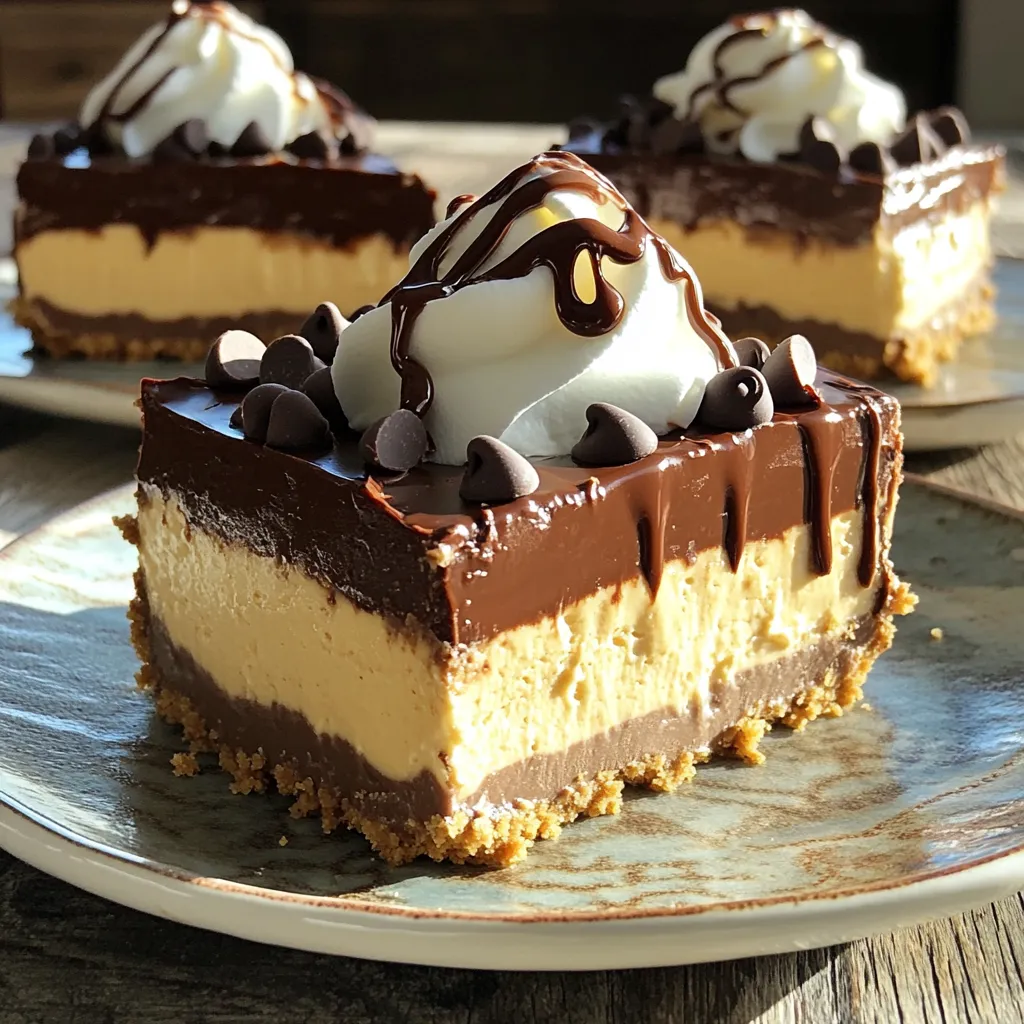
Are you ready for a dessert that combines rich chocolate and creamy peanut butter? This No Bake Chocolate Peanut Butter

- 8 oz penne pasta - 1 lb Italian chicken sausage, casings removed - 1 tablespoon olive oil - 1 medium onion, diced - 3 cloves garlic, minced - 1 can (14.5 oz) diced tomatoes, with juices - 1 cup fresh spinach, roughly chopped - 1/2 cup chicken broth (low-sodium) - 1 teaspoon dried oregano - 1 teaspoon red pepper flakes (optional) - Salt and black pepper to taste - 1/4 cup grated Parmesan cheese, plus more for serving - Fresh basil leaves for garnish These ingredients create a rich and tasty Tuscan sausage pasta. Each item adds a unique flavor. Penne pasta serves as a hearty base. It holds the sauce well and absorbs the flavors. Italian chicken sausage brings protein and spice. It creates a savory depth that makes each bite satisfying. Olive oil adds richness and helps sauté the onion and garlic. Diced onion gives sweetness, while garlic adds a punch of flavor. Together, they create a fragrant base. Diced tomatoes add moisture and acidity. They bring brightness to the dish. Chicken broth enhances the sauce, making it more savory. Spinach adds color and nutrients, making the meal more balanced. Dried oregano gives an earthy note, while red pepper flakes can add heat. Lastly, Parmesan cheese brings creaminess and umami. Fresh basil leaves add a burst of freshness when served. Gather these ingredients to create a delicious meal in no time. Start by boiling water in a large pot. Add salt to the water for flavor. Once boiling, add the penne pasta. Cook the pasta according to the package instructions. It usually takes about 8-10 minutes. When it’s done, drain it and set it aside. This will be the base for your dish. In a large skillet, heat one tablespoon of olive oil over medium heat. Once hot, add the diced onion. Cook it for about 3-4 minutes until it turns soft and clear. Then, add the minced garlic. Stir it for one minute. This step adds a great aroma. Next, add the Italian chicken sausage. Break it apart with a wooden spoon. Cook this for about 5-7 minutes, until it’s fully browned. Now, add the can of diced tomatoes with juices to the skillet. Pour in the chicken broth and stir well. Add the dried oregano and optional red pepper flakes for some heat. Bring the mixture to a simmer. Once simmering, toss in the chopped spinach and cooked penne pasta. Mix everything together well. Cook for 2-3 more minutes. This lets the spinach wilt and the flavors blend. Finally, season with salt and black pepper. Stir in the grated Parmesan cheese until well mixed. Remove from heat and serve warm. Garnish with fresh basil leaves and more cheese if you like. Enjoy your meal! Choosing the right sausage is key. I prefer Italian chicken sausage for its flavor and lower fat. Look for fresh sausage with a good spice mix. Check for no fillers or additives. A quality sausage makes a huge difference in taste. Spices bring the dish to life. I add dried oregano for an earthy taste. Red pepper flakes give a kick, but use them to your liking. Fresh herbs, like basil, add brightness at the end. Don't forget to taste as you go to find the perfect balance. Cooking pasta correctly is important. Use a large pot with plenty of water. Salt the water well before adding pasta. This helps the pasta absorb flavor. Cook until just al dente, as it will continue cooking in the skillet. Drain it, but don’t rinse; you want that starch to help sauce stick. {{image_2}} If you're looking for substitutes, I have some great options. For a gluten-free version, swap penne pasta with gluten-free pasta. You can also use turkey sausage or plant-based sausage for a lighter meal. If you need a dairy-free dish, skip the Parmesan cheese or use a vegan alternative. These swaps keep the meal tasty while fitting your diet. You can easily boost the nutrition by adding more veggies. Try bell peppers, zucchini, or mushrooms. Just sauté them with the onions for extra flavor. If you want more protein, add cooked chickpeas or lentils. They soak up the sauce well and add great texture. While I love penne, feel free to use other pasta shapes. Fusilli, rotini, or farfalle work nicely too. The key is to choose a pasta that holds onto the sauce. This makes each bite delicious and satisfying. Experiment with your favorites and enjoy a new twist on this classic dish! After enjoying your Tuscan sausage pasta, store leftovers in an airtight container. Allow the dish to cool down before sealing. Keep it in the fridge for up to three days. This helps maintain freshness and flavor. To freeze, place the cooled pasta in a freezer-safe container. Make sure to leave space at the top for expansion. It can last in the freezer for up to three months. When you're ready to eat, simply thaw in the fridge overnight. For best results when reheating, use a skillet on low heat. Add a splash of chicken broth or water to keep it moist. Stir occasionally until heated through. You can also microwave it in short intervals, stirring between each. Enjoy your meal just as tasty as the first time! Tuscan sausage pasta lasts about 3 to 5 days in the fridge. Store it in an airtight container. When you want to eat it, just reheat it well. Yes, you can make this dish ahead. Cook it fully and cool it down. Store it in the fridge. When you are ready to eat, just heat it back up. You can serve this pasta with a fresh salad or garlic bread. A light green salad goes well with the rich flavors. Garlic bread adds a nice crunch and taste. For drinks, try a light white wine or sparkling water. This blog post covered key ingredients, cooking steps, and tips for Tuscan sausage pasta. I shared how to choose the best sausage and improve flavor with spices. You learned about variations, storage, and answers to common questions. With this knowledge, you can create a tasty meal anytime. Enjoy experimenting and sharing your pasta dishes with friends and family!

Tuscan Sausage Pasta Skillet Quick and Flavorful Meal

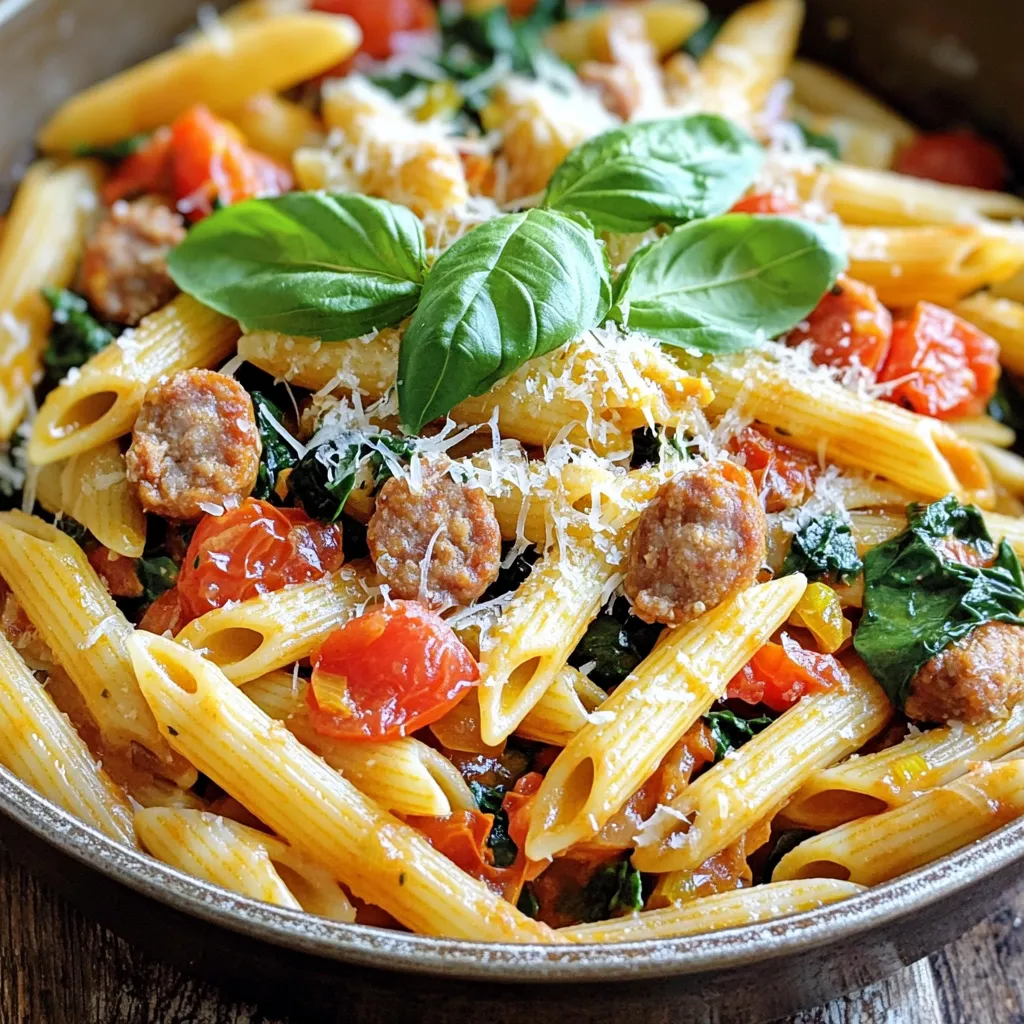
Looking for a quick, tasty meal that impresses? You’re in the right place! This Tuscan Sausage Pasta Skillet packs bold

Chicken and Mushroom Components - 4 boneless, skinless chicken breasts - 8 oz. cremini mushrooms, sliced - 1 medium onion, diced - 3 cloves garlic, minced Seasonings and Liquids - 1 cup low-sodium chicken broth - 1 cup heavy cream - 1 teaspoon dried thyme - 1 teaspoon dried rosemary - Salt and pepper to taste - 2 tablespoons olive oil Garnish and Serving Suggestions - Fresh parsley, chopped (for garnish) For the best slow cooker creamy mushroom chicken, you need the right ingredients. Start with fresh chicken breasts. They should be boneless and skinless for easy cooking. The cremini mushrooms add a rich flavor. Slicing them keeps them tender in the sauce. A medium onion and minced garlic provide a great base for taste. For liquids, use low-sodium chicken broth. This keeps the dish flavorful but not too salty. Heavy cream makes the sauce rich and creamy. Seasonings like thyme and rosemary give it a lovely aroma. Don't forget the salt and pepper. They enhance every bite. Lastly, fresh parsley adds color and freshness. Chop it finely for a beautiful garnish. You can serve this dish over fluffy rice or creamy mashed potatoes. It makes every plate look inviting. Seasoning and Searing First, take the four chicken breasts. Season them with salt and pepper. Heat two tablespoons of olive oil in a skillet over medium heat. When the oil is hot, sear the chicken breasts for about three to four minutes on each side. You want them to be lightly browned. This step adds flavor and locks in juices. Setting Aside the Chicken Once the chicken is browned, remove it from the skillet. Set it aside on a plate. This allows the chicken to rest while you cook the vegetables. Sautéing Onions and Mushrooms In the same skillet, add one diced onion, three minced garlic cloves, and eight ounces of sliced cremini mushrooms. Sauté this mixture for about five minutes. You want the mushrooms to be tender and the onions to be translucent. This step builds a rich flavor base for your dish. Combining Ingredients in the Slow Cooker Now, grab your slow cooker. Place the seared chicken breasts at the bottom. Top them with the sautéed mushrooms and onions. Pour in one cup of low-sodium chicken broth. Sprinkle one teaspoon of dried thyme and one teaspoon of dried rosemary on top. This adds great depth to your dish. Cooking Times on Low and High Settings Cover the slow cooker and set it to low for six to seven hours. You can also set it to high for three to four hours. The low setting gives the best flavor, but both options work well. Final Steps for Creamy Sauce When cooking time is up, remove the chicken breasts and set them aside again. Stir one cup of heavy cream into the mushroom mixture in the slow cooker. Mix well until combined. Finally, return the chicken to the slow cooker. Coat it with the creamy mushroom sauce and let it cook for another 15 minutes on low. This makes the sauce rich and creamy. Achieving the Right Creaminess To get that perfect creamy texture, use heavy cream. This gives the sauce a rich flavor. If you want it lighter, try half-and-half. You can also add a bit of cream cheese for extra smoothness. Mix it in slowly to blend well. If the sauce seems too thick, add a splash of chicken broth. This keeps it creamy but not too heavy. Adjusting Seasonings for Personal Taste Taste is key! Start with salt and pepper, then add herbs. Thyme and rosemary work great, but feel free to try others. If you like it spicy, add some red pepper flakes. For a fresher flavor, toss in lemon juice right before serving. Always taste as you go. This way, you can make it just right for you. Best Practices for Meal Prep You can prep this dish in advance. Season and sear the chicken a day before. Store it in the fridge until you are ready to cook. Chop your onions and mushrooms ahead too. Keep them in airtight containers. This saves you time on cooking day. Time-Saving Tips Use a slow cooker liner for easy clean-up. This saves you from scrubbing later. If you are short on time, use pre-sliced mushrooms. They cut down on prep time. You can also freeze leftovers for another meal. Just reheat and enjoy! {{image_2}} Using Different Mushrooms You can switch up the mushrooms in this recipe. Try shiitake, button, or portobello mushrooms. Each type gives a unique taste. Shiitake mushrooms bring a rich, earthy flavor. Button mushrooms offer a mild taste. Portobello mushrooms add a meaty texture. Feel free to mix and match for fun flavors! Substituting Chicken for Other Proteins If you want to change the protein, use turkey or pork. You can also use tofu for a plant-based option. Tofu absorbs the creamy sauce well. Just make sure to cut it into cubes. Cook it a bit longer if using larger pieces. Each protein brings its own flavor and texture to the dish. Making It Low-Fat or Dairy-Free To make this dish low-fat, use low-fat cream or Greek yogurt. You can also use coconut milk for a dairy-free version. This will still give you a creamy texture but cut down the calories. Adjust the seasoning to suit your taste. Use fresh herbs for added flavor without extra fat. Ideas for Gluten-Free Options For a gluten-free version, ensure your chicken broth is gluten-free. Most commercial brands are safe, but always check the label. You can serve this dish with rice or gluten-free pasta. Both options work great with the creamy sauce. Enjoy a delicious meal without worries about gluten! How long does Slow Cooker Creamy Mushroom Chicken last in the fridge? It stays fresh for up to four days. Keep it in an airtight container to maintain its flavor. What are the best storage containers? Use glass or plastic containers with tight lids. These will help keep the chicken moist and flavorful. How do you safely freeze this dish? First, let it cool to room temperature. Then, portion it into freezer-safe bags or containers. Remove as much air as possible before sealing. This will prevent freezer burn and keep the dish tasty. What are the reheating tips? Thaw it in the fridge overnight before reheating. You can warm it in a skillet on low heat or in the microwave. Add a splash of chicken broth or cream to keep it creamy. Enjoy the rich flavors! Can I use frozen chicken? Yes, you can use frozen chicken. Just add an extra hour to the cooking time. This ensures the chicken cooks all the way through without drying out. How do I thicken the sauce? To thicken the sauce, you can mix a bit of cornstarch with cold water. Stir it into the sauce about 15 minutes before serving. This will give it a nice, creamy texture. What to serve with creamy mushroom chicken? I love to serve this dish over fluffy rice or creamy mashed potatoes. The sauce pairs well with both. You can also add a side of steamed veggies for a fresh touch. How to enhance the flavor profile? Adding a splash of white wine to the slow cooker can boost the flavor. You can also try fresh herbs like thyme or rosemary. These will add depth to your dish. Can I add more vegetables? Absolutely! You can add vegetables like carrots, peas, or bell peppers. Just chop them small so they cook evenly with the chicken. What if I don’t have a slow cooker? If you lack a slow cooker, use a heavy pot with a lid. Cook it on low heat on the stove. Stir it occasionally to prevent sticking. This method gives you similar results. This blog post gave you a clear guide for making creamy mushroom chicken. We covered the ingredients, step-by-step instructions, and helpful tips. Plus, you learned about variations and storage options. Now, you have everything needed to create this dish. Enjoy the process, and don't be afraid to make it your own! Happy cooking!

Savory Slow Cooker Creamy Mushroom Chicken Recipe

If you’re craving a hearty meal that cooks itself, then my Savory Slow Cooker Creamy Mushroom Chicken recipe is perfect

- 2 medium sweet potatoes, peeled and diced - 1 can (15 oz) black beans, rinsed and drained - 1 cup fresh spinach, roughly chopped Sweet potatoes give these quesadillas a sweet and earthy flavor. I like to peel and dice them, then boil until soft. Black beans add protein and fiber. They create a hearty filling. Fresh spinach brings a nice touch of color and nutrition. It wilts perfectly when mixed in. - 1 teaspoon cumin - 1 teaspoon chili powder - 1/2 teaspoon garlic powder - Salt and pepper to taste Spices elevate the taste. Cumin adds warmth, while chili powder gives a slight kick. Garlic powder enhances the overall flavor. Salt and pepper balance everything out. Adjust these to your liking for extra flavor. - 4 large flour tortillas - 1 cup cheese (cheddar, mozzarella, or a blend) Flour tortillas are soft and perfect for wrapping. You can use different cheese based on your taste. Cheddar offers a sharp taste, while mozzarella melts beautifully. Mixing cheeses can create a delightful blend of flavors. Choose your favorites for a personal touch! First, we need to cook the sweet potatoes. Boil a pot of salted water. Add the diced sweet potatoes and cook for about 10 to 12 minutes. You want them fork-tender. Drain them when they are done. Next, we will mash the sweet potatoes. Place the cooked sweet potatoes in a large bowl. Use a fork or potato masher to break them down. Now, let’s add some flavor! Mix in 1 teaspoon of cumin, 1 teaspoon of chili powder, 1/2 teaspoon of garlic powder, and a pinch of salt and pepper. This will make the sweet potatoes taste amazing! Now, it’s time to add more goodness. Take a can of black beans, rinse, and drain them. Add the black beans to the mashed sweet potatoes. Next, chop 1 cup of fresh spinach and fold it in too. Mix everything until it combines well. The colors will be vibrant and inviting! Let’s build our quesadillas. Take a large flour tortilla and place it on a flat surface. On one half of the tortilla, spread a good amount of the sweet potato mixture. Top that with a sprinkle of cheese. I like using cheddar or mozzarella. Now, fold the tortilla over to form a half-moon shape. We will cook these in a skillet. Heat 1 tablespoon of olive oil over medium heat. Place the quesadilla in the skillet and cook for 3 to 4 minutes on each side. You want the tortilla to be golden brown and the cheese melted. Don’t rush this step; a golden color means crispy perfection! Repeat with the rest of the tortillas, adding more oil as needed. To ensure the cheese melts well, use grated cheese. Grated cheese melts faster than slices. Spread it evenly over the sweet potato mixture. This helps make every bite cheesy and delicious. To get a crispy tortilla, heat your skillet before adding oil. Use medium heat. Add just enough olive oil to coat the skillet lightly. Cooking each quesadilla for 3-4 minutes on each side gives a nice golden color. Flip carefully to avoid spills. Want to spice things up? Consider adding a pinch of cayenne pepper or smoked paprika. These spices elevate the flavor. You can also add diced jalapeños for heat. Mix them into the sweet potato blend for a kick. For toppings, fresh avocado slices are a great choice. They add creaminess. You can also serve with sour cream or Greek yogurt. Fresh cilantro on top gives a nice touch. It adds color and flavor. Scaling this recipe is easy. Just double or triple the ingredients as needed. Use larger skillets to cook more quesadillas at once. This saves time and keeps everyone happy. To keep quesadillas warm, place them in a low oven. Set it to about 200°F (93°C). Cover them with a clean kitchen towel to retain heat. This way, everyone can enjoy them hot and fresh. {{image_2}} You can make these quesadillas vegan by changing a few ingredients. First, swap the cheese for a plant-based alternative. Look for brands that melt well, like cashew or almond cheese. You can also use nutritional yeast for a cheesy flavor without dairy. Add more veggies to your filling for extra nutrients. Try bell peppers, zucchini, or mushrooms. They add great flavor and texture. Want to mix it up? Change the beans! You can use pinto beans or chickpeas instead of black beans. Both options offer a great taste. Seasonal veggies can shine in this dish. In summer, add corn or tomatoes for freshness. In fall, try adding roasted butternut squash. Each change keeps the dish exciting and tasty. If you need gluten-free options, look for gluten-free tortillas. Many stores offer them now. Just check the label to ensure they fit your needs. For a low-calorie version, reduce the cheese or use less oil when cooking. You can even use cooking spray instead. This way, you can enjoy quesadillas without guilt. To keep your sweet potato black bean quesadillas fresh, store them in the fridge. First, let them cool to room temperature. Then, wrap each quesadilla tightly in plastic wrap or aluminum foil. Place them in an airtight container. They last about 3-4 days in the fridge. When you’re ready to eat, you will have a quick and tasty meal waiting for you. If you want to save some for later, freezing is a great option. You can freeze them before or after cooking. For freezing before cooking, assemble the quesadillas as usual. Place them on a baking sheet in a single layer. Freeze for about 1 hour until firm. Then, wrap each one in plastic wrap and put them in a freezer-safe bag. For freezing cooked quesadillas, let them cool completely. Wrap them well and store in a freezer-safe container. They can last up to 2-3 months in the freezer. When you want to enjoy your quesadillas again, reheating them properly is key. For the best results, use a skillet. Heat it over medium heat and add a bit of oil. Place the quesadilla in the skillet and cook for about 3-4 minutes on each side. This method keeps the quesadilla crispy and the cheese melty. You can also use an oven. Preheat it to 350°F (175°C) and bake for about 10-15 minutes. This way, your quesadillas will be warm and delicious without falling apart. Yes, you can prepare these quesadillas in advance. Here are some tips for prep: - Cook the sweet potatoes: You can boil and mash them a day ahead. Store the mash in the fridge. - Mix the filling: Combine sweet potatoes, black beans, and spinach ahead. Keep it in an airtight container. - Assemble later: When you’re ready to eat, just assemble and cook the quesadillas. This saves time and keeps them fresh. These quesadillas pair well with many sides. Here are some ideas: - Fresh salad: A simple green salad can balance the meal. - Guacamole: Creamy avocado dip adds flavor and richness. - Salsa: Fresh or jarred salsa gives a nice kick. - Rice: Serve with brown or white rice for a filling meal. Making these quesadillas gluten-free is easy. Here’s how: - Swap tortillas: Use gluten-free tortillas. Many brands offer great options. - Check beans: Ensure the black beans are gluten-free. Most canned ones are safe. - Modify seasoning: Most spices are gluten-free, but check labels for cross-contamination. These swaps keep the dish tasty while meeting dietary needs. Sweet potato black bean quesadillas are simple, tasty, and healthy. We covered key ingredients like sweet potatoes, black beans, and spinach, plus spices to boost flavor. I shared steps to prepare, cook, and perfect these quesadillas. You learned tips for serving a crowd and creating variations, like vegan and gluten-free options. Now, you can enjoy a flavorful meal that suits many diets. Try out these ideas and make your quesadillas unique!

Sweet Potato Black Bean Quesadillas for Dinner Delight

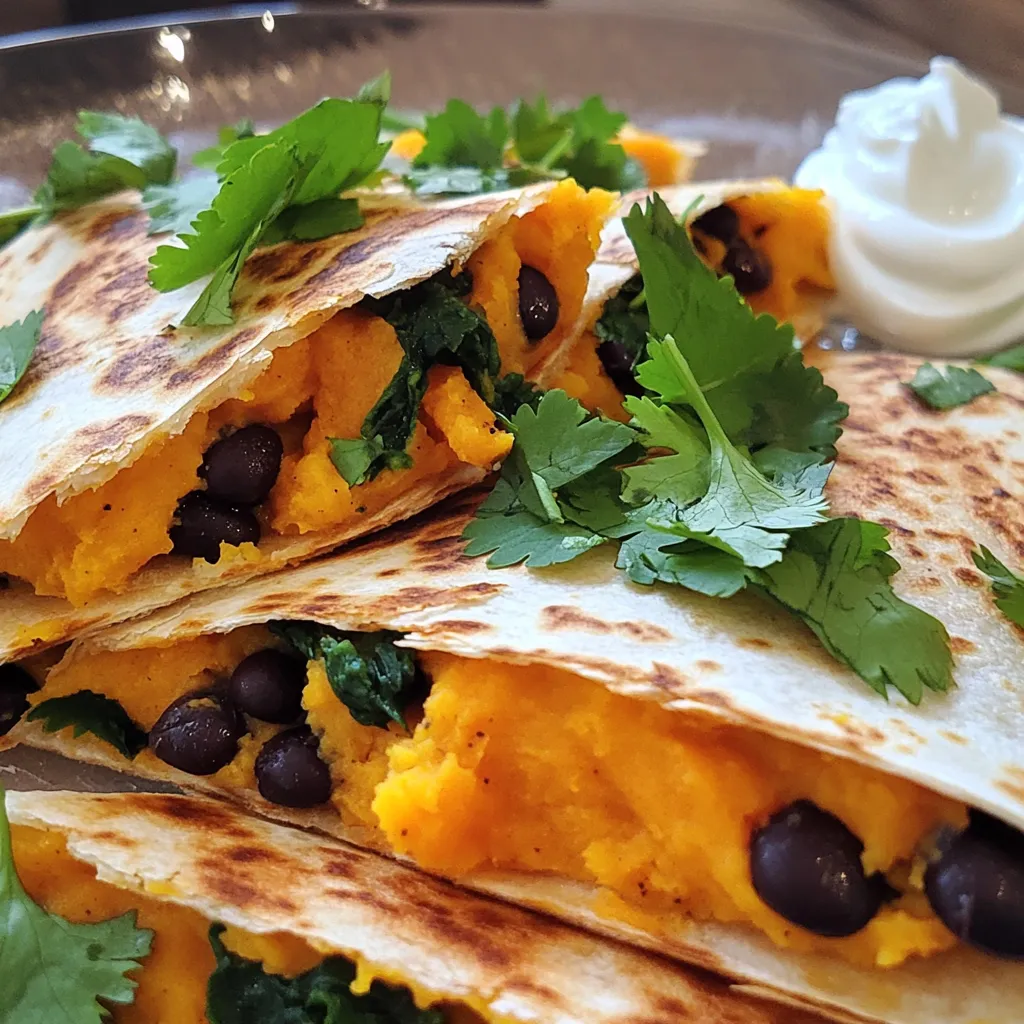
Looking for a tasty dinner idea? Try my Sweet Potato Black Bean Quesadillas! This dish mixes sweet potatoes, black beans,

- 1 cup graham cracker crumbs - 3 tablespoons unsalted butter, melted - 2 cups cream cheese, softened - 1 cup powdered sugar - 1 teaspoon vanilla extract - 1 cup apple pie filling - 1/2 teaspoon cinnamon - 1/4 cup caramel sauce (plus extra for drizzling) - Whipped cream, for topping - Fresh apple slices, for garnish These ingredients come together to form tasty mini caramel apple cheesecakes. Each item plays a big role. Graham cracker crumbs create a crunchy base. They mix well with melted butter, giving a rich flavor. Cream cheese makes the filling creamy and smooth. It pairs perfectly with powdered sugar and vanilla extract. These add sweetness and flavor. Apple pie filling brings a delicious fruity taste. Adding cinnamon gives it a warm spice. Caramel sauce is what makes these cheesecakes special. You can drizzle extra on top for more sweetness. Finally, whipped cream and fresh apple slices add a beautiful finish. They make each cheesecake look and taste great. Gather these items before starting your mini cheesecake adventure! 1. Preheat the oven and prepare muffin tin: Start by preheating your oven to 325°F (160°C). This step is key for even baking. Line a muffin tin with cupcake liners. The liners help with easy removal later. 2. Prepare the crust with graham cracker mixture: In a medium bowl, mix 1 cup of graham cracker crumbs and 3 tablespoons of melted unsalted butter. Stir until the crumbs feel damp and crumbly. This mixture forms the base of your mini cheesecakes. 3. Bake the crust and cool: Press about 1 tablespoon of the crumb mixture into each cupcake liner. Bake these for 5-7 minutes until they are set. Once done, take them out and let them cool. 1. Mix cream cheese, sugar, and vanilla: In a large mixing bowl, beat 2 cups of softened cream cheese until it is smooth. Gradually add 1 cup of powdered sugar and 1 teaspoon of vanilla extract. Mix until it is well blended. 2. Add apple pie filling and cinnamon: Gently fold in 1 cup of apple pie filling and 1/2 teaspoon of cinnamon. This gives your filling a warm, cozy flavor. Make sure everything is combined well, but don't overmix. 1. Spoon filling into crusts: Now, spoon the cheesecake mixture into each cooled crust. Fill each liner about 2/3 of the way full. This allows room for rising. 2. Bake and allow to cool before chilling: Bake the mini cheesecakes for 20-25 minutes until the centers are set. Let them cool at room temperature. After that, refrigerate them for at least 2 hours to firm up. With these steps, you’ll create delightful mini caramel apple cheesecakes that are sure to impress! - Ensuring the cream cheese is at room temperature: Start with cream cheese that is soft. This makes mixing easy and helps you avoid lumps. Leave it out for about 30 minutes before you start. - Avoiding overmixing the filling: Mix until it is smooth. Overmixing can introduce too much air, leading to cracks in your cheesecakes. Blend just until combined for a creamy texture. - Checking for doneness: When baking, look for a slight jiggle in the center. They will continue to set as they cool. If they puff up too much, they might dry out. - Presentation ideas with whipped cream and caramel drizzle: Top each cheesecake with a swirl of whipped cream. Drizzle caramel sauce over it for a sweet touch. This makes each cheesecake look extra special. - Using various garnish options such as nuts: Sprinkle chopped nuts, like pecans or walnuts, on top for added crunch. Fresh apple slices also add color and a fresh taste. Choose your favorite toppings to make them unique. {{image_2}} You can have fun with flavors in your mini caramel apple cheesecakes. Instead of apple pie filling, try different pie fillings. Cherry and pumpkin fillings work great too. Each option brings a new taste that can surprise your guests. You can also swap out spices. If you want a twist, use nutmeg instead of cinnamon. This small change can give your cheesecakes a warm and cozy vibe. Mixing flavors keeps things exciting and lets you create a special treat. If you need gluten-free options, you can change the crust. Use gluten-free graham cracker crumbs or almond flour for a tasty base. This way, everyone can enjoy the dessert without worry. For those watching their sugar intake, consider using sugar-free sweeteners. Look for options like stevia or erythritol. These substitutes can help keep the flavor while lowering the sugar content, making it easier to enjoy this treat guilt-free. To keep your mini caramel apple cheesecakes fresh, refrigerate them right away. Place them in an airtight container. This keeps out air and moisture. The cheesecakes stay tasty for up to five days. Always check for any signs of spoilage before eating. If you notice any off smells or colors, it's best to throw them away. You can freeze these mini cheesecakes to enjoy later. Start by letting them cool completely. Once cool, place them in a single layer in an airtight container. You can also wrap them in plastic wrap first for extra protection. They can last up to three months in the freezer. When you want to eat one, take it out and thaw it in the fridge overnight. This helps keep the texture smooth and creamy. Enjoy your treat when it's ready! Yes, you can make mini caramel apple cheesecakes ahead of time. They taste great when chilled overnight. Just follow the recipe and let them cool. After that, store them in the fridge. This makes them easy to serve for parties or gatherings. If you need a substitute for cream cheese, try using Greek yogurt or ricotta cheese. Both options give a creamy texture. You can also use vegan cream cheese for a dairy-free version. Adjust the sweetness in the recipe, as these substitutes might be less sweet than cream cheese. Leftover mini cheesecakes can last about 4 to 5 days in the fridge. Store them in an airtight container to keep them fresh. If they have caramel or whipped cream, they may not last as long. Always check for signs of spoilage before eating. These mini caramel apple cheesecakes are easy to make and fun to enjoy. We talked about the ingredients, preparation steps, and baking tips. We even covered variations and storage options. Now, you can impress your friends with these delicious treats. Don’t hesitate to try different flavors or adjust for dietary needs. With these simple steps, you’ll create a dessert that delights every time. Happy baking!

Mini Caramel Apple Cheesecakes Delightful and Easy

If you’re craving a sweet treat that’s both simple and delicious, you’ve landed in the right spot! Mini Caramel Apple

To make rich Pumpkin Spice White Hot Chocolate, you need: - 2 cups whole milk - 1 cup heavy cream - 1 cup white chocolate chips - 1/2 cup pumpkin puree - 1 teaspoon vanilla extract - 1 teaspoon pumpkin pie spice (plus extra for garnish) - Whipped cream for topping - Cinnamon sticks for garnish (optional) These ingredients create a warm, creamy drink that warms your heart. You can swap out some ingredients if needed. Here are some ideas: - Use almond milk or oat milk instead of whole milk for a lighter option. - Coconut cream can replace heavy cream for a dairy-free version. - If you don't have white chocolate chips, try using white chocolate bars. Just chop them up. - Use pumpkin spice mix if you lack pumpkin pie spice. These swaps can still give you a delicious drink! You'll need a few tools to make this drink: - A medium saucepan to heat your ingredients. - A whisk or spoon to stir everything well. - Mugs for pouring and serving your hot chocolate. Having the right equipment makes the process easier and more enjoyable! Start by pouring 2 cups of whole milk and 1 cup of heavy cream into a medium saucepan. Set the stove to medium heat. Stir gently to mix the milk and cream. Keep stirring until it’s warm but not boiling. This step is key. You want a smooth base for your drink. Next, add 1 cup of white chocolate chips to the warm milk mix. Stir continuously to help the chocolate melt. It should become smooth and creamy. This part adds a sweet richness to your drink. Keep stirring until all the chips melt completely. Now it's time for the fun flavors! Add 1/2 cup of pumpkin puree to the mix. Then add 1 teaspoon of vanilla extract. Finally, sprinkle in 1 teaspoon of pumpkin pie spice. Stir well to combine everything. Heat this mixture until it’s warm to your liking, but don’t let it boil. Once you have a smooth and flavorful blend, take it off the heat. Pour the pumpkin spice white hot chocolate into mugs. Top each mug with whipped cream. For a pretty touch, sprinkle extra pumpkin pie spice on top. You can even add a cinnamon stick for garnish if you like! To make your pumpkin spice white hot chocolate super creamy, you need whole milk and heavy cream. These two create a rich base. Heat them gently in a pot. Always stir so they do not scorch. When you add white chocolate chips, keep stirring until they melt fully. This step is key. The smoother your mixture, the creamier your drink. Everyone has their own taste. You can adjust the sweetness to fit your needs. If you like it sweet, add more white chocolate chips. For a less sweet drink, use less. You can also add a bit of sugar if needed. Taste as you go. This way, you find the right balance for you. Presentation can make your drink special. Serve the hot chocolate in nice mugs. Top it with a generous swirl of whipped cream. A sprinkle of pumpkin pie spice adds flavor and visual appeal. For an extra touch, add a cinnamon stick to each mug. It looks great and adds more flavor. Enjoy this cozy drink with friends or family for a warm gathering. {{image_2}} You can easily make this drink dairy-free. Use almond milk or oat milk instead of whole milk. Coconut cream works great in place of heavy cream. For a rich taste, try using dairy-free white chocolate chips. It gives that sweet flavor without the dairy. You can boost the flavor of your pumpkin spice white hot chocolate. Add a pinch of nutmeg for warmth. A splash of maple syrup can add sweetness and depth. If you love a bit of spice, try adding a dash of cayenne pepper. This adds a fun kick to your drink. You can also mix in some caramel sauce for a sweet twist. Want a cold treat? You can turn this hot drink into an iced version. First, make the hot chocolate as usual. Then let it cool completely. Pour it over ice in a large glass. Top with whipped cream and a sprinkle of pumpkin pie spice. This is a refreshing twist for warm days or if you just love iced drinks. To keep your pumpkin spice white hot chocolate fresh, pour any leftovers into a clean container. Make sure the container has a lid. Store it in the fridge for up to three days. If you want to keep it longer, consider freezing it. Use freezer-safe bags or containers. Leave some space for the liquid to expand. When you are ready to enjoy your drink again, take it out of the fridge. Pour the pumpkin spice white hot chocolate into a saucepan. Heat it over low to medium heat. Stir often until it's warm. Avoid boiling it, as this can change the texture. If frozen, let it thaw overnight in the fridge before reheating. The white hot chocolate lasts about three days in the fridge. However, for the best taste, drink it within two days. If you see any changes in color or smell, it’s best to discard it. Always check for freshness before enjoying. Keeping it sealed tight helps maintain its creamy delight. Yes, you can use milk alternatives. Almond, oat, and soy milk work well. Each option adds a unique taste. Choose one that you enjoy. Make sure it’s unsweetened for the best flavor balance. You can use white chocolate bars, chopped into small pieces. If you're looking for dairy-free, try vegan white chocolate. You could also use sweetened condensed milk for a rich flavor. Just adjust the amount of sugar in the recipe. To make this recipe vegan, swap the whole milk and heavy cream for coconut or almond milk. Use vegan white chocolate chips, too. Pumpkin puree is already vegan, so it works perfectly. Follow the same steps to make your creamy delight! We explored all the key steps to make a great Pumpkin Spice White Hot Chocolate. From the ingredients and substitutions to the tools you'll need, each part plays a vital role. You learned how to heat your milk, melt white chocolate, and combine flavors for the perfect blend. Remember to customize your drink and consider the suggested variations. Store extras correctly for best flavor. With this knowledge, you can create a delicious treat. Enjoy every sip!

Pumpkin Spice White Hot Chocolate Creamy Delight

Get ready to fall in love with my Pumpkin Spice White Hot Chocolate! This creamy delight combines rich white chocolate

- 2 large russet potatoes - 3 tablespoons olive oil - 4 cloves garlic, minced - 1 teaspoon paprika - ½ teaspoon salt - ¼ teaspoon black pepper - Fresh parsley, chopped (for garnish) To make Air Fryer Garlic Potato Chips, you need a few basic ingredients. You will start with two large russet potatoes. These potatoes are perfect because they are starchy and crisp up well. The next key ingredient is olive oil, about three tablespoons will do. This oil adds flavor and helps the chips get crispy. Garlic brings the magic here, so use four cloves, minced. Minced garlic offers a strong flavor that pairs well with the potatoes. Paprika adds a nice touch of warmth and color, so grab a teaspoon. You will also need half a teaspoon of salt and a quarter teaspoon of black pepper for seasoning. Finally, fresh parsley gives a pop of color and freshness. Use it for garnish before serving your chips. By combining these ingredients, you will create a delicious snack that is both crispy and flavorful. First, wash the large russet potatoes under cold water. This removes dirt and any chemicals. Next, peel the potatoes using a vegetable peeler. After peeling, slice them thinly. Aim for 1/16 inch thickness. A mandoline works great for even slices. To make the chips extra crispy, soak the slices in cold water for 30 minutes. This helps to remove excess starch. After soaking, drain the slices. Pat them dry using a kitchen towel. Dry slices help create a better texture. In a large bowl, combine the dried potato slices with olive oil, minced garlic, paprika, salt, and black pepper. Mix well to coat every slice evenly. This step is key for flavor. You want every bite to be tasty. Set your air fryer to 360°F (180°C). Preheat it for about 5 minutes. Preheating ensures the chips cook evenly. This step helps achieve that perfect crunch. Place the potato slices in a single layer in the air fryer basket. You may need to do this in batches. Air fry the slices for 10 to 12 minutes. Shake the basket halfway through for even cooking. Keep an eye on them until they turn golden brown. Once cooked, take the chips out of the air fryer. Let them cool on a wire rack for a few minutes. Cooling helps them stay crispy. For a nice touch, garnish with fresh chopped parsley before serving. Enjoy your homemade garlic potato chips! To get chips that are crispy, slice your potatoes thin. Aim for 1/16 inch thick slices. This thickness helps them cook evenly. If the slices are too thick, they may not crisp up well. Soaking the slices is key. Soak them in cold water for 30 minutes. This removes excess starch and helps with crispiness. After soaking, drain and pat the slices dry. Removing moisture is important for that crunch. You can change up the flavors in many ways. Try adding different seasonings like onion powder or chili powder. You can also mix in cheese for a savory twist. Adjust the seasoning to fit your taste. If you like it spicy, add more black pepper or chili flakes. If you prefer milder flavors, reduce the garlic or paprika. If your chips turn out soggy, check your soaking time. Make sure you soak them for the full 30 minutes. Also, ensure you dry them well before seasoning. For even cooking, arrange the slices in a single layer in the air fryer. If you crowd the basket, the chips will not cook evenly. Shake the basket halfway through cooking. This helps ensure they crisp up all around. {{image_2}} For the best chips, I recommend using russet potatoes. They are starchy and make great, crispy chips. You can also try Yukon Gold or red potatoes. These types have a creamier texture. Yukon Gold gives a buttery taste, while red potatoes add a subtle sweetness. Each potato type brings a unique flavor and texture to your chips. You can easily mix things up with flavors. Adding cheese makes the chips rich and savory. Try parmesan or cheddar for a tasty twist. Fresh herbs, like rosemary or thyme, can also add a burst of flavor. If you like heat, sprinkle some chili powder on your chips. It gives a nice kick and pairs well with garlic. You can even add a dash of cayenne for extra spice. Experimenting with these flavors can make your chips even more exciting! To keep your garlic potato chips fresh, use an airtight container. Glass or plastic containers work well. You can also use a resealable bag. Store them at room temperature in a cool, dry place. Do not refrigerate them. This will make them soggy. When stored properly, they stay fresh for about 3 days. After that, they may lose their crispiness. To regain the crispiness of your chips, use the air fryer. Preheat it to 350°F (175°C). Place the chips in a single layer and heat for about 3-5 minutes. This will make them crispy again. You can also use an oven. Bake the chips at 350°F (175°C) for the same time. Avoid using the microwave, as it makes chips soggy. Enjoy your tasty snack again! Yes, you can use other oils for these chips. Some good options are: - Avocado oil - Canola oil - Grapeseed oil These oils work well because they have high smoke points. They also add a nice flavor. Olive oil is great, but feel free to switch it up! You can tell the chips are done when they are golden brown and crispy. Look for these signs: - Crisp texture - Deep golden color - No soft spots If you see these signs, your chips are ready to enjoy! Yes, you can still make garlic potato chips without an air fryer. Here are two other methods: 1. Oven Method: Preheat your oven to 400°F (200°C). Place the potato slices on a baking sheet in a single layer. Bake for 20-25 minutes, flipping halfway through. 2. Stovetop Method: Heat oil in a pan over medium heat. Fry the potato slices in small batches until golden brown. Both methods work well but may not be as crispy as the air fryer. This recipe makes about 4 servings. Each serving is a nice snack size, perfect to share. If you need more, just double the recipe! Making garlic potato chips is simple and fun. You start with fresh ingredients like russet potatoes, olive oil, and spices. By following the clear steps—washing, soaking, seasoning, and air frying—you can achieve a crispy snack. Remember to customize flavors and troubleshoot any issues for the best results. Store leftovers properly to keep them fresh. Enjoy experimenting with different potatoes and seasonings. Now, go ahead and crunch on these tasty chips!

Air Fryer Garlic Potato Chips Crispy and Flavorful Snack

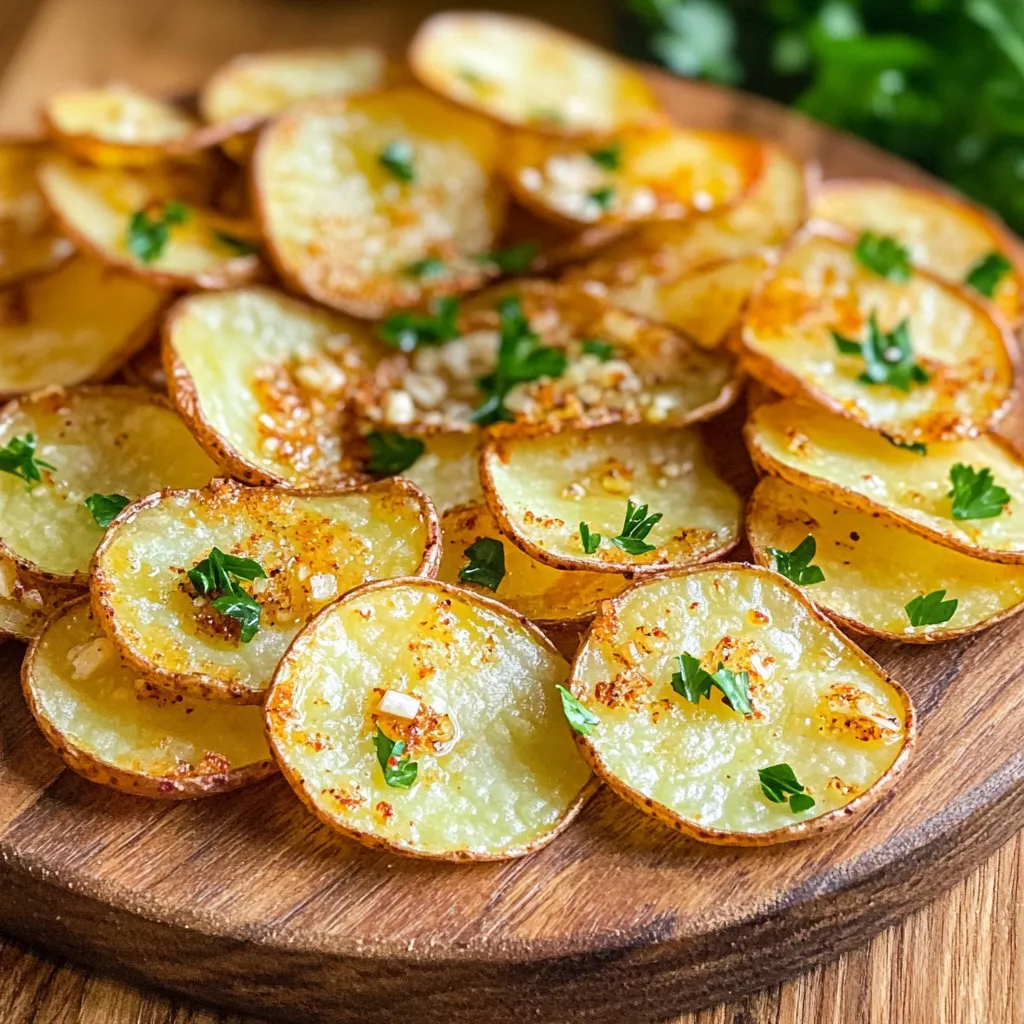
Looking for a snack that’s both crispy and packed with flavor? You’ll love these Air Fryer Garlic Potato Chips! With

- 1 cup canned pumpkin puree - 1 banana, frozen - 1 cup almond milk (or any milk of choice) - 1 tablespoon maple syrup - 1 teaspoon vanilla extract - 1 teaspoon pumpkin pie spice - 1 tablespoon chia seeds (optional) The base of this smoothie is pumpkin puree. It gives a rich, creamy feel. You need a frozen banana for natural sweetness and smoothness. Almond milk is my choice for a nutty taste, but any milk works. Maple syrup adds a touch of sweetness. Vanilla extract brings a warm flavor, while pumpkin pie spice adds that classic autumn taste. Chia seeds are optional but add nice texture and nutrients. - Whipped cream or coconut cream - Cinnamon powder Toppings make this smoothie extra special. A dollop of whipped cream or coconut cream gives it a nice finish. A sprinkle of cinnamon powder on top adds a nice touch of flavor and looks pretty. You can even add more pumpkin pie spice if you like! Enjoy making it your own. {{ingredient_image_1}} 1. Combine ingredients in the blender Start by adding the canned pumpkin puree, frozen banana, almond milk, maple syrup, vanilla extract, pumpkin pie spice, and chia seeds if you want. This mix gives the smoothie its rich taste. 2. Blend until smooth and creamy Blend the mixture on high speed. You want it to be smooth and creamy. If you see lumps, stop the blender and scrape down the sides. Blend again until it’s perfect! 3. Adjust sweetness to taste After blending, taste your smoothie. If you want it sweeter, add more maple syrup. Blend again briefly to mix. - Pour into tall glasses Carefully pour the smoothie into tall glasses. The color will look amazing! - Top with whipped cream and garnish Add a dollop of whipped cream or coconut cream on top. A sprinkle of cinnamon powder will add a nice touch. It makes your smoothie look even better! Enjoy your creamy pumpkin pie smoothie! To make a great smoothie, use a high-power blender. It blends the ingredients well and gives a smooth finish. If you use a regular blender, you might miss that creamy texture. Always stop to scrape down the sides of the blender. This ensures all ingredients mix evenly. If you skip this step, you may find lumps in your smoothie. Adjusting spices and sweetness is key to a tasty smoothie. If you love spice, add more pumpkin pie spice. You can also mix in extra cinnamon or nutmeg for depth. For sweetness, start with the maple syrup. Taste and add more if you want it sweeter. Toppings can make your smoothie look fun and inviting. A dollop of whipped cream or coconut cream adds richness. Sprinkle a bit of cinnamon powder on top for a nice touch. This not only looks good but adds flavor too. Pro Tips Use Fresh Pumpkin: For an even richer flavor, consider using fresh roasted pumpkin instead of canned puree. Roast pumpkin chunks until tender, then blend them for a homemade puree. Adjust Sweetness: Taste your smoothie before serving and adjust the sweetness according to your preference. Some pumpkins can be sweeter than others, so you may not need as much maple syrup. Experiment with Spices: If you enjoy a spicier kick, add a pinch of cayenne pepper or more pumpkin pie spice to enhance the flavor profile of your smoothie. Chill Your Ingredients: For an extra refreshing smoothie, chill your almond milk and other ingredients in advance. This will make your smoothie even colder and more enjoyable. {{image_2}} You can use many types of milk in your pumpkin pie smoothie. Almond milk is a great choice. It adds a nice nutty flavor. You can also try oat milk for a creamier texture. Coconut milk gives a tropical touch. If you drink dairy, whole milk or skim milk works too. Each option changes the taste a bit. For those who prefer non-dairy, there are many choices. Soy milk is rich and creamy. Rice milk is lighter and a bit sweet. Choose what you like best. Each milk gives your smoothie a unique twist. Want to mix things up? You can add fruits like apples or pears. They bring a fresh taste to the smoothie. Just chop them up and blend them in. Spices can also enhance your drink. Consider adding a pinch of nutmeg or a dash of allspice. They give warmth and depth to the flavor. Feel free to experiment! This is your drink, so make it your own. To store leftover pumpkin pie smoothie, pour it into a clean jar. Seal the jar tightly. You can keep it in the fridge for up to two days. After this time, the smoothie may lose its creaminess and flavor. If you want to save the smoothie for later, freezing is a great choice. Pour the smoothie into ice cube trays or freezer-safe bags. Make sure to leave some space for expansion. It can last up to three months in the freezer. When you're ready to enjoy it, take out the cubes or bag. Thaw it in the fridge overnight or at room temperature for a few hours. You can also blend the frozen cubes for a quick smoothie treat. Enjoy your delicious pumpkin pie smoothie anytime! Pumpkin is low in calories and high in fiber. It helps keep you full. It is also rich in vitamins A and C, which boost your immune system. The antioxidants in pumpkin can help with skin health. Plus, pumpkin has potassium, which is good for your heart. Yes, you can add protein powder. It makes the smoothie more filling. Choose a flavor that goes well with pumpkin, like vanilla or cinnamon. Mix it in when you blend the other ingredients. The smoothie can last for about one day in the fridge. Store it in an airtight container. If it separates, just shake or stir it before drinking. Absolutely! This smoothie is already vegan if you use almond milk. Just skip the whipped cream or use coconut cream as a topping. Enjoy a tasty, plant-based treat! This blog post shared a simple and tasty pumpkin pie smoothie recipe. You learned about the key ingredients, steps to make it, and tips to improve its taste and texture. We also explored variations and smart storage methods. Enjoy this smoothie as a healthy treat or quick breakfast. Feel free to customize it to fit your taste. Making smoothies can be fun and tasty, so get blending!

Pumpkin Pie Smoothie Creamy and Delicious Treat

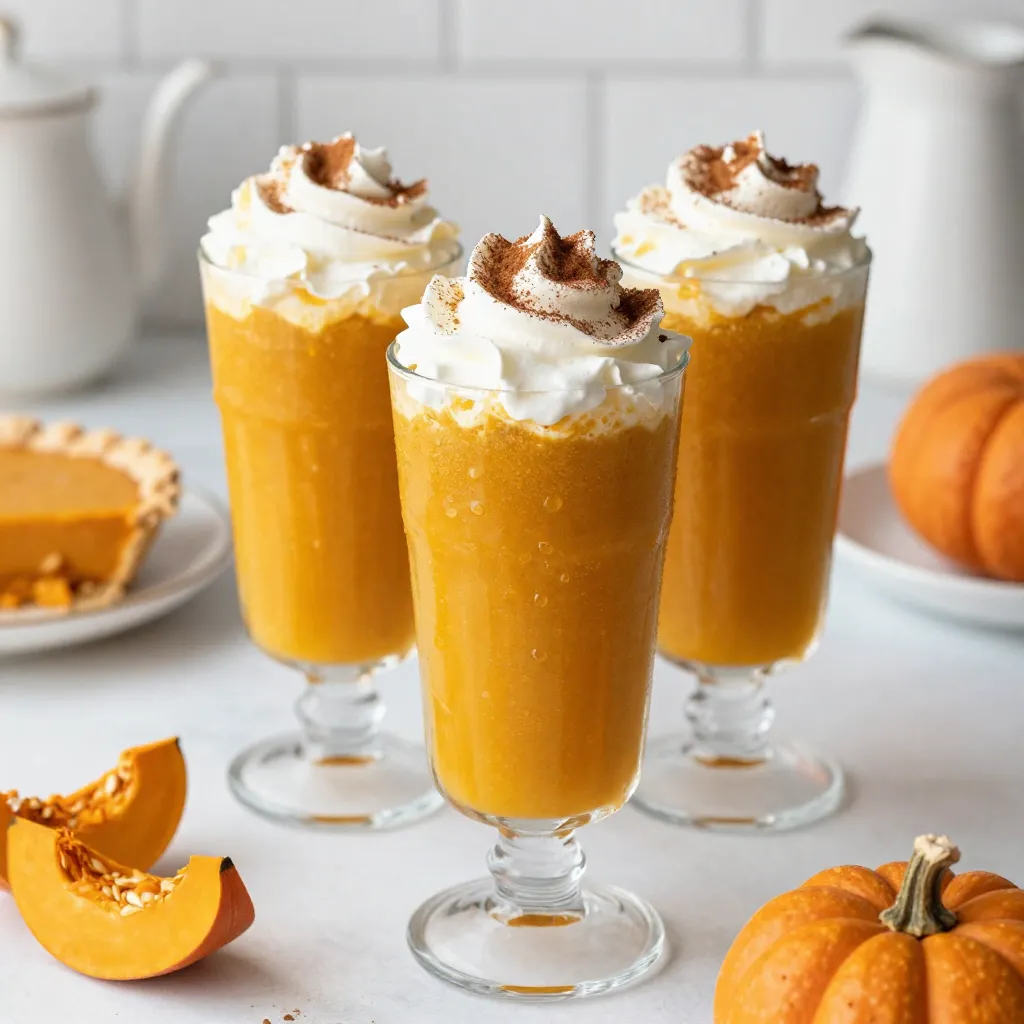
Looking for a tasty way to celebrate fall? This Pumpkin Pie Smoothie is creamy, delicious, and packed with flavor! With

To make the ultimate fudgy brownies, gather these ingredients: - 1 cup unsalted butter - 2 cups granulated sugar - 4 large eggs - 1 teaspoon vanilla extract - 1 cup all-purpose flour - 1 cup unsweetened cocoa powder - 1/2 teaspoon salt - 1 cup semi-sweet chocolate chips - 1/2 cup chopped walnuts (optional) Each ingredient plays a key role in the texture and taste. The butter adds richness, while sugar helps create that shiny top. Eggs act as a binder, giving the brownies a soft, fudgy feel. Flour gives structure, and cocoa powder brings deep chocolate flavor. Chocolate chips add extra indulgence, and walnuts bring a nice crunch if you choose to add them. Choosing the right ingredients makes a big difference. Here are my tips: - Butter: Use unsalted butter for better control over salt levels. - Sugar: Choose granulated sugar for the best texture. - Eggs: Fresh eggs help with rising and taste. - Vanilla: Pure vanilla extract gives a more natural flavor than imitation. - Flour: Use all-purpose flour for a good balance of texture. - Cocoa Powder: Select high-quality unsweetened cocoa for a rich taste. - Chocolate Chips: Semi-sweet chips make brownies sweeter and more indulgent. - Walnuts: If using, opt for fresh, raw walnuts for the best crunch and flavor. Sometimes, you may not have all the ingredients. Here are some easy swaps: - Butter: Use coconut oil or margarine, but the flavor may change. - Sugar: You can replace granulated sugar with brown sugar for a moister brownie. - Eggs: Replace each egg with 1/4 cup unsweetened applesauce for a vegan option. - Flour: Use gluten-free flour blends if you need a gluten-free choice. - Cocoa Powder: Dutch-process cocoa can be used for a smoother taste. - Chocolate Chips: You can use dark chocolate or milk chocolate chips based on your preference. These tips and substitutes will help you create the best fudgy brownies, tailored to what you have on hand! {{ingredient_image_1}} First, set your oven to 350°F (175°C). This is the ideal heat for fudgy brownies. While the oven heats, prepare your baking pan. Use a 9x13 inch pan for the best results. Grease it well or line it with parchment paper. This helps the brownies come out easily later. Next, grab a medium saucepan. Place it on low heat and add 1 cup of unsalted butter. Stir it until it melts completely. Once melted, take it off the heat. Add 2 cups of granulated sugar to the butter. Mix these two until they look smooth. Let this mixture cool a bit. Now, crack in 4 large eggs, one at a time. Mix well after each egg. Finish this step by stirring in 1 teaspoon of vanilla extract. Now, take a separate bowl. Sift together 1 cup of all-purpose flour, 1 cup of unsweetened cocoa powder, and 1/2 teaspoon of salt. This step helps to remove lumps. Slowly add this dry mix to the wet ingredients. Use a spatula for folding, and be gentle. You don’t want to overmix. When just combined, fold in 1 cup of semi-sweet chocolate chips. If you like, add 1/2 cup of chopped walnuts. Pour the brownie batter into the prepared baking pan. Use a spatula to smooth the top. Place it in your preheated oven. Bake for 25-30 minutes. To check if they are done, insert a toothpick into the center. It should come out with some moist crumbs. This shows you have that perfect fudgy texture! After baking, let the brownies cool in the pan for about 10 minutes. Then, move them to a wire rack to cool completely. Now they are ready to cut into squares and enjoy! To get that rich, fudgy texture, you must not overmix your batter. Mix just until you see no dry flour. Bake for 25 to 30 minutes. When testing, a toothpick should come out with a few moist crumbs. This gives you that gooey center. Also, use good quality chocolate chips. They melt well and enhance the flavor. Many people overbake their brownies. This makes them dry instead of fudgy. Another mistake is not cooling them before cutting. Letting them cool helps them set. If you add too much flour, the brownies will be tough. Stick to the recipe for the best results. Fudgy brownies are great on their own but can be even better with toppings. Try serving them warm with vanilla ice cream. A drizzle of chocolate sauce adds extra sweetness. Fresh berries or whipped cream give a nice contrast. You can also pair them with a strong coffee or a glass of milk for a delightful treat. Pro Tips Use Quality Chocolate: The better the chocolate, the richer and more decadent your brownies will be. Opt for high-quality semi-sweet chocolate chips for the best results. Don’t Overmix: When combining the dry ingredients with the wet, stir gently until just combined. Overmixing can lead to tough brownies. Check Doneness Carefully: For fudgy brownies, a toothpick should come out with a few moist crumbs. If it comes out clean, they may be overbaked. Add a Pinch of Espresso Powder: To intensify the chocolate flavor, add a teaspoon of espresso powder to the dry ingredients. It enhances the richness without adding coffee flavor. {{image_2}} You can enhance your brownies by adding nuts or mix-ins. Walnuts add a nice crunch and flavor. If you like nuts, chop them roughly and mix them into the batter. You can also try almonds or pecans. For a sweet twist, add chocolate chips or peanut butter chips. These mix-ins will make each bite special and fun. Want to make your brownies unique? Consider adding different flavors. Mint extract gives a fresh taste. Just use one teaspoon to keep it balanced. You can also swirl in caramel sauce for a rich treat. To do this, pour half the batter, add caramel, then top with the rest of the batter. This adds a gooey surprise that everyone will love. Need a gluten-free version? You can swap the all-purpose flour for gluten-free flour. This keeps the fudginess intact. For a vegan option, replace the butter with coconut oil and use flax eggs. To make a flax egg, mix one tablespoon of flaxseed meal with three tablespoons of water. Let it sit for a few minutes until it thickens. This way, everyone can enjoy these fudgy brownies! To keep your brownies fresh, store them in an airtight container. This helps maintain their moisture and fudgy texture. You can place a layer of parchment paper between layers to prevent sticking. Keep them at room temperature for up to four days. If you want them to last longer, consider refrigeration, but this can change their texture. Freezing brownies is a great way to save some for later. First, let your brownies cool completely. Then, cut them into squares. Wrap each square tightly in plastic wrap. Place the wrapped brownies in a freezer-safe bag or container. They can last up to three months in the freezer. When you are ready to eat them, just thaw at room temperature. To enjoy your brownies warm, preheat your oven to 350°F (175°C). Place the brownies on a baking sheet lined with parchment paper. Heat for about 10 minutes. This warms them up without drying them out. You can also microwave a square for about 15 seconds. This gives you that gooey, warm experience, perfect with a scoop of ice cream! Fudgy brownies can last about 3 to 5 days at room temp. Store them in an airtight container. If you want them fresh longer, keep them in the fridge. They can last up to a week there. Yes, you can! You can use applesauce or mashed bananas instead of eggs. Use 1/4 cup of applesauce or banana for each egg. This will help keep the brownies moist and fudgy. If the brownies are undercooked, they will be gooey and soft in the middle. This means they need more time in the oven. An undercooked brownie can taste great, but it may not hold its shape. To check if brownies are done, insert a toothpick in the center. If it comes out with a few moist crumbs, they are ready. If it comes out clean, they might be overbaked. A little fudginess is what you want! Absolutely! You can use dark chocolate or milk chocolate instead of semi-sweet chocolate. The taste will change, but it can still be delicious. Just make sure to adjust the sugar if you use milk chocolate, as it is sweeter. In this post, we explored how to make fudgy brownies. We covered key ingredients and how to choose the best ones. I shared tips on baking, achieving that perfect fudgy texture, and avoiding common mistakes. You learned about fun variations, storage methods, and answered common questions. Now, you have all the tools to bake amazing fudgy brownies. Enjoy the process and share your treats! Happy baking!

Ultimate Fudgy Brownies Rich and Decadent Delight

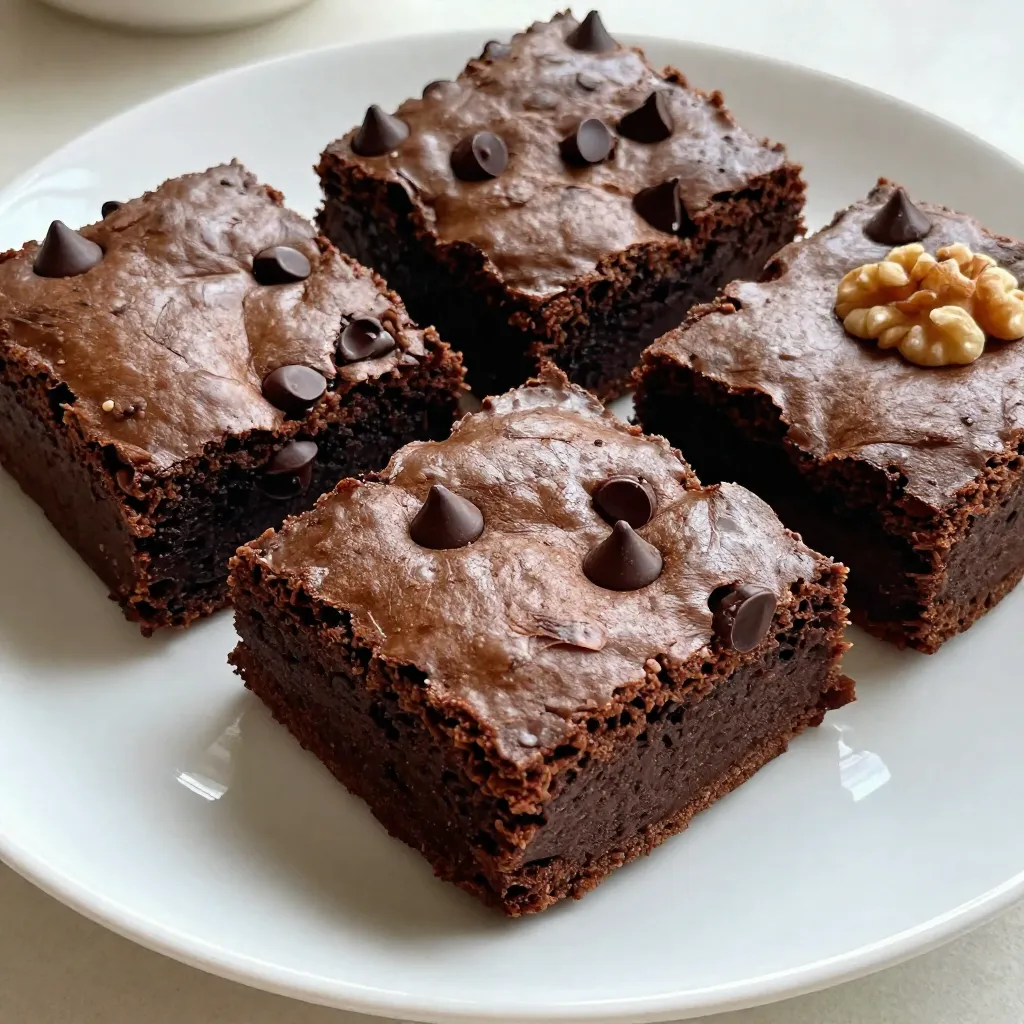
Welcome to the world of indulgence with my ultimate fudgy brownies! If you’re craving rich, decadent delight, you’ve hit the

Older posts
Newer posts
← Previous Page1 … Page11 Page12 Page13 … Page84 Next →

dsad

© 2026 Lisa Dishes • Built with GeneratePress

Our Policies

  • Copyright Policy
  • Cookie Policy
  • GDPR Policy
  • Privacy Policy
  • Disclaimer
  • Terms Of Use

More Information

  • Home
  • About
  • Contact
  • Appetizers
  • Dessert
  • Dinner
  • Drinks
©2026, Lisa Dishes About Back To Top