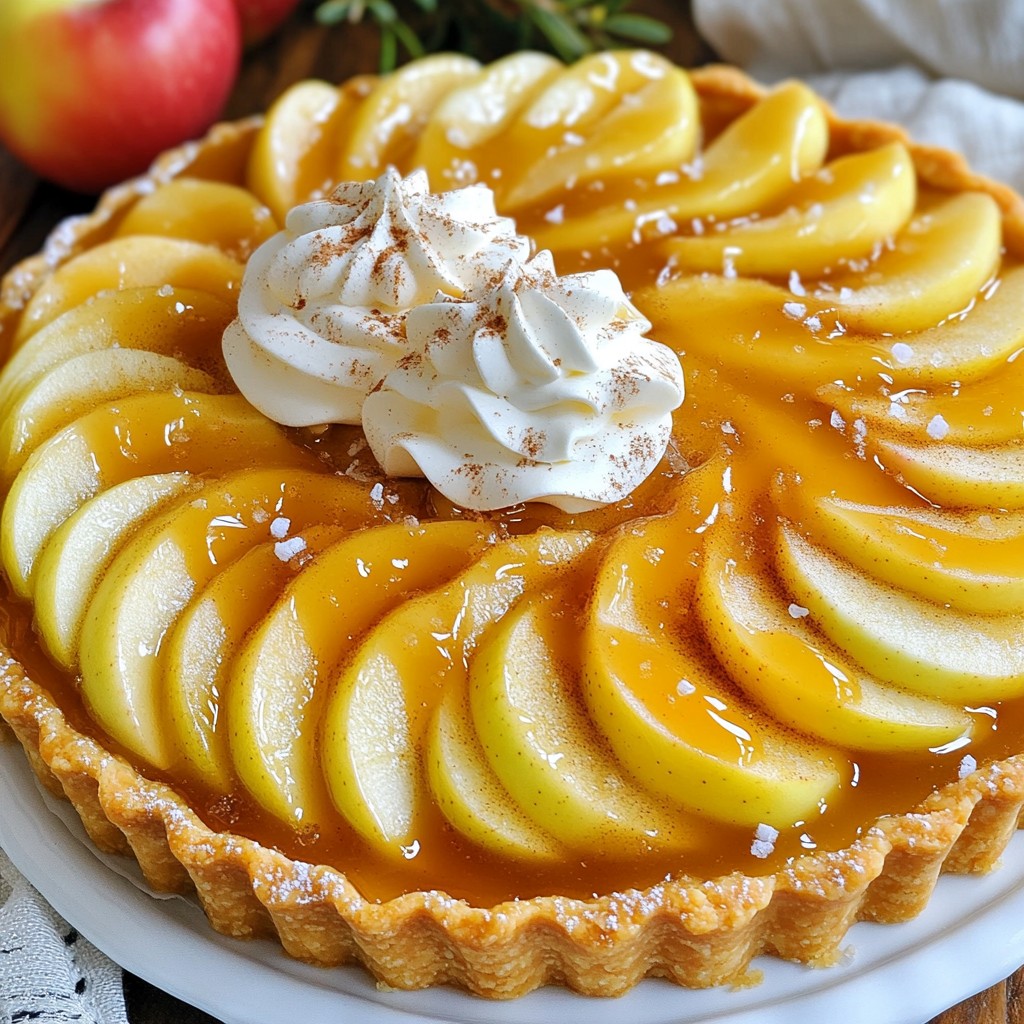
Are you ready to impress your friends and family with a show-stopping dessert? This Salted Caramel Apple Tart is the perfect blend of sweet and salty, making it deliciously irresistible. I’ll share my easy recipe that guarantees success with every bite. Whether you're a baking novice or a seasoned pro, you’ll find simple steps and helpful tips to make this tart a favorite in your home. Let's get started!
Why I Love This Recipe
- Delicious Flavor Combo: The tartness of the apples perfectly balances the sweetness of the salted caramel, creating a mouthwatering dessert that everyone will adore.
- Simple Ingredients: This recipe uses common ingredients that you probably already have in your pantry, making it easy to whip up any time.
- Impressive Presentation: With beautifully arranged apple slices and a glossy caramel drizzle, this tart looks as stunning as it tastes, perfect for special occasions.
- Versatile Serving Options: Dress it up with a scoop of vanilla ice cream or a dollop of whipped cream, making it a versatile dessert for any preference.
Ingredients
Complete List of Ingredients
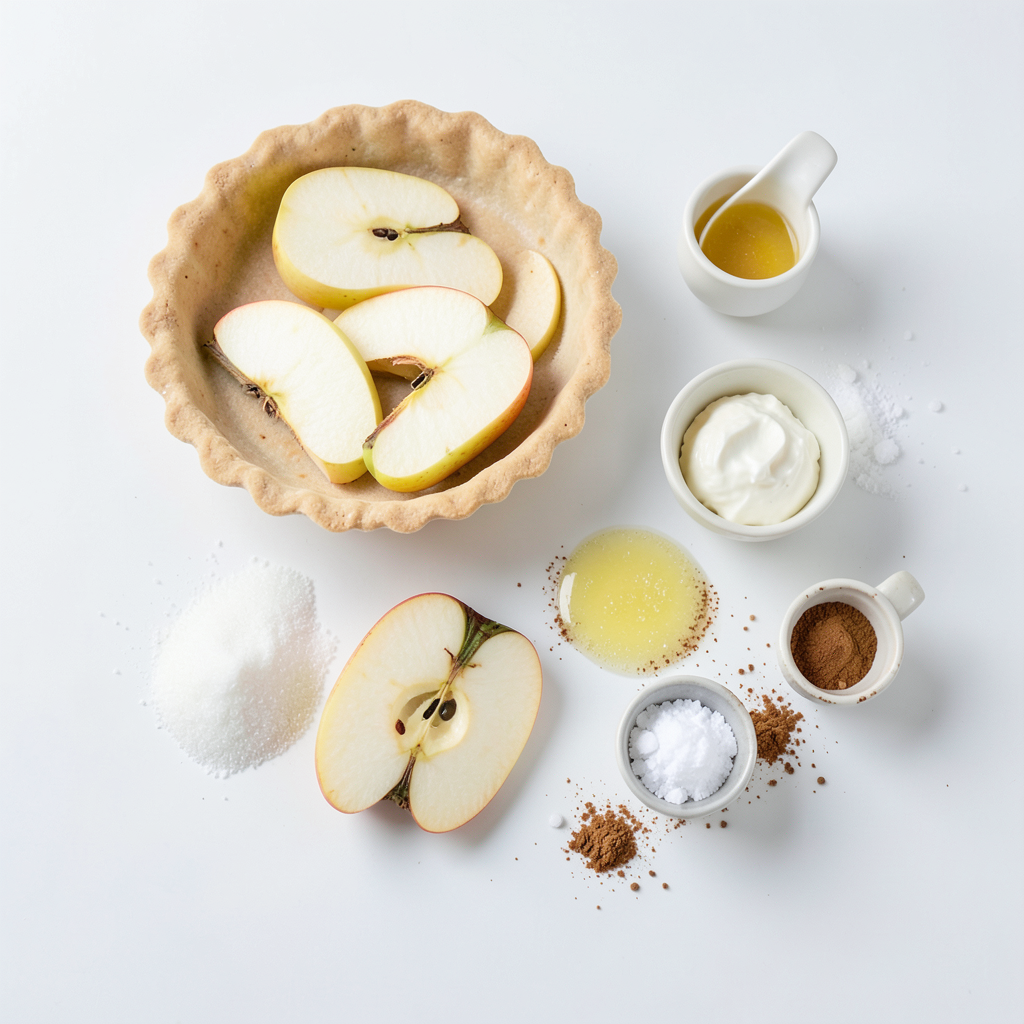
To make a delicious salted caramel apple tart, gather these ingredients:
- 1 pre-made tart shell (9-inch)
- 3 large apples (e.g., Granny Smith and Honeycrisp), peeled, cored, and thinly sliced
- 1 tablespoon lemon juice
- 1/2 cup granulated sugar
- 1/4 cup unsalted butter
- 1/2 cup heavy cream
- 1 teaspoon sea salt
- 1 teaspoon vanilla extract
- 1 teaspoon ground cinnamon
- Optional: whipped cream or vanilla ice cream for serving
Notes on Ingredient Quality
The quality of your ingredients makes a big difference. Use fresh apples for the best flavor. Granny Smith apples give a nice tartness, while Honeycrisp adds sweetness. Choose a good unsalted butter for a rich taste. Heavy cream should be fresh and not low-fat. For the sugar, regular granulated works well. Using pure vanilla extract enhances the flavor of your tart.
Substitutions for Common Ingredients
If you need to make swaps, here are some easy substitutions:
- Tart Shell: You can make your own pastry crust if you prefer. Use a basic pie crust recipe.
- Apples: If you cannot find Granny Smith or Honeycrisp, use any firm apples like Fuji or Braeburn.
- Unsalted Butter: You can use salted butter, but reduce the added sea salt in the recipe.
- Heavy Cream: Full-fat coconut cream works as a dairy-free option for the caramel.
Step-by-Step Instructions
Preparation Steps
1. Start by preheating your oven to 350°F (175°C). This step is key for even baking.
2. Peel, core, and thinly slice the apples. I like to use Granny Smith and Honeycrisp for a nice balance of tart and sweet.
3. In a bowl, toss the apple slices with 1 tablespoon of lemon juice and 1 teaspoon of ground cinnamon. This keeps the apples fresh and adds flavor.
4. Set the apple mixture aside. Let the flavors mingle while you prepare the caramel.
Cooking Instructions
1. In a medium saucepan, combine 1/2 cup of granulated sugar with 1/4 cup of water. Stir gently until the sugar dissolves.
2. Stop stirring and cook the mixture over medium heat. Watch closely as it turns a deep amber color, about 10 minutes.
3. Lower the heat. Carefully add 1/4 cup of unsalted butter, whisking until it melts.
4. Gradually pour in 1/2 cup of heavy cream while whisking continuously. Be cautious; the mixture will bubble.
5. Remove the caramel from heat. Stir in 1 teaspoon of vanilla extract and 1 teaspoon of sea salt until well mixed.
Final Assembly and Baking
1. Take the pre-made tart shell and arrange the apple slices in it. Overlap them slightly for a nice look.
2. Pour the warm salted caramel evenly over the apples, ensuring they are fully coated.
3. Bake the tart in your preheated oven for 25-30 minutes. Look for tender apples and a golden-brown tart shell.
4. Once done, let the tart cool for about 15 minutes before serving. This cooling time helps set everything nicely.
Tips & Tricks
Tips for the Perfect Caramel
To make great caramel, use a heavy saucepan. This helps heat spread evenly. Start with sugar and water. Stir gently until the sugar dissolves. Stop stirring once it begins to boil. Watch for a deep amber color. This step takes about 10 minutes. When it reaches the right color, lower the heat. Carefully add the butter and whisk. Then, pour in the heavy cream slowly. It will bubble, so be cautious. Finally, mix in sea salt and vanilla. Taste your caramel; it should be rich and buttery.
Best Apple Varieties for Baking
When baking, choose apples that hold their shape. Granny Smith apples are tart and crisp. Honeycrisp apples are sweet and juicy. A mix of these two gives depth to your tart. Other great options include Braeburn and Fuji. These apples balance sweetness and tartness well. Avoid soft apples like Red Delicious. They won’t give the right texture or flavor.
Serving Suggestions for Enhanced Presentation
Serve your tart warm or at room temperature. Drizzle extra salted caramel over each slice. This adds a nice touch and flavor. A dollop of whipped cream or a scoop of vanilla ice cream pairs perfectly. For a fun twist, sprinkle some cinnamon on top. You can also add chopped nuts for crunch. Arrange the slices on a beautiful plate. This simple step makes your tart look fancy.
Pro Tips
- Choose the Right Apples: For the best flavor and texture, use a combination of tart and sweet apples, such as Granny Smith for tanginess and Honeycrisp for sweetness.
- Monitor Caramel Color: Keep an eye on the sugar as it cooks; the difference between perfectly caramelized and burnt is just a few seconds, so be ready to add butter and cream!
- Let it Cool: Allow the tart to cool for at least 15 minutes before slicing; this helps the caramel set and makes for cleaner slices.
- Enhance Presentation: Drizzle extra salted caramel over the tart just before serving and add a sprinkle of sea salt to elevate the look and flavor.
Variations
Gluten-Free Options
You can make this tart gluten-free. Use a gluten-free tart shell instead of the regular one. Look for brands that taste good and hold up well. You can also make your own crust with gluten-free flour. Combine almond flour, coconut flour, and a bit of butter for a tasty crust. This way, everyone can enjoy the dessert!
Flavor Additions and Customizations
You can mix in different flavors for fun. Try adding a splash of bourbon or rum to the caramel sauce. This gives a rich taste. If you love spice, add a pinch of nutmeg to the apple mix. For a chocolate twist, drizzle melted chocolate on top before serving. These small changes can make your tart unique.
Seasonal Fruit Variations
Change the fruit with the seasons! In fall, use pears with apples for a lovely combination. In summer, swap apples for peaches or berries. You can even mix fruits for a colorful tart. Seasonal fruit brings out fresh flavors and keeps your tart exciting. Always remember to adjust the sugar based on the fruit's sweetness.
Storage Info
How to Store Leftover Tart
To store leftover salted caramel apple tart, let it cool completely. Then, cover the tart with plastic wrap or foil. Place it in the fridge. This keeps it fresh for up to three days. If you’re using a slice, wrap it tightly in plastic. This helps prevent it from drying out.
Reheating Instructions
When you want to enjoy the tart again, preheat your oven to 350°F (175°C). Place the tart on a baking sheet. Heat it for about 10-15 minutes. This warms the tart and brings back its crispy crust. You can also use the microwave. Just heat a slice for about 20-30 seconds.
Shelf Life and Freezing Guidelines
The salted caramel apple tart lasts for three days in the fridge. If you want to keep it longer, you can freeze it. Wrap it well in plastic wrap and then in foil. It will stay good for up to two months in the freezer. To enjoy it, thaw in the fridge overnight before reheating.
FAQs
What type of apples are best for a tart?
For a tart, I recommend using Granny Smith and Honeycrisp apples. Granny Smith apples add a nice tartness, while Honeycrisp apples bring sweetness and crunch. Their contrasting flavors create a great balance. You can also mix in some Fuji or Braeburn apples for extra flavor depth.
Can I make the caramel sauce in advance?
Yes, you can make the caramel sauce ahead of time. Just store it in a jar or airtight container after it cools. When you want to use it, gently reheat the sauce on the stove or in the microwave. If it thickens, add a splash of heavy cream to loosen it up.
How do I prevent the tart shell from getting soggy?
To prevent a soggy tart shell, pre-bake the shell for 10 minutes before adding the apples and caramel. This helps create a barrier. You can also brush the inside of the shell with melted butter or egg wash. This adds flavor and further protects the crust from moisture.
To make a great tart, start with quality ingredients. Follow the steps for prep and baking. Use tips for the perfect caramel and choose the best apples. Explore variations for gluten-free options and seasonal fruits. Store leftovers correctly to enjoy later.
Baking can be fun and easy. With practice, you’ll impress everyone with your tasty tarts. Enjoy your culinary journey and your delicious creations!