
Latest & Greatest
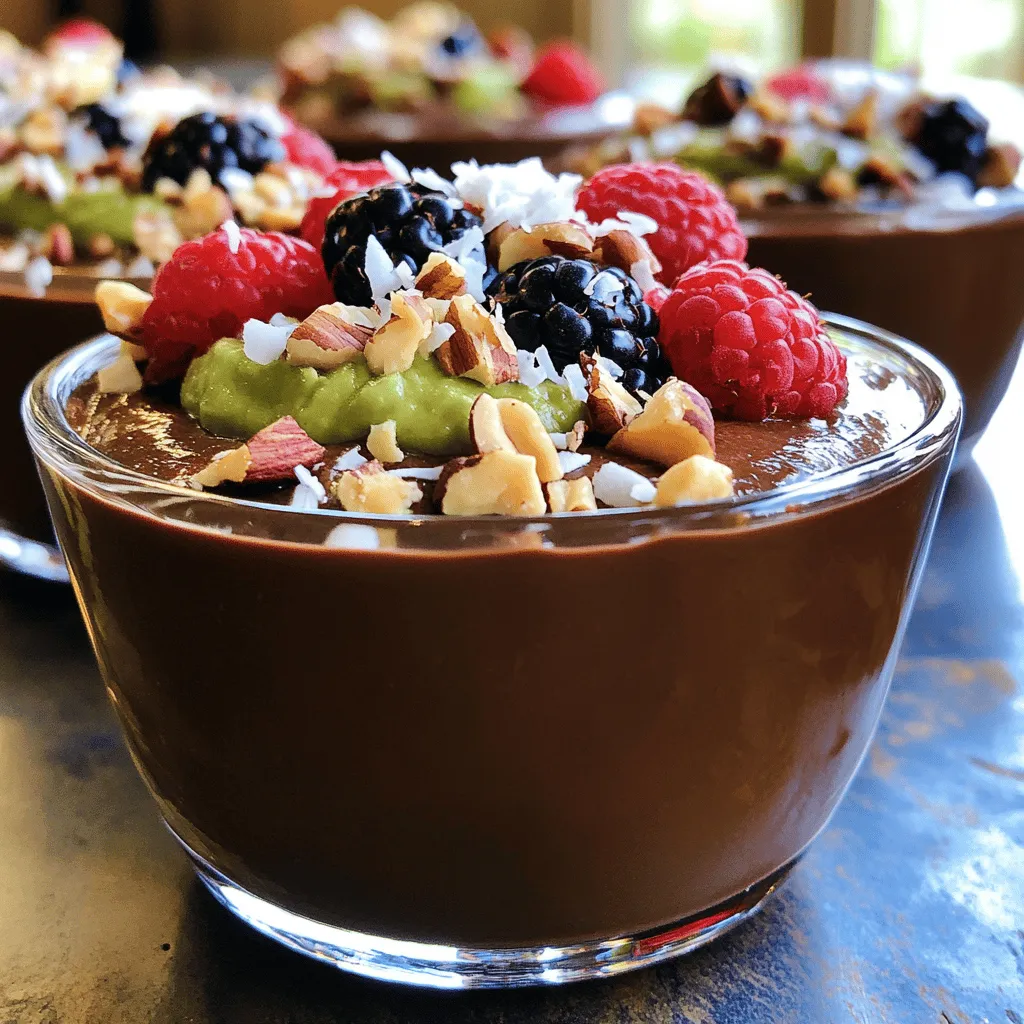
Vegan Chocolate Avocado Pudding Creamy Delight Recipe
Are you ready to indulge in a sweet treat that’s both delicious and healthy? This Vegan Chocolate Avocado Pudding is
Read more…
Sweet Potato Black Bean Enchiladas Flavorful Delight
Get ready to savor a dish that warms your heart and fills your belly: Sweet Potato Black Bean Enchiladas! These
Read more…
Crispy Air Fryer Chicken Wings Simple and Tasty Meal
If you’re craving a crispy snack, you’re in the right place! These air fryer chicken wings are easy to make
Read more…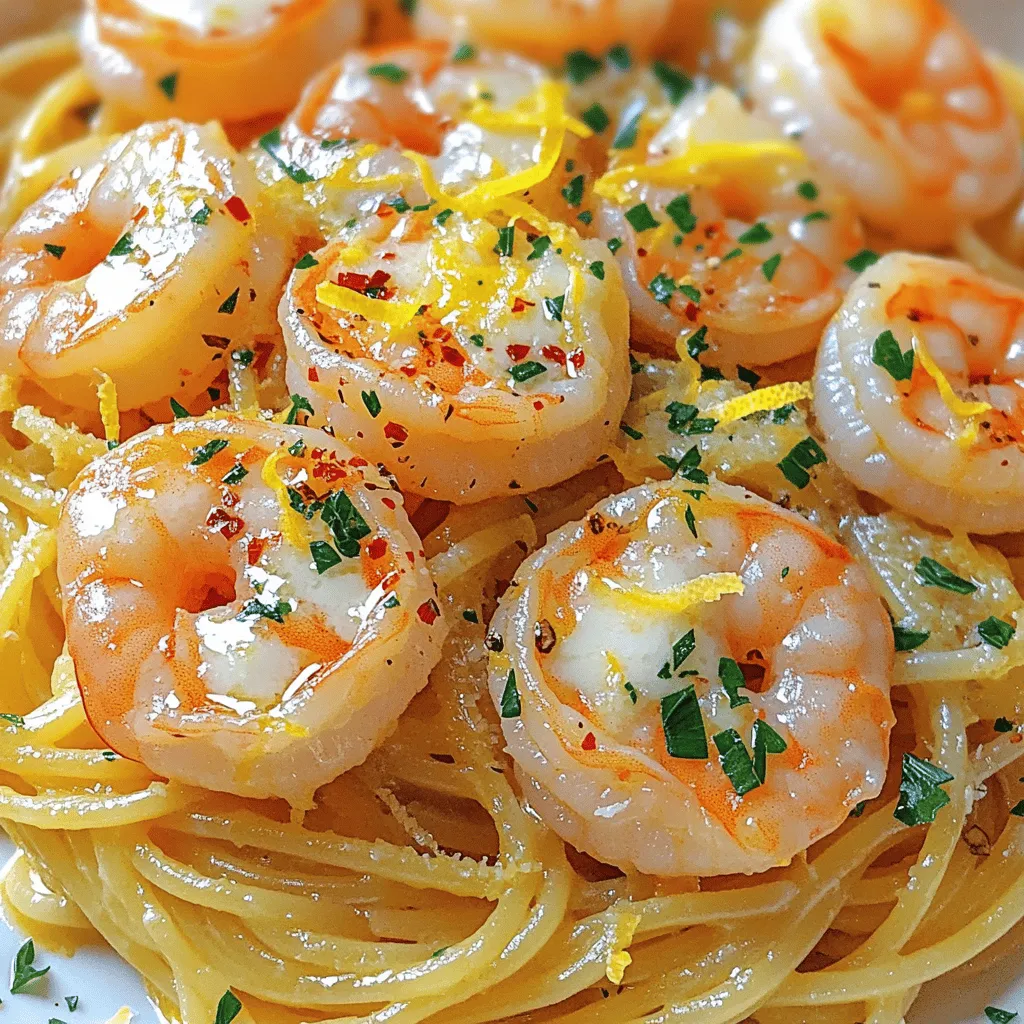
Garlic Butter Shrimp Pasta Simple and Flavorful Meal
If you’re looking for a quick and tasty meal, Garlic Butter Shrimp Pasta is your answer. This dish combines juicy
Read more…
Gluten-Free Blueberry Muffins Simple and Tasty Treat
If you crave a delicious treat that’s easy to make, try my gluten-free blueberry muffins! These muffins are soft, moist,
Read more…
Coconut Curry Lentil Soup Easy and Flavorful Recipe
Looking for a warm, tasty dish that’s easy to make? Try my Coconut Curry Lentil Soup! This hearty recipe uses
Read more…
Mouthwatering Teriyaki Chicken Bowls Easy Recipe Guide
Are you ready to elevate your weeknight meals? My easy guide to mouthwatering teriyaki chicken bowls is just what you
Read more…
Instant Pot Chicken Tikka Masala Easy Family Dinner
Looking for a quick, delicious family dinner? You’ve found it! Instant Pot Chicken Tikka Masala brings rich flavors and tender
Read more…browse recipes


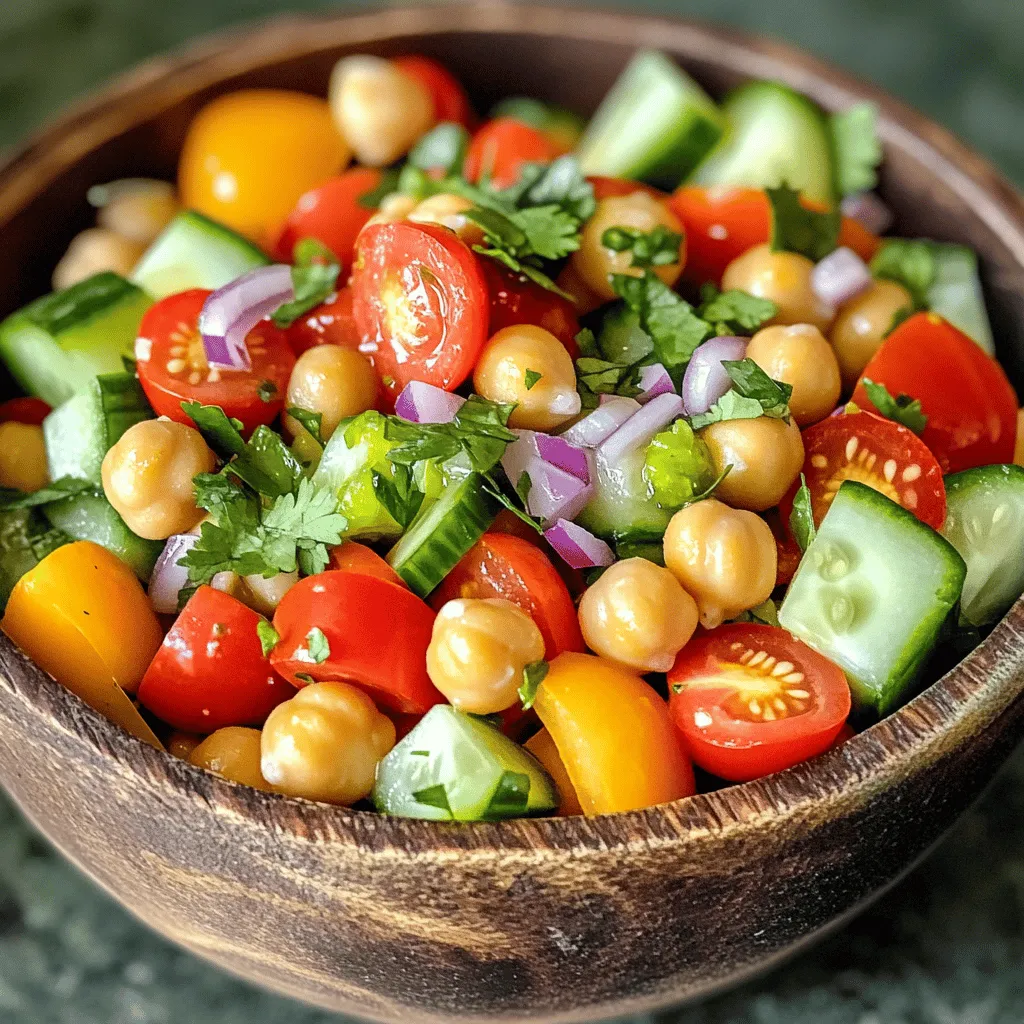
Spicy Chickpea Salad Flavorful and Nourishing Delight
Looking for a fresh, spicy twist on salad? Try this Spicy Chickpea Salad! It’s packed with vibrant flavors and nourishing ingredients that make each…
My Latest Desserts

Mango Coconut Chia Pudding Delicious and Nutritious Treat
Are you ready to treat yourself to something truly delicious and nutritious? Mango Coconut Chia Pudding is the perfect way Read Full Recipe-
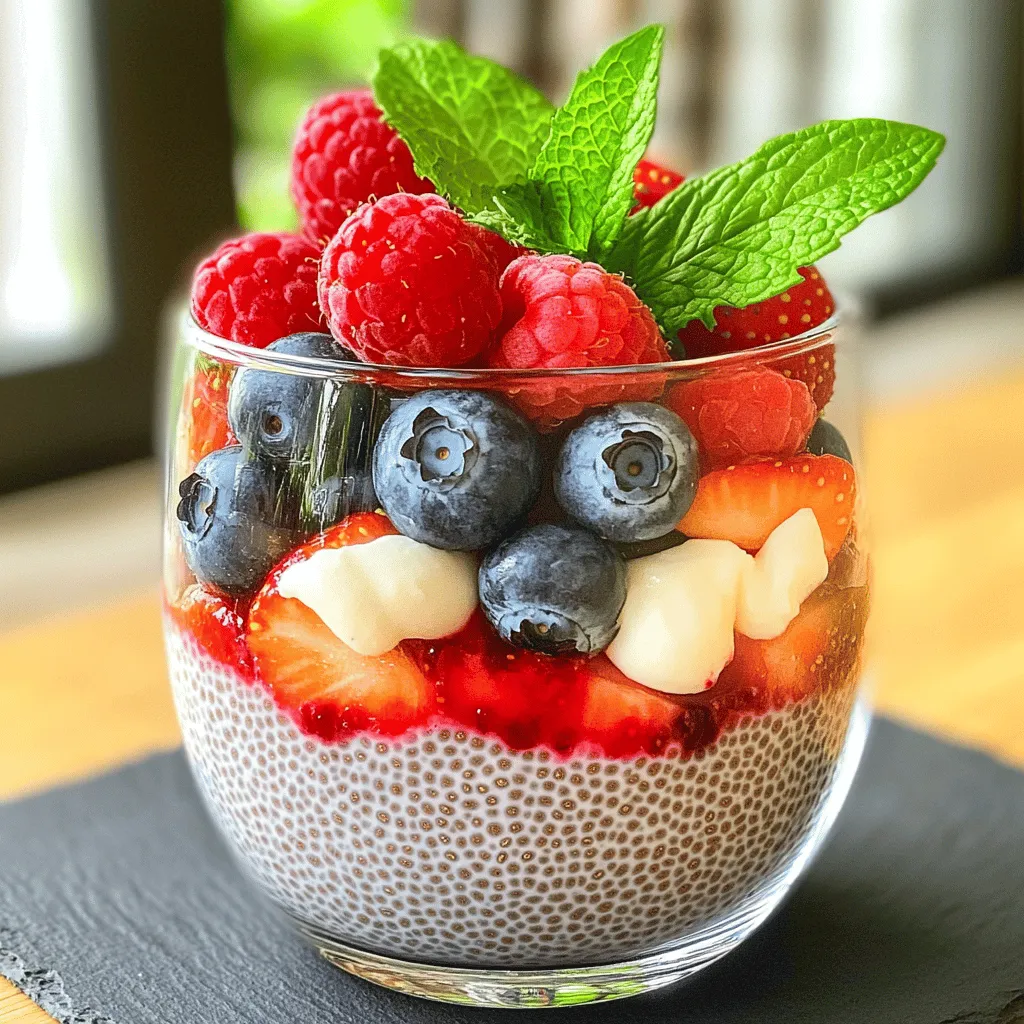
Berry Chia Pudding Simple and Healthy Delight
Berry Chia Pudding is a simple and healthy treat that packs a punch. With just a few easy ingredients, you Read Full Recipe -
Pumpkin Spice Energy Bites Tasty and Healthy Snack
Looking for a tasty and healthy snack to fuel your day? This Pumpkin Spice Energy Bites recipe is your answer! Read Full Recipe -
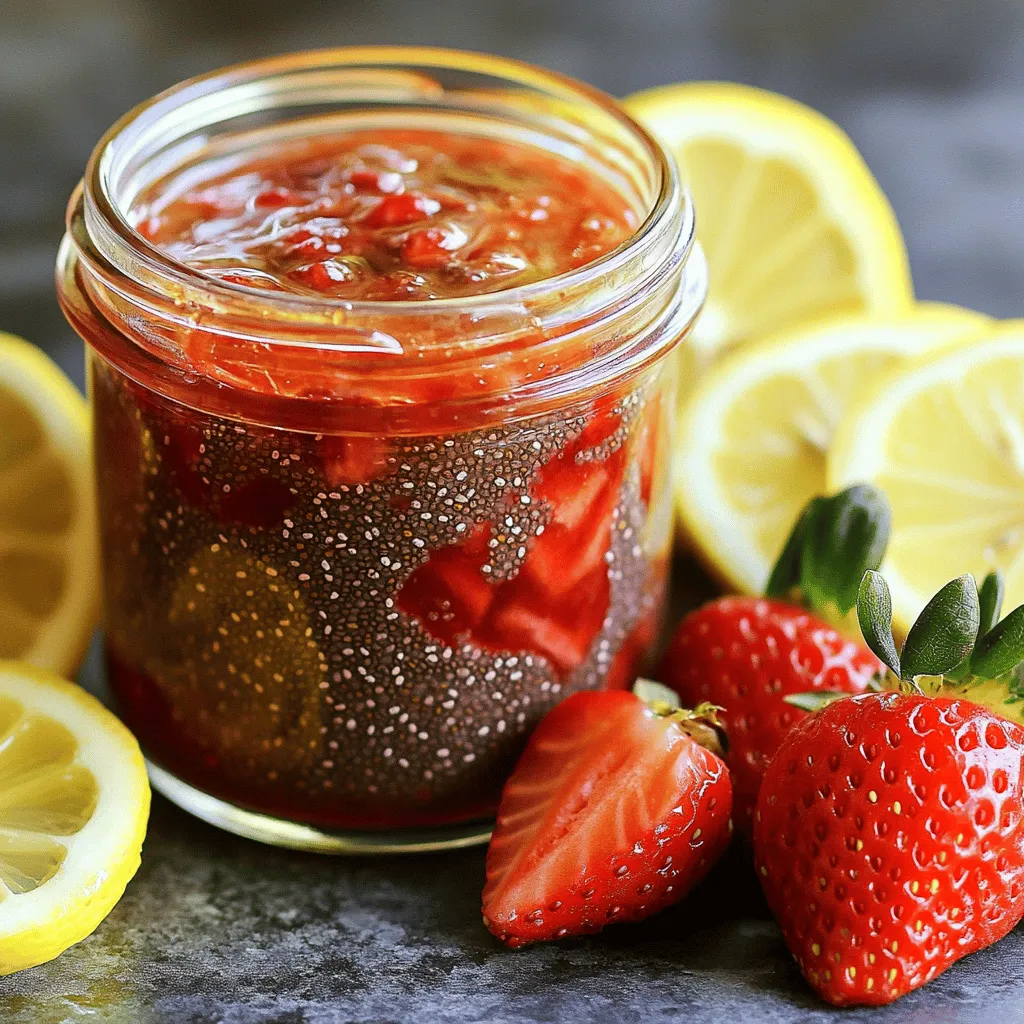
Strawberry Chia Seed Jam Tasty and Healthy Treat
If you’re craving a sweet treat that’s also good for you, I’ve got just the thing: Strawberry Chia Seed Jam! Read Full Recipe -
Pumpkin Spice Muffins Warm and Cozy Fall Treat
Fall is the perfect time for warm and cozy treats, and nothing says autumn like pumpkin spice muffins. These fluffy Read Full Recipe -
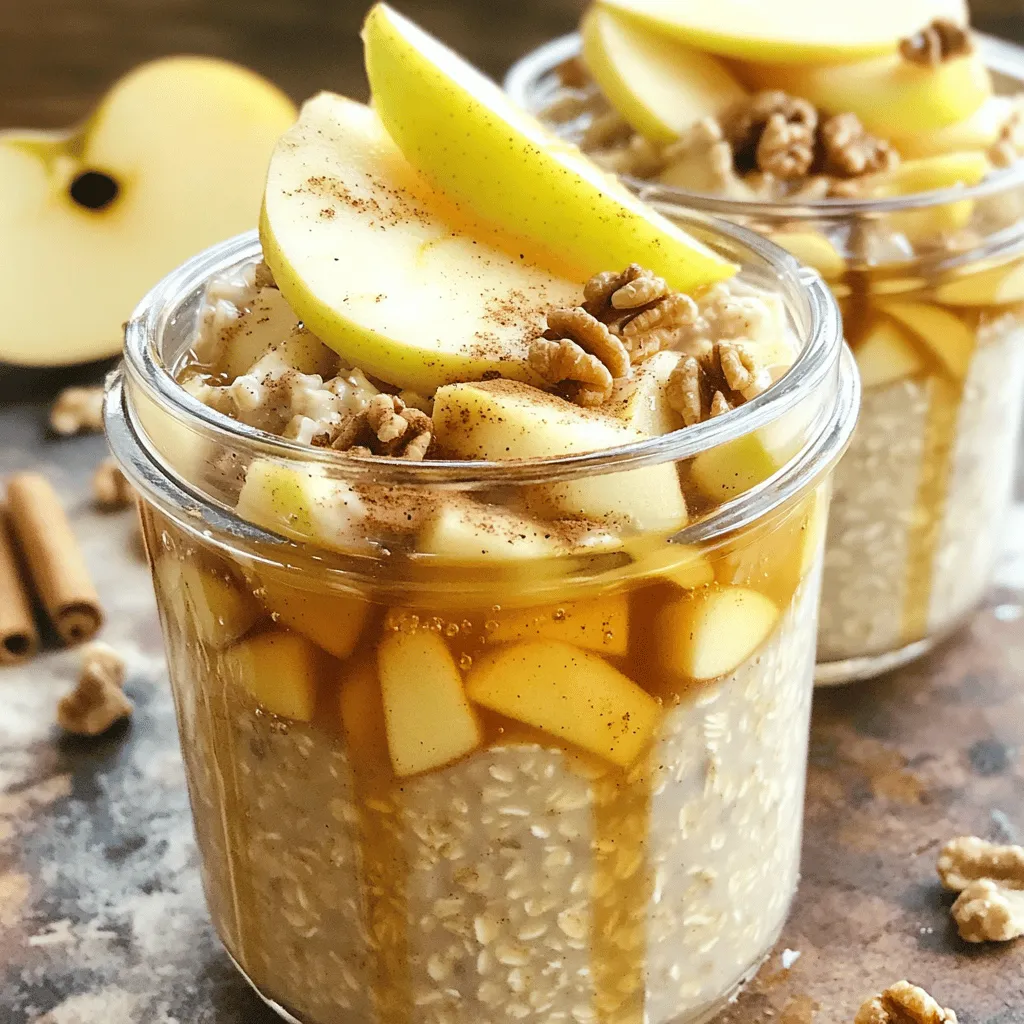
Apple Cinnamon Overnight Oats Healthy Breakfast Option
Looking for a quick and healthy breakfast? You’ve found it! Apple Cinnamon Overnight Oats are the perfect choice for busy Read Full Recipe -
Raspberry Almond Shortbread Bars Simple and Tasty Treat
Looking for a sweet treat that’s easy to make and perfect for any occasion? Raspberry Almond Shortbread Bars are your Read Full Recipe -
Chocolate Covered Strawberry Pops Delightful Treats
Are you ready for a sweet treat? Chocolate Covered Strawberry Pops are delicious and fun to make. I’ll guide you Read Full Recipe -
Fresh Strawberry Yogurt Bark Delicious and Easy Treat
Looking for a quick and tasty treat? Fresh Strawberry Yogurt Bark is your answer! This easy recipe combines creamy Greek Read Full Recipe -
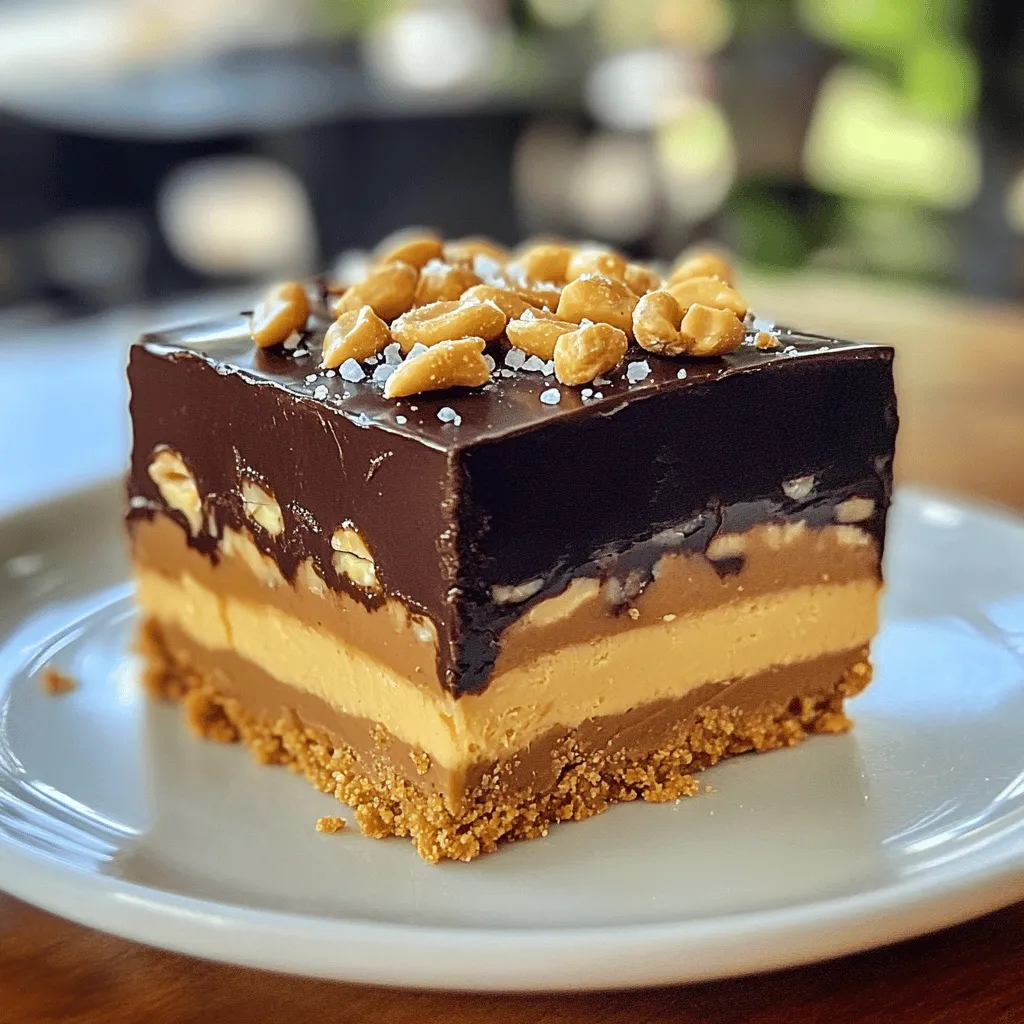
No-Bake Snickers Bars Simple and Decadent Treat
Indulge in a simple and delicious treat with my No-Bake Snickers Bars recipe! These bars come together fast and need Read Full Recipe -
Lemon Blueberry Energy Bites Nourishing Snack Idea
Looking for a tasty, energy-packed snack? Try my Lemon Blueberry Energy Bites! These little balls are the perfect blend of Read Full Recipe -
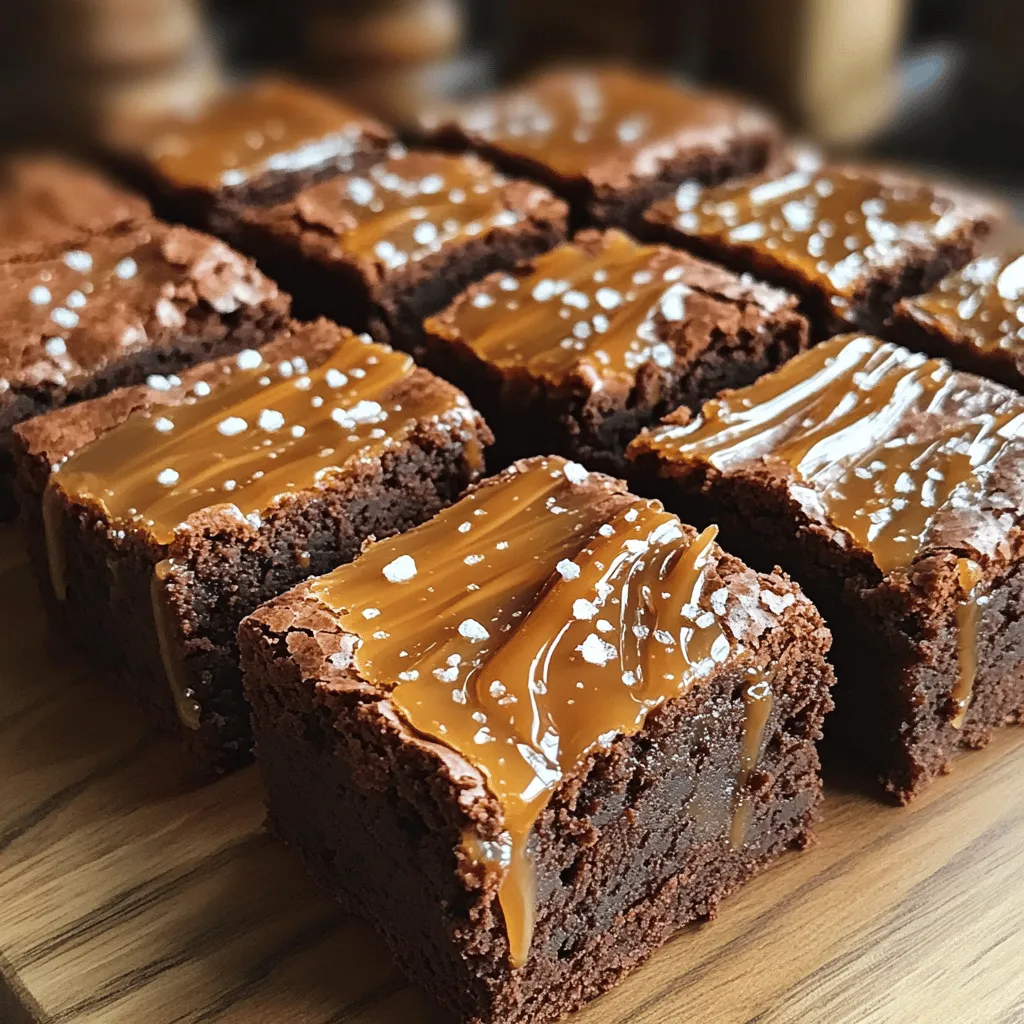
Fudgy Salted Caramel Brownies Rich and Indulgent Treat
Love brownies? Get ready to elevate your dessert game with these Fudgy Salted Caramel Brownies! They combine rich chocolate with Read Full Recipe


hey,
i’m !
I’m so happy you’re here!
Each recipe I share is a little piece of love from my kitchen. May they fill your heart and home with warmth. Let’s cook up something wonderful together.
![To make Creamy Coconut Lentil Curry, gather these simple ingredients: - 1 cup red lentils, rinsed and drained - 1 can (14 oz) coconut milk - 1 medium onion, finely chopped - 3 cloves garlic, minced - 1-inch piece of ginger, minced - 1 tablespoon curry powder - 1 teaspoon ground cumin - 1/2 teaspoon turmeric powder - 1 can (14 oz) diced tomatoes - 2 cups vegetable broth - 1 tablespoon vegetable oil - 1 tablespoon lime juice - Salt and pepper to taste - Fresh cilantro, for garnish Using fresh ingredients can enhance the flavor. If you can’t find fresh ginger, you can use ground ginger. For the spices, fresh spices give a stronger flavor than dried ones. If you have dried spices, use them, but try to add them earlier in the cooking process. If you’re out of red lentils, you can substitute with green or brown lentils. Keep in mind that these will take longer to cook. Also, if you want a creamier texture, try using full-fat coconut milk instead of light coconut milk. Using vegetable broth adds depth to the dish, but you can easily swap it with water if needed. The lime juice adds a fresh kick, so don’t skip it! Fresh cilantro makes a great garnish, but if you don’t like it, parsley works too. This recipe is flexible, so feel free to adjust based on what you have. For the full recipe, check the main article. To make a great Creamy Coconut Lentil Curry, you need to prepare well. Start by gathering all your ingredients. This makes cooking easier and more fun. Accurate measuring helps you get the right taste. For this dish, use a cup for the lentils and a can for the coconut milk. Sautéing the vegetables is key for flavor. Heat your vegetable oil in a pot over medium heat. Add the chopped onion first. Cook it until it turns soft and a little clear, about five minutes. This step brings out the onion's sweet taste. Next, add minced garlic and ginger. Cook them for one to two minutes. You want to smell their lovely aroma. Add the spices next. Mix in the curry powder, cumin, and turmeric. Let them cook for a minute to release their flavors. This step makes your curry taste amazing. Now, let's cook the lentils. Pour in the diced tomatoes and vegetable broth. Stir everything well and bring it to a gentle boil. Add the rinsed lentils to the pot. Make sure to stir again. Cover the pot and let it simmer for about 20 minutes. The lentils should be soft and cooked through. After that, it’s time for the coconut milk. Stir it in along with lime juice. This adds creaminess and a nice zing. Season with salt and pepper to your liking. Heat everything for another five minutes. When it's ready, take the pot off the heat. Let it sit for a few minutes before you serve. This allows the flavors to blend nicely. Enjoy your creamy, flavorful meal over rice or quinoa. For a lovely touch, add fresh cilantro on top. For the full recipe, check out the [Full Recipe]. To cook lentils perfectly, start by rinsing them well. This removes any dust or debris. Use red lentils for this recipe; they cook fast and become soft. Adjusting spice levels is easy. If you like it mild, add less curry powder and cumin. For heat, add chili powder or fresh chili to the mix. Always taste as you go. Avoid common mistakes like overcooking lentils. When they turn mushy, they lose texture. Keep an eye on them while cooking. Also, don’t skip the lime juice; it brightens the dish. Serve Creamy Coconut Lentil Curry with fluffy rice or warm naan. Both soak up the sauce well. You can also try quinoa for a healthy twist. Garnish your curry for a beautiful look. Fresh cilantro adds color and flavor. A wedge of lime on the side is perfect for a zesty kick. Pair your meal with a light beverage. I recommend coconut water or a crisp white wine. They complement the curry and refresh your palate. For the full recipe, check out the complete guide to Creamy Coconut Lentil Curry. {{image_2}} You can easily adjust this creamy coconut lentil curry to fit your diet. First, it is vegan and vegetarian-friendly. Both options use the same base ingredients, so you get great flavor without meat. For gluten-free needs, this recipe already fits the bill. Just ensure that your vegetable broth is gluten-free. Always check labels when buying broth or other packaged items. If you want to add protein, try chicken or tofu. Cook chicken pieces in the pot before adding other ingredients. For tofu, use firm tofu, and sauté it until golden before mixing it in. Adding different vegetables can enhance the dish. Try spinach, bell peppers, or carrots. You can add them in the last few minutes of cooking for a nice crunch. Incorporating spices like coriander or cardamom can also change the flavor. These spices add a lovely warmth to the curry. You can also use fresh herbs like basil or mint for freshness. Regional adaptations make this recipe even more fun. For instance, add Thai red curry paste for a spicier kick. This gives it a whole new flavor profile. You can also make it Indian-style by adding garam masala or mustard seeds. So, feel free to play around with the ingredients. The creamy coconut lentil curry is all about your taste! After serving, let the curry cool down. Place it in an airtight container. This keeps it fresh. You can store the curry in the fridge for up to 4 days. When you're ready to eat it again, reheat it on low heat. Stir often to keep it from sticking. You want to avoid losing that rich flavor. To freeze the curry, let it cool completely. Use a freezer-safe container or bag. Be sure to leave some space for expansion. The curry can freeze well for up to 3 months. When you want to eat it, take it out of the freezer. Move it to the fridge for a night to defrost. To reheat, warm it gently on the stove. Add a splash of water or broth to keep it creamy and delicious. This way, you maintain the taste and texture. Enjoy your flavorful meal anytime! What makes the curry creamy? The creaminess comes from coconut milk. It adds richness and smoothness. When you stir it in, it blends perfectly with the spices and lentils. This balance creates a soft, velvety texture that feels great in your mouth. Can I use other types of lentils? Yes, you can use other lentils like green or brown. However, they may take longer to cook. Red lentils are best for a smooth curry, as they break down easily. If you choose different lentils, adjust the cooking time accordingly. How can I make the curry spicier? To add heat, try adding chopped chili peppers. You can also use cayenne pepper or red pepper flakes. Mix them in when you add the spices. Taste as you go to find your perfect level of spice. How do I know when lentils are cooked? Lentils are cooked when they are soft and tender. They should not be crunchy. You can taste them to check. If they still feel firm, cook them a bit longer. Can I substitute coconut milk with another ingredient? You can use almond milk or cashew cream as a substitute. However, they will not give the same rich flavor. For a thick texture, add a bit of nut butter or cream. What are the best ways to serve this dish? Serve the curry over rice or quinoa for a hearty meal. You can also pair it with naan bread. Garnish with fresh cilantro and a wedge of lime for extra flavor. Enjoy it hot for the best taste. For the full recipe, check out the earlier section. Creating Creamy Coconut Lentil Curry is simple and rewarding. We covered each ingredient, from fresh spices to helpful substitutes. I walked you through step-by-step cooking techniques to ensure perfect results. You learned essential tips for serving and storing, as well as creative variations for dietary needs. Enjoy experimenting with flavors and making this dish your own. With practice, you'll master this tasty meal and impress your family and friends. Start cooking today and savor the deliciousness!](https://lisadishes.com/wp-content/uploads/2025/04/c1b03525-2d89-4b6e-b697-b6ae0d13fa91-300x300.webp)
![- 2 cups cooked brown rice - 1 pound boneless, skinless chicken breasts, diced - 2 cups fresh broccoli florets - 1 cup shredded cheddar cheese - 1/2 cup cream cheese, softened - 1 cup chicken broth - 1 cup milk - 1 teaspoon garlic powder - 1 teaspoon onion powder - 1/2 teaspoon paprika - Salt and pepper to taste - 1/2 cup breadcrumbs (optional for topping) To make this Cheesy Chicken Broccoli Rice Bake, you need some key ingredients. First, use cooked brown rice as your base. It adds great texture and is healthy. Next, add diced chicken breasts. They are the star of the dish. You want them tender and juicy. Now, let’s talk about the broccoli. Fresh florets add color and crunch. They also boost the nutrition of this dish. For the creamy part, you will need cheddar and cream cheese. The cheddar cheese melts beautifully, while the cream cheese makes it rich and smooth. Don’t forget the chicken broth and milk. They help blend all the flavors. Spices like garlic powder, onion powder, and paprika give the dish great taste. Adjust salt and pepper to your liking. Finally, if you want a crunchy topping, breadcrumbs are a nice option. They add a lovely texture contrast. All these ingredients create a warm and cozy dish. Make sure to check the Full Recipe for detailed steps! - Preheat your oven to 350°F (175°C). Grease a 9x13 inch baking dish with cooking spray or butter. - In a large skillet over medium heat, cook 1 pound of diced, boneless, skinless chicken breasts until golden brown, about 5-7 minutes. Season it with 1 teaspoon garlic powder, 1 teaspoon onion powder, 1/2 teaspoon paprika, and salt and pepper to taste. - In a large bowl, mix 2 cups of cooked brown rice, the cooked chicken, 2 cups of fresh broccoli florets, 1/2 cup of softened cream cheese, 1 cup of chicken broth, and 1 cup of milk. Stir until everything is evenly combined. - Once mixed, add 1/2 cup of shredded cheddar cheese and adjust the seasoning if needed. You want it to taste just right. - Pour the mixture into your prepared baking dish and spread it evenly. - Top with the remaining 1/2 cup of shredded cheddar cheese. If you like a crunch, sprinkle 1/2 cup of breadcrumbs on top. - Bake in the preheated oven for 25-30 minutes. You want the cheese to melt and bubble. The top should turn golden brown. - To check for doneness, look for a bubbly surface and a golden color. Let it cool for a few minutes before serving. For the full recipe, check the [Full Recipe]. To keep your chicken moist, cook it just until golden. Overcooking makes it dry. Use a meat thermometer to check for doneness at 165°F (74°C). This will help you serve juicy chicken every time. For perfect broccoli, steam it for just a few minutes. You want it bright green and tender-crisp. If you cook it too long, it gets mushy. You can also sauté broccoli in a pan with a bit of oil. This adds extra flavor. For a rich and creamy bake, I love using cheddar cheese. It melts well and provides a great flavor. You can also mix in mozzarella for extra stretchiness. If you want a sharp taste, try a bit of Gruyère. When melting cheese, add it near the end of cooking. This keeps it from clumping. Stir gently as it melts to create a smooth texture. You can also mix in a little milk for a creamier result. Pair your Cheesy Chicken Broccoli Rice Bake with a fresh salad. A simple green salad with a light vinaigrette works well. You can also serve it with garlic bread for a comforting meal. For garnishing, add fresh parsley on top right before serving. It adds color and freshness. You can also sprinkle more cheese on top once it comes out of the oven for that extra cheesy touch. For the full recipe, check the earlier section. {{image_2}} You can switch chicken for turkey or tofu. Turkey gives a leaner taste, while tofu suits plant lovers. Cooked sausage or ham also adds great flavor. Simply mix them in with the rice and broccoli. Feel free to add other vegetables. Carrots, peas, or bell peppers work well. Fresh veggies are tasty, but frozen ones save time and still taste good. Just toss them in without thawing. For a low-carb option, use cauliflower rice instead of brown rice. It’s light and still filling. If you need a gluten-free choice, skip the breadcrumbs or find gluten-free ones. Enjoy the same cheesy goodness without worry. To keep your Cheesy Chicken Broccoli Rice Bake fresh, store leftovers in the fridge. Use airtight containers to prevent drying out. I recommend glass or plastic containers with tight-fitting lids. These containers can help keep flavors intact and avoid spills. If you want to save some for later, freezing is easy. First, let the bake cool completely. Then, transfer it into freezer-safe containers or heavy-duty freezer bags. Label them with the date. When you want to eat it, thaw overnight in the fridge. Reheat in the oven at 350°F until hot. You can also use the microwave, but the oven keeps it crispy. In the fridge, your bake will stay good for about 3 to 4 days. If you freeze it, it can last up to 3 months. However, for best taste, try to eat it sooner. Always check for any signs of spoilage before eating. It takes about 15 minutes to prep. Baking takes 25-30 minutes. So, you can enjoy this dish in about 45 minutes. Yes, you can prep everything a day ahead. Just mix all the ingredients and store them in the fridge. When ready, bake it straight from the fridge. This way, you save time on busy days. You can use Greek yogurt for a lighter option. Sour cream works too, adding creaminess. Both will give a nice texture without changing the taste much. Absolutely! Swap out the chicken for chickpeas or tofu. Use vegetable broth instead of chicken broth. Add more veggies like bell peppers or carrots for a heartier meal. Yes, you can reheat leftovers easily. Use the oven at 350°F for about 15-20 minutes. This helps keep the dish moist. Microwaving works too, but it may dry out the rice. Enjoy your delicious Cheesy Chicken Broccoli Rice Bake! For the Full Recipe, check out the earlier sections. This blog post covered a delicious Cheesy Chicken Broccoli Rice Bake. We explored ingredients, step-by-step instructions, and useful tips. You learned about optional toppings and variations for different diets. We also discussed storage and reheating methods to keep your meals tasty. In summary, this dish is simple, versatile, and perfect for any occasion. Ready to make your own? Enjoy cooking!](https://lisadishes.com/wp-content/uploads/2025/06/0a4a7735-bbf7-4abe-85ca-1852d7fe80ba-300x300.webp)

![The classic BLT sandwich has simple but key ingredients. Each one plays a big role in its taste and texture. Here’s what you need: - Bacon varieties (turkey bacon or regular bacon) - Types of bread (whole grain or sourdough) - Fresh produce (lettuce, tomatoes) - Sauce components (mayonnaise, Dijon mustard) - Optional toppings (avocado, microgreens) 1. Bacon Varieties: You can choose turkey bacon for a lighter option or go for regular bacon for that classic crunch and flavor. Both types bring a unique taste that makes your sandwich delicious. 2. Types of Bread: Whole grain bread adds a nutty flavor, while sourdough gives a tangy twist. Choose what you love most. 3. Fresh Produce: Crisp lettuce and juicy tomatoes are essential. Use romaine or iceberg lettuce for crunch and vine-ripened tomatoes for the best taste. 4. Sauce Components: Mayonnaise adds creaminess, while Dijon mustard gives a slight kick. Mix them well for a tasty spread. 5. Optional Toppings: Want to get fancy? Add sliced avocado for creaminess or microgreens for a fresh bite. These extras can change the whole sandwich. For the full recipe, check out the details above. Enjoy your cooking adventure! To start, you need crispy bacon. I recommend using a skillet for the best results. Heat the skillet over medium heat. Add your bacon slices and cook for about 5-7 minutes on each side. This method gives you that perfect crunch. Once done, place the bacon on paper towels to drain excess grease. If you prefer an easier way, you can cook the bacon in the oven. Preheat your oven to 400°F (200°C). Lay the bacon on a baking sheet lined with foil. Bake for 15-20 minutes, flipping halfway. This method frees up your stovetop and gives you crispy bacon. Next, toast the bread. You can use the same skillet where you cooked the bacon. Just drain the grease if needed. Place the bread slices in the skillet and cook until golden brown, about 2-3 minutes per side. If you’d rather use a toaster, that works too! Toast the bread until it’s nice and brown. This adds a great crunch to your sandwich. Now it’s time to make the sauce. In a small bowl, mix together 2 tablespoons of mayonnaise and 1 teaspoon of Dijon mustard. Stir until smooth and well combined. You can tweak the flavor by adding a pinch of salt and pepper. If you want more zing, add a bit more mustard. This sauce brings everything together. Now, let’s build your BLT! Start with one slice of toasted bread. Spread a generous layer of your sauce on top. Next, add 2 slices of crispy lettuce. Then, place 2 slices of thick tomato on top of the lettuce. Sprinkle a little salt and pepper on the tomato for extra taste. Now, add 2 pieces of bacon. If you want, you can include slices of avocado or a handful of microgreens for added flavor and crunch. Top it off with another slice of toasted bread. Repeat this to make a second sandwich. For a nice presentation, cut each sandwich in half diagonally. This makes it easy to handle and looks great on the plate. You can serve your sandwiches on a rustic wooden board. Add a small bowl of pickles on the side and a serving of potato chips for that extra crunch. This simple touch makes your meal look delicious and inviting. Enjoy your iconic BLT Sandwich with your favorite sides! Using quality ingredients makes all the difference in a BLT. For bacon, I highly recommend crispy turkey bacon. It gives you the crunch without too much fat. If you prefer regular bacon, go for a thick cut. It adds a rich, smoky flavor. Fresh produce is key. Look for vine-ripened tomatoes; they are juicy and sweet. For lettuce, choose romaine or iceberg. Both add a nice crunch. Bread choices affect flavor and texture. I suggest whole grain or sourdough. Whole grain adds a nutty taste. Sourdough offers a tangy flavor and crispy crust. Achieving crispy bacon is an art. Cook it in a skillet over medium heat. Flip it often to ensure even cooking. It takes about 5-7 minutes per side. Drain the bacon on paper towels to remove extra grease. Toasting bread is simple yet crucial. You can use the same skillet once you cook the bacon. Toast each slice until it’s golden brown. This adds texture and keeps the sandwich from getting soggy. To boost flavor, think about adding spices or herbs. A pinch of smoked paprika can add depth. If you enjoy a bit of heat, try crushed red pepper flakes. Customizing the sauce can elevate your BLT. Mix mayonnaise with a teaspoon of Dijon mustard for a tangy kick. You can also add garlic powder for extra flavor. For a twist, consider sliced avocado or microgreens. They add creaminess and freshness to each bite. For the full recipe, visit [Full Recipe]. {{image_2}} You can make your BLT even better with a few easy changes. - Adding cheese for creaminess: Try adding slices of sharp cheddar or creamy goat cheese. The cheese melts a little, giving your sandwich a rich taste. - Switching up the greens: Instead of regular lettuce, use spinach or arugula. These greens add a peppery kick and extra nutrients. Want to shake things up? There are many fun ways to change your BLT. - Using flavored mayonnaise: Mix in chipotle for a smoky taste or garlic for a zing. These flavors will take your sandwich to a whole new level. - Exploring different bacon types: Use pork bacon for that classic taste, or try turkey bacon for a lighter option. You can even find vegetarian bacon made from plants! Eating healthy doesn’t mean giving up on flavor. - Low-calorie bread options: Choose whole grain or low-calorie bread. These options keep your sandwich tasty while cutting calories. - Using turkey bacon or veggie bacon: Both options give you the bacon flavor with less fat. They are great for anyone watching their diet. For the full recipe, check out my Classic BLT Sandwich! To keep your bacon and bread fresh, follow these tips: - Bacon: Store cooked bacon in an airtight container. It lasts about 4-5 days in the fridge. If it's uncooked, wrap it tightly and keep it in the fridge or freezer. - Bread: For leftover bread, place it in a zip-top bag. Keep it at room temperature for a few days. If you want it to last longer, freeze the bread. When it comes to mayonnaise-based mixtures, like the one in the BLT, follow these tips: - Store any leftover sauce in a sealed container. It will stay fresh in the fridge for about a week. - Always check for any off smells or changes in texture before using leftovers. If you want to prepare sandwiches in advance, here’s how: - Prepare the ingredients but don’t assemble the sandwich right away. Keep them separate for best results. - Store the bacon, lettuce, and tomatoes in separate containers. This helps maintain their freshness and flavor. - Assemble the sandwich just before eating. This keeps the bread from getting soggy. You might wonder if you can freeze sandwiches. The answer is yes, but with some rules: - You can freeze the bacon and the bread. However, avoid freezing assembled sandwiches. They may lose their texture. - If you freeze bacon, wrap it in plastic wrap and then place it in a freezer bag. This prevents freezer burn. - For bread, slice it before freezing. This makes it easier to grab what you need later. - When ready to eat, thaw the bacon in the fridge overnight and toast the bread for that perfect crunch. For a full recipe, check out the details above and enjoy your Classic BLT! You can cook bacon in a skillet or oven. The skillet gives you crispy bacon quickly. Cook it over medium heat for about 5-7 minutes. Watch it closely to avoid burning. You can also bake bacon in the oven. Preheat the oven to 400°F. Lay strips on a baking sheet and bake for about 15-20 minutes. This method is easy and keeps your kitchen clean. Yes, you can! Use meat substitutes like tempeh, tofu, or veggie bacon. For added flavor, try marinating these options. You can also add grilled vegetables, like eggplant or zucchini. They bring a nice texture and taste. Using avocado is another great choice. It adds creaminess and richness to the sandwich. To keep your bread dry, follow these tips: - Toast the bread well. This creates a barrier. - Use less mayonnaise or spread it on just one side. - Pat the tomatoes dry with a paper towel. - Layer the lettuce between the mayo and tomatoes. This helps absorb moisture. A prepared BLT lasts about 2-3 hours at room temperature. If you must store it, wrap it tightly in plastic. Keep it in the fridge for up to 1 day. Be aware that the bread may get soggy. It’s best to eat it fresh for the best flavor. Here are some great side dishes: - Potato chips for crunch. - A simple side salad for freshness. - Pickles for a tangy kick. - Sweet potato fries for something different. These options complement the BLT well and enhance your meal. For the full recipe, check out the section above. You learned how to create the perfect BLT sandwich. From selecting quality ingredients to crispy bacon and fresh bread, each step matters. You can customize flavors to suit your taste with sauces and toppings. Remember to store leftovers properly to maintain freshness. This classic sandwich is versatile, making it easy to adapt or enjoy as is. With these tips, you can make a tasty BLT that will impress anyone. Enjoy your sandwich-making journey!](https://lisadishes.com/wp-content/uploads/2025/06/a459258c-ae8f-4f4e-833f-9af8045d1a36-300x300.webp)
Loaded Buffalo Chicken Casserole Tasty and Simple Dish
Looking for a dish that packs a flavorful punch? This Loaded Buffalo Chicken Casserole is both tasty and simple to make. With juicy chicken,…

My Latest Dinners
-
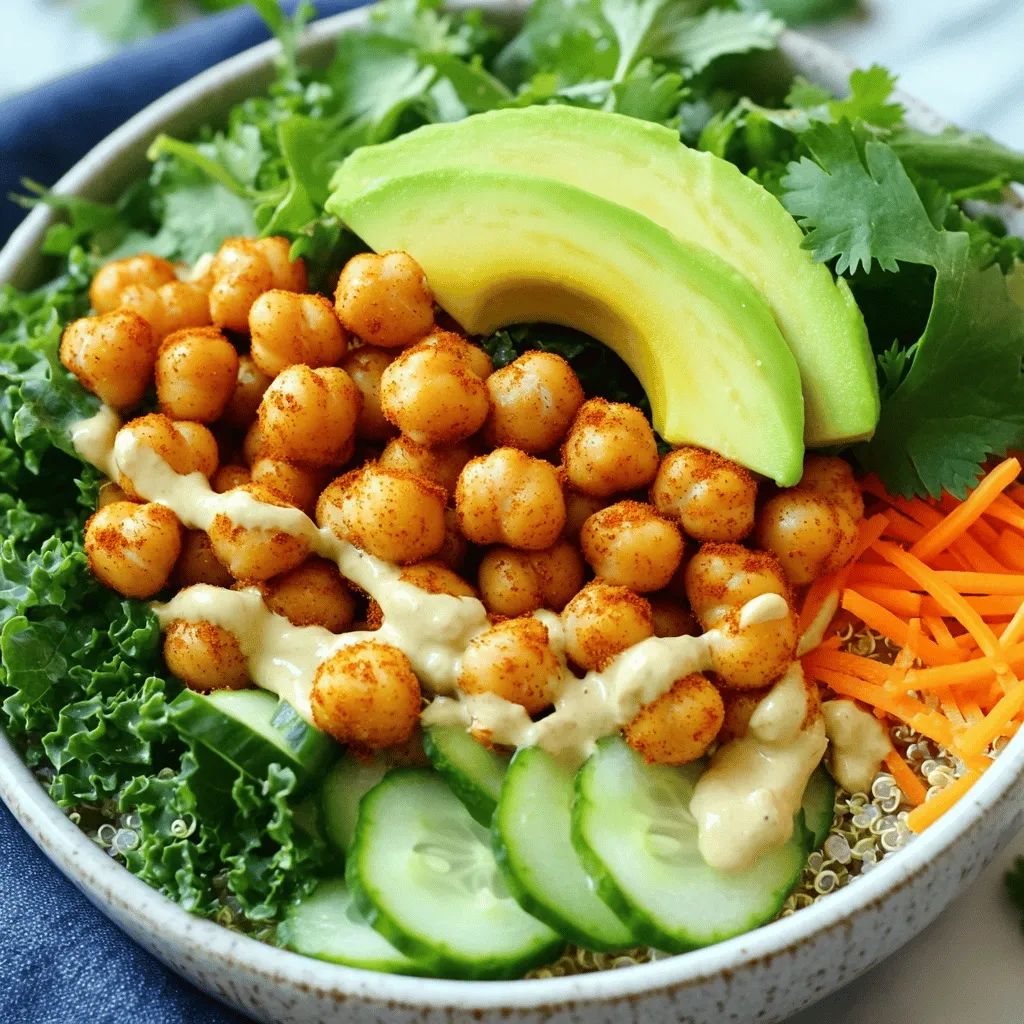
Crispy Chickpea Buddha Bowl Energizing and Nutritious
Looking for a delicious, energizing meal? Try my Crispy Chickpea Buddha Bowl! Packed with protein, fresh veggies, and a zesty Read Full Recipe -
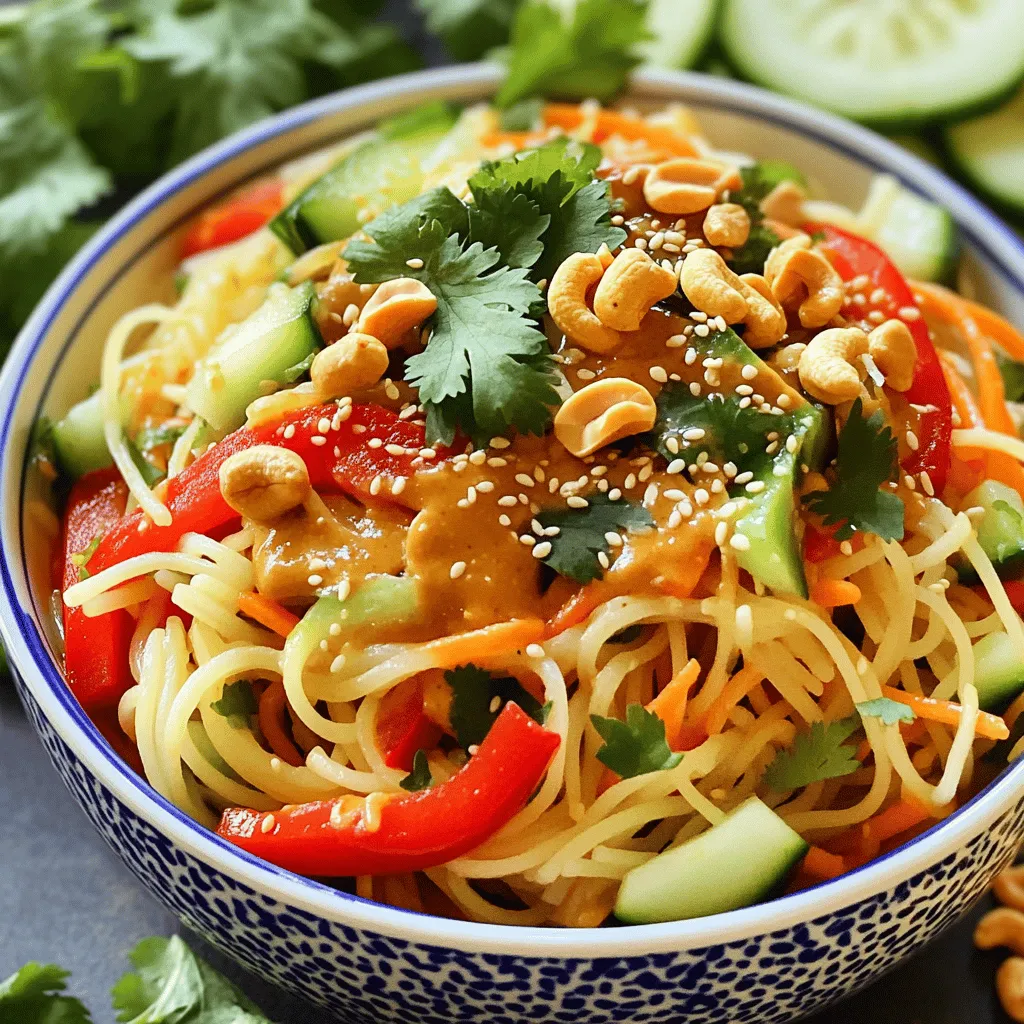
Spicy Cashew Noodle Salad Tasty and Simple Recipe
Are you ready to enjoy a tasty dish that packs a flavorful punch? My Spicy Cashew Noodle Salad is not Read Full Recipe -
Sweet Chili Salmon Bowls Healthy and Flavorful Meal
Looking for a quick, healthy meal that’s bursting with flavor? Sweet Chili Salmon Bowls are the answer! I’ll walk you Read Full Recipe -
Chicken Taco Soup Flavorful and Simple Recipe Guide
Looking for a quick and tasty meal? I’ve got the perfect solution: Chicken Taco Soup! This flavor-packed recipe is easy Read Full Recipe -
Baked Lemon Garlic Tilapia Simple and Tasty Meal
Are you ready to whip up a meal that’s both simple and bursting with flavor? Baked Lemon Garlic Tilapia is Read Full Recipe -
Buffalo Chicken Stuffed Peppers Tasty and Easy Recipe
Are you craving a meal that’s both tasty and easy to make? Look no further! This Buffalo Chicken Stuffed Peppers Read Full Recipe