

Latest & Greatest
Iraqi Lentil Soup Hearty and Flavorful Recipe
If you’re looking for a warm, filling meal, you must try my Iraqi Lentil Soup. This dish blends simple ingredients into a hearty, flavorful delight. I’ll…
Read more…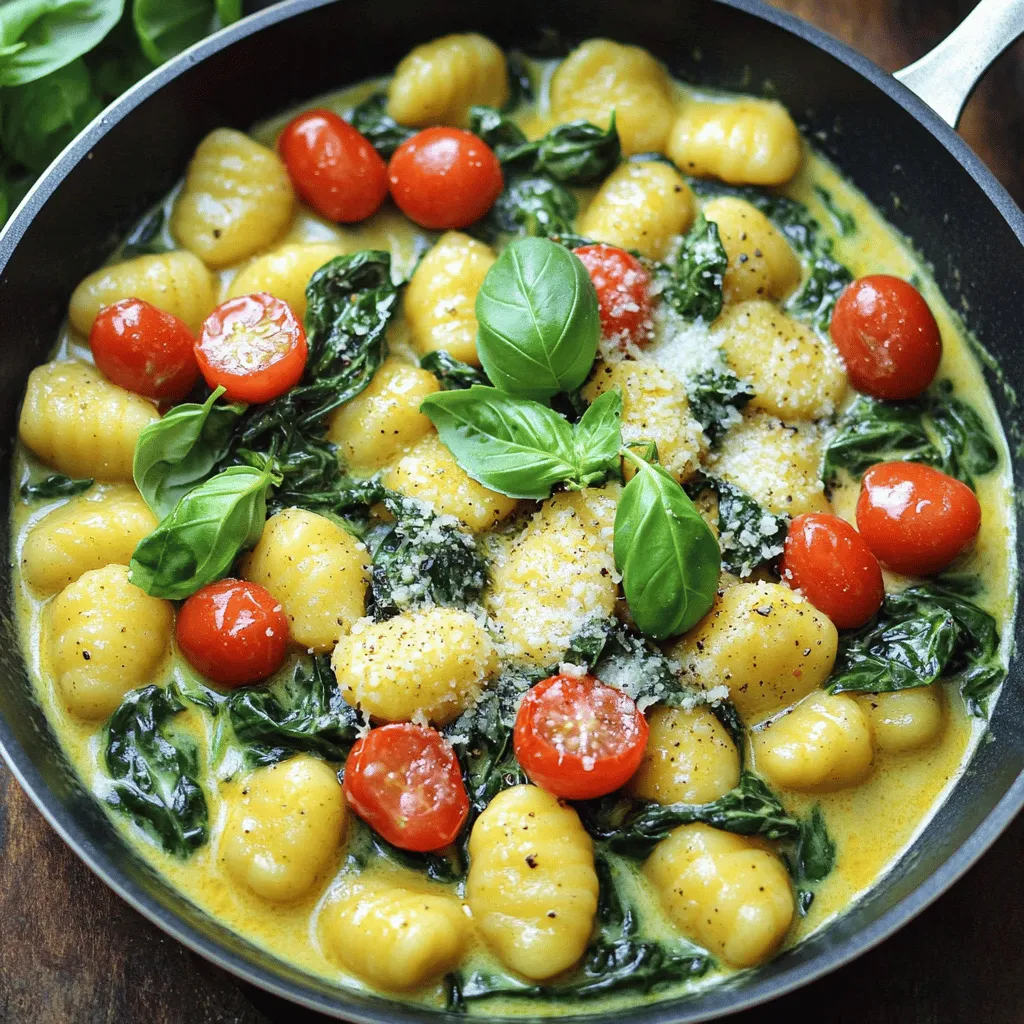
20-Minute One-Pan Spinach Gnocchi Quick and Easy Meal
Looking for a quick meal that’s full of flavor? You’re in the right place! My 20-Minute One-Pan Spinach Gnocchi is the perfect dish for busy nights.…
Read more…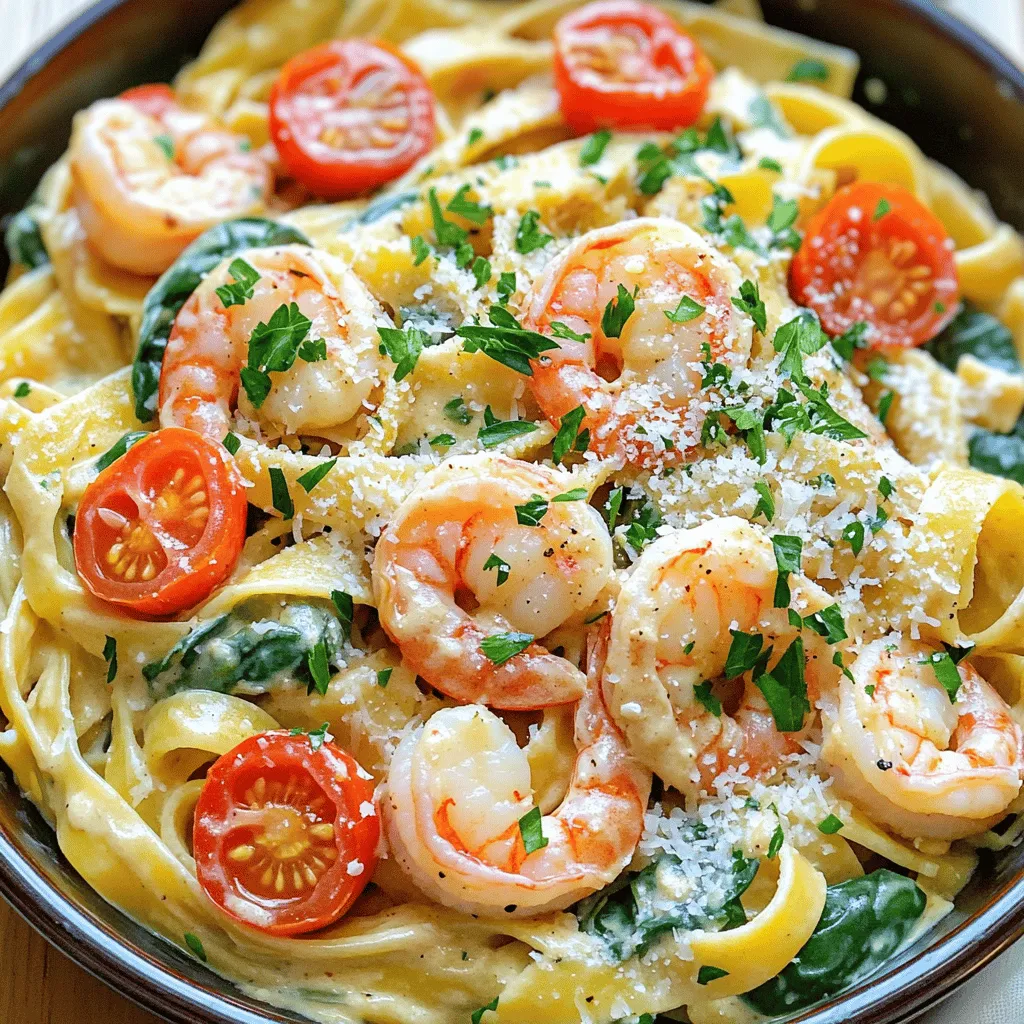
Creamy Cajun Shrimp Pasta Flavorful and Simple Dish
Are you ready for a dish that’s as easy to make as it is delicious? Creamy Cajun Shrimp Pasta blends rich flavors with vibrant ingredients for…
Read more…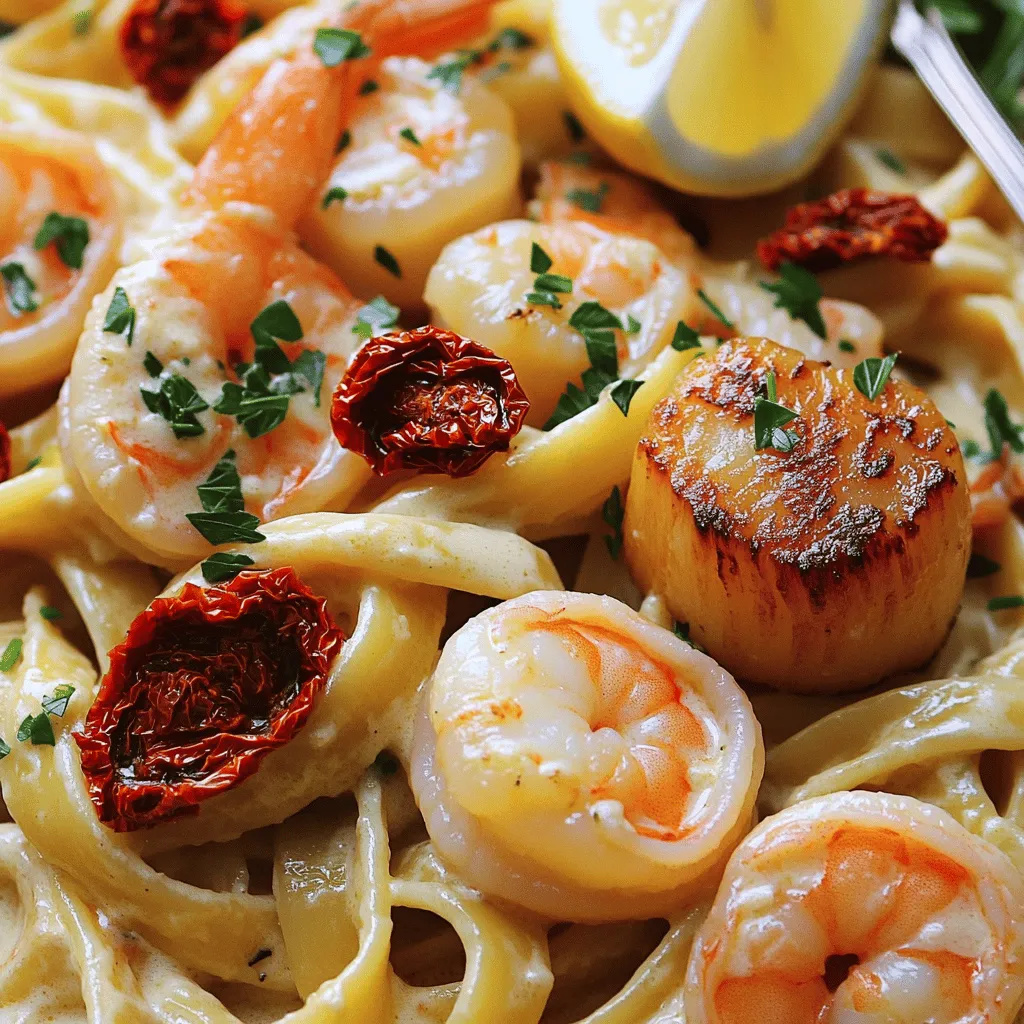
Savory Shrimp Scallop Pasta Creamy Delight Recipe
Get ready to create a dish that wows your taste buds! My Savory Shrimp Scallop Pasta Creamy Delight Recipe combines fresh seafood with a rich, creamy…
Read more…
Cheesecake Brownies Irresistible Chocolate Delight
Are you ready to indulge in a rich, chocolaty treat? Cheesecake brownies blend two beloved desserts into one tasty delight. Imagine thick, fudgy brownies topped with…
Read more…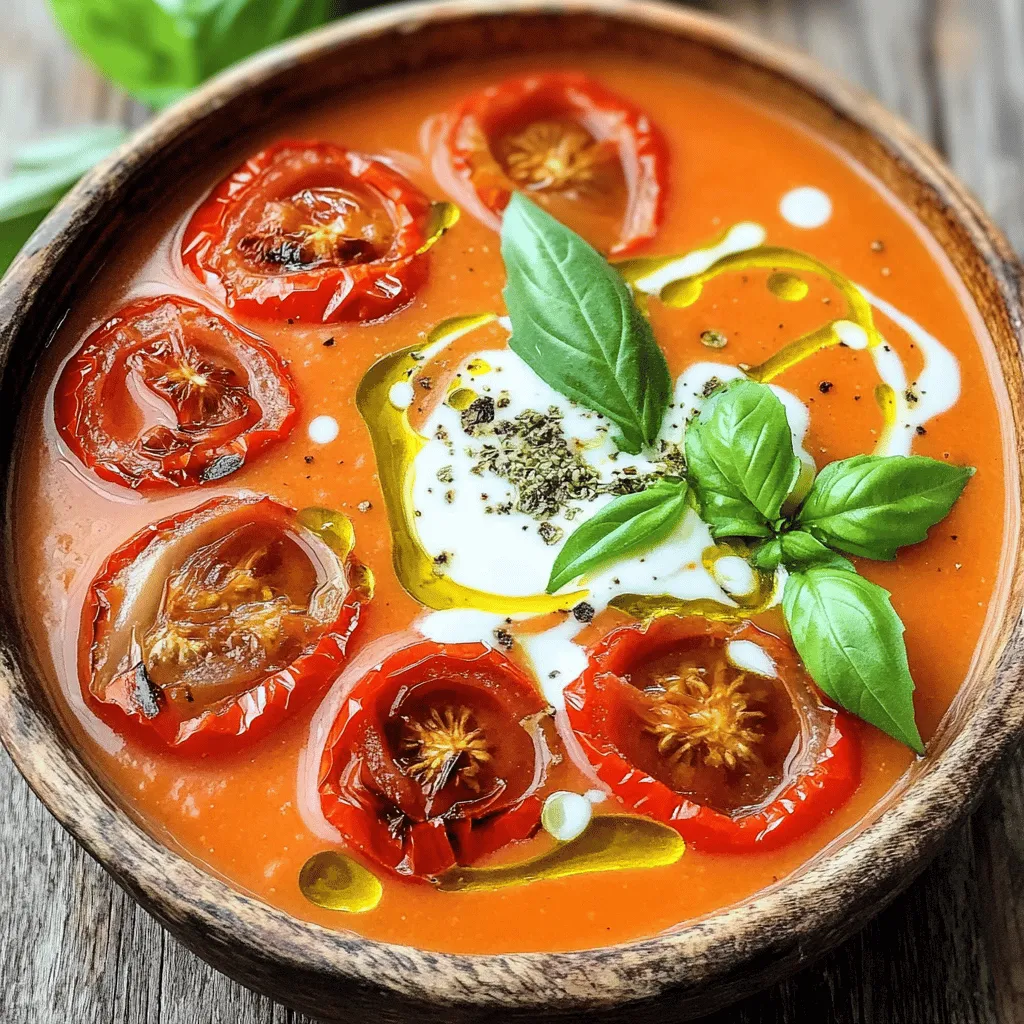
Easy Roasted Tomato Soup Flavorful and Comforting Dish
If you’re craving a warm and rich dish, it’s time to make Easy Roasted Tomato Soup! This recipe is simple yet packed with flavor, making it…
Read more…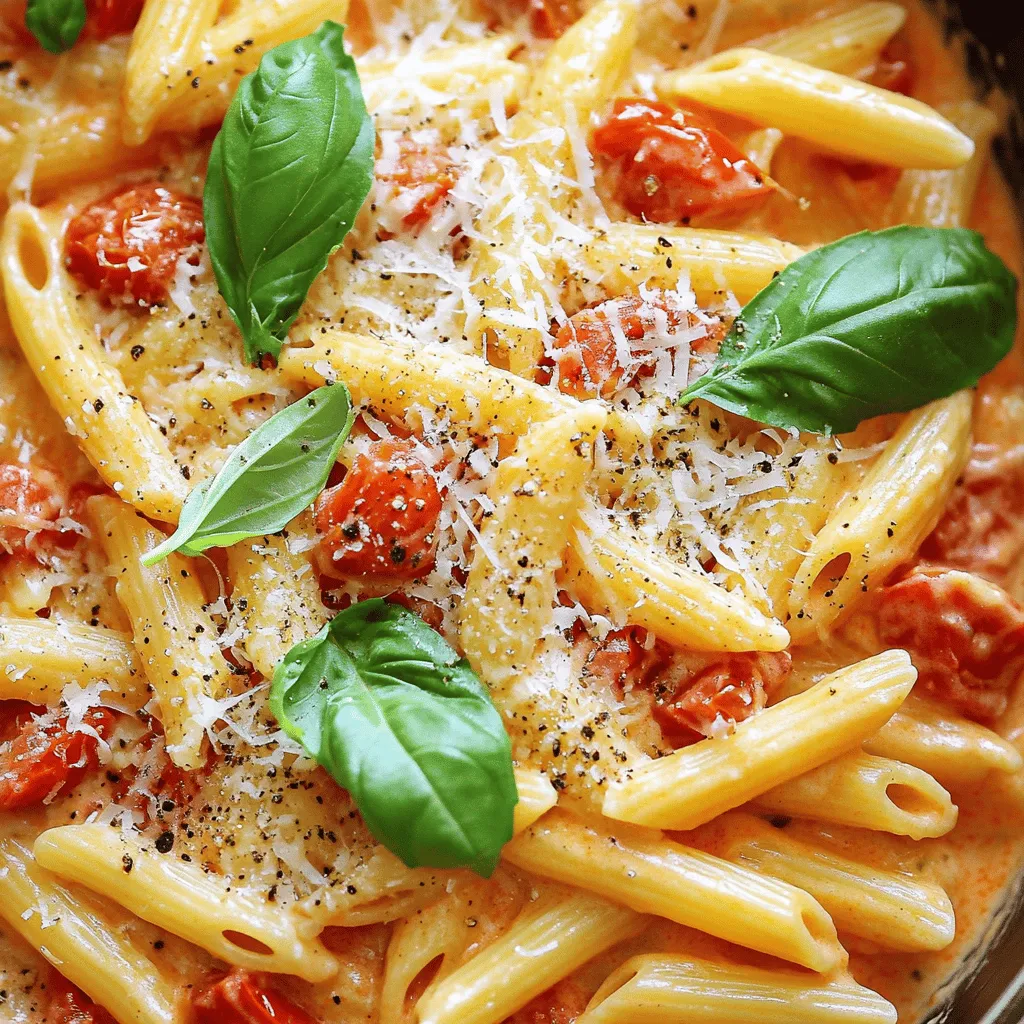
One Pan Creamy Tomato Pasta Easy and Flavorful Meal
One Pan Creamy Tomato Pasta is the perfect dish for busy nights. It’s easy, quick, and full of flavor! You can whip this up in just…
Read more…
Savory Cheese Scones Simple and Tasty Recipe
If you’re craving a delicious snack, look no further than savory cheese scones! This simple and tasty recipe will have your taste buds dancing with delight.…
Read more…browse recipes


Savory Chicken Bombs Recipe for Flavorful Dinner
Craving a fun and tasty dinner? You’re in the right place! This Savory Chicken Bombs Recipe packs juicy chicken and flavors into a delicious…
My Latest Desserts

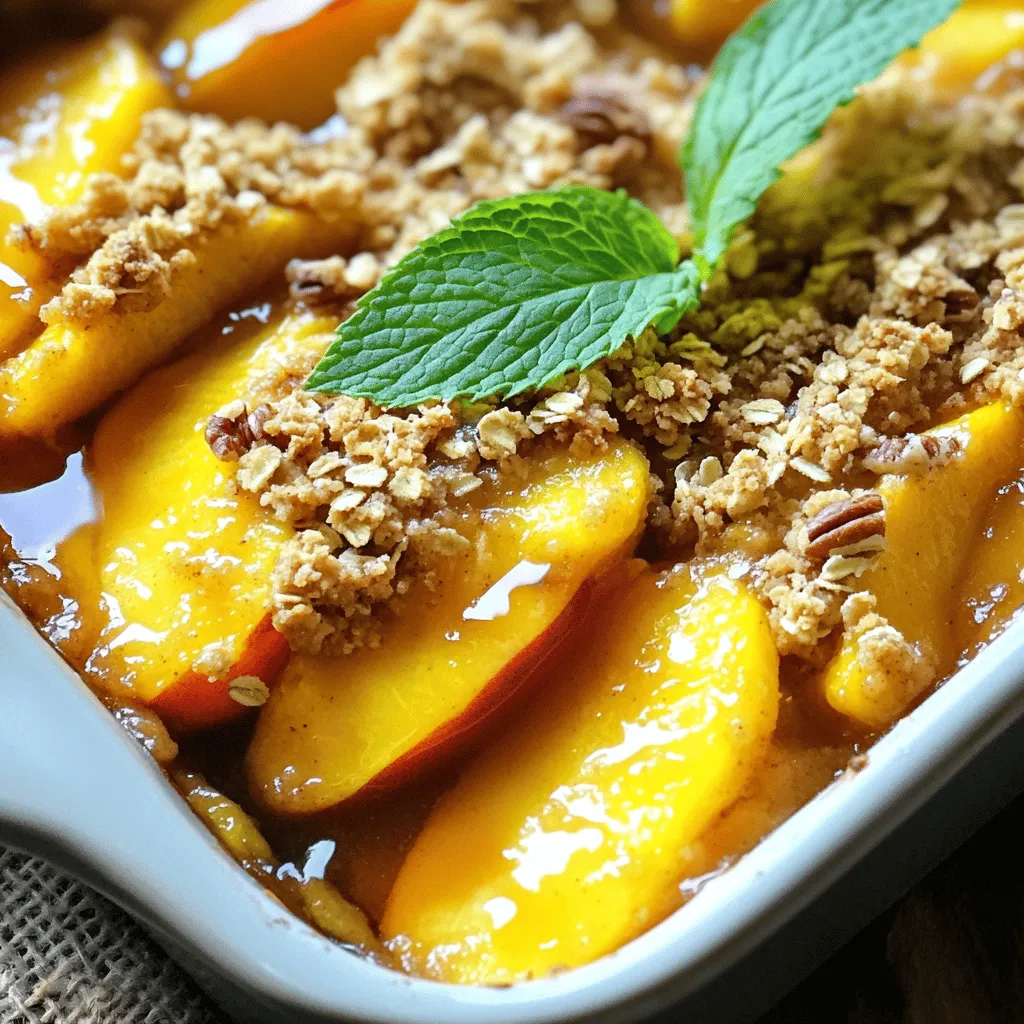
Peach Crisp with Oat Topping Simple Comfort Food
If you’re craving a dessert that combines juicy peaches with a crunchy oat topping, you’re in the right place! My Peach Crisp with Oat Topping is a warm and comforting... Read Full Recipe-
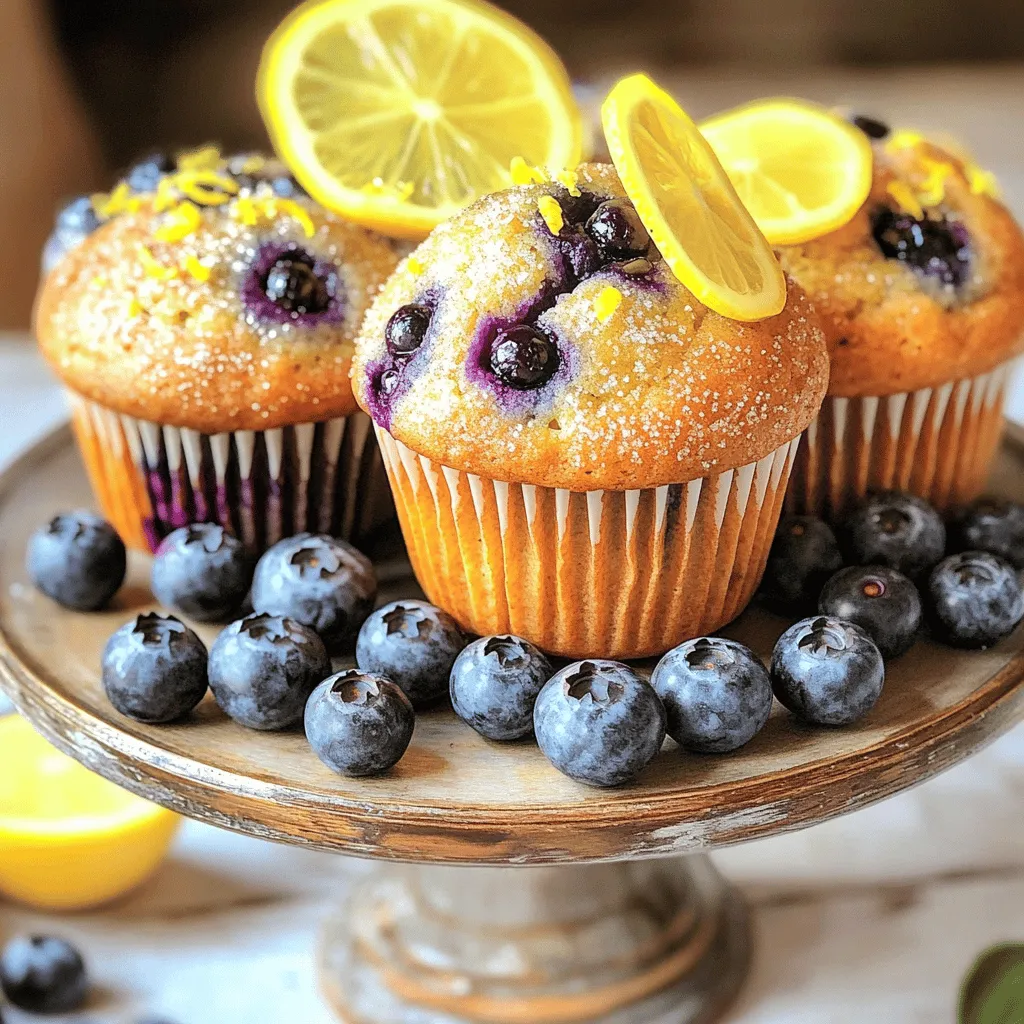
Lemon Blueberry Muffins Fresh and Flavorful Treat
Looking for a fresh and tasty treat? My Lemon Blueberry Muffins are just what you need! Bursting with zesty lemon and sweet blueberries, these muffins are perfect for breakfast or... Read Full Recipe -
Apple Cinnamon Overnight Oats Tasty and Simple Recipe
Start your mornings right with a delicious bowl of Apple Cinnamon Overnight Oats! This simple recipe combines wholesome ingredients to give you a quick, easy breakfast. You’ll only need a... Read Full Recipe -
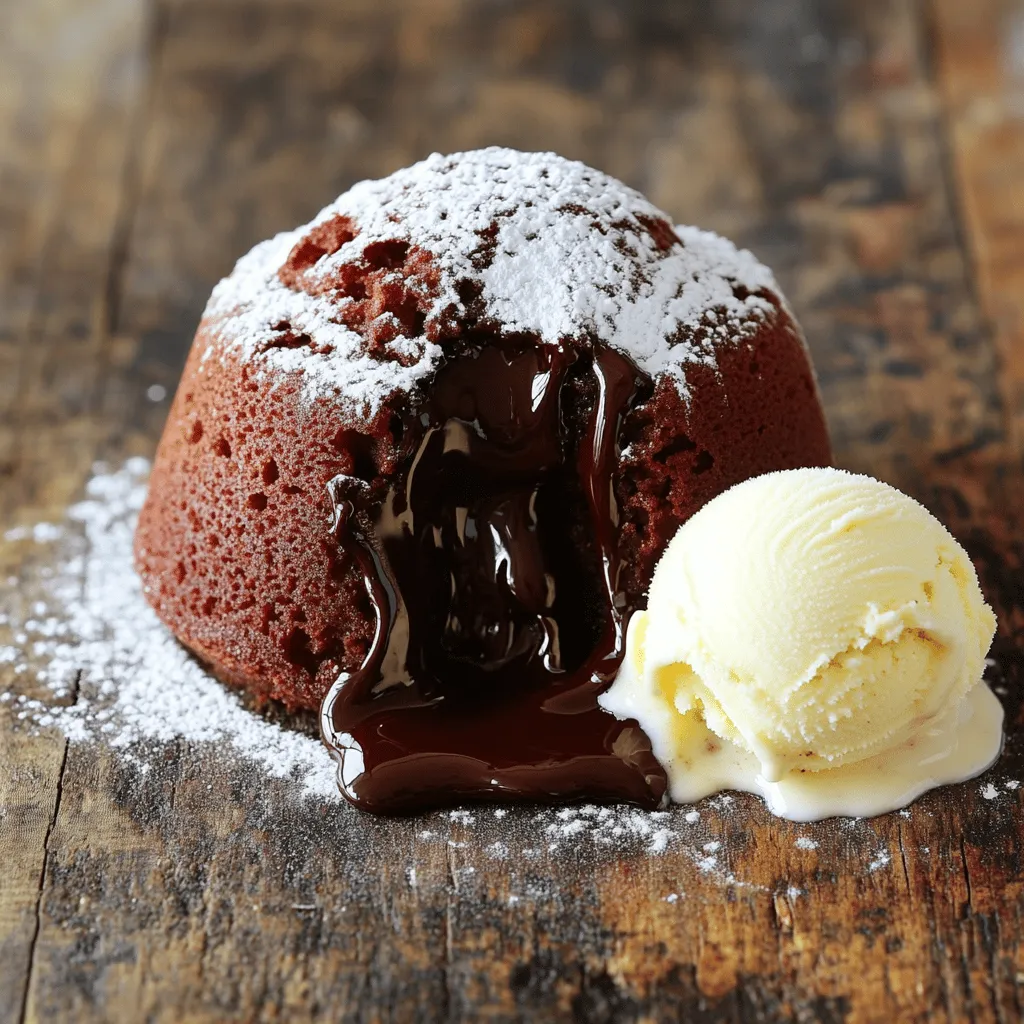
Easiest Chocolate Lava Cake Quick and Delicious Treat
Craving a sweet treat that impresses without complicated steps? You’ll love this Easiest Chocolate Lava Cake recipe! This dessert is quick to make and packed with gooey chocolate goodness. With... Read Full Recipe -
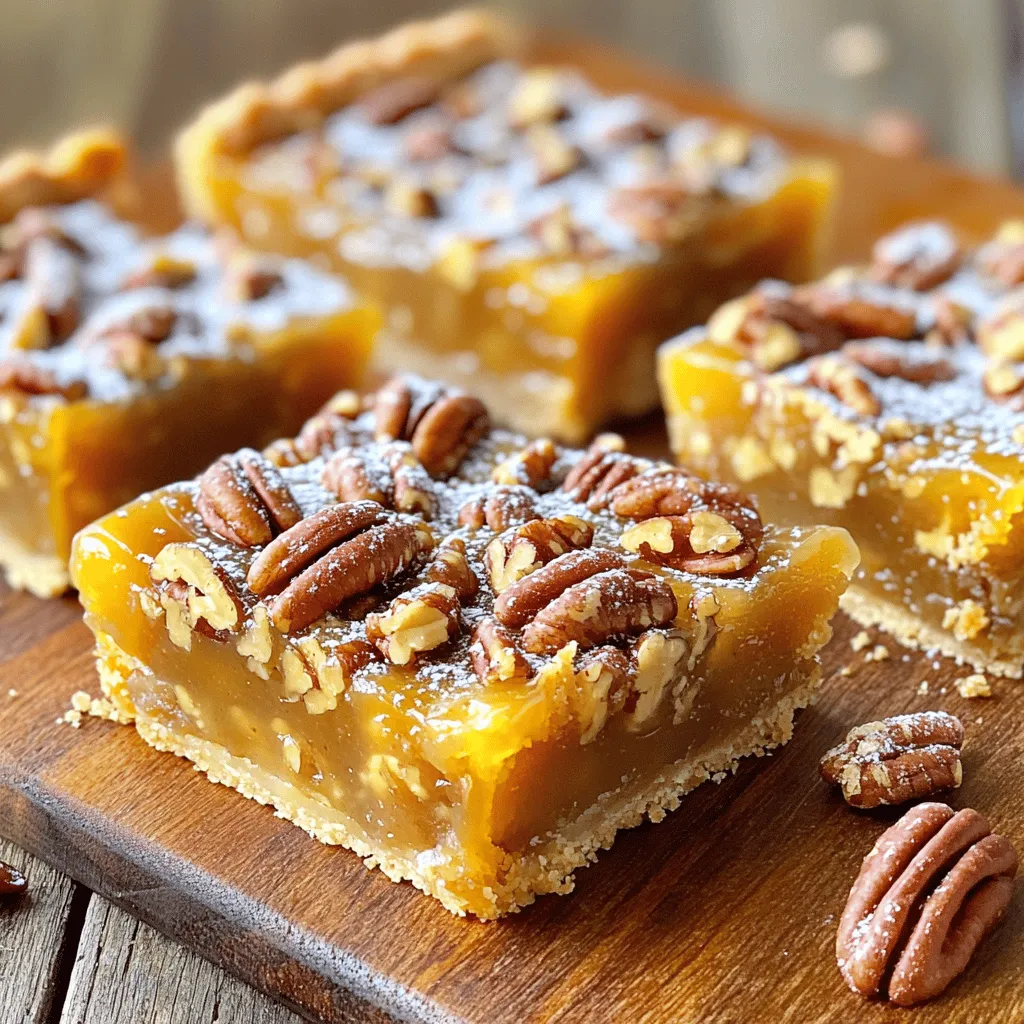
Maple Pecan Pie Bars Delightful Dessert Treat
Are you ready to indulge in a delightful dessert? These Maple Pecan Pie Bars are a sweet twist on a classic favorite! With crunchy pecans and rich maple flavor, every... Read Full Recipe -
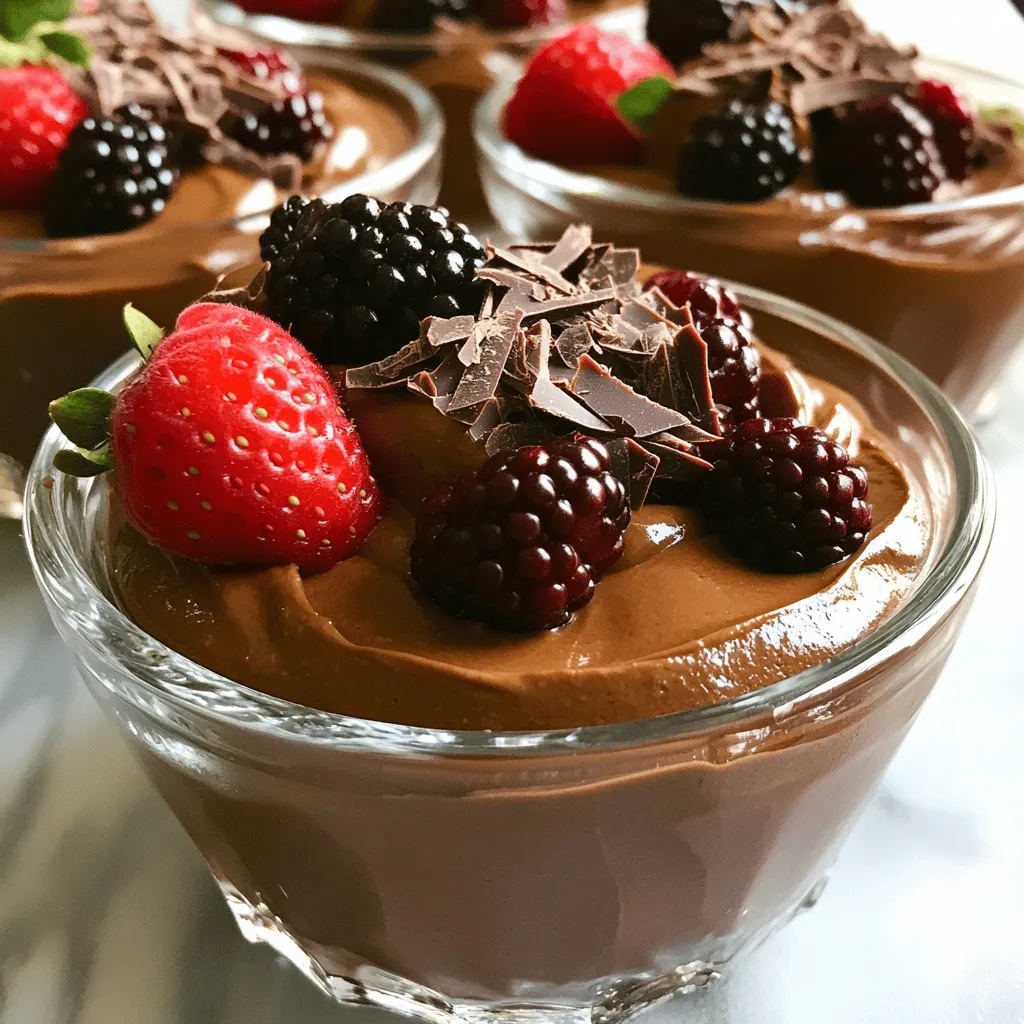
Vegan Chocolate Avocado Mousse Rich and Creamy Delight
If you crave a dessert that’s both rich and healthy, you’re in the right place. This Vegan Chocolate Avocado Mousse combines ripe avocados, unsweetened cocoa powder, and a touch of... Read Full Recipe -
Peanut Butter Chocolate Chip Cookies Simple and Sweet
If you love the rich taste of peanut butter and the sweetness of chocolate, you’re in for a treat! This blog post will guide you through making simple and sweet... Read Full Recipe -
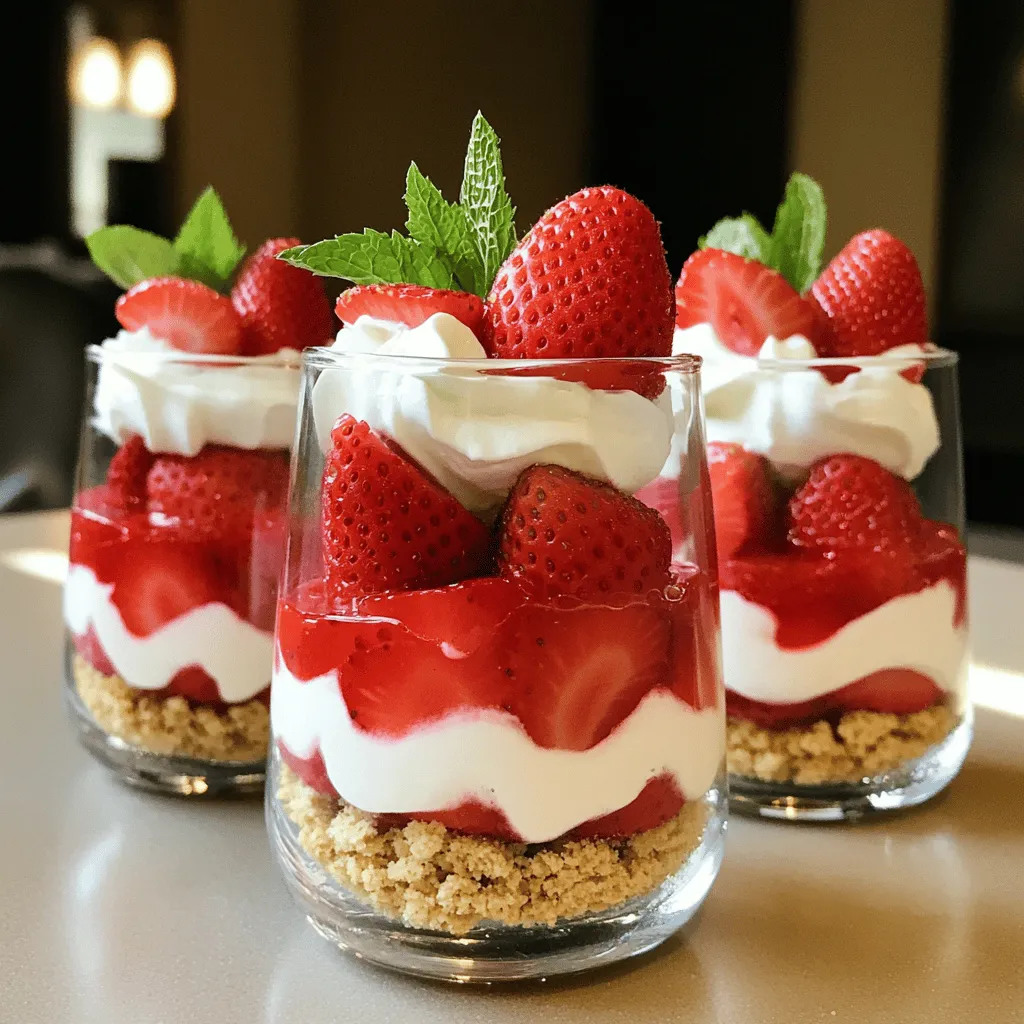
No-Bake Strawberry Shortcake Quick and Simple Delight
Are you craving a sweet treat that’s easy and delicious? Look no further! My No-Bake Strawberry Shortcake is a quick and simple delight, perfect for any occasion. With just a... Read Full Recipe -
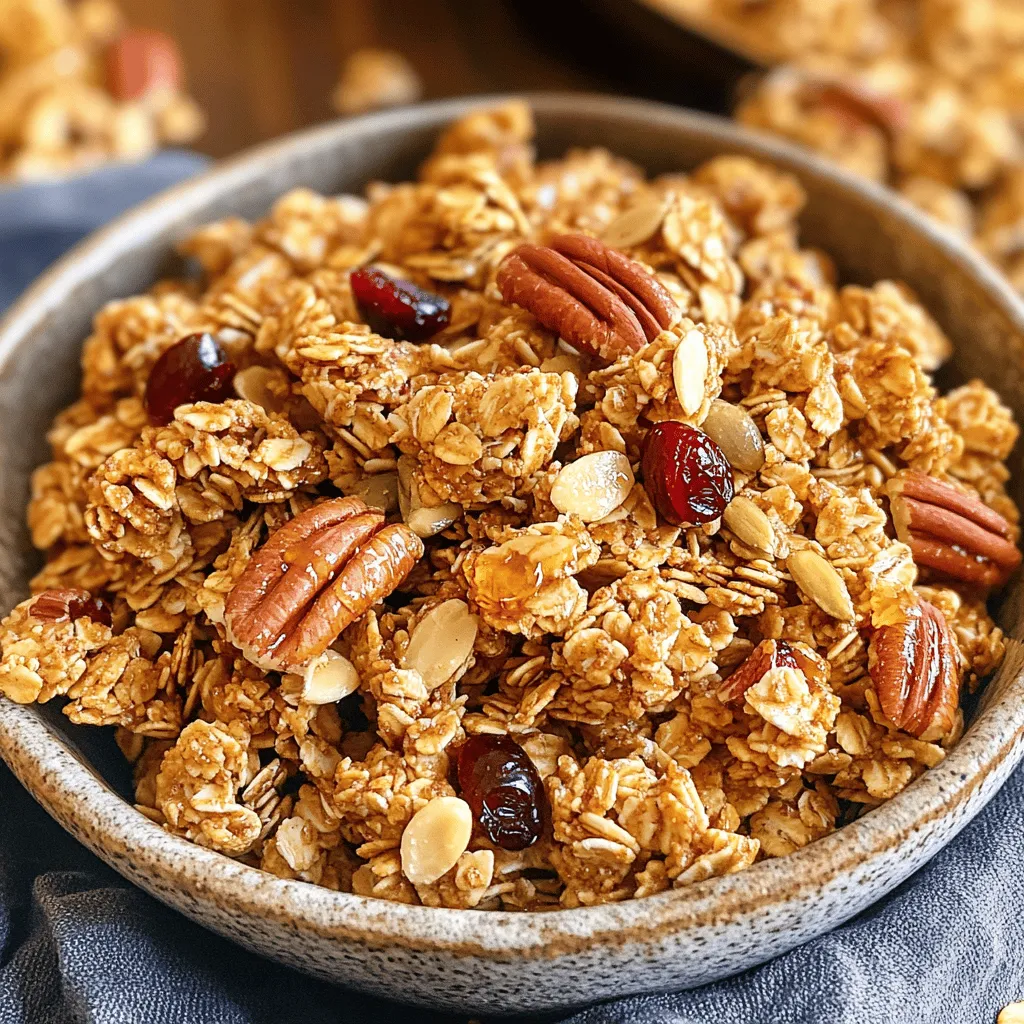
Maple Pecan Granola Crunchy and Healthy Snack
Looking for a tasty yet healthy snack? You’ll love my Maple Pecan Granola! This crunchy treat is simple to make and packed with flavor. With a few key ingredients and... Read Full Recipe -
Strawberry Shortcake Trifle Delightful Layered Treat
Are you ready to impress your friends with a strawberry shortcake trifle? This delightful layered treat combines juicy strawberries, fluffy whipped cream, and soft cake for pure indulgence. It’s a... Read Full Recipe


My Latest Recipes

hey,
i’m !
I’m so happy you’re here!
Each recipe I share is a little piece of love from my kitchen. May they fill your heart and home with warmth. Let’s cook up something wonderful together.


![To make a tasty Indian pumpkin curry, you will need the following ingredients: - 2 cups pumpkin, peeled and cubed - 1 medium onion, finely chopped - 2 tomatoes, pureed - 1 tablespoon ginger-garlic paste - 1 green chili, slit - 1 teaspoon cumin seeds - 1 teaspoon mustard seeds - 1 teaspoon garam masala - 1 teaspoon turmeric powder - 1 teaspoon coriander powder - 1/2 teaspoon red chili powder (adjust to spice preference) - 1 cup coconut milk - 2 tablespoons vegetable oil - Fresh cilantro leaves for garnish - Salt to taste You can swap some ingredients to suit your needs. If you want a different flavor, try these: - Use butternut squash instead of pumpkin for a sweeter taste. - For a dairy-free option, use almond or soy milk instead of coconut milk. - If you dislike heat, leave out the green chili or use a mild pepper. Accurate measuring is key for great results. Here’s how to measure: - When measuring pumpkin, make sure to pack it lightly in the cup. - Use a scale for spices to ensure you get the right amount. - Remember, little changes in spice can greatly affect the taste. Measuring correctly helps create a balanced flavor in your curry, making it a dish you will love to share. For the full recipe, check the links above. To start, we need to prep the pumpkin and chop the onions. - Prepping the pumpkin: Take 2 cups of pumpkin, peel it, and cube it into bite-sized pieces. This helps the pumpkin cook evenly. - Chopping the onions: Grab 1 medium onion and finely chop it. The finer the chop, the better the flavor. Next, we make the tomato puree. - Making the tomato puree: Blend 2 ripe tomatoes until smooth. This puree will add richness to our curry. Now it's time to cook! - Heating oil and cooking spices: In a large pot, heat 2 tablespoons of vegetable oil over medium heat. Once hot, add 1 teaspoon of cumin seeds and 1 teaspoon of mustard seeds. Cook until they start to sputter. This releases their flavors. - Adding ingredients in order: Next, add the chopped onions and 1 slit green chili. Cook until the onions are golden brown. Then, mix in 1 tablespoon of ginger-garlic paste and cook for 2 minutes. Add your tomato puree along with 1 teaspoon of turmeric powder, 1 teaspoon of coriander powder, and 1/2 teaspoon of red chili powder. Cook until the oil separates, about 5-7 minutes. After this, it’s time for the pumpkin! To achieve the perfect texture, we need to simmer the curry. - How to achieve the perfect texture: Toss in the cubed pumpkin and sauté for another 2-3 minutes. Then, pour in 1 cup of coconut milk and add salt to taste. Stir well and cover the pot. Let it simmer on low heat for 15-20 minutes. Stir occasionally to stop sticking. - Final additions before serving: Once the pumpkin is soft, sprinkle in 1 teaspoon of garam masala. Adjust salt if needed and let it cook for another 2 minutes. Garnish with fresh cilantro leaves for a beautiful touch! This simple process brings out all the flavors in your Indian pumpkin curry. For more details, check out the Full Recipe. To sauté onions and spices well, start with hot oil. Use medium heat and add the cumin and mustard seeds first. Let them pop for flavor. Then, add finely chopped onions. Cook until they turn golden brown. This step brings out their sweetness. When cooking pumpkin, keep it tender but not mushy. Cut your pumpkin into even cubes. This way, they cook at the same rate. Stir gently when adding spices and coconut milk. Avoid stirring too much to keep the cubes intact. You can add more spices to change the flavor. Consider adding cinnamon or cardamom for warmth. If you like heat, toss in more chili powder. Each spice brings a unique taste, so feel free to experiment. For sides, serve the curry with steamed basmati rice or fluffy naan. Both pair well with the creamy sauce. You can also add a fresh salad or a tangy yogurt dip to balance the flavors. Serve the curry in deep bowls for a cozy feel. Use colorful bowls to make the dish pop. You can add a sprinkle of fresh cilantro on top for a touch of green and freshness. For a fun touch, serve with slices of lime or lemon. This adds a zesty kick. You can also offer naan on the side for dipping. These little touches make your meal look and taste special. For the full recipe, check the [Full Recipe]. {{image_2}} You can switch the pumpkin for sweet potatoes or butternut squash. Both choices add a sweet touch. If you want to change the flavor of the curry, try different types of coconut milk. For a richer taste, use full-fat coconut milk. For a lighter option, go for light coconut milk. To adjust the spice level, you can make it milder or spicier. If you prefer mild, use less red chili powder. You can also skip the green chili. For more heat, add more red chili powder or a chopped jalapeño. Try using cayenne pepper for an extra kick. This recipe is naturally vegan, as it uses coconut milk and no animal products. To keep it gluten-free, make sure to check all spice labels. Some spice blends may contain gluten. Use fresh spices where possible for the best flavor. You can also pair it with gluten-free rice or naan for a complete meal. To keep your Indian pumpkin curry fresh, follow these tips: - Place the curry in an airtight container. - Let it cool to room temperature before sealing. - Store it in the fridge for up to 3 days. This method keeps the flavors intact and the pumpkin tender. If you want to save the curry for later, freezing is a great option: - Use a freezer-safe container or a heavy-duty freezer bag. - Leave space at the top for expansion. - Freeze the curry for up to 3 months. When you are ready to eat, thaw in the fridge overnight. To reheat your curry without losing flavor, try these methods: - Use the stove on low heat for even warming. - Add a splash of coconut milk or water to keep it creamy. - Stir often to prevent sticking. Avoid using high heat, as this can overcook the pumpkin. Enjoy each bite just like the first! How long does it take to cook pumpkin? It usually takes about 15 to 20 minutes to cook pumpkin. You want it tender but not mushy. The cooking time may vary based on the size of the pumpkin cubes. Smaller pieces cook faster, while larger ones take a bit longer. Can I use canned pumpkin? Yes, you can use canned pumpkin. It saves time since it's already cooked. Just reduce the cooking time to about 5 to 10 minutes. This way, it heats through and absorbs the flavors. Can I make this recipe without coconut milk? You can skip coconut milk if you prefer. Use vegetable broth or water instead. The curry will still taste great, but it will lack that creamy texture. You can also add cashew cream for richness. How can I make this curry in a slow cooker? To make this curry in a slow cooker, follow these steps: - Sauté the onions, spices, and ginger-garlic paste in a pan first. - Then add all the ingredients, including pumpkin, to the slow cooker. - Set it on low for 4 to 6 hours or high for 2 to 3 hours. What to serve with Indian pumpkin curry? Serve Indian pumpkin curry with steamed basmati rice or warm naan. The rice soaks up the sauce well, while naan is great for dipping. Best accompaniments for this dish? Pair the curry with a side of yogurt or a cucumber salad. These cool sides balance the spices and add freshness. A sprinkle of cilantro on top adds color and flavor, too! This blog post shared how to make a tasty pumpkin curry. We covered ingredients, substitutes, and measuring tips. I provided step-by-step instructions for preparing, cooking, and finishing the dish. You learned cooking techniques and ways to enhance flavors. We explored variations for dietary needs and storage tips for leftovers. In closing, I encourage you to try this recipe and make it your own. Enjoy the rich flavors and share it with others!](https://lisadishes.com/wp-content/uploads/2025/04/16cb9113-adfa-445d-b909-4eabe25ec57f-300x300.webp)

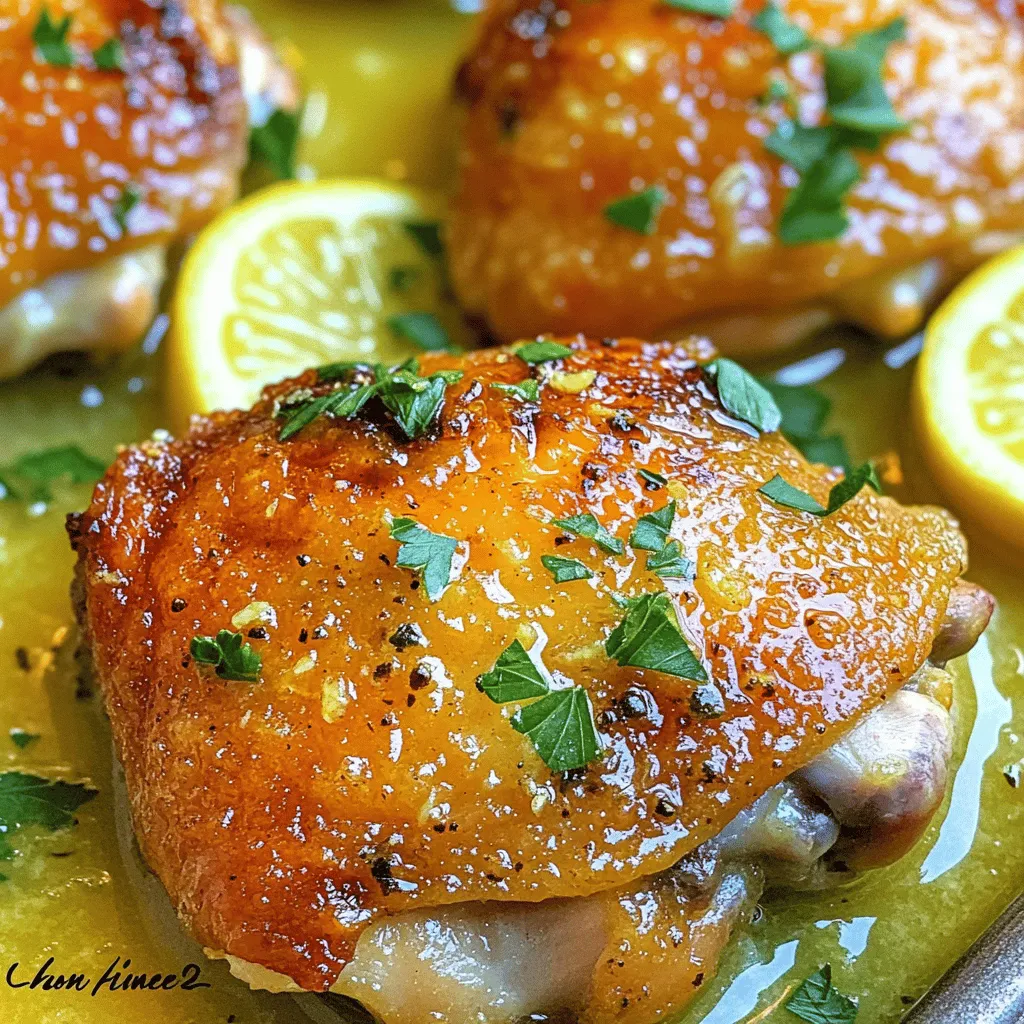
Baked Lemon Butter Chicken Juicy and Flavorful Meal
If you’re craving a dish that’s both juicy and packed with flavor, you’re in the right place! My Baked Lemon Butter Chicken combines tender…