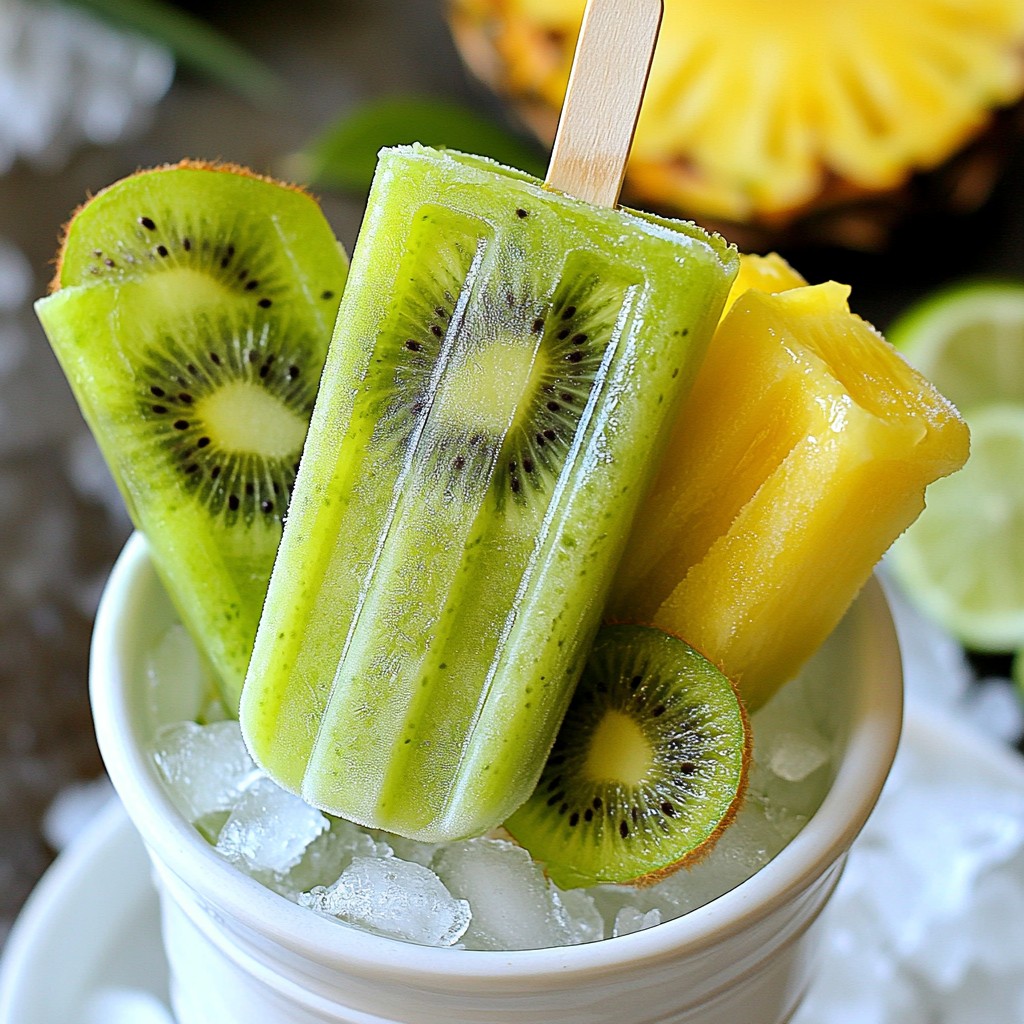
Are you ready to chill out this summer with a tasty treat? Kiwi Pineapple Popsicles are your perfect way to beat the heat! These colorful pops are easy to make and bursting with flavor. I’ll guide you through simple steps, handy tips, and fun variations to elevate your summer snacking. So grab your fruits and let’s get started on this refreshing journey! Your taste buds will thank you.
Why I Love This Recipe
- Refreshing Flavor: The combination of kiwi and pineapple creates a vibrant and tropical taste that is perfect for hot summer days.
- Health Benefits: Both kiwi and pineapple are packed with vitamins and antioxidants, making these popsicles a guilt-free treat.
- Easy to Make: This recipe requires minimal effort and just a few fresh ingredients, making it ideal for quick summer snacks.
- Customizable: You can easily modify the sweetness and add other fruits to the mix, allowing for endless flavor combinations!
Ingredients
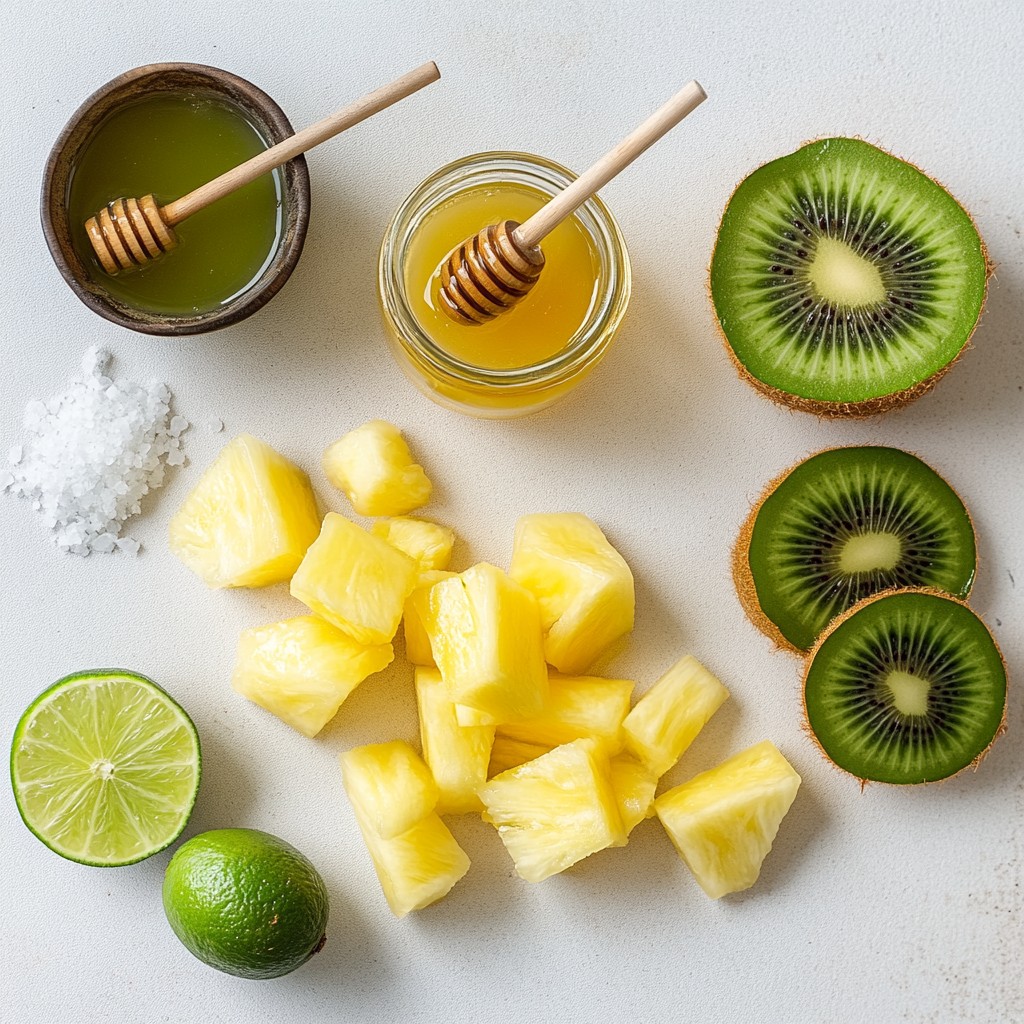
List of Ingredients
- 3 ripe kiwis, peeled and chopped
- 1 cup fresh pineapple chunks
- 1 tablespoon honey or maple syrup (optional)
- 1 cup coconut water or regular water
- Juice of 1 lime
- A pinch of salt
I love using fresh fruits for these popsicles. The ripe kiwis give a tangy taste, while the pineapple adds sweetness. Together, they create a bright, refreshing flavor. Coconut water keeps the popsicles light and hydrating.
Optional Sweeteners
You can add honey or maple syrup if you want extra sweetness. I prefer honey for its floral notes, but maple syrup also works well. Start with one tablespoon. Taste the mix before adding more.
Recommended Tools and Equipment
To make these popsicles, you need a blender and popsicle molds. A good blender mixes everything smoothly. The molds shape the popsicles perfectly. You’ll also need popsicle sticks. I use wooden ones, but plastic works too. Be sure to have a measuring cup for the liquids.
With these ingredients and tools, you're set to create a tasty treat!
Step-by-Step Instructions
Preparation Steps
Start by gathering your ingredients. You need three ripe kiwis, one cup of fresh pineapple chunks, and coconut water. If you like it sweet, grab honey or maple syrup. You will also need one lime and a pinch of salt.
Next, peel the kiwis and chop them into small pieces. Cut the fresh pineapple into chunks. This makes it easy to blend.
Blending and Mixing Process
Now, it’s time to blend! Add the chopped kiwis, pineapple chunks, coconut water, lime juice, and salt into your blender. If you want a sweeter treat, add the honey or maple syrup now.
Blend the mixture until it is smooth. You can leave a few small chunks for texture. This gives your popsicles a fun bite!
Pouring into Molds
Grab your popsicle molds. Carefully pour the mixture into each mold, leaving a little space at the top. The mixture expands when it freezes.
Insert popsicle sticks into the molds. Then, place the molds in the freezer. Let them freeze for at least 4 to 6 hours. They need to be completely set before you enjoy them.
To release the popsicles, run warm water over the outside of the molds. This helps them slide out easily. Now you're ready to enjoy your refreshing kiwi pineapple popsicles!
Tips & Tricks
Achieving the Perfect Texture
To get the best texture, blend the fruits until smooth. Leave a few small chunks. This adds a nice bite. If you want a creamier feel, add a little coconut milk. You can also use yogurt for a richer taste. Experiment with blending times to find your favorite texture.
Alternative Sweetening Options
If you prefer less sugar, skip the honey or maple syrup. The fruits are sweet enough on their own. You can also try using agave syrup or stevia for a low-calorie option. Just remember to add these sweeteners to taste. Always start with a little and add more if needed.
Presentation Ideas for Serving
Make your popsicles fun to serve! Use colorful plates or bowls. Stand them in a jar filled with crushed ice. This keeps them cold and looks great. You can also wrap them in parchment paper for a cute touch. Add fresh mint leaves for a pop of color.
Pro Tips
- Use Ripe Fruits: The riper the kiwis and pineapples, the sweeter and more flavorful your popsicles will be. Look for fruits that yield slightly to pressure for the best taste.
- Experiment with Sweetness: Adjust the sweetness of your popsicles by tasting the mixture before freezing. You can always add more honey or maple syrup if needed.
- Add Texture: For added texture, consider folding in some finely chopped fruit or shredded coconut into the mixture before pouring it into molds.
- Storage Tips: Once frozen, store the popsicles in a zip-top bag to prevent freezer burn and maintain their vibrant flavor.
Variations
Using Different Fruits
You can swap in other fruits for fun. Try strawberries, mangoes, or peaches. Each fruit brings its own flavor. Mixing fruits makes these popsicles even better. Just keep the ratios the same. Use about three cups of fruit total. The key is to blend them well with coconut water and lime juice.
Creamy Kiwi Pineapple Popsicles
For a creamy twist, add yogurt or coconut cream. This makes the popsicles rich and smooth. Use about one cup of yogurt for six popsicles. Blend it with the fruit to get a nice texture. You can use Greek yogurt for extra protein. This change adds a new layer of taste that kids will love.
Adding Herbs or Spices
Herbs and spices can enhance the flavor. Mint is a great choice for a fresh taste. Add a few leaves while blending for a cool kick. You can also try a pinch of ginger for warmth. This adds a nice zing to your popsicles. Just remember, a little goes a long way!
Storage Info
Freezing and Shelf Life
Kiwi pineapple popsicles freeze well and can last for up to three months. Store them in an airtight container or a freezer bag. This helps keep them fresh and tasty. Label the container with the date. This way, you will know how long they have been stored.
How to Store Leftover Mix
If you have leftover mix, pour it into an airtight container. You can store it in the fridge for up to two days. Before enjoying, give it a good stir. The ingredients may settle, but this is normal. You can also freeze the mix for later use. Just remember to leave space for it to expand.
Tips for Thawing and Enjoying
To enjoy your popsicles, run warm water over the mold for a few seconds. This helps them slip out easily. If you thaw them too long, they might get too soft. Enjoy them right away for the best taste. For added fun, try dipping them in yogurt or sprinkling some nuts on top!
FAQs
How do I make kiwi pineapple popsicles without a mold?
You can use small cups or ice cube trays. Fill them with your blended mixture. Insert sticks into the center of each cup or tray. Cover with plastic wrap to hold the sticks in place. Freeze for at least 4-6 hours. When ready, run warm water over the outside of the cup or tray. This helps loosen the popsicles.
Can I use frozen fruits instead of fresh?
Yes, you can use frozen fruits. They are easy to blend and add a nice chill. Just keep in mind that frozen fruits may make the popsicles a bit thicker. You might need to add a little more water or coconut water. Adjust the sweetness if needed.
Are these popsicles suitable for kids?
Absolutely! Kiwi pineapple popsicles are a fun and healthy treat for kids. They are packed with vitamins and taste great. You can adjust the sweetness to match your child's preferences. Plus, making them together can be a fun activity. Kids love to see their creations freeze and enjoy them on a hot day!
You now have the tools to make delicious kiwi pineapple popsicles. We explored the key ingredients, step-by-step instructions, and helpful tips. You learned about sweeteners and equipment, plus variations to try. Remember to store your popsicles right for best taste. With these methods, your popsicles will impress friends and family. Enjoy the fun of making them, and don’t hesitate to experiment. Happy popping!