Welcome to my ultimate guide on Red Velvet Crinkle Cookies! If you’ve ever craved a treat that's both chewy and rich, you’re in the right place. In this post, I’ll share the perfect recipe, tips, and variations to make these cookies irresistible. Whether you're a baking novice or a seasoned pro, you'll find everything you need to create a delicious batch. Let’s dive into the sweet world of red velvet goodness!
Why I Love This Recipe
- Deliciously Unique Flavor: The combination of cocoa and red food coloring creates a delightful twist on traditional cookies, making them a standout treat.
- Easy to Make: This recipe requires simple ingredients and straightforward steps, perfect for bakers of any skill level to enjoy.
- Festive Appearance: The vibrant red color and crinkly texture make these cookies visually appealing and perfect for celebrations.
- Soft and Chewy Texture: These cookies bake up soft and chewy, providing a satisfying bite that everyone will love.
Ingredients
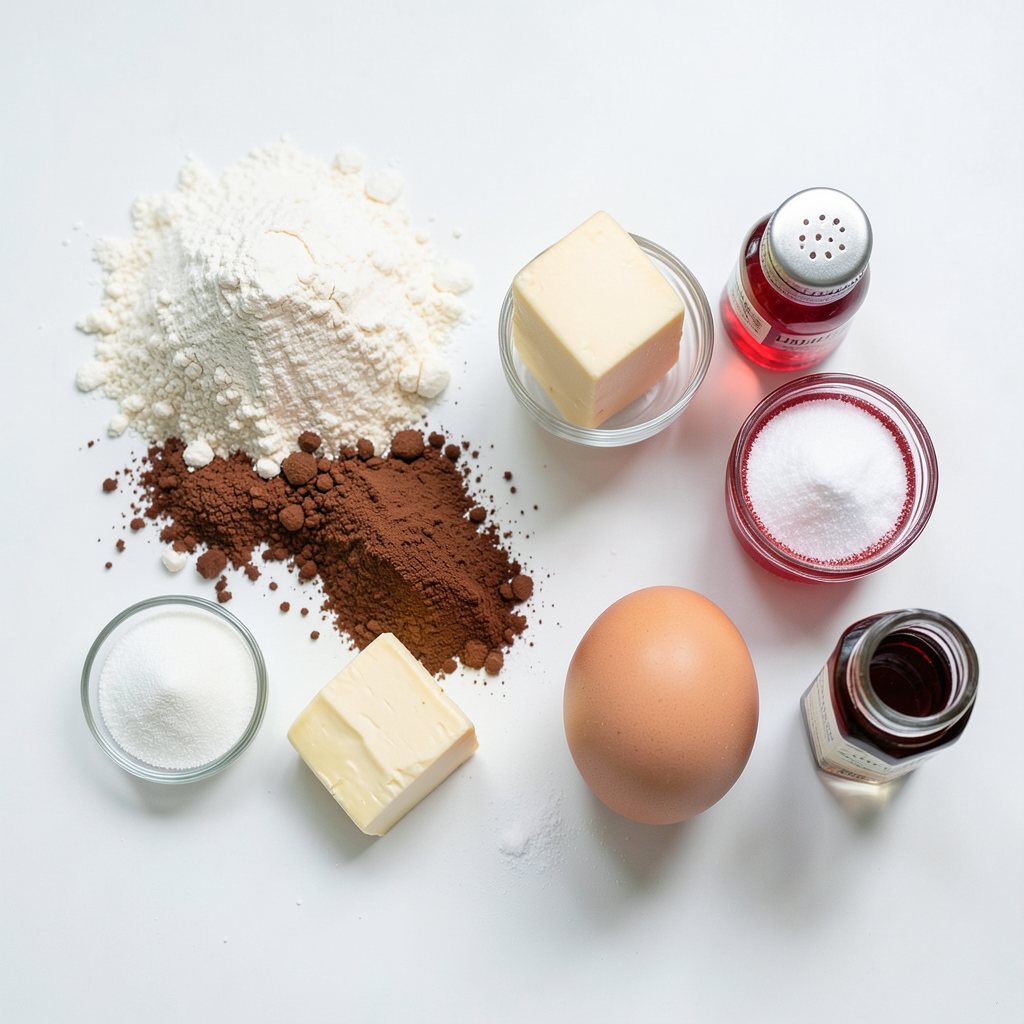
List of Ingredients for Red Velvet Crinkle Cookies
To make the perfect red velvet crinkle cookies, you will need:
- 1 1/2 cups all-purpose flour
- 1/4 cup cocoa powder
- 1 teaspoon baking powder
- 1/2 teaspoon salt
- 1/2 cup unsalted butter, softened
- 1 cup granulated sugar
- 1 large egg
- 1 tablespoon red food coloring
- 1 teaspoon vanilla extract
- 1/2 cup powdered sugar (for coating)
Essential Ingredients vs. Optional Ingredients
The essential ingredients for these cookies include flour, cocoa powder, butter, sugar, egg, and food coloring. These items create the base flavor and texture. The cocoa powder gives the cookies their rich taste, while the red food coloring provides the signature color.
Optional ingredients can include different extracts, like almond or mint, if you want to experiment with flavors. However, I recommend sticking to vanilla for the best classic taste.
Substitutions for Common Ingredients
Sometimes, you may not have all the ingredients on hand. Here are some easy swaps:
- Butter: Use coconut oil or margarine.
- Granulated sugar: Substitute with brown sugar for added moisture.
- Egg: A flax egg works well as a vegan option. Just mix 1 tablespoon of ground flaxseed with 3 tablespoons of water. Let it sit until it thickens.
- Red food coloring: If you prefer a natural option, beet juice can give a nice red hue, though the color may vary.
These substitutions can help you adapt the recipe based on what you have in your kitchen. Enjoy the baking process!
Step-by-Step Instructions
Prepping Your Ingredients
Start by gathering all your ingredients. You need:
- 1 1/2 cups all-purpose flour
- 1/4 cup cocoa powder
- 1 teaspoon baking powder
- 1/2 teaspoon salt
- 1/2 cup unsalted butter, softened
- 1 cup granulated sugar
- 1 large egg
- 1 tablespoon red food coloring
- 1 teaspoon vanilla extract
- 1/2 cup powdered sugar (for coating)
Make sure to measure everything accurately. This helps your cookies turn out just right. Next, preheat the oven to 350°F (175°C). Line two baking sheets with parchment paper. This step keeps your cookies from sticking.
Detailed Baking Instructions
In a medium bowl, whisk together the flour, cocoa powder, baking powder, and salt. Set this mix aside. In a large bowl, cream the softened butter and granulated sugar. Do this for 3-4 minutes until it looks light and fluffy.
Now, beat in the egg, red food coloring, and vanilla extract. Mix until everything is fully combined. Gradually add the dry mix to the wet mix. Stir until a soft dough forms.
Cover the dough with plastic wrap. Place it in the fridge for about 30 minutes. This helps the dough firm up. Once chilled, scoop the dough with a cookie scoop or tablespoon. Roll each scoop into a ball. Then, roll each ball in powdered sugar for a lovely coating.
Place the balls on your prepared sheets, leaving about 2 inches between them. Bake for 10-12 minutes. Look for set edges but soft centers. Once done, let them cool on the baking sheet for 5 minutes. After that, move the cookies to a wire rack to cool completely.
Cooling and Serving Tips
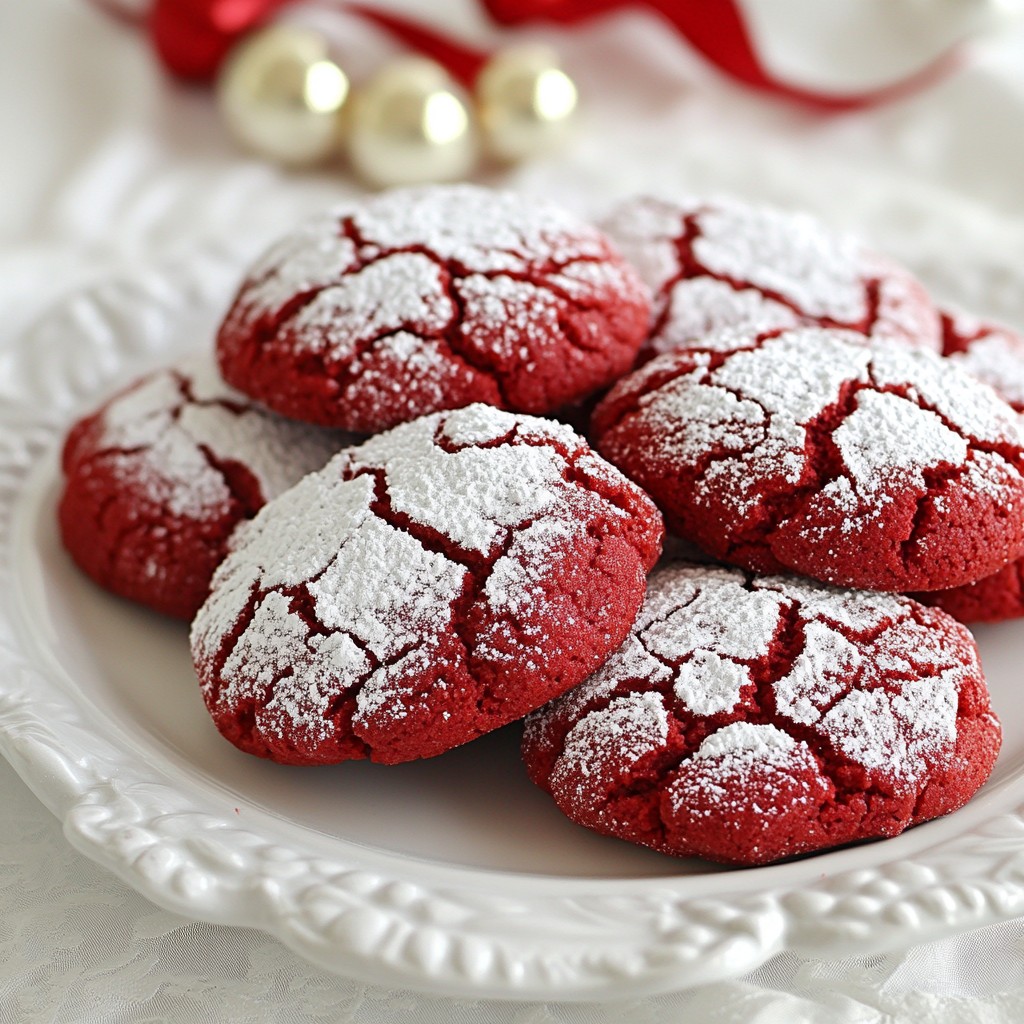
For the best taste, let them cool fully before serving. This helps them set and enhances the texture. When you serve, arrange the cookies on a festive plate. Dust with extra powdered sugar just before serving. It adds a nice touch and looks great! Enjoy these sweet treats with friends or family.
Tips & Tricks
How to Achieve the Perfect Crinkle Effect
To get that dreamy crinkle look, follow these steps. First, chill your dough for at least 30 minutes. This helps the cookies maintain their shape while baking. Next, roll the cookie balls in powdered sugar. Make sure they are well coated. This sugar creates cracks as they bake. Lastly, bake them just until the edges set. The centers should still be soft. This balance gives you a chewy texture with a pretty crinkle.
Common Mistakes to Avoid
I’ve learned some common pitfalls to avoid when making these cookies. One mistake is overmixing the dough. Mix just until combined for the best texture. Another mistake is skipping the chill time. Chilling helps the cookies hold their shape. Also, don’t skip the powdered sugar coating. This creates that stunning crinkle effect. Lastly, don’t bake them too long. If they look too firm, they are likely overbaked.
Best Practices for Storing Dough
Storing your dough properly is key for future baking. Wrap the dough tightly in plastic wrap to keep it fresh. You can store it in the fridge for up to three days. If you want to save it longer, freeze the dough. Use an airtight container or freezer bag. When ready to bake, thaw it overnight in the fridge. Then, roll it into balls and coat in powdered sugar before baking. This way, you’ll always have fresh cookies ready to go.
Pro Tips
- Chill the Dough: Refrigerating the dough for at least 30 minutes helps the cookies maintain their shape and enhances the texture.
- Even Coating: Roll the dough balls in powdered sugar twice for a thicker, more even coating that creates a beautiful crinkle effect.
- Watch the Baking Time: Keep an eye on the cookies as they bake; they should be soft in the center when you take them out for a chewy texture.
- Store Properly: For the best freshness, store the cookies in an airtight container at room temperature, separating layers with parchment paper.
Variations
Alternative Flavors and Add-ins
You can play with flavors in your crinkle cookies. Try adding white chocolate chips for a sweet twist. Or, mix in chopped nuts for some crunch. How about a hint of mint extract? Just a drop adds a fresh touch. You can also swap the red food coloring for another color. Blue or green can create fun holiday treats. This way, you get a new look and flavor every time!
Gluten-Free and Vegan Adaptations
Making these cookies gluten-free is easy. Just replace all-purpose flour with a gluten-free blend. Make sure it has xanthan gum to help with texture. For a vegan version, swap the egg for flaxseed meal. Mix one tablespoon of flaxseed with three tablespoons of water. Let it sit for five minutes to thicken. Use vegan butter instead of regular butter for a dairy-free treat. These changes keep the cookies tasty and soft.
Seasonal Twists for Red Velvet Crinkle Cookies
Seasonal flavors can add fun to your cookies. In fall, try adding pumpkin spice to the dough. It pairs well with the red velvet flavor. For winter, a dash of peppermint extract gives a festive touch. You can even fold in crushed candy canes for a crunchy surprise. In spring, consider adding lemon zest for a bright flavor. Each season brings new ideas to make these cookies special!
Storage Information
How to Store Baked Cookies
To keep your Red Velvet Crinkle Cookies fresh, store them in an airtight container. This helps maintain their soft texture. Place parchment paper between layers if stacking. Store them at room temperature for up to a week. If you want them to last longer, consider refrigerating them. Just remember to let them return to room temperature before enjoying.
Freezing Cookie Dough vs. Baked Cookies
You can freeze both cookie dough and baked cookies. To freeze cookie dough, scoop it into balls and place them on a baking sheet. Freeze until firm, then transfer to a freezer bag. You can bake them straight from frozen; just add a few extra minutes to the baking time.
For baked cookies, let them cool completely. Then, wrap each cookie tightly in plastic wrap. Place the wrapped cookies in a freezer bag. They can last for about three months in the freezer. Thaw them by leaving them out for a few hours or microwaving them for a few seconds.
Shelf Life of Red Velvet Crinkle Cookies
Red Velvet Crinkle Cookies taste best fresh. If stored properly, they can last about a week at room temperature. In the fridge, they may stay fresh for about two weeks. For maximum freshness, freeze them after baking. This way, you can enjoy them later without losing flavor or texture.
FAQs
What is the history of red velvet cookies?
Red velvet cookies come from the classic red velvet cake. The cake became popular in the United States in the 1920s. It has a striking red color and a hint of cocoa. Over time, bakers made cookies inspired by this cake. These cookies keep the rich flavor and vibrant color. Now, they are loved for their soft texture and unique look.
Can I use liquid food coloring instead of gel?
Yes, you can use liquid food coloring instead of gel. However, it may change the cookie's texture. Gel food coloring is thicker and more concentrated. It gives a richer color without adding extra liquid. If you use liquid, add a bit more flour to balance. This helps keep your cookies soft and chewy.
How do I know when the cookies are done baking?
To know when your cookies are done, check the edges. They should look set and slightly firm. The centers may still look soft and puffy. This is normal and helps keep them chewy. If you want a firmer cookie, bake a minute longer. Always let them cool for a few minutes on the baking sheet before moving them.
Red Velvet Crinkle Cookies are a fun treat that many enjoy. We covered the key ingredients, including must-haves and options. Next, I outlined simple steps for baking and cooling your cookies perfectly. You also learned tips for achieving that crinkle look and what mistakes to avoid. Variations let you experiment with flavors and dietary needs. Finally, I shared how to store your cookies and answered common questions. Now, you're ready to bake your own delicious batch! Enjoy your tasty journey.