Homemade Bagels Fresh and Simple Delight Recipe

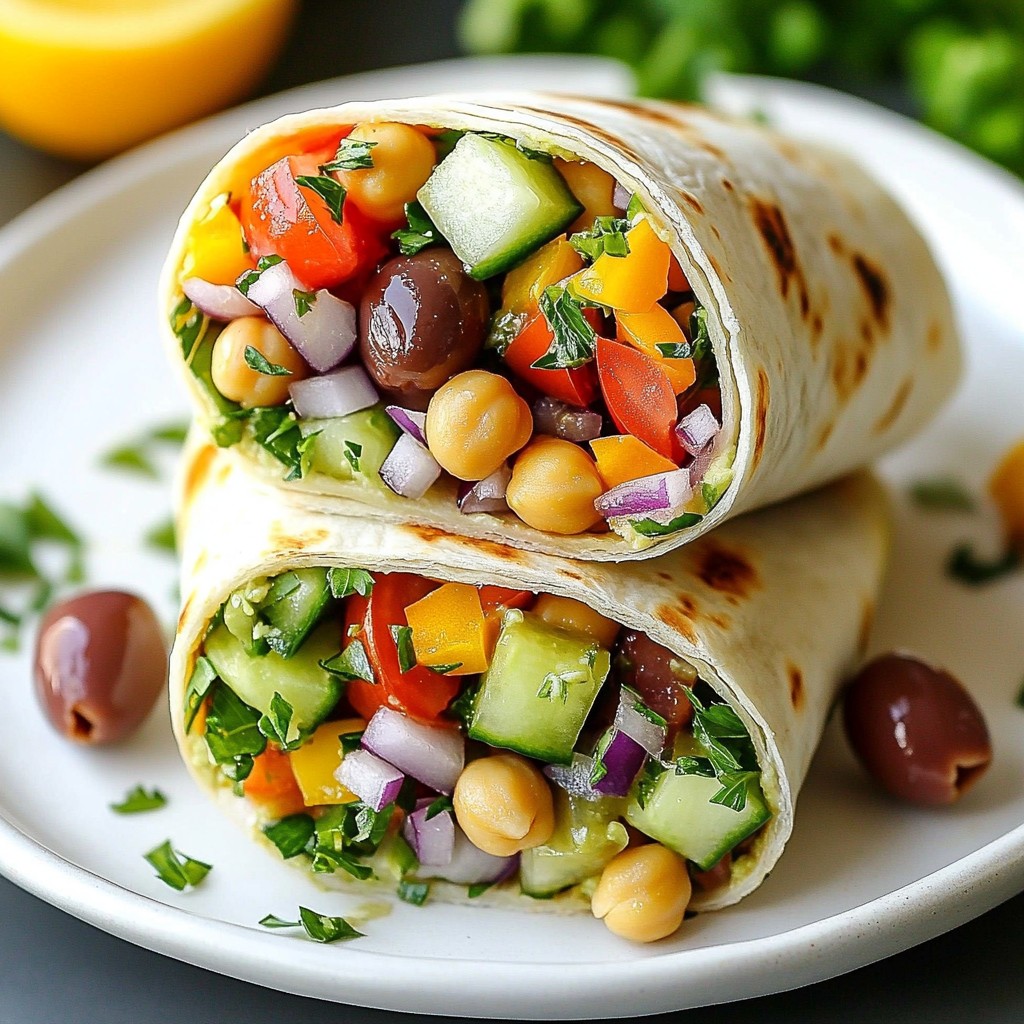
Are you ready to bake your own bagels at home? With my Homemade Bagels Fresh and Simple Delight Recipe, you can create delicious bagels quickly and easily. This guide walks you through every step, from mixing the dough to perfecting that chewy texture. I’ll share tips on ingredients, toppings, and even variations. Say goodbye to store-bought and hello to fresh bagels that wow your taste buds! Let’s get started!

Ingredients

List of Ingredients

To make these delightful bagels, gather the following:

– 4 cups all-purpose flour

– 1 tablespoon salt

– 1 tablespoon sugar

– 2 teaspoons instant yeast

– 1 ½ cups warm water (about 110°F)

– 1 tablespoon honey (for boiling)

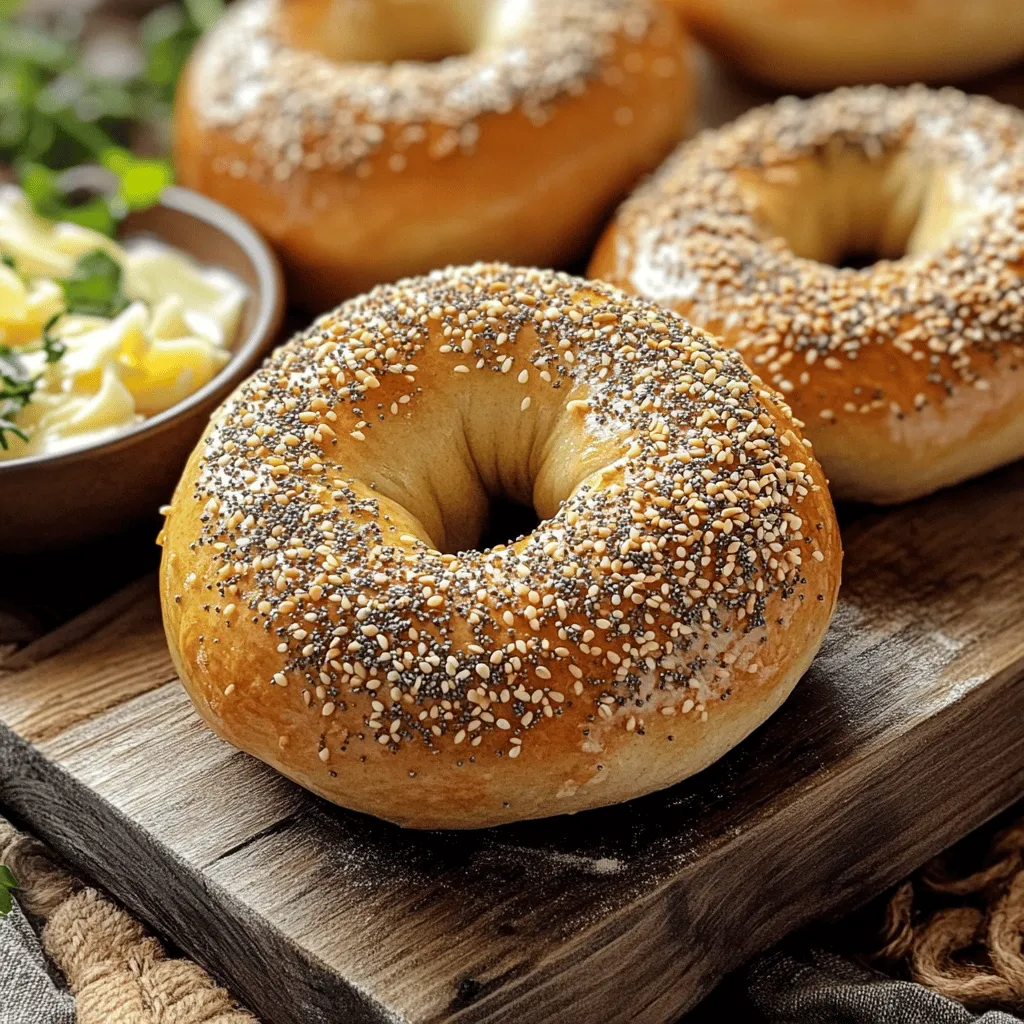
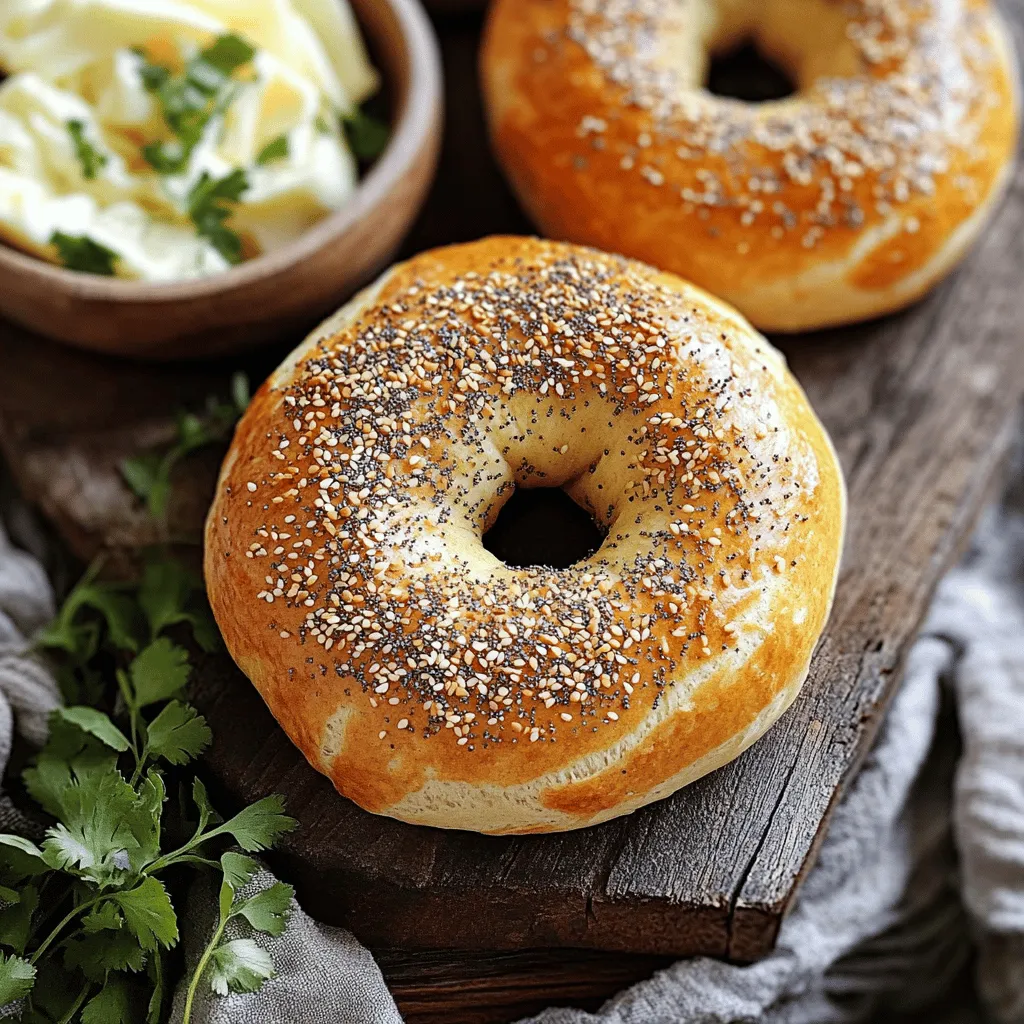
– Sesame seeds, poppy seeds, or everything bagel seasoning (for topping)

– Optional: 1 egg (for egg wash)

Measurements and Substitutions

If you need to adjust, you can use whole wheat flour instead of all-purpose flour. This adds a nutty taste. You can replace sugar with honey if you prefer a different sweetener. For the yeast, active dry yeast can work, but it needs to be proofed first. Just mix it with warm water and sugar, then wait for bubbles to form. This shows the yeast is alive and ready to use.

Recommended Toppings

Toppings make your bagels fun and unique. Try sesame seeds for a classic touch. Poppy seeds add a nice crunch. Everything bagel seasoning brings a mix of flavors that many love. You can also go wild with toppings like cheese or herbs. For a sweet twist, consider cinnamon sugar or even chocolate chips. Enjoy experimenting to find your favorite combination!

Step-by-Step Instructions

Preparation Phase

Start by gathering all your ingredients. This makes the process smooth. You need all-purpose flour, salt, sugar, and instant yeast. Warm water is key too, around 110°F. Mix these dry ingredients in a large bowl. Slowly pour in the warm water. Use a wooden spoon to mix until you see a shaggy dough.

Kneading and Rising the Dough

Next, turn the dough out onto a lightly floured surface. Knead the dough for about 10 minutes. You want it smooth and elastic. This step is crucial for that chewy texture. After kneading, place the dough in a lightly oiled bowl. Cover it with a damp cloth. Let it rise in a warm spot for about 1 hour. It should double in size.

Boiling and Baking Techniques

Once the dough has risen, it’s time to shape your bagels. Punch it down and divide into 10 pieces. Roll each piece into a ball. Poke a hole in the center with your finger. Gently stretch it to form the bagel shape. Now, place them on a baking sheet.

Bring a large pot of water to a boil. Add 1 tablespoon of honey to the water. Boil each bagel for 1 minute on each side. This helps create the classic chewy texture. Use a slotted spoon to remove them and place back on the baking sheet. If you want a shiny finish, brush each bagel with whisked egg. Sprinkle your favorite toppings on top.

Preheat your oven to 425°F. Bake the bagels for 20-25 minutes. Look for that golden brown color. Let them cool on a wire rack before you dig in. Follow this step-by-step guide for a great homemade bagel experience. For the full recipe, refer to the Bagel Bliss: A Chewy Delight.

Tips & Tricks

Achieving the Perfect Texture

To get that chewy bagel texture, focus on the dough. Use high-protein all-purpose flour. This type of flour gives bagels strength. Knead the dough well for about ten minutes. This builds gluten. Gluten makes the bagels chewy. Don’t skip the boiling step. Boiling creates a crust that holds in moisture.

Avoiding Common Mistakes

One common mistake is not measuring ingredients accurately. Use a kitchen scale for precise results. Another mistake is skipping the rise time. Let the dough rise until it doubles in size. This helps the bagels become light and airy. Also, avoid overcrowding during boiling. Boil only a few bagels at a time.

Tools and Equipment Suggestions

You will need some basic tools for bagel-making. Here’s a quick list:

– Large mixing bowl

– Wooden spoon

– Clean surface for kneading

– Parchment paper for baking

– Large pot for boiling

– Slotted spoon for removal

– Optional: kitchen scale for measuring

These tools help ensure success in your bagel-making journey. For the best results, keep everything organized and ready to go. For the full recipe, check out Bagel Bliss: A Chewy Delight.

Variations

Flavor Additions

You can easily change the taste of your bagels. Mix in herbs or spices for a fun twist. Try adding garlic powder or dried onion for a savory kick. If you love cheese, blend in shredded cheddar or parmesan. For a sweet bagel, consider cinnamon and sugar. Each of these additions makes your bagels unique and exciting.

Alternative Toppings

Bagels are great with many toppings. Instead of just sesame seeds, try different flavors. You can use poppy seeds, onion flakes, or even everything bagel seasoning. For a sweet touch, sprinkle brown sugar and cinnamon. You can also add fresh herbs like rosemary or thyme. Get creative and make each bagel a new experience.

Gluten-Free Bagel Options

If you need gluten-free bagels, don’t worry! You can use gluten-free flour blends. Look for ones that include xanthan gum to help with texture. Follow the same steps in the recipe, but adjust water as needed. Your bagels will still be chewy and tasty, just like the original. Enjoy your homemade bagels, no matter your dietary needs!

For more details on making these delicious treats, check out the Full Recipe.

Storage Info

Best Ways to Store Homemade Bagels

To keep your homemade bagels fresh, you need to store them right. If you plan to eat them within a few days, place them in a paper bag. This keeps them soft and tasty. Avoid plastic bags, as they make bagels soggy. For longer storage, wrap them in foil and place them in an airtight container.

Freezing Instructions

If you made too many bagels, freezing is a great option. First, let them cool completely on a wire rack. Then, wrap each bagel tightly in plastic wrap. After that, place the wrapped bagels in a freezer bag. They can stay fresh for up to three months. When you’re ready to eat them, just take them out and let them thaw.

Reheating Tips

To enjoy your bagels again, reheating is easy. For a crispy result, preheat your oven to 350°F (175°C). Place the bagels on a baking sheet and heat for about 5 to 10 minutes. If you like them softer, you can microwave them for 15 to 20 seconds. This way, you keep that fresh taste. For extra flavor, add your favorite toppings before reheating.

Remember, to keep the deliciousness alive, store, freeze, and reheat wisely! If you’re interested in making these bagels, check out the Full Recipe for detailed steps.

FAQs

How long do homemade bagels last?

Homemade bagels last about 2 to 3 days at room temperature. Store them in a paper bag for best results. You can freeze them for up to 3 months. Just wrap them well in plastic wrap before freezing.

Can I make bagel dough ahead of time?

Yes, you can make bagel dough ahead of time. Prepare the dough and let it rise. Then, cover it tightly and place it in the fridge. It can stay there for 1 to 2 days. When ready to use, let it come to room temperature before shaping.

What makes bagels chewy?

Bagels are chewy due to the high gluten content in the flour. When you knead the dough, gluten develops and creates a strong structure. Boiling the bagels also helps enhance their chewiness.

Can I use bread flour instead of all-purpose flour?

Yes, you can use bread flour instead of all-purpose flour. Bread flour has a higher protein content, which gives bagels a firmer texture. This can make your bagels even chewier and more delicious.

How to get a shiny crust on bagels?

To get a shiny crust, brush the bagels with an egg wash before baking. This gives them a nice golden color. Boiling them in honey water also helps create that glossy finish.

Where did bagels originate?

Bagels have roots in Jewish culture, specifically from Poland. They are believed to date back to the 17th century. They were made for special occasions and have become a beloved food worldwide. For a delightful experience, try making them using the Full Recipe.

Making bagels at home is fun and easy. We covered key ingredients, precise measurements, and tasty toppings. I shared step-by-step instructions to help you knead, rise, boil, and bake like a pro. You also learned handy tips for great texture and common mistakes to avoid. Don’t forget the fun variations and storage tips to keep your bagels fresh. Now, you’re ready to create delicious bagels. Enjoy the process and share your tasty results!

To make these delightful bagels, gather the following: - 4 cups all-purpose flour - 1 tablespoon salt - 1 tablespoon sugar - 2 teaspoons instant yeast - 1 ½ cups warm water (about 110°F) - 1 tablespoon honey (for boiling) - Sesame seeds, poppy seeds, or everything bagel seasoning (for topping) - Optional: 1 egg (for egg wash) If you need to adjust, you can use whole wheat flour instead of all-purpose flour. This adds a nutty taste. You can replace sugar with honey if you prefer a different sweetener. For the yeast, active dry yeast can work, but it needs to be proofed first. Just mix it with warm water and sugar, then wait for bubbles to form. This shows the yeast is alive and ready to use. Toppings make your bagels fun and unique. Try sesame seeds for a classic touch. Poppy seeds add a nice crunch. Everything bagel seasoning brings a mix of flavors that many love. You can also go wild with toppings like cheese or herbs. For a sweet twist, consider cinnamon sugar or even chocolate chips. Enjoy experimenting to find your favorite combination! Start by gathering all your ingredients. This makes the process smooth. You need all-purpose flour, salt, sugar, and instant yeast. Warm water is key too, around 110°F. Mix these dry ingredients in a large bowl. Slowly pour in the warm water. Use a wooden spoon to mix until you see a shaggy dough. Next, turn the dough out onto a lightly floured surface. Knead the dough for about 10 minutes. You want it smooth and elastic. This step is crucial for that chewy texture. After kneading, place the dough in a lightly oiled bowl. Cover it with a damp cloth. Let it rise in a warm spot for about 1 hour. It should double in size. Once the dough has risen, it’s time to shape your bagels. Punch it down and divide into 10 pieces. Roll each piece into a ball. Poke a hole in the center with your finger. Gently stretch it to form the bagel shape. Now, place them on a baking sheet. Bring a large pot of water to a boil. Add 1 tablespoon of honey to the water. Boil each bagel for 1 minute on each side. This helps create the classic chewy texture. Use a slotted spoon to remove them and place back on the baking sheet. If you want a shiny finish, brush each bagel with whisked egg. Sprinkle your favorite toppings on top. Preheat your oven to 425°F. Bake the bagels for 20-25 minutes. Look for that golden brown color. Let them cool on a wire rack before you dig in. Follow this step-by-step guide for a great homemade bagel experience. For the full recipe, refer to the Bagel Bliss: A Chewy Delight. To get that chewy bagel texture, focus on the dough. Use high-protein all-purpose flour. This type of flour gives bagels strength. Knead the dough well for about ten minutes. This builds gluten. Gluten makes the bagels chewy. Don’t skip the boiling step. Boiling creates a crust that holds in moisture. One common mistake is not measuring ingredients accurately. Use a kitchen scale for precise results. Another mistake is skipping the rise time. Let the dough rise until it doubles in size. This helps the bagels become light and airy. Also, avoid overcrowding during boiling. Boil only a few bagels at a time. You will need some basic tools for bagel-making. Here’s a quick list: - Large mixing bowl - Wooden spoon - Clean surface for kneading - Parchment paper for baking - Large pot for boiling - Slotted spoon for removal - Optional: kitchen scale for measuring These tools help ensure success in your bagel-making journey. For the best results, keep everything organized and ready to go. For the full recipe, check out Bagel Bliss: A Chewy Delight. {{image_2}} You can easily change the taste of your bagels. Mix in herbs or spices for a fun twist. Try adding garlic powder or dried onion for a savory kick. If you love cheese, blend in shredded cheddar or parmesan. For a sweet bagel, consider cinnamon and sugar. Each of these additions makes your bagels unique and exciting. Bagels are great with many toppings. Instead of just sesame seeds, try different flavors. You can use poppy seeds, onion flakes, or even everything bagel seasoning. For a sweet touch, sprinkle brown sugar and cinnamon. You can also add fresh herbs like rosemary or thyme. Get creative and make each bagel a new experience. If you need gluten-free bagels, don’t worry! You can use gluten-free flour blends. Look for ones that include xanthan gum to help with texture. Follow the same steps in the recipe, but adjust water as needed. Your bagels will still be chewy and tasty, just like the original. Enjoy your homemade bagels, no matter your dietary needs! For more details on making these delicious treats, check out the Full Recipe. To keep your homemade bagels fresh, you need to store them right. If you plan to eat them within a few days, place them in a paper bag. This keeps them soft and tasty. Avoid plastic bags, as they make bagels soggy. For longer storage, wrap them in foil and place them in an airtight container. If you made too many bagels, freezing is a great option. First, let them cool completely on a wire rack. Then, wrap each bagel tightly in plastic wrap. After that, place the wrapped bagels in a freezer bag. They can stay fresh for up to three months. When you're ready to eat them, just take them out and let them thaw. To enjoy your bagels again, reheating is easy. For a crispy result, preheat your oven to 350°F (175°C). Place the bagels on a baking sheet and heat for about 5 to 10 minutes. If you like them softer, you can microwave them for 15 to 20 seconds. This way, you keep that fresh taste. For extra flavor, add your favorite toppings before reheating. Remember, to keep the deliciousness alive, store, freeze, and reheat wisely! If you're interested in making these bagels, check out the Full Recipe for detailed steps. Homemade bagels last about 2 to 3 days at room temperature. Store them in a paper bag for best results. You can freeze them for up to 3 months. Just wrap them well in plastic wrap before freezing. Yes, you can make bagel dough ahead of time. Prepare the dough and let it rise. Then, cover it tightly and place it in the fridge. It can stay there for 1 to 2 days. When ready to use, let it come to room temperature before shaping. Bagels are chewy due to the high gluten content in the flour. When you knead the dough, gluten develops and creates a strong structure. Boiling the bagels also helps enhance their chewiness. Yes, you can use bread flour instead of all-purpose flour. Bread flour has a higher protein content, which gives bagels a firmer texture. This can make your bagels even chewier and more delicious. To get a shiny crust, brush the bagels with an egg wash before baking. This gives them a nice golden color. Boiling them in honey water also helps create that glossy finish. Bagels have roots in Jewish culture, specifically from Poland. They are believed to date back to the 17th century. They were made for special occasions and have become a beloved food worldwide. For a delightful experience, try making them using the Full Recipe. Making bagels at home is fun and easy. We covered key ingredients, precise measurements, and tasty toppings. I shared step-by-step instructions to help you knead, rise, boil, and bake like a pro. You also learned handy tips for great texture and common mistakes to avoid. Don’t forget the fun variations and storage tips to keep your bagels fresh. Now, you’re ready to create delicious bagels. Enjoy the process and share your tasty results!

Homemade Bagels

Discover the joy of making homemade bagels with our easy Bagel Bliss recipe! Enjoy the chewy delight of fresh bagels topped with your favorite seasonings. This step-by-step guide takes you from mixing the dough to boiling and baking the perfect bagels in just 1 hour and 30 minutes. Perfect for brunch or a snack! Click through to explore the full recipe and create your own delicious bagel masterpiece today!

Ingredients
  

4 cups all-purpose flour

1 tablespoon salt

1 tablespoon sugar

2 teaspoons instant yeast

1 ½ cups warm water (about 110°F)

1 tablespoon honey (for boiling)

Sesame seeds, poppy seeds, or everything bagel seasoning (for topping)

Optional: 1 egg (for egg wash)

Instructions
 

In a large mixing bowl, combine flour, salt, sugar, and instant yeast.

    Gradually add the warm water to the dry ingredients, mixing with a wooden spoon until a shaggy dough forms.

      Knead the dough on a lightly floured surface for about 10 minutes until smooth and elastic.

        Place the kneaded dough in a lightly oiled bowl, cover with a damp cloth, and let rise in a warm place for about 1 hour or until doubled in size.

          Preheat your oven to 425°F (220°C) and prepare a baking sheet lined with parchment paper.

            Once the dough has risen, punch it down and divide it into 10 equal pieces. Roll each piece into a ball.

              Poke a hole in the center of each ball with your finger and gently stretch it to form a bagel shape. Place on the prepared baking sheet.

                Bring a large pot of water to a boil and add the honey. Boil each bagel for 1 minute on each side. Use a slotted spoon to remove and place back on the baking sheet.

                  If desired, brush the tops of each boiled bagel with whisked egg to give a shiny finish and sprinkle with desired toppings.

                    Bake in the preheated oven for 20-25 minutes or until golden brown.

                      Let cool on a wire rack before enjoying.

                        Prep Time: 30 minutes | Total Time: 1 hour 30 minutes | Servings: 10 bagels

                          - Presentation Tips: Serve warm with cream cheese, lox, or your favorite spreads on a rustic wooden board for an inviting brunch setup.

                            Leave a Comment

                            Recipe Rating