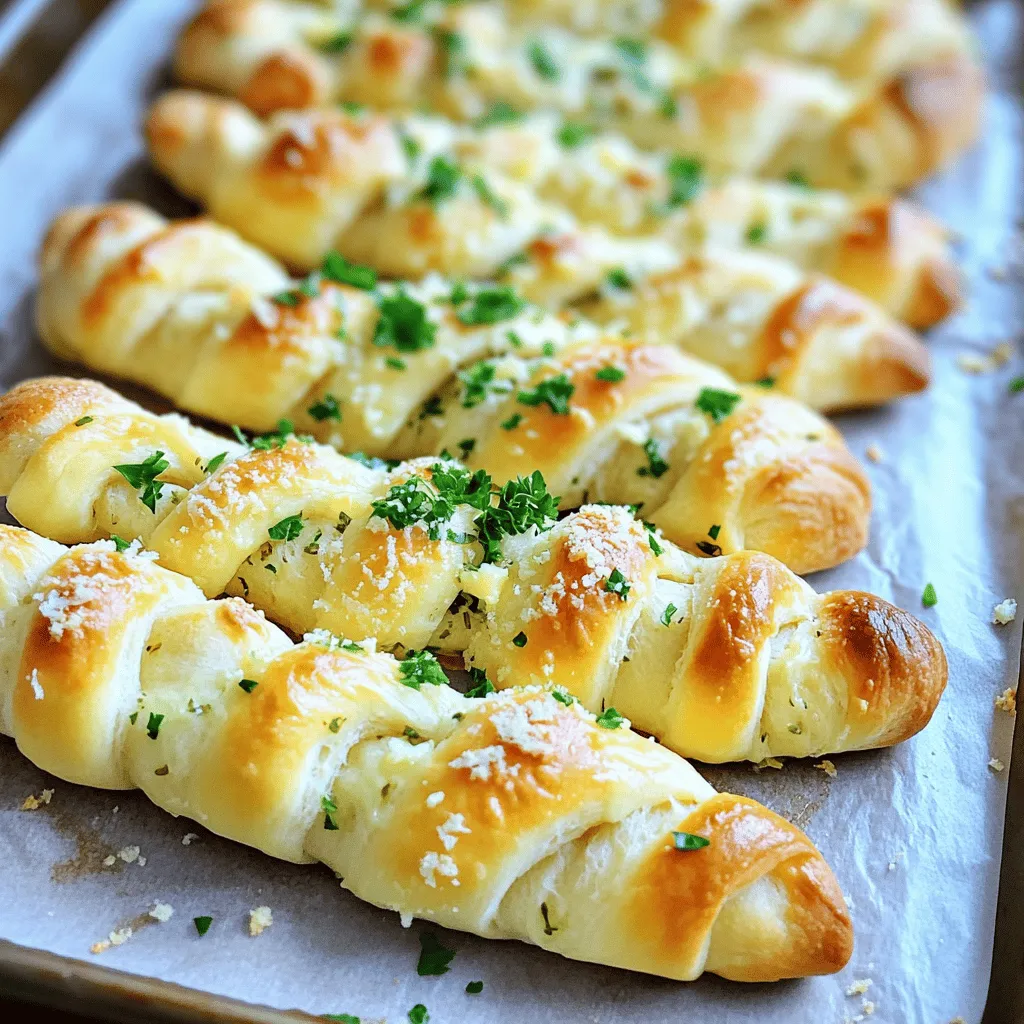
Looking for a quick and tasty snack? You’re in the right place! My Herb Garlic Parmesan Breadsticks are simple to make and perfect for any meal. With just a few ingredients and easy steps, you’ll impress family and friends in no time. Let’s dive into the delicious world of homemade breadsticks that add a burst of flavor to your day!
Ingredients
List of Ingredients
– 2 cups all-purpose flour
– 1 tablespoon instant yeast
– 1 teaspoon sugar
– 1 teaspoon salt
– 1 tablespoon olive oil
– 3/4 cup warm water (about 110°F/45°C)
– 1 teaspoon garlic powder
– 1/2 teaspoon dried oregano
– 1/2 teaspoon dried basil
– 1/2 cup grated Parmesan cheese
– 2 tablespoons unsalted butter, melted
– 1 tablespoon fresh parsley, chopped (for garnish)
Substitute Options
You can swap all-purpose flour with whole wheat flour for a healthier choice. For the instant yeast, use active dry yeast, but let it bloom first. Olive oil can be replaced with melted coconut oil or vegetable oil. If you don’t have garlic powder, fresh minced garlic works too. Use any dried herbs you prefer, like thyme or rosemary. You can replace Parmesan with another cheese, like mozzarella or cheddar.
Measurements and Quantities
Be precise with your measurements for the best results. Use a kitchen scale for the flour if you can. For liquid ingredients, measuring cups work just fine. Remember, baking is a science. The right amounts ensure that your breadsticks are fluffy and tasty. Use a thermometer to check the water temperature. It should be warm, not hot. This helps the yeast to wake up and rise the dough properly.
Step-by-Step Instructions
Preparing the Dough
Start by mixing warm water, sugar, and instant yeast in a bowl. Let it sit for 5-10 minutes until it bubbles. This means your yeast is alive and ready. In another bowl, whisk together the flour, salt, garlic powder, oregano, and basil. This mix brings great flavor. Once your yeast is frothy, add olive oil. Slowly add the dry mix until a dough forms. Knead the dough on a floured surface for 5-7 minutes until it feels smooth. Place the dough in a greased bowl. Cover it with a damp cloth and let it rise in a warm spot for 30-45 minutes. It should double in size.
Shaping the Breadsticks
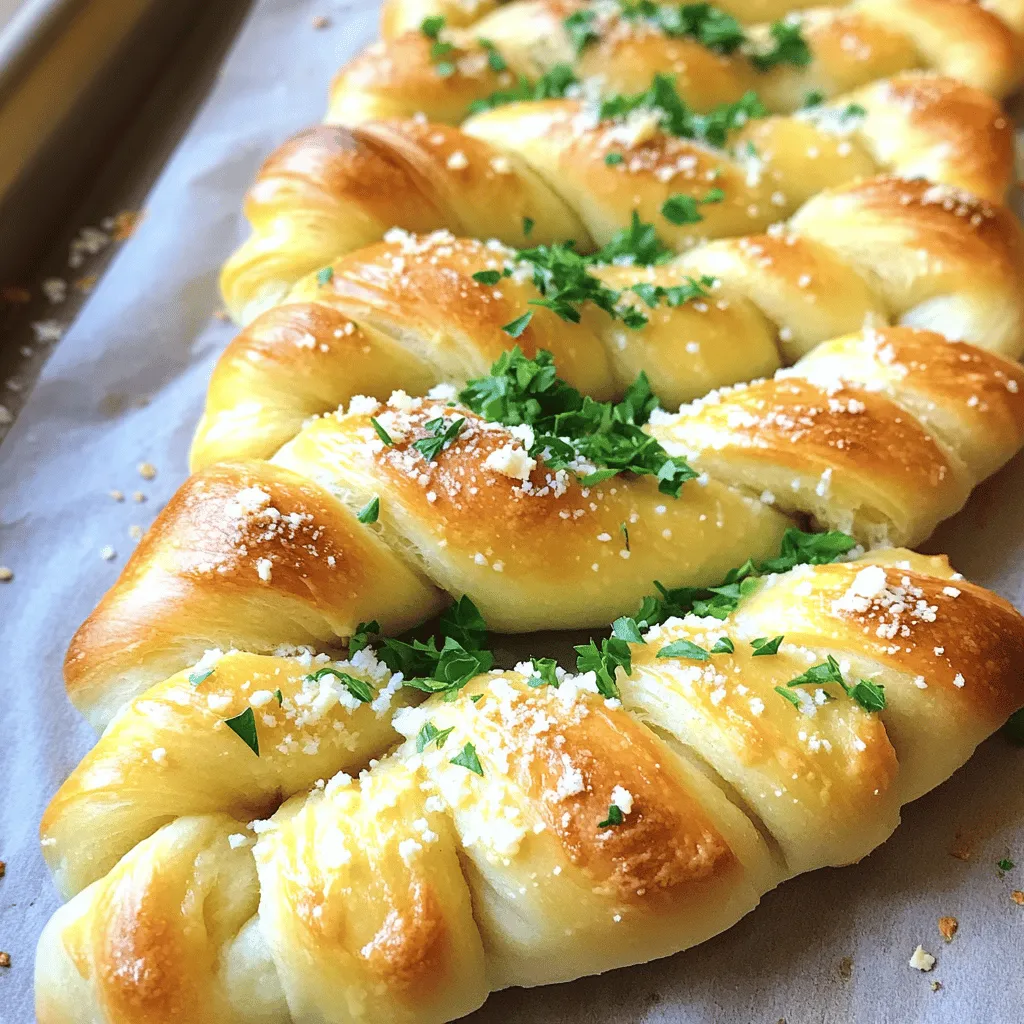
After the dough has risen, punch it down gently. Roll it out into a rectangle about 1/2 inch thick. Cut the dough into strips that are 1 inch wide and 6 inches long. Now comes the fun part! Twist each strip a couple of times to make a nice spiral shape. Arrange your twisted breadsticks on a lined baking sheet. Make sure to leave space between them for baking.
Baking Instructions
Preheat your oven to 400°F (200°C). Brush melted butter over the tops of the breadsticks. Sprinkle grated Parmesan cheese on top for extra flavor. Bake in the oven for 15-18 minutes. Keep an eye on them until they turn golden brown. When they come out, sprinkle with fresh chopped parsley to make them look great. Enjoy your warm, tasty breadsticks!
Tips & Tricks
Storage Tips for Freshness
To keep your breadsticks fresh, store them in a paper bag. This allows air to flow and keeps them from getting soggy. If you want to keep them longer, wrap them tightly in plastic wrap. You can also freeze them for up to three months. Just let them cool completely before wrapping.
Common Mistakes to Avoid
One mistake is not letting the dough rise enough. You want it to double in size. If it doesn’t rise, your breadsticks will be dense. Another mistake is cutting the strips too thick. Aim for one inch wide for the best results. Lastly, don’t skip the butter and cheese topping. It adds great flavor.
Enhancing Flavor with Add-ins
You can make these breadsticks even better with fun add-ins. Try adding more herbs like rosemary or thyme for a fresh twist. If you like spice, sprinkle in some red pepper flakes. You can even mix in different cheeses like mozzarella or cheddar for a cheesy kick. Get creative and make them your own!
Variations
Cheese Variations
You can switch up the cheese in your breadsticks. While Parmesan is rich and flavorful, you can try other cheeses too. Mozzarella gives a nice stretch and gooey texture. Just sprinkle some shredded mozzarella before baking. Cheddar adds a sharp flavor. Mix it in the dough or sprinkle it on top. Each cheese gives a unique twist to the breadsticks.
Herb Variations
Herbs can change the whole vibe of your breadsticks. You can add rosemary for a woodsy flavor. Just chop it finely and mix it into the dough. Thyme adds a light, fresh taste. Dried herbs work too! Just remember to adjust the amounts. Fresh herbs are more intense, so use less. Feel free to experiment with your favorite herbs!
Gluten-Free Option
If you need a gluten-free option, you can use gluten-free flour. Make sure it’s a one-to-one blend for best results. Follow the same steps as the original recipe. The texture may vary, but the taste will still shine. Add a bit of extra olive oil to help with moisture. Enjoy the same great flavors without the gluten!
Storage Info
How to Store Leftover Breadsticks
To keep your leftover breadsticks fresh, place them in a paper bag. This helps them stay crispy. Avoid plastic bags, as they trap moisture and make them soggy. If you want to keep them longer, wrap them in foil. Store them at room temperature for up to two days.
Reheating Instructions
When you want to enjoy your leftover breadsticks, preheat your oven to 350°F (175°C). Place the breadsticks on a baking sheet. Heat them for about 5 to 10 minutes. This will warm them up and restore their crispy outside. You can also use a toaster oven for the same effect.
Freezing for Later Use
If you want to save some breadsticks for later, freezing is a great option. Wrap each breadstick in plastic wrap or foil. Place them in a freezer bag. They can last up to three months in the freezer. When you’re ready to eat, thaw them in the fridge overnight. Reheat in the oven for a fresh taste.
FAQs
How long do homemade breadsticks last?
Homemade breadsticks stay fresh for 2-3 days at room temperature. Store them in a bag or an airtight container. If you want to keep them longer, freeze them. They can last up to 3 months in the freezer.
Can I make these breadsticks ahead of time?
Yes, you can make these breadsticks ahead of time. Prepare the dough and let it rise. After that, shape the breadsticks and place them on a baking sheet. Cover and refrigerate for up to 24 hours. When you are ready, bake them straight from the fridge. Just add a few extra minutes to the baking time.
What can I serve with herb garlic parmesan breadsticks?
These breadsticks pair well with many dishes. You can serve them with marinara sauce, garlic butter, or a creamy dip. They also go great with soups and salads. Try them alongside pasta or as a side for your favorite Italian meal. Enjoy experimenting with different pairings!
In this post, we covered all the steps to make tasty breadsticks. We explored ingredients, substitutes, and measurements to help you prepare dough. You learned how to shape and bake them perfectly. We shared tips for storage, common mistakes, and flavor boosters. Variations like cheese and herbs let you get creative. Extra info on storage and reheating keeps them fresh. Now, you are ready to enjoy delicious, homemade breadsticks anytime!