
Are you ready to bake something truly special? Garlic Herb Swirl Bread is not just a treat; it’s a delight for your taste buds. In this post, I’ll guide you through every step, from mixing the dough to rolling in those flavorful herbs. You’ll learn essential tips to make your bread rise perfectly and stay soft. Let’s turn your kitchen into a fragrant haven of garlic and herbs!
Ingredients
Essential Ingredients for Garlic Herb Swirl Bread
To make this delightful bread, you will need the following key ingredients:
– 4 cups all-purpose flour
– 1 packet (2 ¼ tsp) active dry yeast
– 1 ½ cups warm water (110°F)
– 2 tablespoons sugar
– 1 teaspoon salt
– 4 tablespoons unsalted butter, softened
– 4 cloves garlic, minced
– 2 tablespoons fresh parsley, chopped
– 1 tablespoon fresh rosemary, chopped
– 1 tablespoon fresh thyme, chopped
– ½ teaspoon black pepper
Each ingredient plays a key role. The flour gives the bread its structure. Yeast makes the dough rise and adds flavor. Warm water helps activate the yeast. Sugar feeds the yeast for a good rise. Salt enhances all the flavors. Butter adds richness and a soft texture. Garlic adds that famous aroma and taste, while fresh herbs bring a vibrant touch.
Optional Add-ins for Extra Flavor
Feel free to get creative with your garlic herb swirl bread. Consider adding:
– Shredded cheese (like mozzarella or cheddar)
– Chopped sun-dried tomatoes
– Crushed red pepper for heat
– Walnuts or pecans for crunch
These add-ins can boost flavor and texture. Cheese melts and creates a gooey center. Sun-dried tomatoes add a sweet-tart kick. Red pepper can spice things up, while nuts provide a nice crunch. Try a mix of these to see what you love best!
Importance of Fresh Herbs
Using fresh herbs is crucial for the best flavor. Dried herbs can work, but they lack the punch fresh herbs offer. Fresh parsley, rosemary, and thyme add bright notes to the bread. They also provide a lovely aroma while baking. Always chop the herbs just before using them to keep their flavor strong. Then, your garlic herb swirl bread will taste fresh and delicious!
Step-by-Step Instructions
Preparing the Yeast Mixture
To start, grab a small bowl. Combine 1 ½ cups of warm water, 2 tablespoons of sugar, and 1 packet of active dry yeast. Let this sit for 5-10 minutes. Watch for it to become frothy. This means the yeast is active and ready to work its magic in your dough.
Making the Dough
Next, take a large mixing bowl. Add 4 cups of all-purpose flour and 1 teaspoon of salt. Make a small well in the center. Pour in your frothy yeast mixture and 4 tablespoons of softened butter. Mix it all together using your hands or a wooden spoon. Once a dough forms, knead it on a floured surface. Knead for about 8-10 minutes until it feels smooth and elastic.
Rolling and Filling the Bread
After kneading, place your dough in a greased bowl. Cover it with a damp cloth and let it rise in a warm spot for 1 hour. When it doubles in size, punch it down. Turn it out onto a floured surface. Roll the dough into a rectangle, about 12×18 inches. In a small bowl, mix 4 cloves of minced garlic, 2 tablespoons of chopped parsley, 1 tablespoon of chopped rosemary, 1 tablespoon of chopped thyme, and ½ teaspoon of black pepper. Spread this garlic herb mixture evenly over your dough, leaving a small border on the edges. Carefully roll the dough into a tight log and pinch the seams to seal.
Final Proofing and Baking
Now, slice the log into 1-inch thick rounds. Place them in a greased baking dish, cut side up. Cover the rolls with a kitchen towel. Let them rise for another 30 minutes. Preheat your oven to 375°F (190°C). Bake the rolls for 25-30 minutes until they are golden brown on top. When ready, allow the bread to cool slightly before serving. Pull apart the rolls to reveal the delicious swirl of garlic and herbs inside. Enjoy every bite!
Tips & Tricks
How to Achieve the Perfect Rise
To get your bread to rise well, use warm water. The ideal temperature is about 110°F. This warmth helps the yeast wake up and grow. Mix the yeast with warm water and sugar. Let it sit for 5-10 minutes until it looks frothy. This shows the yeast is alive. Once your dough forms, put it in a warm spot. Cover it with a damp cloth. Let it rise for about an hour. The dough should double in size, which means it’s ready to shape.
Kneading Techniques for Bread Dough
Kneading is key to great bread. It helps develop gluten, which gives bread its nice texture. Use a floured surface and your hands. Push the dough down and fold it over. Turn it a quarter turn and repeat. Keep kneading for about 8-10 minutes until the dough feels smooth and elastic. You can also use a stand mixer with a dough hook for this step. Just mix it on low speed until it comes together.
Ensuring a Flaky, Flavorful Swirl
To get a nice swirl, roll the dough into a rectangle. Aim for about 12×18 inches. Spread the garlic herb filling evenly, but leave a border. This helps seal the log when you roll it up. Start from one long edge and roll tightly. Pinch the seams well to keep the filling inside. After slicing the log, let the rolls rise again. This second rise helps build that lovely flaky texture. When baked, you’ll have a tasty swirl of garlic and herbs!
Variations
Adding Cheese to the Garlic Herb Swirl
Cheese can make your garlic herb swirl bread even tastier. I love using mozzarella or cheddar. These cheeses melt well and add a rich flavor. Simply sprinkle the grated cheese over the garlic herb mixture before you roll it up. This way, the cheese gets all gooey and delicious during baking. It creates a wonderful cheesy swirl that pairs great with the herbs and garlic. You can also try adding a little parmesan for a nice salty touch.
Using Different Herbs or Spices
Feel free to mix up the herbs in your swirl. You can use basil, dill, or oregano for a unique twist. Each herb brings a new flavor and scent to the bread. If you want some heat, try adding red pepper flakes or smoked paprika. This change can add a fun kick. When you choose your herbs, go for fresh ones whenever you can. They give the best taste and aroma.
Gluten-Free Garlic Herb Swirl Bread Option
If you need a gluten-free version, you can still enjoy this bread. Use a gluten-free all-purpose flour mix. Make sure it has xanthan gum, as this helps the bread rise. The steps are the same, but the dough may feel a bit different. Don’t worry! It will still taste great. Keep an eye on the baking time. Gluten-free bread can bake a little faster, so check for a golden color. Enjoy your gluten-free garlic herb swirl bread warm with your favorite dip!
Storage Info
Best Methods for Storing Garlic Herb Swirl Bread
To keep your Garlic Herb Swirl Bread fresh, place it in an airtight container. You can also wrap it tightly in plastic wrap. This helps prevent it from drying out. If you plan to eat it within a few days, store it at room temperature. For longer storage, the fridge is an option, but it may change the bread’s texture.
Reheating Instructions for Leftovers
When you have leftover rolls, reheating them is simple. Preheat your oven to 350°F (175°C). Place the rolls on a baking sheet. Cover them with foil to keep them moist. Heat for about 10-15 minutes, or until warm. You can also microwave individual rolls for 20-30 seconds. Just be careful not to overheat, or they may get tough.
Freezing Garlic Herb Swirl Rolls
Freezing is a great way to save extra rolls. After baking and cooling, place the rolls in a freezer bag. Squeeze out as much air as possible before sealing. They will stay fresh for about three months. When you want to eat them, thaw in the fridge overnight. Reheat as mentioned before, and enjoy that fresh, warm taste again!
FAQs
What is the best way to serve Garlic Herb Swirl Bread?
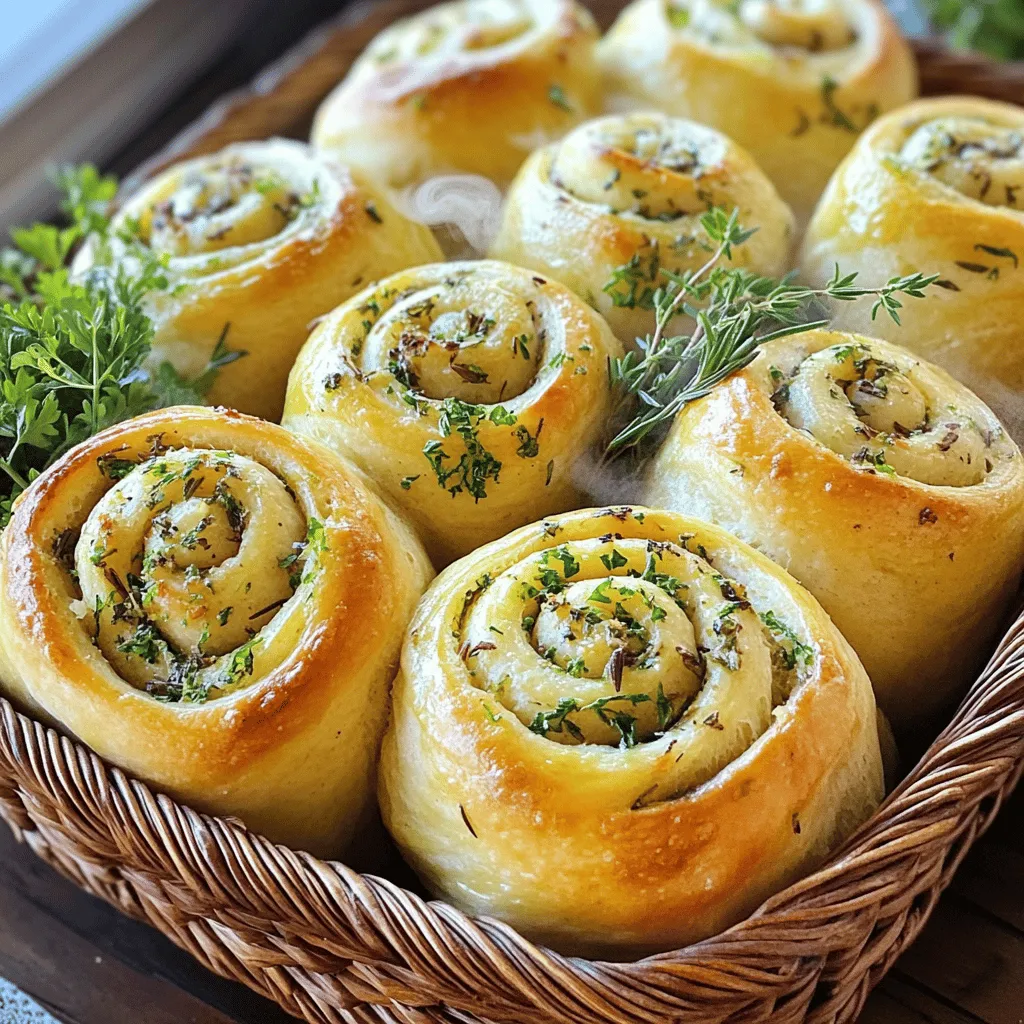
Serve Garlic Herb Swirl Bread warm. It tastes best right out of the oven. Place it in a rustic basket for a nice look. Garnish with fresh herbs for a pop of color. You can also pair it with olive oil or soft butter. This bread works well as a side for soups or salads too.
Can I make garlic herb bread ahead of time?
Yes, you can make garlic herb bread ahead of time. Prepare the dough and let it rise. After rolling and filling, you can wrap it tightly and store it in the fridge. Bake it fresh the next day. This way, you have warm bread ready when you need it.
How long does homemade garlic herb swirl bread last?
Homemade garlic herb swirl bread lasts about 2-3 days at room temperature. Store it in a bread bag or wrapped in plastic. If you want it to last longer, freeze it. It can stay fresh in the freezer for up to 3 months. Just remember to thaw it before enjoying.
Where can I buy pre-made garlic herb swirl bread?
You can find pre-made garlic herb swirl bread at many grocery stores. Check the bakery section for fresh options. Some local bakeries may also offer this bread. If you’re looking for a specific brand, check online retailers or specialty shops.
Garlic Herb Swirl Bread is simple yet delicious. We explored key ingredients, from fresh herbs to tasty add-ins. I shared steps to make it, helping you rise and bake perfectly. Use the tips to get that flaky swirl just right. Don’t forget variations like cheese or gluten-free options for all diets. Proper storage keeps your bread fresh longer. Enjoy serving it warm or reheated. This bread adds flavor to any meal and brings joy to your kitchen. Make it often, and share it with friends!