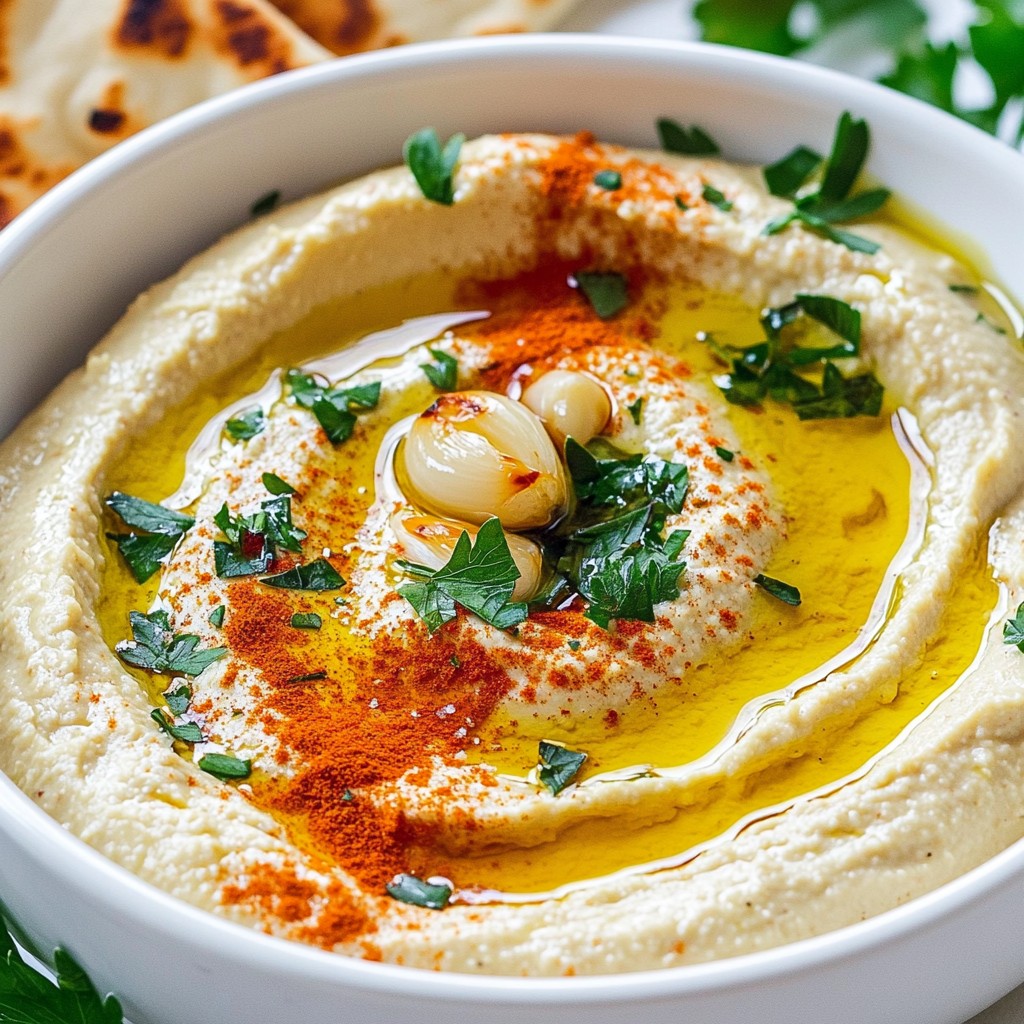
If you’re craving a dip that’s both creamy and packed with flavor, you’ve hit the jackpot! My Creamy Roasted Garlic Hummus is the perfect blend of simple ingredients that come together in no time. Whether you’re hosting a party or enjoying a quiet night in, this dip will wow your taste buds. Get ready to elevate your snacking game with an easy recipe you can customize to fit any palate!
Why I Love This Recipe
- Flavorful and Aromatic: The roasted garlic adds a rich, sweet flavor that elevates the traditional hummus taste.
- Easy to Make: With just a few simple steps, you can whip up a delicious batch of hummus in no time.
- Versatile Dip: Perfect for pairing with pita bread, fresh veggies, or as a spread on sandwiches.
- Healthy Snack: Packed with protein and fiber, this hummus is a nutritious choice for any time of day.
Ingredients
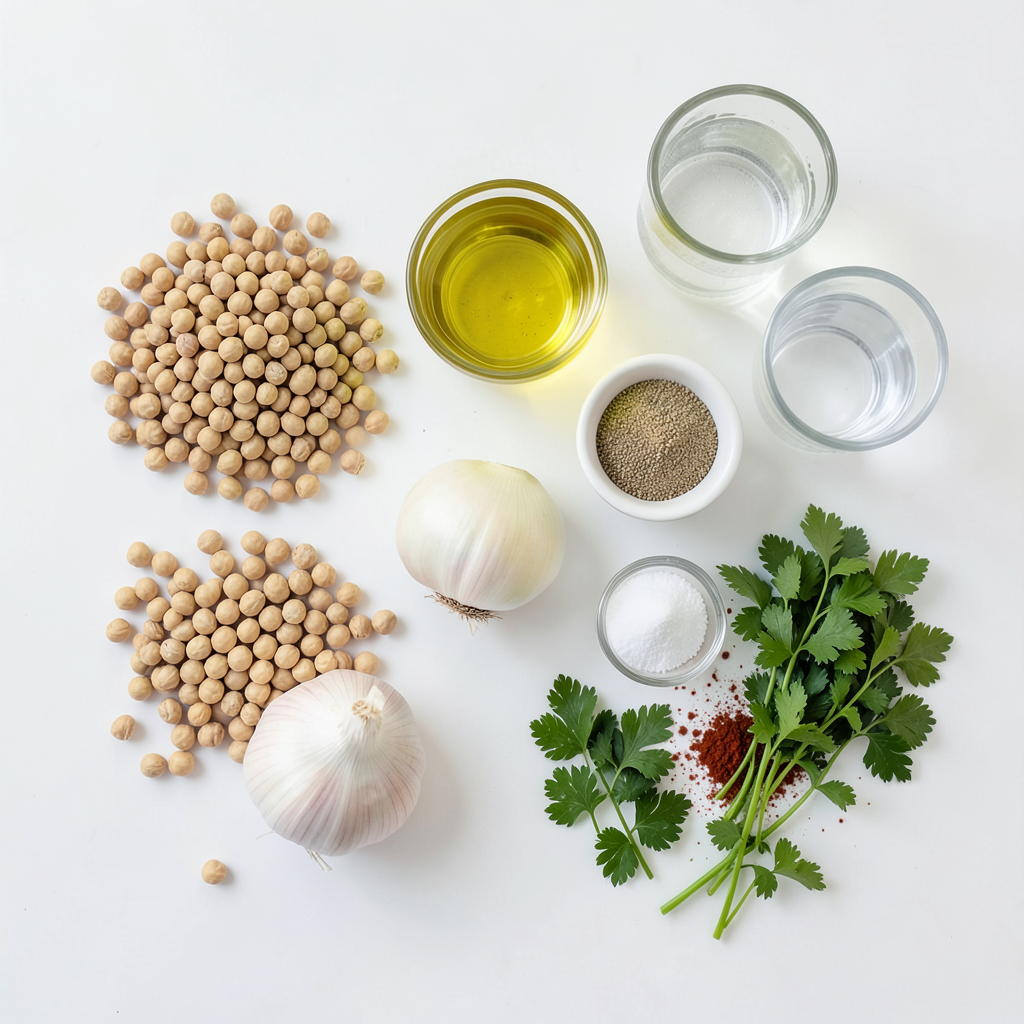
List of Ingredients
To make creamy roasted garlic hummus, you need the following:
- 1 cup dried chickpeas (or 1 can, drained and rinsed)
- 1 head of garlic
- 3 tablespoons tahini
- 3 tablespoons olive oil
- 2 tablespoons lemon juice
- 1 teaspoon ground cumin
- Salt to taste
- 3–4 tablespoons water (adjust for desired creaminess)
- Fresh parsley, for garnish
- Paprika, for garnish
Substitutions for Ingredients
If you can't find some of these ingredients, don't worry! Here are some easy swaps:
- Chickpeas: You can use canned chickpeas for a quicker option.
- Tahini: Try using sunflower seed butter or Greek yogurt if you need a nut-free option.
- Olive Oil: Avocado oil or any neutral oil can work well.
- Lemon Juice: Lime juice gives a nice twist if you’re out of lemon.
- Ground Cumin: You can substitute with ground coriander or smoked paprika for a different flavor.
Nutritional Information
Here's a quick look at what you'll get per serving (assuming 6 servings):
- Calories: 120
- Protein: 4g
- Carbohydrates: 10g
- Dietary Fiber: 3g
- Fat: 8g
This hummus is not just tasty but also packed with nutrients! You get healthy fats from the olive oil and tahini, plus protein and fiber from the chickpeas. Enjoy it guilt-free!
Step-by-Step Instructions
Roasting the Garlic
To start, you need to roast the garlic. First, heat your oven to 400°F (200°C). Take a head of garlic and slice off the top. This lets the heat reach the cloves. Drizzle a little olive oil on the cut side. Wrap the garlic in aluminum foil. Place it in the oven for 30 to 35 minutes. The cloves should feel soft and smell sweet when done. Let it cool before using.
Preparing the Chickpeas
Next, prepare your chickpeas. If you use dried chickpeas, soak them overnight in water. This helps them cook better. The next day, drain them and boil in salted water for about one hour. They should be tender when done. If you choose canned chickpeas, just drain and rinse them under cold water. This removes extra salt and makes them ready to use.
Blending the Hummus
Now it’s time to blend the hummus. In your food processor, add the cooked chickpeas. Squeeze the roasted garlic cloves out of their skins and add them too. Next, include tahini, olive oil, lemon juice, ground cumin, and salt. Blend everything until it’s smooth. If you want it creamier, add water one tablespoon at a time. Blend until you reach the perfect texture. Taste and adjust with more lemon juice or salt if needed.
Tips & Tricks
Achieving the Perfect Creaminess
To make your hummus super creamy, use the right chickpeas. I recommend dried chickpeas over canned. If you use dried ones, soak them overnight. This helps them cook better. When you blend, add water slowly. Start with one tablespoon and blend well. Check the texture. Keep adding water until you reach your perfect creaminess.
Best Practices for Flavor Enhancement
Roasting garlic adds a sweet flavor. Don’t skip this step! Wrap the garlic in foil and roast until it’s soft. When you blend the hummus, add lemon juice and ground cumin. These spices help bring out the best taste. Taste your hummus after blending. Adjust with more salt or lemon juice if needed. Little changes can make a big difference!
Tools You’ll Need
You’ll need a few simple tools to make this hummus:
- A sharp knife for cutting garlic
- Aluminum foil for wrapping garlic
- A large bowl for soaking chickpeas
- A pot for cooking chickpeas
- A food processor for blending your hummus
Having these tools ready makes the process smooth and fun!
Pro Tips
- Soak Chickpeas: For the best texture, soak dried chickpeas overnight. This helps them cook evenly and become softer, resulting in creamier hummus.
- Roast Garlic for Depth: Roasting garlic enhances its sweetness and mellows its flavor. Make sure to let it cool before squeezing out the cloves for blending.
- Adjust Creaminess: Add water gradually to achieve your desired consistency. Start with a tablespoon and blend, adding more if necessary until it's perfectly creamy.
- Garnish for Presentation: Don't skip the drizzle of olive oil and sprinkle of paprika and parsley on top. It adds a beautiful finish and extra flavor to your hummus.
Variations
Flavor Variations
You can make your creamy roasted garlic hummus even more fun. Try adding spice for a kick. A pinch of cayenne pepper or a splash of hot sauce can make it lively. Want to go herb-infused? Mix in fresh herbs like basil or cilantro. They add a fresh taste that brightens the dip.
Serving Suggestions
Hummus is great with many foods. You can serve it with crisp veggies like carrots, cucumbers, and bell peppers. These add crunch and color to your plate. Pita bread is another classic choice. You can cut it into triangles for easy dipping. For a twist, try serving it with crackers or breadsticks.
Dietary Modifications
This hummus is already vegan and gluten-free. Chickpeas are naturally plant-based and gluten-free. If you want to reduce calories, use less olive oil. You can also swap tahini for a lower-fat option, like yogurt. Just remember, these changes may alter the flavor a bit. Enjoy experimenting to find what works best for you!
Storage Information
How to Store Leftovers
To store leftover hummus, place it in an airtight container. Spread a thin layer of olive oil on top. This helps keep it fresh and tasty. Seal the container tightly. Store it in the fridge for up to one week. When you're ready to eat, give it a stir. You might need to add a splash of water to regain creaminess.
Freezing Hummus
You can freeze hummus, too! It’s a great way to save extra hummus for later. Use a freezer-safe container or freezer bag. I recommend dividing it into smaller portions. This makes it easy to thaw only what you need. When frozen, hummus lasts about three months. To thaw, place it in the fridge overnight. Stir it well before serving for the best taste.
Shelf Life Tips
Hummus stays good for about a week in the fridge. Always check for any signs of spoilage. If it smells off or you see mold, it's best to toss it. To keep your hummus fresh longer, use clean utensils when serving. This avoids contamination. Enjoy your creamy roasted garlic hummus at its best!
FAQs
Can I use canned chickpeas?
Yes, you can use canned chickpeas for this recipe. They save time and make prep easier. Just drain and rinse them well before using. This helps remove excess salt and improves the flavor of your hummus. Canned chickpeas are soft, so you won't need to soak or cook them. They blend smoothly into the creamy texture you want.
How do I make hummus creamier?
To make your hummus creamier, add more water slowly while blending. Start with one tablespoon at a time. Blend after each addition until you reach your desired creaminess. You can also add a bit more olive oil or tahini. These ingredients help enhance the smoothness. Lastly, ensure your chickpeas are very soft, as this affects the final texture.
What can I serve with creamy roasted garlic hummus?
Creamy roasted garlic hummus pairs well with many foods. You can serve it with fresh veggies like carrots, cucumbers, and bell peppers. Pita bread or pita chips are also great choices. For a fun twist, try it with crackers or toasted bread. This dip works well as a spread on sandwiches too. The options are endless, so get creative!
In this post, we covered how to make creamy roasted garlic hummus from scratch. We discussed all the ingredients, substitutions, and their nutritional facts. You learned a step-by-step guide to prepare, roast, and blend your hummus perfectly.
Remember, you can tweak flavors and storage tips for best taste. With these insights, you can create a tasty snack or dip that fits your needs. Enjoy making hummus that impresses your friends and family!