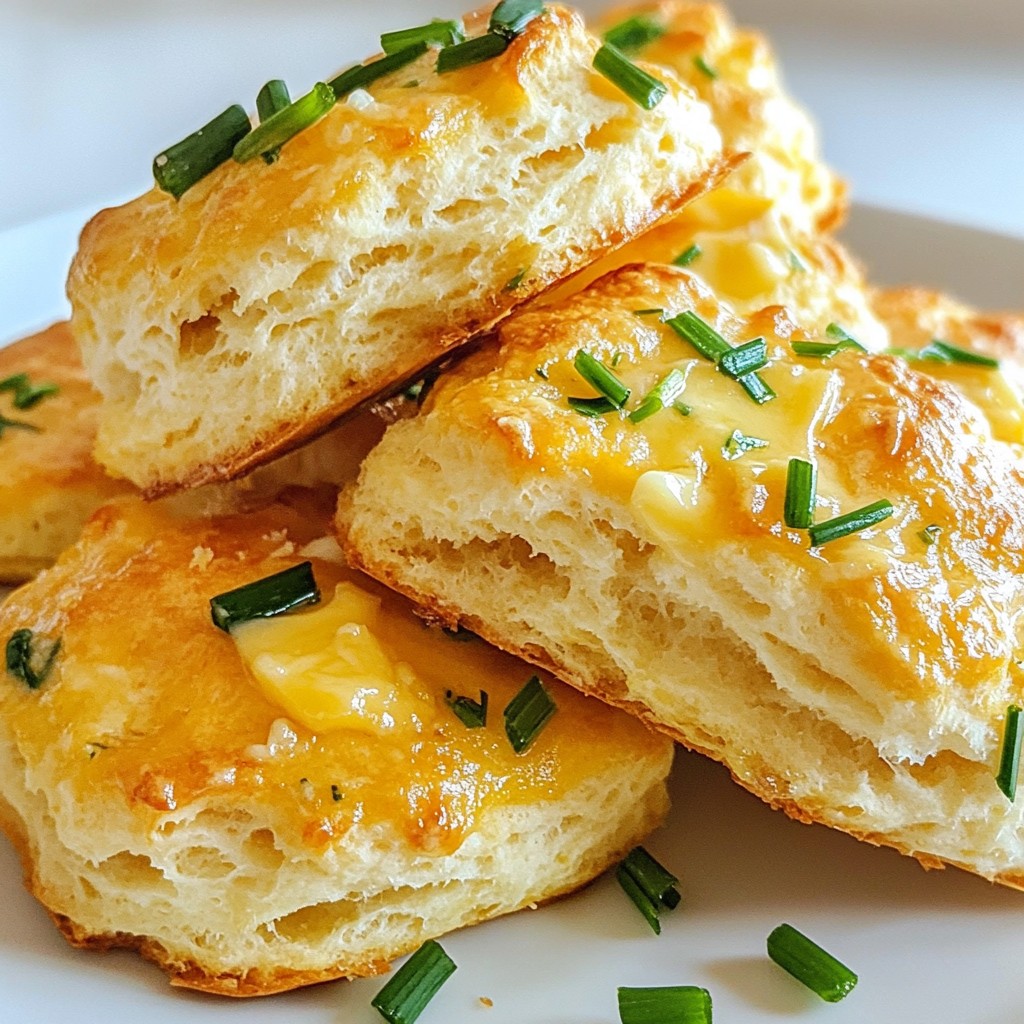
Love warm, fluffy biscuits? You’re in for a treat with my Cheddar Chive Drop Biscuits! This easy recipe delivers delicious flavors with soft, cheesy bites that melt in your mouth. Perfect for breakfast or a side dish, these biscuits will impress your family and friends. Let’s dive into the simple ingredients and steps to make your new favorite baked good!
Why I Love This Recipe
- Easy to Make: This recipe requires minimal ingredients and can be whipped up in just 15 minutes of prep time.
- Flavor Packed: The combination of sharp cheddar and fresh chives creates a delightful flavor that elevates any meal.
- Perfectly Textured: These drop biscuits are light, fluffy, and have a wonderful golden crust that’s irresistible.
- Versatile Pairing: They are perfect as a side for soups, salads, or even enjoyed on their own with butter.
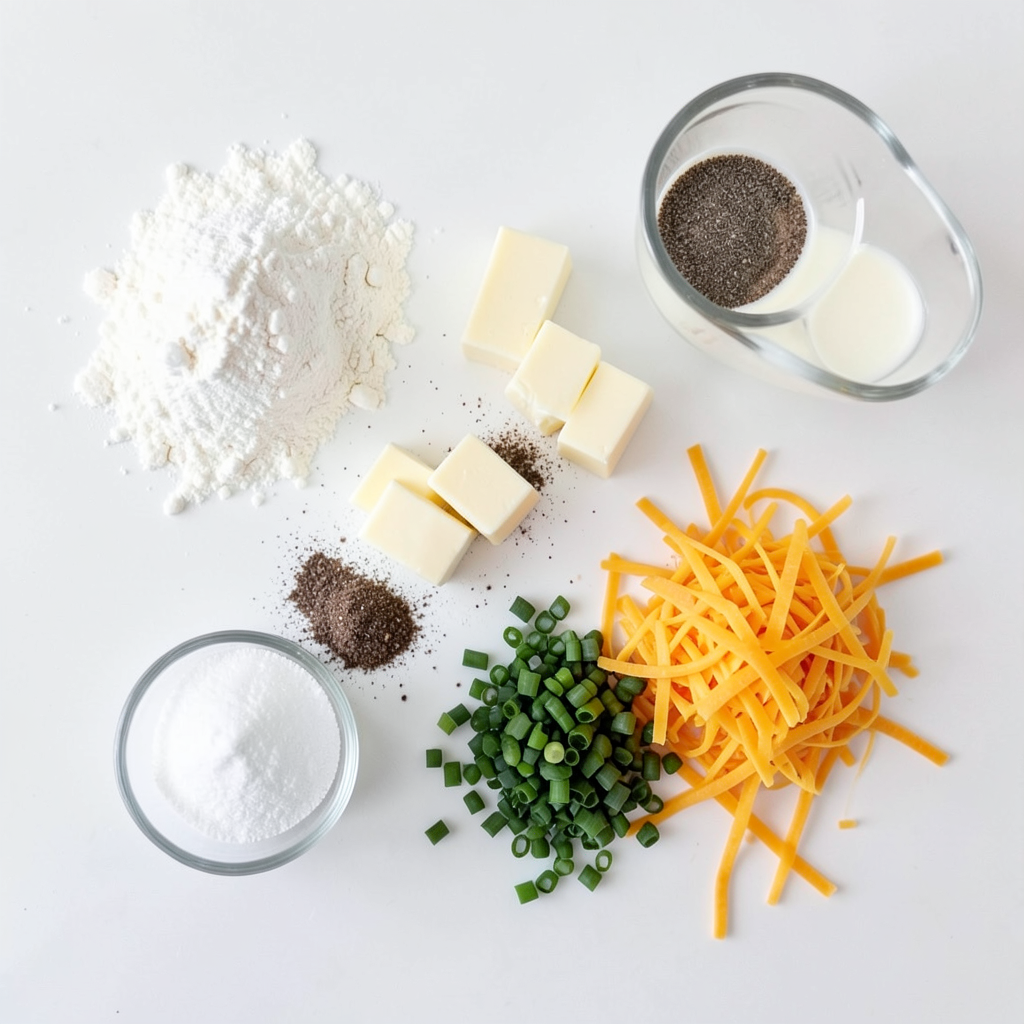
Ingredients
Detailed ingredient list
- 2 cups all-purpose flour
- 1 tablespoon baking powder
- 1/2 teaspoon baking soda
- 1 teaspoon salt
- 1/2 teaspoon black pepper
- 1/2 cup cold unsalted butter, cubed
- 1 cup sharp cheddar cheese, shredded
- 1/4 cup fresh chives, finely chopped
- 3/4 cup buttermilk
Ingredient substitutions and recommendations
You can swap the sharp cheddar cheese with other tasty cheeses. Try mozzarella or gouda for a milder flavor. If you want a stronger taste, use pepper jack or aged cheddar.
For those who need gluten-free options, use a gluten-free all-purpose flour blend. Just make sure it has xanthan gum for the right texture.
If you don’t have buttermilk, you can make a quick substitute. Mix 3/4 cup of milk with 1 tablespoon of lemon juice or vinegar. Let it sit for five minutes before using. This trick gives your biscuits the same tangy flavor.
Step-by-Step Instructions
Prepping the oven and baking sheet
Start by preheating your oven to 425°F (220°C). This high heat helps the biscuits rise and turn golden. While the oven heats, line a baking sheet with parchment paper. This prevents the biscuits from sticking and makes cleanup easy.
Mixing the dry ingredients
In a large bowl, combine the dry ingredients. Add 2 cups of all-purpose flour, 1 tablespoon of baking powder, 1/2 teaspoon of baking soda, 1 teaspoon of salt, and 1/2 teaspoon of black pepper. Use a whisk to mix them well. Whisking ensures there are no clumps and helps the biscuits rise evenly.
Incorporating butter and cheese
Now, it’s time to add the butter and cheese. Cut 1/2 cup of cold, unsalted butter into small cubes. Add these cubes to the flour mix. Using your fingers or a pastry cutter, work the butter into the flour until it looks like coarse crumbs. This step is key for a flaky texture. Next, stir in 1 cup of shredded sharp cheddar cheese and 1/4 cup of finely chopped fresh chives. Make sure they are spread evenly throughout the mix.
Forming and baking the biscuits
For the last step, pour in 3/4 cup of buttermilk. Use a spatula to mix gently until just combined. The dough will be a bit sticky. Don’t overmix; this keeps the biscuits fluffy. Now, using a spoon or an ice cream scoop, drop generous spoonfuls of dough onto your baking sheet. Space them about 2 inches apart. This allows them to expand while baking. Bake for 12-15 minutes. Look for golden tops, and check with a toothpick. If it comes out clean, they are ready! Enjoy the warm biscuits fresh from the oven.
Tips & Tricks
Achieving the best texture
To get fluffy biscuits, start with cold butter. Cold butter creates steam as it melts. This steam helps the biscuits rise. Cut the butter into small cubes before adding it to the flour. Use a pastry cutter or your fingers to mix. You want coarse crumbs, not a smooth dough.
Avoid overmixing the dough. When you add buttermilk, mix just until combined. A few lumps are okay. Overmixing makes the biscuits tough. We want them light and tender, so be gentle!
Enhancing flavor
You can make these biscuits even tastier by adding herbs or spices. Try adding garlic powder or dried thyme for a twist. Fresh herbs like parsley or dill can also work well.
For cheese, sharp cheddar is great, but feel free to switch it up. Gruyère adds a nutty flavor, while pepper jack gives a spicy kick. Experiment and find your favorite mix!
Presentation tips
Serve these biscuits warm for the best taste. Brush the tops with melted butter for shine. Sprinkle extra chives on top for a lovely look.
Pair them with soups or salads to make a complete meal. You can stack them high on a plate for a beautiful display. A touch of color from fresh herbs makes them even more appealing!
Pro Tips
- Chill the Ingredients: Ensure your butter and buttermilk are cold to create flakier biscuits.
- Don't Overmix: Mix just until combined to keep the biscuits tender and light.
- Use Fresh Chives: Freshly chopped chives add a burst of flavor compared to dried ones.
- Experiment with Cheese: Try different cheese varieties like pepper jack or gouda for a unique twist.
Variations
Sweet and savory twists
You can change the flavor of Cheddar Chive Drop Biscuits easily. Try adding herbs like rosemary or thyme. You can also use spices like garlic powder or smoked paprika. Each herb or spice gives the biscuits a new taste. This lets you create a unique flavor with every batch.
Seasonal ingredients
Seasonal produce can make your biscuits even better. In spring, use fresh scallions for a mild onion taste. In summer, roasted peppers can add sweetness and color. Fall brings squash or pumpkin puree, which adds moisture and a hint of sweetness. Using seasonal ingredients keeps the recipe fresh and fun.
Dietary adjustments
You can make these biscuits vegan or lactose-free too. For vegan options, replace butter with coconut oil or a vegan butter. Use almond or soy milk instead of buttermilk. If you want to make it lactose-free, choose lactose-free cheddar cheese. These changes keep the flavors while meeting different dietary needs.
Storage Info
Best practices for storage
To keep your Cheddar Chive Drop Biscuits fresh, store them in airtight containers. This helps maintain their fluffy texture. Choose a container that seals well. Place them in the fridge if you plan to eat them within a few days. This keeps them safe from spoiling.
Freezing leftover biscuits
Freezing is a great way to save extra biscuits. First, let them cool completely. Then, wrap each biscuit in plastic wrap. Place the wrapped biscuits in a freezer bag or container. Make sure to push out as much air as you can. When you want to enjoy them again, take out the biscuits and reheat them. You can bake them at 350°F (175°C) for about 10-15 minutes. They will taste almost as fresh as when you made them!
Shelf life details
These biscuits are best when eaten within three days if stored in the fridge. If frozen, they can last for up to three months. For the best taste, try to eat them within a month. This ensures you enjoy their cheesy goodness at its peak!
FAQs
Can I make these biscuits ahead of time?
Yes, you can! For best results, prepare the dough and drop it onto the baking sheet. Cover the sheet with plastic wrap and put it in the fridge. You can store it for up to one day. When ready, bake as directed. Just remember, baking time may change slightly. Make sure to check for that golden top.
What can I serve with Cheddar Chive Drop Biscuits?
These biscuits pair well with many dishes. Here are some great options:
- Soups, especially creamy ones like potato or tomato.
- Salads for a fresh crunch alongside.
- Breakfast dishes, like scrambled eggs or bacon.
- Enjoy them with a warm bowl of chili.
They also shine as a snack with butter or cheese spread.
Can I use a different type of cheese?
Absolutely! You can swap sharp cheddar for other cheeses. Here are some options:
- Monterey Jack for a milder flavor.
- Gruyère for a nutty taste.
- Feta for a tangy kick.
Just keep in mind that different cheeses may change the biscuit's texture and flavor. Experiment and find your favorite mix!
These Cheddar Chive Drop Biscuits combine simple ingredients for a tasty treat. You can adapt the recipe to fit your needs with various cheeses or gluten-free flour. Following the tips helps achieve the best texture and flavor. Store them properly to keep fresh, or freeze extras for another day. I hope you'll enjoy making these delightful biscuits and sharing them with family and friends. Experiment with flavors and techniques to make this recipe your own!